How to Make a Fall Gnome Door Hanger (with a Messy Bow)
Let me show you how to make a super cute fall gnome door hanger complete with my signature messy bow! This DIY project will look just adorable on your front door.

TAKE A LOOK AT SEVERAL OTHER DIY MESSY BOWS I’VE SHARED:
Take a look at several other DIY GNOMES I've shared:
- DIY Gnome Ornament
- Paint Brush Gnome Ornaments
- Halloween Gnome Banner
- Gnome DIY Christmas Tree
- Burlap Carrot Gnome Door Decor
What do you think? Are you ready to see the simple steps to make this gnome? Let's get to it!
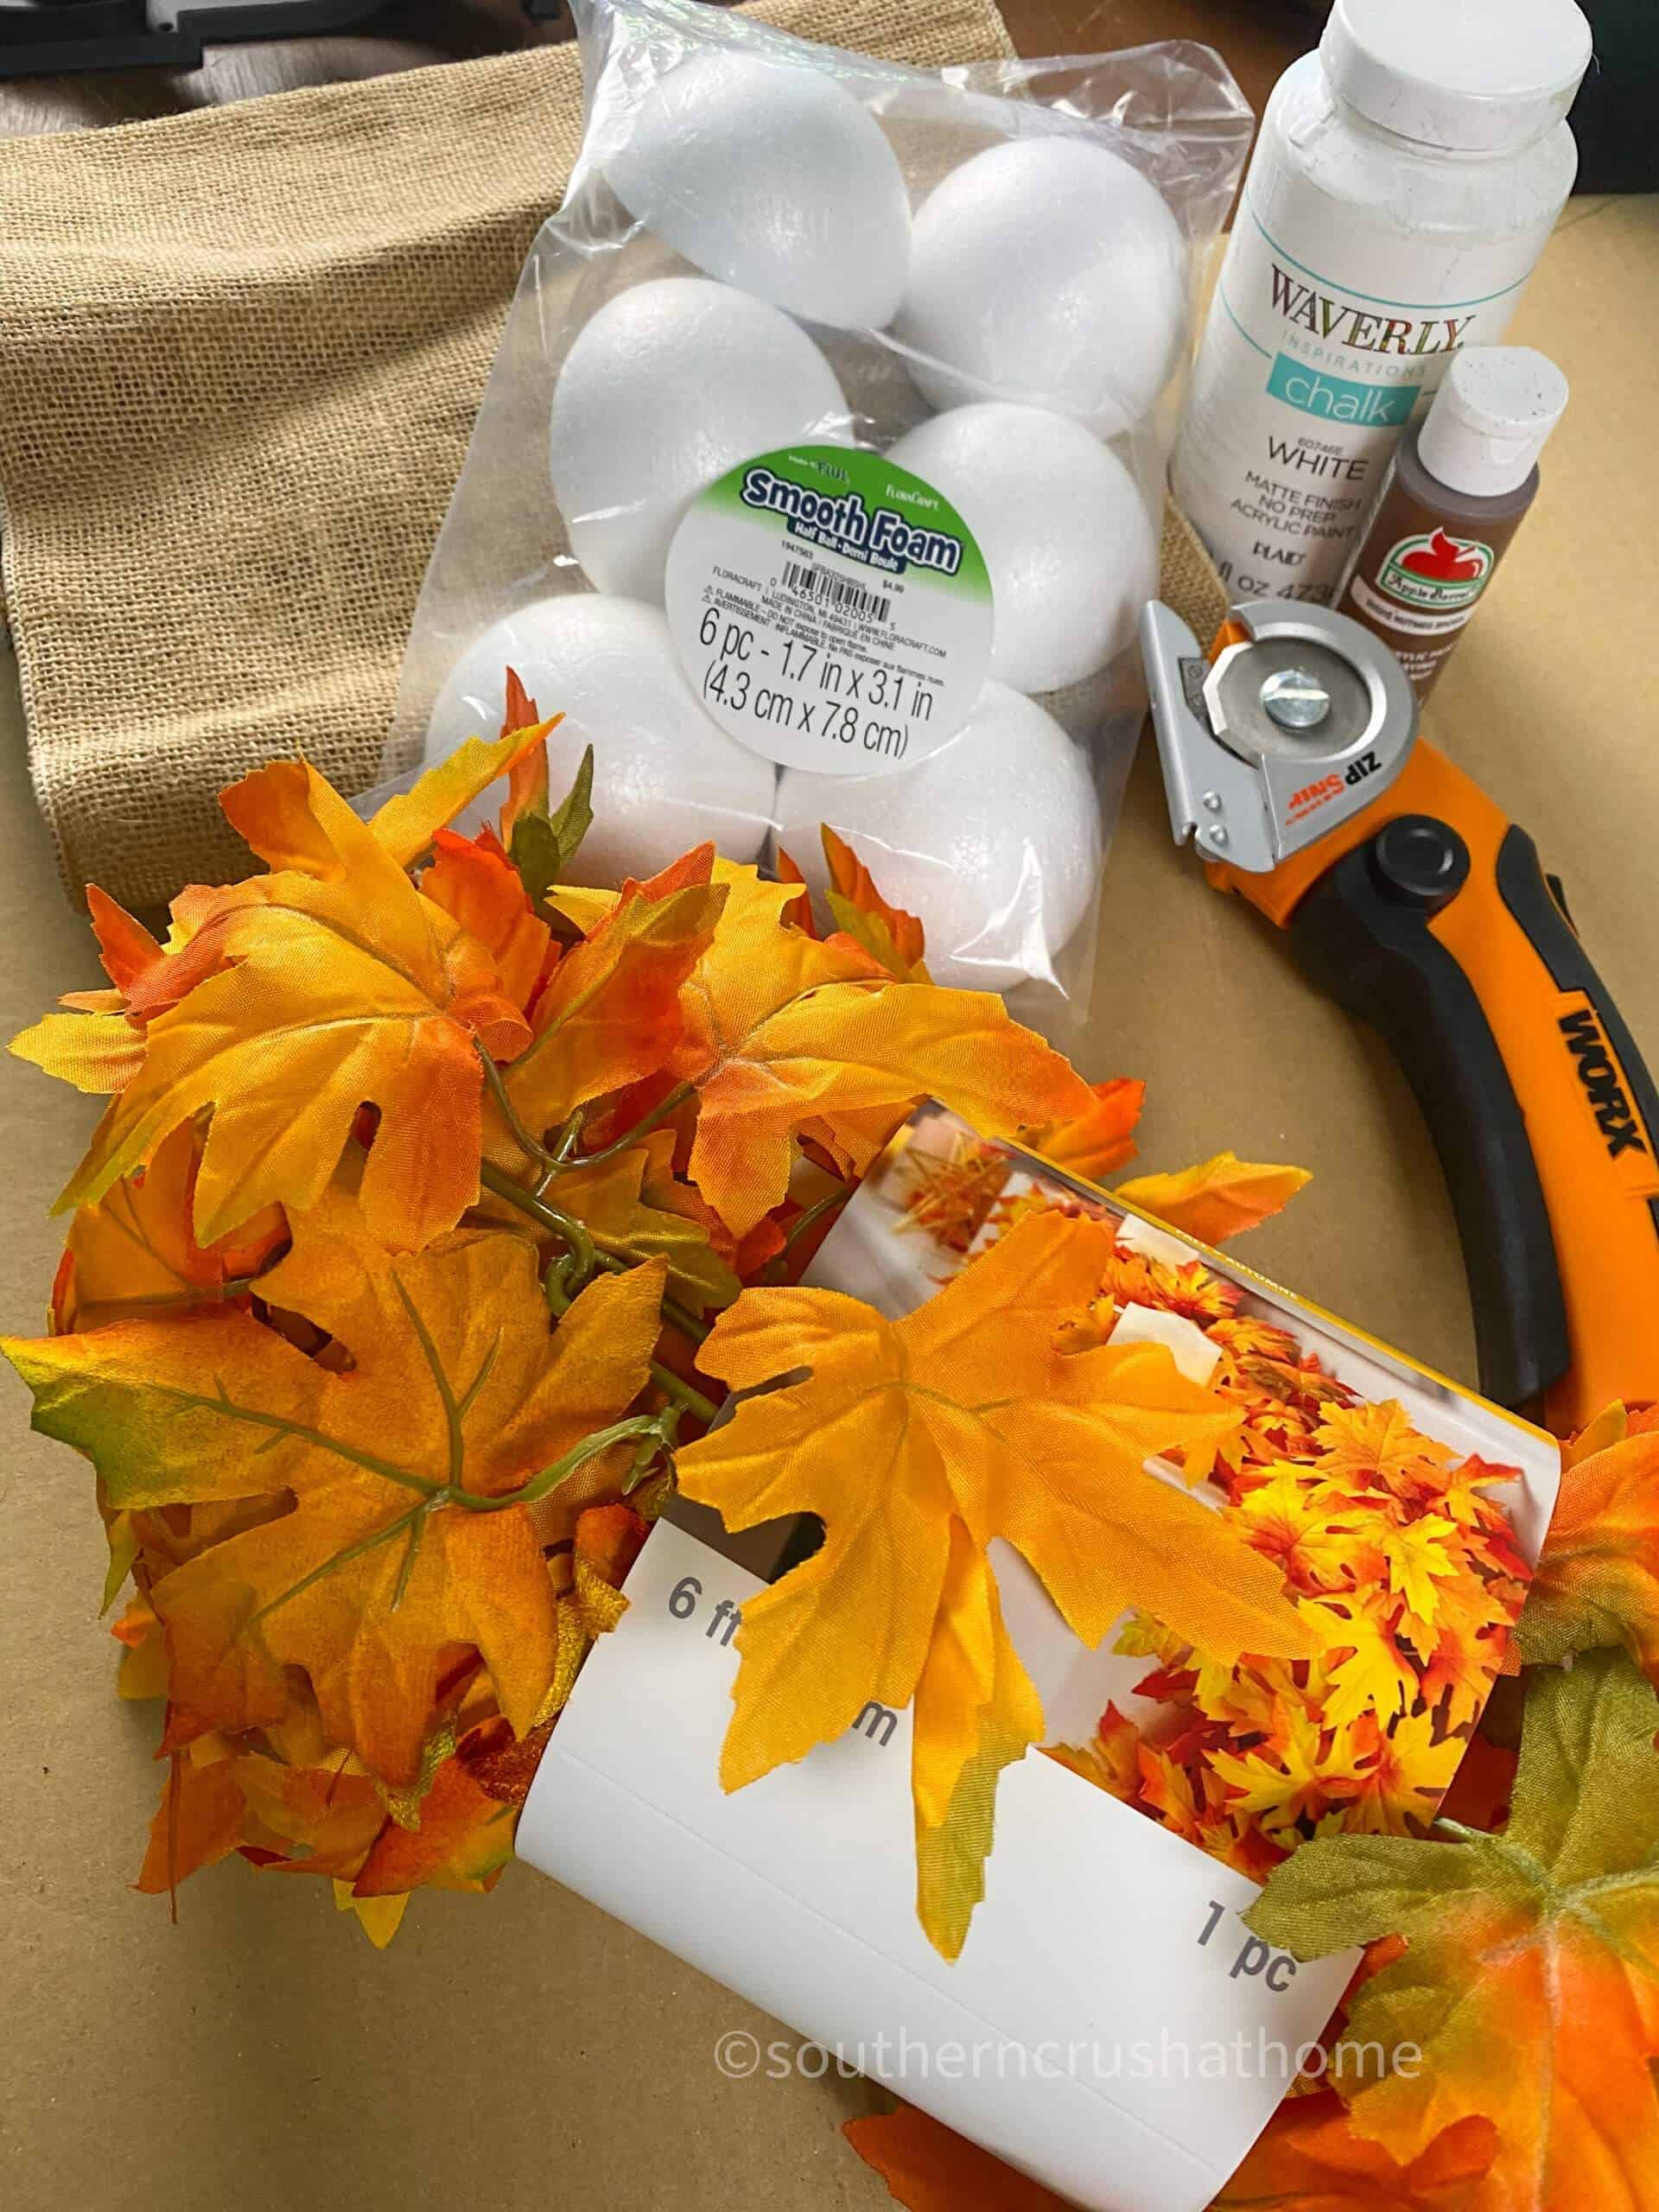
SUPPLIES needed for Fall Gnome Door Hanger
All the supplies needed can be found HERE in my Amazon Shop!
- Burlap
- Fabric Scissors
- Fall Leaves
- Chalk Paint
- Brown Acrylic Paint
- Styrofoam Ball
- Assorted Ribbon
- Hot Glue Gun
- Cardboard
How to make a Fall Gnome Door Hanger
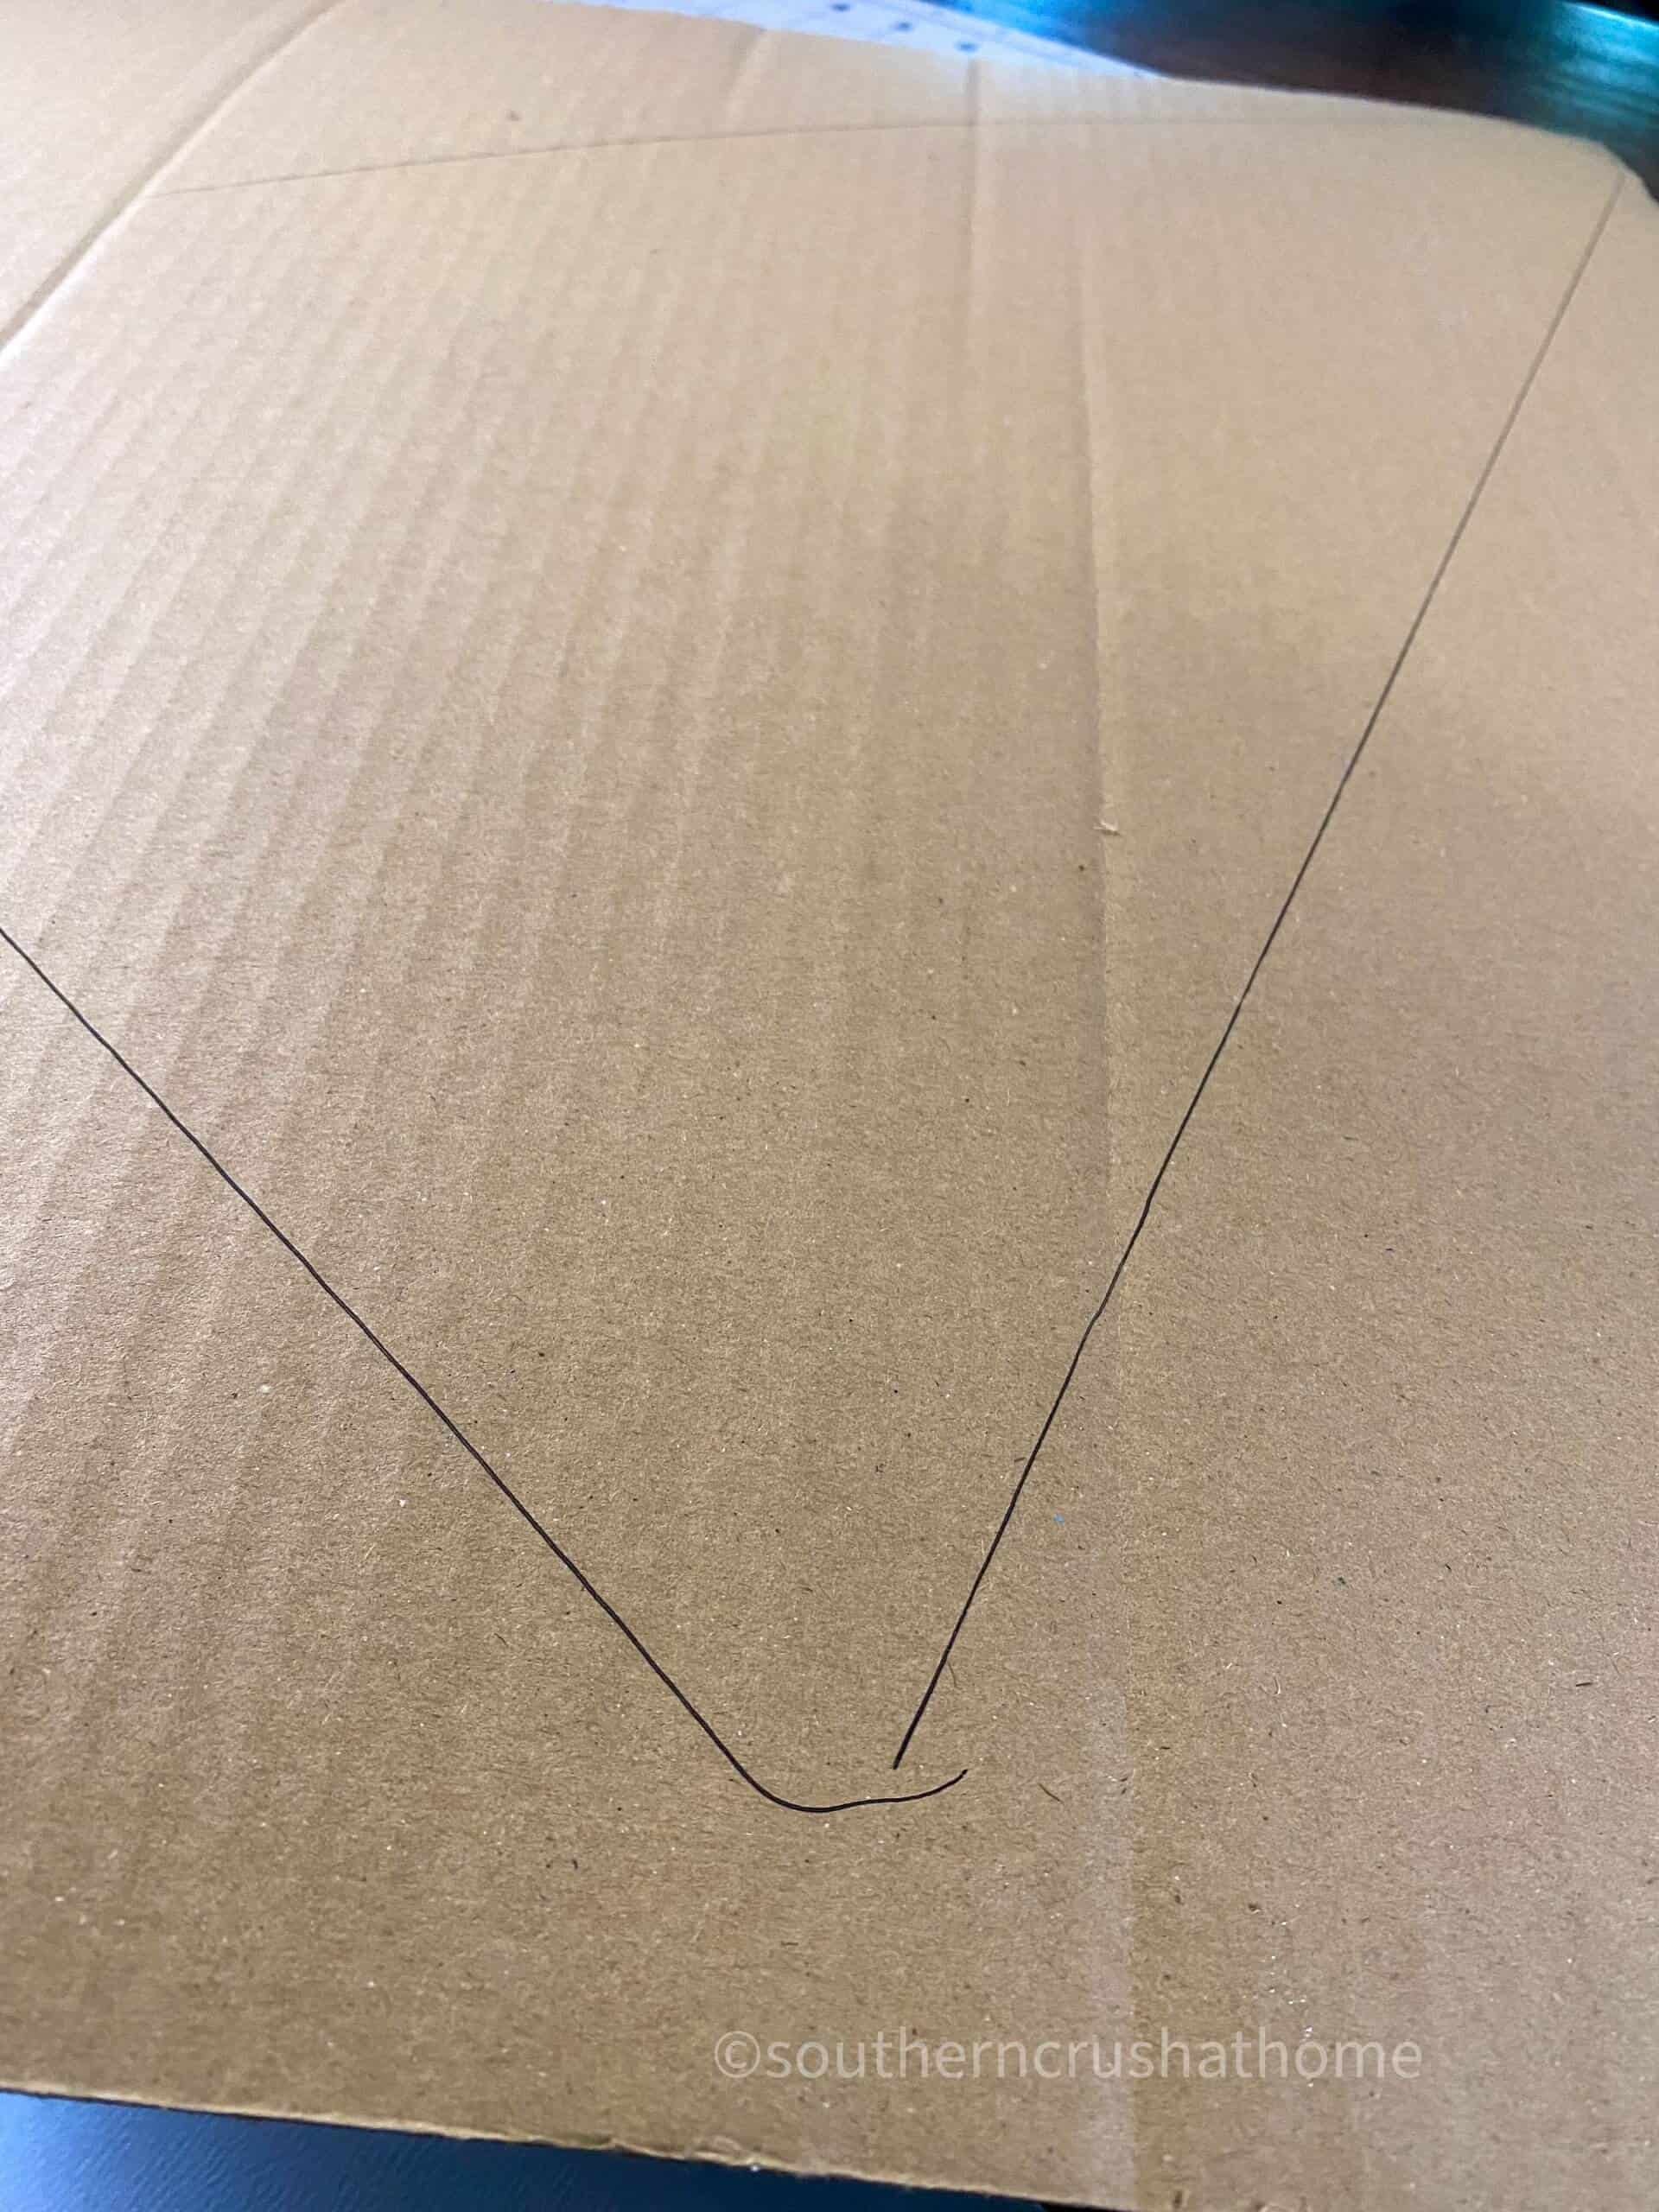
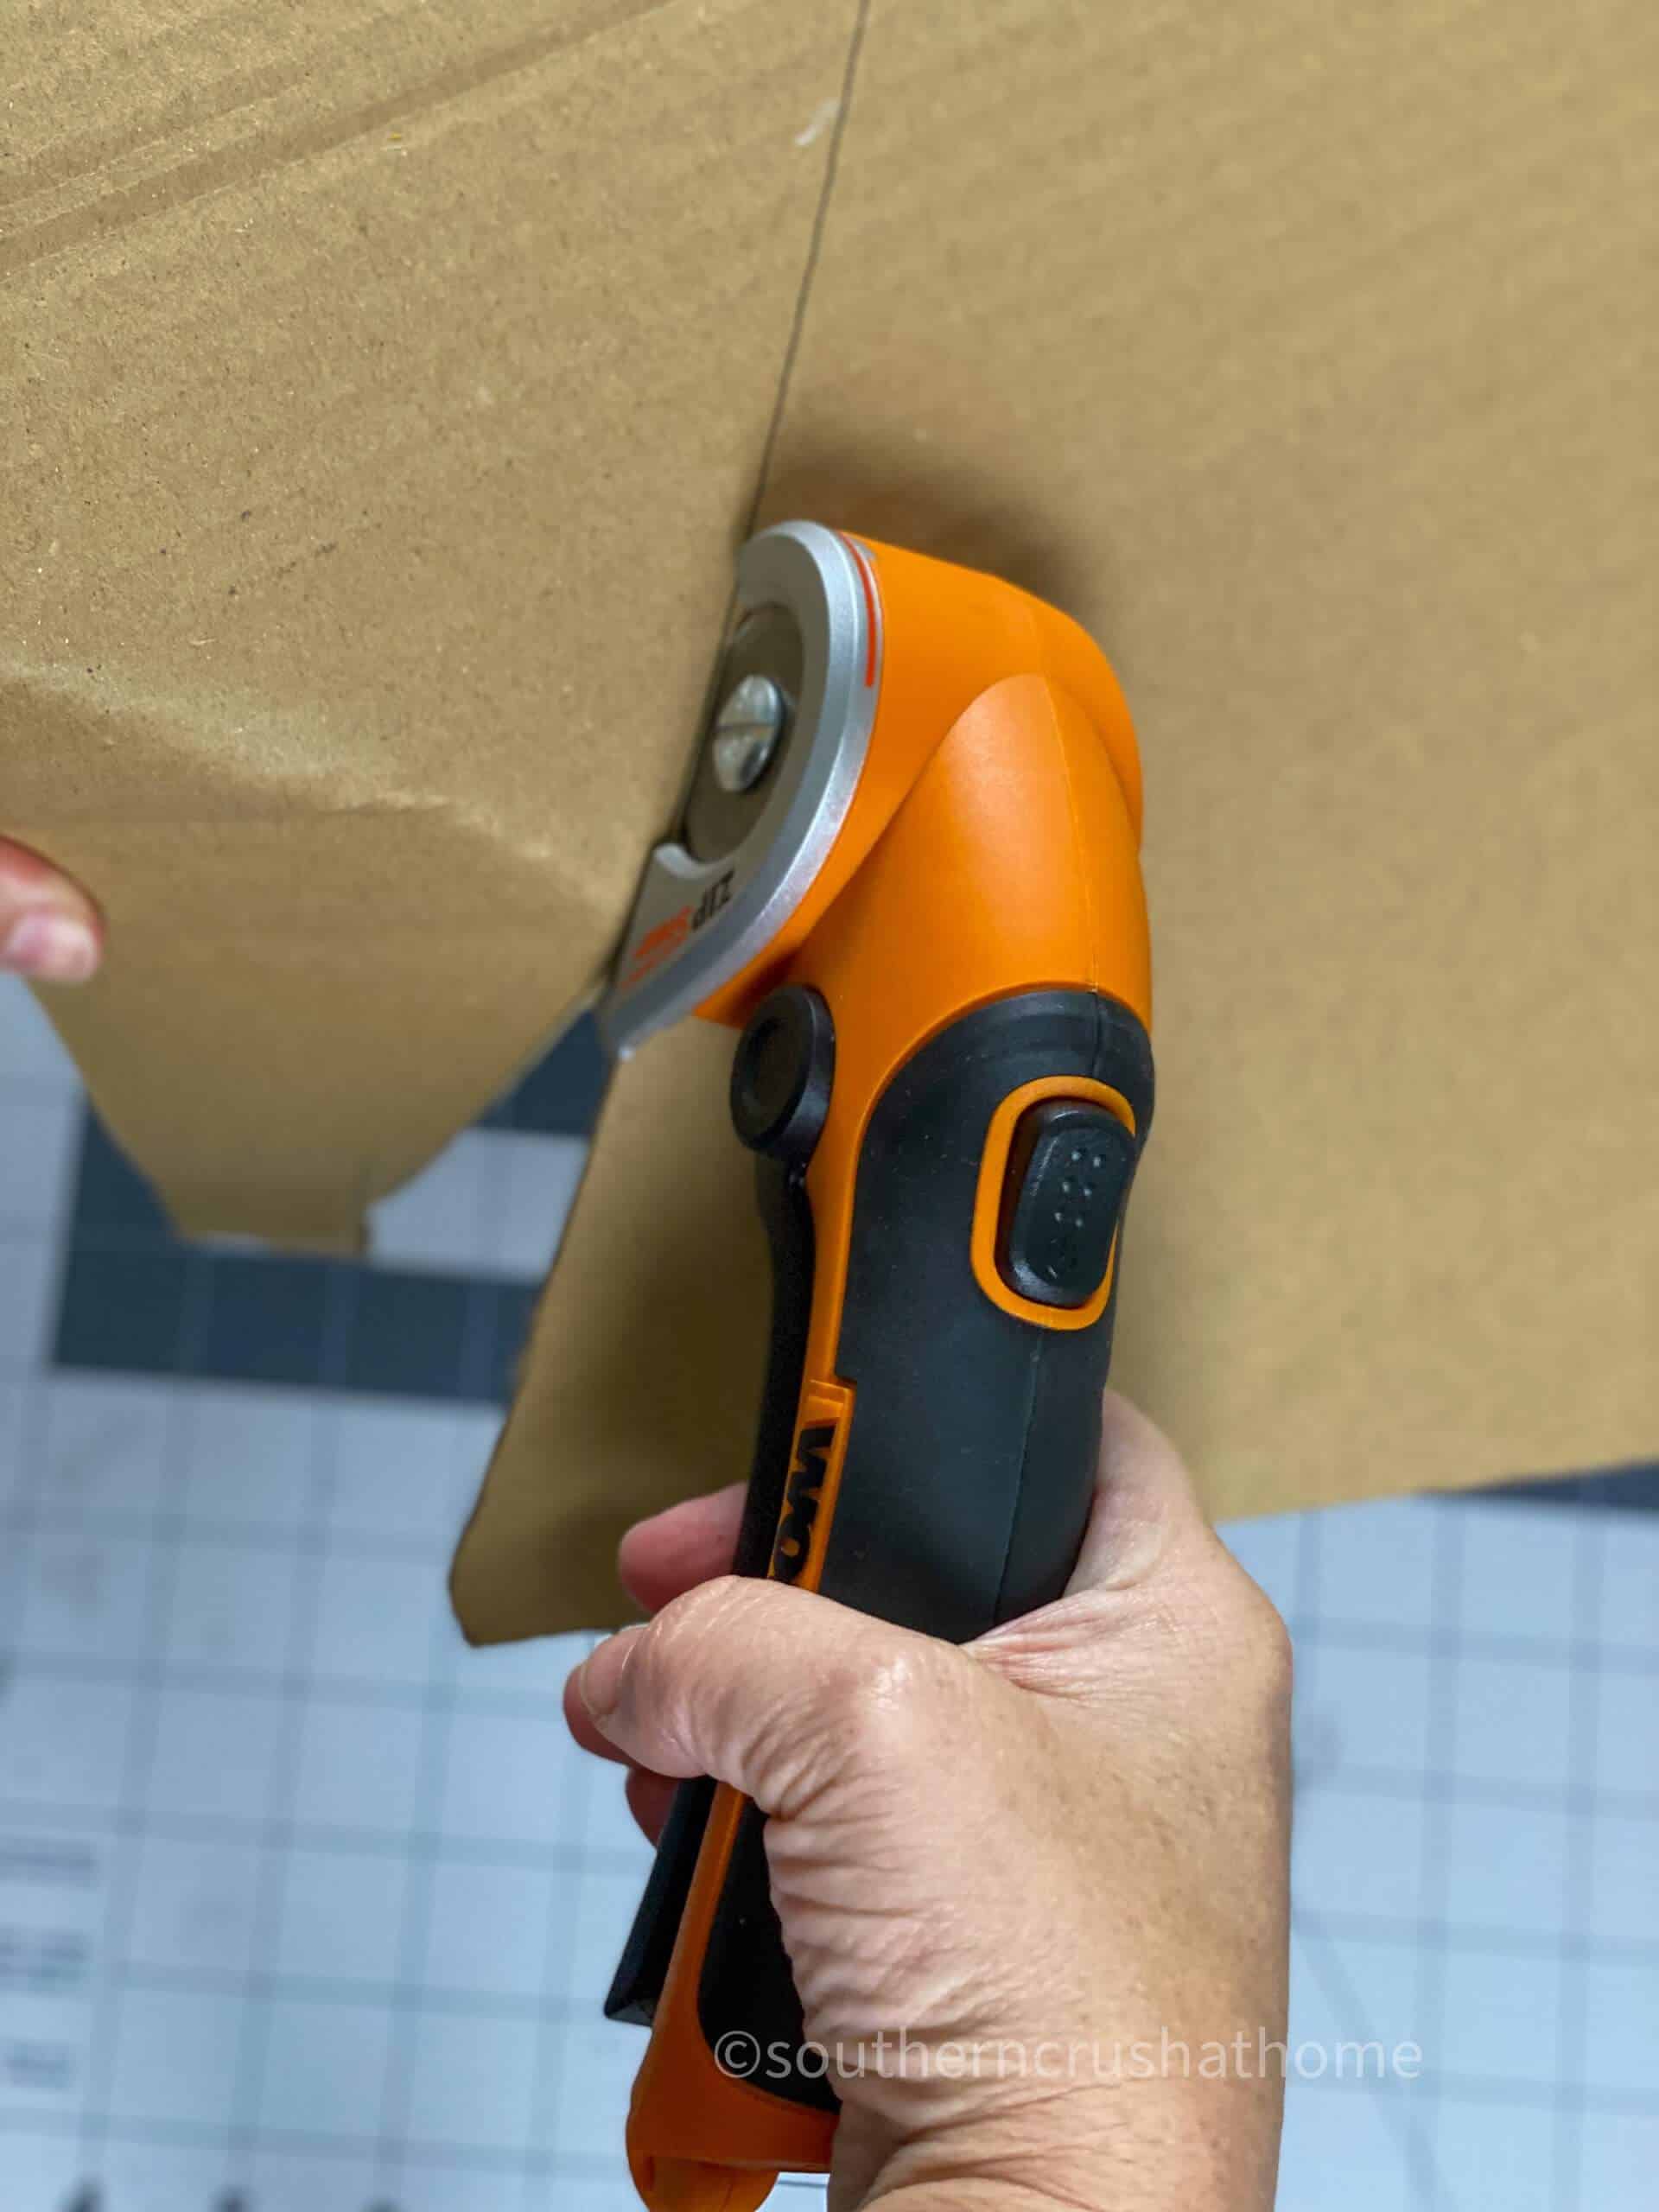
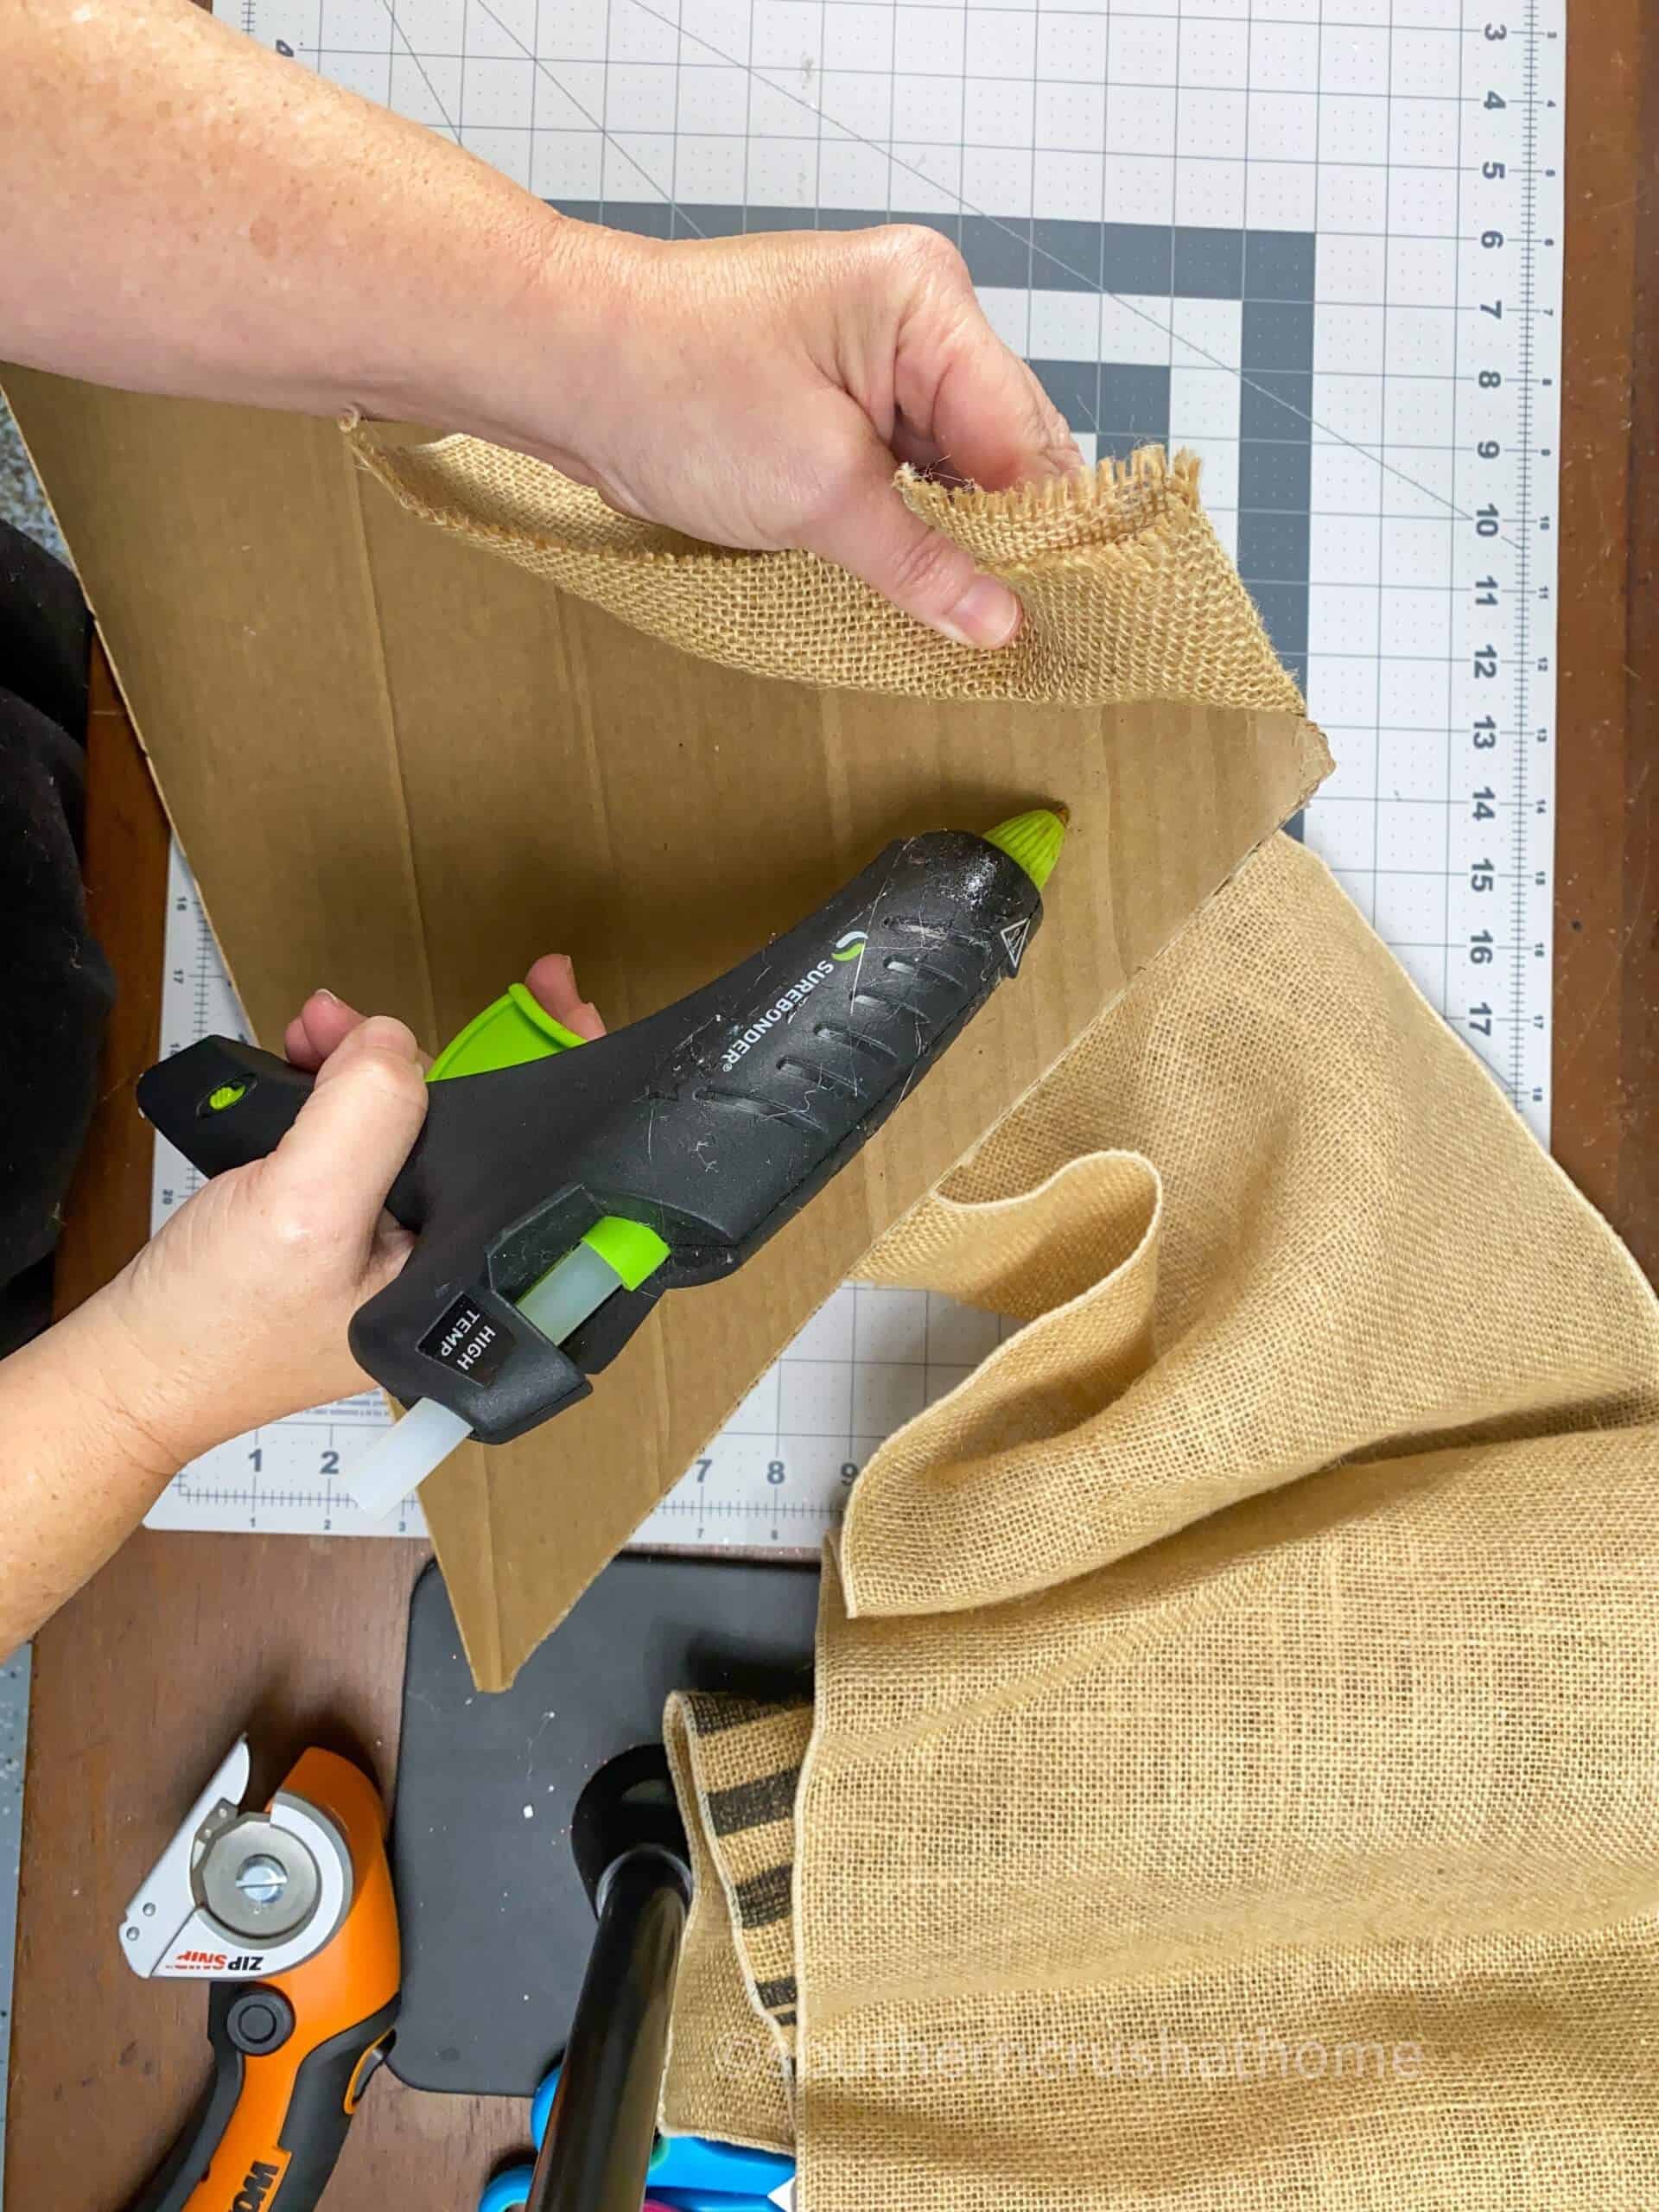
Save those Amazon boxes. They can be used for so many fun crafts, especially during the holidays. Start by drawing a large triangle on the box. This will be the gnome's hat. You want it to be large enough for the size gnome you are making. You can make it any size that you want.
Next you want to cover the cardboard triangle with burlap. Just lay the cardboard on top of the burlap and use hot glue to secure it.You won't really see the back, but you can hot glue the edges under to give it a nice finished edge.
add the fall leaves…
Once the hat is covered in burlap, it's time to make the beard. If you use a leaf garland, just remove the leaves and hot glue them to the bottom of the hat. You can lift the burlap up and lay the leaves under to ensure no cardboard shows.

Continue to hot glue the leaves in a triangular fashion to create the beard. You will see how they are glued in a triangle shape, so as you add each layer you add another leaf or two. Easy peasy!

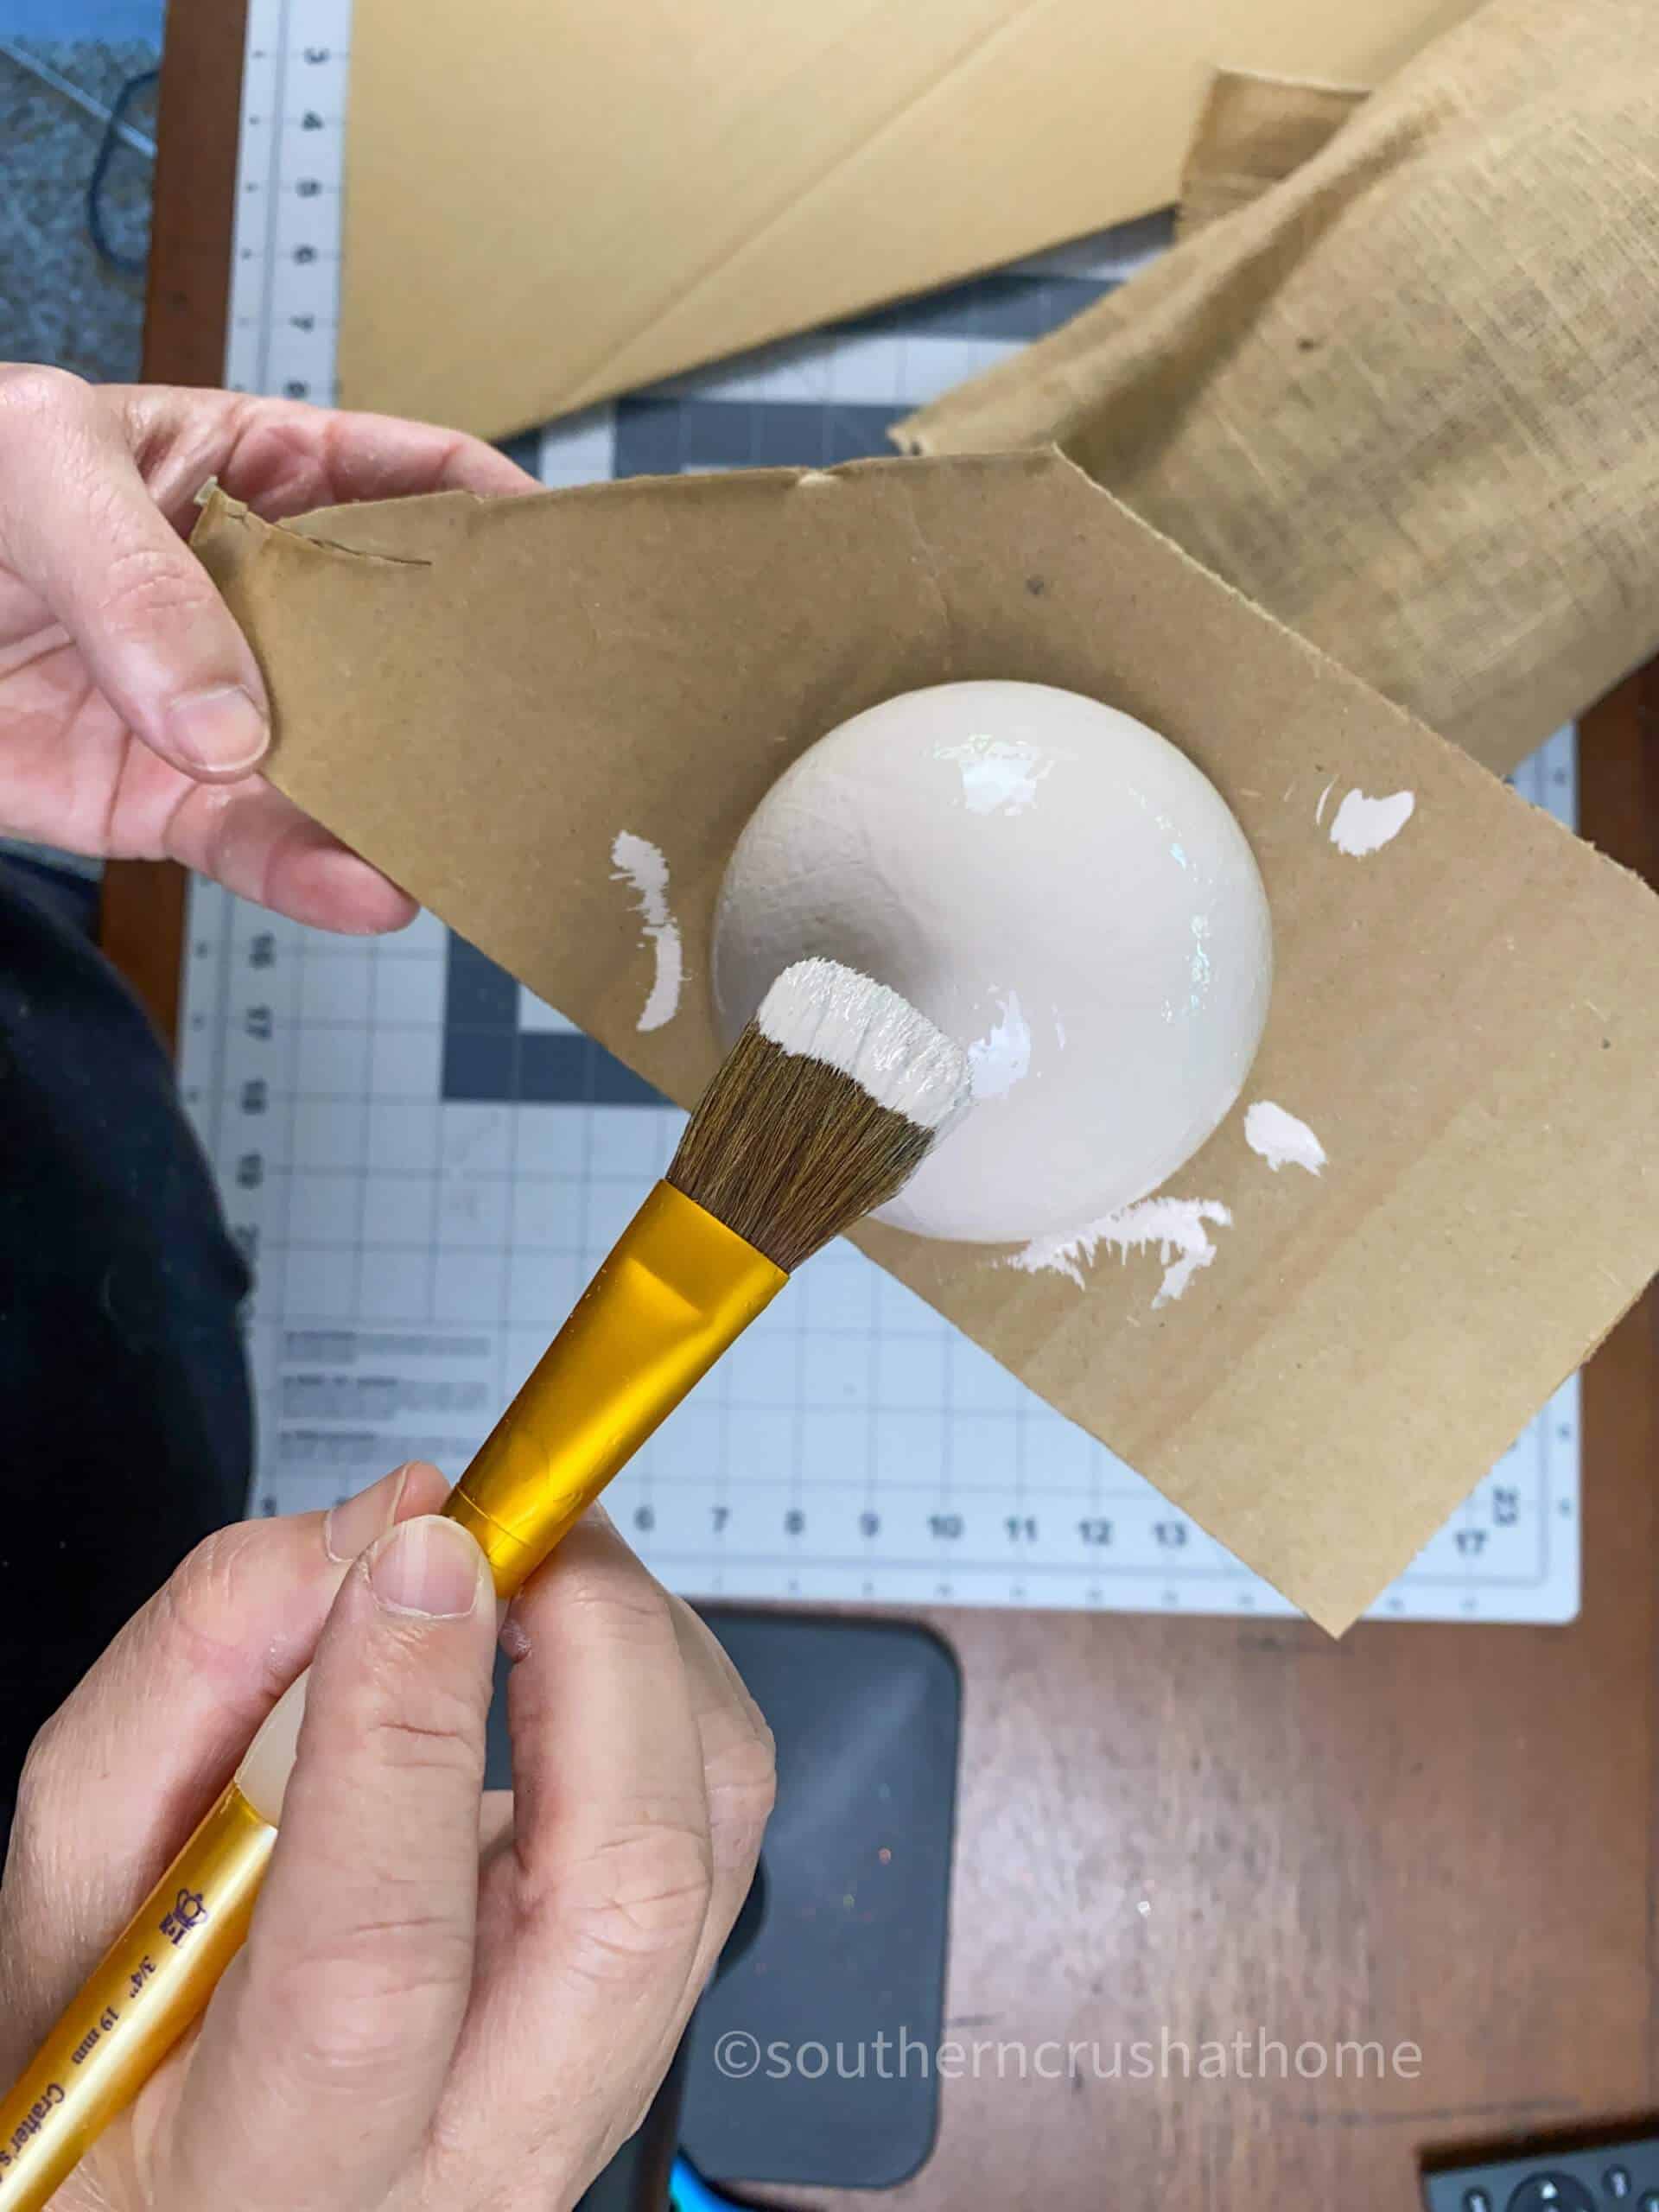
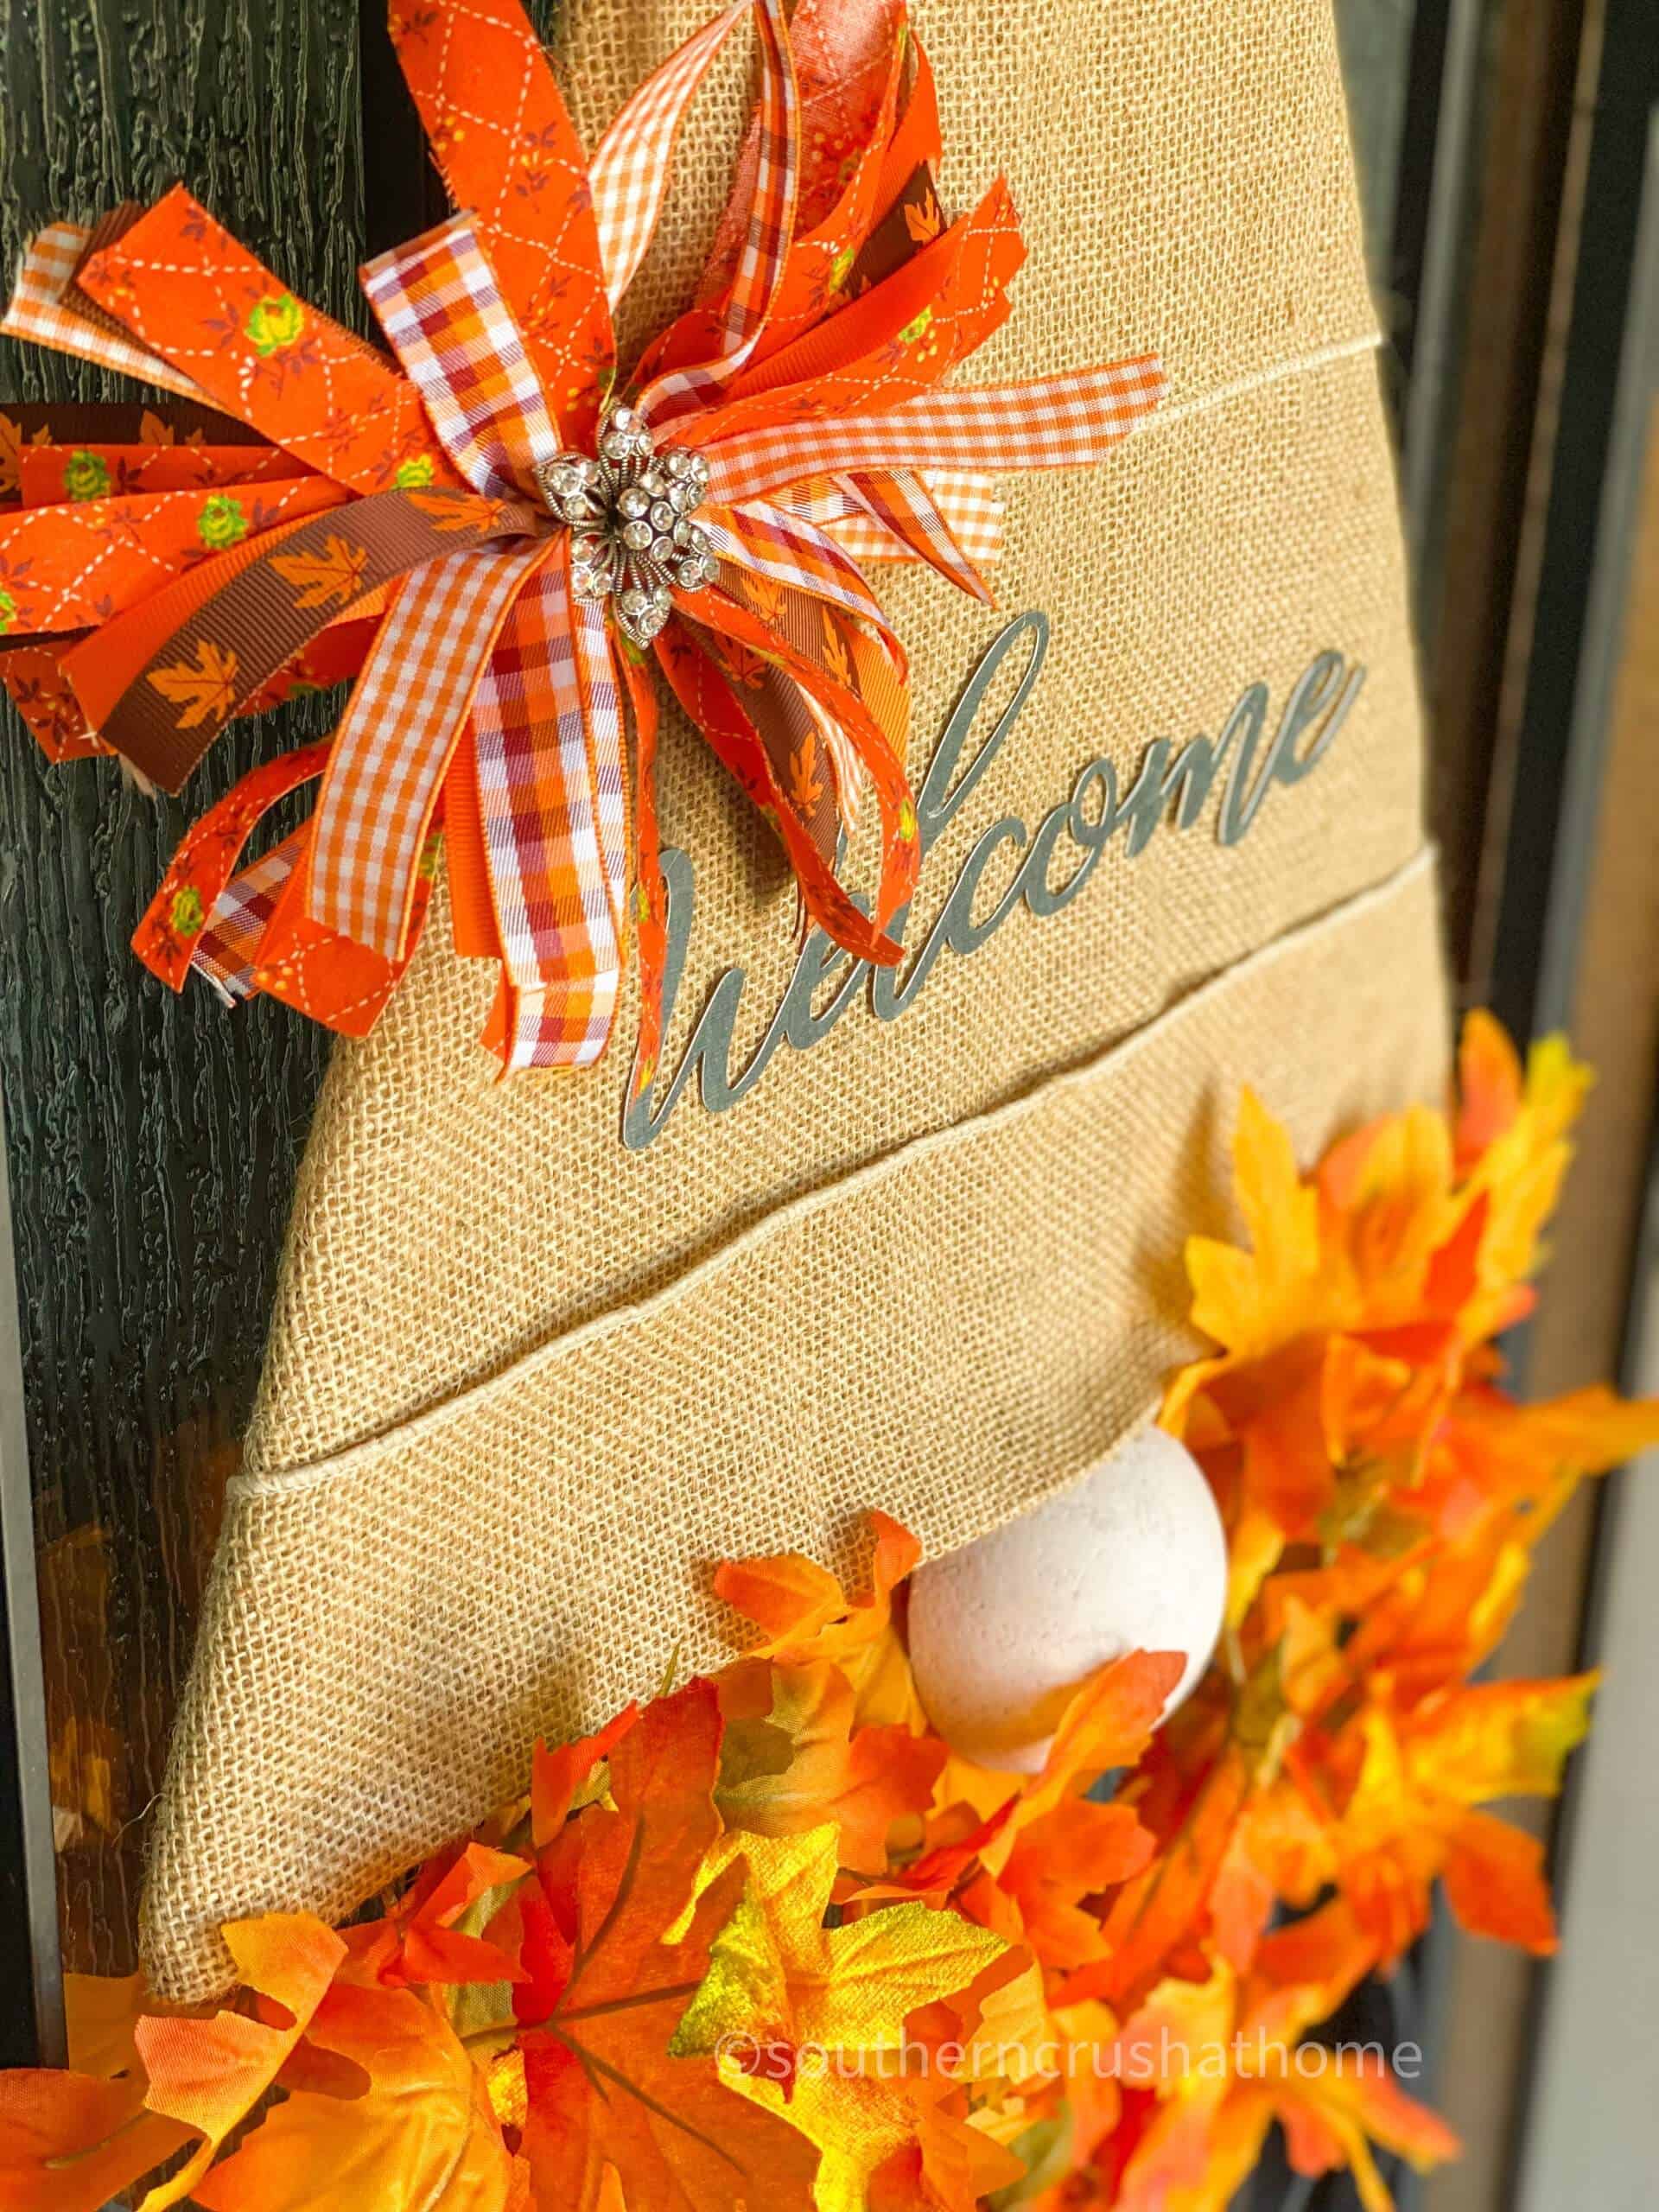
Now it's time to add the nose. The second you add the nose the gnome comes together. Place the nose right under the center of the hat. Be sure the leaves are covering around the nose.
next…
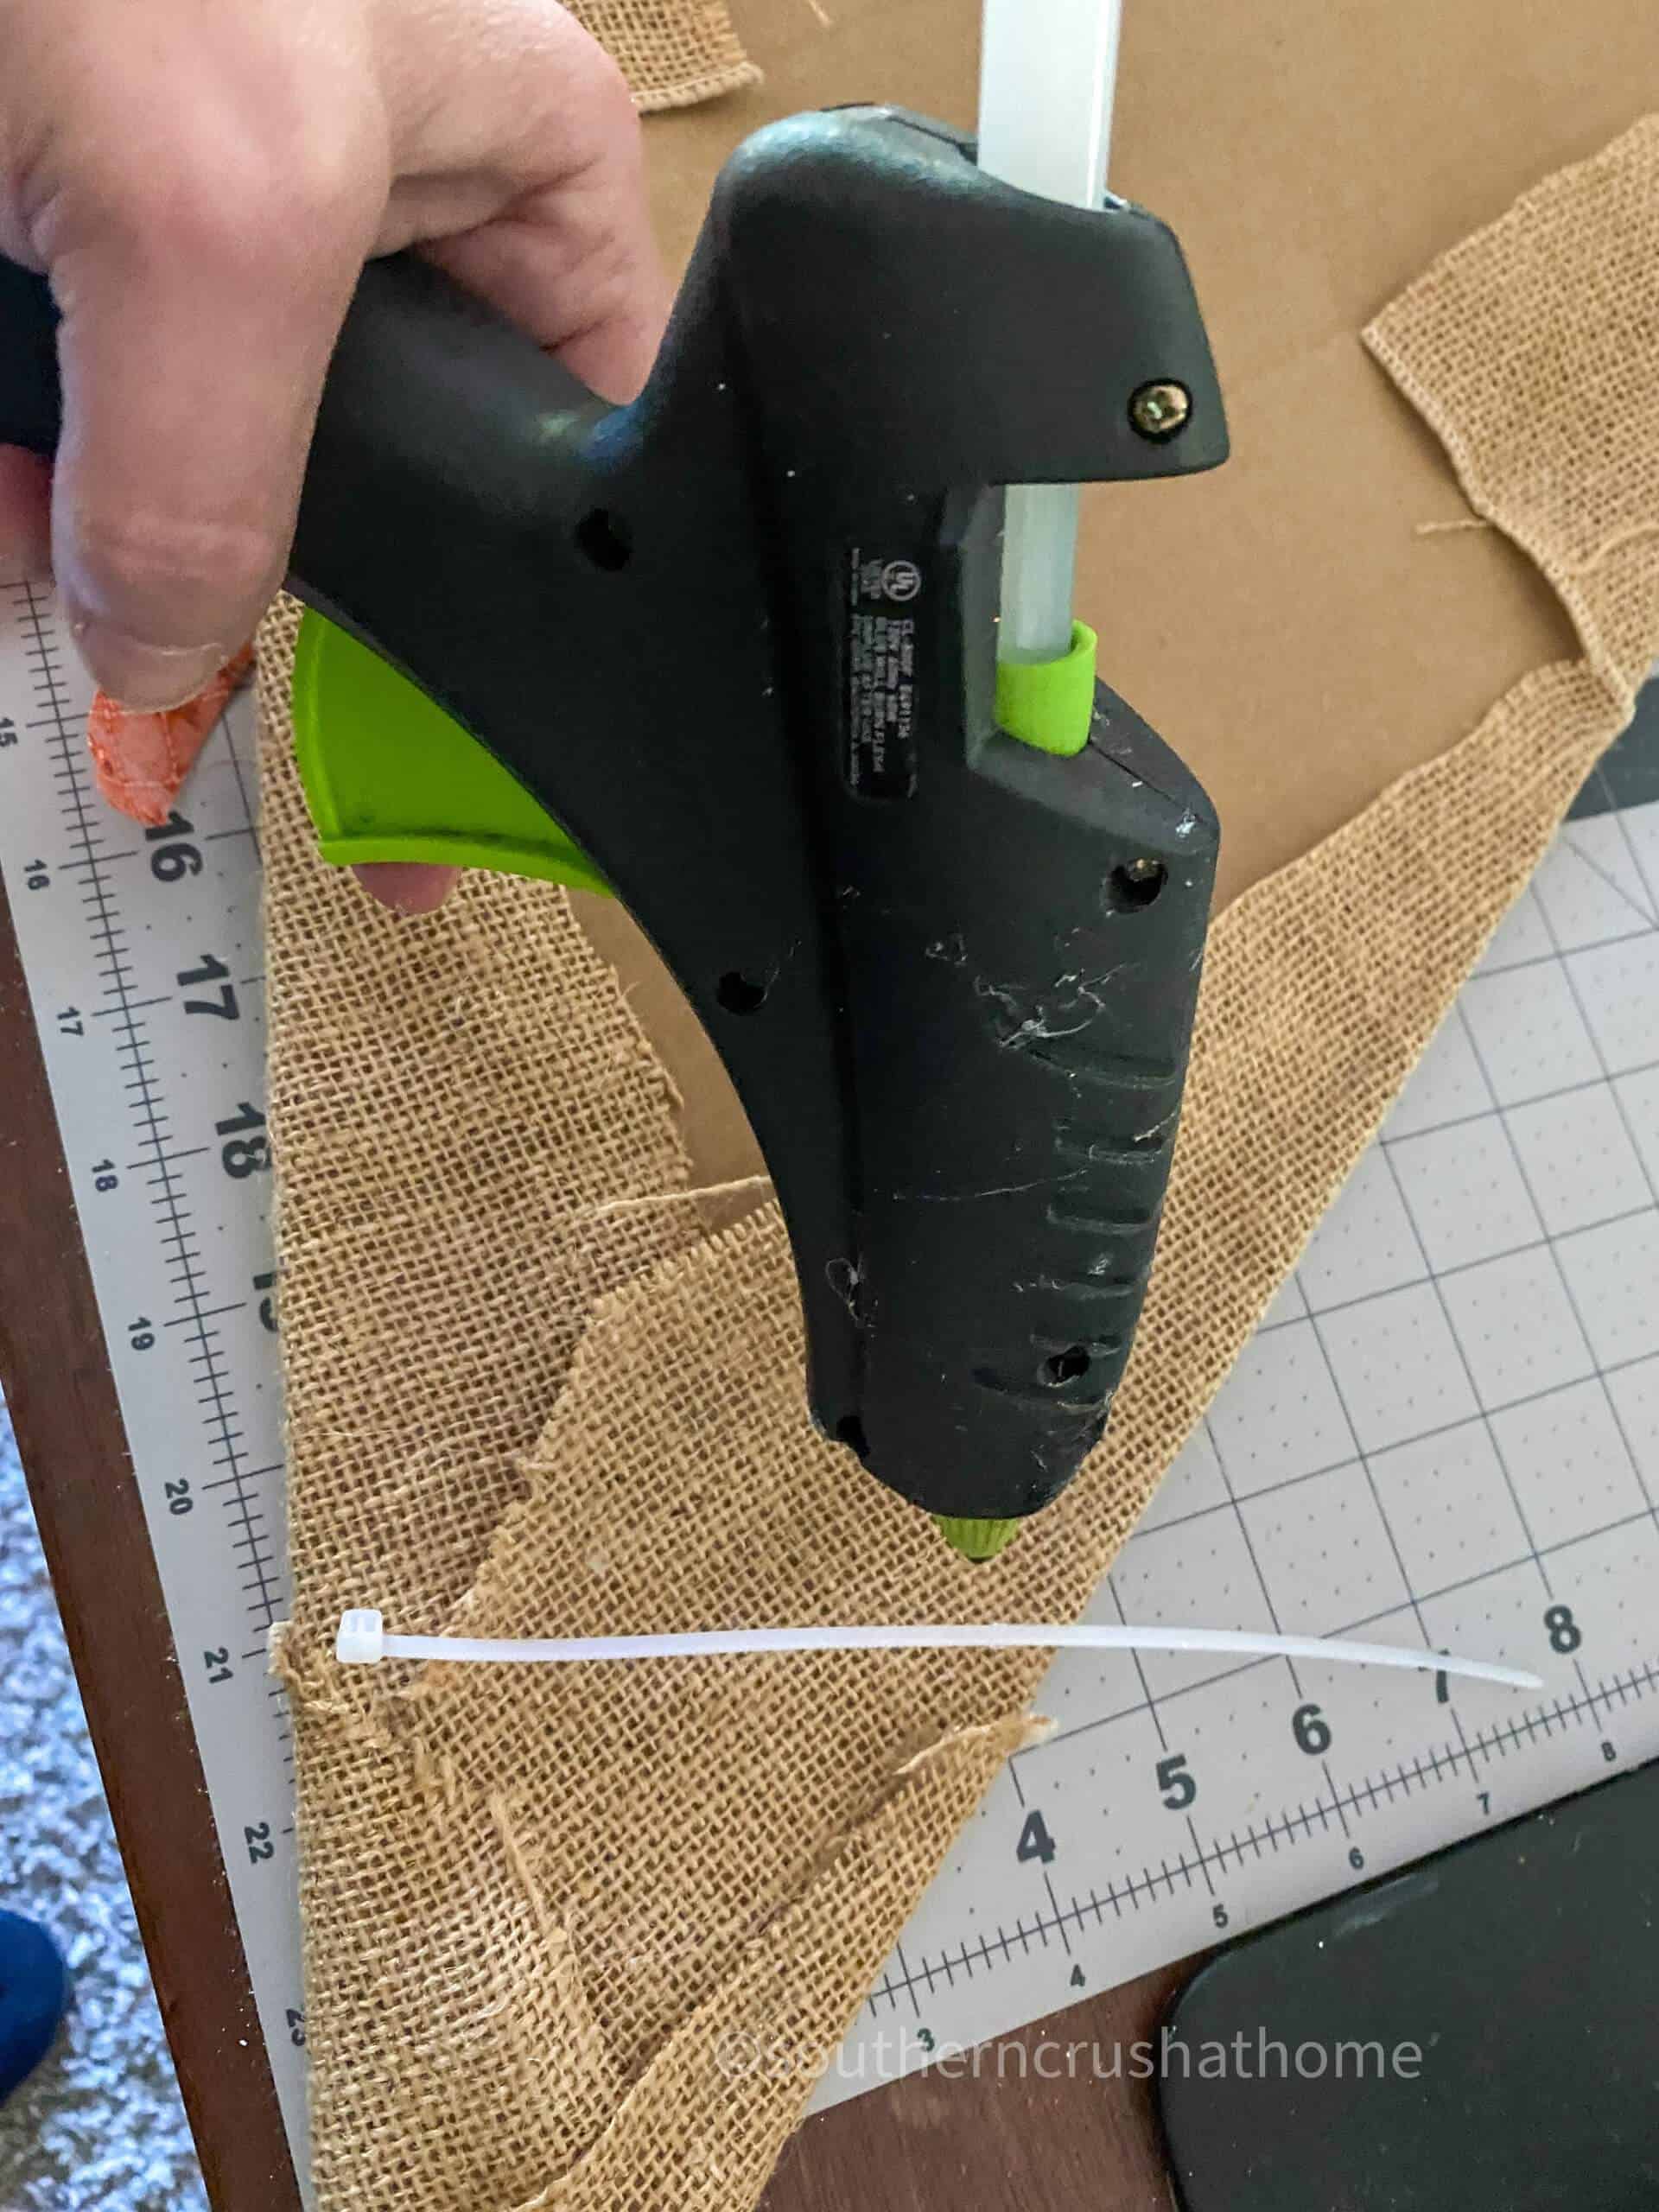
Add a zip tie to the back of the gnome to make it easy to hang on the door.
lastly…
Make a simple messy bow in pretty fall colors and secure it to the top edge of the hat with a zip tie. You can check out my simple messy bow tutorial HERE.
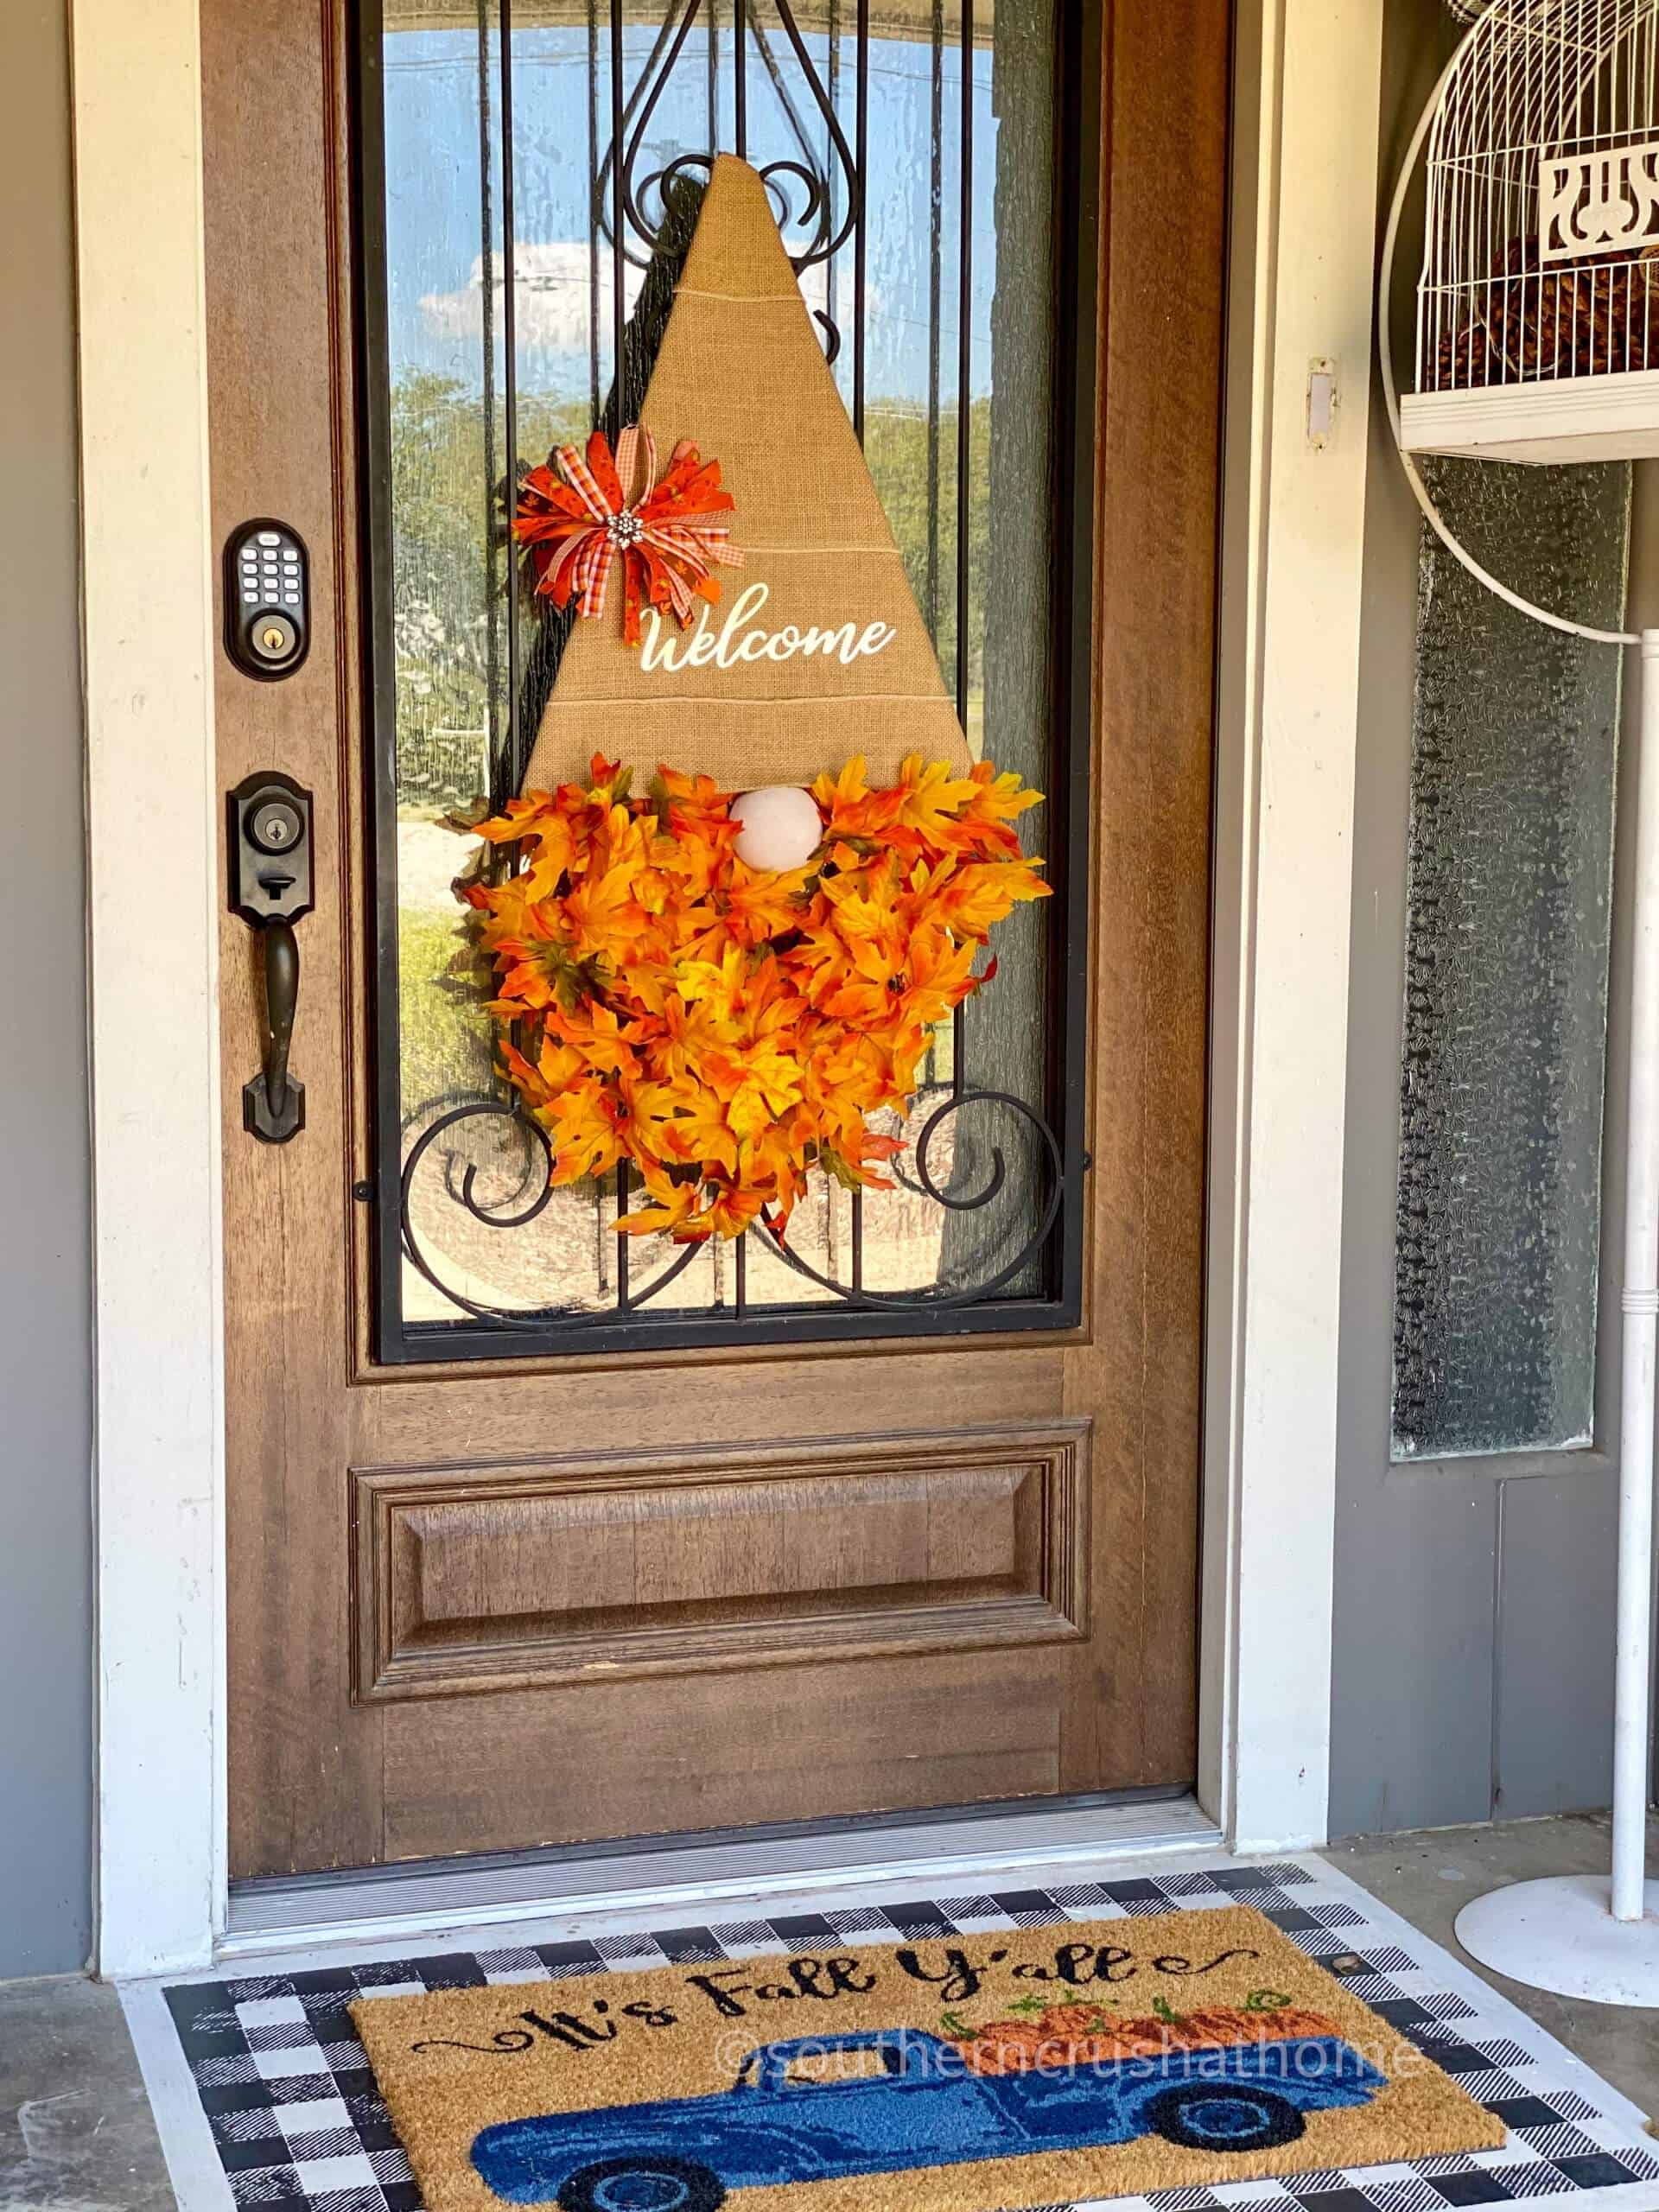
Add a pretty embellishment to the center of the bow for a little sparkle. I also added a welcome sign to the front with hot glue. That's all there is to it! What do you think?
Another view of the fall gnome door hanger looking up!
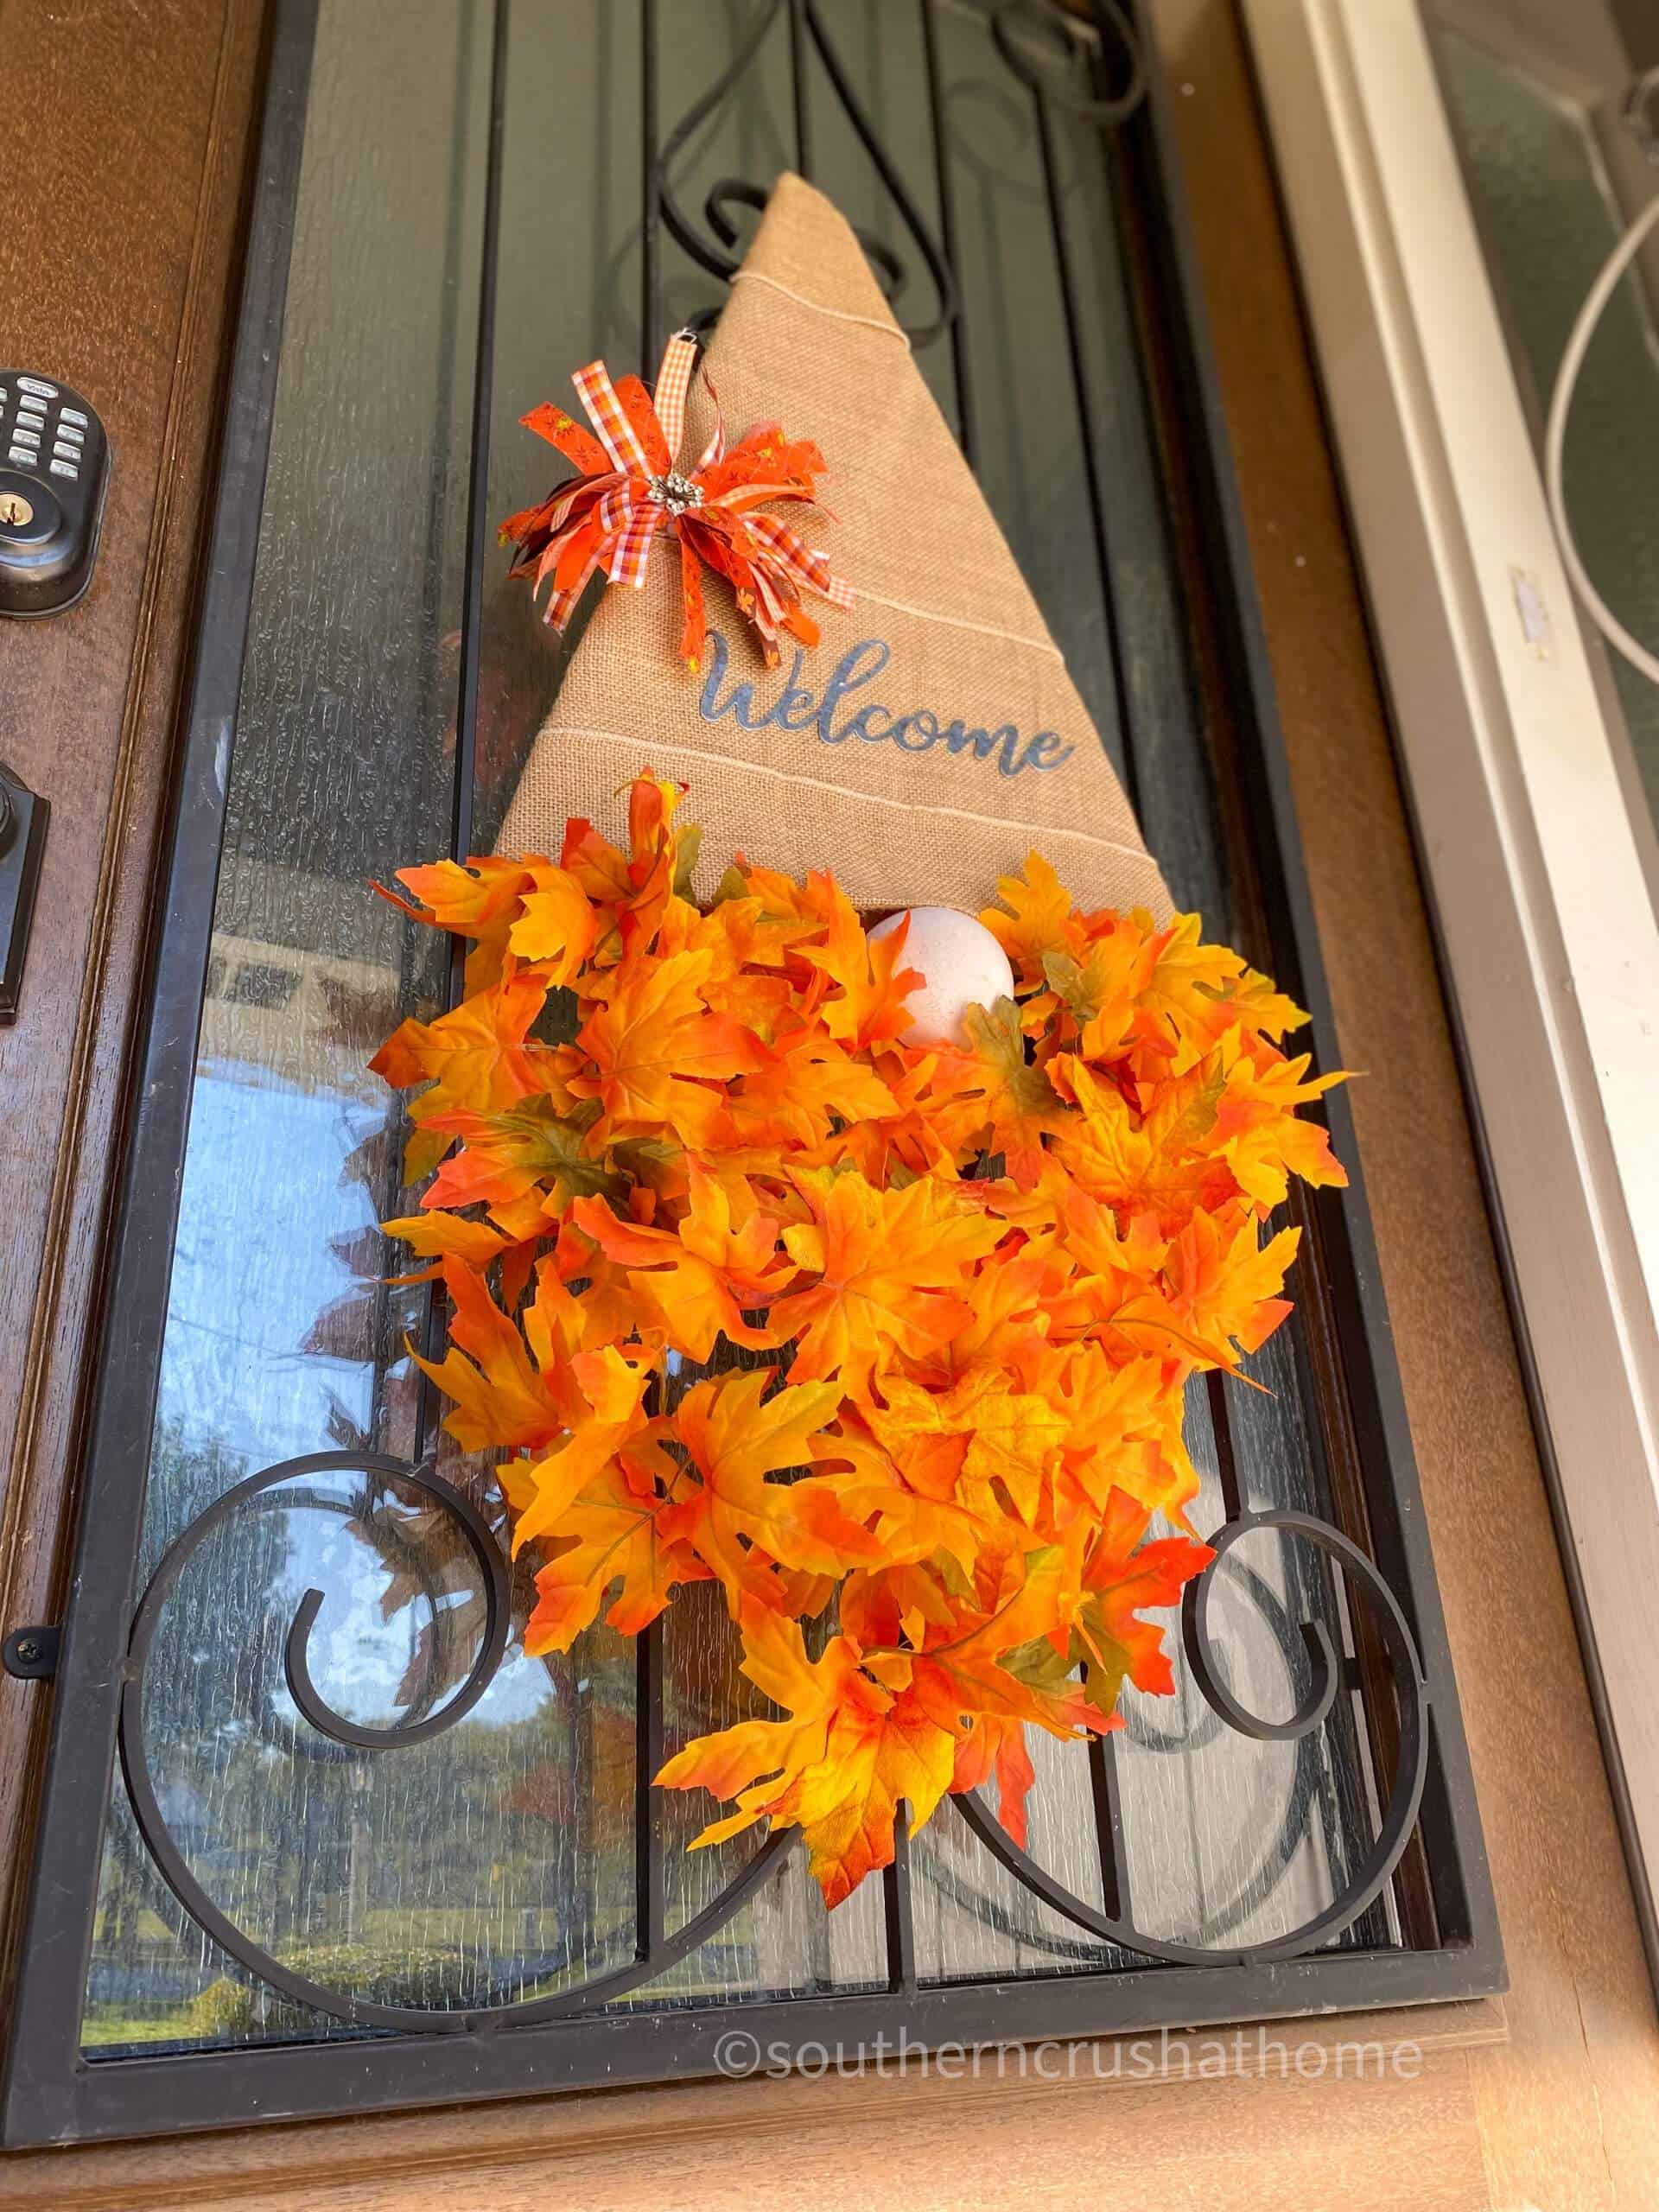
It really finishes out the fall porch look. I'll be adding a few pumpkins and viola!
Fall Gnome Door Hanger
Here are just a few ways you can decorate with your fall gnome. Of course, hanging it on your front door is the obvious choice, but here are a few more ideas.
- Hang it indoors above your mantel, or table.
- Secure it to a grapevine wreath for greater impact.
- Add it to an old window, or in the middle of an empty frame for a little dimension.
Don't you love these ideas? How would you decorate with this fall gnome? Let me know if you make your own by leaving a comment below.
step by step video tutorial
If you want to see the exact step by step process, be sure to check out this video tutorial below over on my YouTube Channel!

BE SURE TO CHECK OUT THESE OTHER DIY FALL IDEAS!
- Fall Floral Burlap Home Decor
- 13 Gorgeous Dollar Tree Pumpkin Wreath Form Ideas
- 11 Ways to Make Your Home Smell Like Fall

Be sure to PIN this for later!

Fall Gnome Door Hanger
Equipment
- ZipSnipz
Materials
- Burlap Fabric
- Fall Leaves
- White Chalk Paint
- Brown Acrylic Paint
- Styrofoam Ball Half
- Assorted Ribbon
- Cardboard
Instructions
- Draw a large triangle on a cardboard box.
- Cut out your triangle.
- Paint the nose with white chalk paint.
- Cover the cardboard triangle with burlap.
- Hot glue the leaves to the burlap hat to create a beard.
- Add the nose with hot glue.
- Make a messy bow using assorted ribbon in fall colors.
- Secure it with a zip tie.
- Add an embellishment to the center of the bow and attach to the hat.
None is so stinking cute!????????