Easy Pumpkin Spice Scented Halloween Broom Gnome Banner
One of the things we all love about the fall season are all the wonderful scents, like pumpkin and cinnamon. As soon as I spotted these little scented brooms at the dollar store, I knew immediately they would make a sweet little gnome. The shape was just perfect. Add the yummy pumpkin spice scent to the mix and I was one happy girl!
Have you jumped on the gnome bandwagon yet? This will be the 5th one I've made, and I see more in my future, especially with the holidays coming.
Take a look at several other DIY GNOMES I've shared:
- DIY Gnome Ornament
- Paint Brush Gnome Ornaments
- Gnome DIY Christmas Tree
- Burlap Carrot Gnome Door Decor
Now, let's get to the super quick tutorial so you can create your own gnome banner!
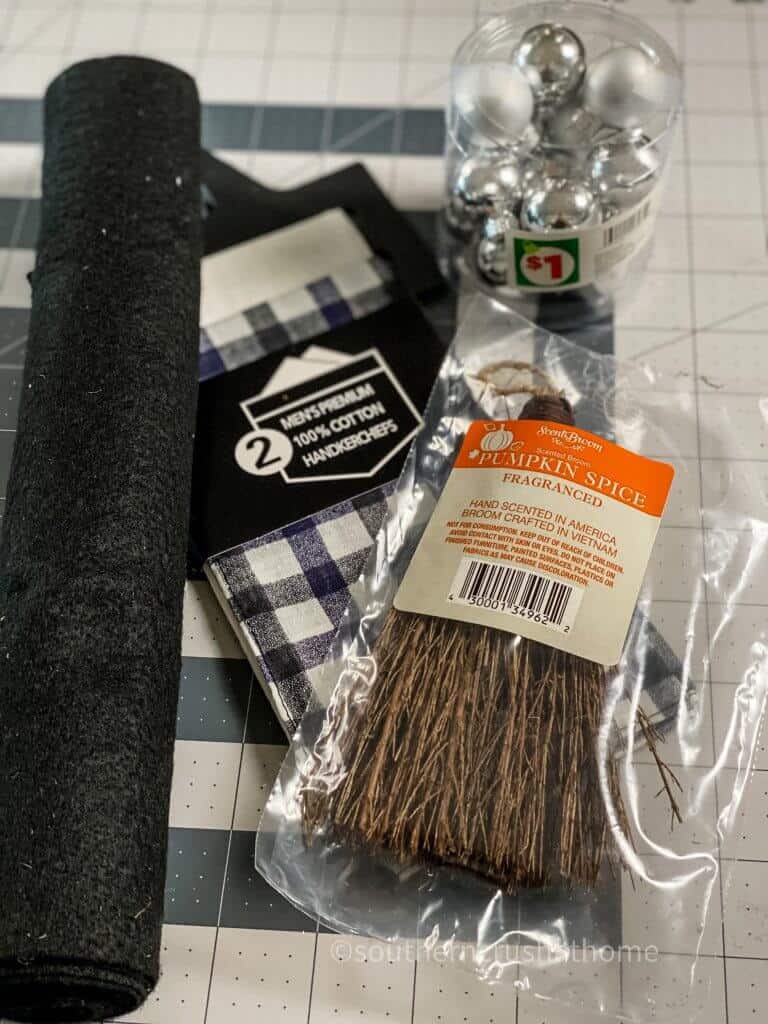
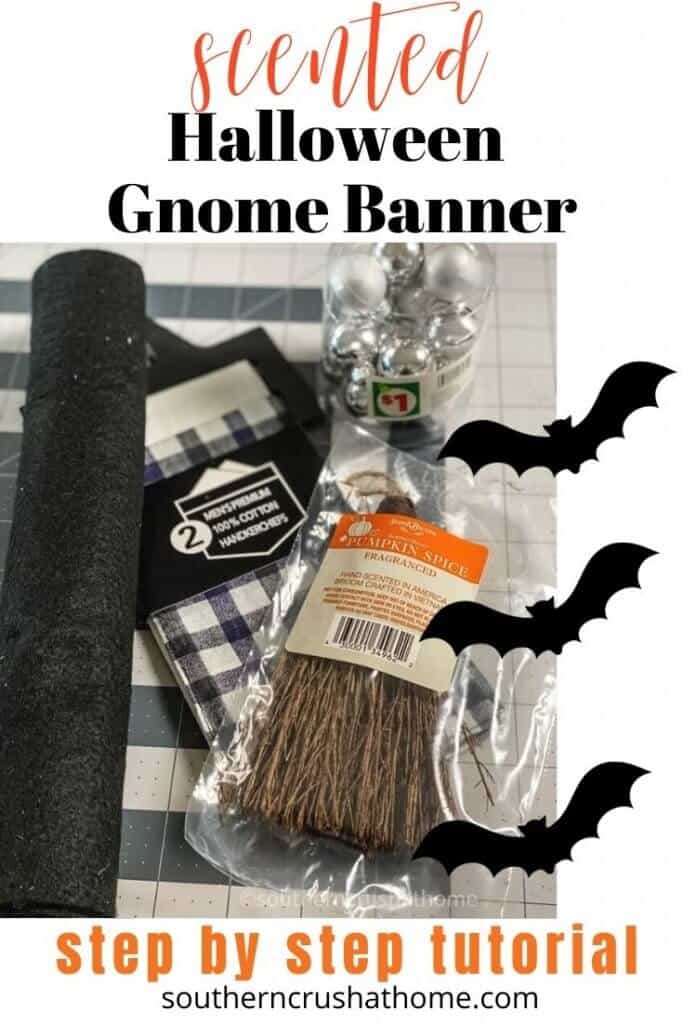
SUPPLIES needed for HALLOWEEN Broom Gnome Banner
All the supplies needed can be found HERE in my Amazon Shop!
- Scented Broom
- Fabric Scissors
- Silver Ornament Balls
- Men's Handkerchiefs
- Black Felt
- Hot Glue Gun
- White Paint Pen
How to make a HALLOWEEN Broom Gnome Banner
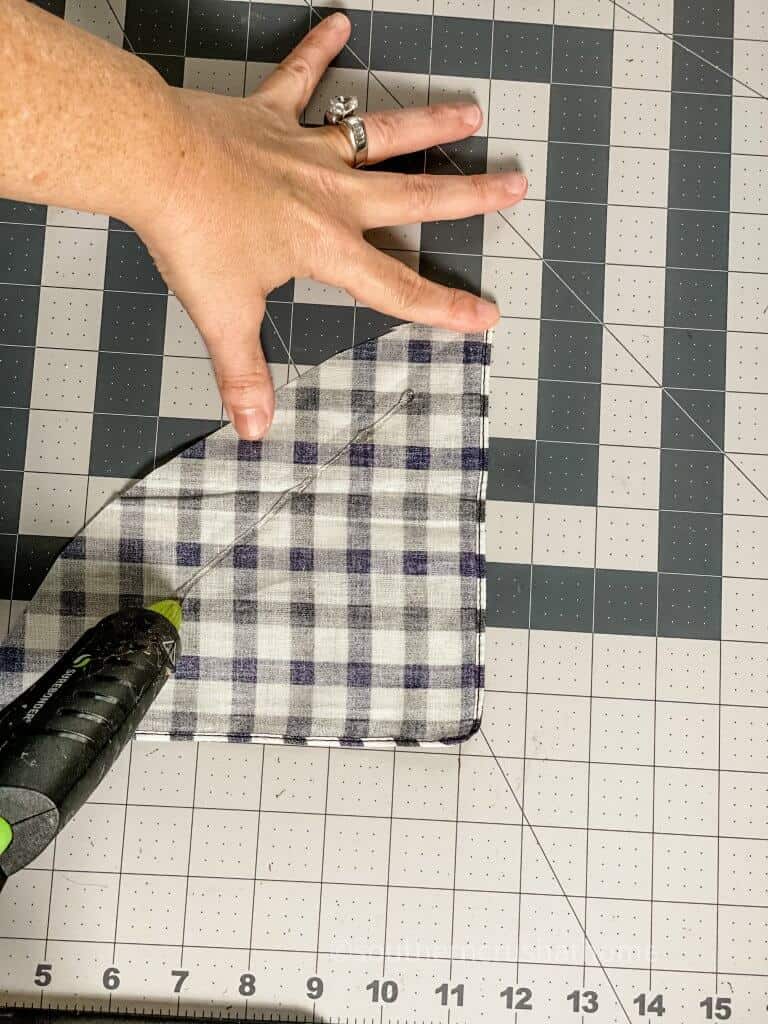
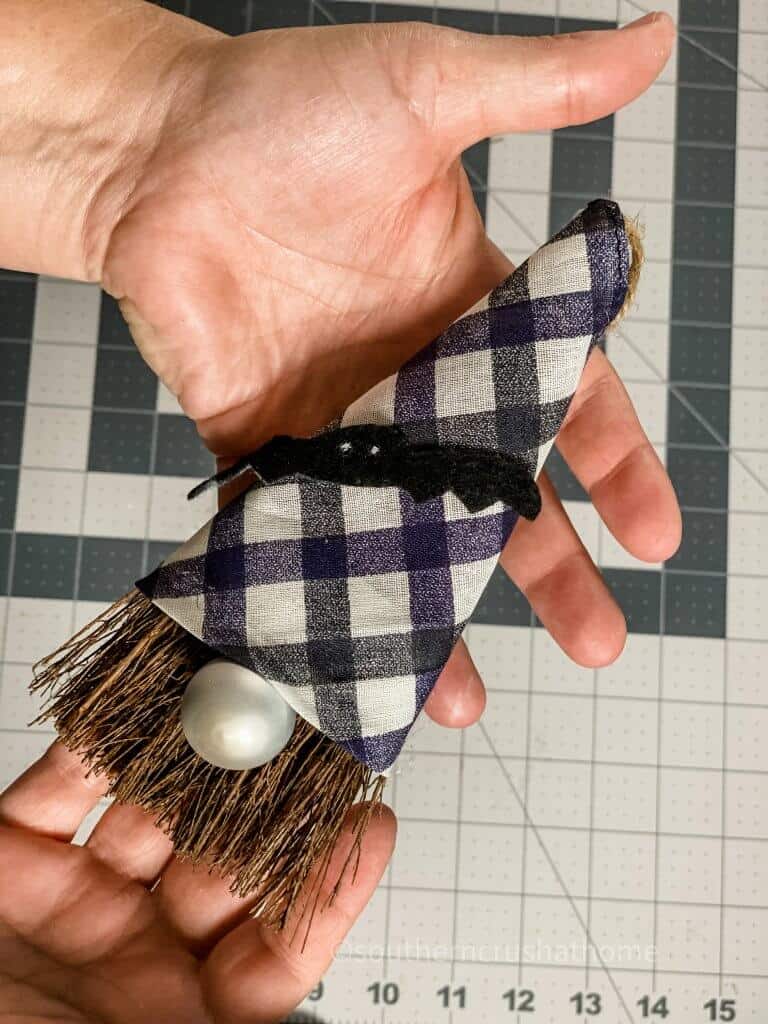
Place the scented broom on top of the handkerchief and cut around it, so there is enough fabric to fold over for the gnome hat.

You can use any design or style fabric that you like. Men's handkerchiefs are the perfect size for this project, and you can't beat the price!
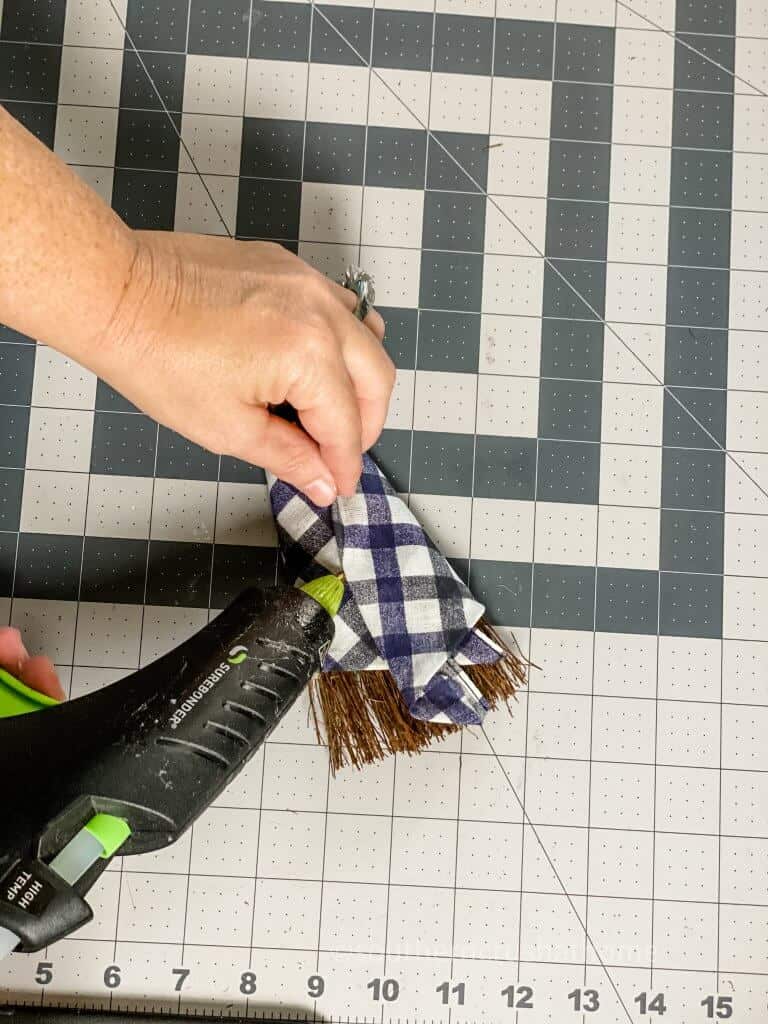
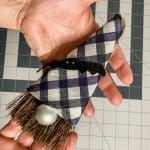
Now, secure the fabric by folding it over the back of the broom. Make a finished edge by folding about 1/4″ of the fabric under and closing with a little more hot glue. You won't really see the back, but it's always nice to have a finished edge.
MAKE THE BAT…
Fold the black felt in half and use a white sharpie, or piece of chalk, to draw a bat. You only need to draw half the bat, because you will be cutting on the fold. That way the bat will come out pretty close to even on both sides. Easy peasy!
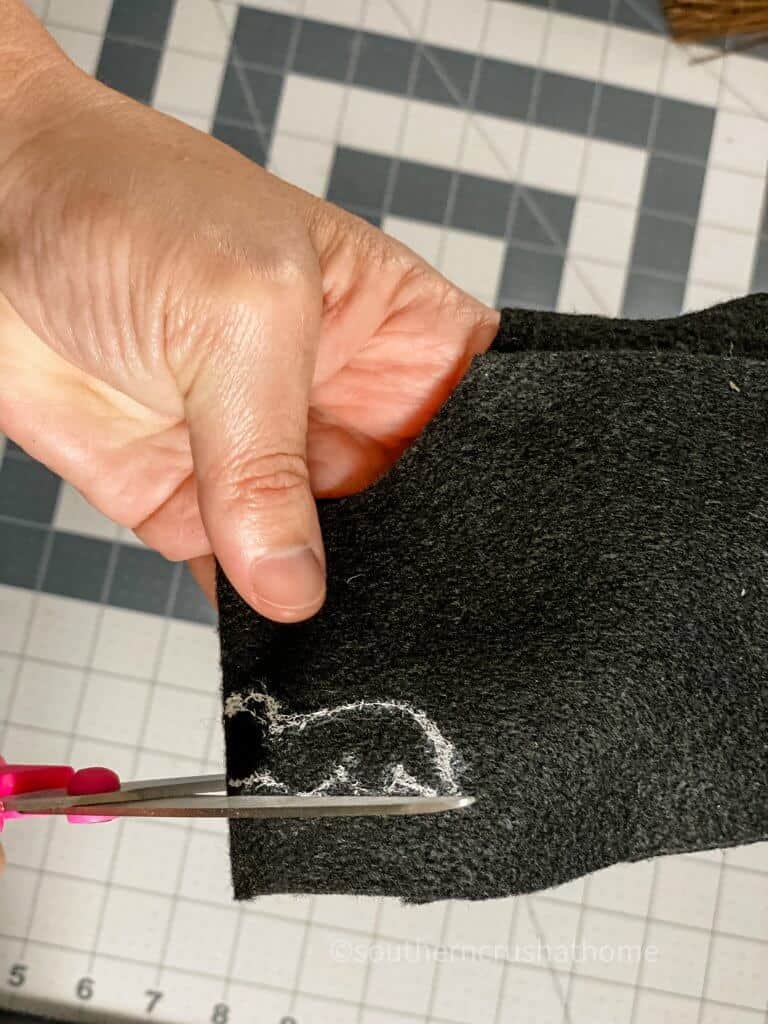
If you don't feel comfortable free handing the image, you can print out a small bat image to trace. The main thing is to have fun with it!
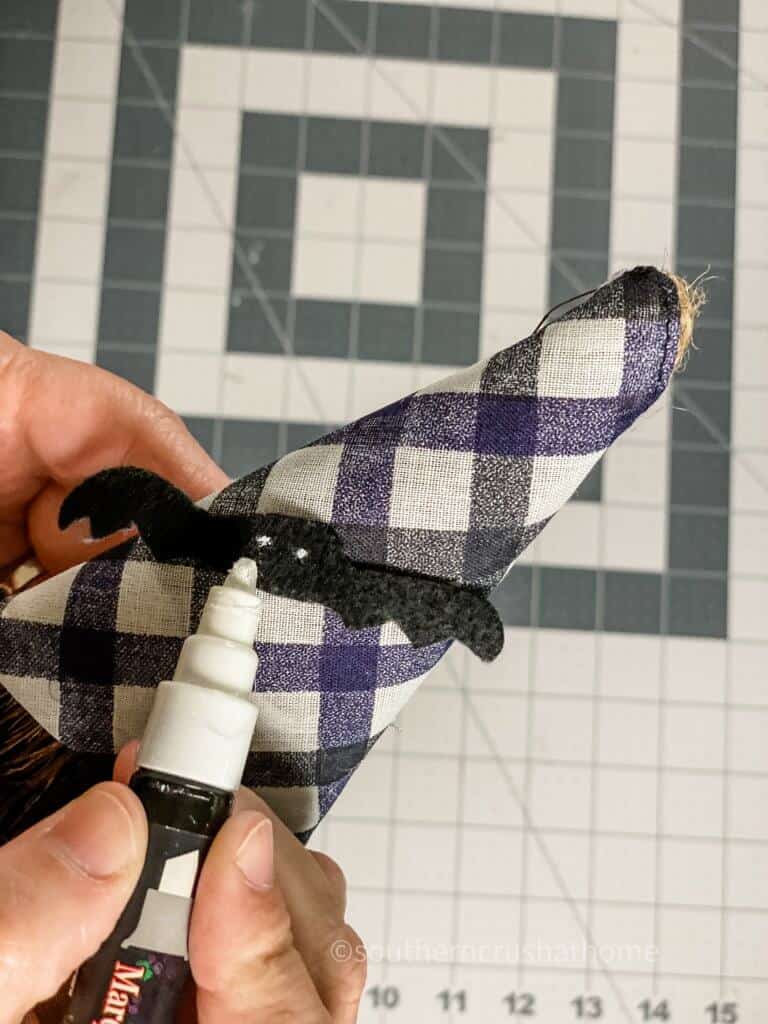
Now it's time to give the bat eyes with the chalk marker. Isn't he cute? Add a drop of hot glue to the center of the bat and place him on the gnome hat. I like how he looked at an angle, but you can place him wherever you like.
next…
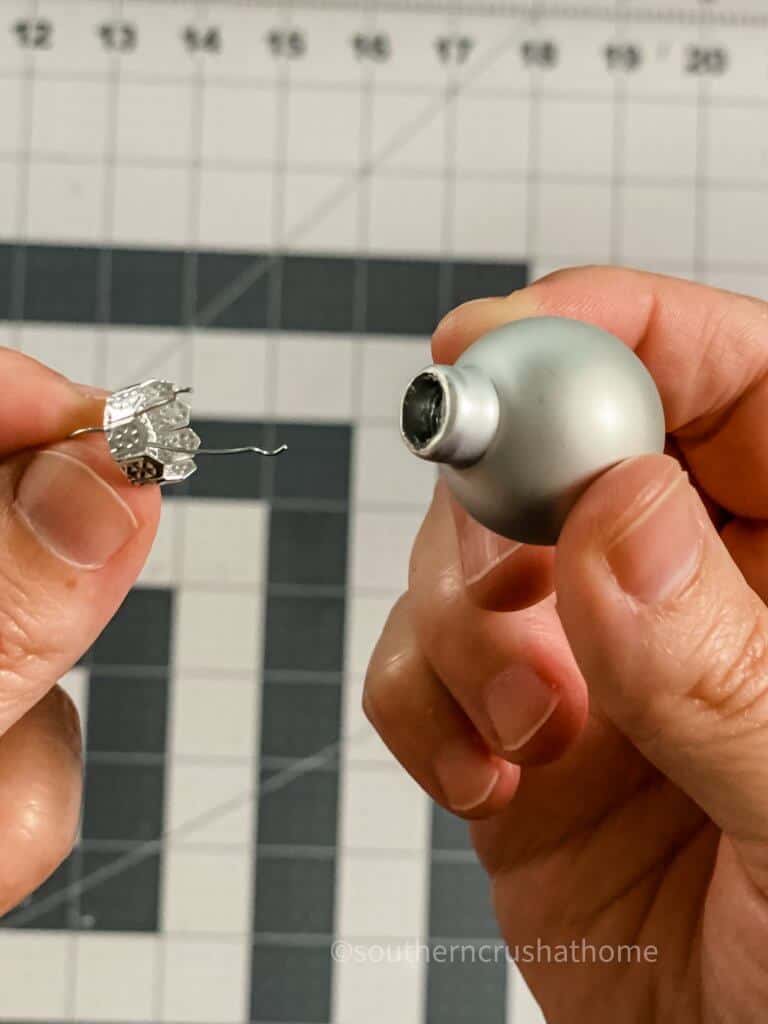
Remove the cap from the silver ornament ball and dispose of it-unless you can think of a way to repurpose the cap! If so, I'd love to hear in the comments below.
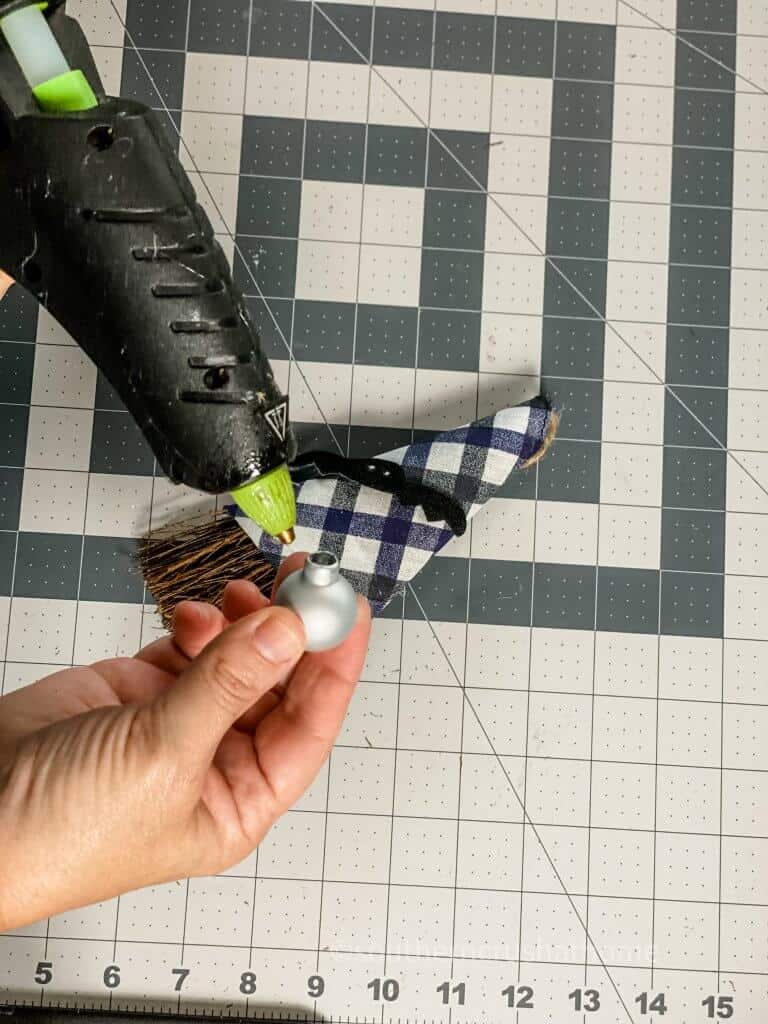
Add a little bit of hot glue to the ornament and secure it just under the gnome hat. You want it to look like the nose is just peeking out.
That's all there is to it! What do you think? So easy, right? I can totally see making a Christmas version with red felt. Or maybe a Grinch? Stay tuned…
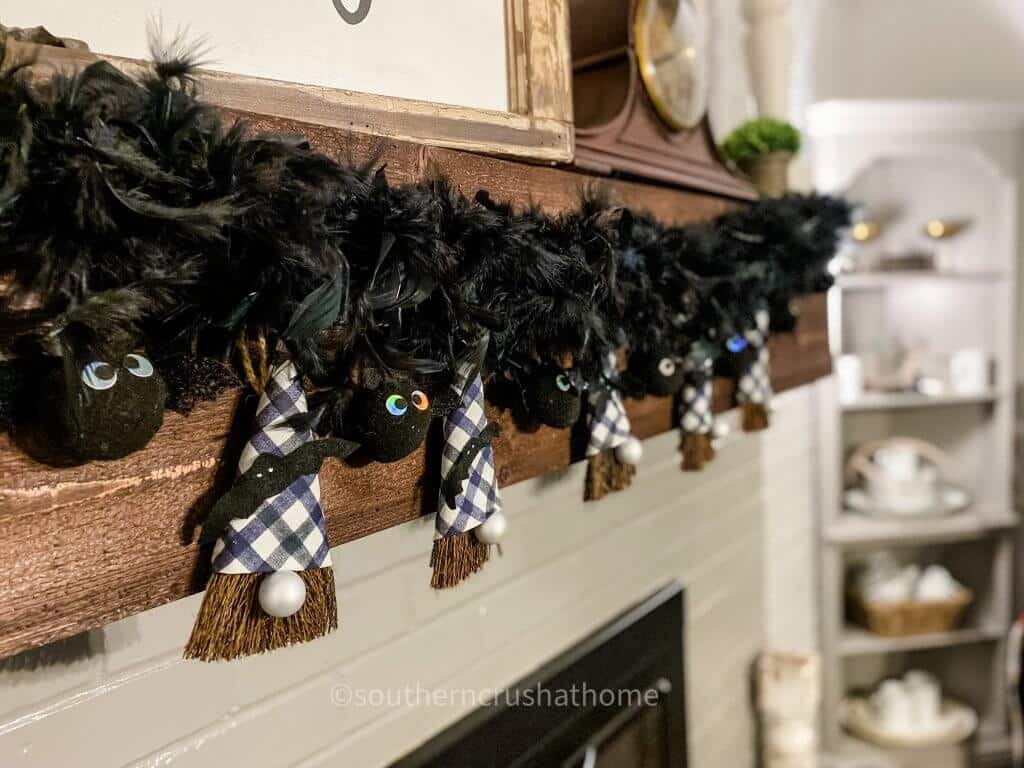
You can stop here as your little gnome is complete, but I wanted a banner so I made five. Look how fun they are all lined up:
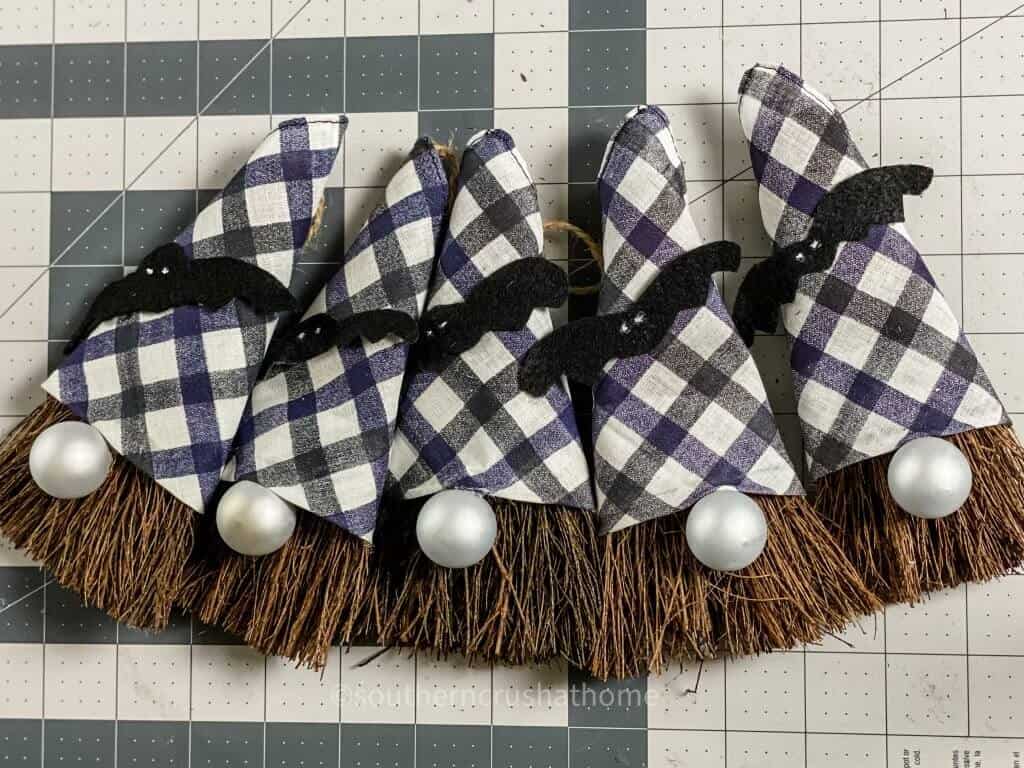
Scented Broom Gnome Banner
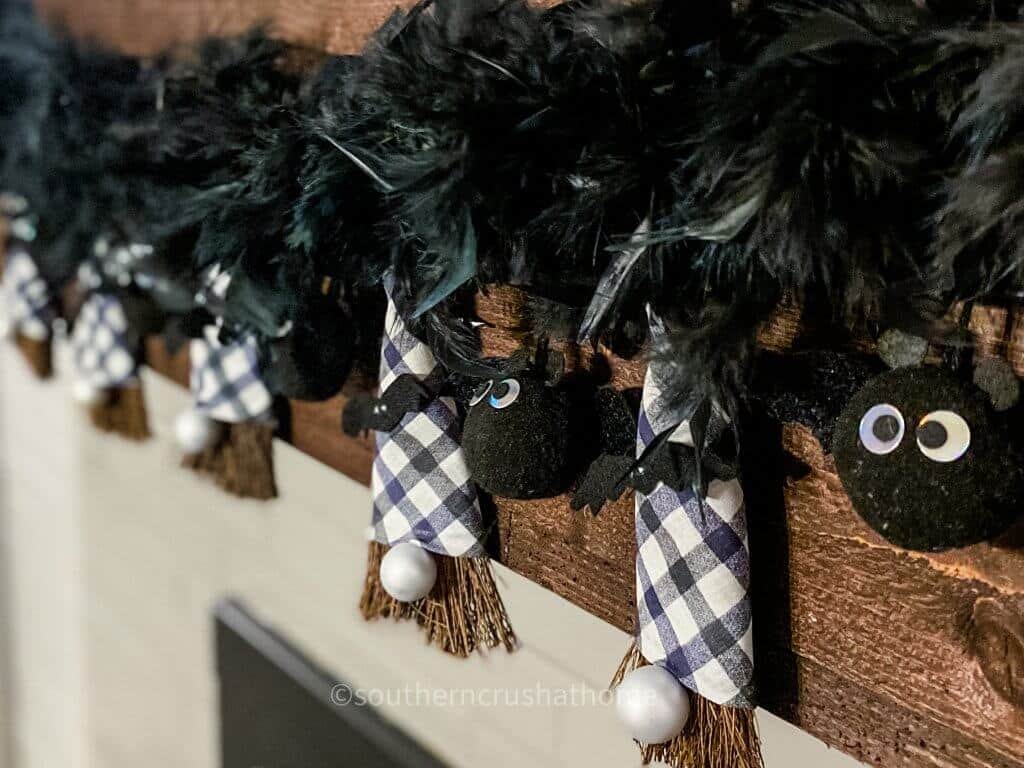
For the banner I just attached them with the twine hanger that was already on the broom. So convenient. Look how adorable they look on my Halloween mantel. I couldn't resist adding a feather boa and some little bats in between each gnome. Cuteness overload!
Here are just a few ways you can decorate with your Halloween gnome banner:
- Drape it across a mantel, or buffet table with twine, or ribbon.
- Hang it above a door or on a covered porch.
- Add it to an old window, or frame for a festive touch.
Don't you love these ideas? How would you use this banner? Let me know if you make your own by leaving a comment below.
step by step video tutorial
If you want to see the exact step by step process, be sure to check out this video tutorial below over on my YouTube Channel!
BE SURE TO CHECK OUT THESE OTHER DIY HALLOWEEN IDEAS!
Be sure to PIN this for later!
Halloween Scented Broom Gnome Banner
Equipment
- Fabric Scissors
Materials
- Scented Broom
- Silver Ornament Balls
- Men's Handkerchiefs
- Black Felt
- White Paint Pen
Instructions
- Place the scented broom on top of the handkerchief and cut around it.
- Run a bead of hot glue across the edge of the handkerchief and fold it over the broom for the hat.
- Make a finished edge by folding about 1/4" in and gluing.
- Fold the black felt in half and draw half of a bat with paint pen.
- Draw bat eyes with the chalk marker.
- Remove the cap from the silver ornament ball.
- Add a little bit of hot glue to the ornament and secure it just under the gnome hat.
Halloween-y but not cheesy like most Halloween decor! I like this!
I’ve made the gnomes before but not put them on a banner. Great idea! Love all your extra touches!
Gnomes are big right now and I love how you incorporated them into the Halloween holiday! Super simple and cute!
Adorable, I’ve only made one gnome before.
Haven’t fallen down the gnome hole yet. But this one might send me over the edge. ????
That’s hilarious!