Christmas Tree Topper Idea (using the Messy Bow)
Need a fresh Christmas Tree topper idea? Using scrap fabric or extra ribbon along with some burlap material makes this a whimsical, non-traditional idea for a tree topper.
This bow is so easy that anyone can make one to use on a Christmas tree or anywhere an added pop of color is needed. See how to create your own tree topper bow in this tutorial.
PIN this for later!
A tree-topper or tree topper is typically a decorative ornament placed at the top otherwise known as the “crown” of a Christmas tree. They are usually the last decoration to be placed on the tree and sometimes there is a special ceremony involved.
I have fond memories of placing a bright, multi-colored star on the top of our Christmas tree when I was little. It was so much fun.
We played music and drank hot cocoa and made an event out of decorating the tree.
Adding a tree topper to a Christmas tree dates back centuries and is a fun way to personalize your tree. Ideas include an angel, star, finial, Santa, or a bow!
This blog post contains affiliate links. The opinions are wholly my own from my own experience. I may earn a small commission from clicks through to the websites that end in a purchase.
What You'll Need to Make a Tree Topper Bow
- burlap material
- 4-5 various choices of ribbons with at least one of them wired
- zip tie
- optional embellishment or bling
- hot glue gun and glue
- scissors

PIN this for later!
Watch the YouTube Video Tutorial on How to Make a Messy Bow Tree Topper
If it's easier for you to watch a video, then I've got you covered here with this easy-to-learn step-by-step instructional video tutorial on how to make your very own messy bow.
Be sure to subscribe while you're at it!
Instructions for Making a Christmas Bow Tree Topper
- Cut the burlap and ribbons into approximately 2-4″ wide by 12-16″ long strips. The length of the ribbons will determine the size of the bow.
- Starting with a burlap piece, lay the ribbon strips down one by one in a criss-cross pattern varying the ribbons as you go.
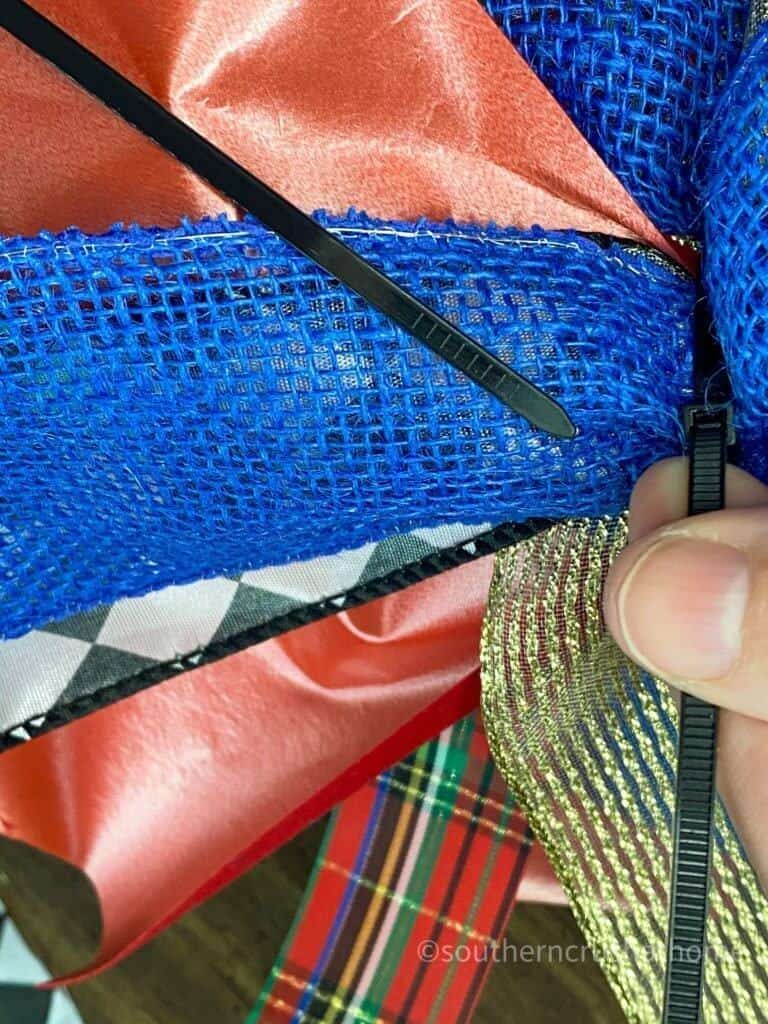
- Taking the zip tie, wiggle it underneath the stack of ribbons until it comes out on the other side and then zip it half way.
- Flip the ribbon stack over and bring the zip tie around the the back to zip it tight. Trim the zip tie.
- Pull each ribbon strip towards the center until you have a pom pom shape for your bow.
- Take the stack in your hand like a bouquet and using the scissors, trim to the desired length evening up the strips.
- Shake out the bow to release the strings.
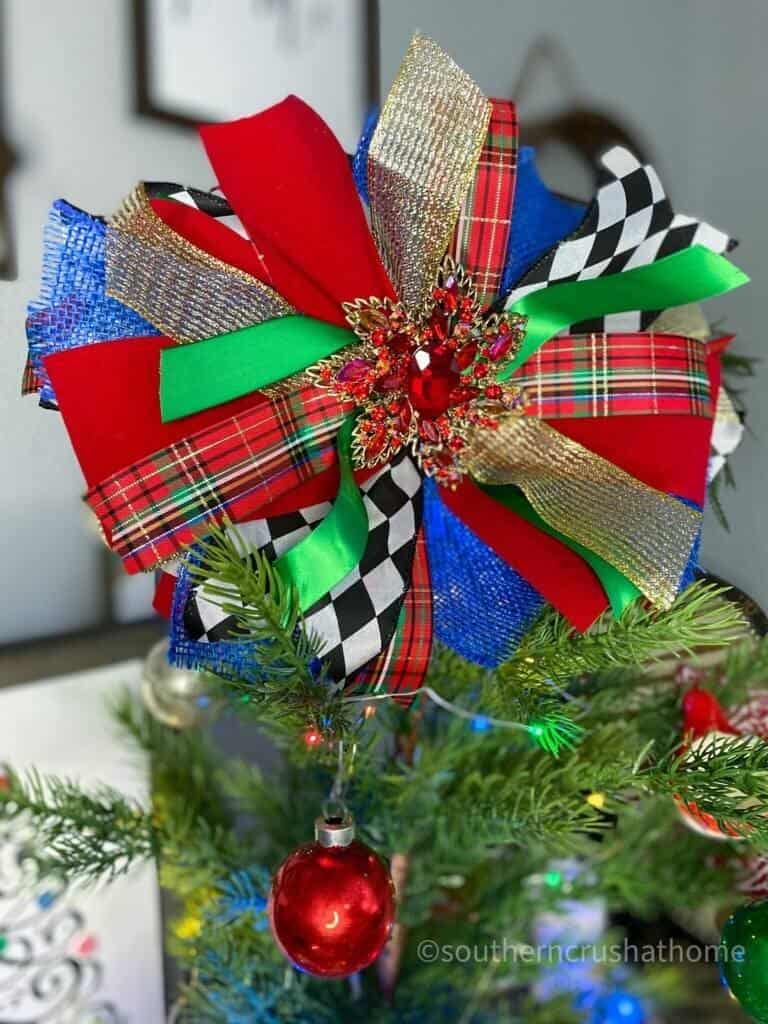
- Glue an embellishment in the center like a piece of vintage jewelry or bling.
- Use an extra zip tie to thread through the original zip tie to attach to the top of your tree.
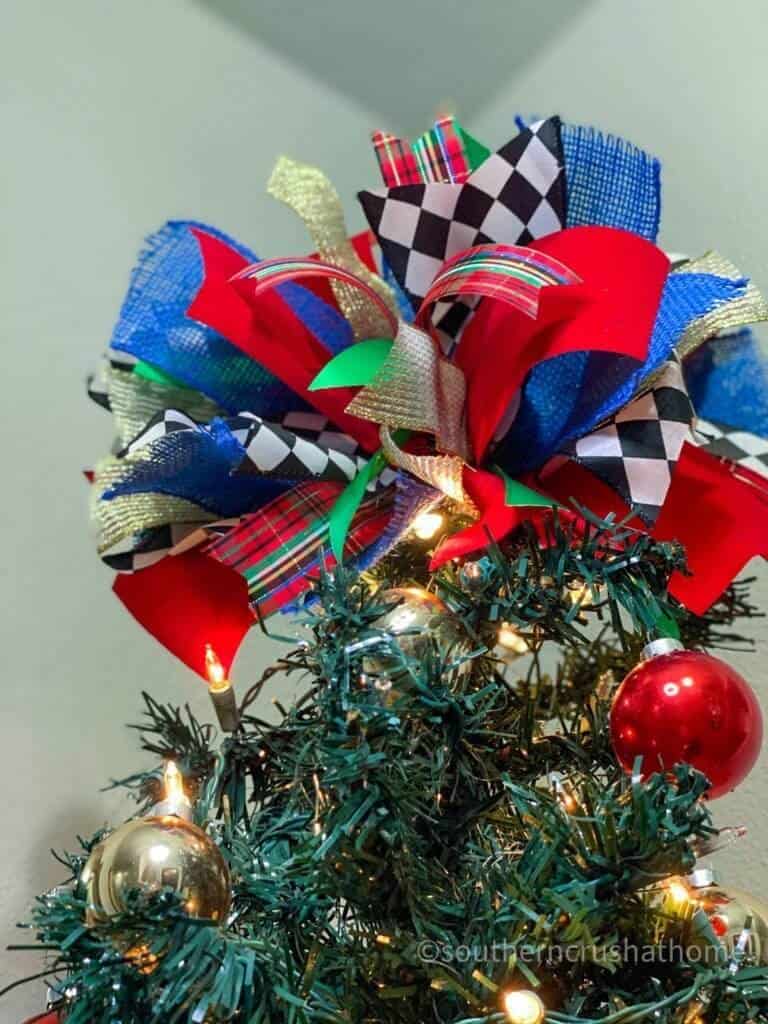
Messy Bow Tree Topper with Bling
This is how a simple vintage brooch or rhinestone embellishment would look in the center of your messy bow tree topper. It gives it just the right amount of extra sparkle!

Stunning and gorgeous and all handmade by YOU!
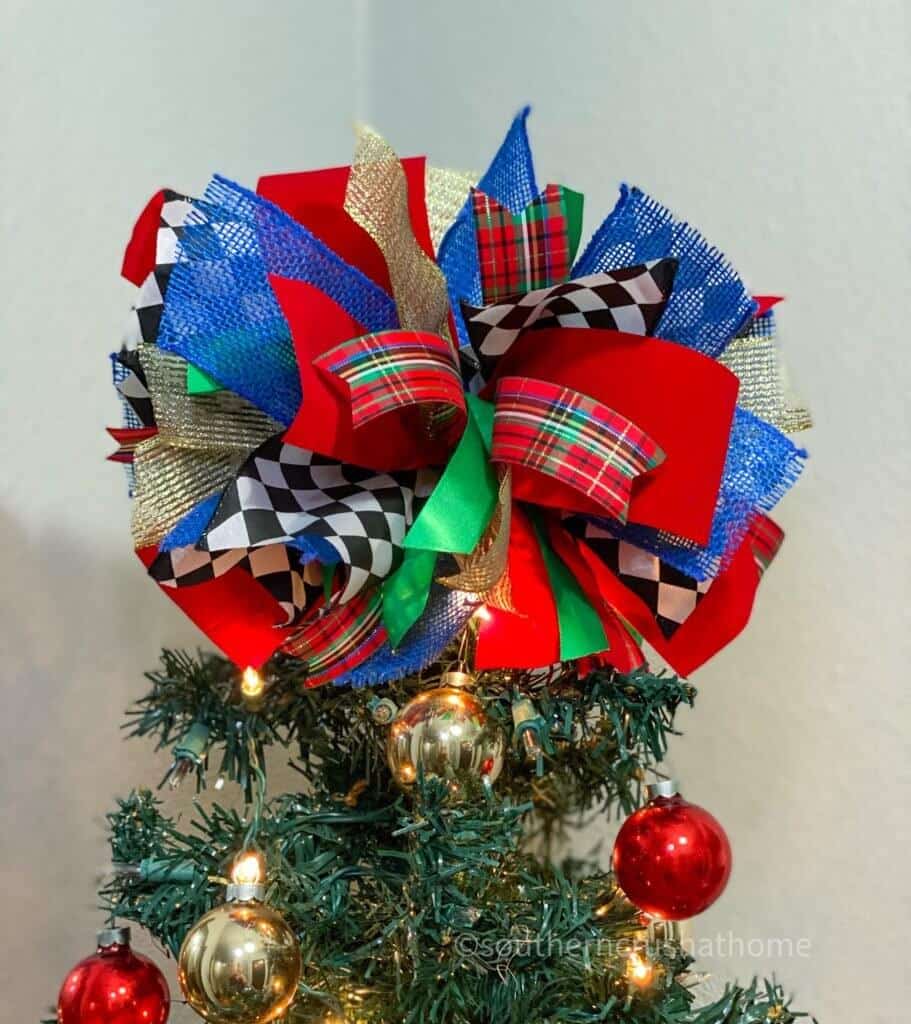
Messy Bow Tree Topper Without Bling
This is how it would look without bling in the center of your messy bow tree topper. This look is traditional and simple.
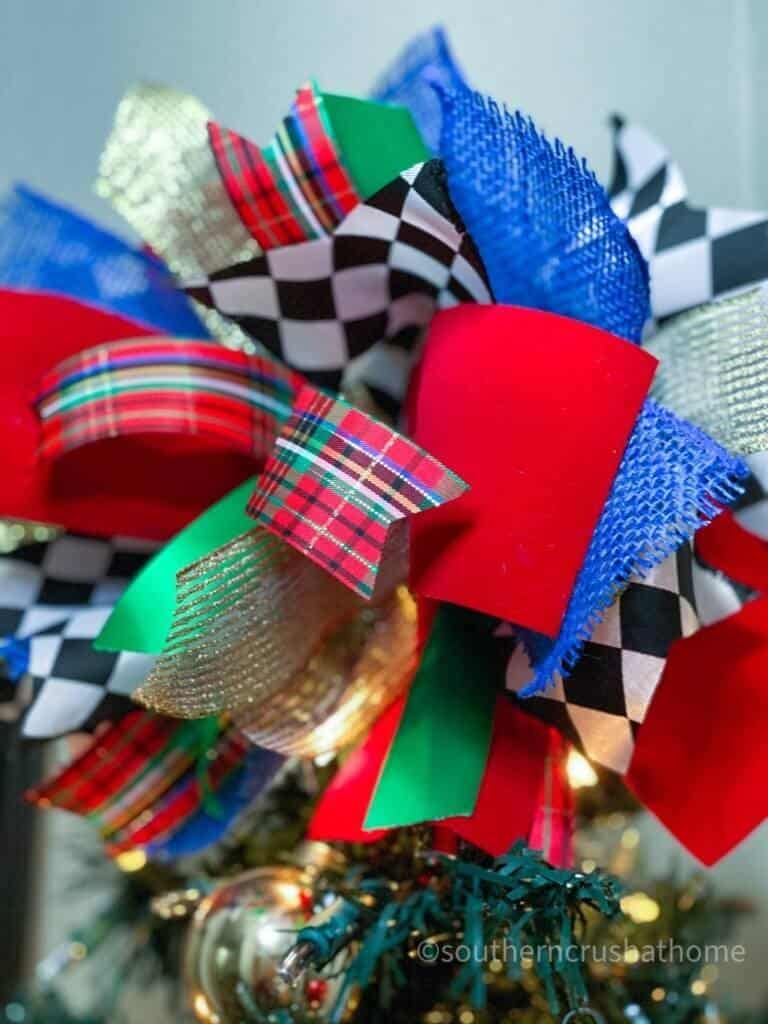
This is a close up look at the tree topper bow with all it's colors and uniqueness!
What are the Most Popular Tree Topper Ideas?
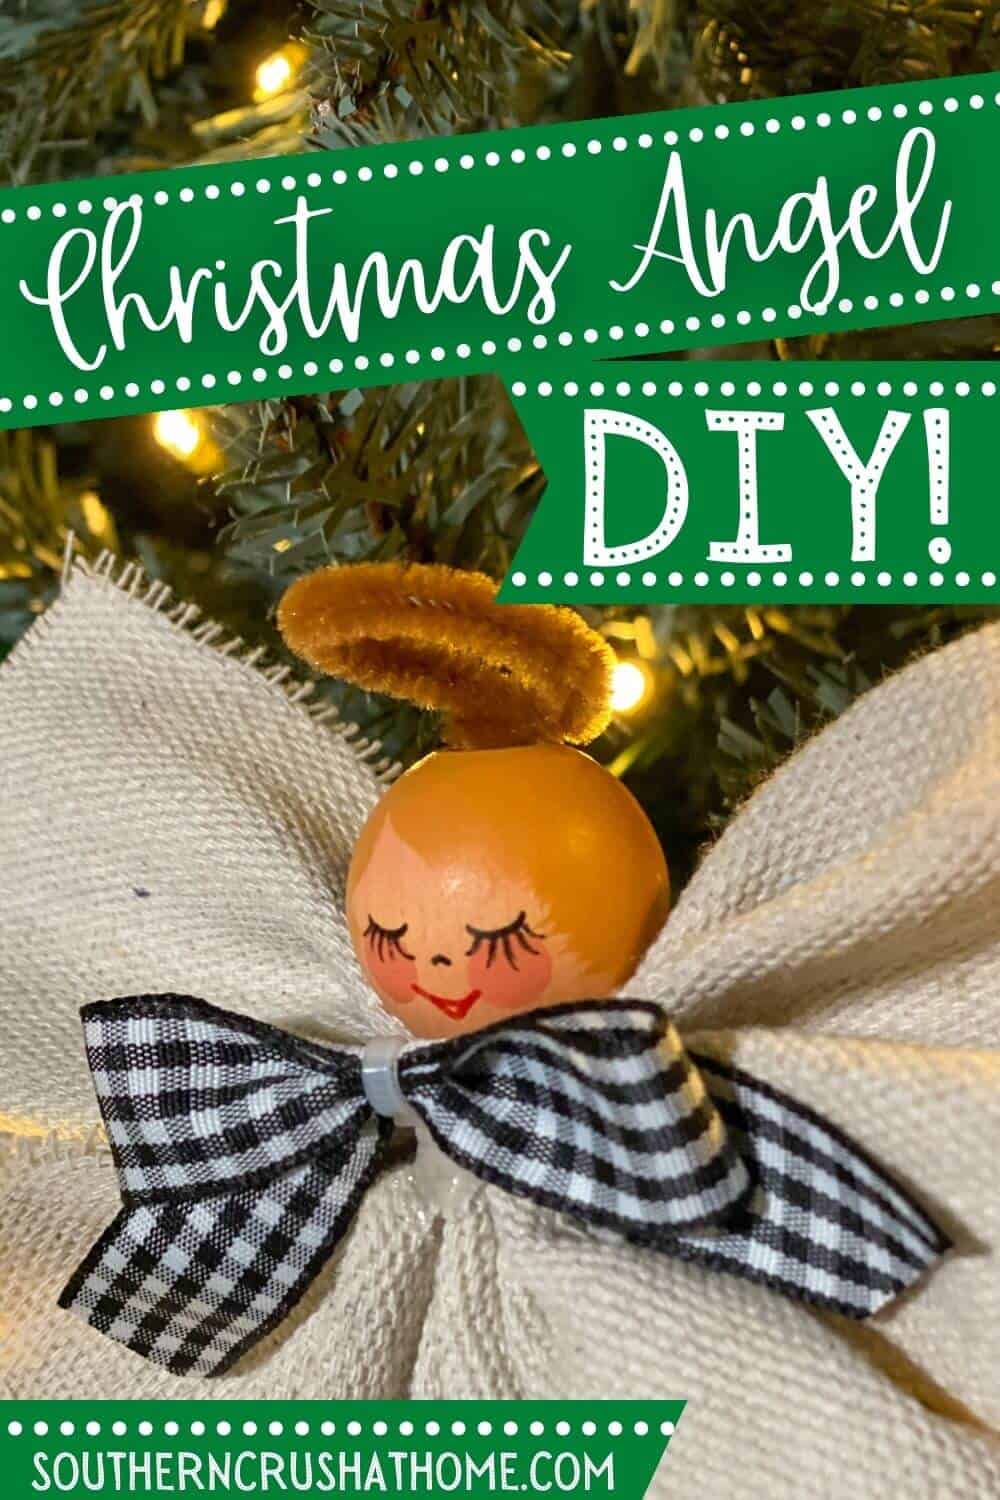
- A Christmas angel is the most common tree-topper. Here are some of my favorite angel tree topper ideas!

- A star is another popular choice for a tree topper. The star symbolizes the Star of Bethlehem that led the shepherds to the manger.
- The snowflake is a little less traditional of a tree topper idea; but snowflakes still a popular choice.
- Father Christmas or Santa are also popular tree-topper ideas. There are so many to choose from out there; I picked a few and put them here.
- Finials are a beautiful way to top a Christmas tree. They come in so many shapes, colors and sizes. These can be plastic or blown glass. Make sure your ceiling is high enough for one of these though.
How to Choose the Right Tree Topper
When choosing a tree topper, there are a few things you'll want to keep in mind. First, think about the overall look you're going for. Do you want something traditional or modern?
Next, consider the size of your tree. If you have a small tree, you'll want to choose a smaller topper. For a large tree, you can go with a bigger topper.
Finally, think about what kind of materials you want your topper to be made out of. Glass and metal are popular choices, but there are also many fabric and plastic toppers available.
No matter what your style or budget, there's sure to be a tree topper that's perfect for you!
Here are a few of my favorite tree toppers below:

Tips for storing your tree topper
When it comes time to take down your Christmas tree, you'll want to be careful with your topper. Glass and metal toppers can be fragile, so it's important to wrap them up carefully.
For fabric and plastic toppers, you can just fold them up and store them in a box. Make sure to label the box so you know what's inside when it comes time to decorate next year!
With a little bit of care, your tree topper will last for many Christmases to come!
The History of Tree Toppers
The first recorded use of a tree topper was in the 15th century in Germany. Trees were often decorated with fruit, nuts, and candles. The candles were used to represent the stars in the sky.
The first Christmas tree topper was made out of glass and was shaped like a star. It was created in 1846 by German glassblower Hans Greiner.
The first electrically-lit tree topper was created in 1903 by Edward H. Johnson, the founder of the Edison Illuminating Company. The topper was a replica of his company's light bulb.
Tree toppers became more popular in the United States in the 1920s and 1930s. Many different designs were created, including angels, Santa Claus, and stars.
Today, tree toppers come in all shapes and sizes. You can find them made out of glass, metal, plastic, or even fabric. There's sure to be a tree topper that's perfect for your holiday decor!
More Creative Ways to Decorate your Christmas Tree
- Gnome Ornaments
- Easy DIY Christmas Messy Bow
- Easy Mop Head Ornament
- Buffalo Plaid Hoop Ornament
- Movie Theater Themed Christmas Tree
More Ideas for Using Bows in your Christmas Decor
- Gorgeous Wreath for Christmas using Bows
- Floral Christmas Centerpiece with Bows
- Cute Bows Perfect for Stockings
- Burlap Bows for Christmas
I can’t wait to meet you! Leave your thoughts below in the comments, please… BTW— Life is short—Enjoy the mess!

Christmas Tree Topper Idea
Materials
- burlap material
- ribbons
- zip tie
- embellishment optional
- hot glue
Instructions
- Cut the burlap and ribbons into approximately 2-4" wide by 12-16" long strips. The length of the ribbons will determine the size of the bow.
- Starting with a burlap piece, lay the ribbon strips down one by one in a criss-cross pattern varying the ribbons as you go.
- Taking the zip tie, wiggle it underneath the stack of ribbons until it comes out on the other side and then zip it half way.
- Flip the ribbon stack over and bring the zip tie around the the back to zip it tight. Trim the zip tie.
- Pull each ribbon strip towards the center until you have a pom pom shape for your bow.
- Take the stack in your hand like a bouquet and using the scissors, trim to the desired length evening up the strips.
- Shake out the bow to release the strings.
- Glue an embellishment in the center like a piece of vintage jewelry or bling.
Love this!!!
Awe thank you so much! It was fun to make!