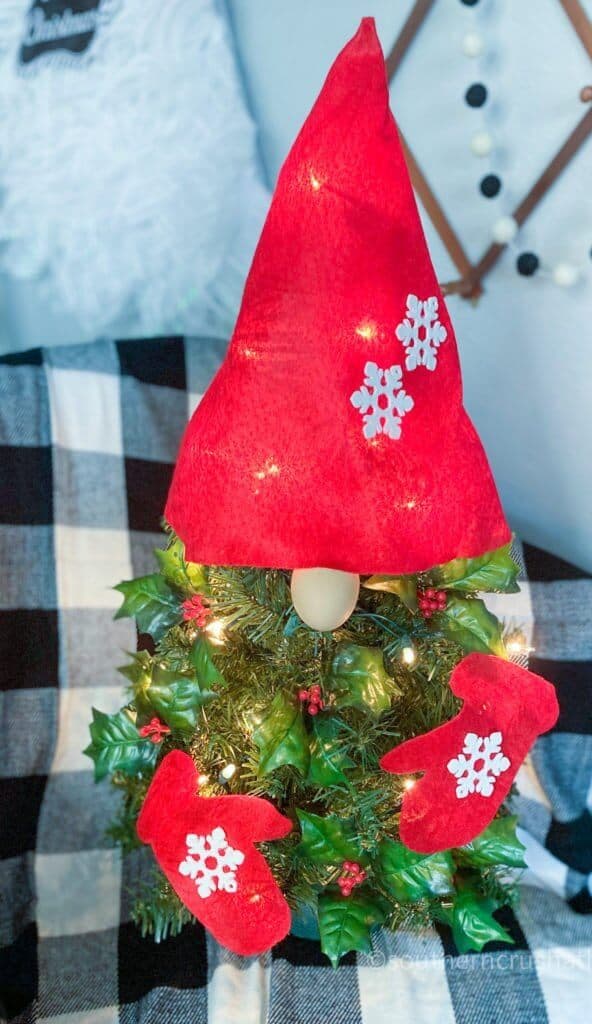
Gnome DIY Christmas Tree + FREE Pattern
Each year I love to decorate big and tiny Christmas trees all around my house! This year I even made my first Gnome DIY Christmas tree! This simple DIY Christmas tree idea is my own version of the fast growing gnome trend. Everywhere I look it seems gnomes are popping up as Christmas trees! Follow this sweet tutorial and make your very own…

Be Sure to PIN this for Later!
be sure to check out these other DIY gnome ideas!
- Easy Mason Jar Lid GNOME Ornaments For Christmas
- Mop Head Gnome Ornament
- Dollar Store Paint Brush Gnome Christmas Ornaments
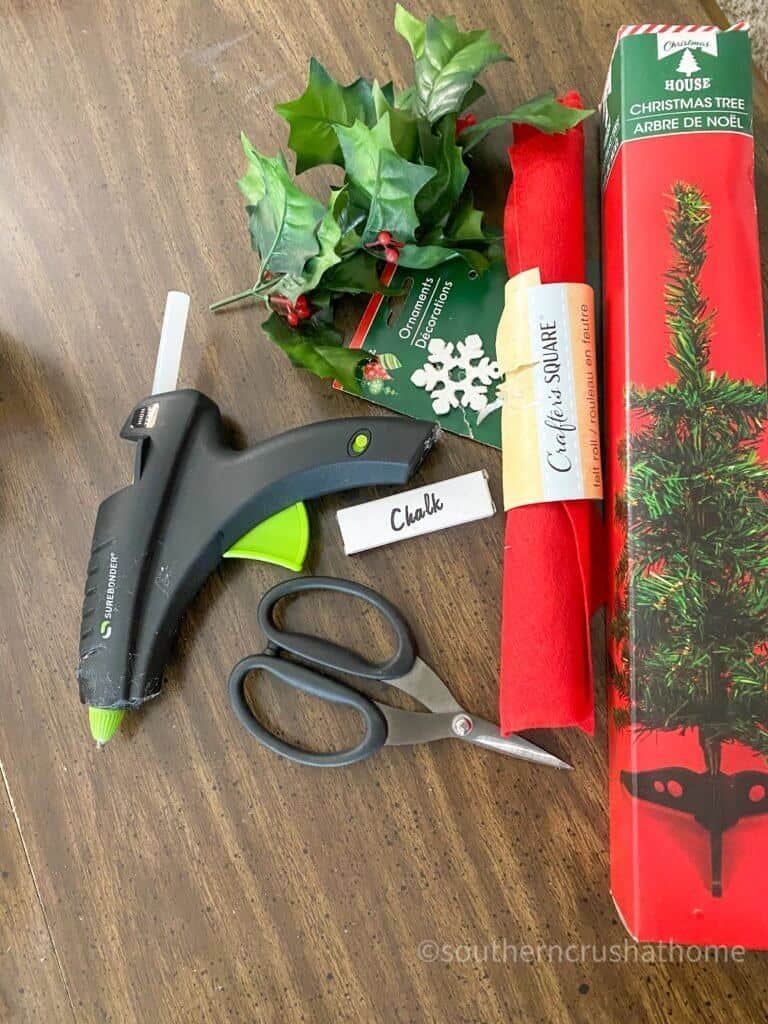
Supplies needed for GNome christmas tree
- Tiny Christmas Tree (You can use the one from the Dollar Tree)
- Hot Glue Gun and Glue
- Dollar Tree Crafters Square Red Felt Sheet
- Dollar Tree Snowflake Ornaments or other embellishment
- Chalk
- FREE Mitten Pattern

GNOME DIY christmas TREE STEP BY STEP INSTRUCTIONS
- Print out a copy of the FREE Mitten Pattern.
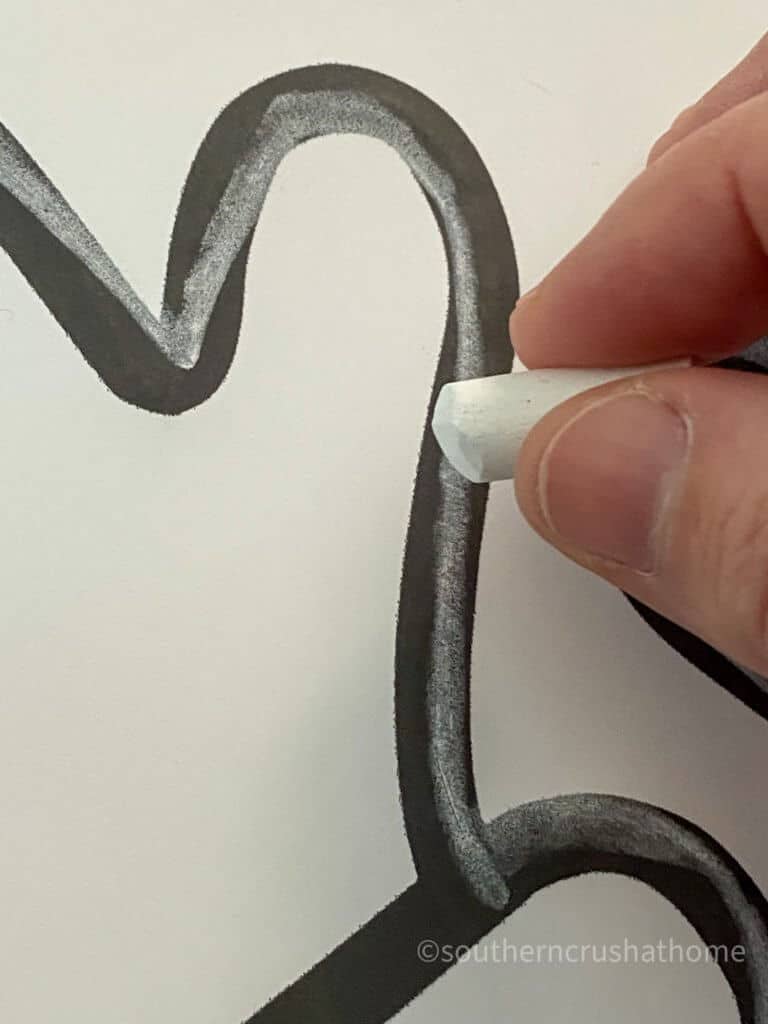
- Using a piece of chalk, outline the mittens on the pattern.

- Spread out the felt and cut out a piece that fits the 8.5″x11″ sheet.
- Flip the pattern over chalk side down.
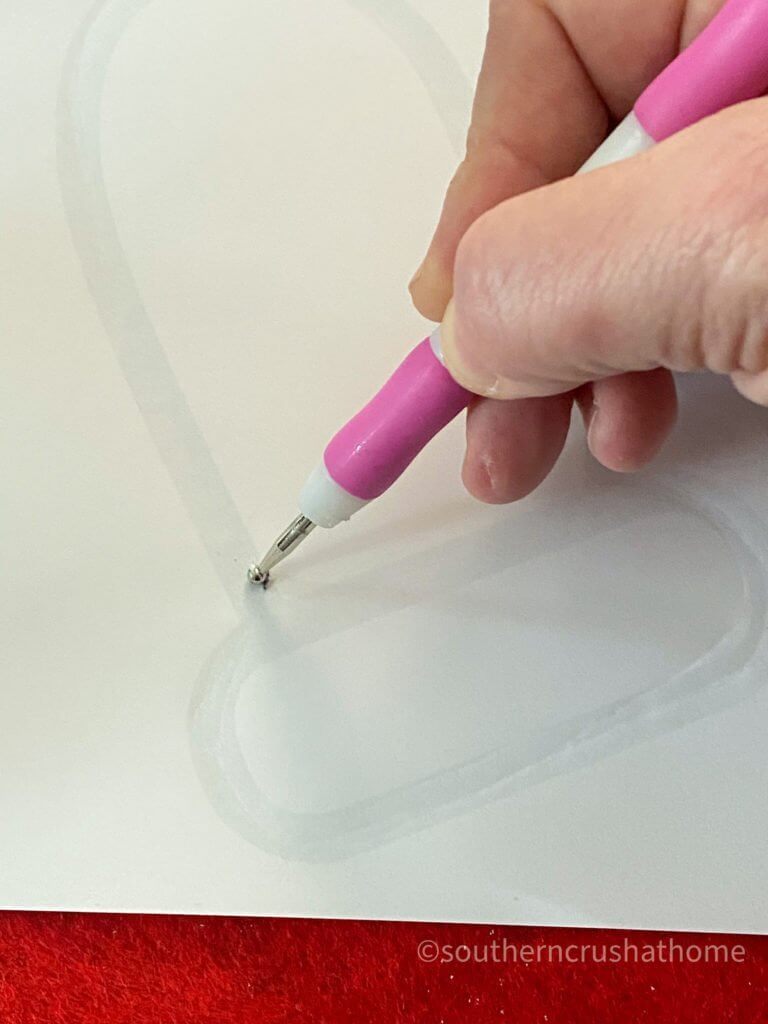
- Using any object (like a pencil eraser or other tool) press down and re-outline the mitten pattern. Make sure to go over the area twice and be careful not to move the paper around too much as this would smear the chalk underneath.
- Remove your paper pattern and reveal the chalk pattern left behind on the felt! It's really like magic!
- Cut out the mittens.
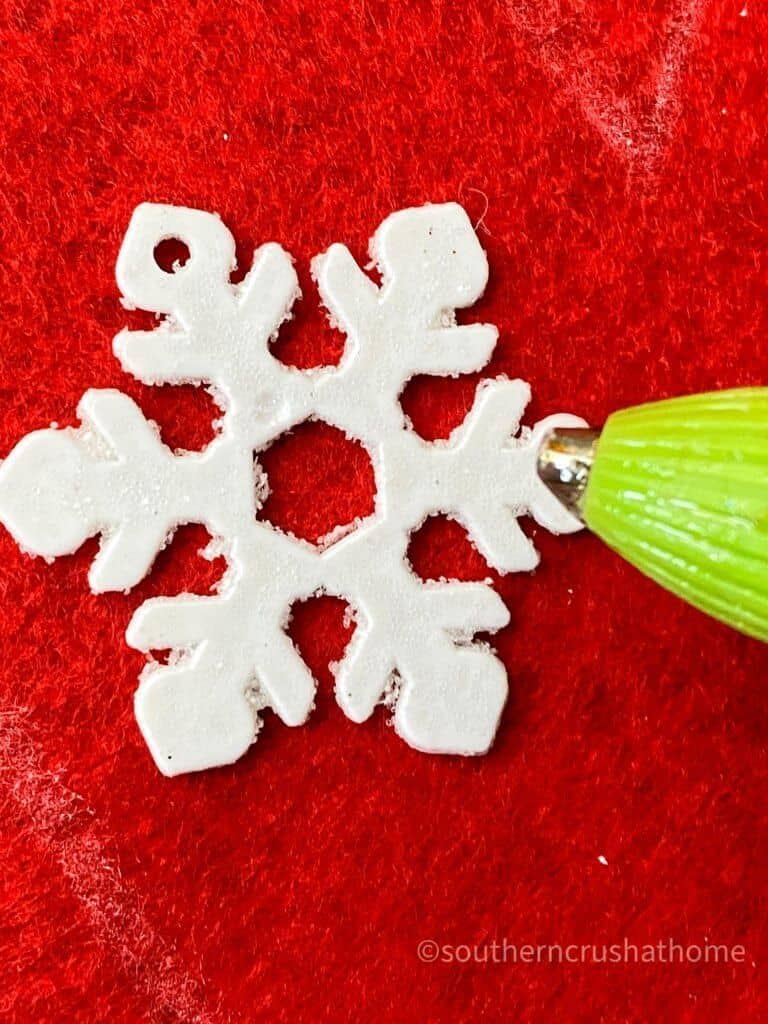
- Glue on any embellishments or add a cute layer of fabric. Get creative! This is the fun part! I added the plastic snowflake ornaments to each mitten.
- Using the tree top as your guide; wrap the remaining felt around the top of the tree into a “cone-like” shape and trim the felt to fit.
- Glue the seam where the two pieces of felt meet and trim the gnome hat where neeeded.
- Create a nose out of any materials you have available. I used a brown, plastic craft egg leftover from Easter, but you could use a section of an egg carton or a wooden knob. Get creative.
- Glue the nose in place and add your mittens!


If you want to add more greenery to the tree, try using some faux holly like I did here…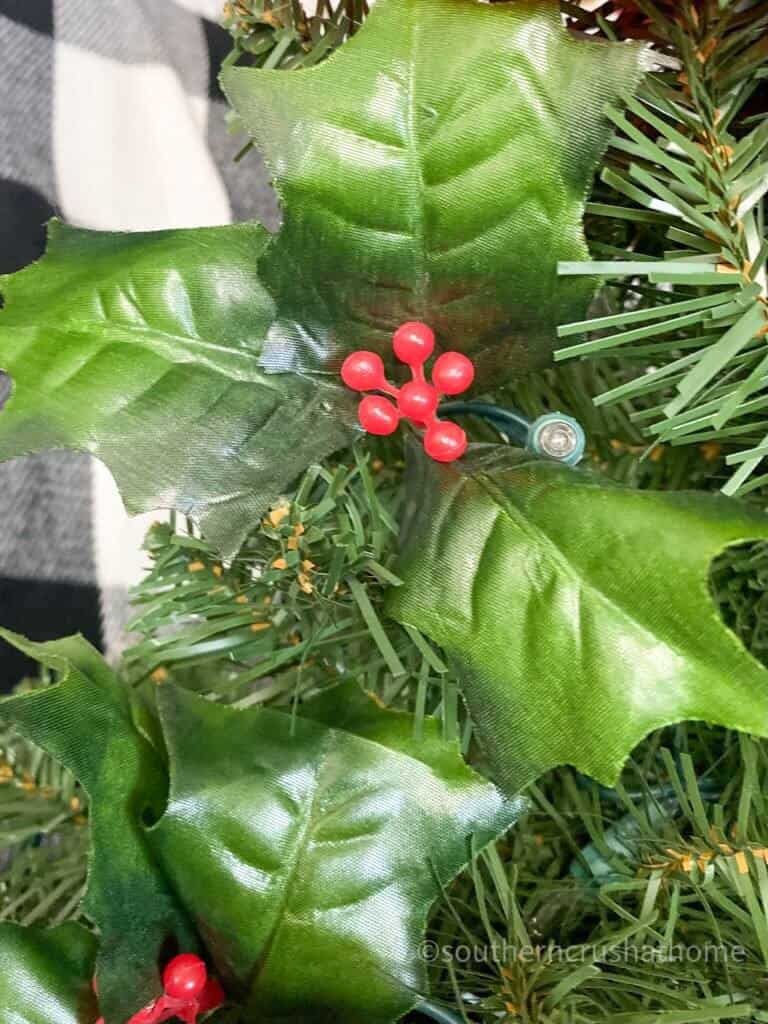
The faux holly made a HUGE difference and the little berries added just the right pop of red color the tree needed! 
If you missed the VIDEO TUTORIAL you can find it HERE!
GNOME SWEET DIY GNOME!
That's it for the cutest, easiest Gnome DIY Christmas tree there is! This turned out so sweet I believe it will become one of my favorite trees to decorate each year! Here are some of my other trees you might like to check out:
- Pioneer Woman Christmas Tree Theme + Free Fabric Christmas Tree Pattern
- The Best Christmas Tree Theme for 2020 – Movie Theater Decorations
- Dollar TREE Decorated CHRISTMAS TREE UNDER $50

SIGN UP FOR MY EMAILS
If you love these kinds of DIY ideas, you need to be getting my emails, friend! Each week I send out a couple of emails that include updates, crafts, shopping experiences, and decor inspiration. Be sure to get yourself signed up below.
I can’t wait to meet you! Leave your thoughts below in the comments, please… BTW— Life is short—Enjoy the mess!

GNOME DIY Christmas Tree
Materials
- 1 Tiny Christmas Tree You can use the one from the Dollar Tree
- 1 Hot Glue Gun and Glue
- 1 Dollar Tree Crafters Square Red Felt Sheet
- 1 Dollar Tree Snowflake Ornaments or other embellishment
- 1 Chalk
- 1 FREE Mitten Pattern
Instructions
- Print out a copy of the FREE Mitten Pattern.
- Using a piece of chalk, outline the mittens on the pattern.
- Spread out the felt and cut out a piece that fits the 8.5″x11″ sheet.
- Flip the pattern over chalk side down.
- Using any object (like a pencil eraser or other tool) press down and re-outline the mitten pattern. Make sure to go over the area twice and be careful not to move the paper around too much as this would smear the chalk underneath.
- Remove your paper pattern and reveal the chalk pattern left behind on the felt! It's really like magic!
- Cut out the mittens.
- Glue on any embellishments or add a cute layer of fabric. Get creative! This is the fun part! I added the plastic snowflake ornaments to each mitten.
- Using the tree top as your guide; wrap the remaining felt around the top of the tree into a “cone-like” shape and trim the felt to fit.
- Glue the seam where the two pieces of felt meet and trim the gnome hat where neeeded.
- Create a nose out of any materials you have available. I used a brown, plastic craft egg leftover from Easter, but you could use a section of an egg carton or a wooden knob. Get creative.
- Glue the nose in place and add your mittens!
Happy Birthday thank you for sharing your thoughts. I have to say you look wonderful. I will be 49 this month on the 23rd. I only hope I can take the wisdom you shared.
Thank you so much for the birthday wishes and compliments! You are too kind!
I love gnomes, he’s so cute!
Thank you for sharing free of charge. It really means a lot. You are so very kind! God bless you always!
You’re so welcome!
Thank you for showing off my movie theater tree! I appreciate you and it looks like I’m in good company! So many pretty Christmas trees! https://www.southerncrushathome.com/links