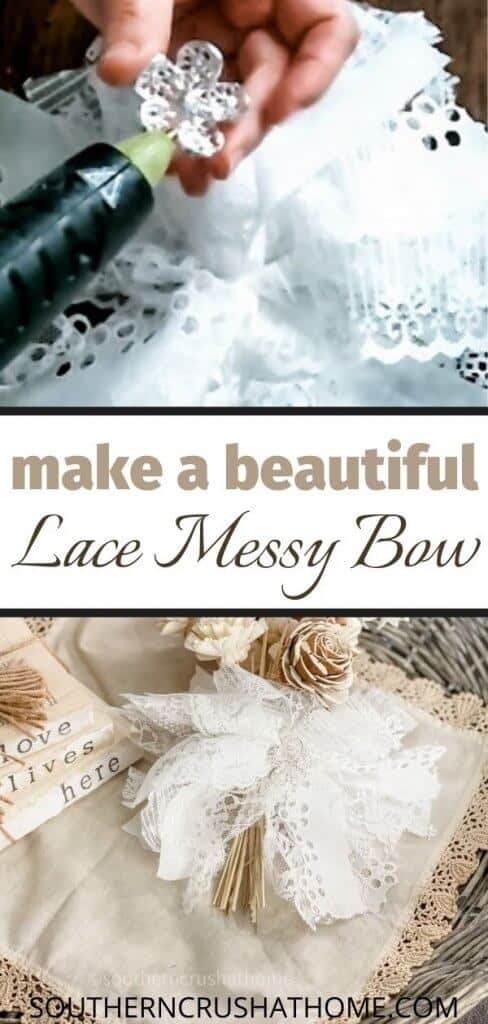
5 Minute No Sew Lace Messy Bow
Let me show you how to make a lovely lace messy bow with this super simple DIY tutorial. My signature Messy Bows are so popular, because you can use whatever you have on hand to make them, including fabric scraps and ribbon.
Be sure to PIN this for later!
If you are a regular reader of my blog, you know I love to make my signature Messy Bow. My very first one is shown here in this DIY messy bow making tutorial. You may also like this DIY tulle bow. Like so many of you, I love to craft with pretty lace. It is so feminine and adds instant beauty to just about anything.
The great thing about this messy bow tutorial, is you can use the same process for just about any type of material.
Let's get to this easy bow tutorial, so you can make your own.
SUPPLIES needed for Lace Messy Bow
All the supplies needed can be found HERE in my Amazon Shop!
- Assorted Lace
- Zip Ties
- Rhinestone Embellishment
- Scissors
How to make a LACE MESSY BOW
Collect lace from all over! This is the fun part. You can find lace at flea markets, thrift stores, garage sales and even online. Have fun shopping for all the differenct lace patterns you can find (or maybe you have some of your own you've been saving).
You can use the lace in it's white form like I did here or you can tea stain it or coffee stain it if desired! This gives it a darker and more vintage look.
Once you have the lace collected…
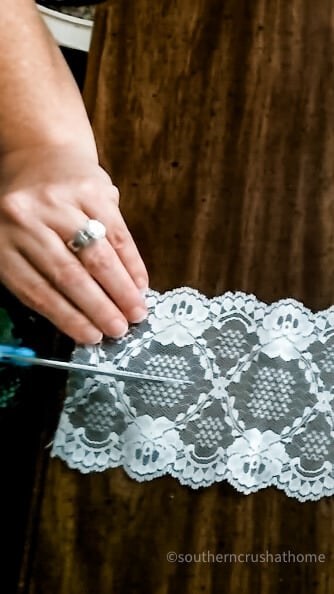
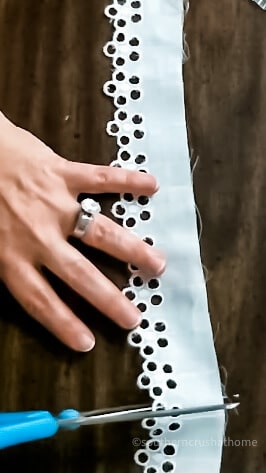
Start by cutting the ribbon to the size that you want. You can really make the bow any size that you want. For this bow, I cut the strips about 8″ long.
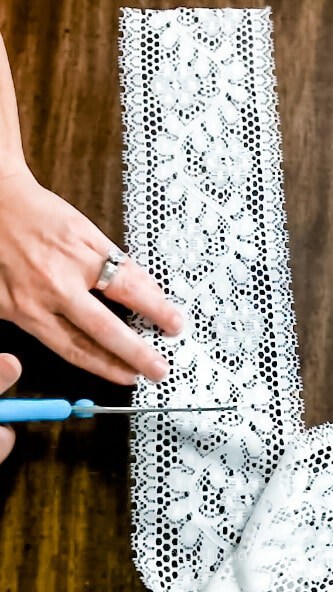
I also cut the strips down the middle so it wouldn't be as wide. If you have any end pieces, you can trim those out so they are not uneven.
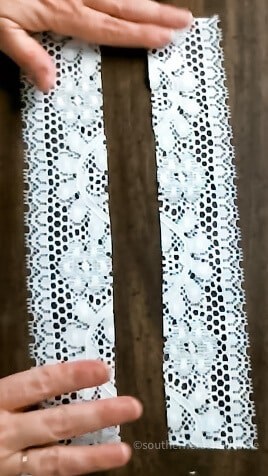
Continue to cut each piece of lace to the similar length and width. Keep in mind, the longer the strips, the larger the messy bow.
For this messy bow I cut approximately 16-20 strips of lace. The number of strips is up to you. 
This white cotton eyelet was the perfect addition to the lace messy bow as it added a bit of structure to the otherwise completely soft bow.
next…
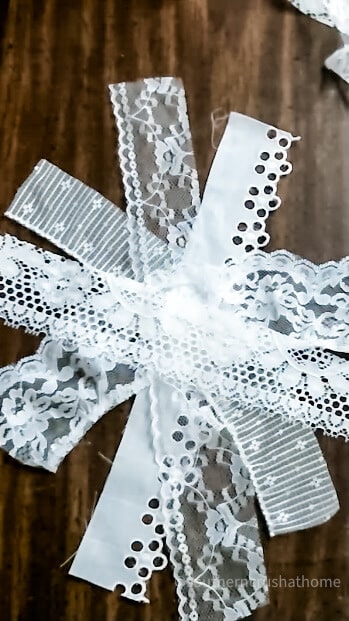
Simply lay the lace pieces in a criss-cross fashion in a circular pattern until all the pieces are used.
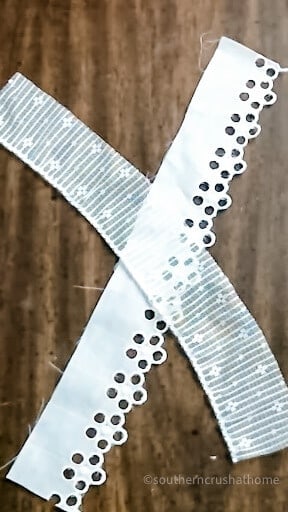
Just continue to alternate the type of lace. There really is no rhyme or reason to this, just be sure to switch up the layers to get lots of dimension and texture.
NEXT…
Once you have all the pieces of lace laid out, thread a zip tie underneath through the bottom and pull the zip tie tight until you have it where you want it.
Use your fabric scissors to give the bow a little “hair-cut”, or trim. This is really what gives you that messy bow effect. Really get creative and make the bow as long as you like, or as short as you like.
Once you trim it down, give it a good shake to get all of the mess out of the bow. The scrap fabric and lace pieces left behind makes a bit of a mess and is why it is called a messy bow!
last…
Just spread the bow out piece by piece and pull all the lace strips apart. If you are happy with how it looks, now you can embellish it.
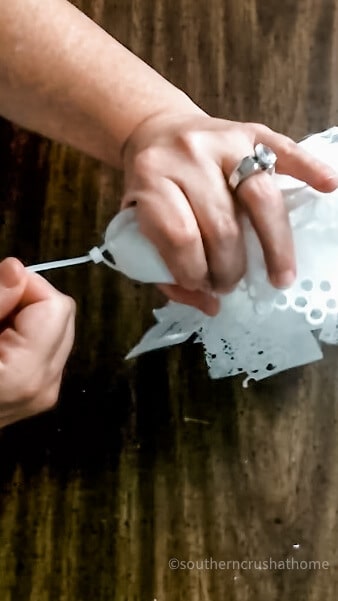
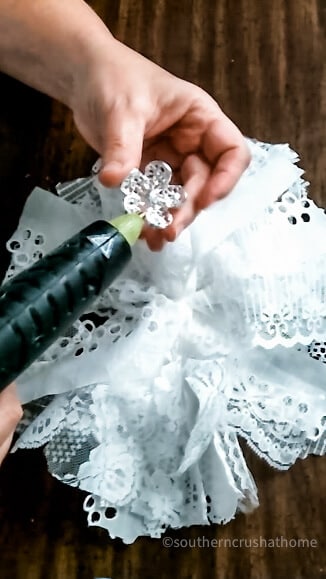
Add a rhinestone daisy, or any other embellishment that you have on hand, to the center of the bow with hot glue.
now you've got a lace messy bow!
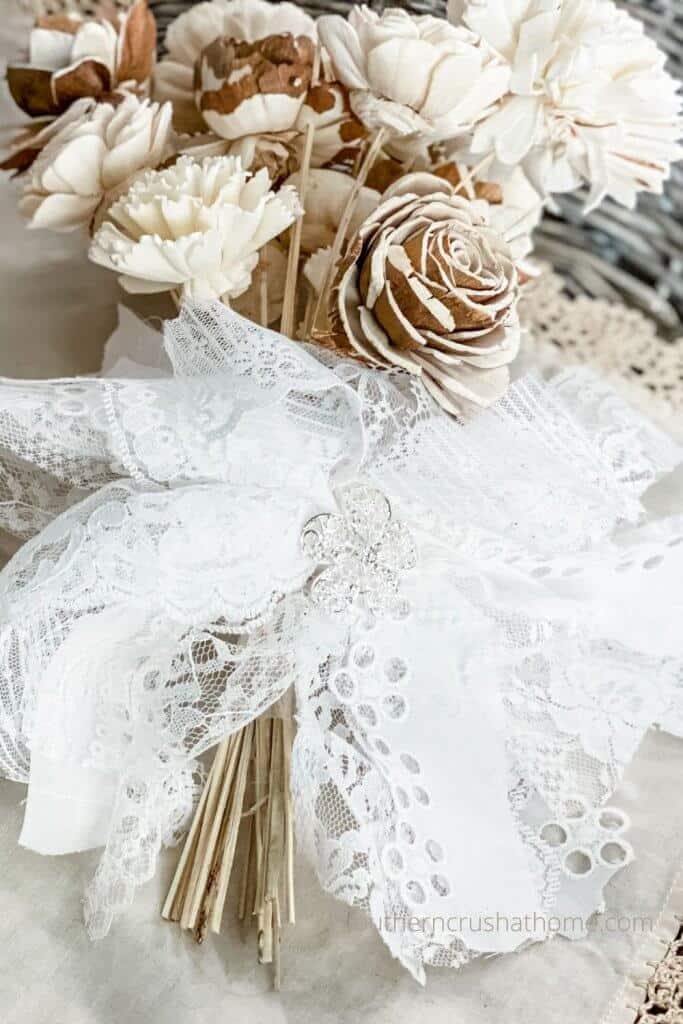
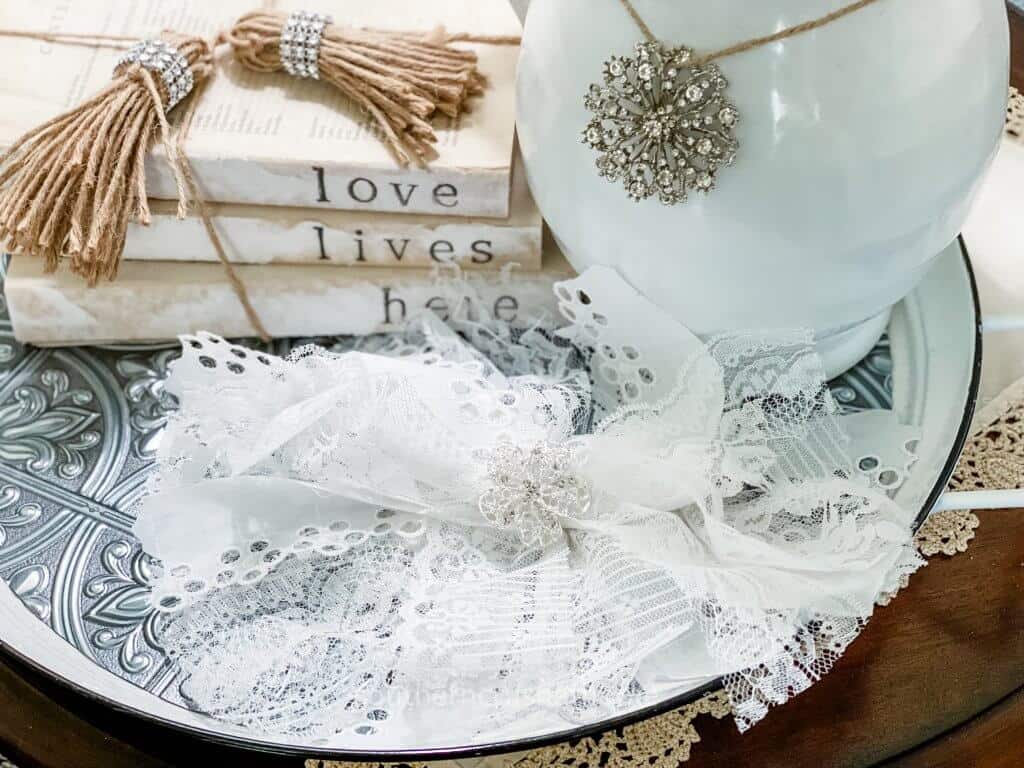
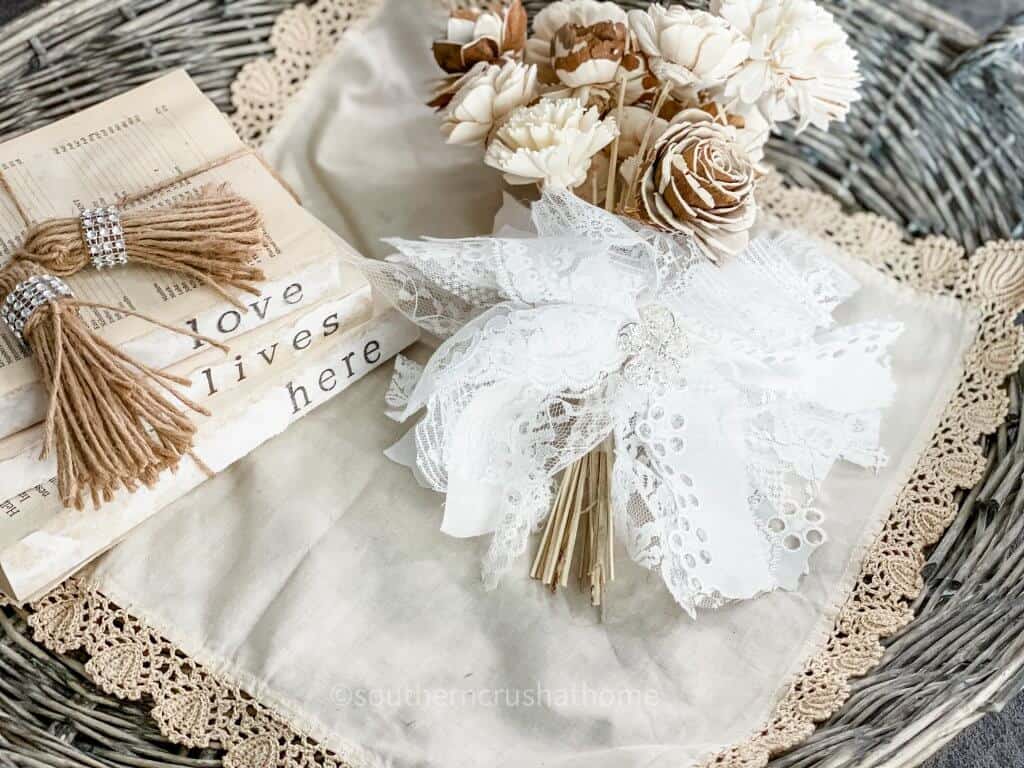
Look how beautiful this bow turned out. There are so many ways to use this lovely bow!

You can add it to a wreath, hang it on a banner, or even use it in a bouquet. I styled it on this simple tray along with this thrift flip pitcher DIY and these fun stamped books!
Wouldn't this beautiful lace bow be pretty for a wedding? They could be used for display, on signs, or on the buffet tables. You could even make a little corsage out of them for the Mother of the Bride.
I'm thinking they would make adorable and affordable DIY pew bows for the end of each of the wedding church pews. How about at the altar with the candle displays?
What about on the guest book sign in table? Or the bride's cake table? or as part of a wonderful floral centerpiece for each of the guest tables at the reception? I could really go on and on… what are some of your ideas for a lace messy bow?
that's it!
I hope you enjoyed this simple DIY and I would love to hear if you make your own lace messy bow. Leave me a comment below and inspire me by sharing pictures of your beautiful finished piece!
Be sure to PIN this one for later!
step by step video tutorial
If you want to see the exact step by step video process, check out this lace messy bow video tutorial below on my YouTube Channel!

BE SURE TO CHECK OUT THESE OTHER Messy bow DIY IDEAS!

DIY Lace Messy Bow
Equipment
- Fabric Scissors
Materials
- Assorted Lace
- Zip Ties
- Rhinestone Embellishment
Instructions
- Start by cutting the ribbon to the size that you want.
- Cut the strips down the middle so it isn't as wide.
- Continue to cut each piece of lace to the same length and width.
- Cut about 16-20 strips of lace.
- Lay the lace pieces in a criss-cross fashion in a circle until all the pieces are used.
- Continue to alternate the type of lace.
- Once you have all the pieces of lace laid out, thread a zip tie through the bottom and pull the zip tie tight until you have it where you want it.
- Use your fabric scissors to give the bow a trim.
- Once you trim it down, give it a good shake to get all of the mess out of the bow.
- Spread the bow out and pull all the pieces apart.
- Add a rhinestone daisy.
3 Comments