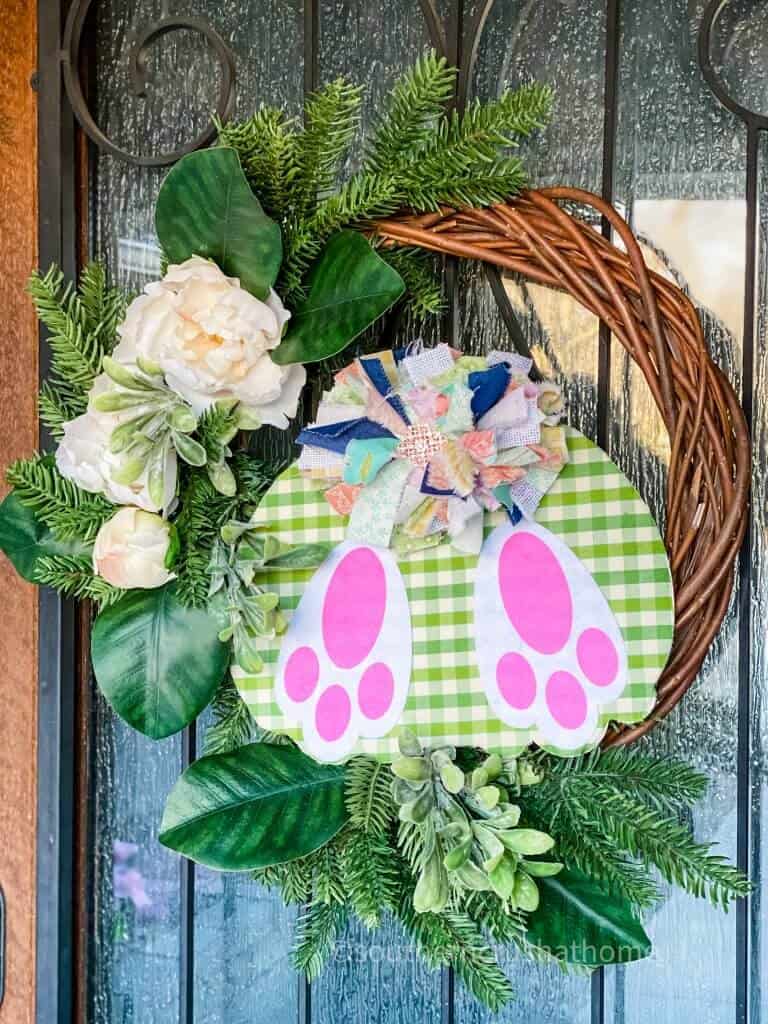
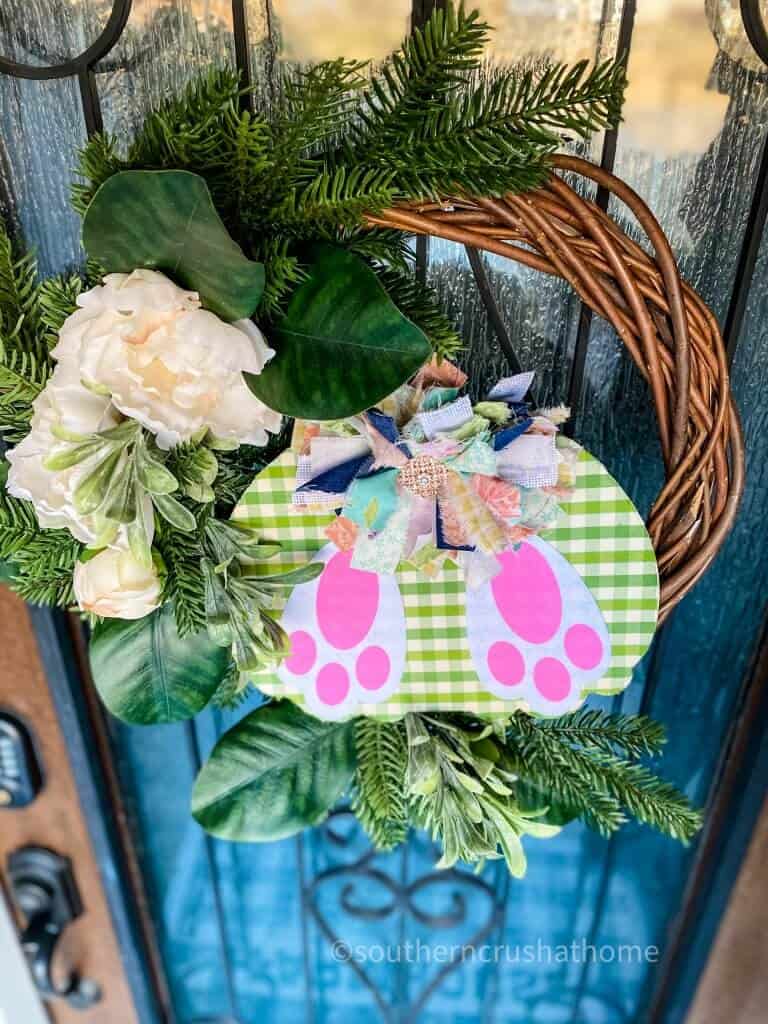
Adorable Bunny Butt Easter Wreath (featuring my Messy Bow)
You have to see the absolutely adorable bunny butt Easter wreath I just made. It features my popular messy bow and looks just darling on my front door. You are going to want to make your own, so let me show you how it's made!
Get ready to run to the dollar store to buy the supplies needed to make this darling bunny butt Easter wreath!
Have you seen any of the bunny butt crafts all over the web? They are so popular and as soon as I saw the little wooden bunny butt at the dollar store I knew it would be perfect for a spring wreath – especially with one of my messy bows!
TAKE A LOOK AT SEVERAL OTHER DIY MESSY BOWS I’VE SHARED:
- 5 Minute Lace Messy Bow
- Fall Gnome Door Hanger with Messy Bow
- Denim Messy Bow
- Messy Bow Burlap Pillow Wrap
- Christmas Tree Topper
- Messy Bow Fall Wood Block Decor
- Drop Cloth Messy Bow
You can make this fun wreath in under an hour and for under $20 – less if you already have a grapevine wreath (mine was repurposed from this thrift store DIY).
Here is the simple Easter DIY:
Be Sure to PIN this for Later!
SUPPLIES NEEDED FOR BUNNY BUTT EASTER WREATH
All the supplies needed can be found HERE in my Amazon Shop!
- Dollar Tree Wooden Bunny Butt
- Grapevine Wreath (I repurposed mine from this previous thrift store DIY)
- Silk Florals and branches
- Assorted Fabric
- Dollar Tree Bunny Feet
- Scissors
- Sandpaper
- Bling
- Hot Glue Gun
HOW TO MAKE A BUNNY BUTT EASTER WREATH WITH A MESSY BOW
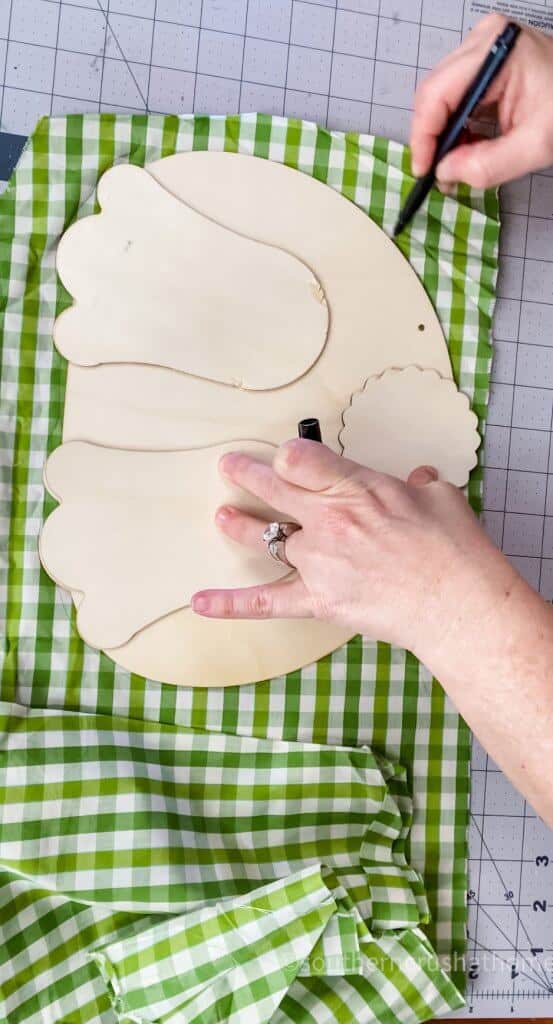
Step 1.
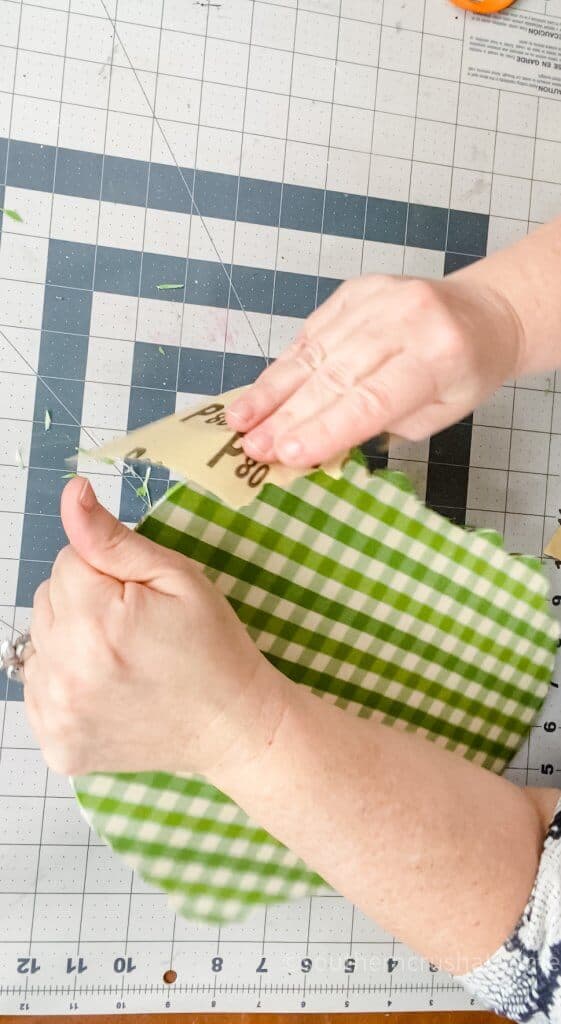
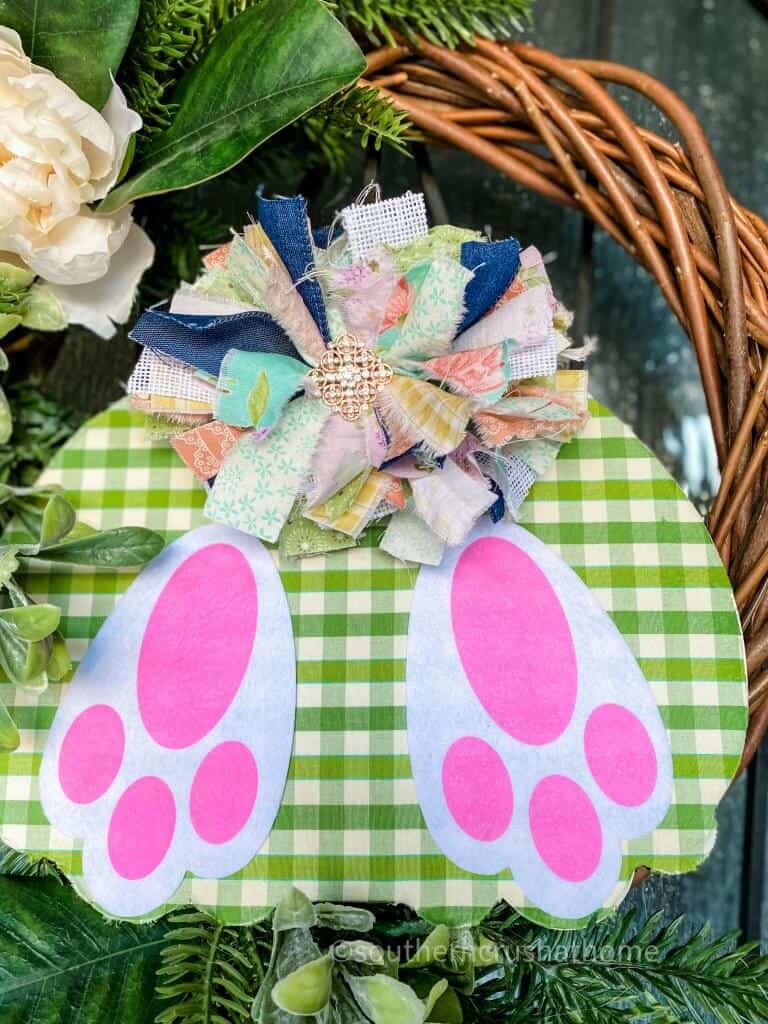
Start by placing the bunny butt onto your fabric. I used a pretty green and white gingham scrap piece of fabric from the thrift store. Trace around it with a marker or pen.
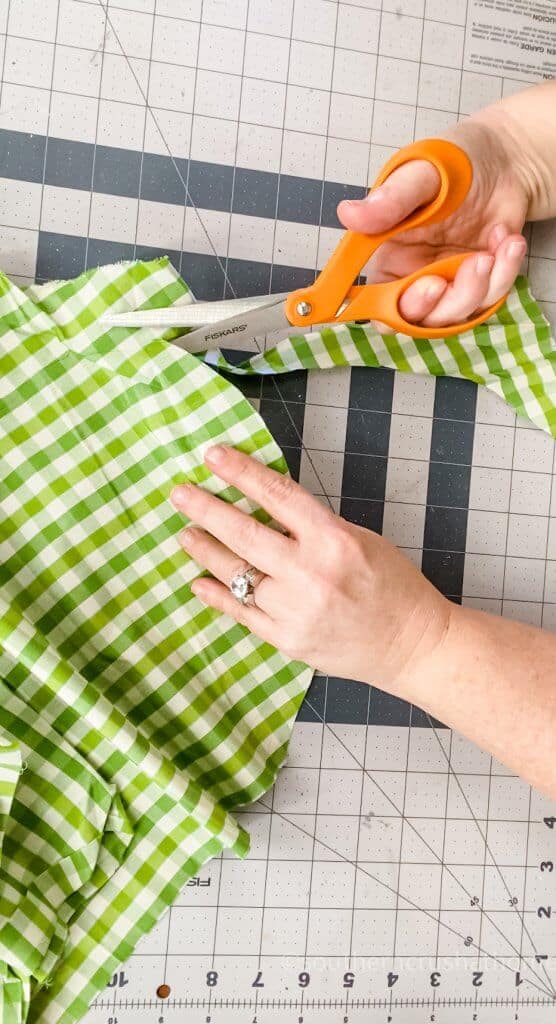
Step 2.
Use fabric scissors to cut out your bunny butt shape.
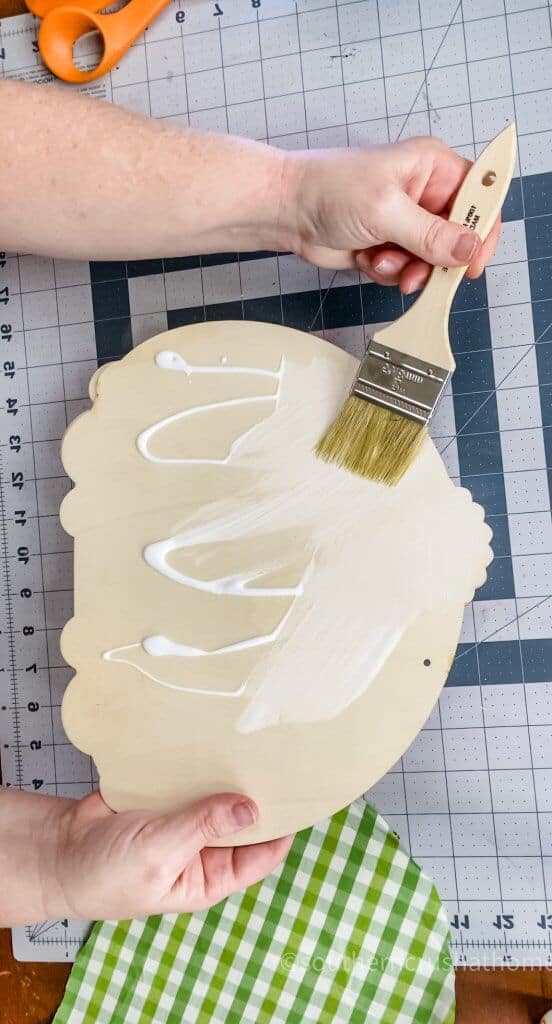
Step 3.
Place a layer of mod podge onto the back side of the wood bunny cut-out and adhere to your fabric.
Step 4.
Use sandpaper to finish off the edges of the wooden bunny butt where the fabric hangs over. I used scissors first and then sandpaper for the edges.
Step 5.
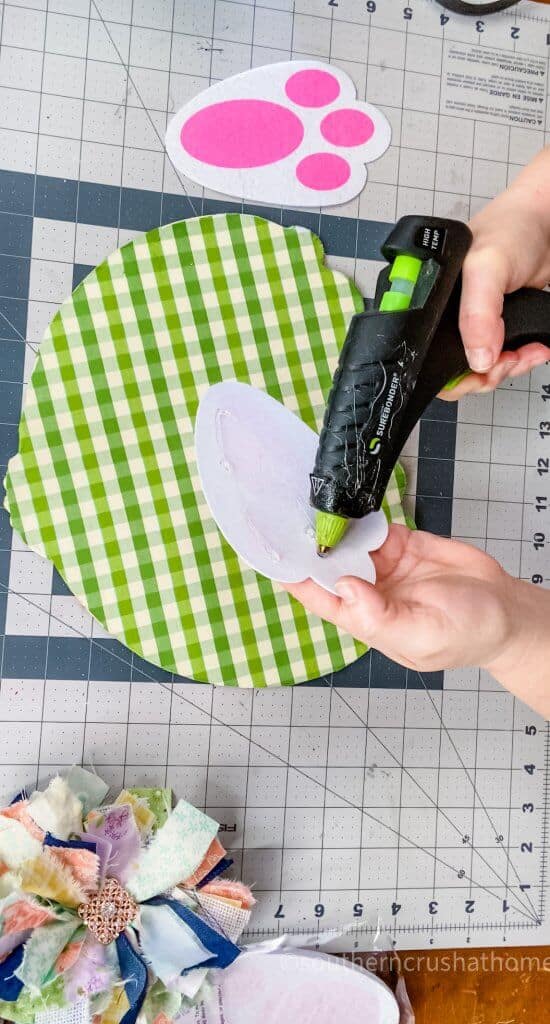
Hot glue the bunny feet to the bottom of the wood bunny butt.
Step 6.
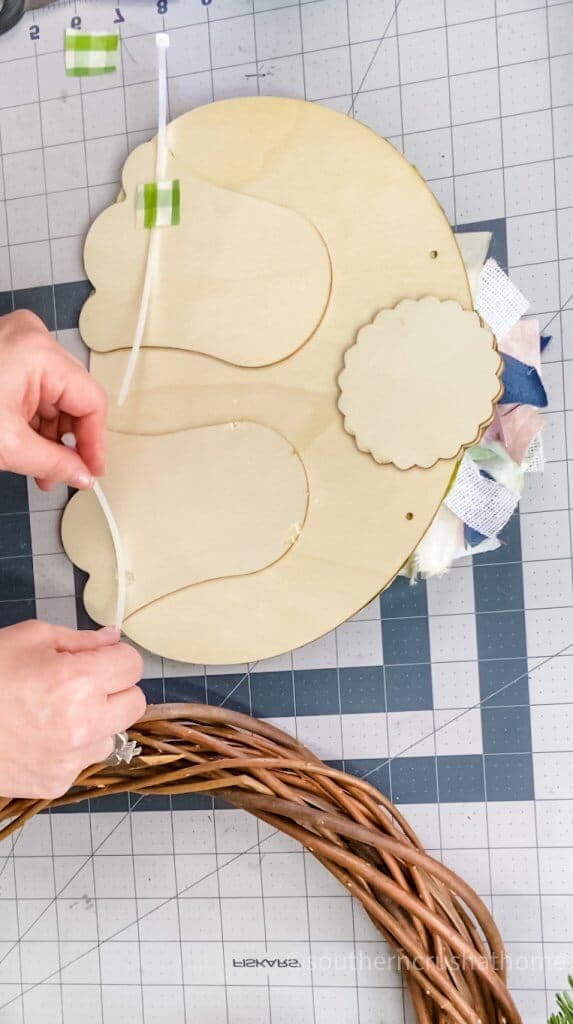
Hot glue a couple of zip ties to the back and secure it to the grapevine wreath.
Now it's time to add your messy bow…
HOW TO MAKE A MESSY BOW (see full tutorial HERE)
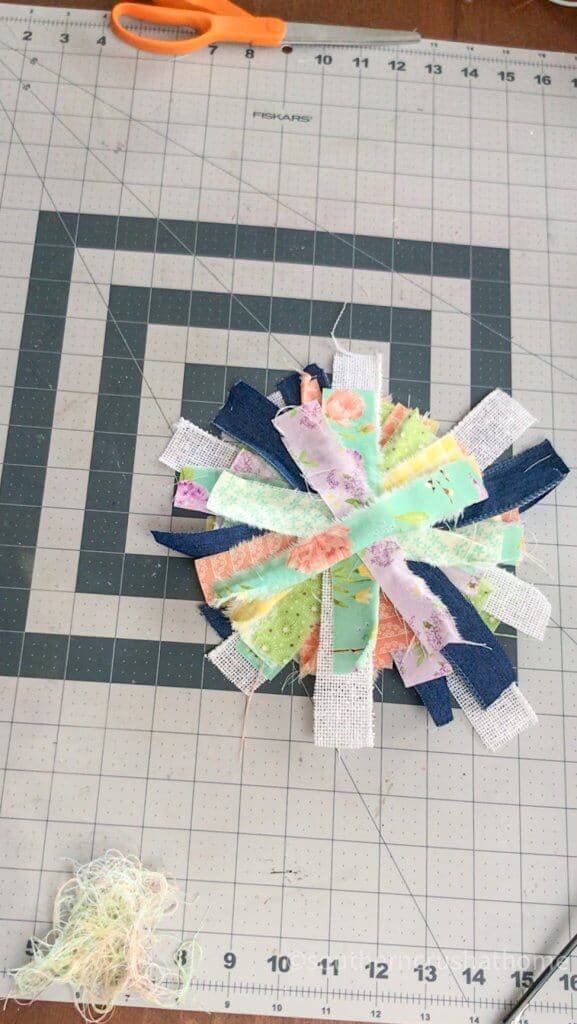
Start by placing the fabric on a cutting mat. Then cut out a section approximately 8.5 X 11 in size to make it easy to work with.
Step 2.
Place small cuts about 1″ inch apart across the length of the fabric. The more strips you cut, the fluffier the bow.
Step 3.
Cut the fabric into strips from where you started the cut. Continue to cut as many strips of fabric as you desire for your messy bow. The longer the strips, the larger the bow. Make them as long as you would like your bow large.
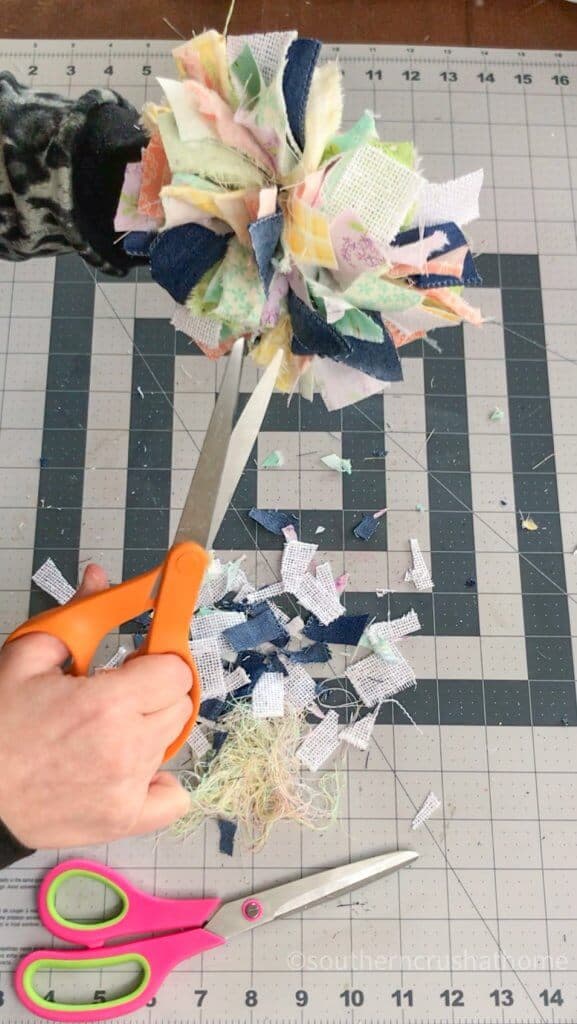
Step 4.
Cut the strips in half again and trim off the ends to get that messy look we love!
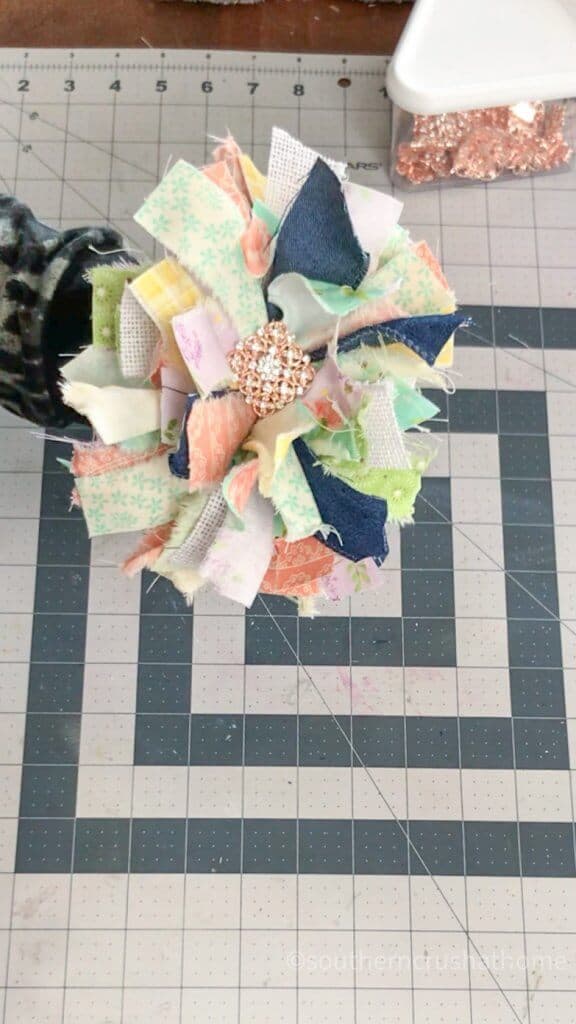
Step 5.
Add an embellishment to the center of the bow and hot glue it to the bunny butt for the tail. I get mine HERE.
step by step video tutorial
If you want to see the exact step-by-step process, be sure to check out this video tutorial below over on my YouTube Channel!
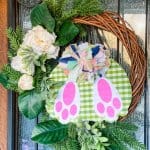
Look how cute this is…
Dollar Tree Bunny Butt Wreath
See how simple that was? In under an hour you can have a super fun and unique Easter bunny butt wreath that will make your friends and family smile when they visit!
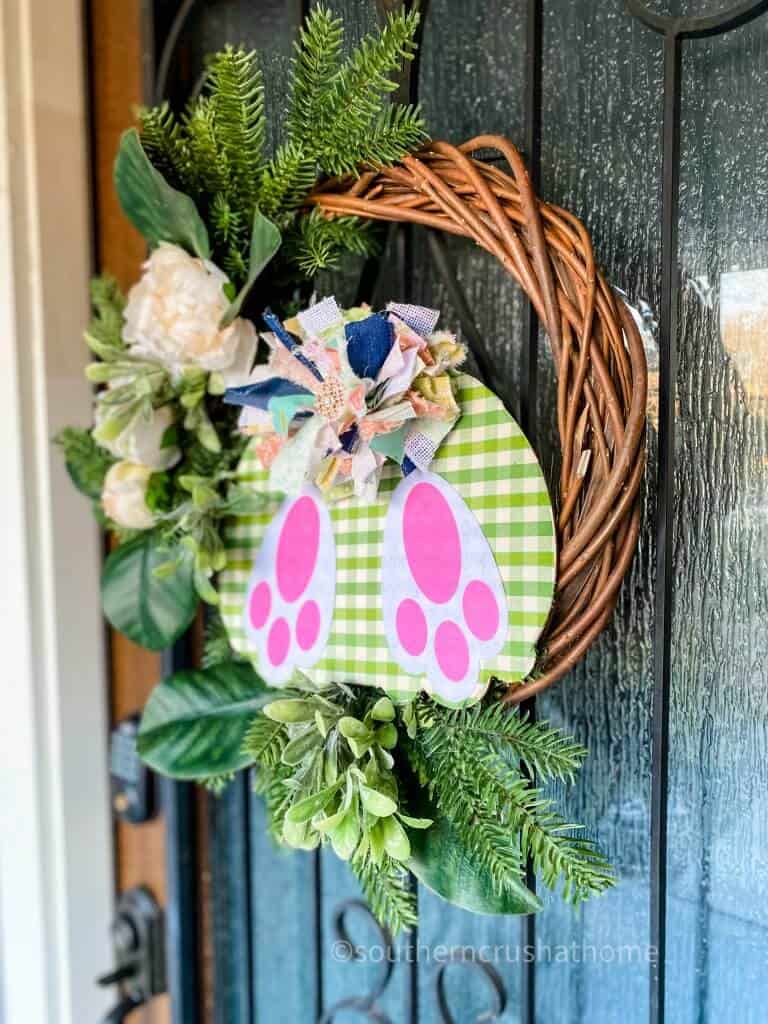
Here it is on my front door:
So what do you think? Are you ready to “hop” onto the bunny trail to make this sweet wreath? While I love it on the front door, this would also look great over a buffet table, or above a mantel.
There are so many uses. The gingham gives it a farmhouse look that will be pretty in the kitchen too.

CHECK OUT THESE OTHER cute Easter dollar tree DIY ideas!
- BOHO Dollar Tree Easter Decor
- How to Make an Easter Bunny Wooden Tag DIY
- Dollar Tree Paddle Ball Bunny Craft
- How to Make a Dollar Tree Sun Hat Bunny Wreath
Adorable Bunny Butt Easter Wreath (featuring the Messy Bow)
Equipment
- scissors
- sandpaper
Materials
- All of these supplies can be found in my Amazon Shop HERE
- Dollar Tree Bunny Butt
- Grapevine Wreath
- Silk Florals & Branches
- Fabric
- Bunny Feet
- Bling
Instructions
- Place the bunny butt onto your fabric.
- Trace around it with a marker or pen.
- Use fabric scissors to cut out your bunny butt shape.
- Place a layer of mod podge onto the wood bunny and adhere to your fabric.
- Hot glue the bunny feet to the bottom of the wood bunny butt.
- Hot glue a couple of zip ties to the back and secure the bunny to the wreath.
- Hot glue your messy bow to the bunny for a tail.
- Hang and enjoy your adorable spring wreath!
absolutely precious I thought to one of the bunny butt and the other one just a bunny and I just did not have a clue of what I was gonna do with the bunny but until I found you thank you
oh my goodness–you’re so welcome! Glad I could help!