How to Make a Dollar Tree Sun Hat Bunny Wreath
I'm so excited to share this adorable Dollar Tree Sun Hat Bunny Wreath. It came together so easily, and will look adorable on your front door, or in your entryway. You only need a few simple supplies to make this sweet bunny wreath.

Be Sure to PIN this for Later!
WHAT YOU’LL NEED TO MAKE THIS Dollar Tree Sun Hat Bunny Wreath
- Dollar Tree Sun Hat
- Dollar Tree Flowers
- Dollar Tree Bunny Basket
- Scissors
- Chalk Marker
- Burlap Fabric
- Brown Pipe Cleaners
- Hot Glue Gun
- Sharpie

HOW TO MAKE A Dollar Tree Sun Hat Bunny Wreath
Cut the basket handle and bunny ears off of the bunny basket. You will reuse them on the wreath. Remove the bunny nose to use as well. If you have difficulty removing it, you can use a heat gun to help.
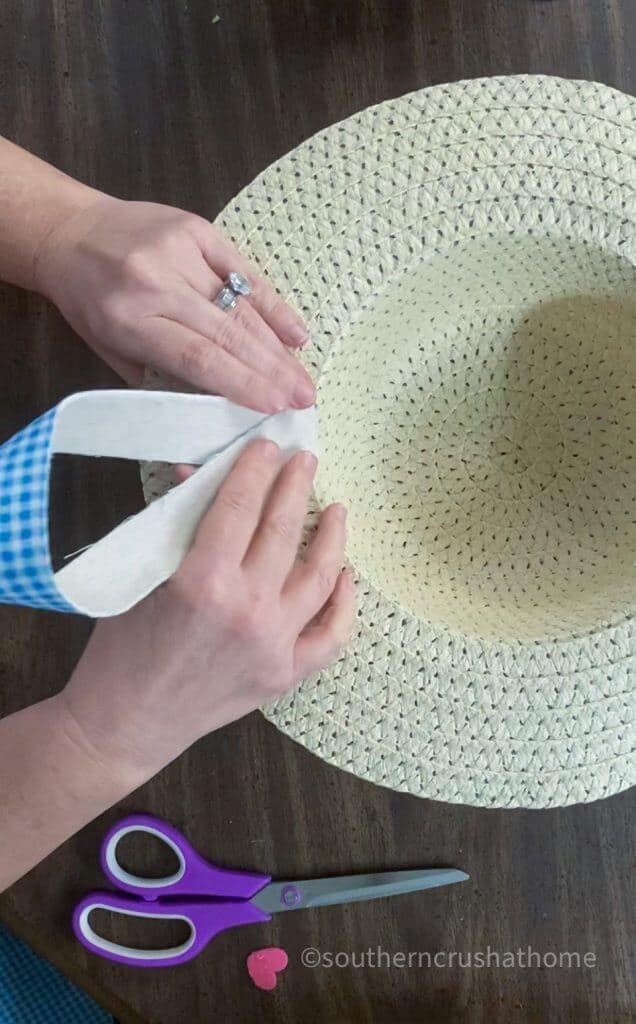
Take the basket handle and hot glue it to the underside of the sun hat. This will be used for hanging.
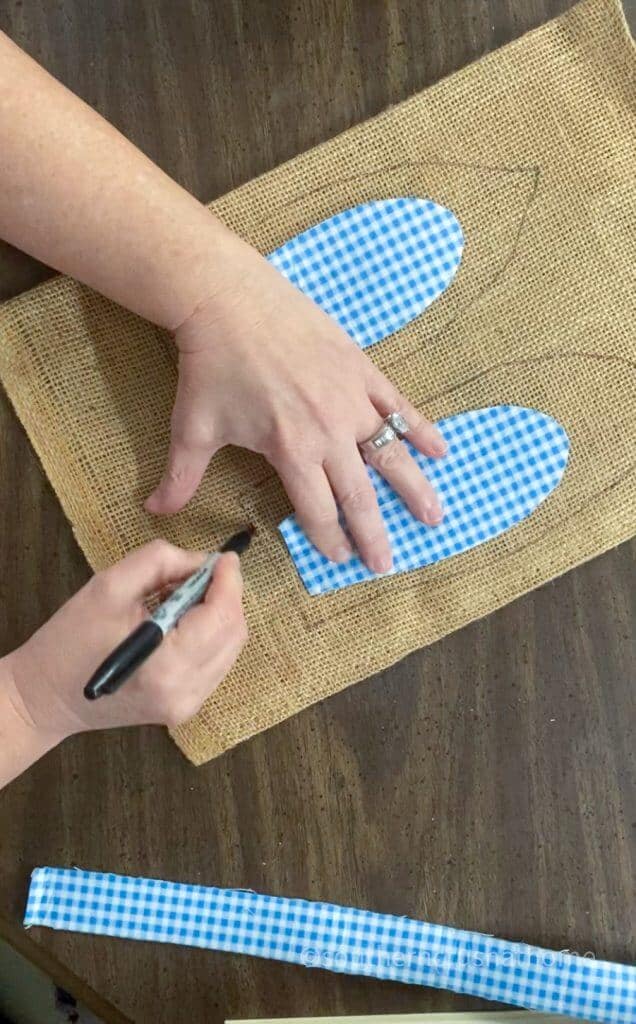
Next, lay the bunny ears on the burlap fabric, and use a sharpie to trace a bunny ear around it. You want the ears to be larger, as the bunny ears you removed will be the middle of the ears.
Use your scissors to cut out the burlap ears. Hot glue the gingham bunny ears to the center of the burlap ears, then secure the finished ears to the top of the sun hat. Don't you love the pretty spring blue color of this fabric?
NEXT…
Now it's time to make the adorable bunny face on the sun hat. Hot glue the sweet pink bunny nose to the center of the hat, and use a sharpie to make oval-shaped eyes.
Give the bunny a mouth by adding a straight line below the nose and a little smiley face. You can see this sweet bunny coming together now!
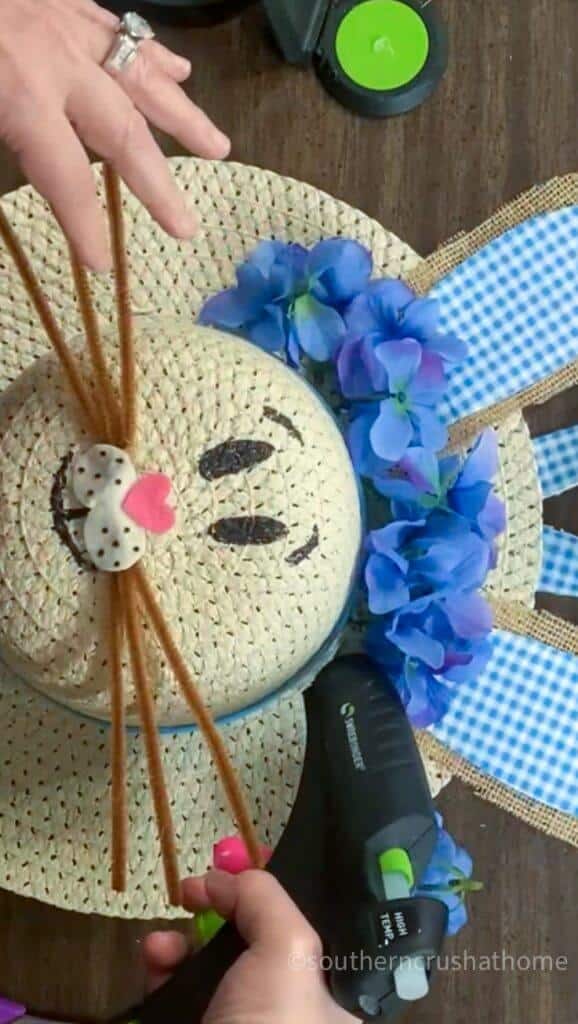
Secure the brown pipe cleaners to the side of the nose with hot glue to act as whiskers. You can trim them however long you want. Cut a circle piece of fabric from the leftover bunny basket. You will use this to make part of the nose, and it will also cover up where you hot glued the whiskers.
Just trim it to an oval shape and cut out the center so it is angled. I added a few polka dots to the fabric with a sharpie. Secure it right below the pink nose. This gives it more of a 3-d effect.
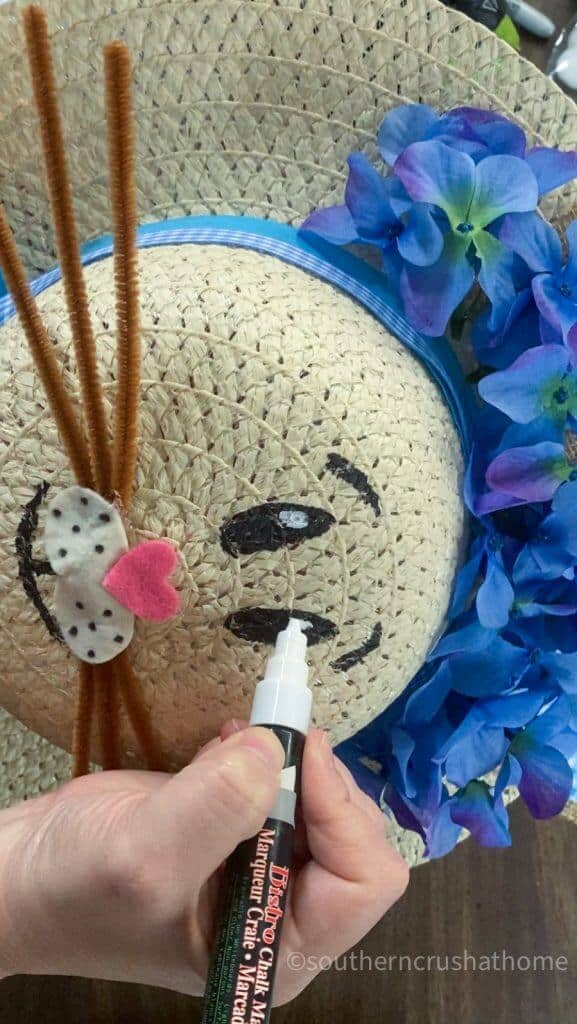
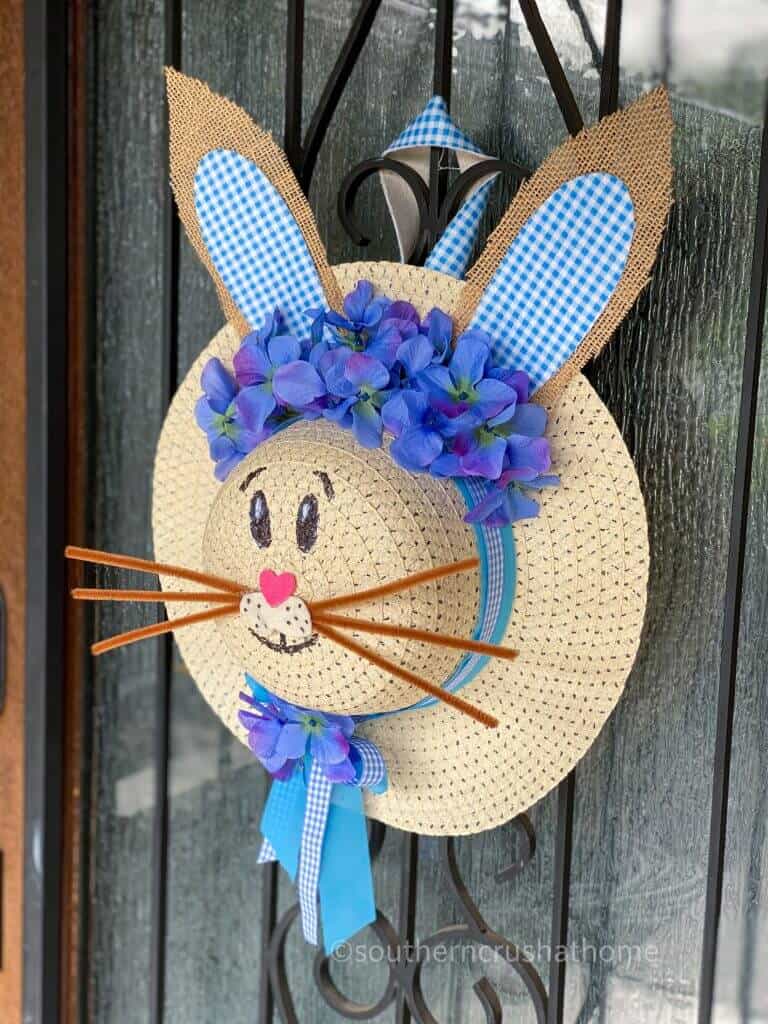
Now all that's left is to add pretty spring flowers to the top of the hat. These blue flowers are just perfect! To give the eyes a little dimension, add a little bit of white to the top of the eyes with a chalk marker.
I also added another gingham ribbon around the hat where the existing blue ribbon was. It's just another way to add dimension, and looks so pretty with the bunny ears. Hot glue a couple of flowers on the bottom of the hat too. This really completes this adorable little bunny wreath.
Dollar Tree Sun Hat Bunny Wreath
See how simple that was? In less than 30 minutes you can have a super fun and unique sun hat bunny wreath that will make your friends and family smile when they visit!
that's it!
Not only is this bunny wreath adorable, but it's also so simple to make, especially because you are reusing the items from the bunny basket. In total, this little guy can be made for about $7! You can't beat that.
Think of all the ways you can decorate with this bunny hat. While I love it on the front door, this would also look great indoors, over a buffet table, or hanging on an old window. There are so many uses. The gingham gives it a farmhouse look that will be pretty in the kitchen too.

BE SURE TO CHECK OUT THESE OTHER dollar tree DIY ideas!
GET DIY EMAILS
If you love DIYs and Ideas like these as well as seeing all the fun things I find out shopping, you need to be getting my emails, my friend! Each week I send out a couple of emails that include updates, crafts, shopping experiences, and decor inspiration. Be sure to get yourself signed up below. I can’t wait to meet you!

That’s a really cute bunny. My granddaughter would love it
Awe! Thanks! I’m sure she would! You should make one!