Thrift Store Wreath Makeover
At first, you might miss the potential of a thrift store wreath makeover! A lot of times I walk right past old, out of season decor sitting on the shelves at the thrift store. But not this time. With a little creativity, mod podge and decorative napkins you can makeover any thrift store wreath…

Be Sure to PIN this for Later!
What you'll need to make-over a wreath
- Wreath that needs a little help (any wreath form works; foam, grapevine, metal)
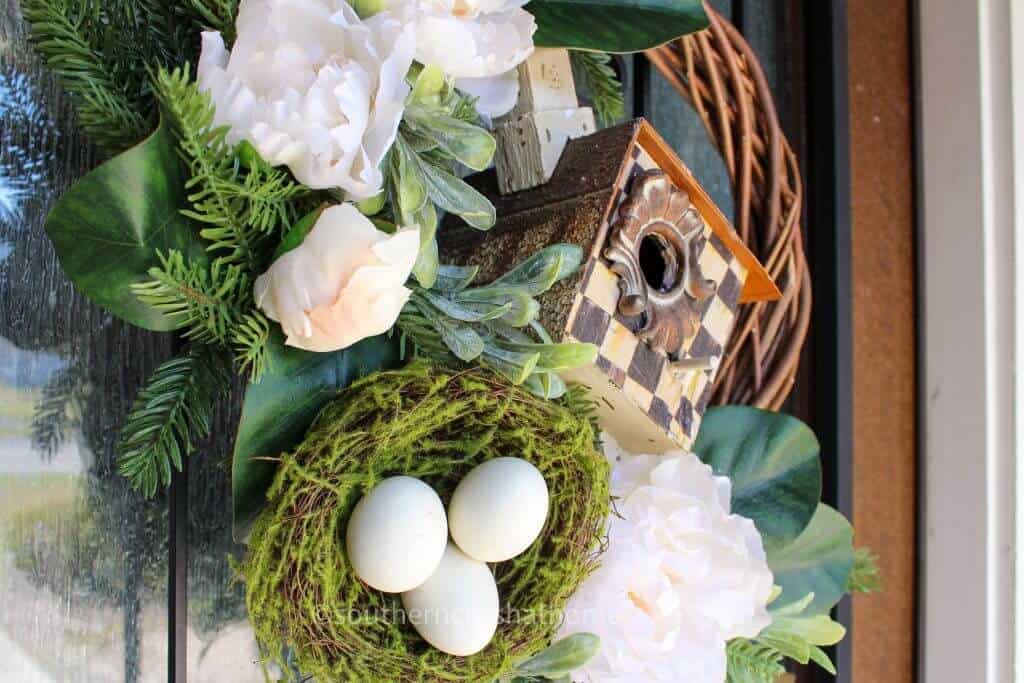
- New Floral Stems
- Bird nest with eggs
- Birdhouse (also from the thrift store, but Dollar Tree has them as well)
- Mod Podge
- Decorative Napkins (choose your favorite)
- Sandpaper Block
- Baggie or Saran Wrap
- Glue Gun
- Paint Brush
- Scissors
How to Upcycle a Thrift Store Wreath
Start by dismantling the thrift store wreath. Remove the parts that aren't very appealing. For me, this was the apples and the glittery fir Christmas branches.
Lay the napkin on top of birdhouse and trim down to fit. Set napkin aside.
Apply a thin coat of mod podge to the top of the birdhouse. I only chose to cover the front of mine.
Allow to dry for just a few minutes to come to ‘tack'.
Separate the napkin layers to reveal the top layer only.
Lay the napkin on the birdhouse and gently tap down using a baggie or saran wrap as a barrier between you and the mod podge.
Allow to dry completely. Top coat with polycrylic if desired.
Add back in updated floral stems by tucking inside the wreath form and securing with hot glue if necessary.
Attach the bird's nest with floral wire or hot glue.
Attach the birdhouse with floral wire and set just inside the wreath opening.
Hang the upcycled wreath on the door or inside the house on display!
IF YOU PREFER TO WATCH THE STEP BY STEP INSTRUCTIONAL VIDEO, WATCH IT BY CLICKING HERE.
upcycled thrift store wreath decor
This thrift store wreath was fun to shop for and even more fun to makeover! It turned out so cute for my front door! I hope you'll keep an open mind when out shopping at thrift stores and keep a look out for old wreaths that need upcycling. Come back and show me what you make in the comments!


Be Sure to PIN this for Later!
be sure to check out these other WREATH ideas!
- Dollar Tree Farmhouse Ping Pong Ball Wreath
- Dollar Tree Summer Sun Hat Wreath + FREE Printable
- Easy Dollar Tree Front Door Bandana Wreath
GET DIY EMAILS
If you love DIYs and Ideas like these as well as seeing all the fun things I find out shopping, you need to be getting my emails, my friend! Each week I send out a couple of emails that include updates, crafts, shopping experiences, and decor inspiration. Be sure to get yourself signed up below. I can’t wait to meet you!

Thrift Store Wreath Makeover
Equipment
- paint brush
- scissors
Materials
- Wreath that needs a little help any wreath form works; foam, grapevine, metal
- New Floral Stems
- Bird nest with eggs
- Birdhouse also from the thrift store, but Dollar Tree has them as well
- Mod Podge
- Decorative Napkins choose your favorite
- Sandpaper Block
- Baggie or Saran Wrap
Instructions
- Start by dismantling the thrift store wreath. Remove the parts that aren't very appealing. For me, this was the apples and the glittery fir Christmas branches.
- Lay the napkin on top of birdhouse and trim down to fit. Set napkin aside.
- Apply a thin coat of mod podge to the top of the birdhouse. I only chose to cover the front of mine.
- Allow to dry for just a few minutes to come to ‘tack'.
- Separate the napkin layers to reveal the top layer only.
- Lay the napkin on the birdhouse and gently tap down using a baggie or saran wrap as a barrier between you and the mod podge.
- Allow to dry completely. Top coat with polycrylic if desired.
- Add back in updated floral stems by tucking inside the wreath form and securing with hot glue if necessary.
- Attach the bird's nest with floral wire or hot glue.
- Attach the birdhouse with floral wire and set just inside the wreath opening.
- Hang the upcycled wreath on the door or inside the house on display!
Love the springtime makeover!!