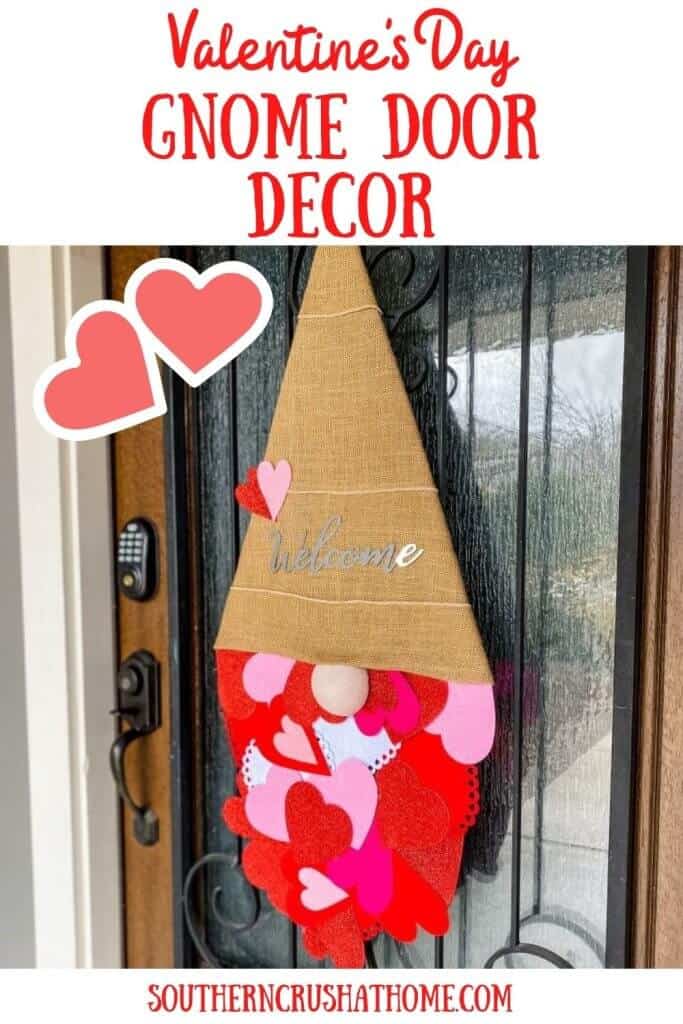
Adorable Valentine’s Day Door Decor Gnome
Greet your guests this Valentine's Day with a festive door decor gnome! This easy DIY project is perfect for crafters of all levels and can be customized to match your decor.
All you need are some crafting supplies, a few simple steps, and your adorable new friend will be ready to brighten up your home. Happy Valentine's Day!
Instead of hanging a wreath on my front door for Valentine's Day this year, I wanted something different. So I went with this adorable DIY gnome! Isn't he just the cutest? You can make your own with this simple tutorial. And it's a fun, easy, and affordable craft. So get creative and have some fun with your holiday decor this year!
If you have visited the blog before, you know I love to make gnomes.
Take a look at several other DIY GNOMES I've shared:
- DIY Gnome Ornament
- Paint Brush Gnome Ornaments
- Halloween Gnome Banner
- Gnome DIY Christmas Tree
- Burlap Carrot Gnome Door Decor
Are you ready to see the easy steps to make this gnome? Let's get to it!
Supplies for Valentine's Day Door Decor Gnome
All the supplies needed can be found HERE in my Amazon Shop!
- Wooden Beads
- Cardboard
- Assorted Hearts – felt, paper, doilies
- Burlap
- Box Cutter or zipsnip cutters
- Metal Welcome – from Dollar Store
- Hot Glue Gun
How to Make a Valentine's Day Gnome
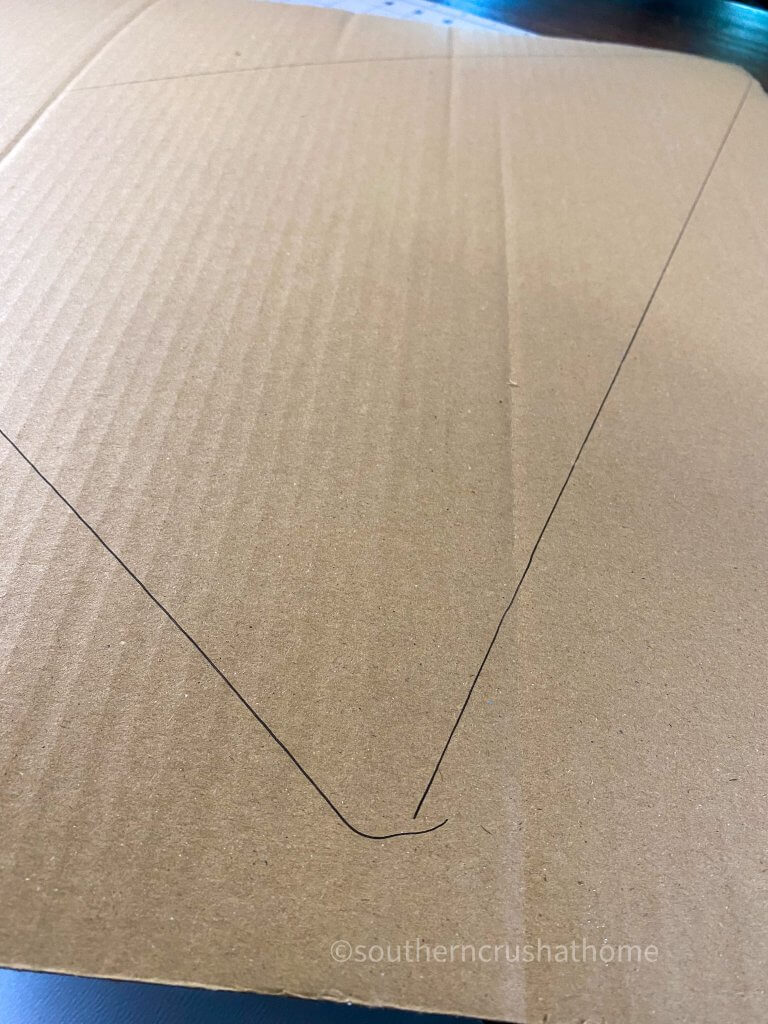
Step 1.
Start by tracing a triangle onto the cardboard for the gnome's hat. Make it as big or small as you'd like. I wanted mine large to hang on my door.
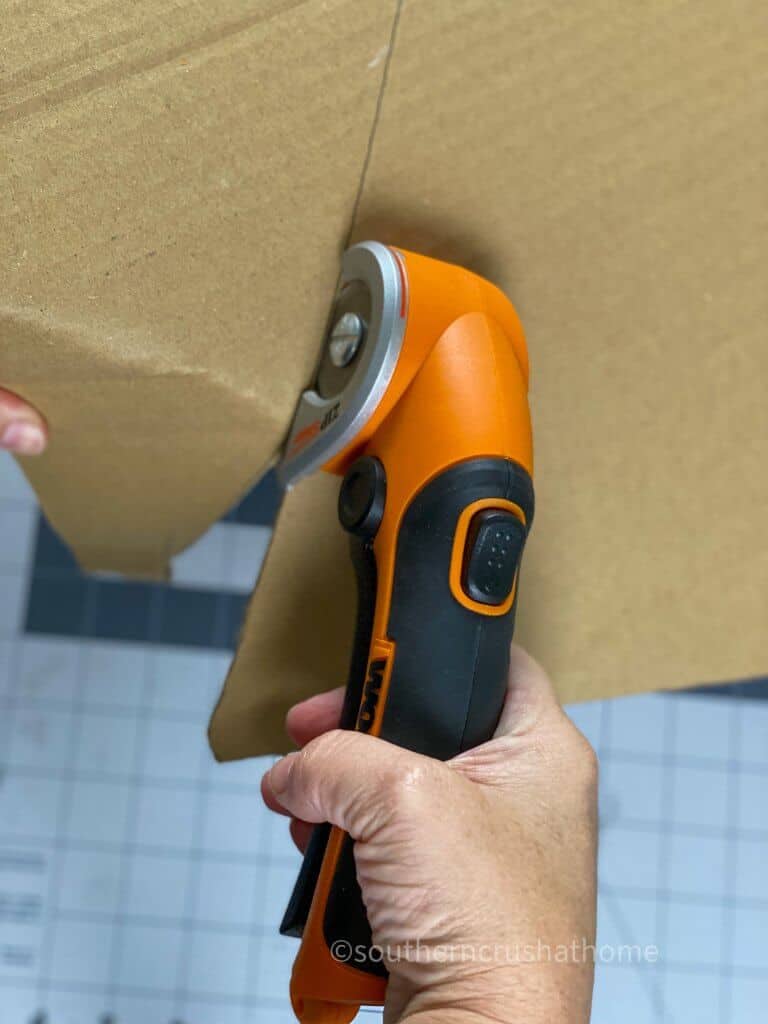
Step 2.
Use your box cutter (or another cutting tool) to cut out the cardboard hat.
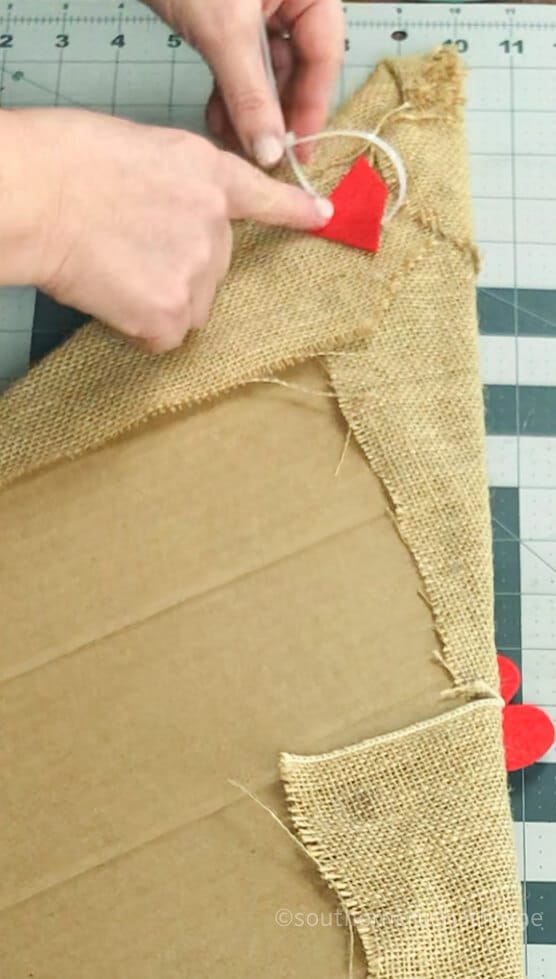
Step 3.
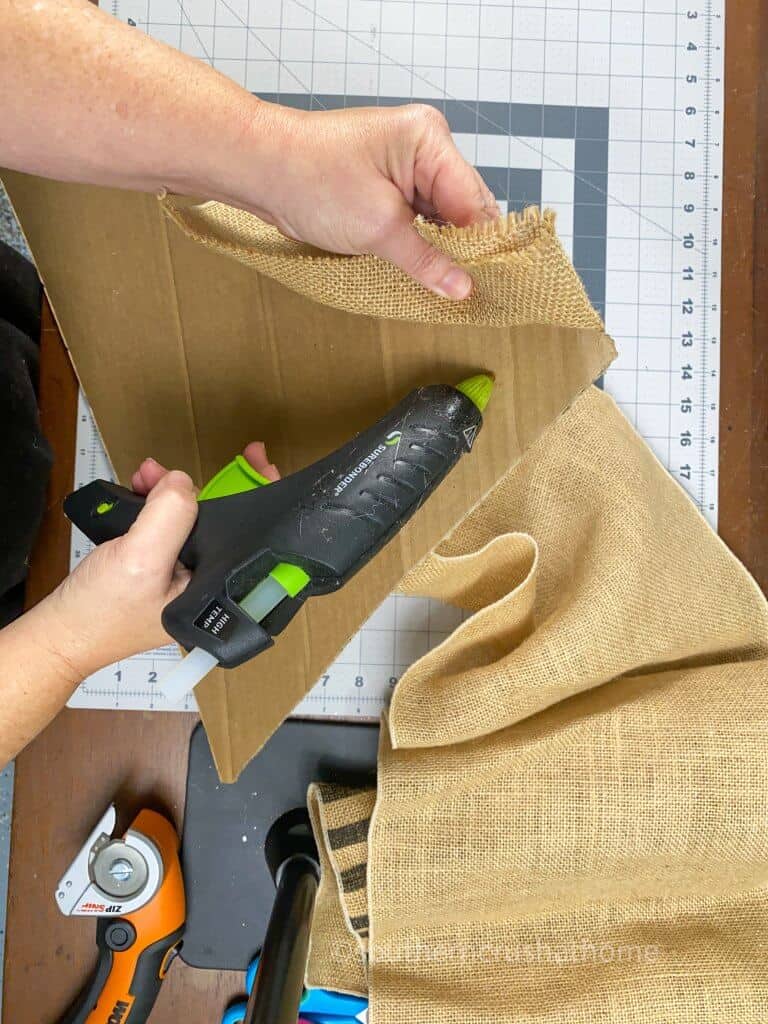
Step 4.
Step 5.
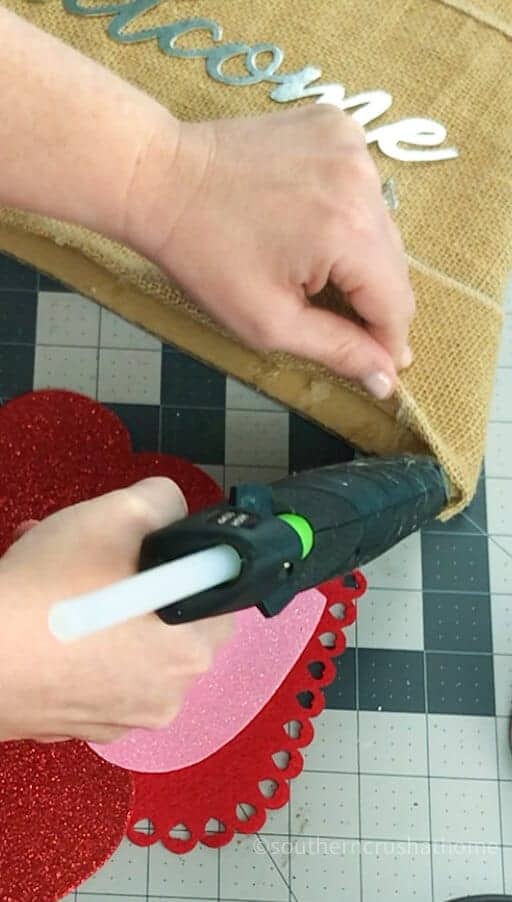
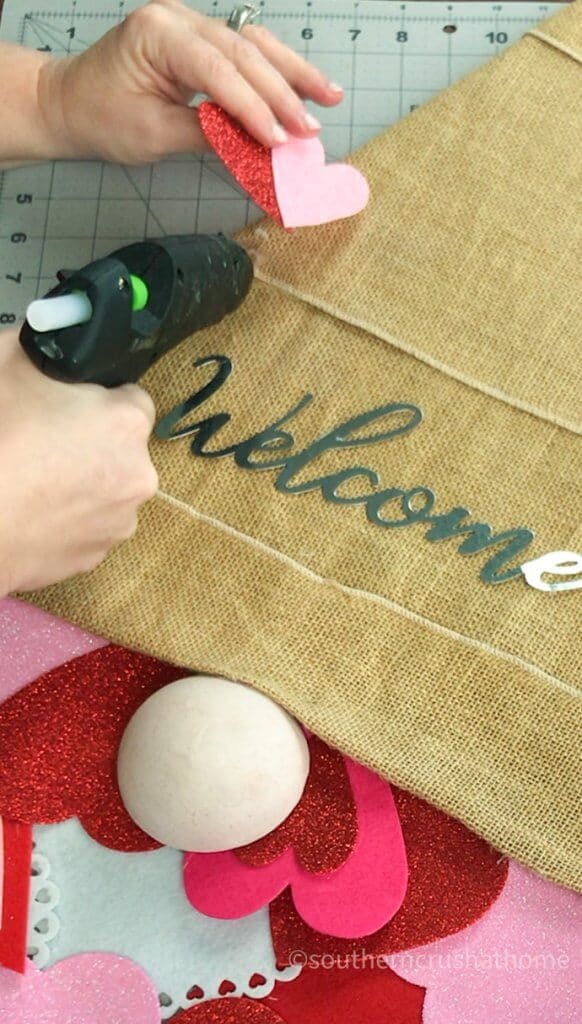
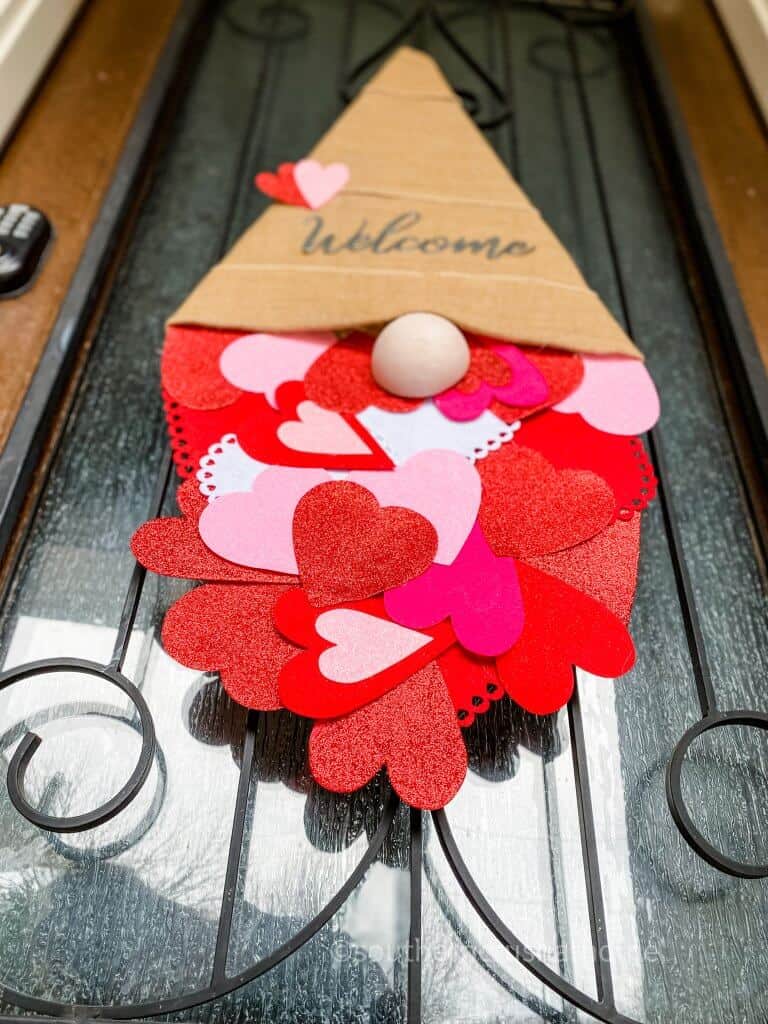
Hot glue the welcome sign to the front of the gnome hat. This gives it a nice greeting for guests and also adds some extra dimension.
Step 6.
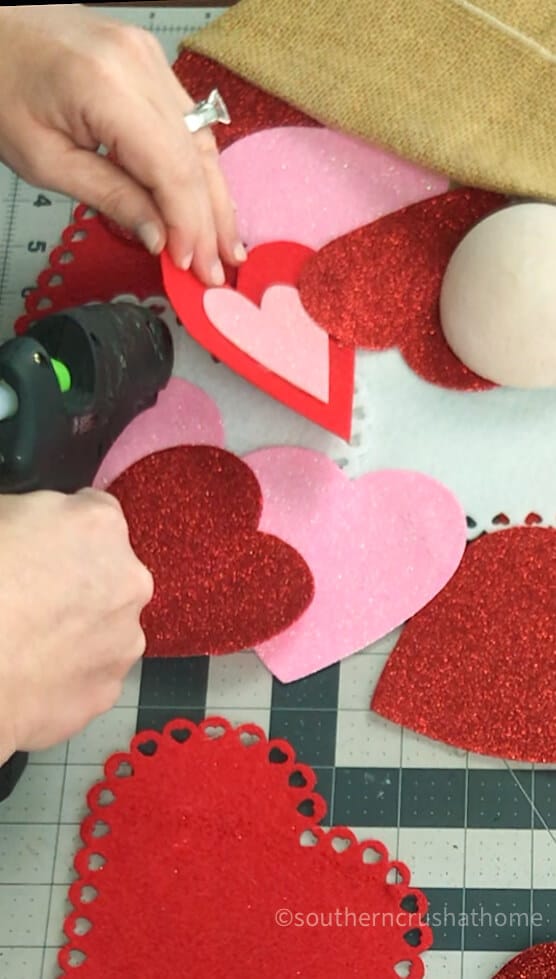
Begin gluing the assorted hearts under the bottom of the gnome burlap hat. It is helpful to start with the larger hearts first to give it a little bit of weight.
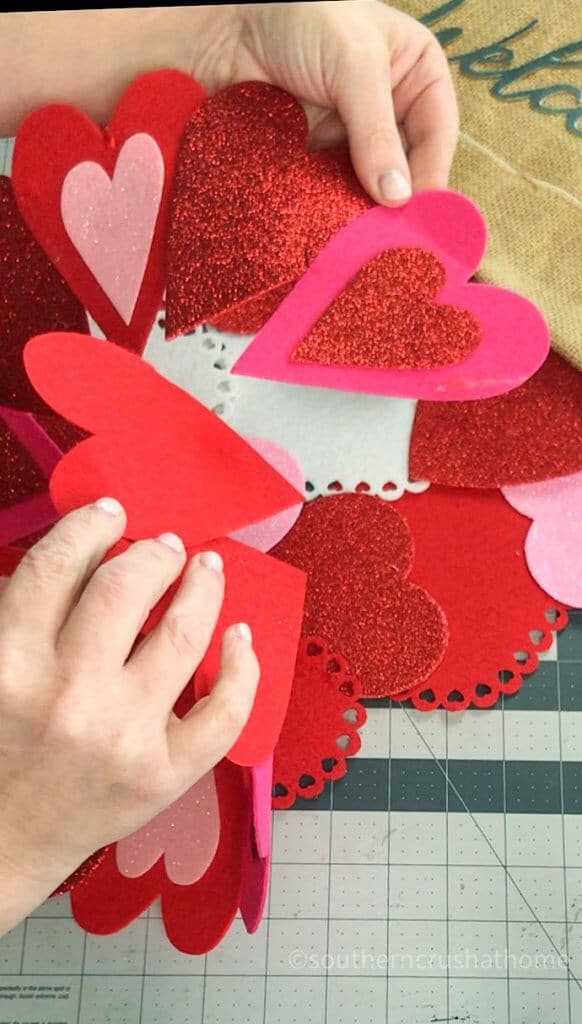
The larger red and white paper doilies are perfect to use as the base. Continue gluing the hearts in all shapes and sizes until the gnome beard is nice and full. You want to create a “reverse triangle” look to it so it represents a beard.
Step 7.
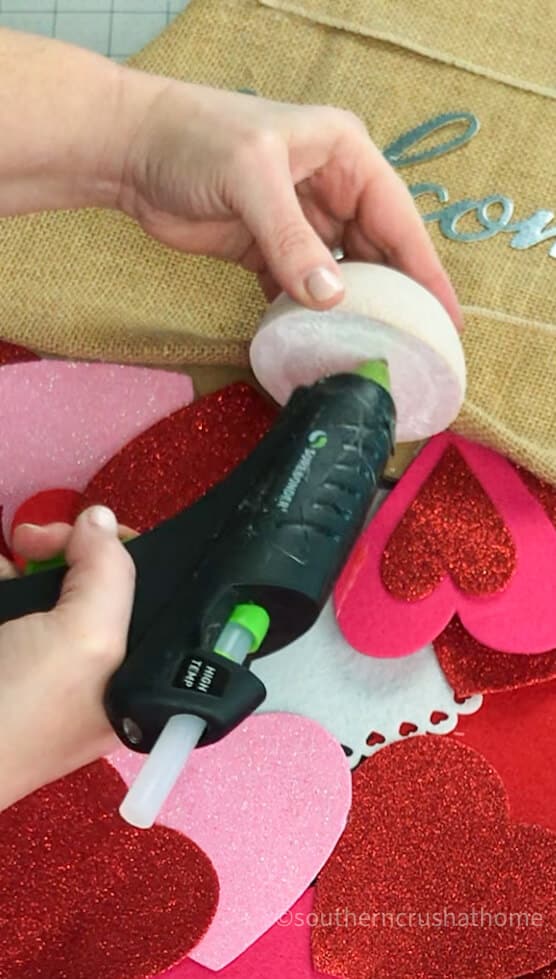
Paint the large wood bead for the gnome's nose. I went with a light beige color that blended well with the burlap. Let it dry then hot glue it to the gnome just under the hat.
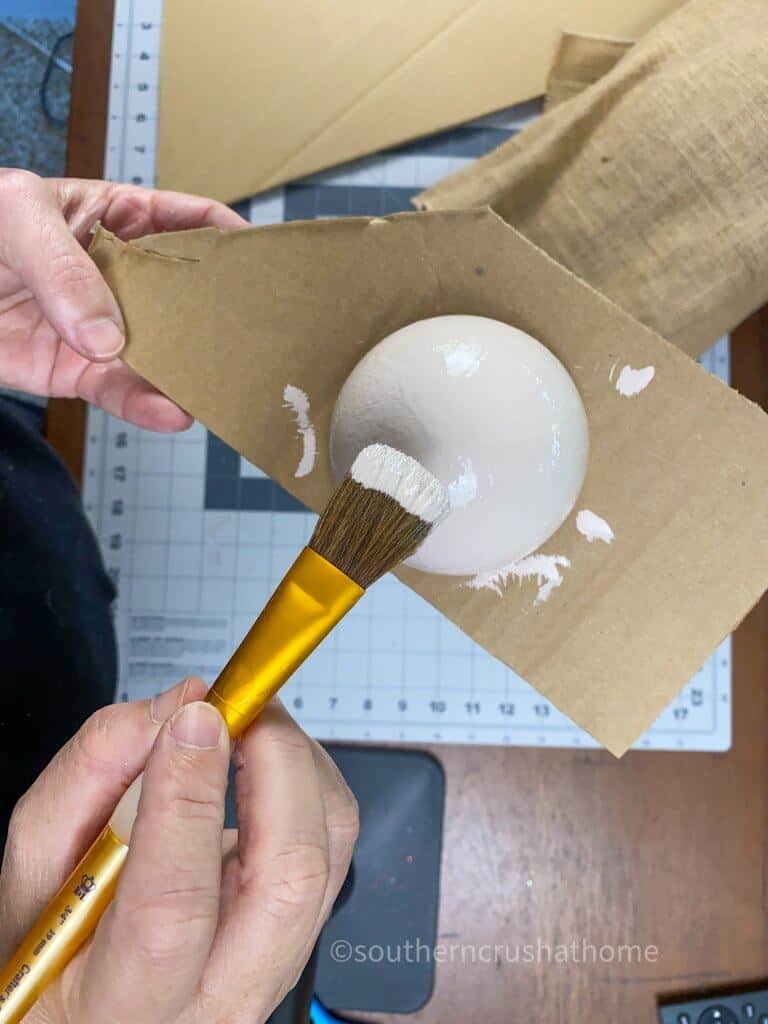
I think it looks cute just peeking out from under the hat.
Add a couple of sparkly hearts to the corner of the hat and your little Valentine's Day gnome is all ready to greet friends and family!
Definitely keep this idea on your list for a fun Valentine's Day craft!

lastly…
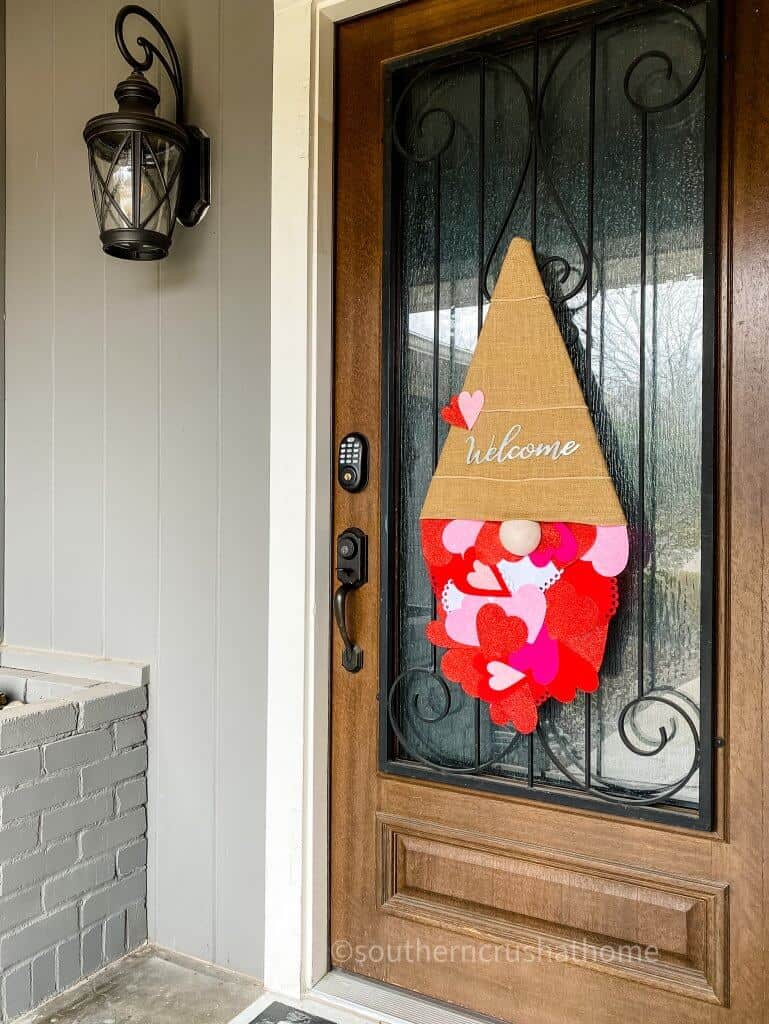
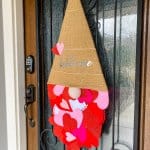
Hang the sweet gnome on your front door, or inside and wait until you see how people smile when they see this little guy!
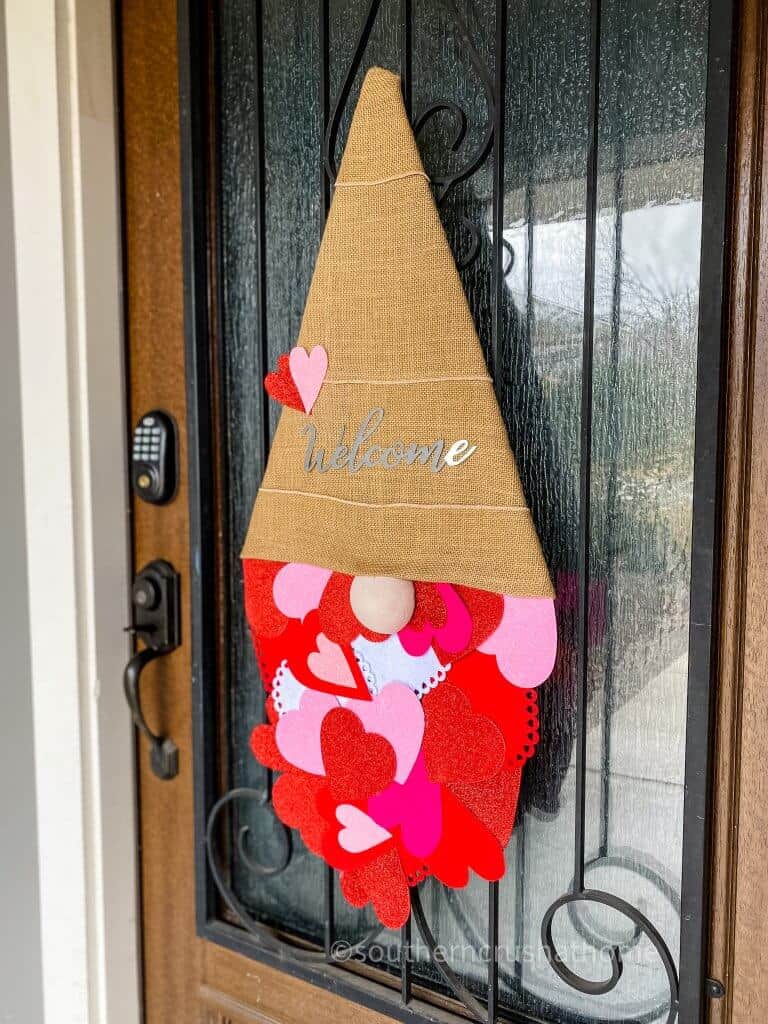
Another view of the gnome hanging on my front door.
step by step video tutorial
If you want to see the exact step-by-step process, be sure to check out this video tutorial below over on my YouTube Channel!

I hope you enjoyed this darling Valentine’s Day gnome. If you make your own please share in the comments below. I’d love to see it!
BE SURE TO CHECK OUT THESE OTHER VALENTINE'S DAY IDEAS!
- Giant Hershey's Kiss DIY
- Black and White Valentine’s DIY Decor
- DIY Valentine’s Pillow
- Easy Oreo Truffles
- Paper Heart Valentine’s Heart Wreath
Be sure to PIN this for later!
Valentine's Day Gnome Door Decor
Equipment
- Box Cutter
Materials
- Wooden Beads
- Cardboard
- Assorted Hearts - felt, paper, doilies
- Burlap
- Metal Welcome
Instructions
- Start by drawing a triangle on the cardboard for the gnome hat.
- Cut out the hat.
- Hot glue burlap to cover the cardboard.
- Paint the wood bead for the gnome nose. Let dry and hot glue it just under the hat.
- Begin gluing the assorted hearts on the bottom of the burlap hat. Continue gluing the hearts until the beard is full.
- Hot glue a zip tie to the back of the hat for hanging.
- Secure the welcome sign to the middle of the hat.
- Finish the hat with a couple of sparkly hearts on the corner of the hat.
One Comment