Halloween Witch Hat DIY
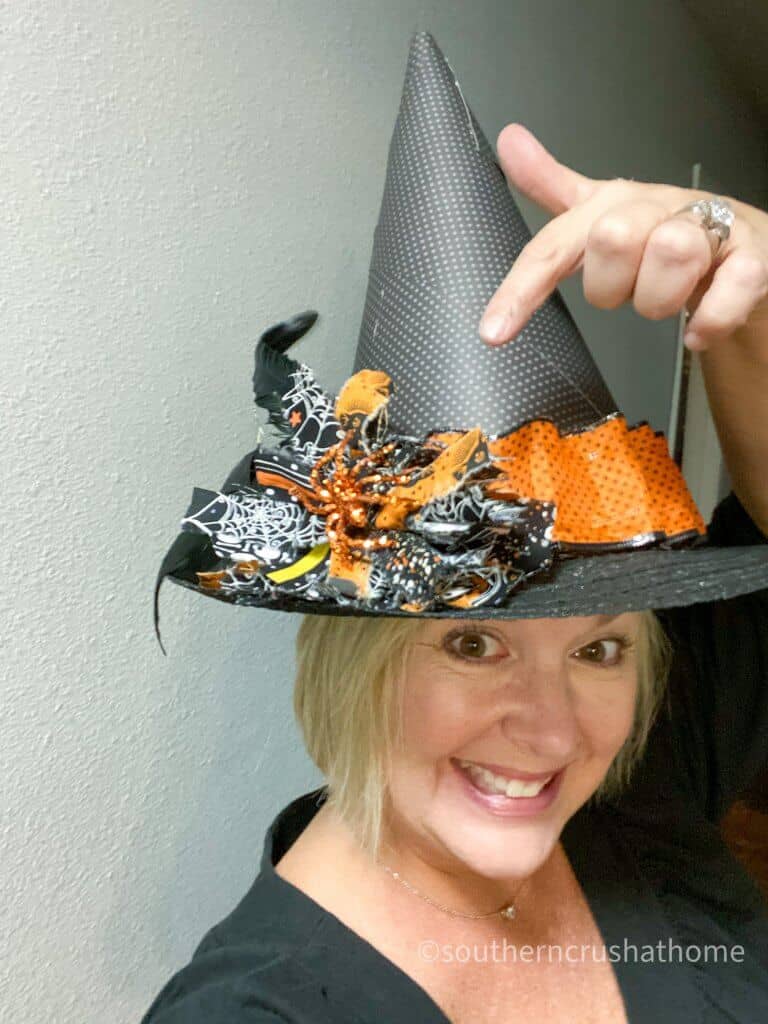
Halloween at my house is always a fun time to create budget friendly decor and celebrate all things sweet! This Dollar Tree sunhat was the perfect thing to use for making a super simple DIY Halloween witch hat. With some scrapbook paper and black paint along with a little hocus pocus of course, this sunhat was transformed into a fun Halloween witch hat to use for my decor or even to wear as a costume!
Be sure to PIN this for later!
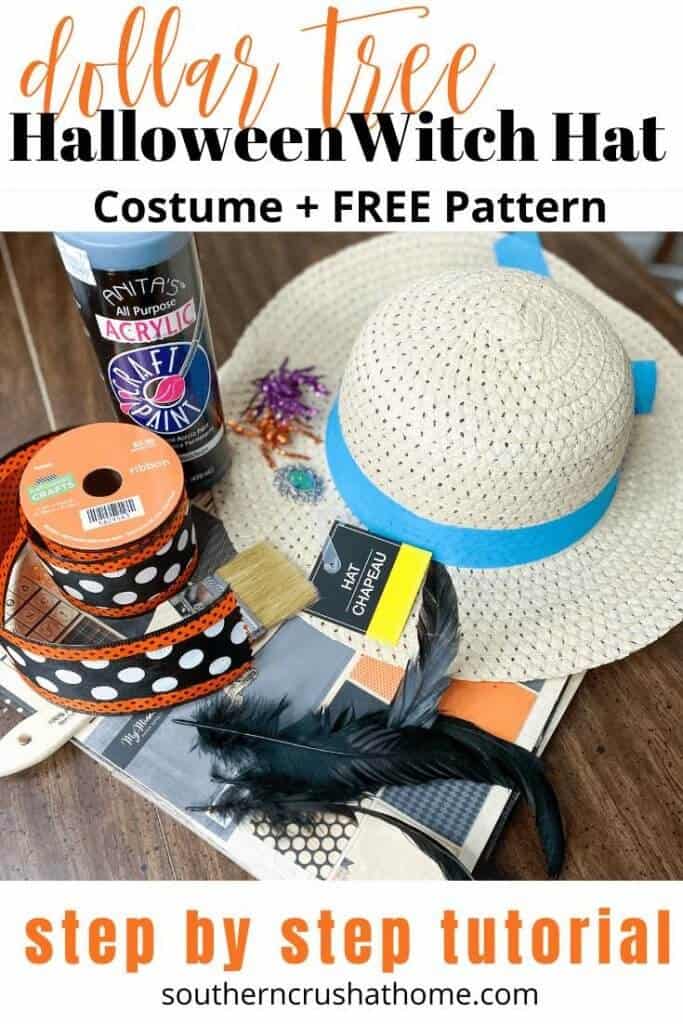
halloween witch hat supplies
- Sunhat from the Dollar Tree or any straw hat will do fine
- Scrapbook paper of your choice or any paper (just make sure the paper is the color you desire your hat to be)
- 2.5″ in ribbon of your choice (mine was wired, unwired might actually work better)
- Hot Glue Gun & Glue
- Black paint
- Chip brush
- Embellishments
HALLOWEEN MESSY BOW SUPPLIES (See Complete Messy Bow Tutorial HERE)
- 4-5 fabrics of your choice
- scissors
- zip tie
- glitter spider or other embellishment
- feathers or other embellishment
step by step instructions for witch hat
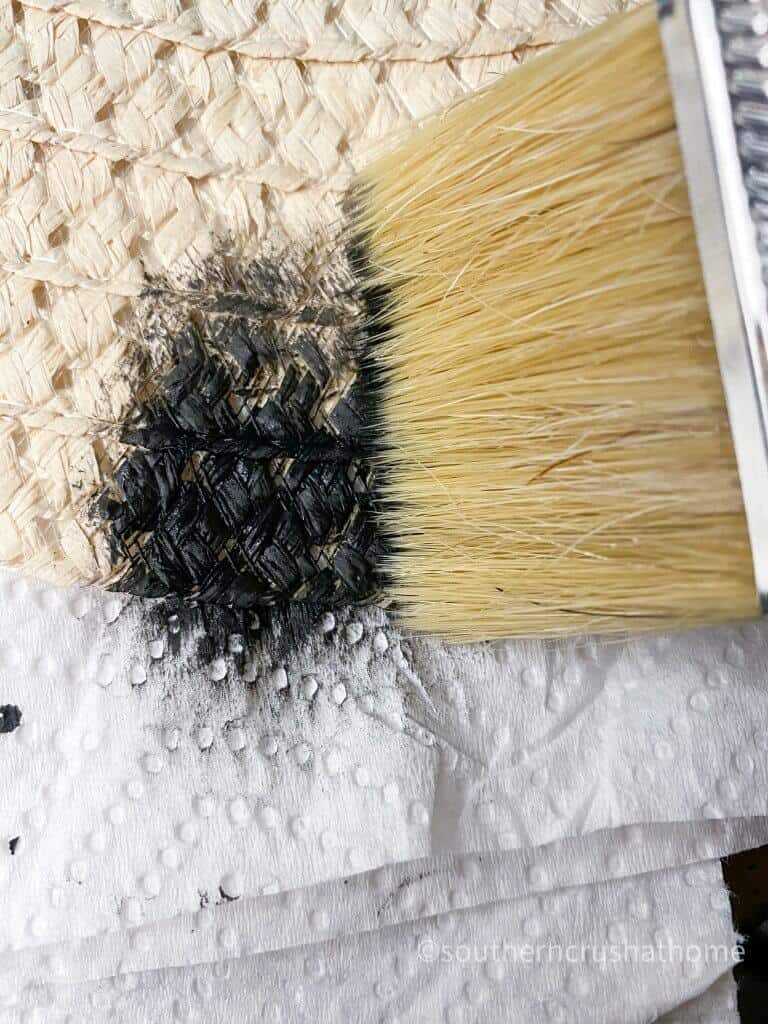
- Start by painting the rim of the sun hat with your black acrylic paint. Using a chip brush, dab until the paint gets in all of the sun hat crevices. Be sure to paint both the top side and underside of the sun hat allowing to dry in between.

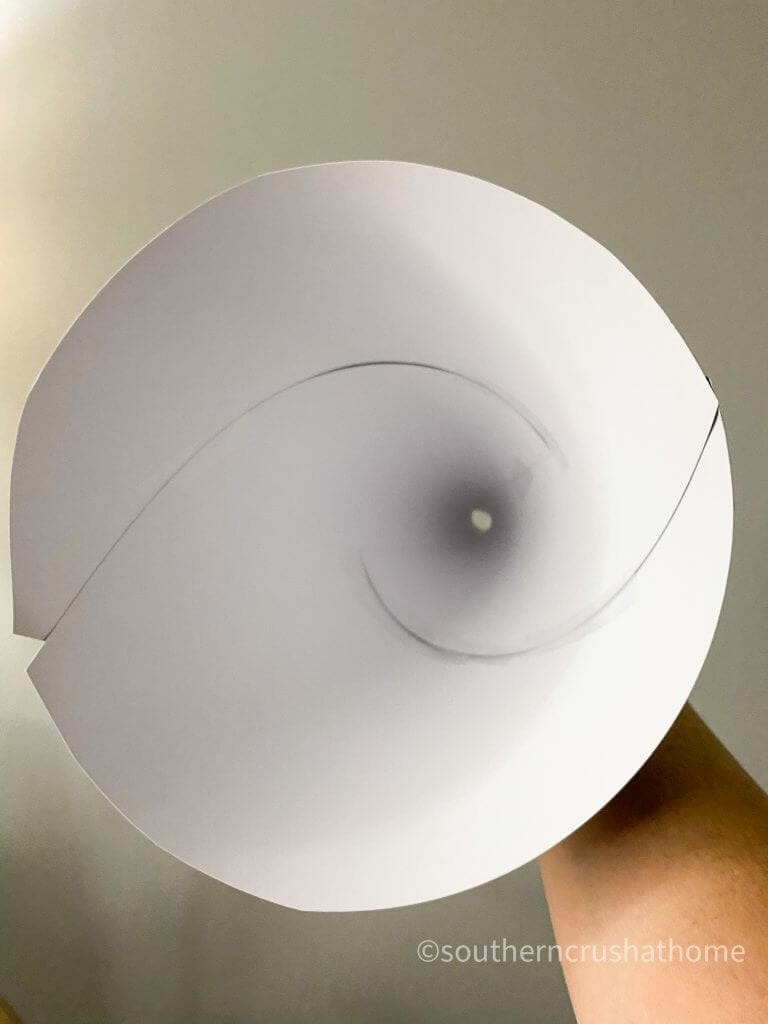
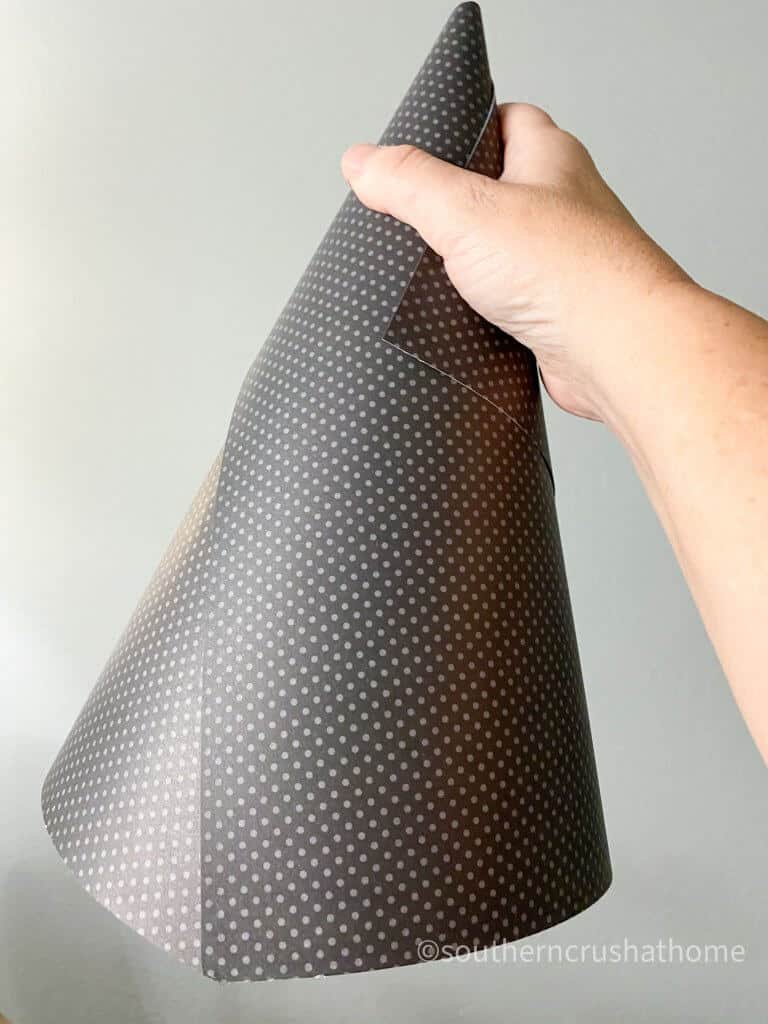
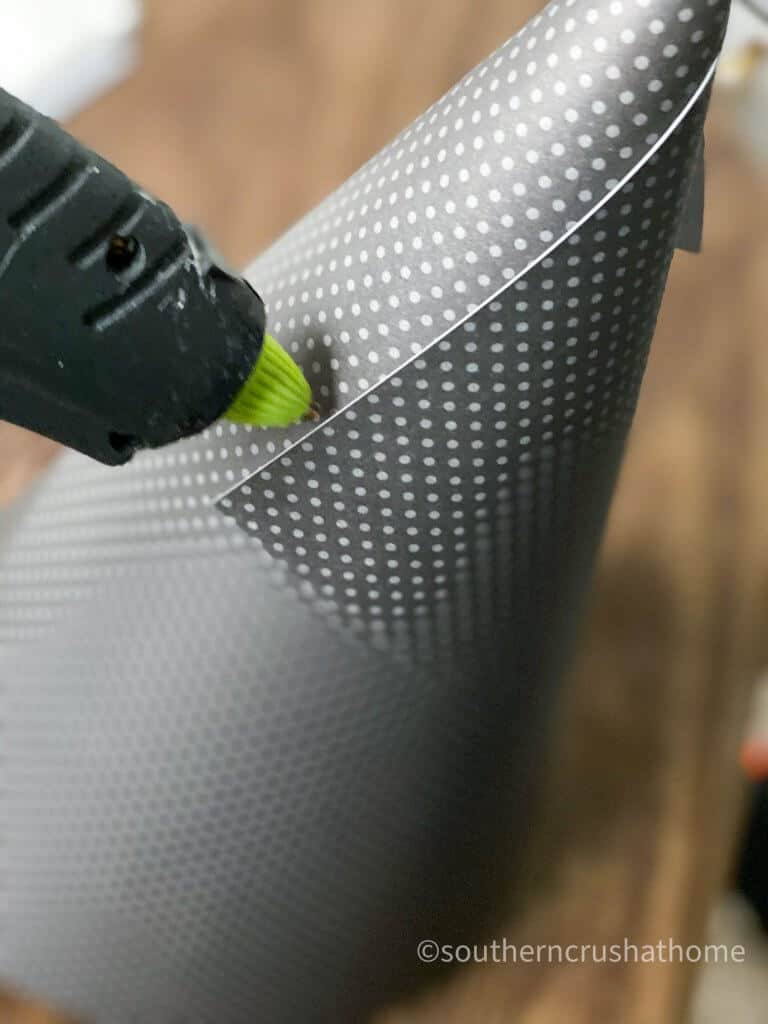
- Take two pieces of scrapbook paper and create a cone shape using THIS FREE PATTERN. Download Pattern HERE.
- Adhere with clear tape, double sided tape or hot glue (this is what I used). Then glue the cone to the top, unpainted portion of the sun hat.
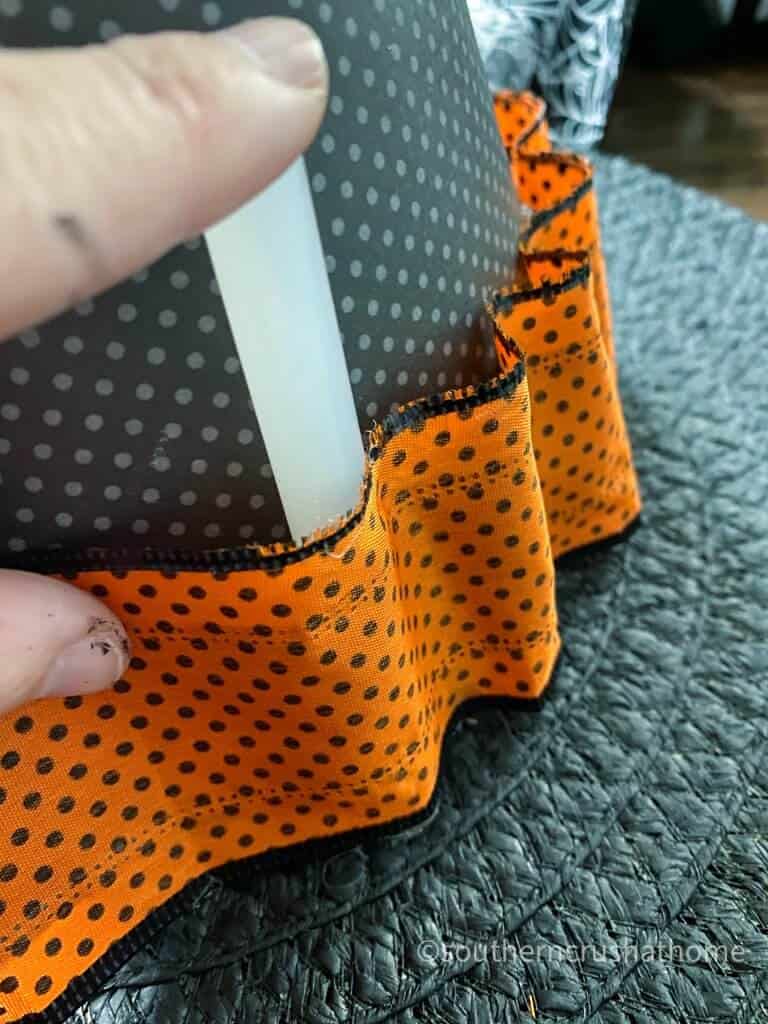
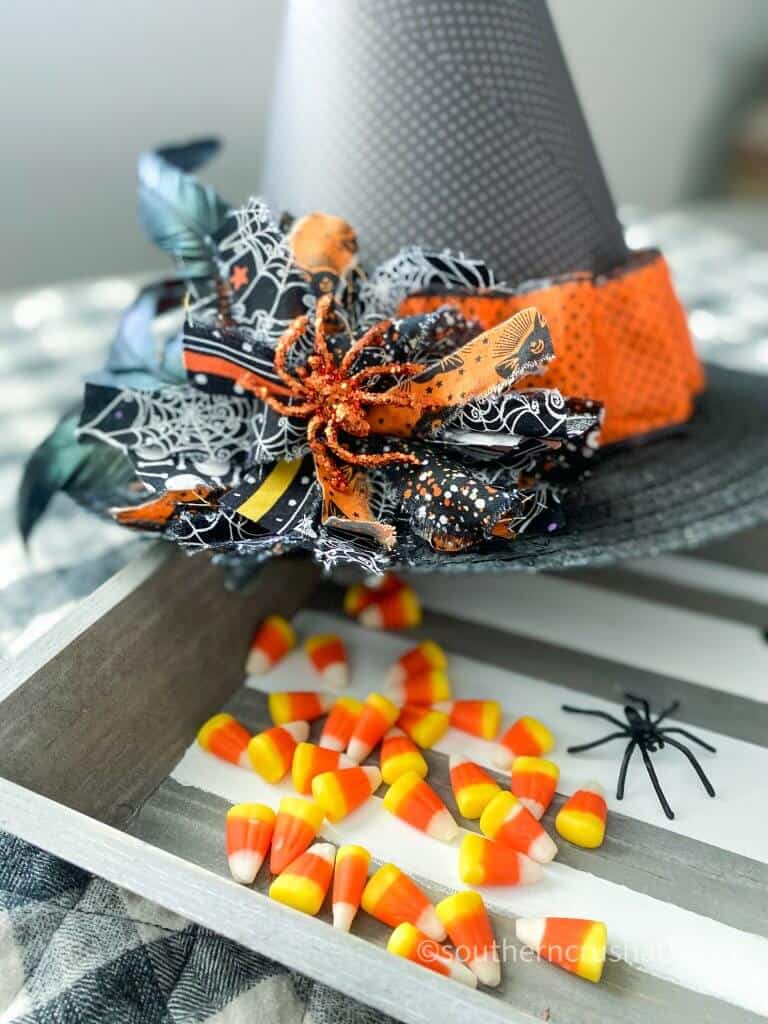
- Taking your wide ribbon, (I used 2.5in wired ribbon) trim the base of your cone where it attaches to your sunhat. In order for it to work on a cone shape, I chose to create a ‘ruffled' look by spacing out where I glued down the ribbon using a glue stick for guage. See below.
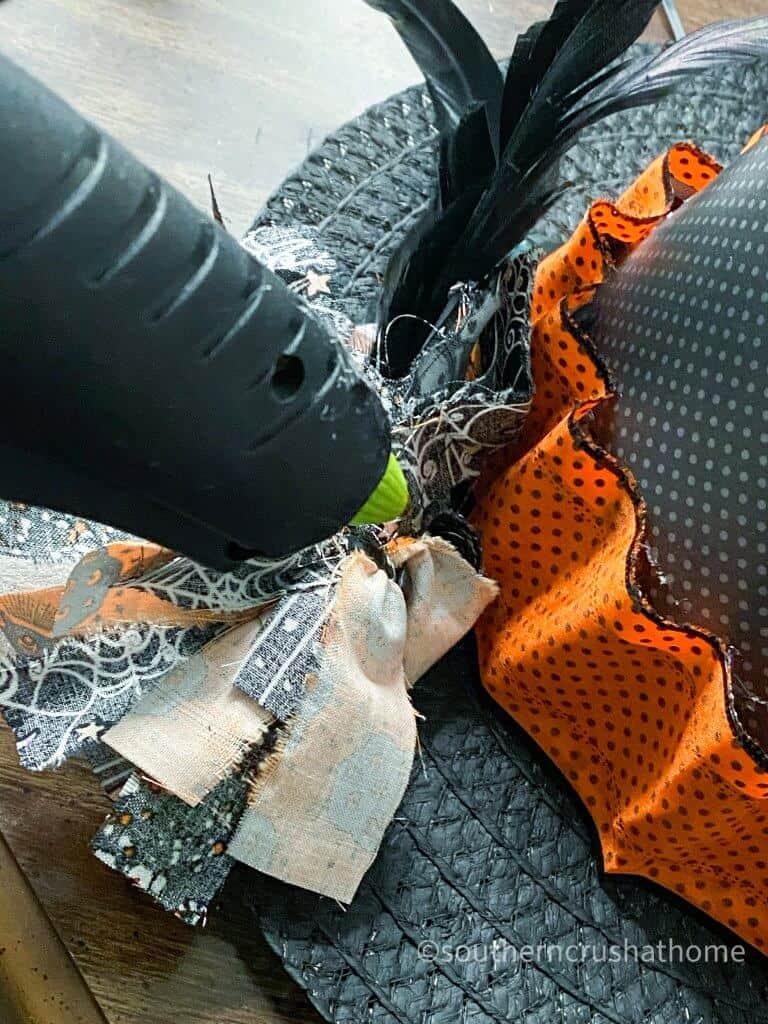
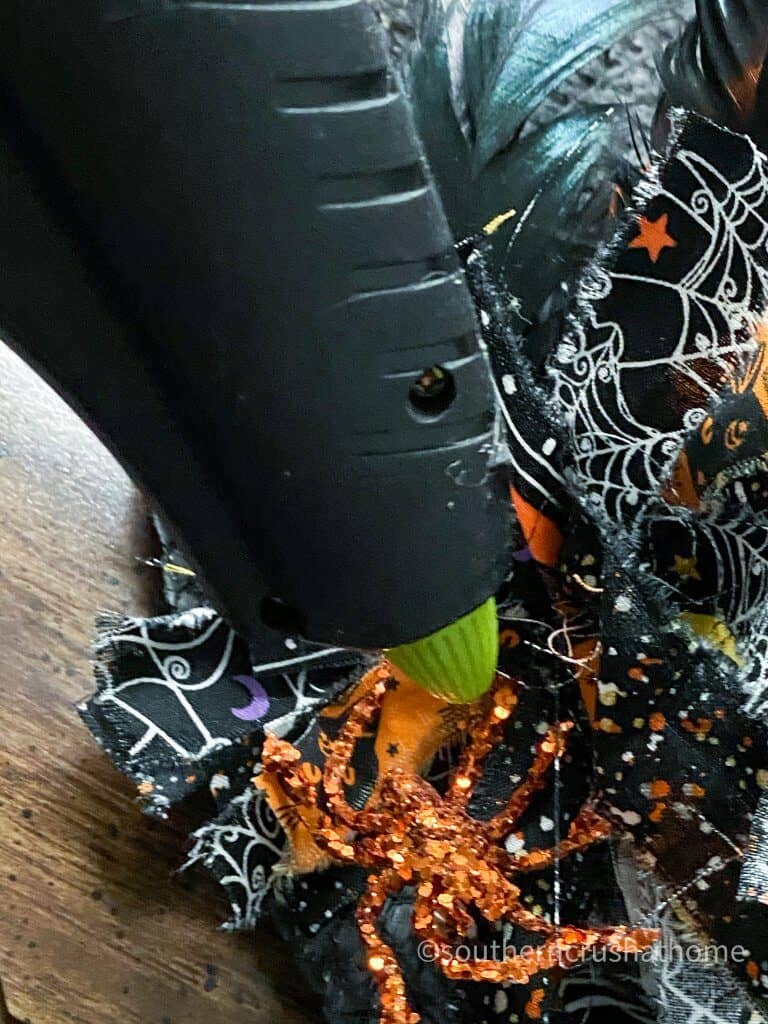
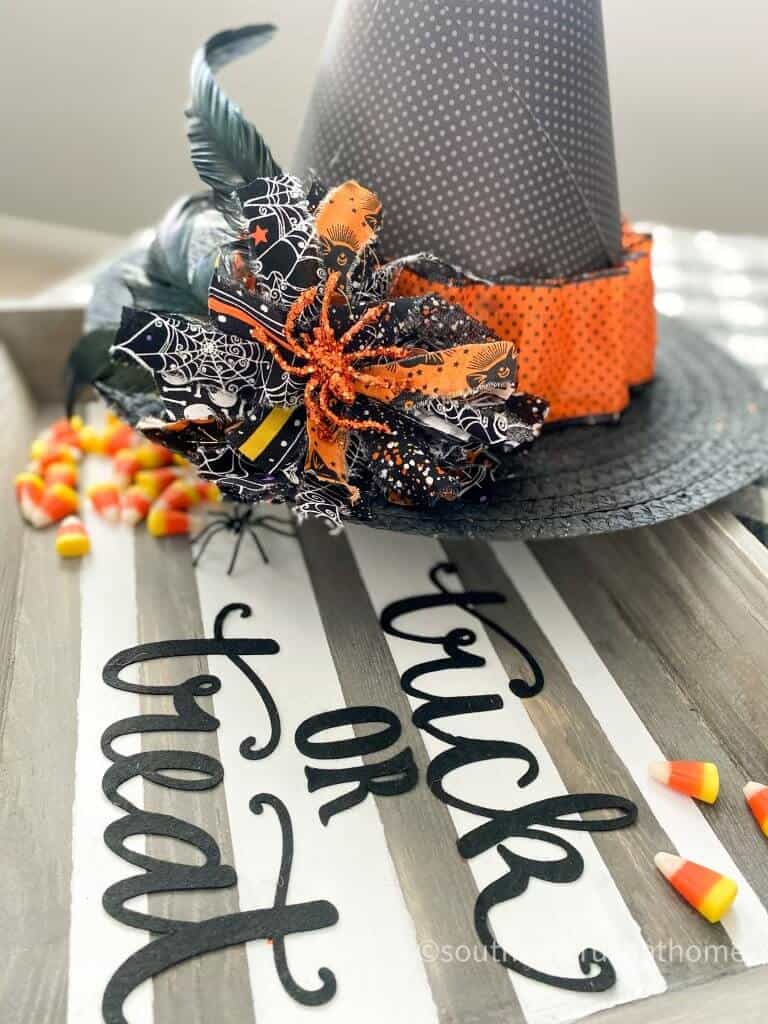
- Now your witch hat is ready for embellishments! These could include, old jewelry, feathers, buttons, glitter spiders, plastic spiders, pumpkins; truly, the sky is the limit… this is the fun part!
I added my signature messy bow of course! Step by step tutorial on how to make a messy bow can be found HERE.
- Finally, glue your embellishments to your witch hat.

This DIY turned out so cute. I hope you'll try it for yourself!
ways to use a diy halloween witch hat
This is so much fun to make and the Dollar Tree sunhat with scrapbook paper make it super budget friendly! There are so many different things you can do with this DIY project. Here are just a few…
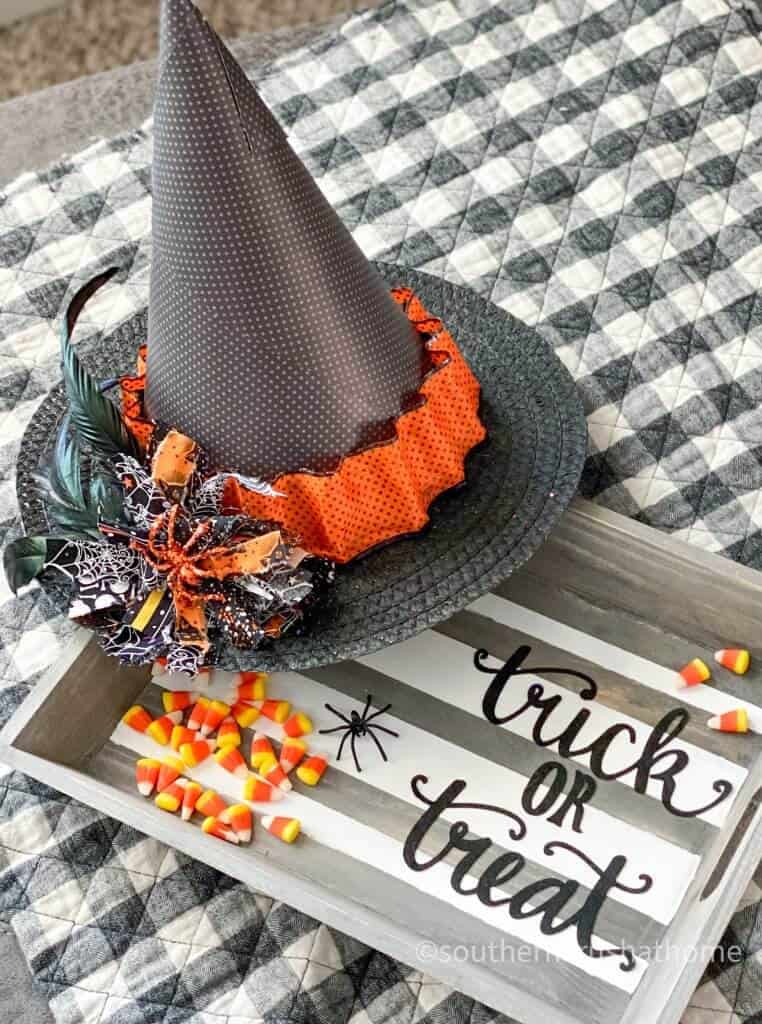
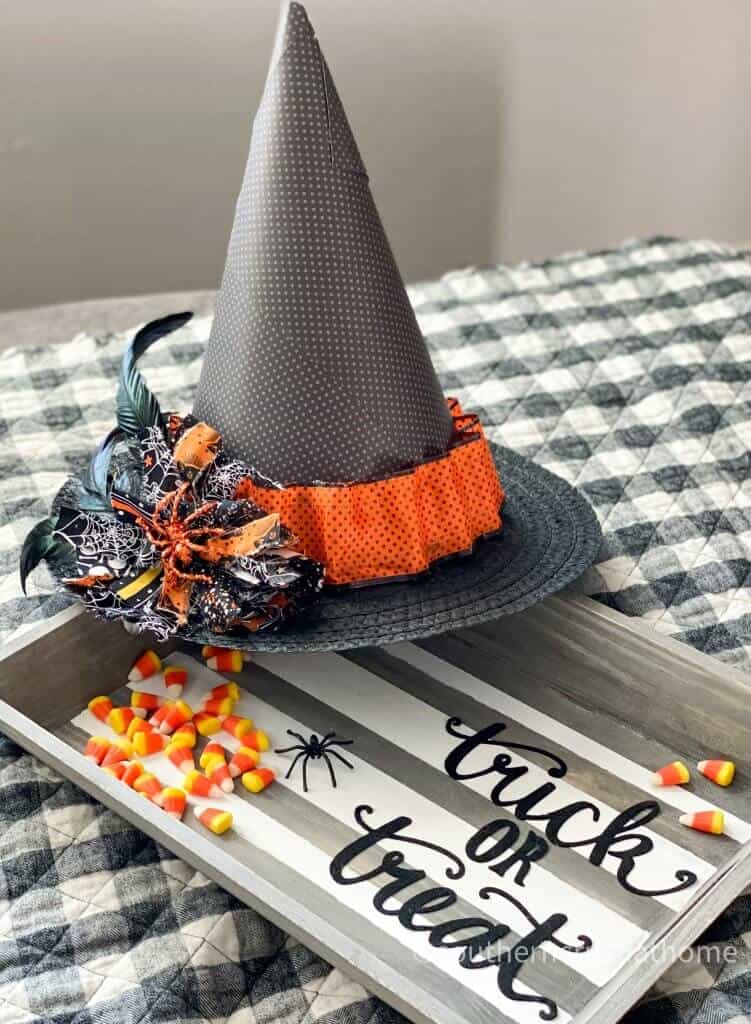
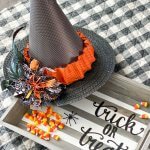
- This Halloween witch hat is great for using on a table as a centerpiece to a spooky tablescape like this one I created.
- It can easily be used to style a Halloween vignette using a fun “Trick or Treat” inspired tray. See how easy it is to make one HERE.
- You can actually wear this Witch Hat as part of a DIY Halloween costume! What a fun way to show your creativity. Make sure all of your embellishments are secure and glued down well, pair it with a black robe or other fun witch costume and then have a blast with your new creation. To keep it on your head all night, add a headband underneath to help secure it into place.
If you run out of time to actually make one of these cute DIY Halloween witch hats; I found some alternatives online you might like as well. Shopping online to see what is out there is also great for inspiration when deciding what embellishments you want to use!

If you missed the video tutorial over on my Facebook Page, you can see it here.
I hope you will make one of these for your Halloween decor. Please come back and share with me when you do.
SIGN UP FOR DIY EMAILS
If you love these kinds of DIY ideas, you need to be getting my emails, friend! Each week I send out a couple of emails that include updates, crafts, shopping experiences, and decor inspiration. Be sure to get yourself signed up below.
I can’t wait to meet you! Leave your thoughts below in the comments, please… BTW— Life is short—Enjoy the mess!
Halloween Witch Hat
Materials
- Sunhat from the Dollar Tree or any straw hat will do fine
- Scrapbook paper of your choice or any paper
- 2.5" in Ribbon of your choice
- Hot Glue Gun & Glue
- Black paint
- Chip brush
- Embellishments
Instructions
- Start by painting the rim of the sun hat with your black acrylic paint. Using a chip brush, dab until the paint gets in all of the sun hat crevices. Be sure to paint both the top side and underside of the sun hat allowing to dry in between.
- Take two pieces of scrapbook paper and create a cone shape using my pattern.
- Adhere with clear tape, double sided tape or hot glue
- Then glue the cone to the top, unpainted portion of the sun hat.
- Taking your wide ribbon, trim the base of your cone where it attaches to your sunhat. In order for it to work on a cone shape, I chose to create a 'ruffled' look by spacing out where I glued down the ribbon using a glue stick for guage.
- Add your embellishments and secure with hot glue.
I absolutely LOVE how you ended up attaching the ribbon!! Absolutely adorable!
LOL! Yes! It was definitely a “do-over” situation. I ripped that ribbon off and reattached it with the ruffled look. I love it too! Thank you so much!
I’m not much of Halloween but It turned out really cute. By the way you make a beautiful good witch.
Awe thank you for the sweet compliment! I’m glad you like it!
Too cute!!!
Awesome. You always do!!
wow! thank you!