DIY Angel Christmas Ornament Ideas
Get ready for cuteness overload with these DIY angel Christmas ornament ideas! You can make several to add to a Christmas tree or attach them to a gift for an extra sweet touch.
This is such a great craft project!
PIN this for later!
This blog post contains affiliate links. The opinions are wholly my own from my own experience. I may earn a small commission from clicks through to the websites that end in a purchase.
As soon as Halloween is over, I get just giddy with excitement for Christmas! That means I will have lots of fun holiday crafts to share with you. I've already started sharing drop cloth projects including a drop cloth Christmas tree skirt that is one of my favorite projects I've ever made. It will look just lovely under your tree, plus it's no-sew.
Here are some other drop cloth projects I've made:
I'm working off of the same drop cloth package for this DIY angel ornament.
Now, let's get to this quick and easy drop cloth angel ornament tutorial.
Supplies needed for a DIY angel ornament
All the supplies needed can be found HERE in my Amazon Shop!
- Drop Cloth
- Fabric Scissors
- Buffalo Check Ribbon
- Zip Ties
- Pipe Cleaners
- Wood Bead for Angel Face
- Hot Glue Gun

How to Make a DIY Angel Ornament
I'm going to walk you through how to make the drop cloth version of this angel craft, but check out the YouTube video for all 5 angel Christmas decoration ideas!
Step One
Start by cutting a square of drop cloth fabric using the fabric scissors. You can make larger or smaller size ornaments depending on the size of fabric you cut. I started with an 8″ by 12″ inch swatch and then folded it in half to cut my two pieces.

Step Two

Step Three

Step Four
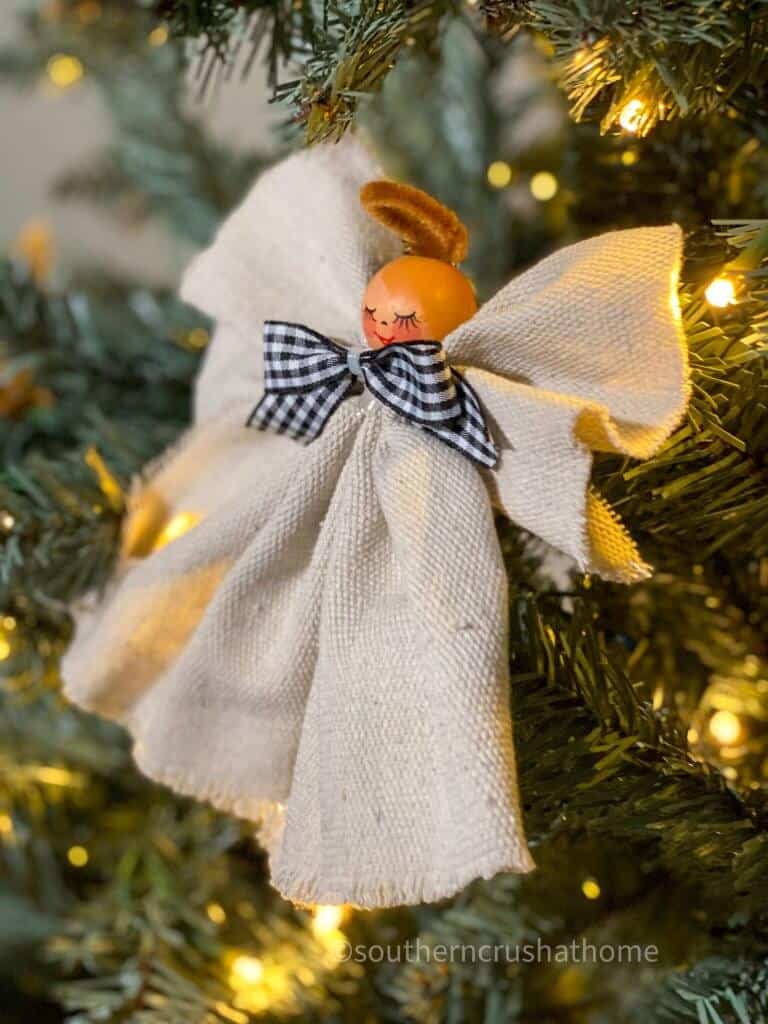
Run a pipe cleaner through the wood bead and fold the top into a circle to represent a halo. You can use whatever color pipe cleaner that you like. I went with a goldish brown color.

Step Five

Step Six

Step Seven
Cut a piece of ribbon for a bow and secure it with a zip tie for a quick and easy one-step bow. Be sure to snip off the rest of the zip tie.
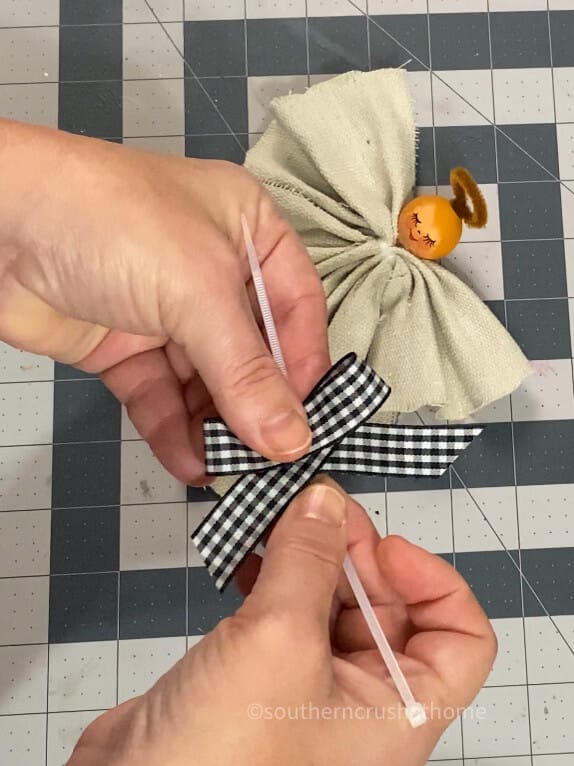
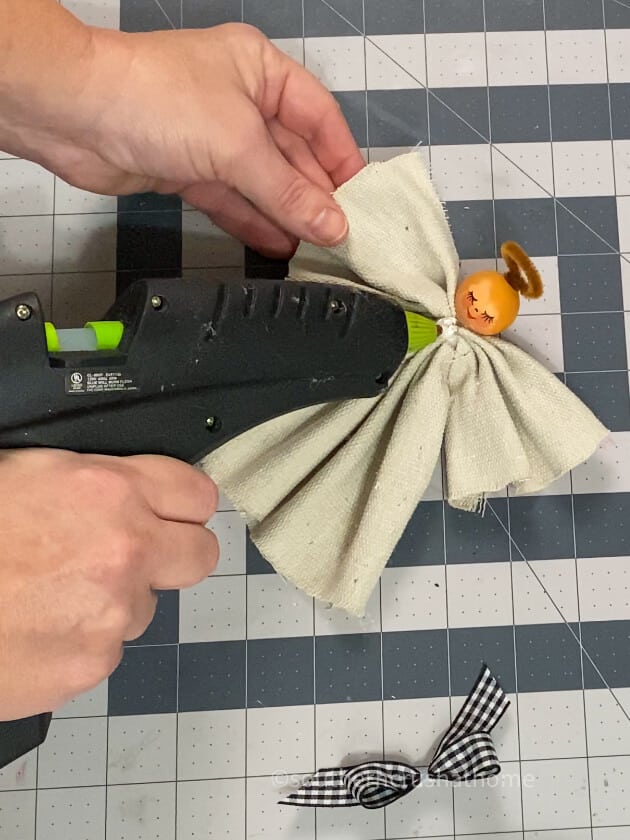
Attach the bow just under the angel face chin with a little hot glue. I show both a buffalo check bow and a gold bow to show you how different it looks just by changing out the ribbon.
DIY Angel Ornament
Finish off the angel by pulling threads of the drop cloth around the edges to fray and give it a shabby look. These angels can also be made to look rustic by tea or coffee staining them.

Look at how beautiful this little ornament is hanging on my tree. She glows in the soft lights. I just love it!

You can tuck these angels into your tree like I did or you can alternatively thread an additional zip tie through the original zip tie on the back to create a way to hang from a branch.
Here's another view of this precious angel ornament from the front of the tree.

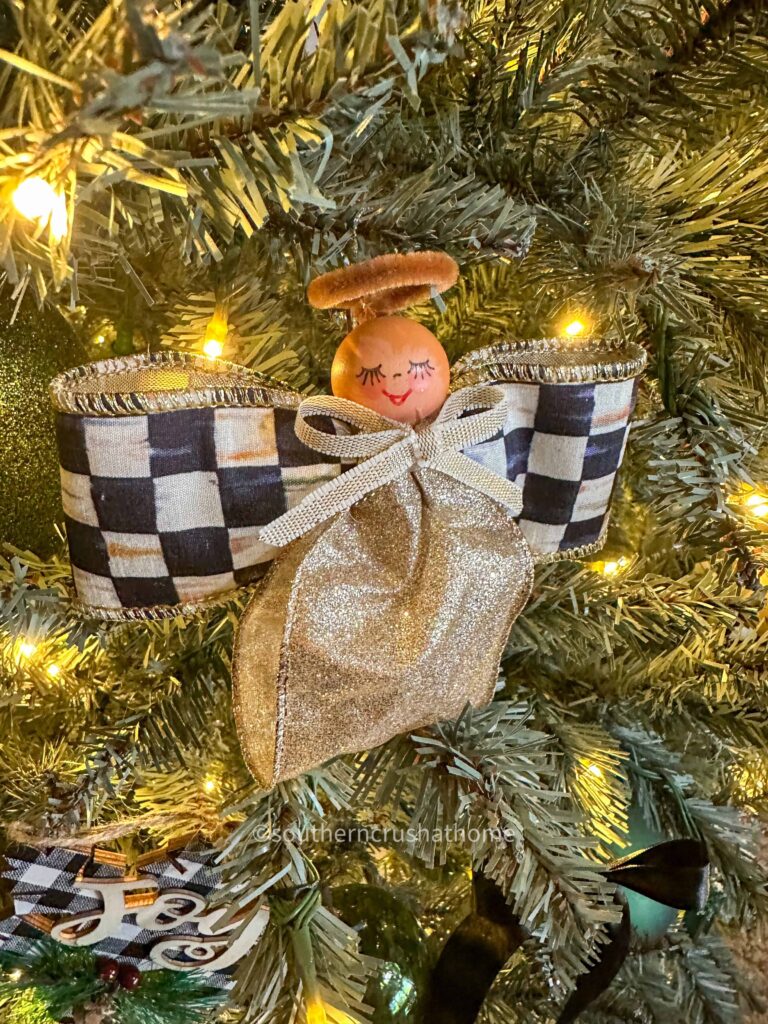
Here she is shown alternatively with a more traditional sparkly gold bow. I think there is a place for both as well as any other ribbon you may choose. That is the fun of creating a one of a kind angel. Which one is your favorite?

I mentioned you could also use burlap instead of drop cloth to make the angel. The burlap was definitely a totally different material from the drop cloth, so you may want to make the angel a bit larger.
I love the burlap becuase of it's pretty frayed edges! The burlap version would be great to use as a Christmas Tree Topper. Here is the little angel ornament shown in burlap:

More DIY Christmas Angel Ornaments
Precious DIY Ribbon Angel Craft
This one might be my favorite! I'm loving the MacKenzie Childs ribbon for her wings!
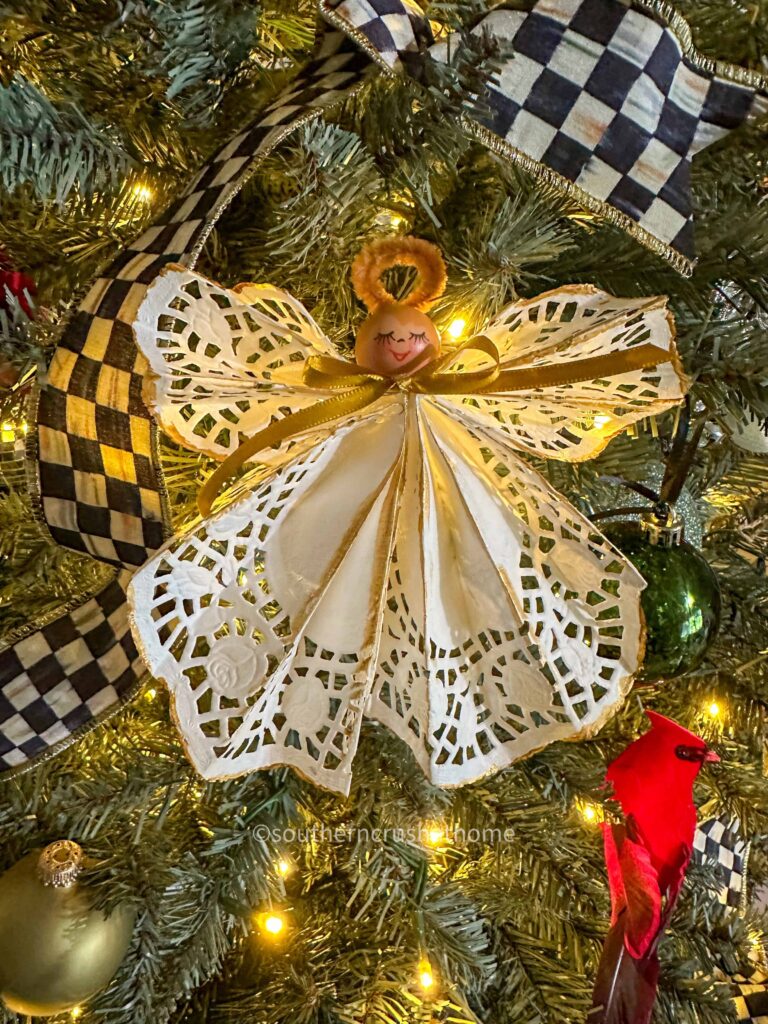
Dollar Tree Paper Origami Angel Craft
I love that this one uses Dollar Tree Paper Doilies to create an easy and fun way to decorate with DIY Angels for Christmas!
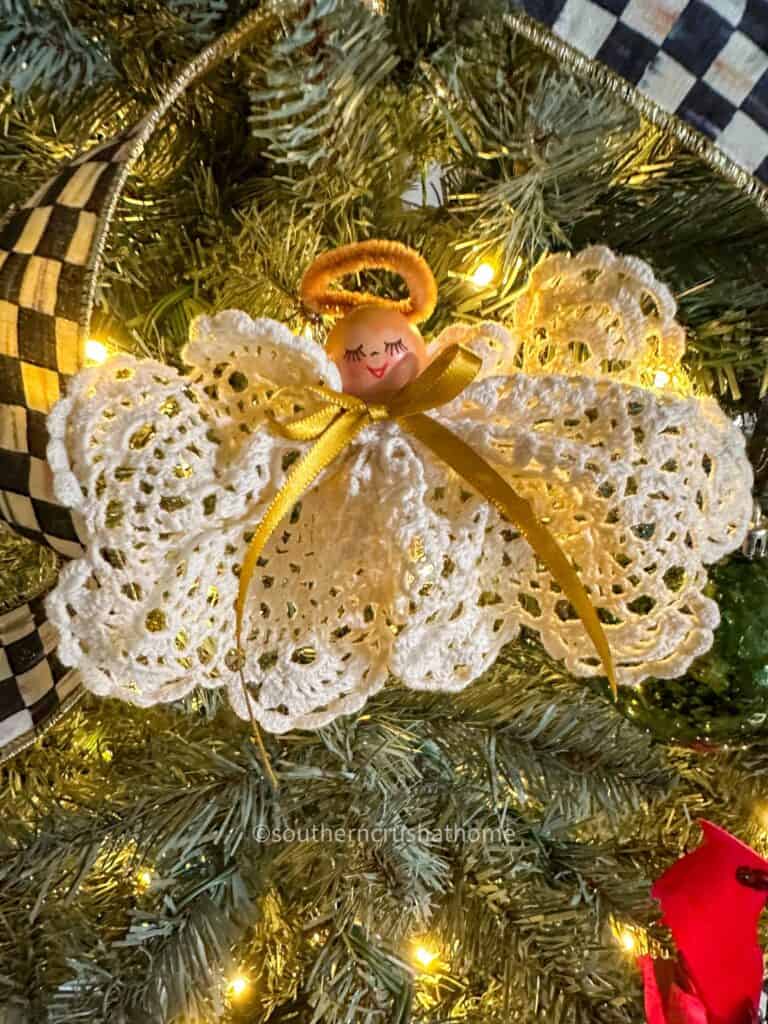
Crochet Doily Angel
Wow! It truly doesn't get any easier than this! Whether you crochet your own doily or purchase a ready-to-use doily, once you secure it in the middle with a ziptie you've got the prettiest little angel for your Christmas Tree!
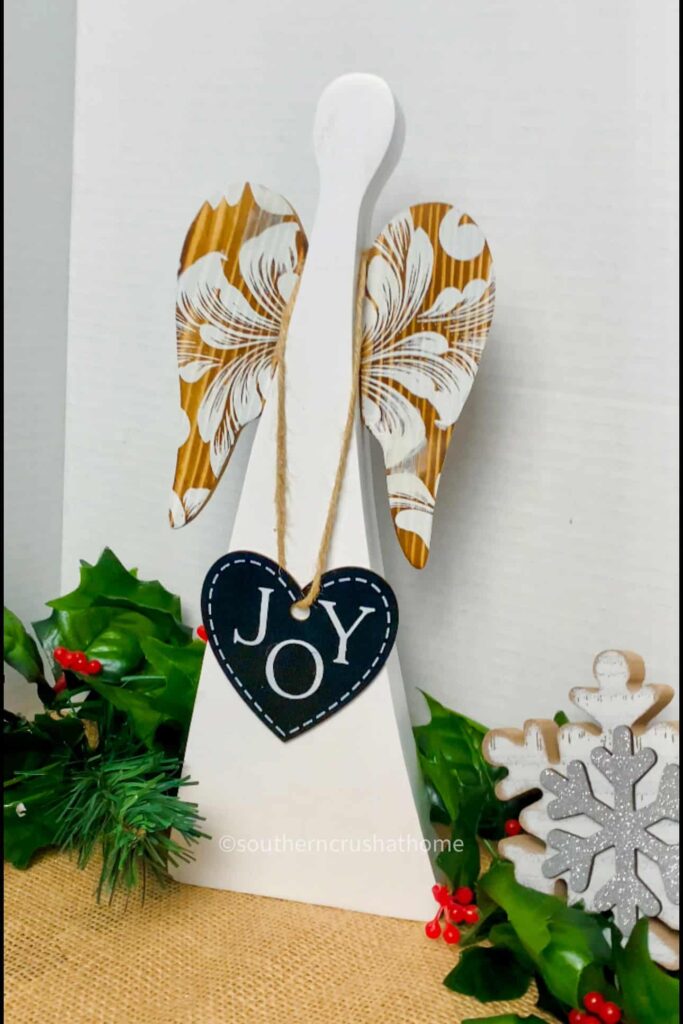
Wooden Stenciled Angel
This is a bonus idea for a DIY angel. I'm loving the idea that you can hunt one of these down while out thrifting or purchase a ready made one to stencil on the wings! Make it your own and have fun!
Click HERE for the supplies for this angel.
Step by Step Video Tutorials
If you want to see the exact step-by-step process for each of these angel crafts, be sure to check out this video tutorial below over on my YouTube Channel!
You may see more drop cloth projects in the coming weeks. I hope you enjoyed this little ornament. Here are several other Christmas tree ornaments I've made…
- Paint Brush Gnome Ornaments
- Easy Mason Jar Lid Ornaments For Christmas
- DIY Buffalo Plaid Ornaments
- How to Make a Scrap Fabric Tree Ornament
- Easy Christmas Ornament DIY (Using a Mop Head)
and a couple of tree toppers:
Are you ready to make your own? If so, let me know by leaving a comment below.
Tips for crafting with drop cloth fabric
- Drop cloth canvas fabric is 100% cotton; therefore it can shrink when washed. If you'd like to wash it before using on a DIY project see washing instructions here.
- Drop cloth material is super soft and frays easily. This is part of what gives it it's ‘shabby' character. Its is a great fabric to use in farmhouse style DIY projects.
- It's inexpensive and can be easily found at most hardware stores.
- The color of most drop cloths is a neutral beige making it super versatile to create crafts for almost any decor.

PIN this for later!

DIY Angel Ornament with Drop Cloth
Equipment
- Fabric Scissors
Materials
- Drop Cloth
- Buffalo Check Ribbon
- Zip Ties
- Pipe Cleaners
- Wood Bead
Instructions
- Cut a square of drop cloth fabric using the fabric scissors.
- Fold the fabric in an accordion-style fashion from the outside of the cut drop cloth towards the middle.
- Secure with a zip tie.
- Use a sharpie, or paint pen to make a face on the wood bead.
- Run a pipe cleaner through the wood bead and fold the top into a circle to represent a halo.
- Cut the pipe cleaner and attach the angel face to the ornament.
- Cut a piece of ribbon for a bow and secure it with a zip tie.
4 Comments