How to Make a Deco Mesh Christmas Angel Craft
This Deco Mesh Christmas Angel would make a great tree topper or could dress up any Christmas wreath. I had a lot of fun putting her together.
The instructions for making the angel are so easy and the supplies are not expensive at all!

PIN this for later!
This is one of my favorite kinds of crafts! I think she needs a special name as well, so I'm asking everyone to place their favorite name in the comments for me…


This blog post contains affiliate links. The opinions are wholly my own from my own experience. I may earn a small commission from clicks through to the websites that end in a purchase.
More Angel Crafts
If you like crafts making sweet angels, you may want to take a peek at these!


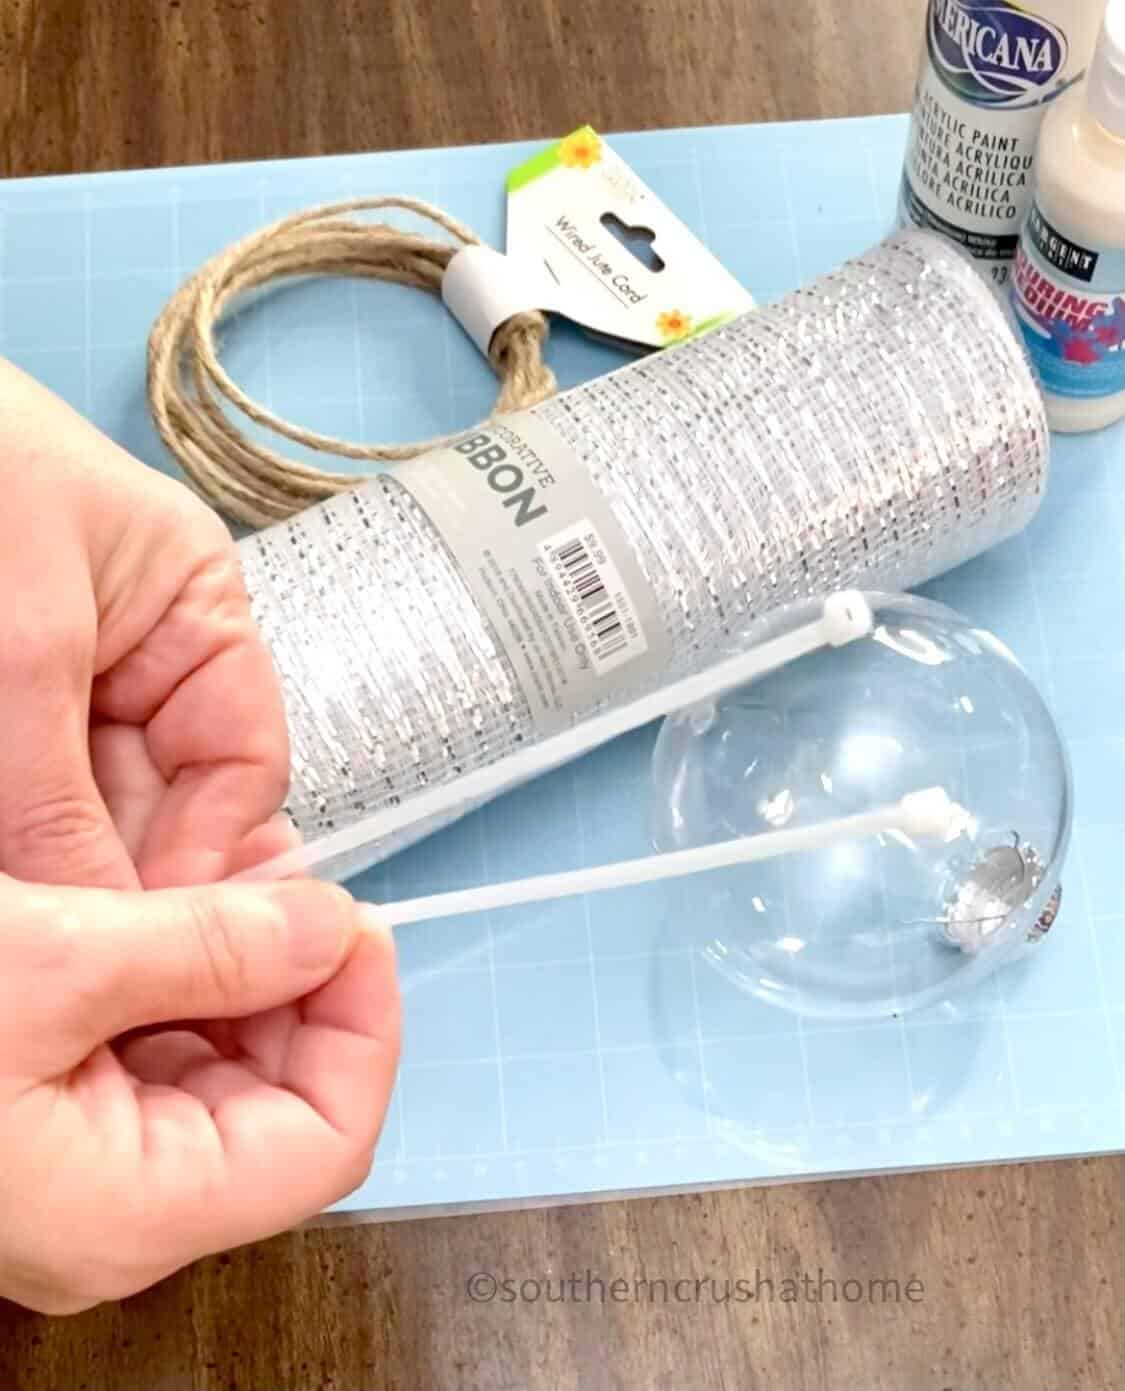
Supplies Needed to Make a Deco Mesh Christmas Angel
- Plastic ornament ball any size you choose (Dollar Tree) they now have white ones
- Pouring Medium
- Acrylic Paint (I used white)
- Plastic cup
- Hot glue
- Wired Jute Twine from Dollar Tree
- 10″ Deco Mesh (I used white with silver strands) Dollar Tree
- 2 Zip Ties (clear is best)
- Ribbon of your choice
- Optional embellishment (I used my favorite bling)
Step by Step Instructions for How to Make a Deco Mesh Angel
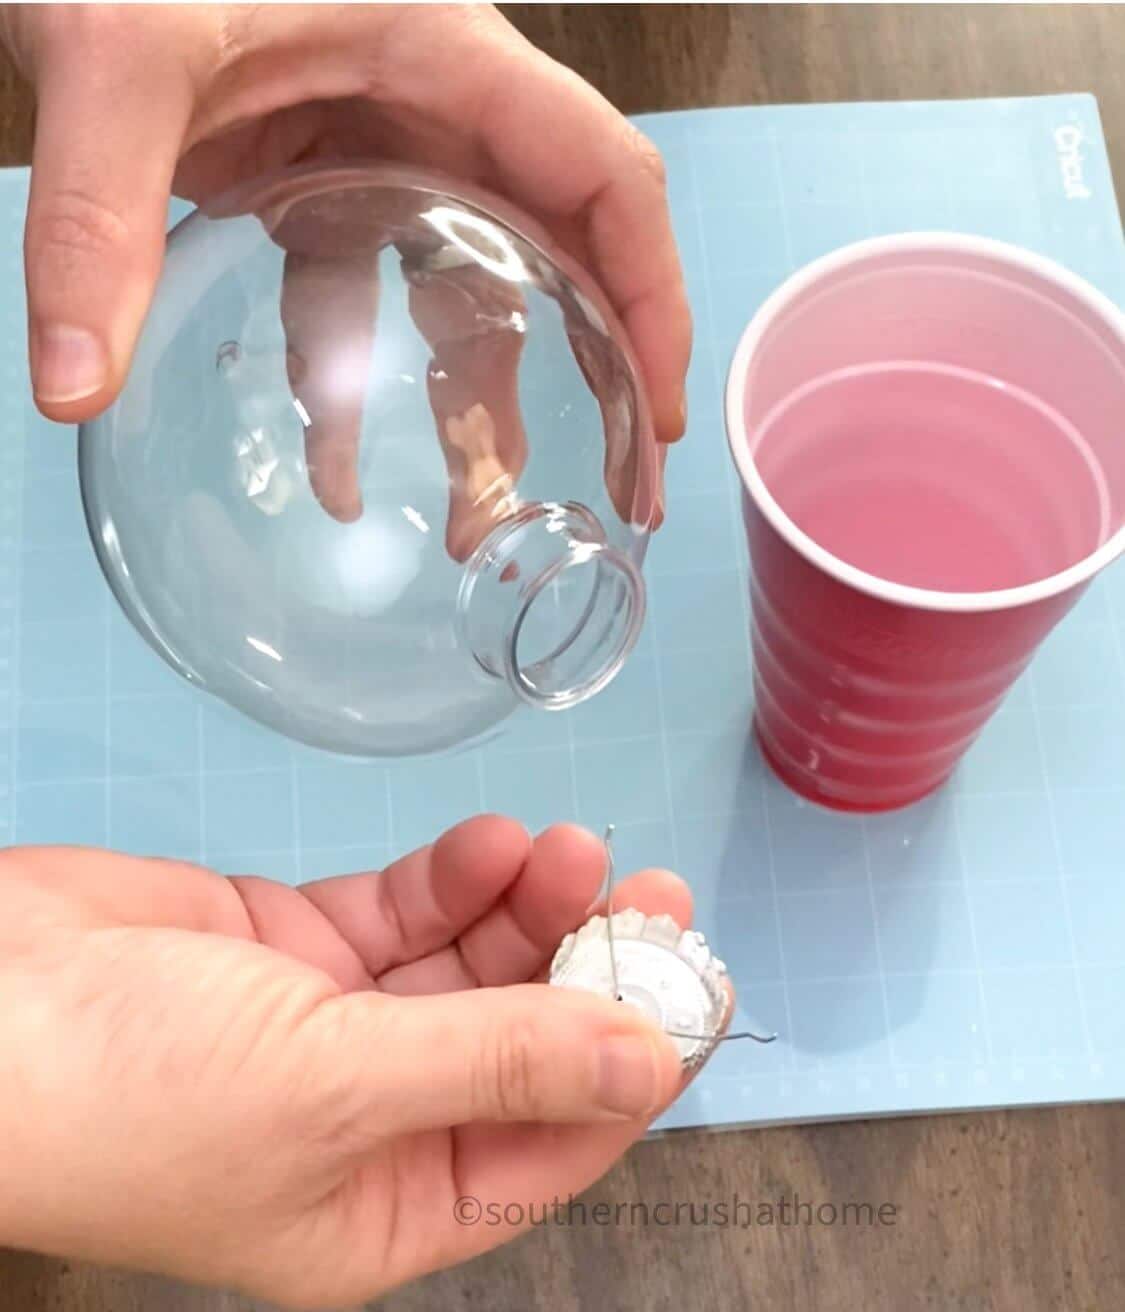
Step One: Create the Angel Head
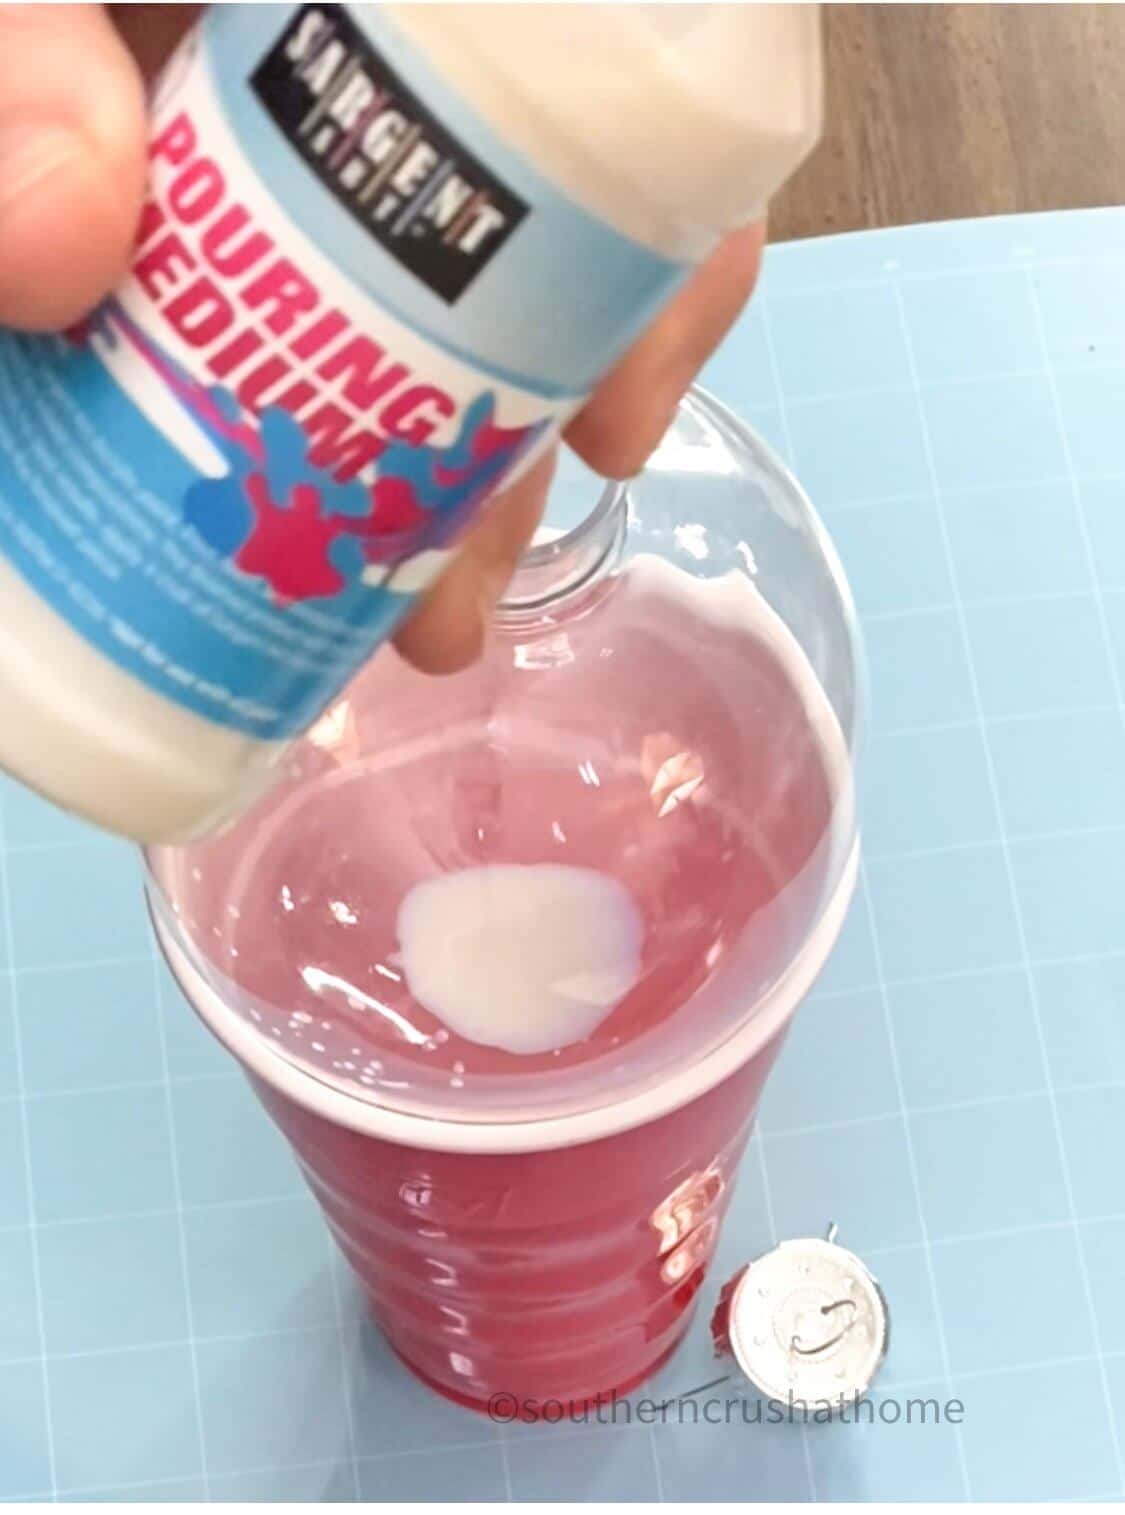
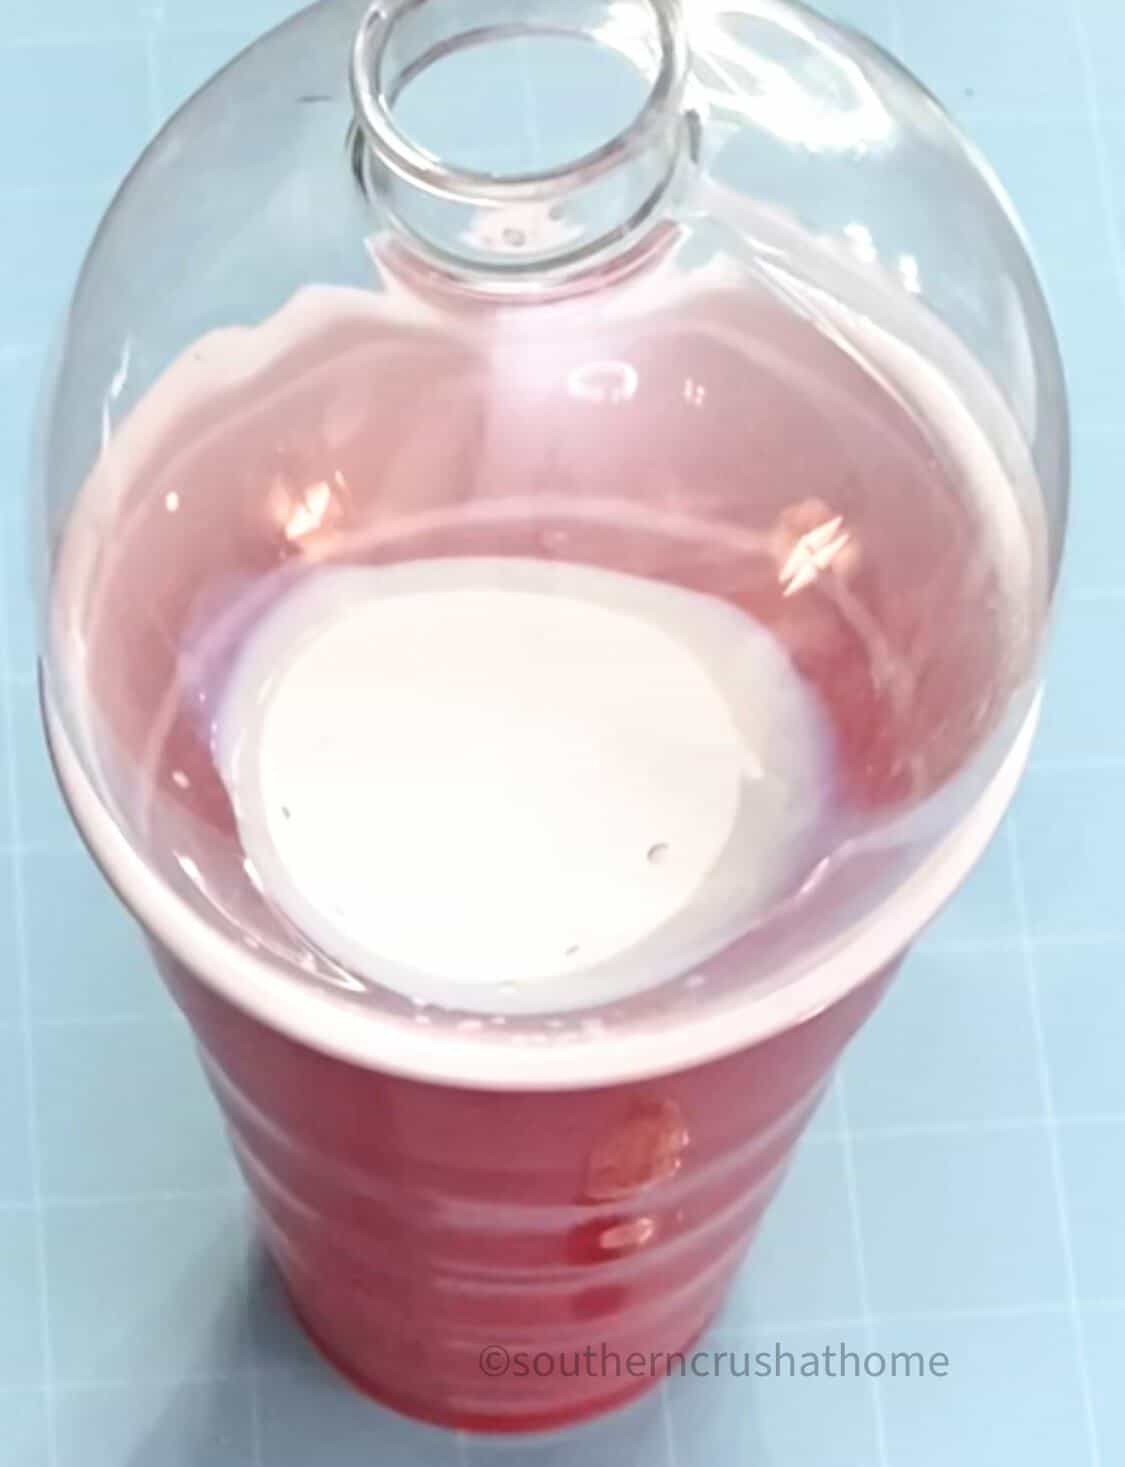
Remove the ornament hanger from the ornament. Drop a small amount of the pouring medium into the ornament ball. Pour a small amount of acrylic paint into the ornament ball.
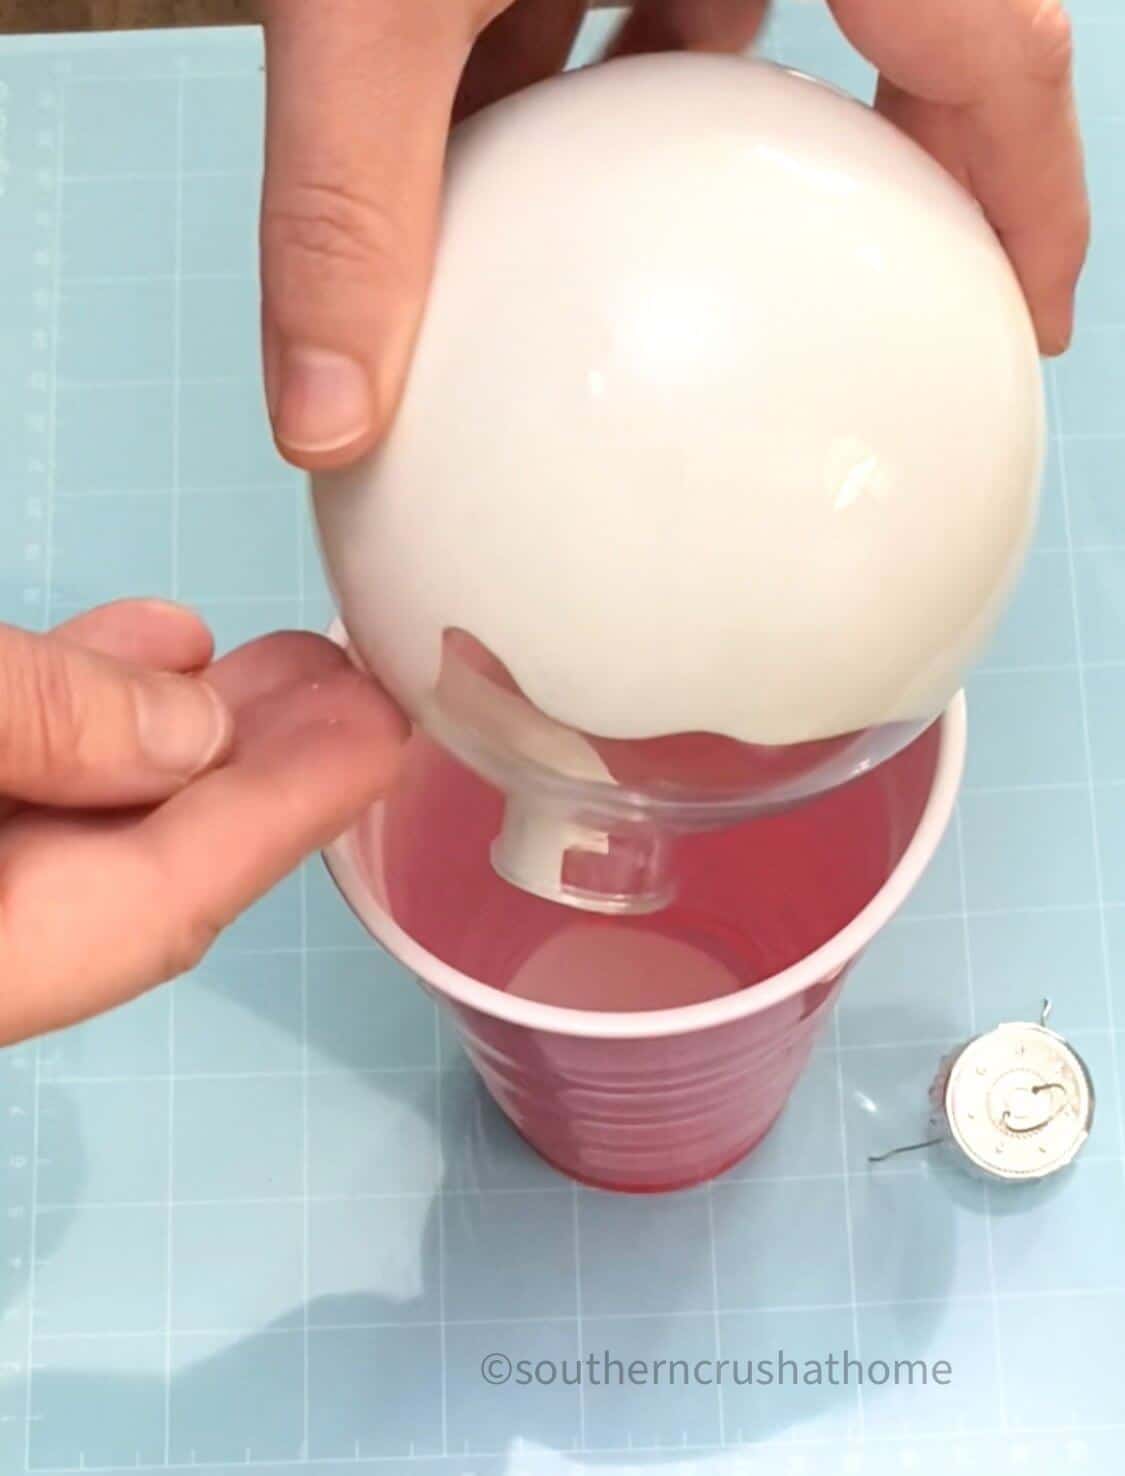
Swirl around in the bottom to mix and then swirl around to coat the inside of the ball. Turn the ornament upside down and allow it to drip dry inside the plastic cup. (You can also use a heat gun to speed it up, but be careful not to melt the plastic ornament.)
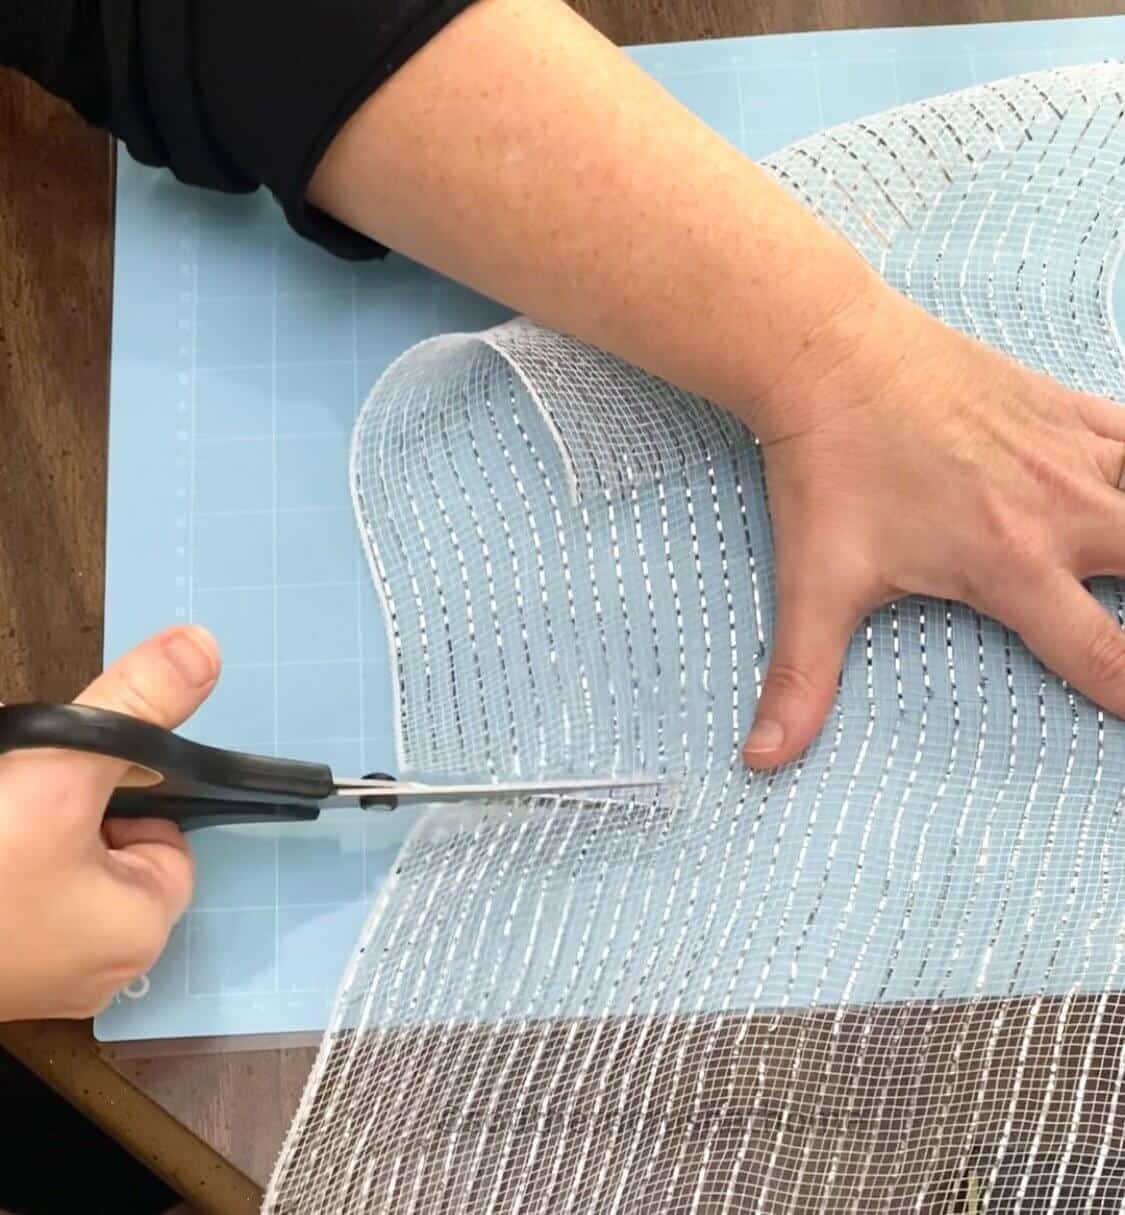
Step Two: Cut and Gather the Deco Mesh
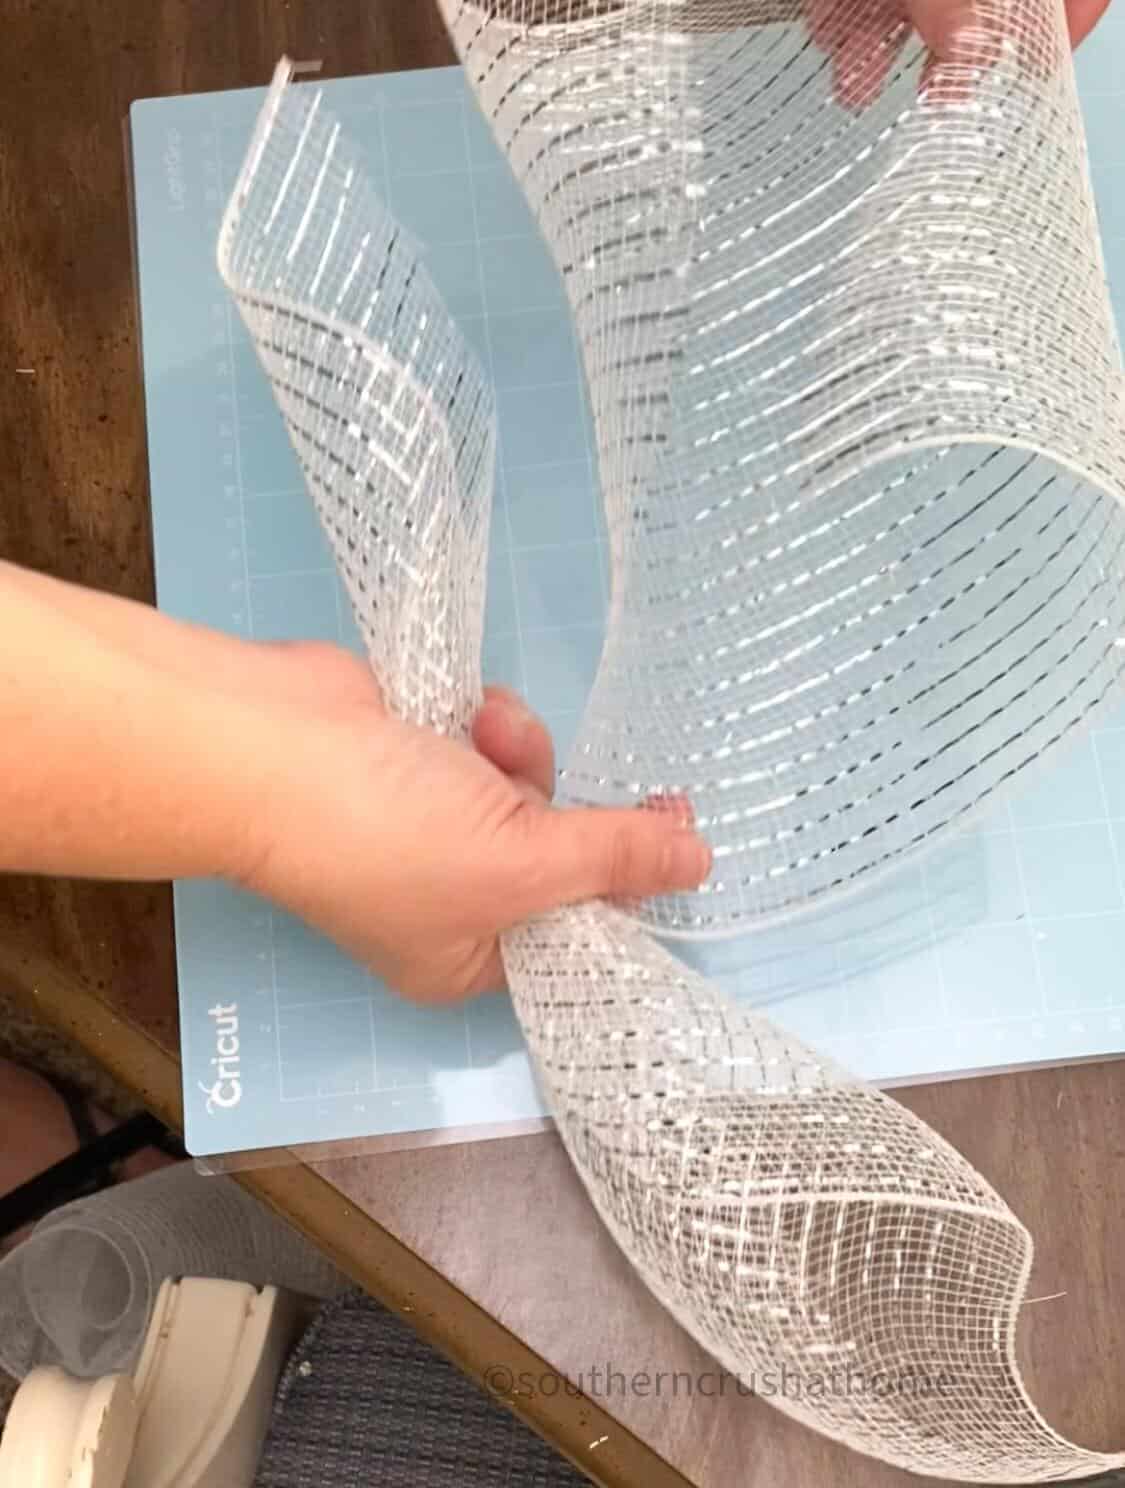
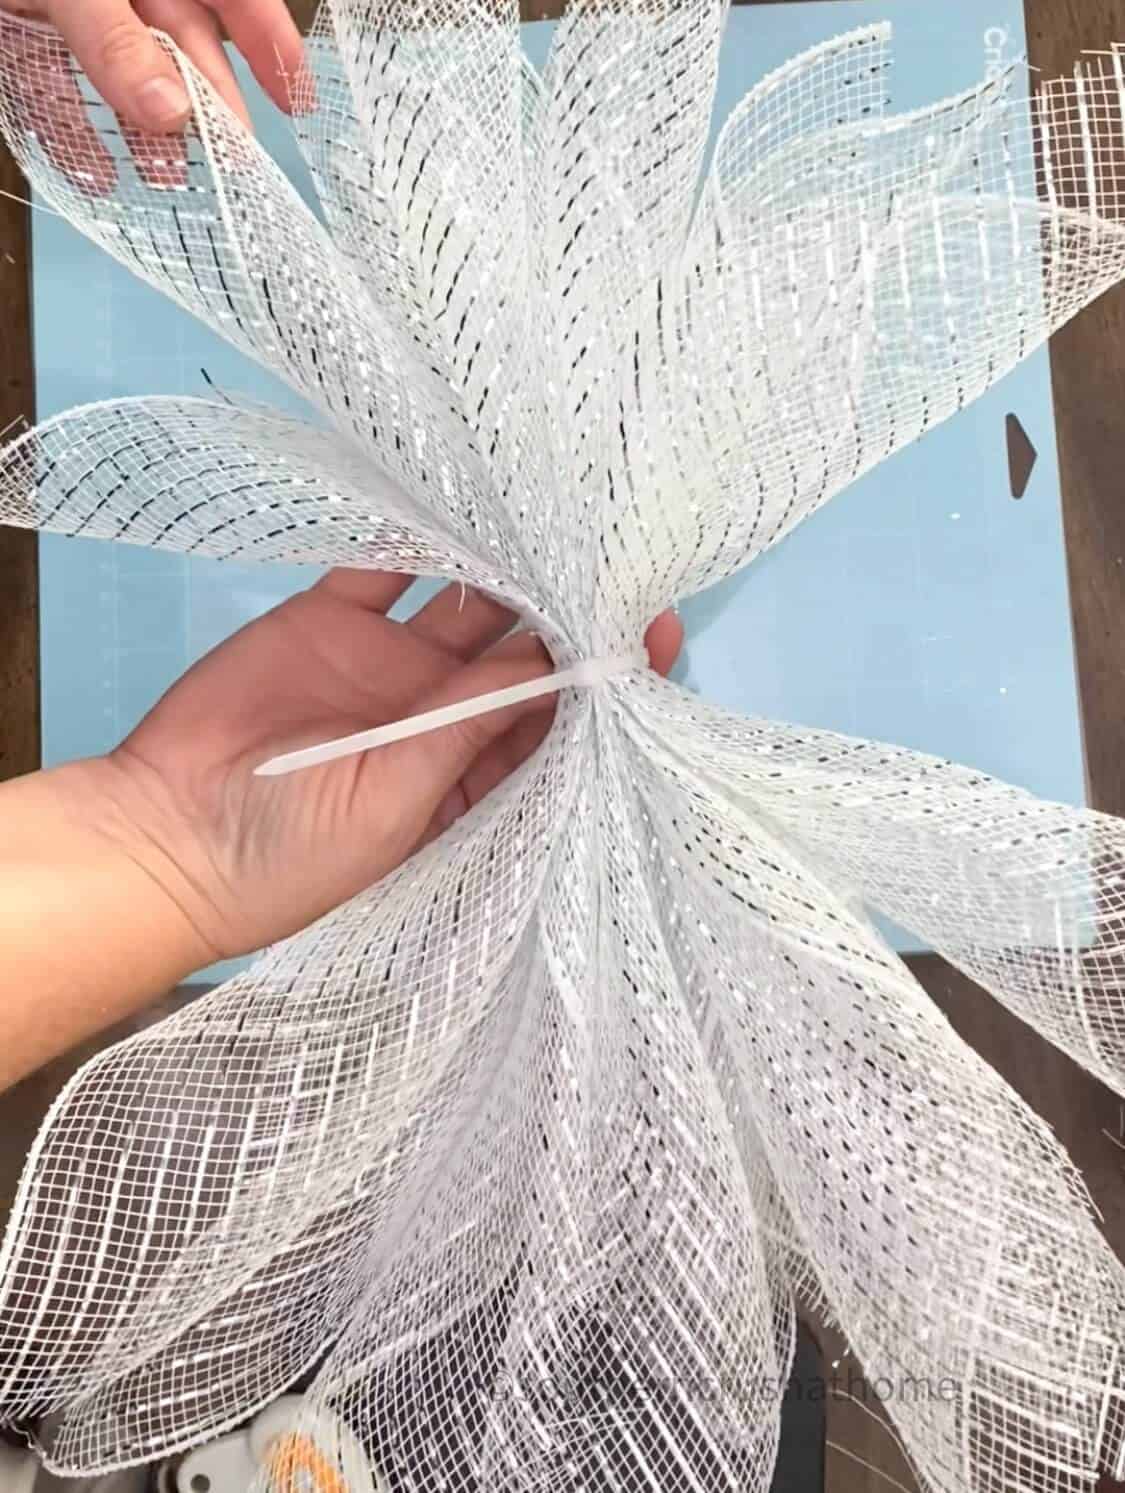
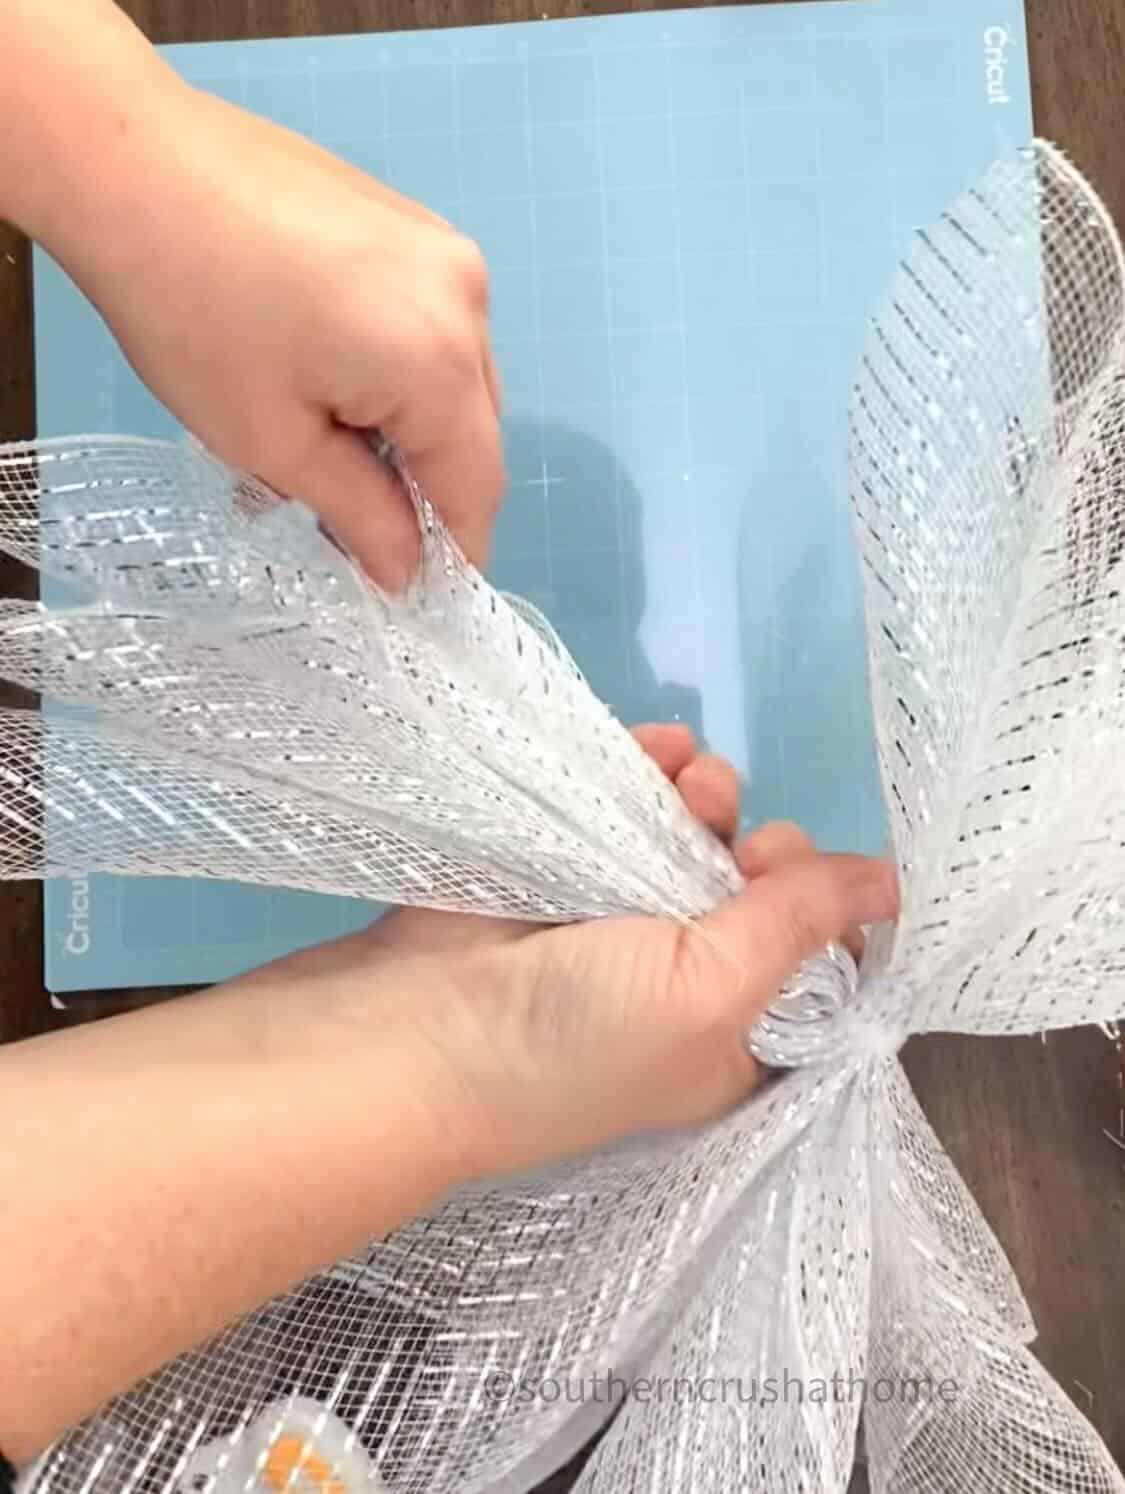
Cut the 10″ deco mesh into ten, 10″inch strips. Taking opposite corners of the mesh pull them outwards and then pinch in the center. Collect all ten pieces in one hand at the center. Secure with one of the clear zip ties at the center.
Step Three: Secure the Deco Mesh
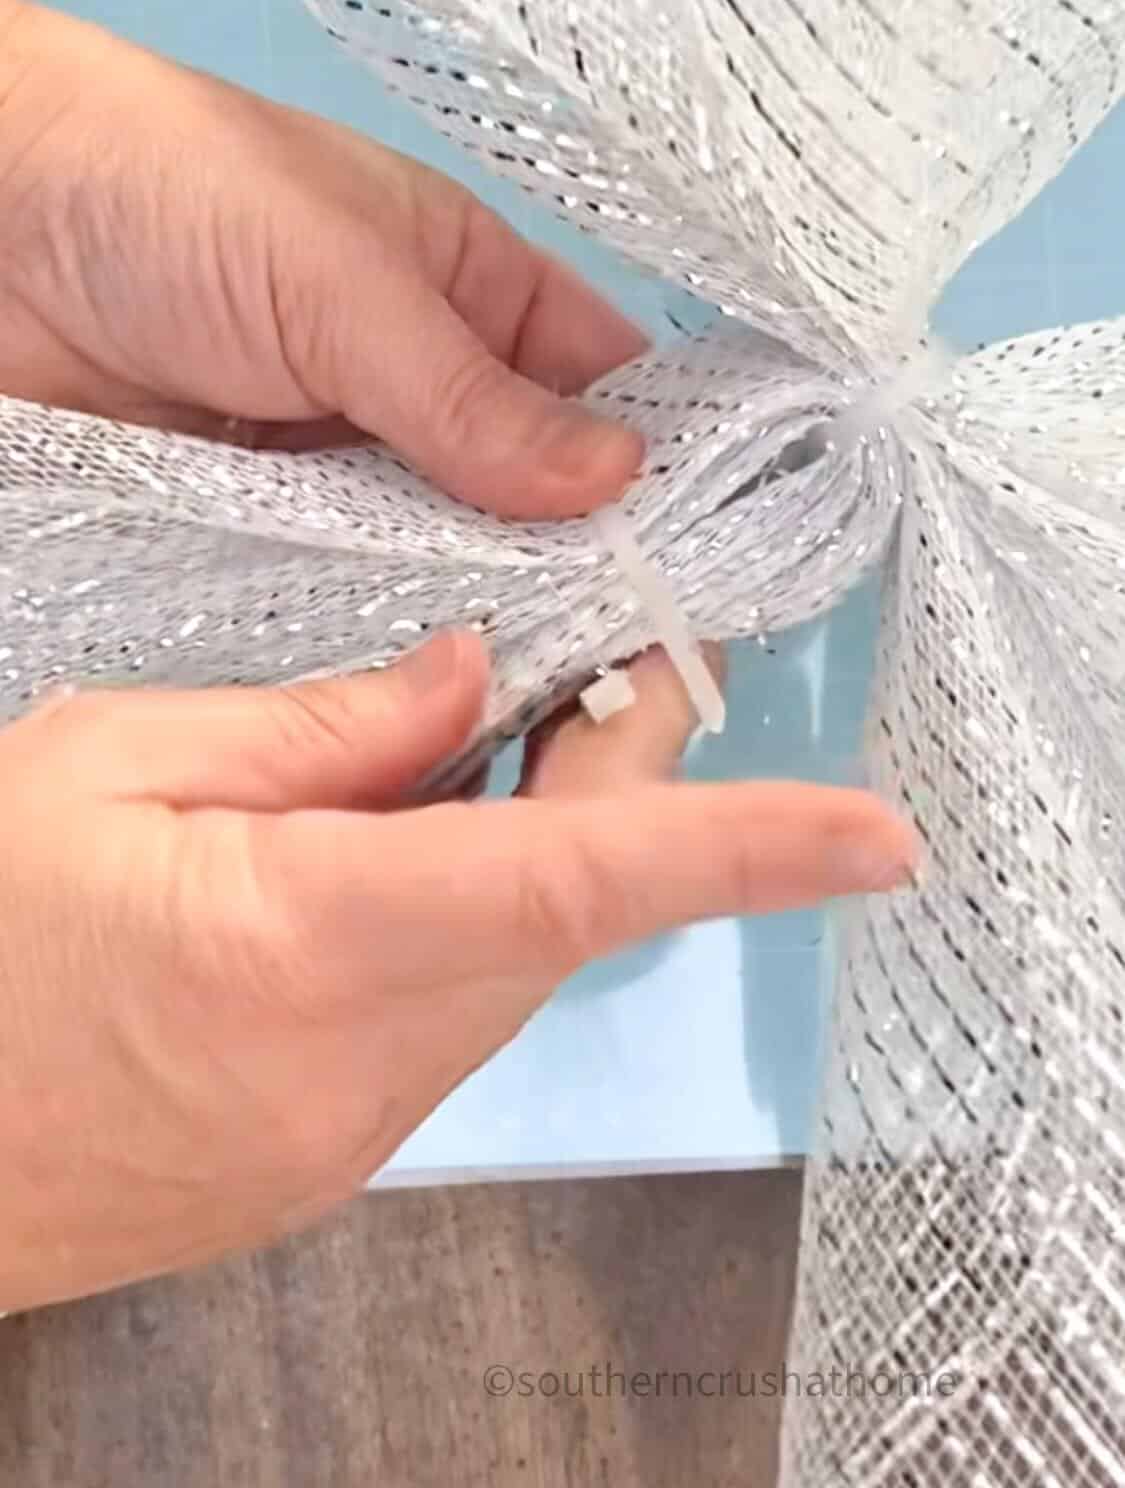
Section off five tails from each side of the arrangement and secure with a second zip tie approximately 1-2″ down to create the bottom half of the Christmas angel.
Step Four: Assemble the Christmas Angel
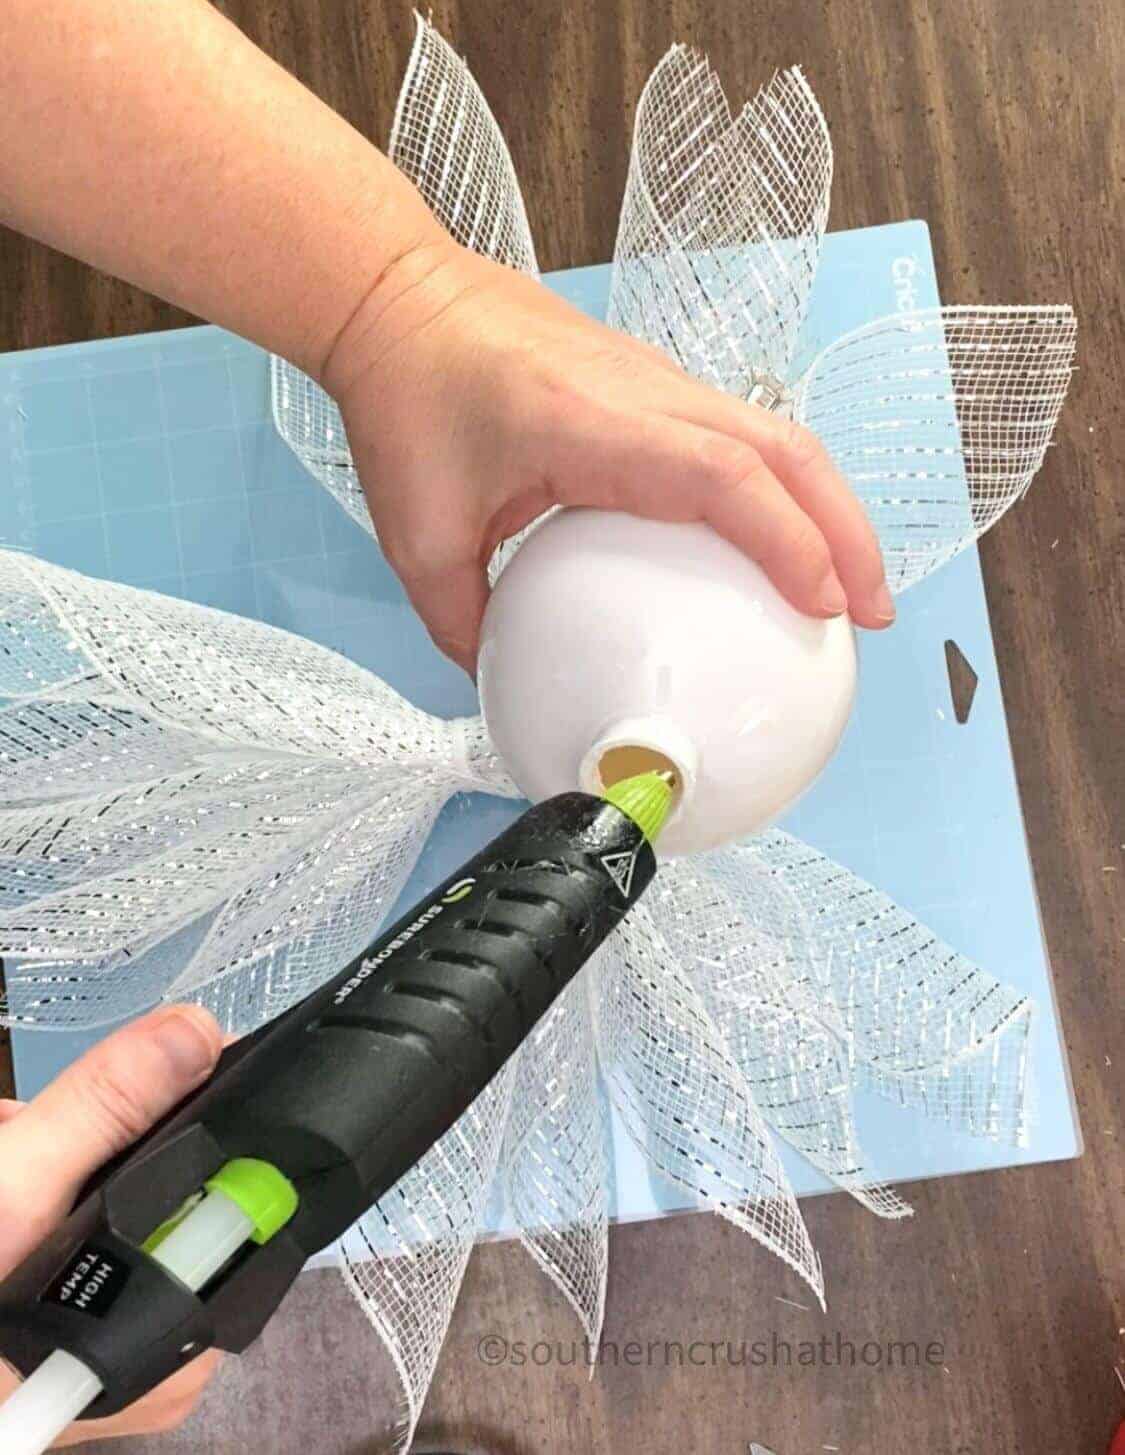
Hot glue the ornament onto the top of the center of the angel shape.
Step Five: Optional Embellish the Deco Mesh Christmas Angel
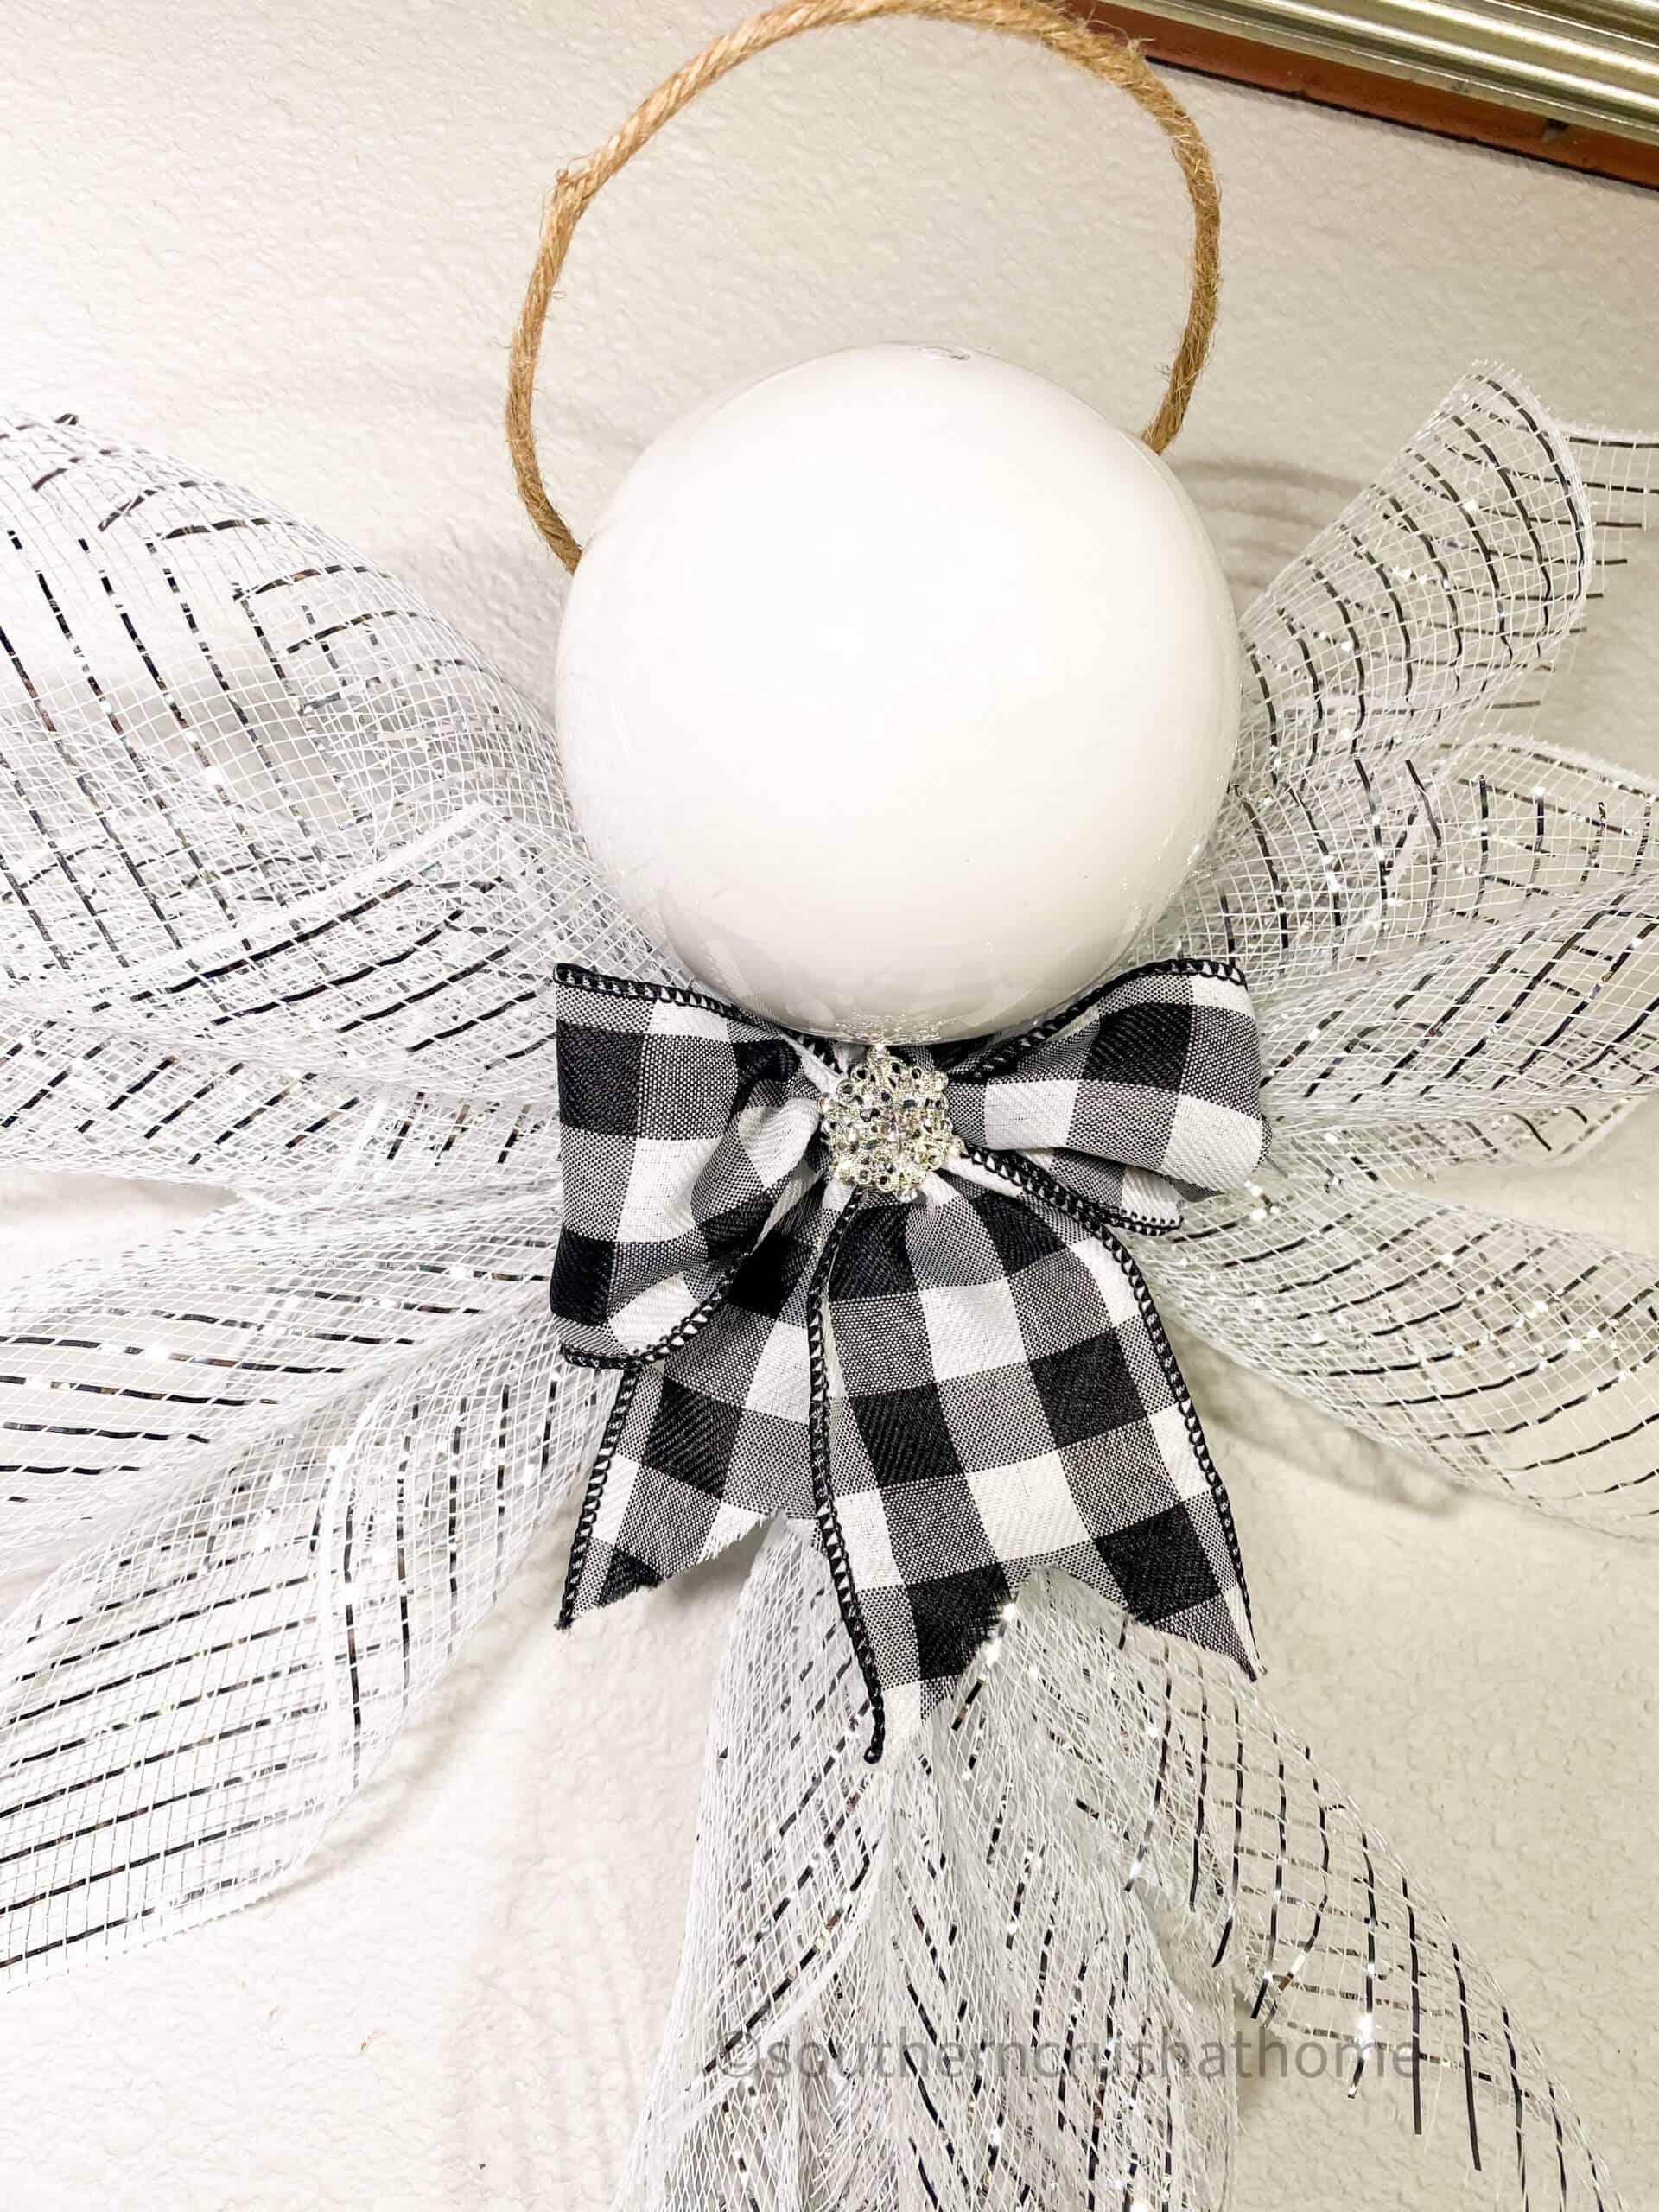
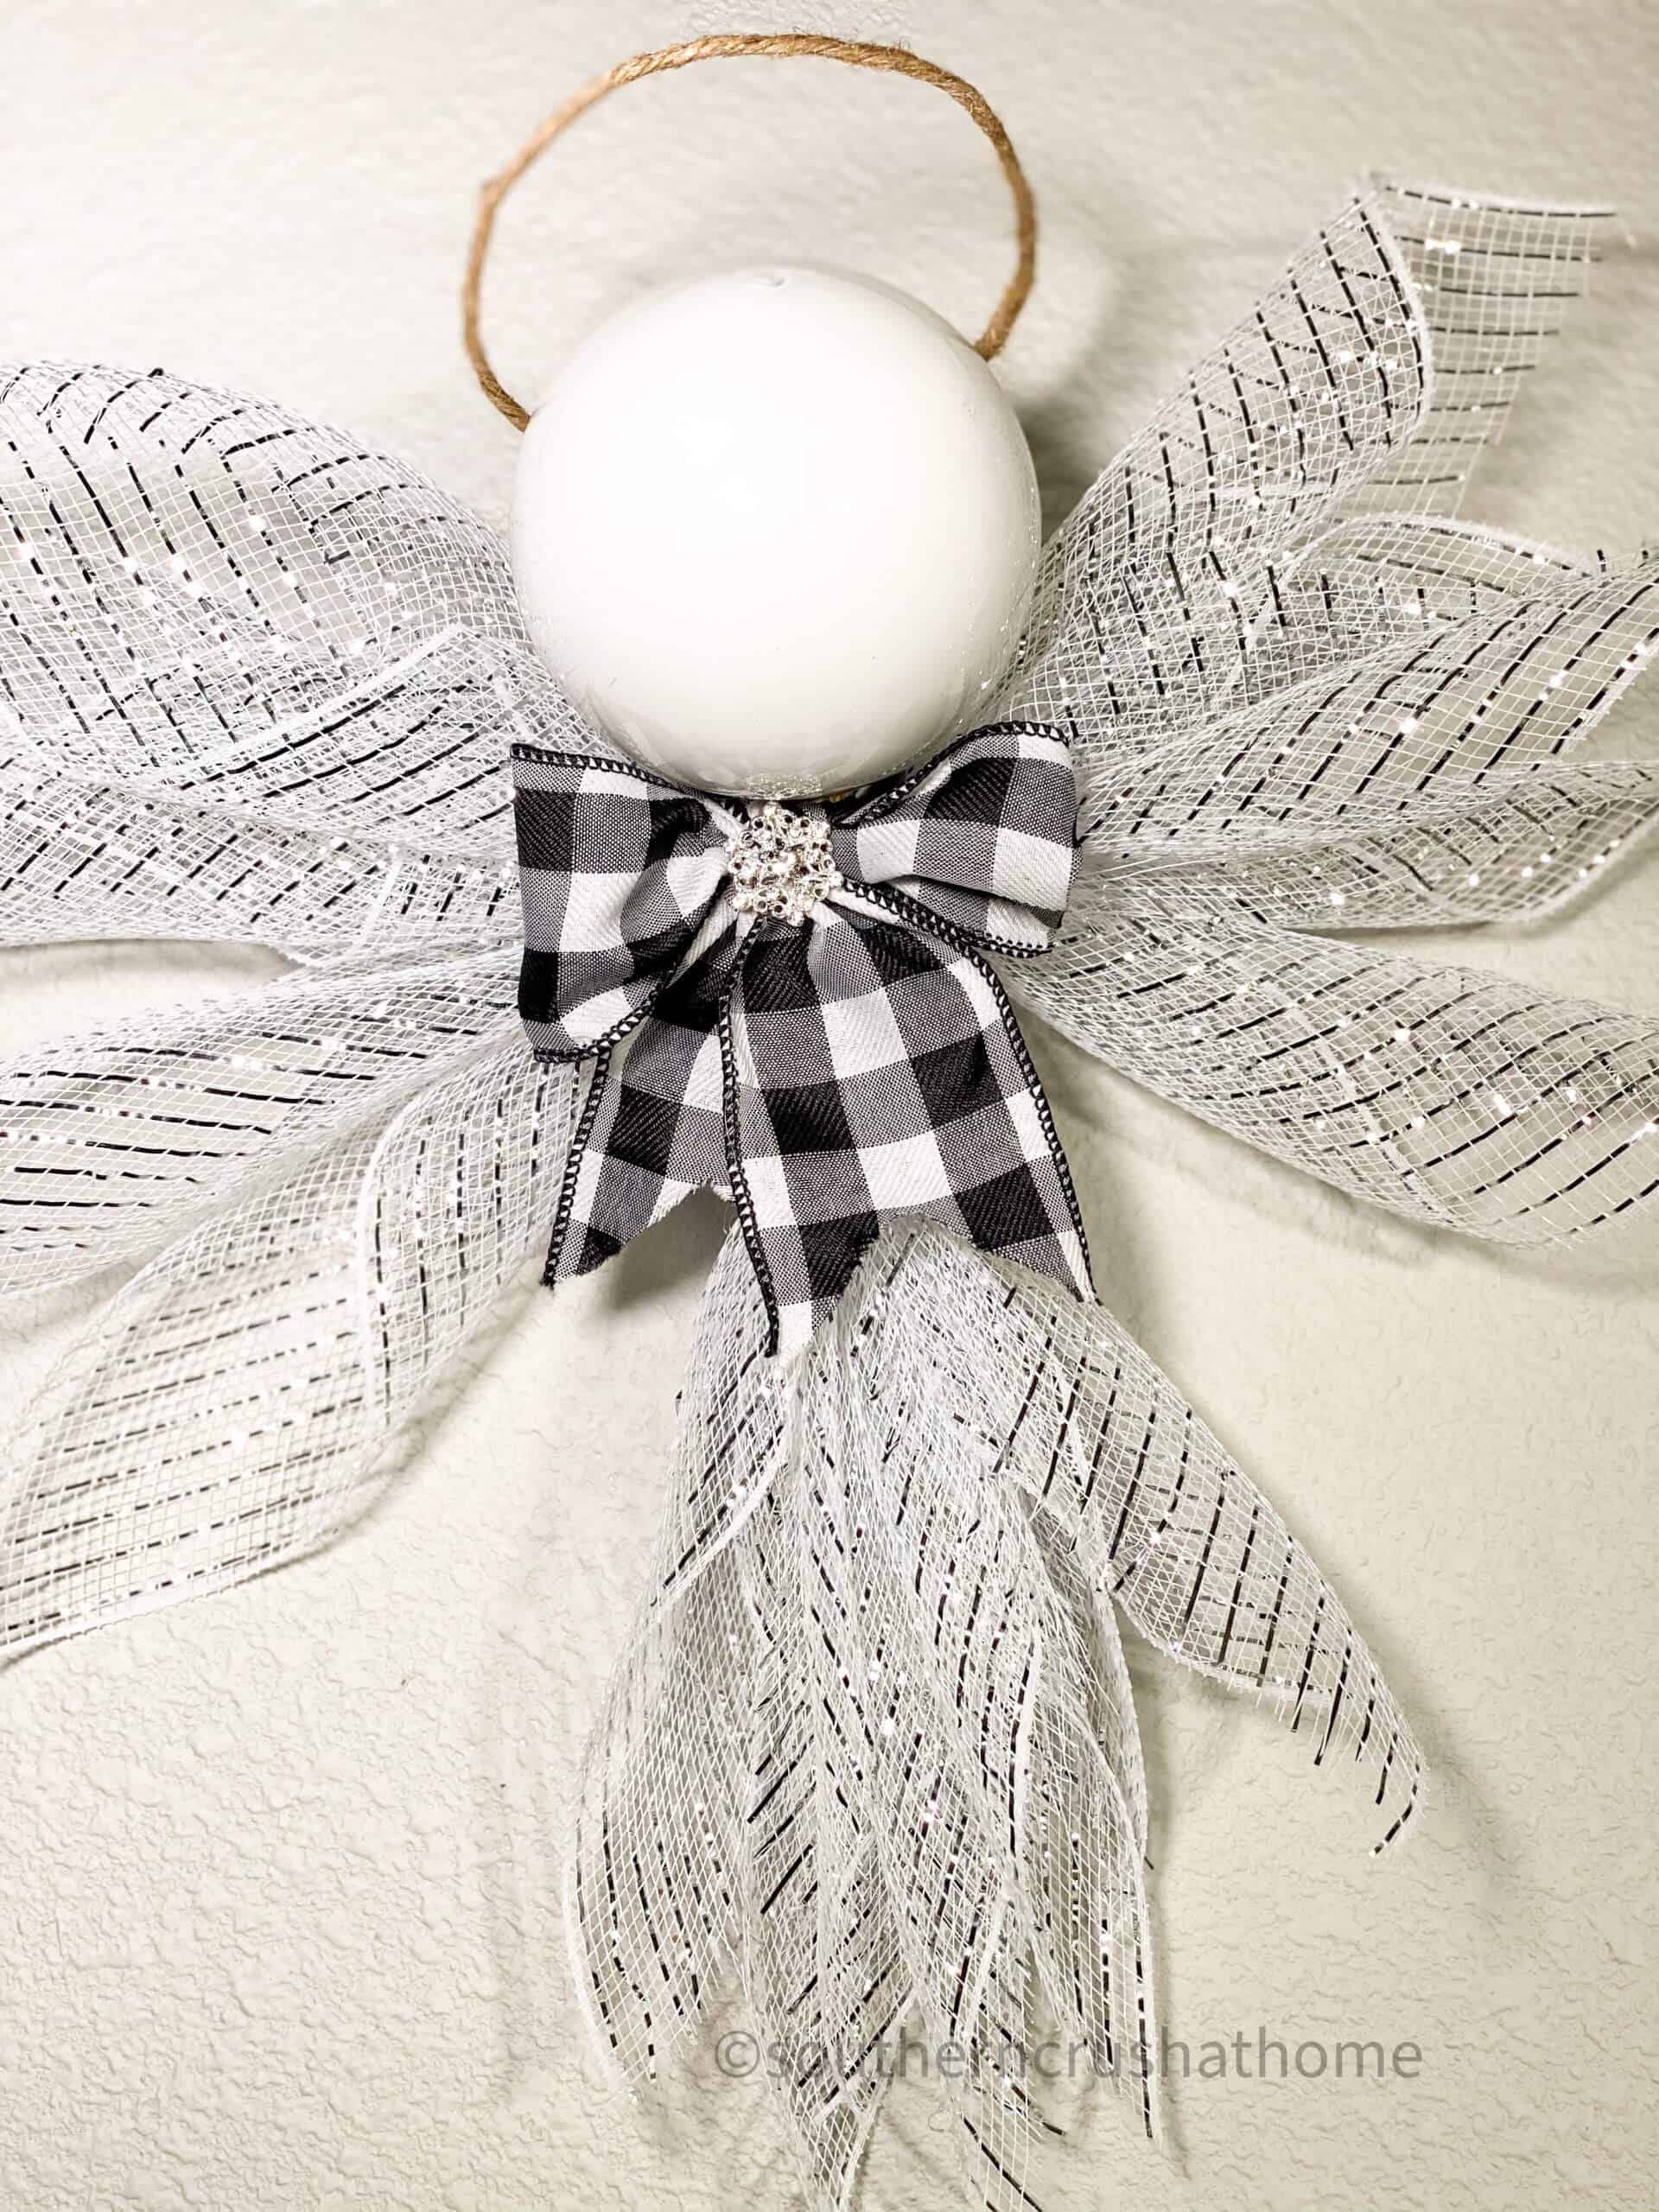
Using the wired jute twine; glue around the “neck” of the ornament and create a halo.
Taking the ribbon of your choice tie a pretty bow around the neck of the ornament to hide the twine and pull the bow tails down to hide the zip ties.
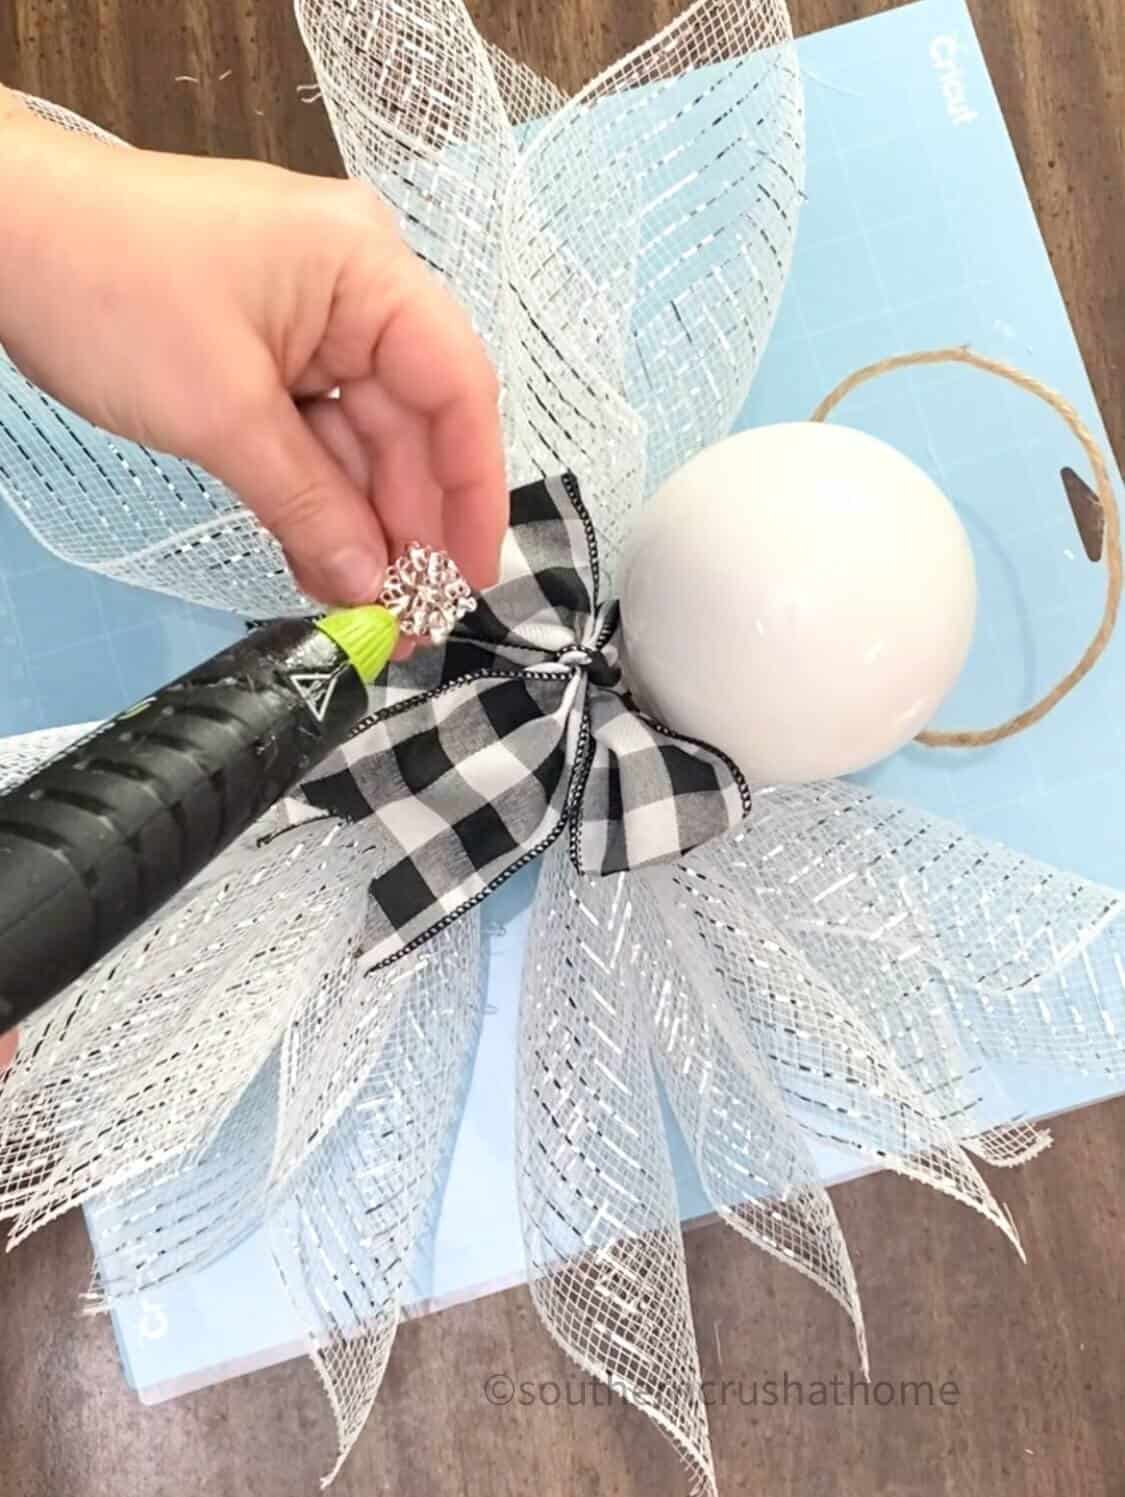
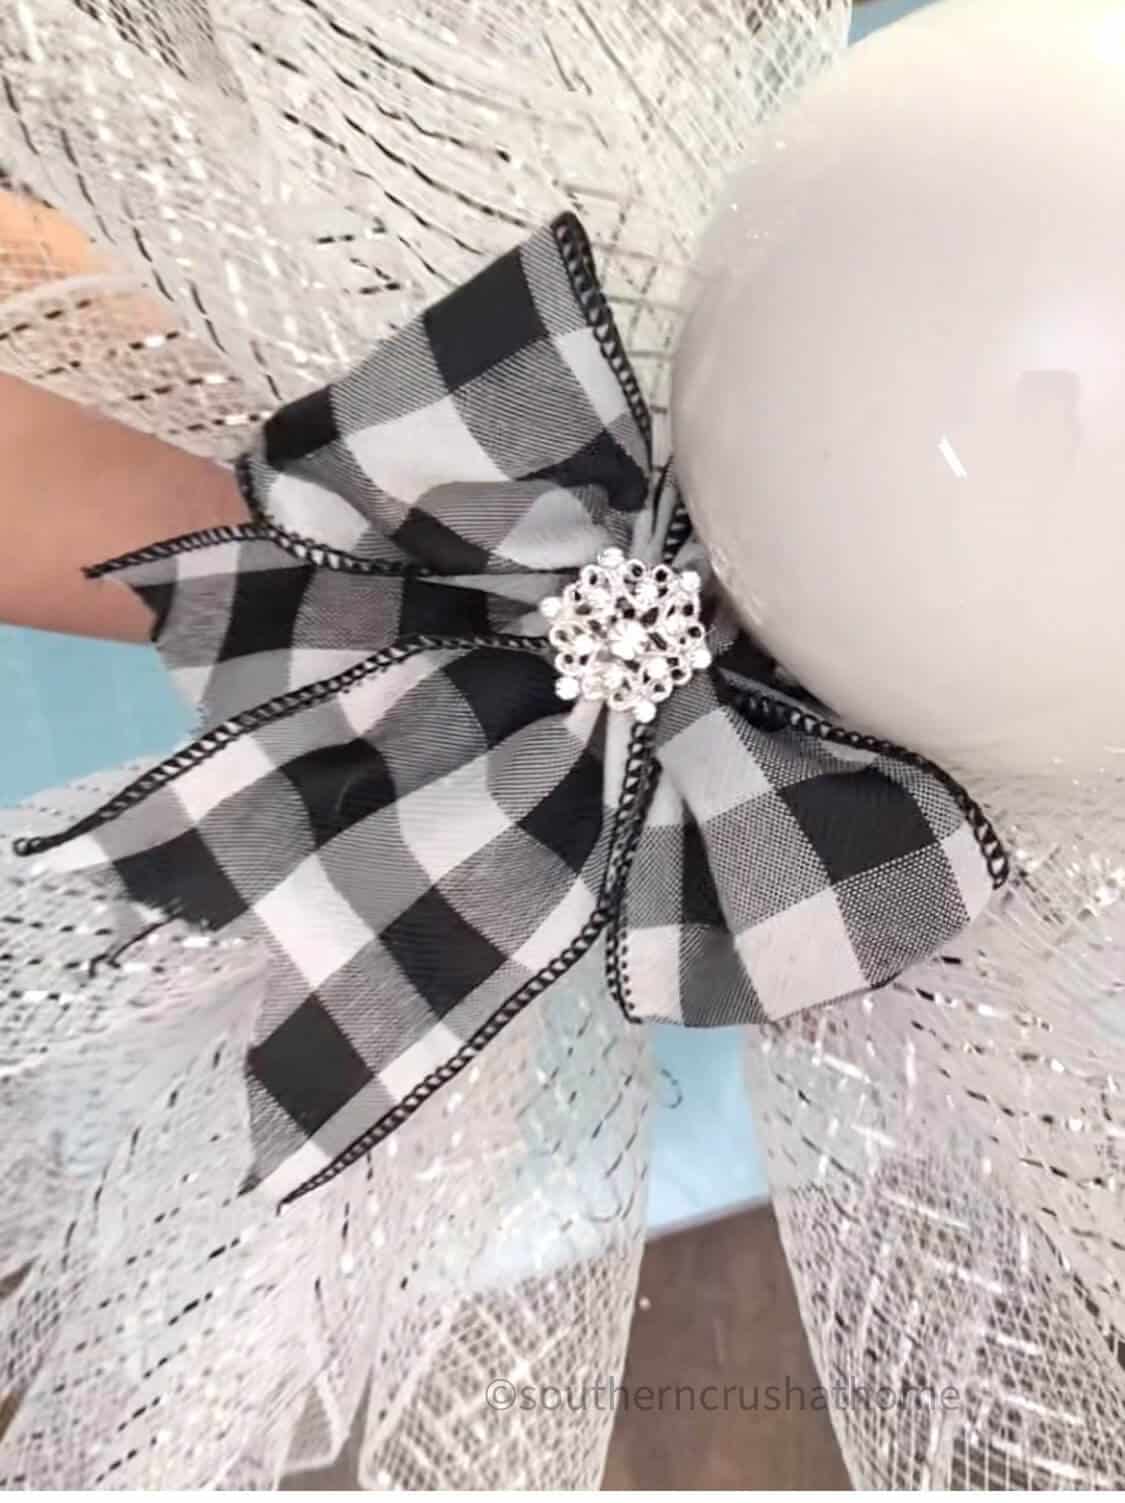
Hot glue an embellishment to the center of the bow.
If you wish to hang the angel; add a third zip tie in the back as shown in the VIDEO TUTORIAL.
If you missed the VIDEO TUTORIAL it can be seen HERE.
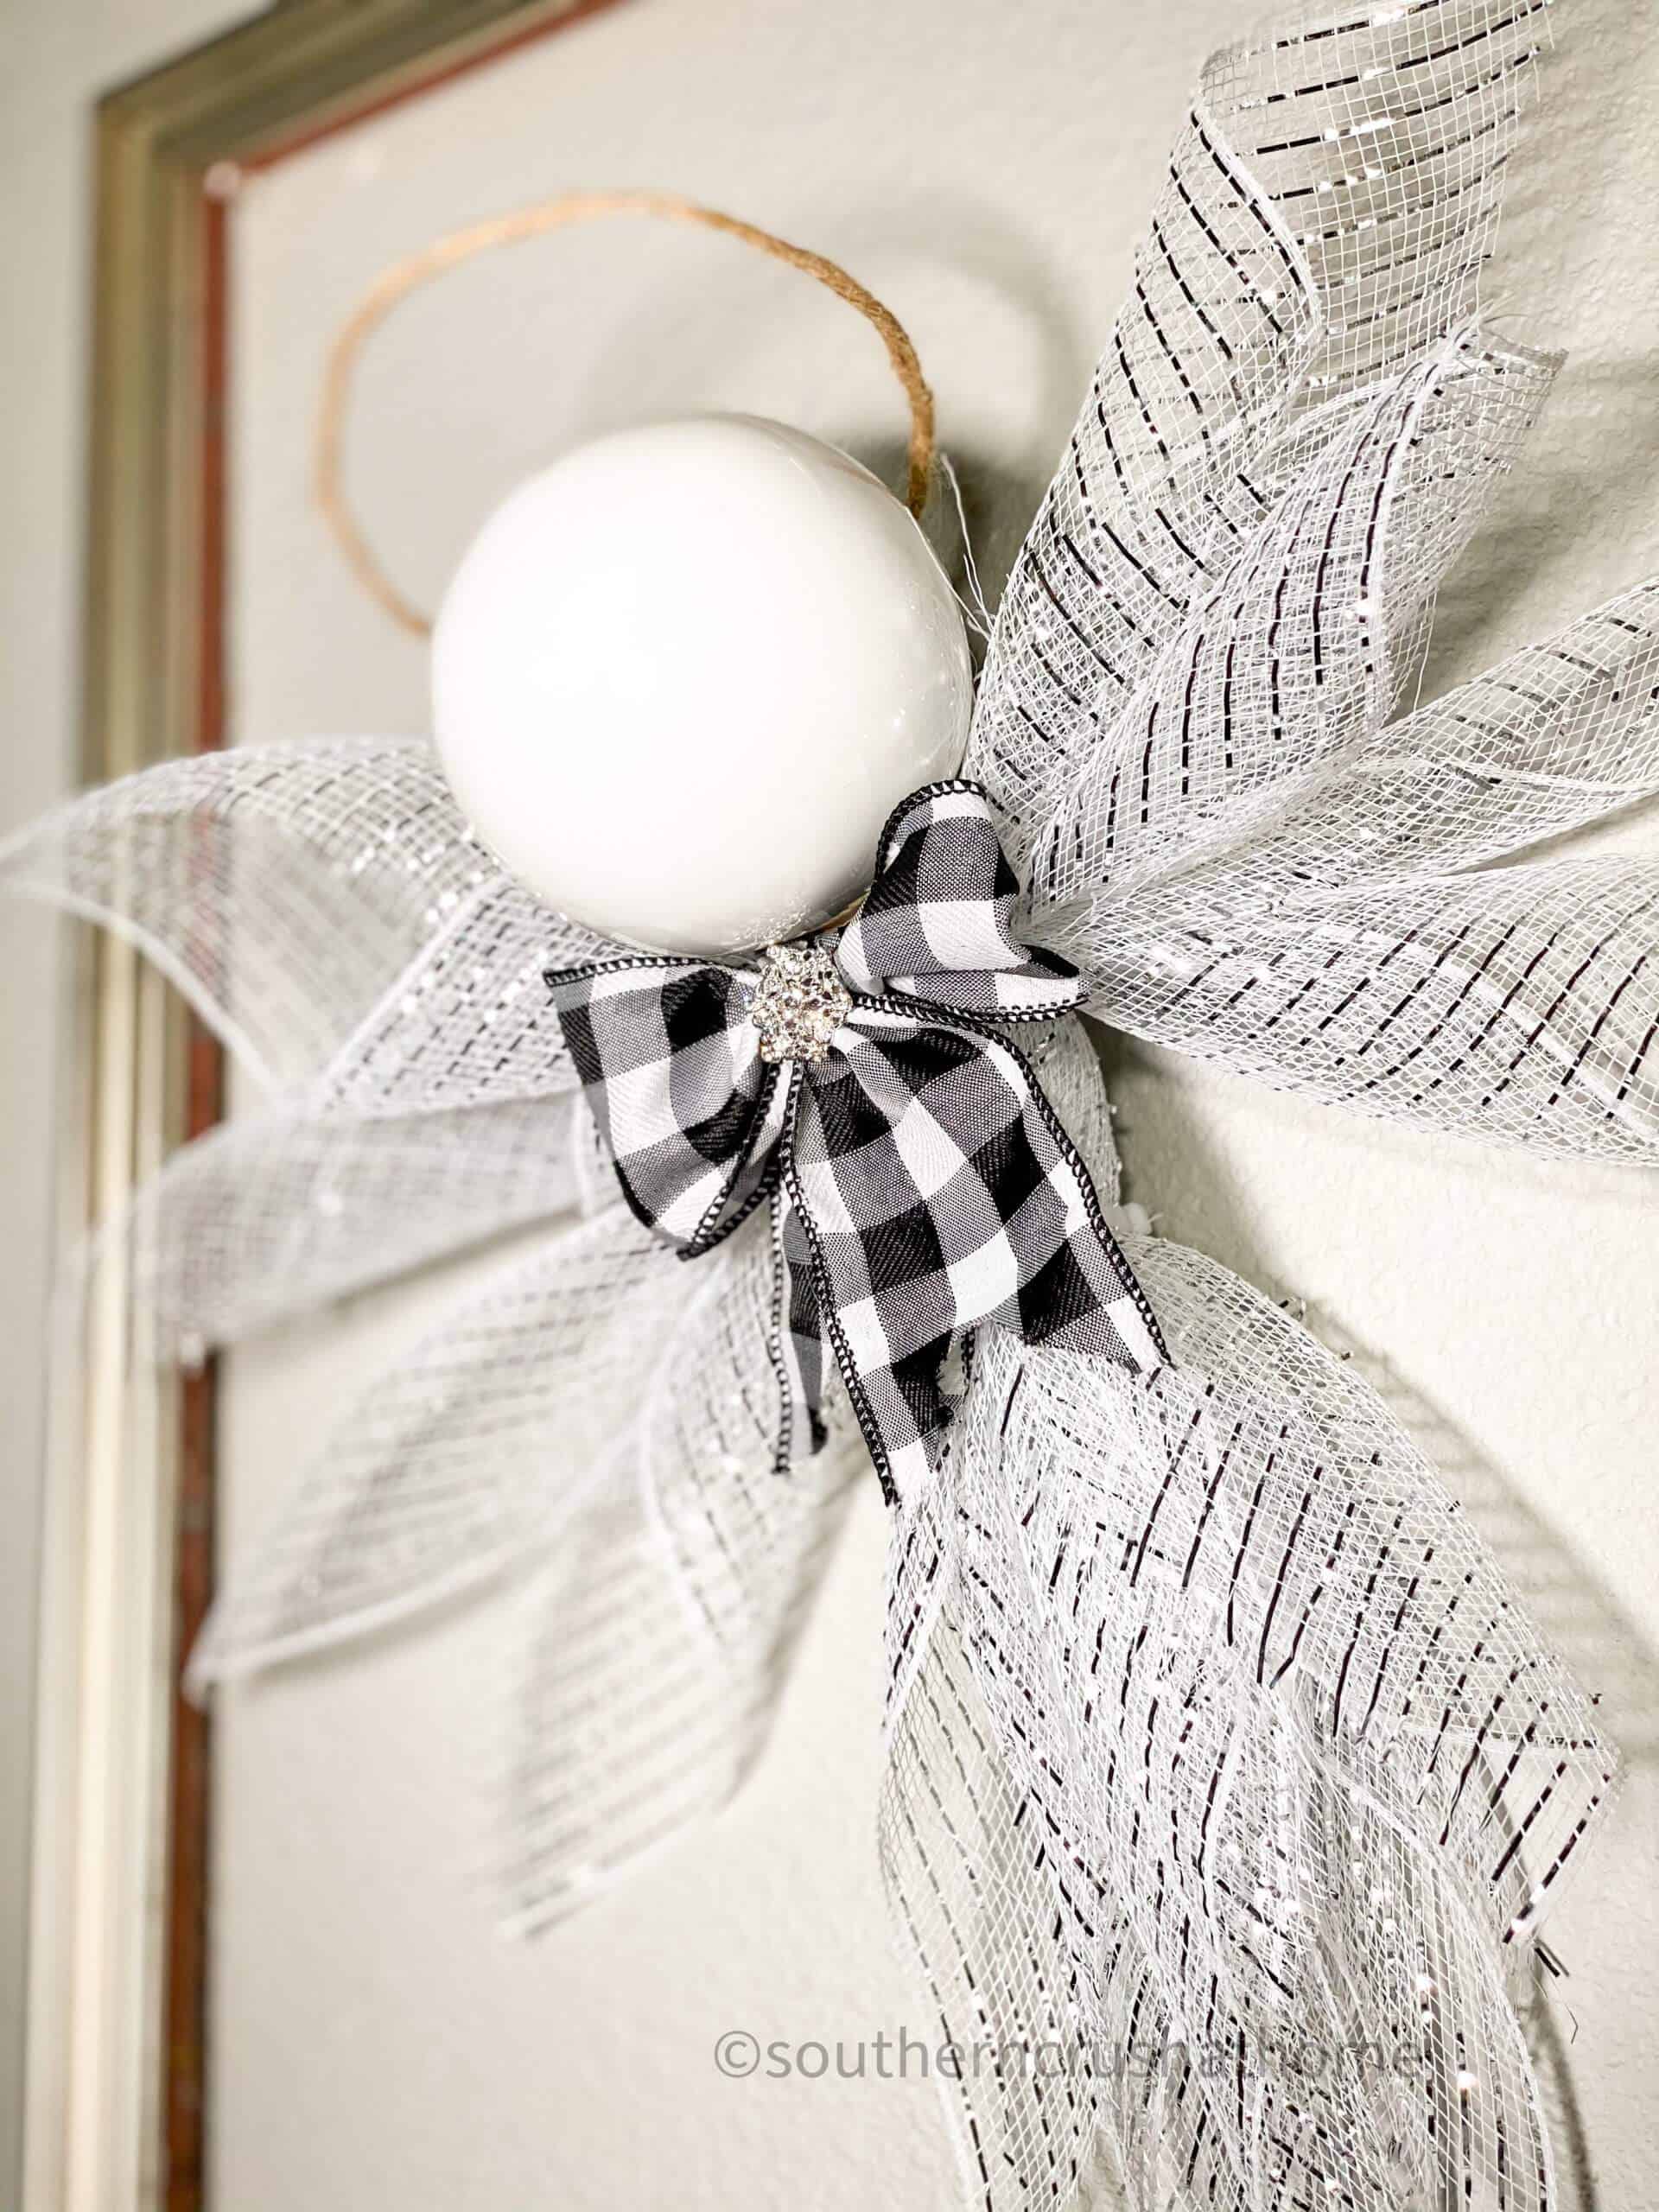
And… You Have a Deco Mesh Christmas Angel
These will definitely surprise you with how easily they come together! You will quickly want to make one, two, or even an entire choir of Christmas angels.
They turn out so beautiful, too! You can certainly use whatever ornament you wish; maybe even one that is already a color that matches your Christmas tree.
Play around with the ribbon colors as well. Maybe you like gold, silver or even a brighter color like red or blue velvet would be pretty, too! Get creative, Have fun!
Deco Mesh Christmas Angel
Materials
- 1 Plastic ornament ball any size you choose
- Pouring Medium
- Acrylic Paint I used white
- 1 Plastic cup
- Glue Gun
- Wired Jute Twine from Dollar Tree
- 10 strips 10" Deco Mesh I used white with silver strands
- 2 Zip Ties clear
- Ribbon of your choice
- 1 Optional embellishment I used my favorite bling
Instructions
- Remove the ornament hanger from the ornament.
- Drop a small amount of the pouring medium into the ornament ball.
- Pour a small amount of acrylic paint into the ornament ball.
- Swirl around in the bottom to mix and then swirl around to coat the inside of the ball.
- Turn ornament upside down and allow to drip dry inside of the plastic cup. (You can also use a heat gun to speed it up, but be careful not to melt the plastic ornament.
- Cut the 10″ deco mesh into ten, 10″inch strips.
- Taking opposite corners of the mesh pull them outwards and then pinch in the center.
- Collect all ten pieces in one hand at the center.
- Secure with one of the clear zip ties at the center.
- Section off five tails from each side of the arrangement and secure with a second zip tie approximate 1-2″ down to create the bottom half of the Christmas angel.
- Hot glue the ornament onto the top of the center of the angel shape.
- Using the wired jute twine; glue around the “neck” of the ornament and create a halo.
- Taking the ribbon of your choice tie a pretty bow around the neck of the ornament to hide the twine and pull the bow tails down to hide the zip ties.
- Hot glue on an embellishment to the center of the bow

PIN this for later!
What a wonderful angel name should be freyA
Bella would be a good name since it is beautiful!
I would name her Miracle because we could all use a little miracle in our lives!!
I would name her “Hawaiian Angel.” She looks so precious and felt the call of Hawaiian Angel. Im going to make one someday to have her in my home.
I ???? your angel and I would call her Desire! We all desire a beautiful angel like yours!
Angelica – first name that came to me. For those Angelic moments you have when you’re crafting. She’s so beautiful! I’m going to try making one. ❤️
I love it! I’m glad you’re going to make one!
I want to make the mesh angel but how do you keep the mesh from freying so much?
It does fray. It’s mesh so it’s going to fray, let me know if you find a solution as I do not have one.
I found out if you cut it with a sodering gun it melts it ant stops it from fraying.
If u get a wood burner to cut ur pieces it will not fray-it worlkd
Cut your pieces of mesh with a wood-burning tool. I have one dedicated just for mesh. It seals the mesh as you run your cut line.
Zip–no fraying!! Thanks for all the beautiful ideas. Now get yer groove on..im hoping to find time this fall to do some????..great therapy after a fire in our home ????
I’m so sorry to hear about your fire! Yes, a burning tool is on my list of things to invest in! Thank you for being here–I appreciate you!
I really like it
thank you so much!
I like the name Angelette…tis French for “messenger of God”
ho tagliato i vari pezzi, si sfilacciano e non ho gli attrezzi descritti dalle varie chat, anche perché non saprei dove comprarli. come posso fare?
Translation: I cut the various pieces, they fray and I don’t have the tools described by the various chats, also because I don’t know where to buy them. how can I do?
Try this tool (aff link): https://rstyle.me/+r9I00uYzogVfTGtyTxiJdw
I think D’Arcy is a lovely name for an angel love the angel its a must try