Tabletop Christmas Cone Trees (Using a Mop Head)
Christmas cone trees make such beautiful holiday decor. There are so many varieties out there to draw from for inspiration; however, making them out of a Dollar Tree mop head was both super easy and affordable. You will enjoy these tabletop Christmas cone trees for years to come as they are durable and easy to store. Let me show you how to make them…
Be sure to PIN this for later!
how do you make tabletop christmas cone trees?
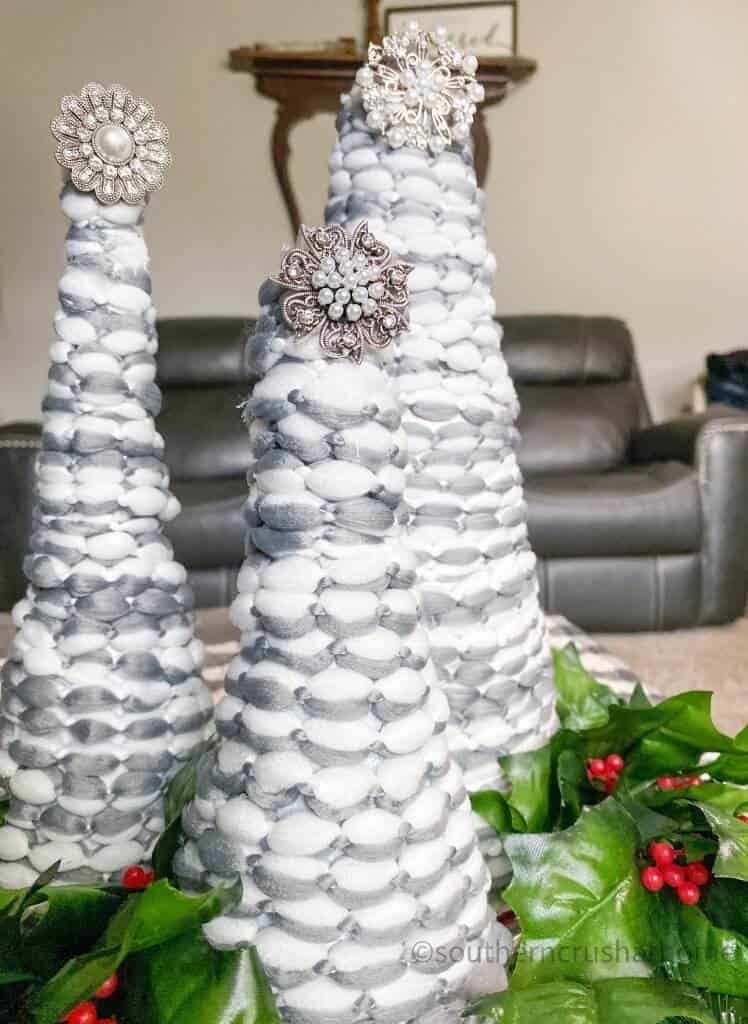
It literally tickles me how easy these are to actually make. You can use a variety of materials and still get the same exact outcome; however, I chose to go with items easily found at my local Dollar Tree. Each Christmas cone tree was a whopping $2 each to create, not including embellishments. I've seen them in stores for around $50-$100 for a trio of Christmas trees to be used as tabletop decor. Make as many of these as you like to use as an arrangement for an entry table, coffee table, tray, dining table, buffet, mantle or just make one to stand alone in a corner of the room as a focal point.
tabletop christmas cone trees you can buy
I looked all over the internet and these were some of the best tabletop trees I could find if you decide you want to buy them instead of make them or if you just want to do like me and use them for additional inspiration!

supplies you'll need to make cone trees
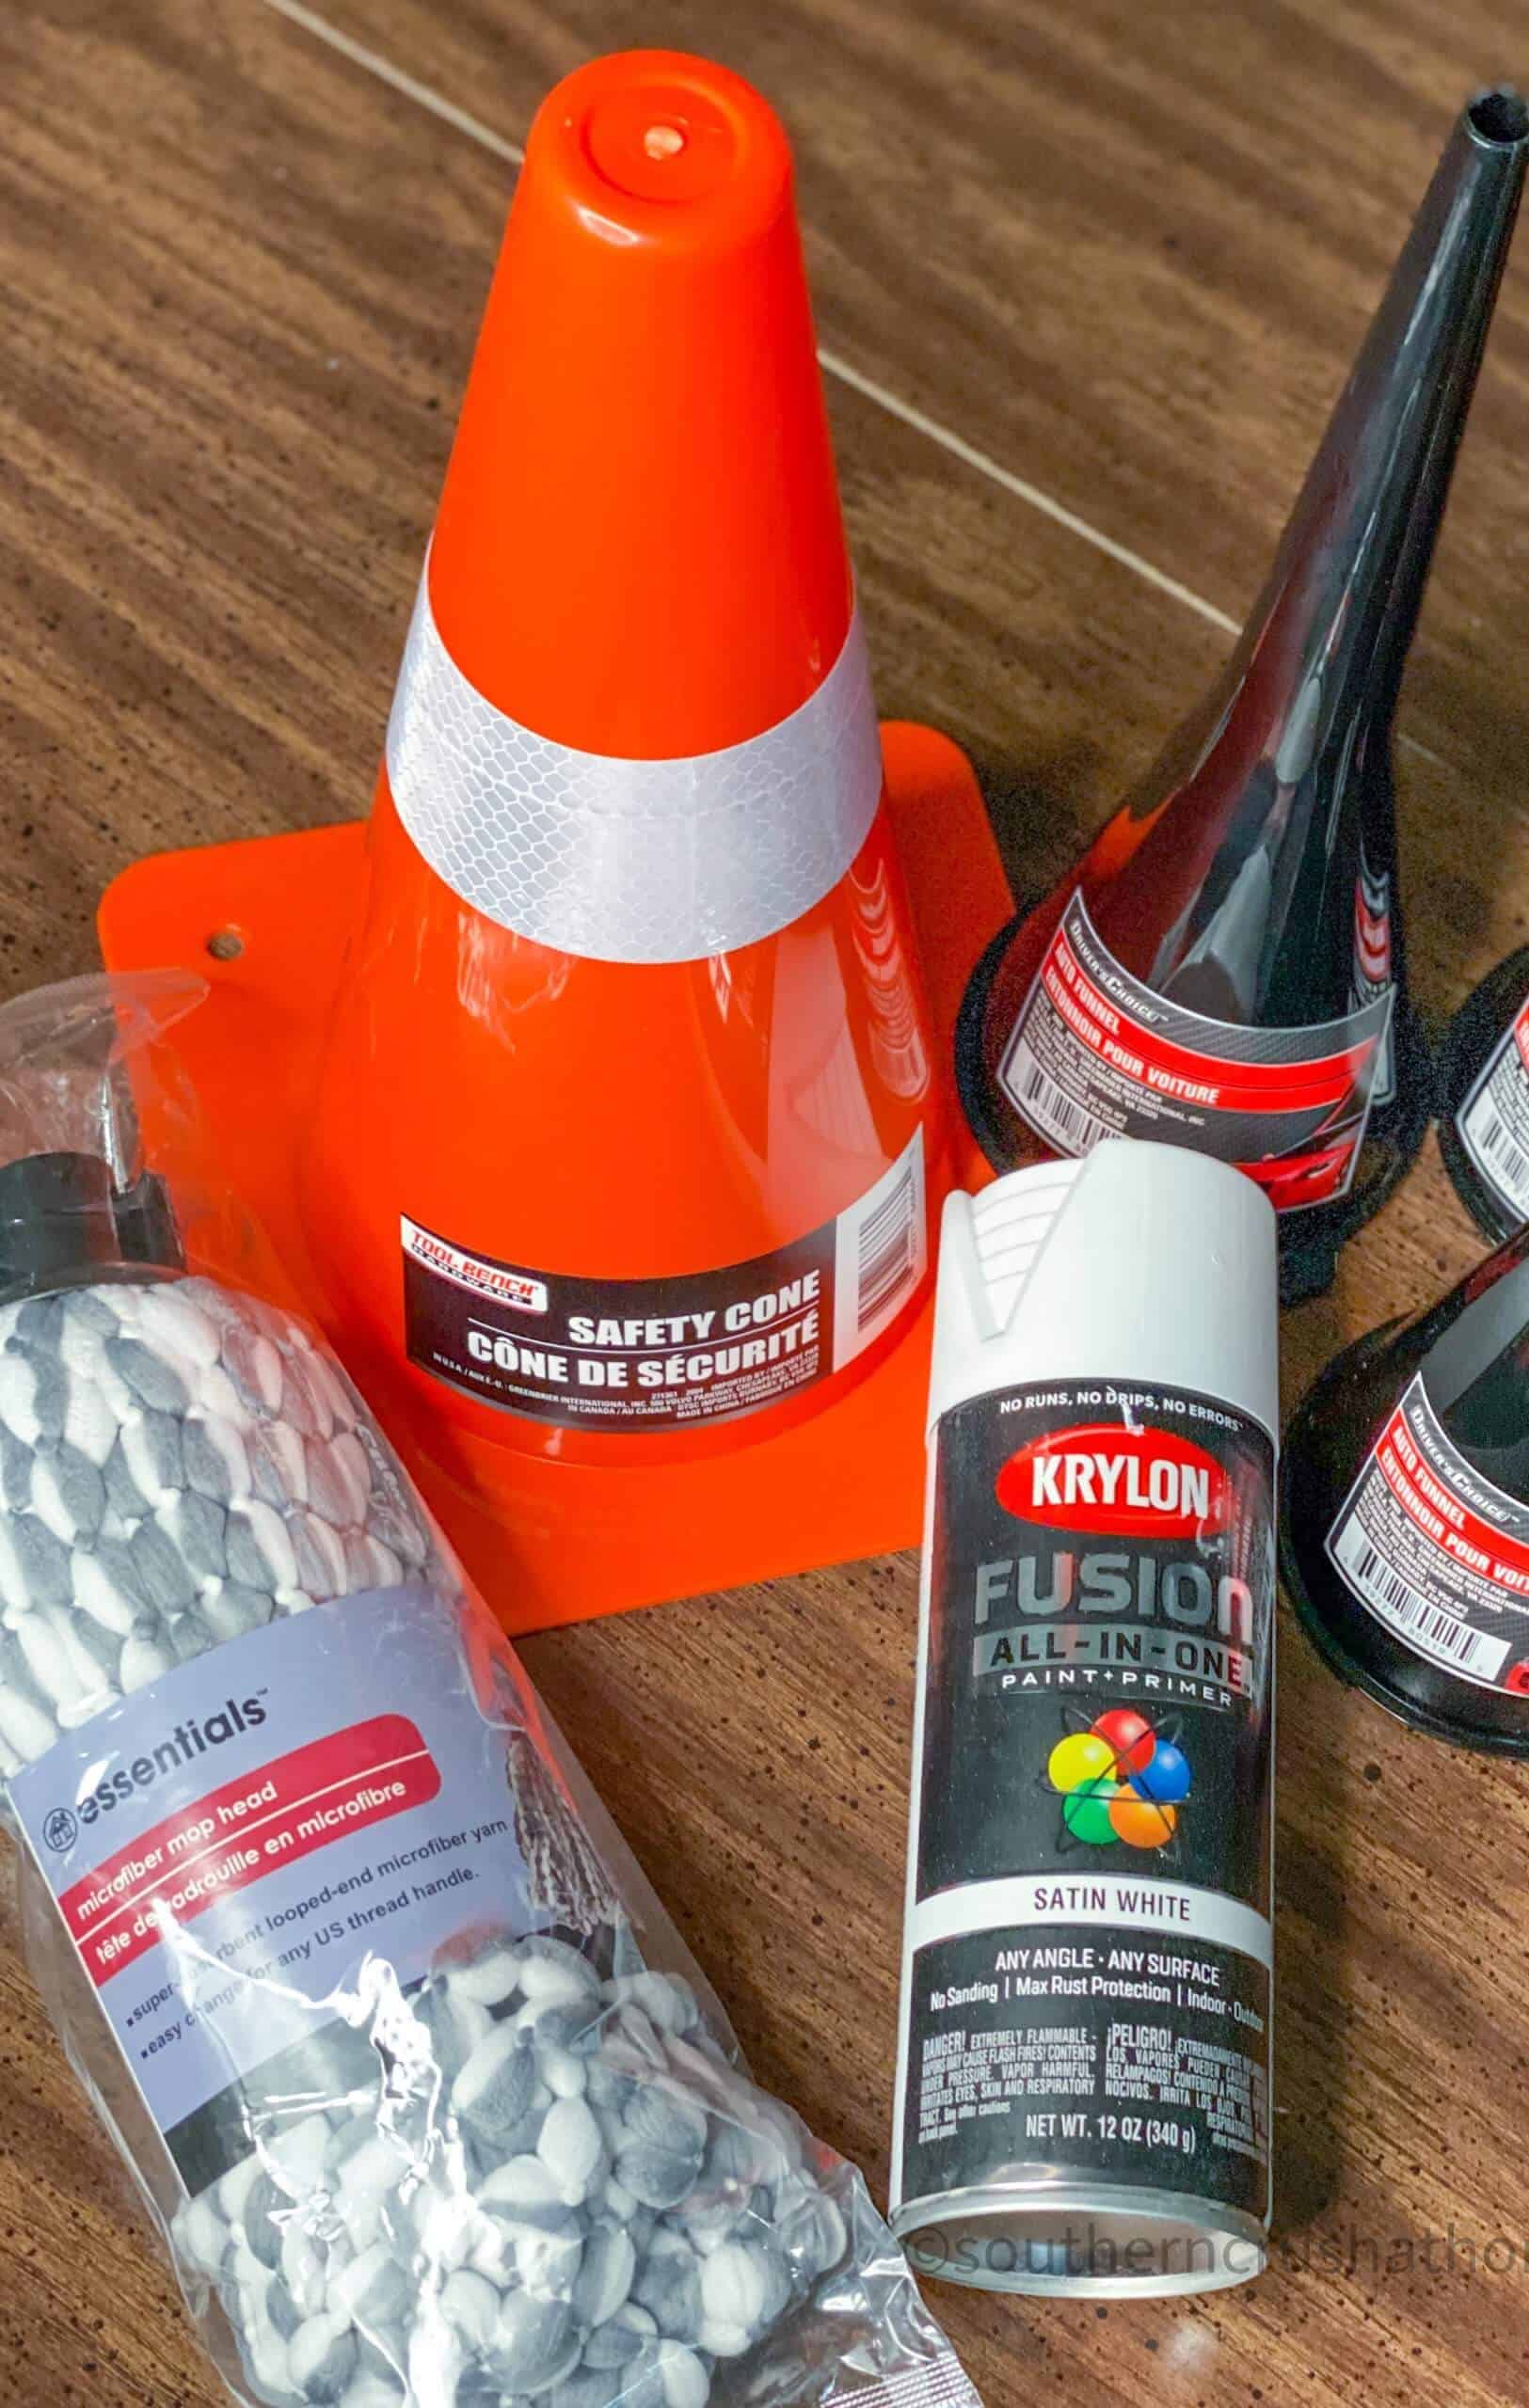
- Cone shaped object (I used an orange safety cone and several oil change funnels from the Dollar Tree)
- Mop head (I used the gray and white one from the Dollar Tree)
- Hot Glue gun and sticks
- Spray paint (white)
- Nippers to remove the bases of the cones if desired
- Embellishments of your choice (I used my signature BLING)
steps to make tabletop christmas cone trees
- Prep your cones by removing all of the price tags and any reflective tape.
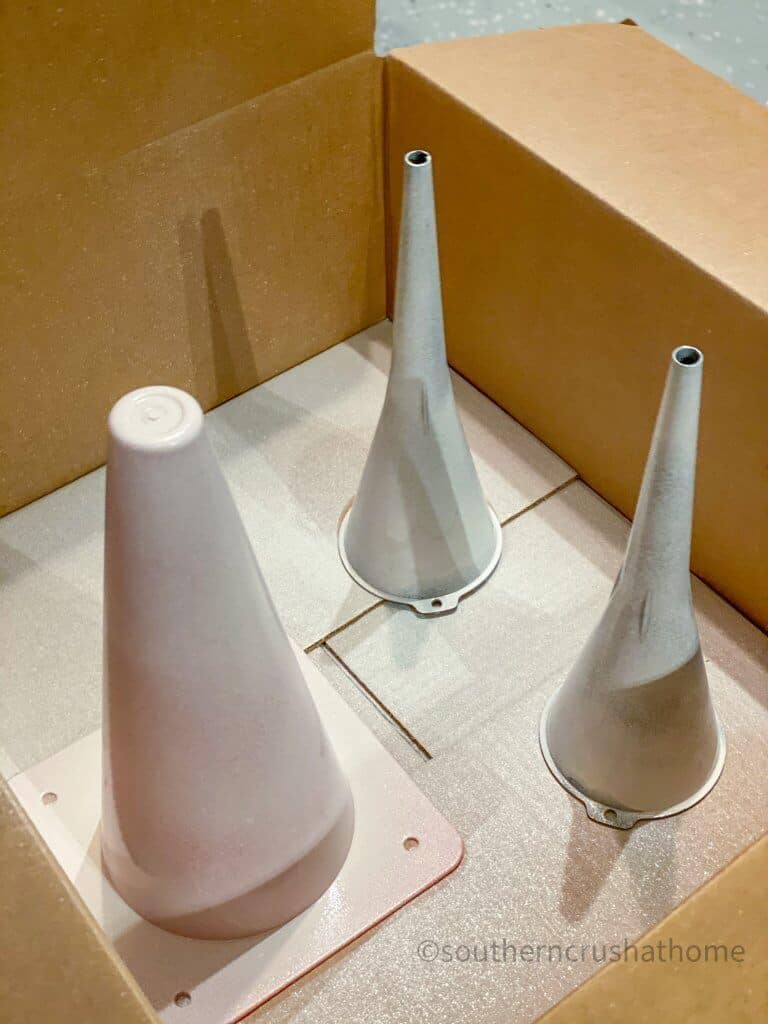
- Run a quick coat of white spray paint over each cone to cover up the bright orange or dark black color so that if any of it shows through your material it won't be noticable.

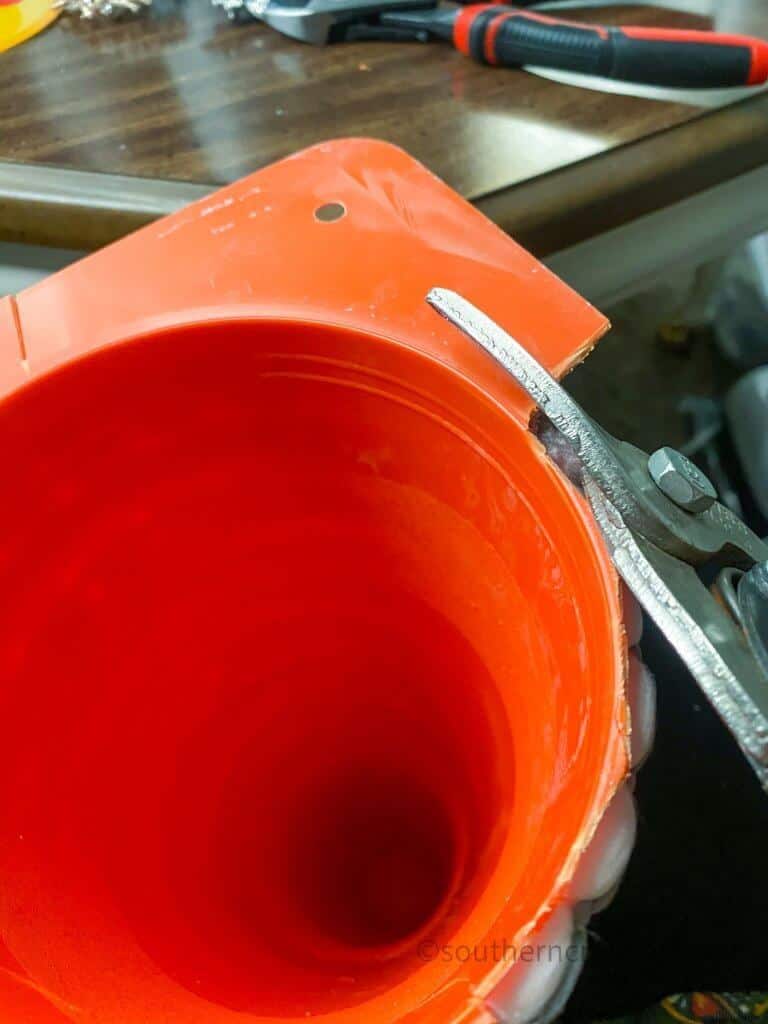
- Taking a pair of sharp nippers, remove the edges of your cone if desired. You can always spin that side of your cone to the back. In the case of the larger orange cone, you can leave the bottom trim in place and cover it with some material or greenery.
- At this point, you can use the nippers to carefully ‘trim' down the tip of the funnels to varying heights so that your trio of trees are not all the same height.
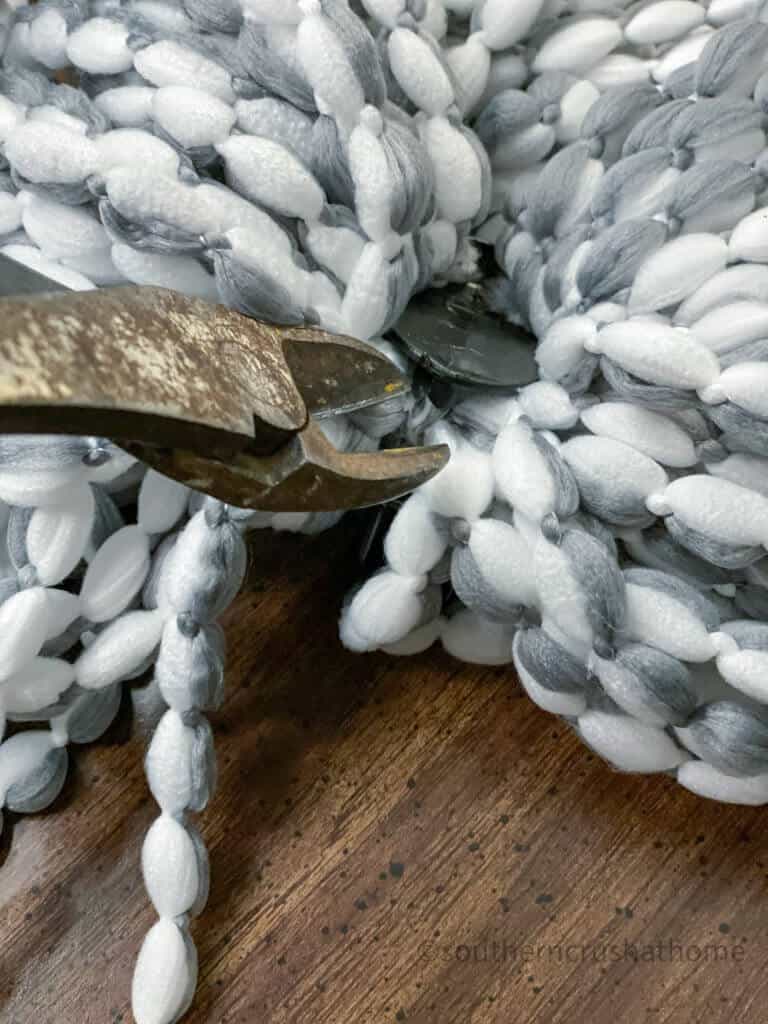
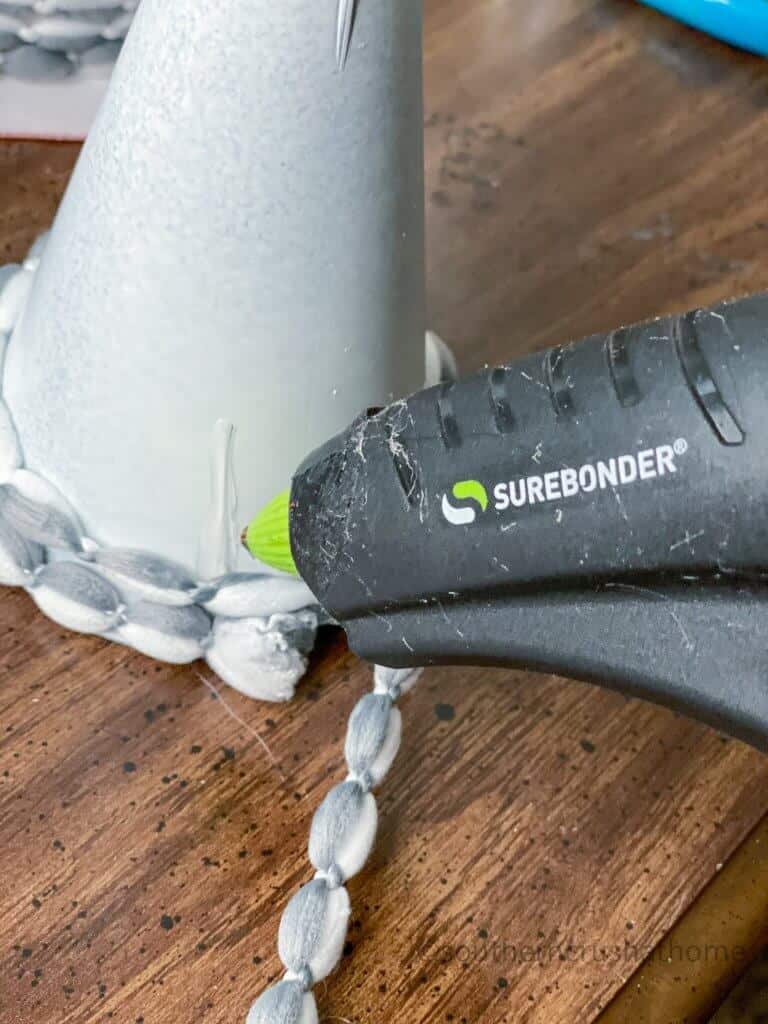
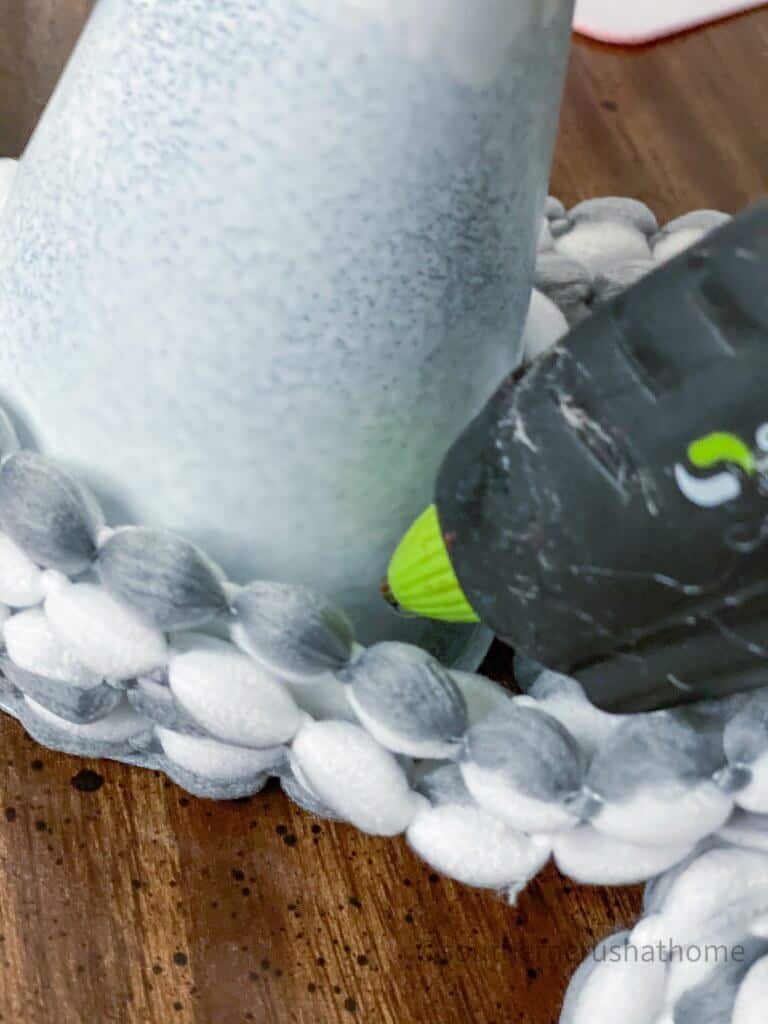
- Begin by removing the mop head string from the black clip housing that it comes in using a pair of pliers.
- Next, add a drop of glue to the side of the cone near the base and wrap the mop string in a circular pattern until the entire cone is covered.
- Top off your Christmas cone tree with any embellishments you like.

ideas for embellishing cone trees
- Use an old vintage piece of jewelry as the topper or some bling
- Add battery operated twinkle lights around the cones
- Glue random rhinestone dots around the sides of the cone from top to bottom
- Place a few colorful sequins up and down the cones for an added pop
- Wrap some twine over the mop head strings spaced out around the cone
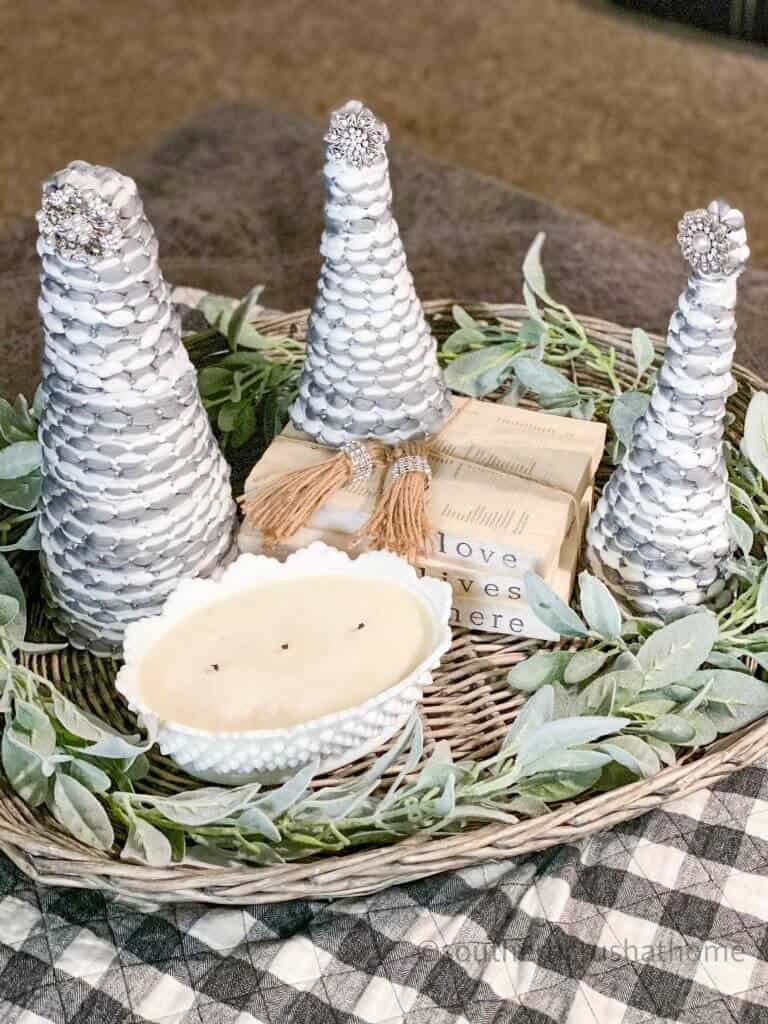
Ways to display your tabletop cone trees
- Place them as part of a larger centerpiece on your formal dining room table
- Put them on a silver platter with some greenery
- Use them on an entryway table with some pine cones tossed around them
- Set them up on one side or another of your mantel as part of a vignette
- Add these to your kitchen countertop next to your Christmas cookie jar
- Arrange cone trees on a hot cocoa bar for decor


Alternatively you can style with neutrals like this stacked book diy and some lambs ear along with a hobnail milk glass candle.
MORE AMAZING dollar tree diy projects
 MORE AMAZING dollar tree diy projects
If you enjoyed learning how to make these tabletop Christmas trees from items found at the Dollar Tree, then you will most certainly love these diy craft ideas too. Check them out and have fun creating these new projects.
- Braided Pumpkin DIY Using a Mop Head
- Dollar Tree Mop Head Wreath
- Dollar Tree Christmas Ornament with a Mop Head
SIGN UP FOR DIY EMAILS
If you love these kinds of DIY ideas, you need to be getting my emails, friend! Each week I send out a couple of emails that include updates, crafts, shopping experiences, and decor inspiration. Be sure to get yourself signed up below.
I can’t wait to meet you! Leave your thoughts below in the comments, please… BTW— Life is short—Enjoy the mess!

Tabletop Christmas Cone Trees
Materials
- Cone shaped object
- Mop head
- Hot Glue gun and sticks
- Spray paint
- Nippers
- Embellishments
Instructions
- Prep your cones by removing all of the price tags and any reflective tape.
- Run a quick coat of white spray paint over each cone to cover up the bright orange or dark black color so that if any of it shows through your material it won't be noticable.
- Taking a pair of sharp nippers, remove the edges of your cone if desired.
- Use the nippers to carefully 'trim' down the tip of the funnels to varying heights so that your trio of trees are not all the same height.
- Remove the mop head string from the black clip housing that it comes in using a pair of pliers.
- Add a drop of glue to the side of the cone near the base and wrap the mop string in a circular pattern until the entire cone is covered.
- Top off your Christmas cone tree with any embellishments you like.
I love this idea,????.
thank you!
Love these, so cute!
These are the cutest!!!
thank you!