Buffalo Check Wood Bead Garland (with Dollar Tree Mop Head Ghost Tassel)
Learn how to make a beautiful buffalo check wood bead garland for Halloween complete with a dollar tree mop head ghost tassel. It's a simple craft project that is fun to make and will look just darling draped across your mantel, or buffet table. Follow this step-by-step tutorial so you can make your own garland in plenty of time for Halloween decorating!
Do you like to decorate for Halloween? I love to add little touches here and there. The great thing about Halloween is you can totally have fun with it by creating easy crafts to add to your existing decor. One of the easiest ways to do that is to add seasonal garland. Get ready for cuteness overload with this buffalo check wood bead garland, with the cutest ghost tassel!
You will want to run to Dollar Tree to buy all the mop heads so you can make your several of these little guys!
Here is the step-by step tutorial…
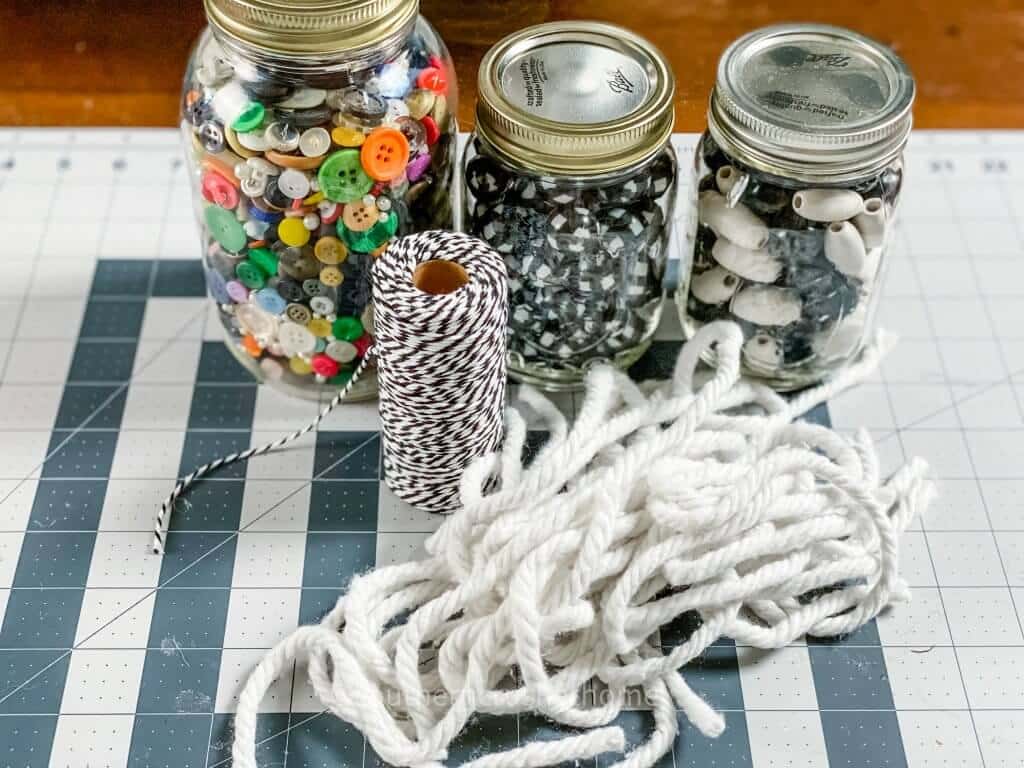
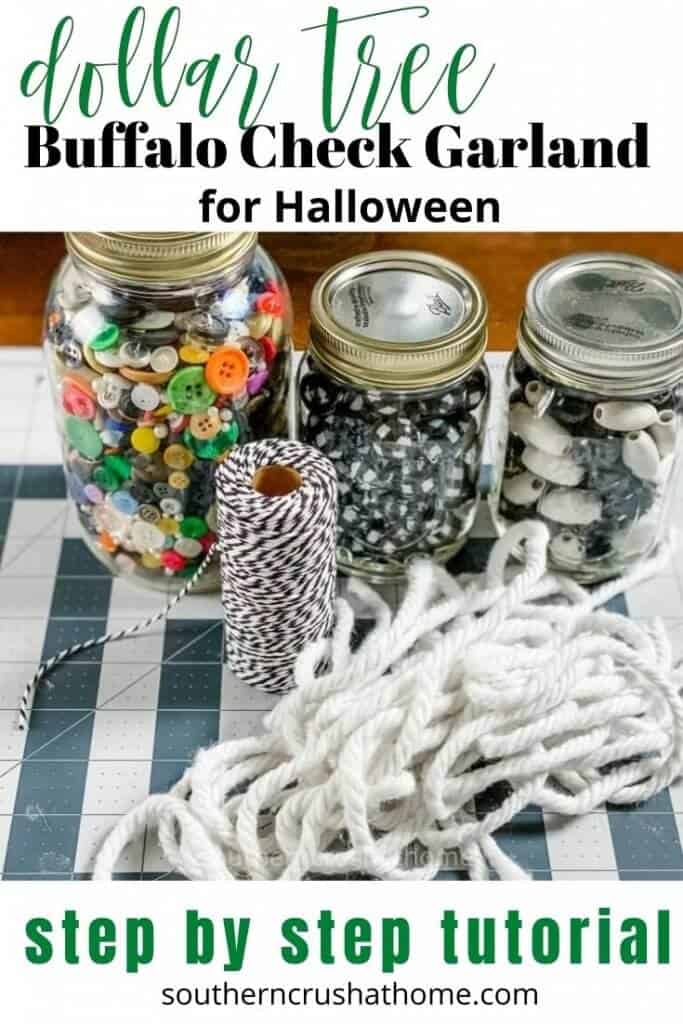
SUPPLIES needed for Buffalo Check Wood Bead Garland
All the supplies needed can be found HERE in my Amazon Shop!
- Black, White and Buffalo Check Beads
- Craft Buttons
- Mop Head
- Scissors
- Twine
- Hot Glue Gun
How to make Buffalo Check Wood Bead Garland
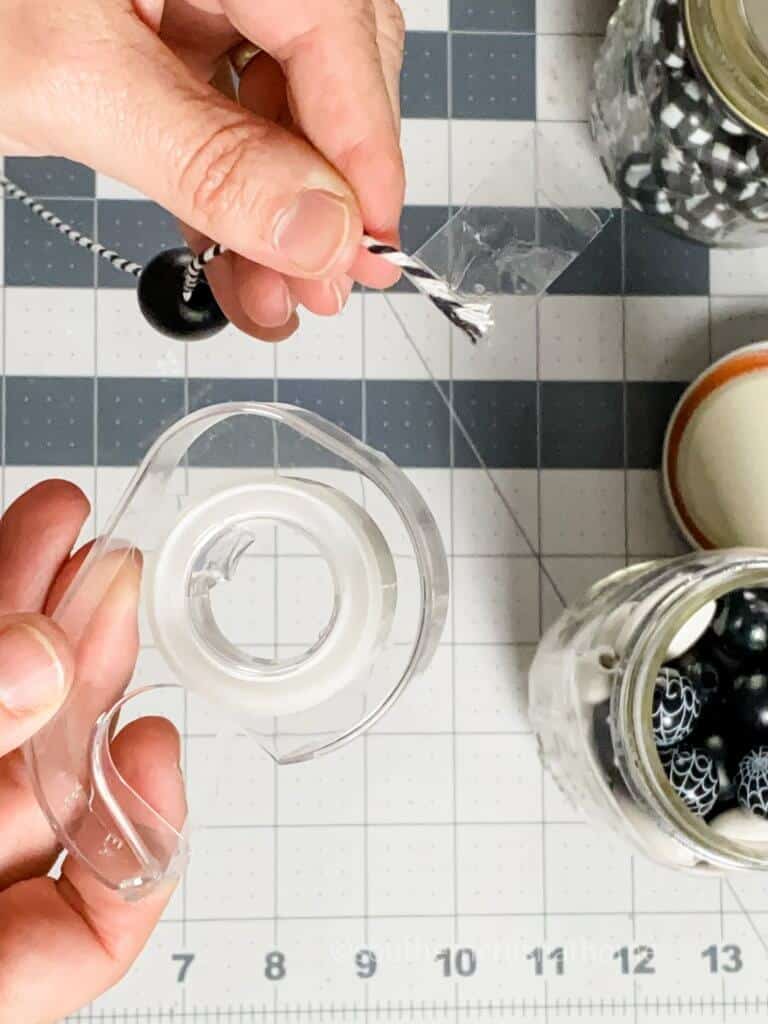
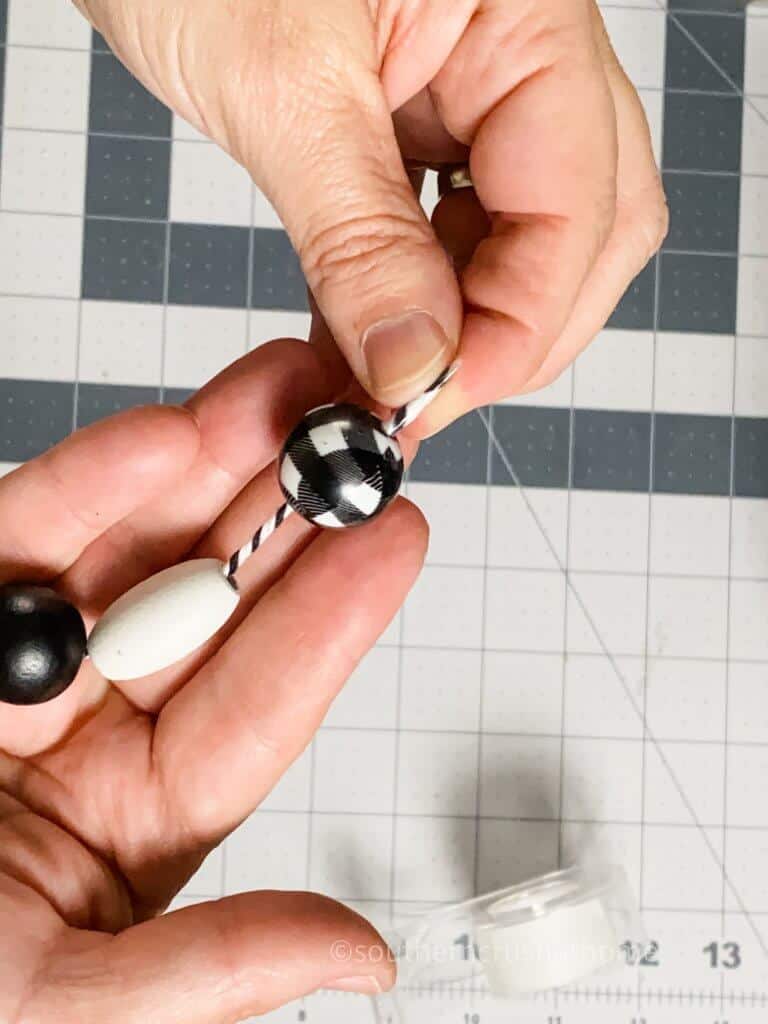
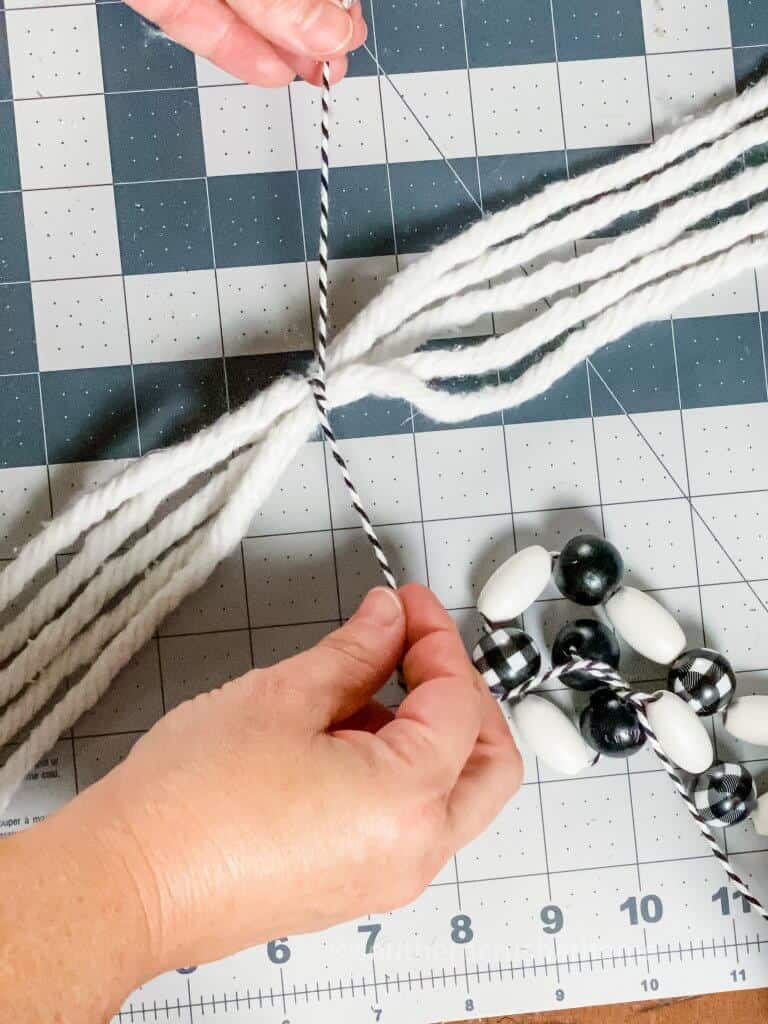
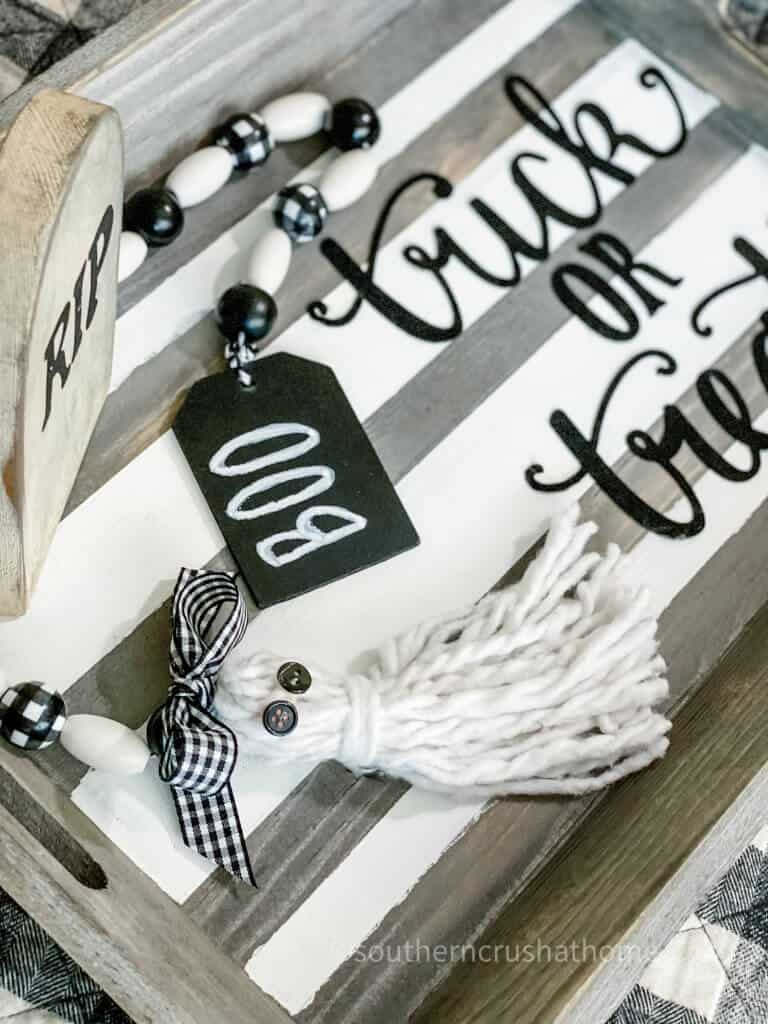
Start by adding wooden beads to the black and white striped twine. Alternate black beads, white beads and buffalo check beads.
QUICK TIP: Wrap the end of the twine with tape to make it easier to thread through the beads.
make the ghost tassel
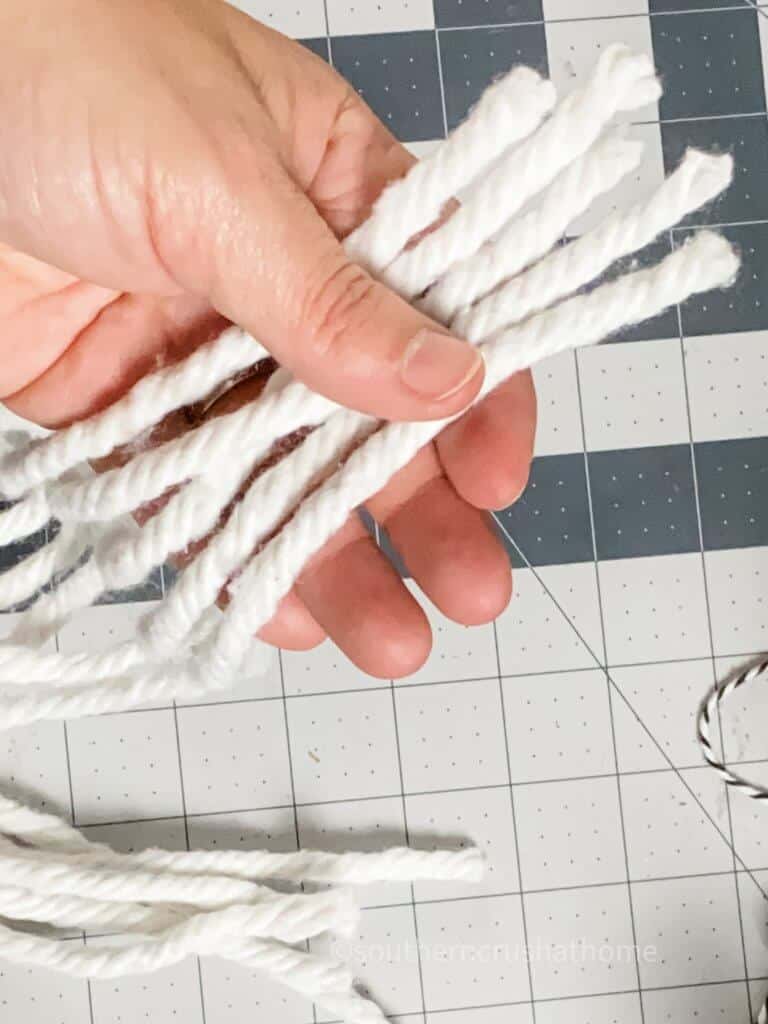
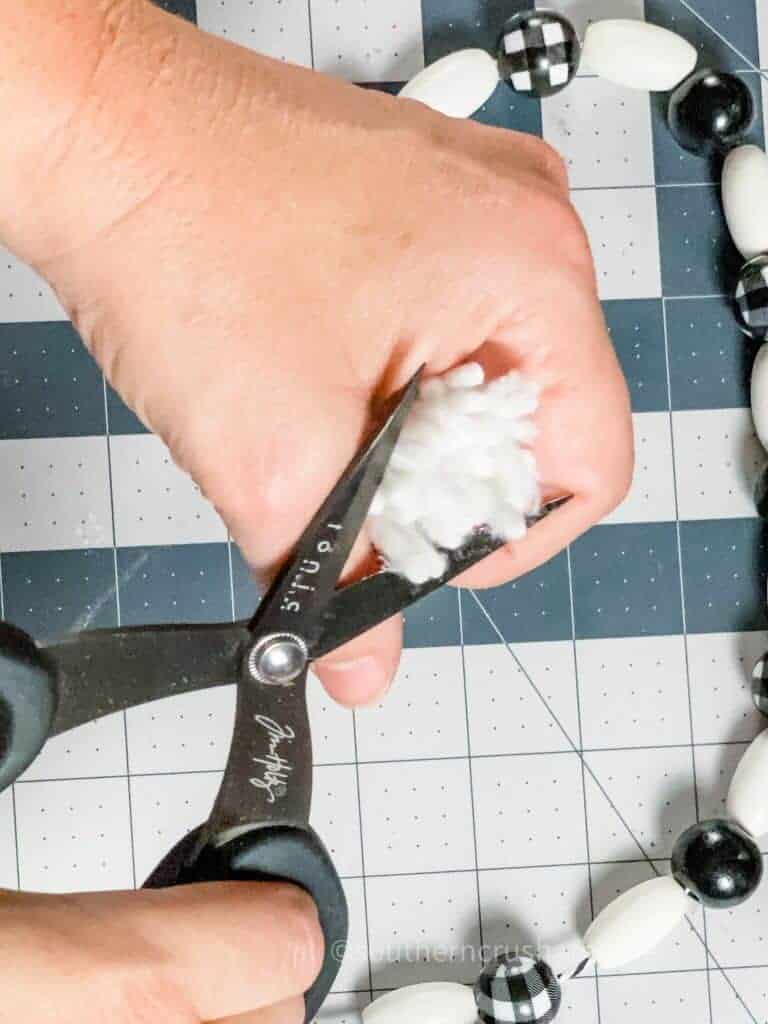
What really makes this Halloween garland is the adorable ghost tassel. It's super easy to make. Separate the mop strings from the plastic center and section off about five strands. The more strands, the thicker your ghost.
NEXT…
Brush out the mop head strands to give them a little more texture. You can use a good ol' dollar store comb or brush for this.
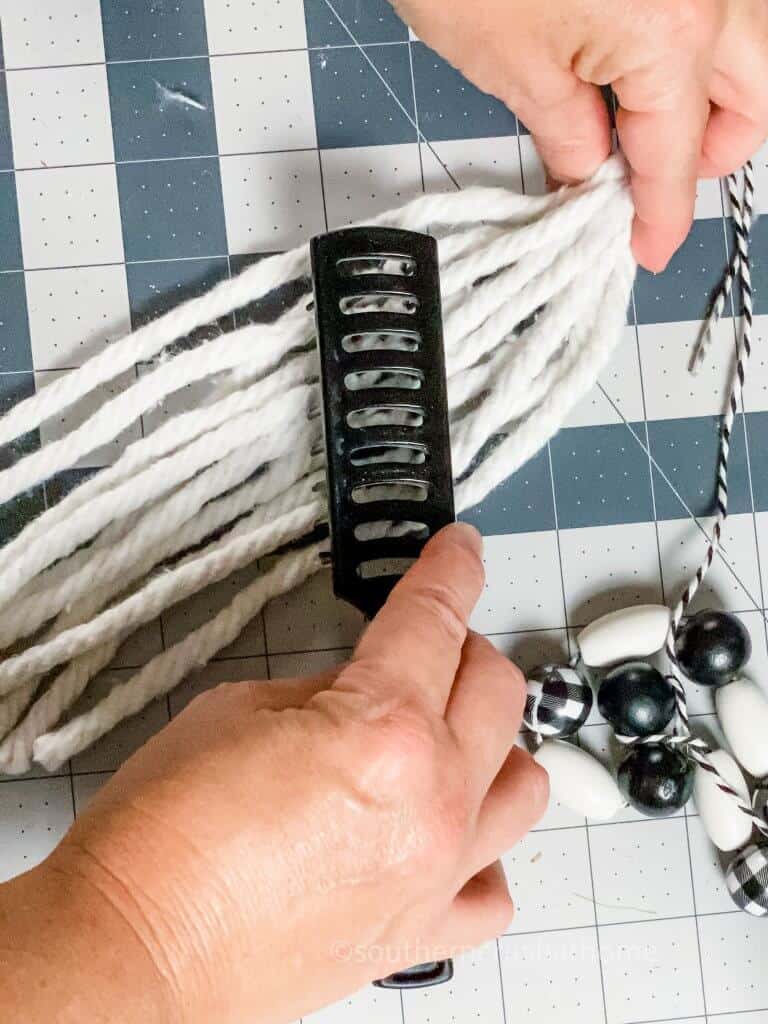
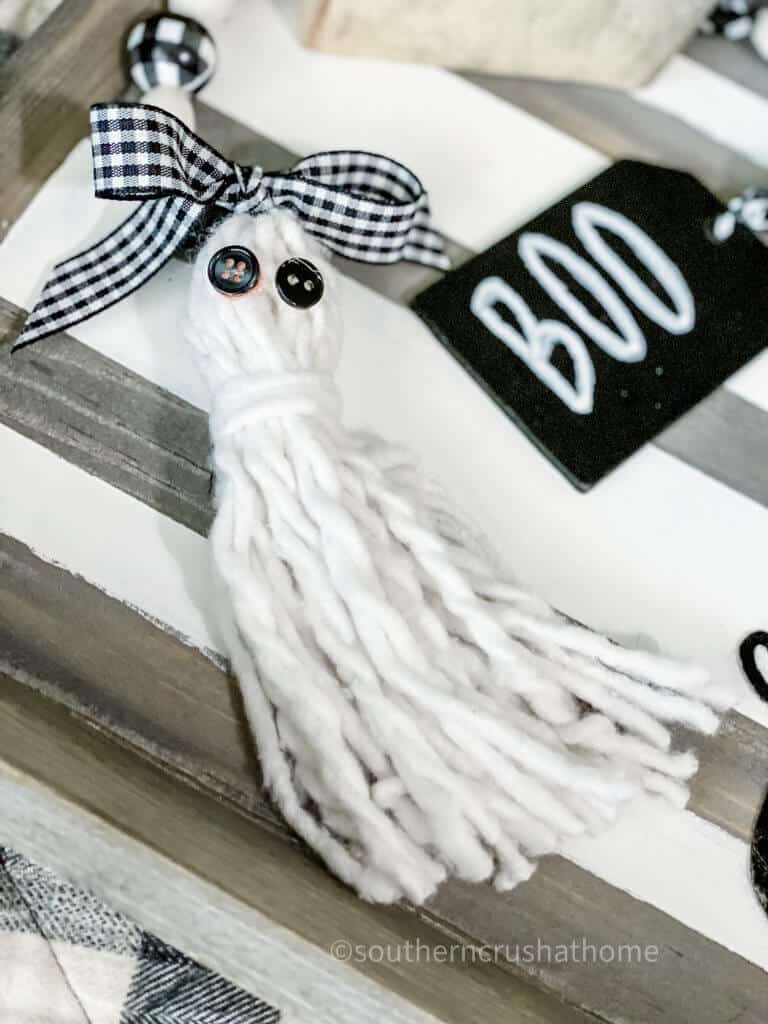
Now you just tie it to the garland with one of the strands and trim the end of the tassel. Easy peasy!
Tie a couple of pieces of the mop head string around the top 1/4″ of the tassels to create that classic tassel look.
Buffalo Check Wood Bead Garland
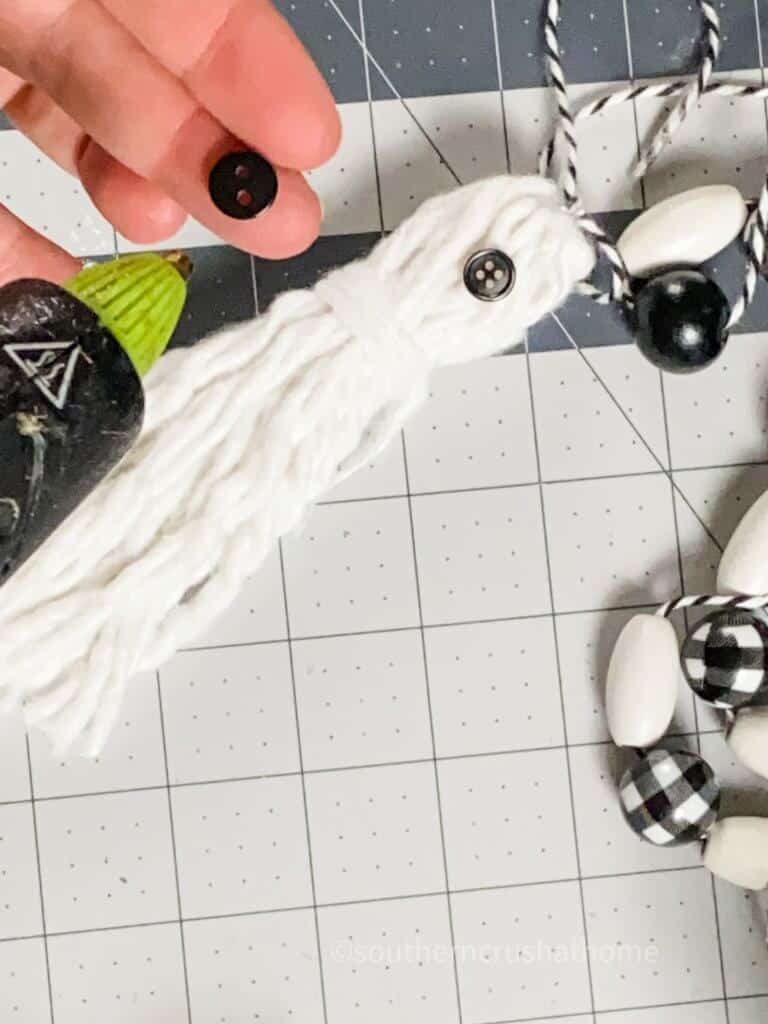
Use your hot glue gun to add button eyes to the ghost tassel. How cute is she? Wouldn't it be fun to make a bunch of these little tassels to hang across a banner.
Grab the ghost tassel and trim the rough edges of the mop strands until they appear to be flush across.
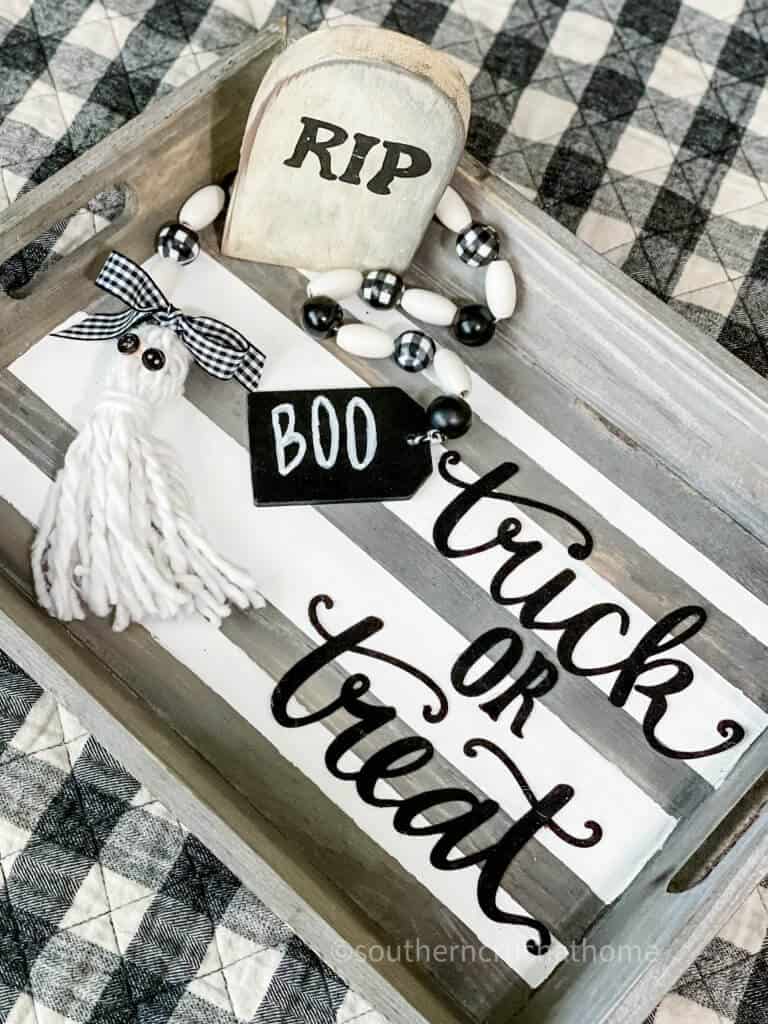
Next I added a simple little bow made with matching Dollar Tree buffalo check ribbon along with a small Dollar Tree black chalkboard tag with the word “BOO” in chalk pen.
DECORATE WITH YOUR Buffalo Check Wood Bead Garland
Add your garland anywhere you want a little festive touch of Halloween to your home.

Here are just a few ways you can decorate with your Halloween garland:
- Drape it on a wood tray.
- Hang it on a mantel, or buffet table.
- Create a Halloween vignette with a few old books and a vase or pretty mum.
What do you think? Are you going to make this sweet Halloween garland? Let me know if you make your own by leaving a comment below.
step by step video tutorial
If you want to see the exact step by step process, be sure to check out this video tutorial below over on my YouTube Channel!
for more fun, look at THESE OTHER DIY HALLOWEEN IDEAS!
- Halloween Broom Gnome Banner
- Halloween Witch Hat DIY
- Cricut Dollar Store Halloween Decor
- Halloween Coffee Table Tray
Be sure to PIN this for later!

Buffalo Check Wood Bead Garland for Halloween
Equipment
- scissors
Materials
- Black, White and Buffalo Check Beads
- Craft Buttons
- Mop Head
- Twine
- Tape
Instructions
- Add wooden beads to the black and white striped twine.
- Continue to add as many beads as you need for the length of garland.
- Cut about 10 pieces of the mop head to the length you want.
- Brush out the mop head strands to give them a little more texture.
- Use your hot glue gun to add button eyes to the tassel.
- Tie it to the garland with one of the strands.
- Trim the end of the tassel.
This is adorable!
You’re so sweet! Thank you for the compliment!