How to Paint Ceramic | Easy Step-by-Step Tutorial with No-Bake Ceramic Paint
In this step-by-step tutorial, I’ll show you how to paint ceramic with no-bake ceramic paint. Painting ceramics is a fun and easy way to express your creativity, and with this simple DIY, you'll be able to create stunning pieces in no time.
Ceramic painting is a great way to add a personal touch to your home decor. You can use it to paint vases, plates, bowls, or any other type of ceramic object. The best part about ceramic painting is that you can be as creative as you want. There are no rules, so feel free to experiment with different colors and designs.
Plus, I’ll share an easy way to use your painted pieces to make a serving tray or cake plate. Be sure to make two so you can gift one and keep one!
Ceramic Paint vs. Acrylic Paint
When it comes to painting ceramics, you have two main options: ceramic paint and acrylic paint. Both have their own benefits and drawbacks, so it's important to choose the right one for your project.
Acrylic paints are more versatile and can be used on a variety of surfaces, but acrylic paint isn't as durable as ceramic paint.
Ceramic paint is specifically designed as a paint for ceramic pieces, so it's ideal if you're looking for a durable finish. It comes in two different versions for painting ceramics, bake and no-bake.
Today I'm sharing with you how to paint on ceramic the quick and easy no-bake ceramic paint.
This blog post contains affiliate links. The opinions are wholly my own from my own experience. I may earn a small commission from clicks through to the websites that end in a purchase.
Supplies Needed to Paint Ceramic
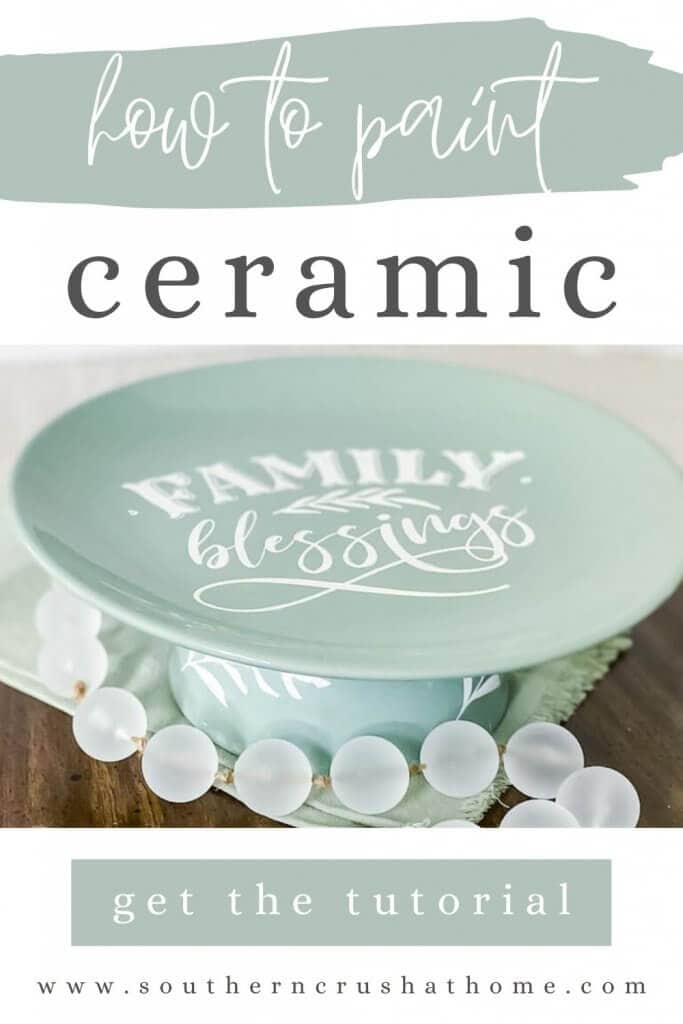
- Family Blessings Mesh Stencil
- Ceramic Paint – Angel Wings (this brand is food safe and dishwasher safe)
- Dollar Tree Ceramic Plate, Bowl, and Mug
- E-6000
- Squeegee
- Hot Glue Gun
How to Paint Ceramic
I’m super excited to share this DIY project with you. You will see how simple it is to paint ceramic pieces using no-bake ceramic paint.
Step by Step Video Tutorial on How to Paint Ceramic
If you prefer to watch a step-by-step video tutorial on how to paint ceramic, then watch the YouTube video below.
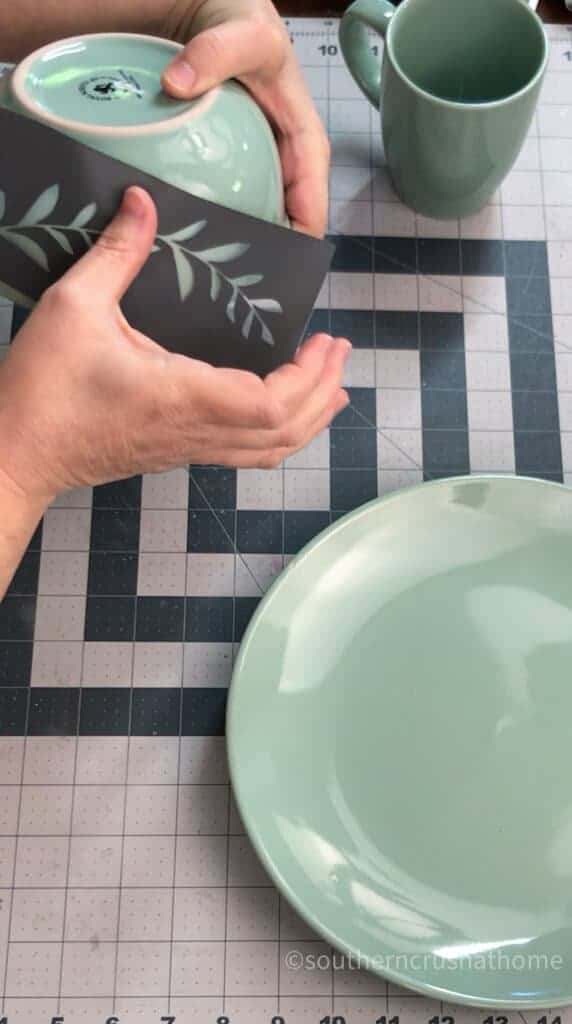
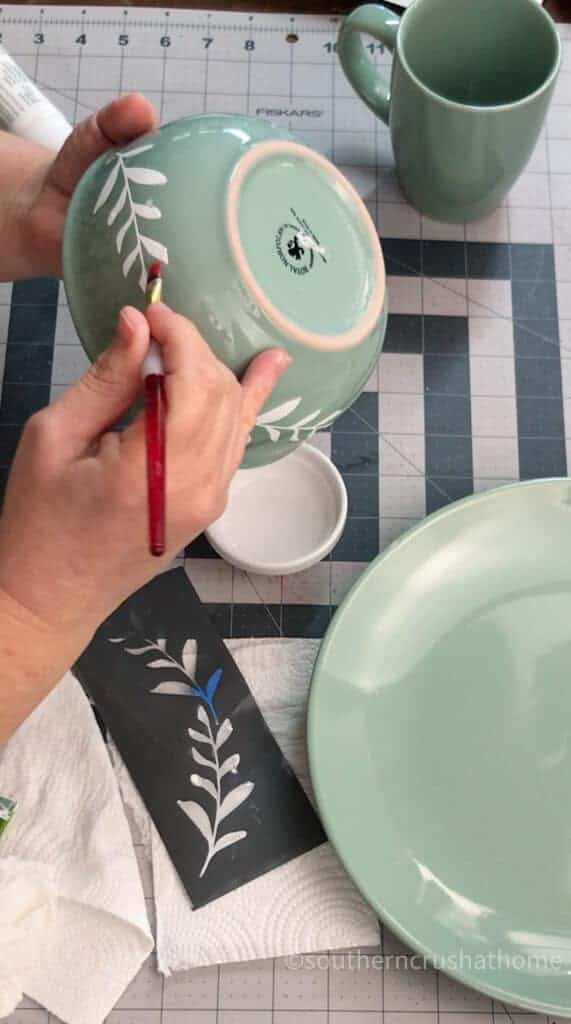
Step 1. Apply the Stencil
Start by placing the mesh stencil on the ceramic piece where you want to add the ceramic paint. These stencils are so easy to work with because they have a sticky backing so there is no tape needed!
You may also enjoy these stenciled projects:
Plus you can wash them off and use them over and over again. I chose to add a pretty floral design to the bowl.
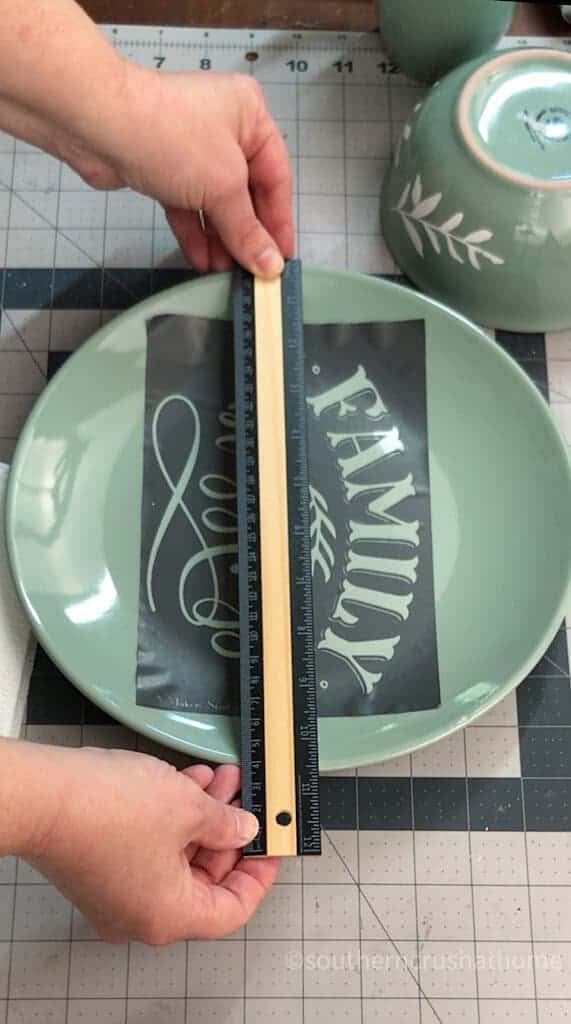
Step 2. Mark the Center
I normally don’t measure but for the ceramic plate, I made sure to find the center of the plate so the quote was in the correct place.
Step 3. Apply the Ceramic Paint
Use a squeegee to apply the ceramic paint across the stencil. You don’t need a lot of the ceramic paint. A little bit of it goes a long way.
When you apply paint like this ceramic paint you should only need a first coat, no second coat is necessary.
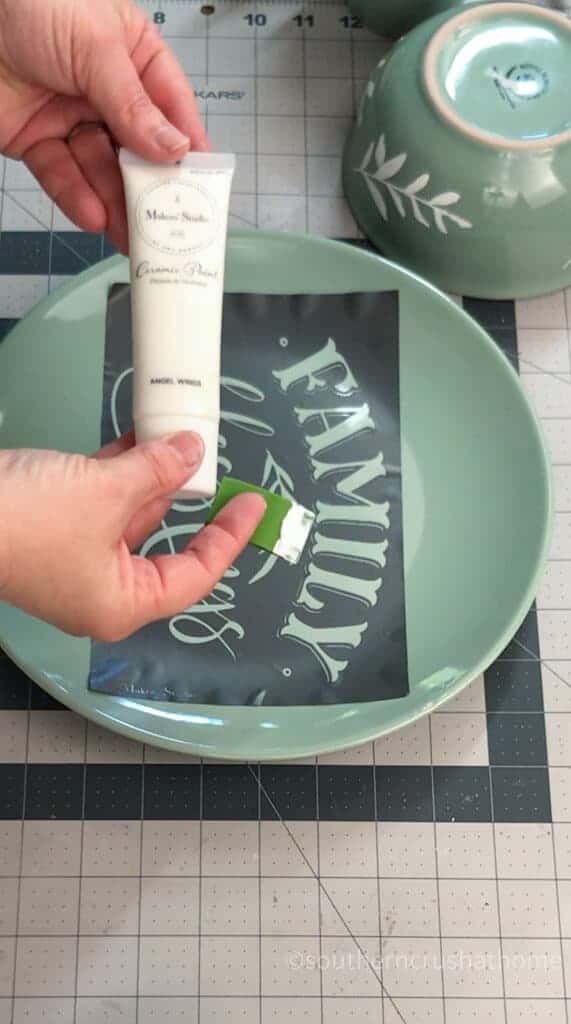
You apply it by scraping it gently across the stencil to apply a light coat of paint. The less passes you can make over the stencil opening the cleaner your result will be once the stencil is removed.
You can get super creative with this and use multiple colors and even create a fun ombre design by blending two colors at a time.

Step 4. Touch Up Any Paint
The paint is very forgiving so if you make a mistake you can use a small artist paintbrush (or even your finger or paper towel) with a little isopropyl alcohol to wipe it off. Any painting mishaps are completely erased. Easy peasy!
My advice, for cleaning up the more detailed areas of the stencil, is to wait for it to dry for a second before attempting to remove it with the brush so that it doesn't simply smear.
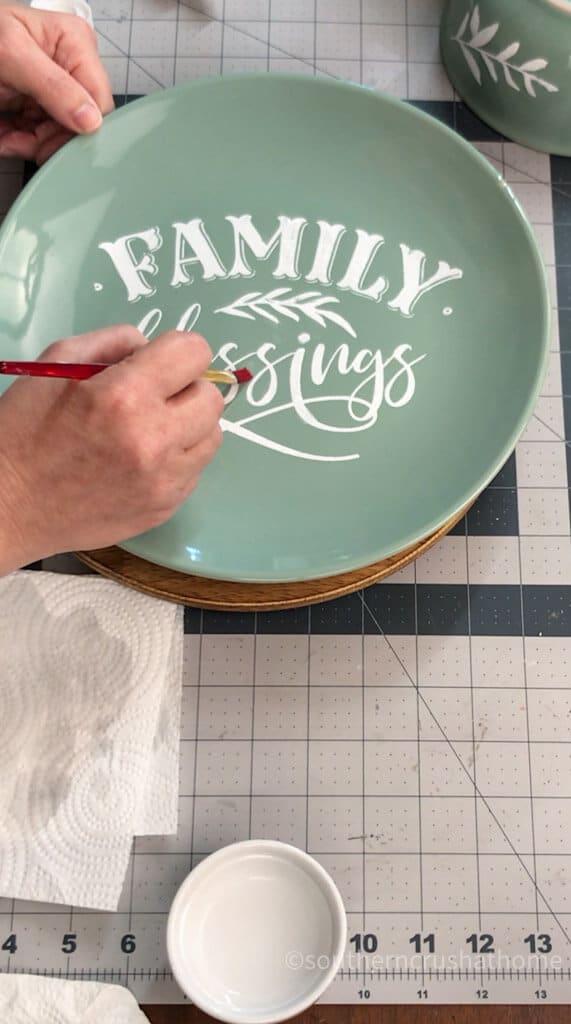
I repeated this process after each of my stencils were applied anywhere there was ceramic paint that was out of the “lines” of my design. I actually really enjoyed this part of the painting project!
Step 5. Repeat the Steps
Follow these same easy steps on any of your other ceramic pieces. Just think of all of the things you could use this painting technique on!
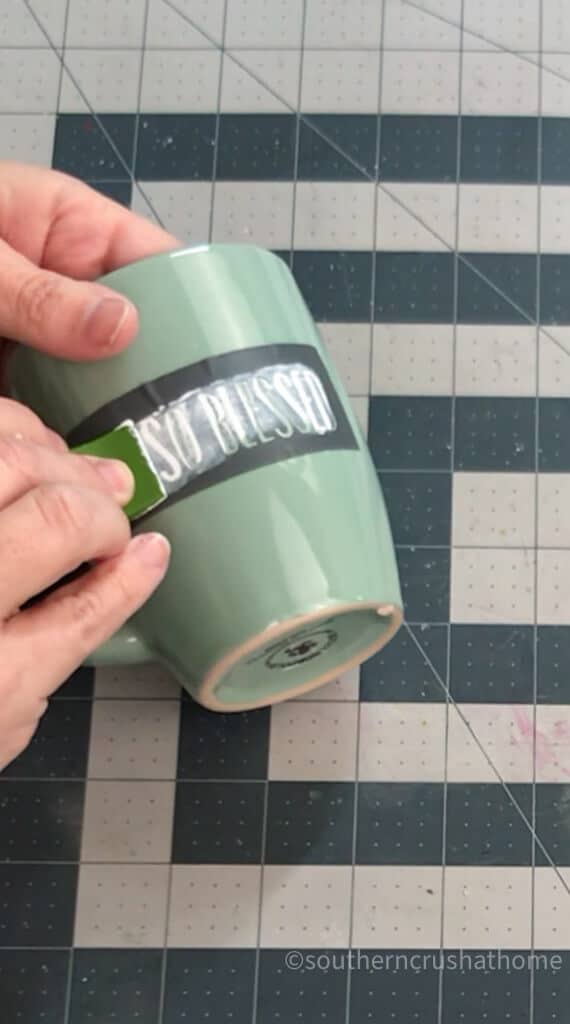
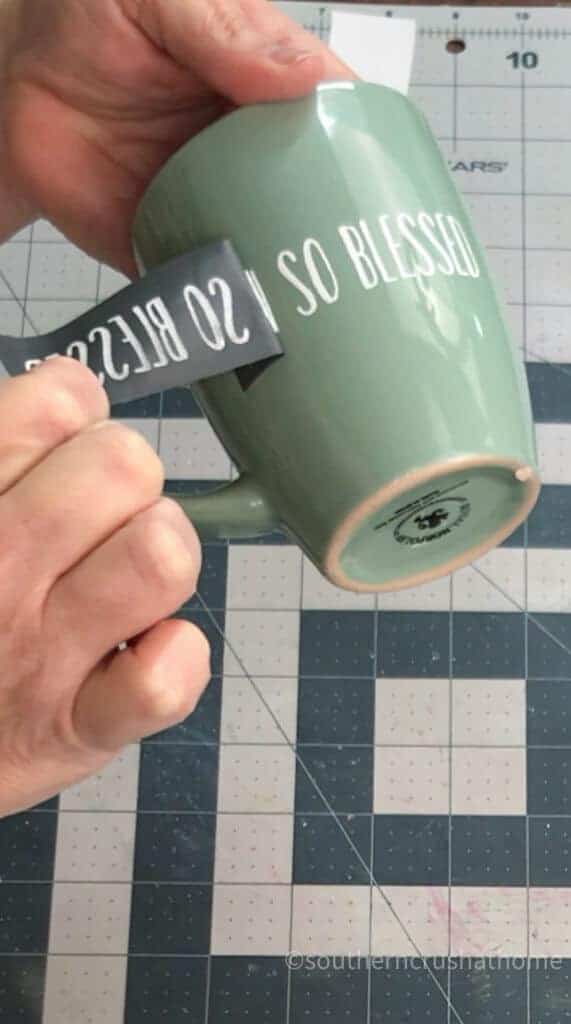
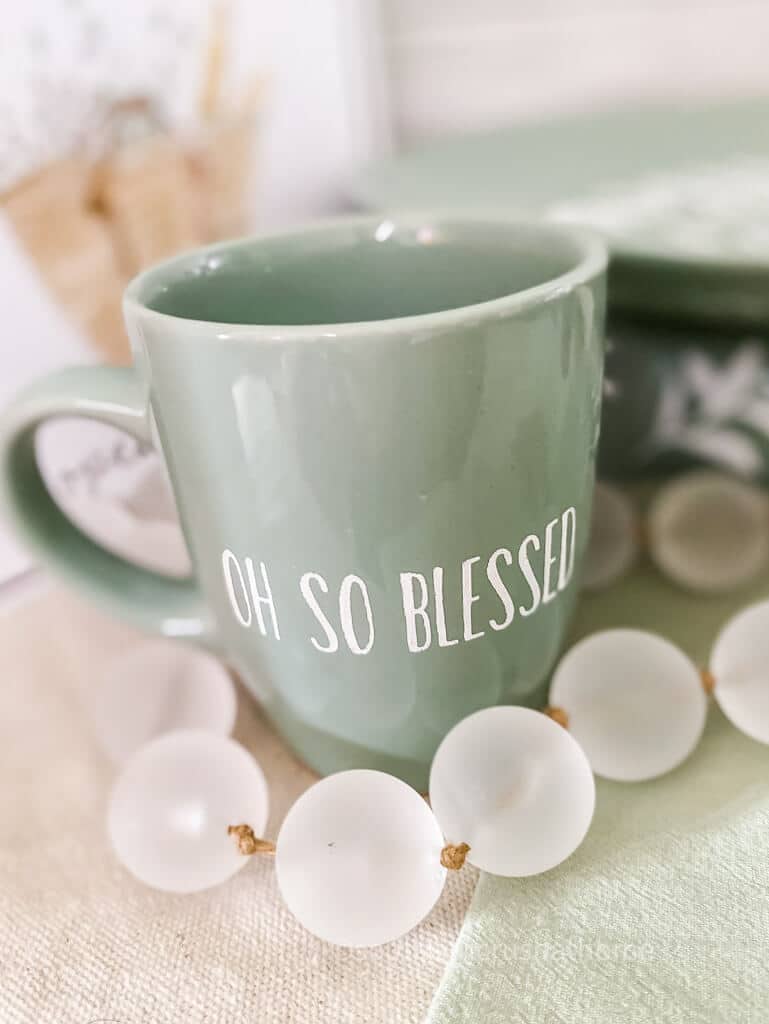
In addition to the plate and bowl, I also stenciled a fun saying onto a Dollar Tree mug. I love painting like this on mugs like the one HERE.
My favorite part is how super easy this painting technique is to customize special personalized gifts too!

Remember to apply a light, thin layer of ceramic paint in one direction if possible. Remove the stencil slowly to avoid smudging any of the ceramic paint.
Pro Tip:
When using these stencils on any rounded surface such as this mug or the bowl; cut small slits into the bottom of the stencil to allow for the stencil to “wrap” around the piece.
Look at how flawless the ceramic paint is on this mug! I love it! How about you?
With this “no-bake” method of using paint on ceramic, there is no need to bake in an oven or a kiln to cure the dish with heat. No extra coats of painting are needed.
The ceramic painting is permanent on the dish surface and this piece is ready to use as soon as it dries thoroughly!
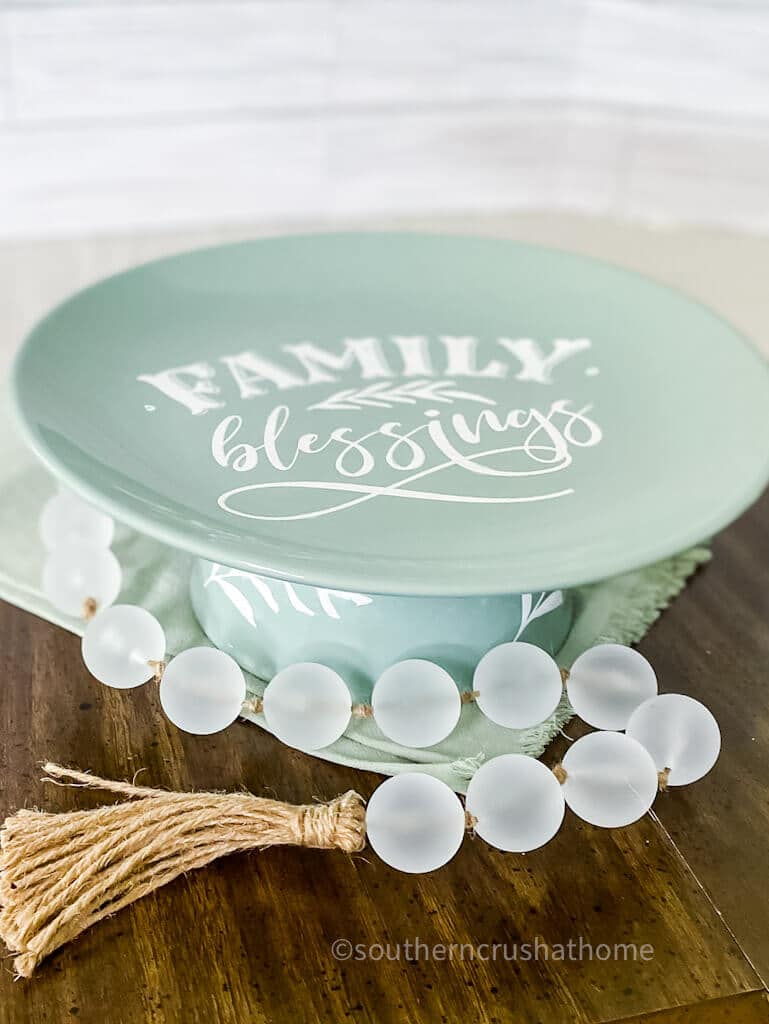
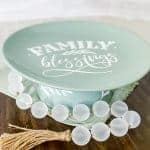
How to Make a DIY Ceramic Cake Plate
I decided to create a pretty cake plate riser using the ceramic plate and bowl together.
I’m a firm believer that you can never have too many cake plates or serving trays! Wouldn't you agree?
Attach the Ceramic Plate to the Ceramic Bowl
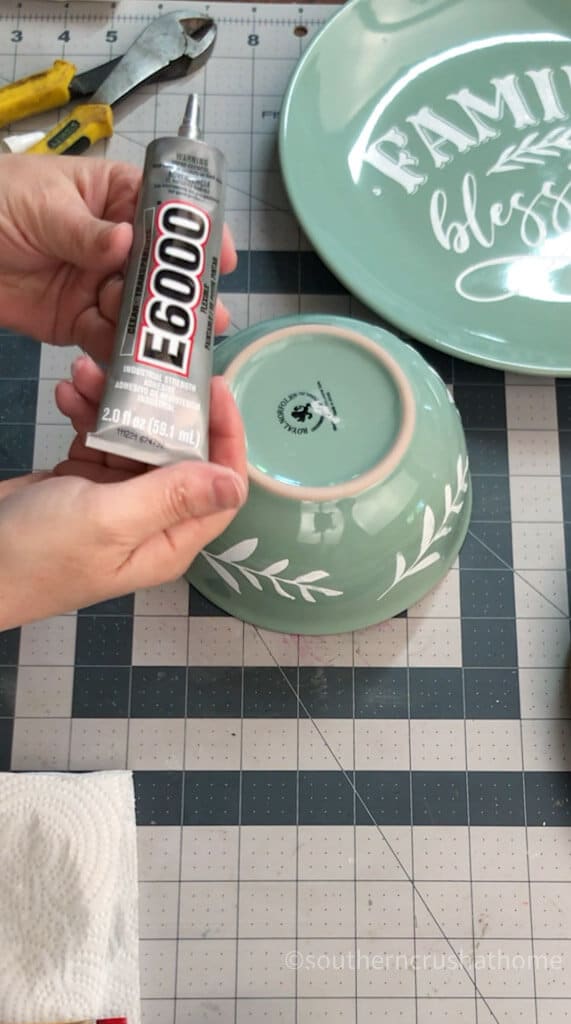
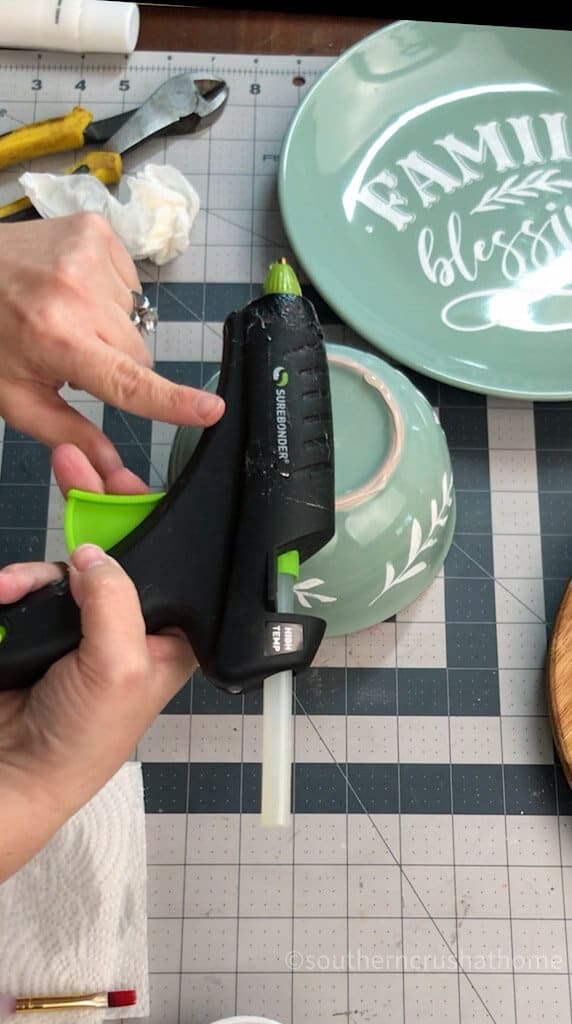
A really good tip for securing ceramic pieces is to use a combination of E-6000 and then hot glue. There is something about this method that makes it extra secure.
Start out with a light, thin bead of the E-6000 or any super glue type adhesive followed by a more generous bead of hot glue.
The hot glue will serve as the initial bonding agent and the E-6000 will solidify the two over a longer period of time once completely dried.
Pro Tip:
Turn the ceramic plate over and attach the bowl from the back so that you can be sure it's centered.
Let the cake plate sit for 24 hours overnight using a stack of books or a heavy weight on the bowl so that the glues can both cure thoroughly before using it. Don't skip this step!
It's super tempting to want to flip it over and use it immediately; however, you will risk it coming apart.
Displaying Ceramic Painted Dishes
Think about all the ways that you can use these beautiful ceramic serving pieces. You can place decorative items on it to display in your kitchen.
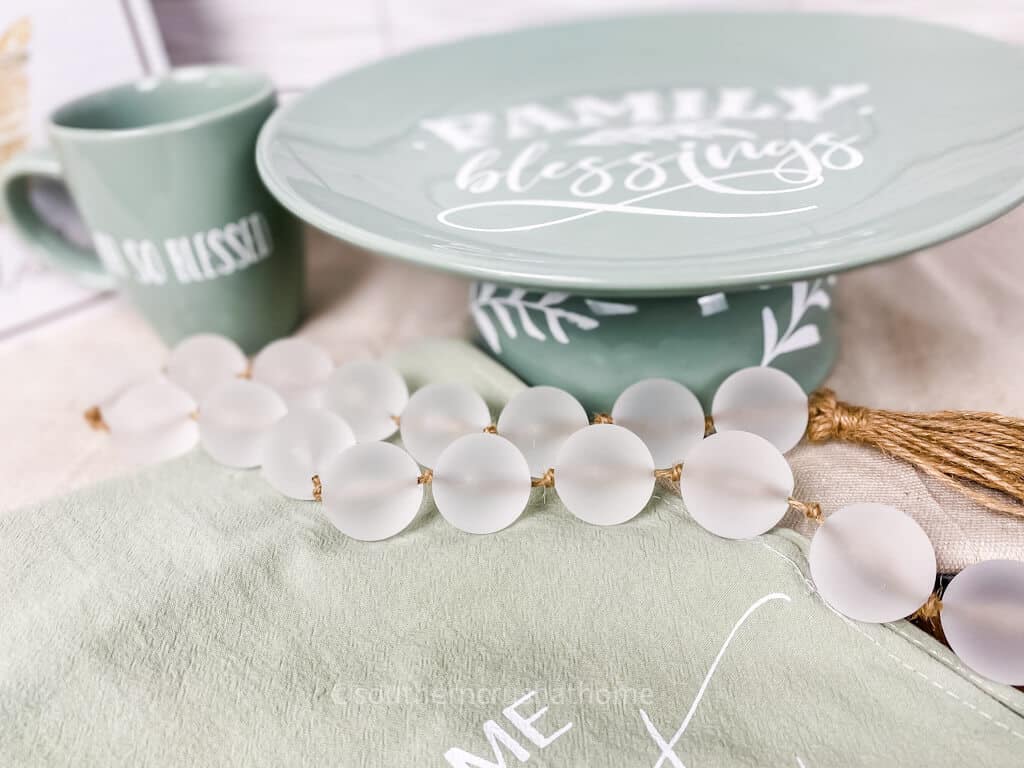
Or use it to serve cookies or any dessert. Another way is to place a clear glass plate over top and place food on top of that.
Even though this no-bake ceramic paint is food safe, I prefer not to place food directly on top.
You will still be able to see the pretty stencil design underneath. I love this idea!
And that's it! You now have a beautiful, painted ceramic piece that you made yourself. Painting ceramics is a great way to relax and get creative, so don't be afraid to experiment with different colors and designs.
So what do you think? Is painting ceramics something you could see yourself making? Leave me a comment below to let me know how you would use this beautiful ceramic cake plate.
Be sure to PIN this for later!
The History of Paint for Ceramic
Ceramic painting has a long and rich history. It is believed to date back to ancient Greece, where this painting method was used to decorate pottery and other objects.
In the Middle Ages, ceramic painting became increasingly popular in Europe. By the Renaissance, it had spread throughout the continent and paint for ceramic was used to decorate everything from tiles, clay, plates, porcelain, and bowls to vases and statues.
Of course, they had to use the high temperature oven bake or kiln firing methods to cure their pieces and often glazed their fired pieces to create a beautiful gloss finish.
Their crafts would take hours and hours of effort, whereas today, we are spoiled with these new easy to use supplies to create and paint our own glossy finished pieces of art without needing a kiln or even an oven.
Today, ceramic painting is super popular among artists and hobbyists alike. I truly hope you enjoyed learning about the history of this fascinating art form.
If you're interested in learning more about how to paint on ceramic or acrylic paint, be sure to check out my other blog posts on these topics.
I share everything from basic painting techniques to advanced design ideas. Ceramic painting is a great way to express your creativity, so don't be afraid to experiment.
Other Ceramic Painting Tutorials
How to Paint Ceramic | Easy Step-by-Step Tutorial with No-Bake Ceramic Paint
Materials
- Ceramic Bowl, Plate, Mug
- Stencil
- No-Bake Ceramic Paint
- Squeegee
- E-6000
- Hot Glue Gun
Instructions
- Start by placing the mesh stencil onto the ceramic piece.
- Find the center of the plate and mark it for the stencil.
- Use a squeegee to apply the ceramic paint across the stencil.
- Remove the stencil slowly.
- Use a small wet brush to clean up any paint. Let dry.
- Place hot glue with -E-6000 onto the painted ceramic bowl to the plate. Let adhesive secure overnight.
You may also enjoy these stenciled projects:
Is the Ceramic Paint waterproof?
I believe so
is there a any way to painting mugs without ovening?
yes, this posts explains how to use no bake ceramic paint.