How to Paint Buffalo Check Video Tutorial (on a Dollar Tree Pizza Pan)
If you are a fan of buffalo check, you don't want to miss this tutorial. I'm showing you how to paint buffalo check on a Dollar Tree pizza pan. Think of all the amazing diy projects you could make using this painting technique. Have fun creating affordable handmade gifts for friends and loved ones.
If you are a regular visitor of this blog, you know I'm a lover of all things buffalo check. Here are several crafts and home decor projects I've made with buffalo check:
- Buffalo Check Bead Garland
- Buffalo Check Decor Trends
- Dollar Tree Buffalo Check Splatter Screen
- Halloween Table with Buffalo Check Accents
- Buffalo Check Cross
- Buffalo Check Painted Doormat
- Repurposed Garden Bench with Buffalo Check
- Buffalo Check Ornaments
JOIN OUR BUFFALO CHECK TRIBE
I’m so obsessed that I even created a unique facebook community of people who love all things buffalo check!
We post diy and craft ideas, home decor finds, really anything with buffalo check on it and create friendships with those who share your same love for buffalo check and buffalo plaid.
I thought it would be fun to show you how to paint a buffalo check design, without using a stencil. It is actually easier than you think. You can use this same tutorial on any shape, but I'm demonstrating on a dollar tree pizza pan. Did you see my recent post with 67 Easy Dollar Tree Pizza Pan Wreath Ideas?

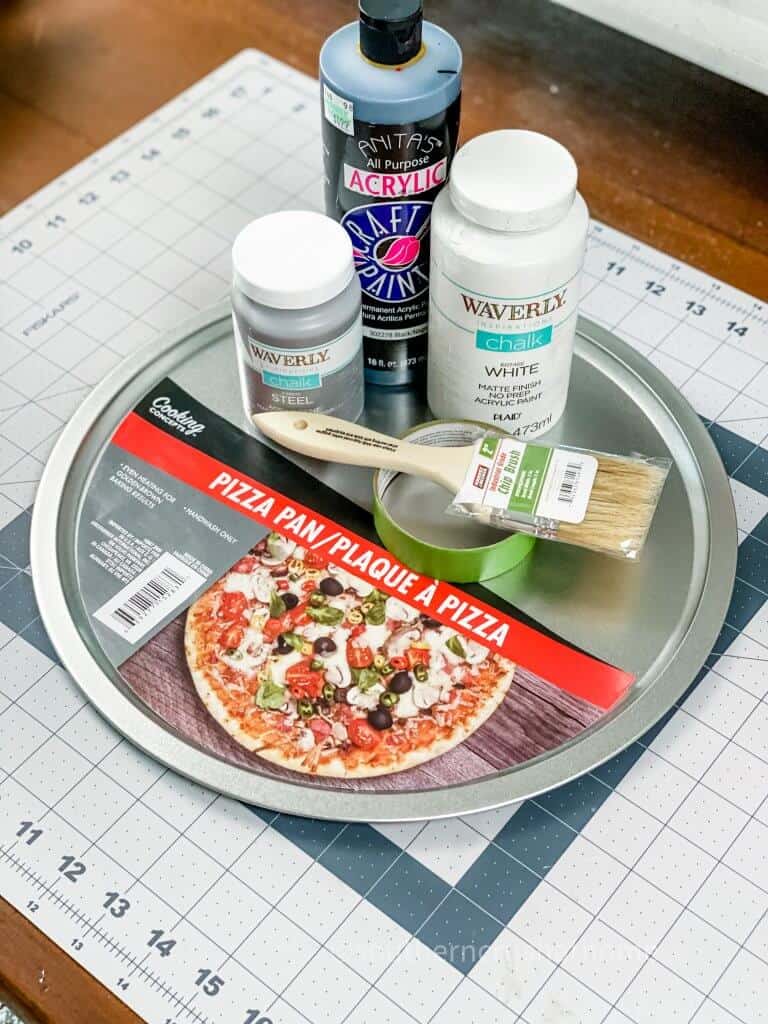
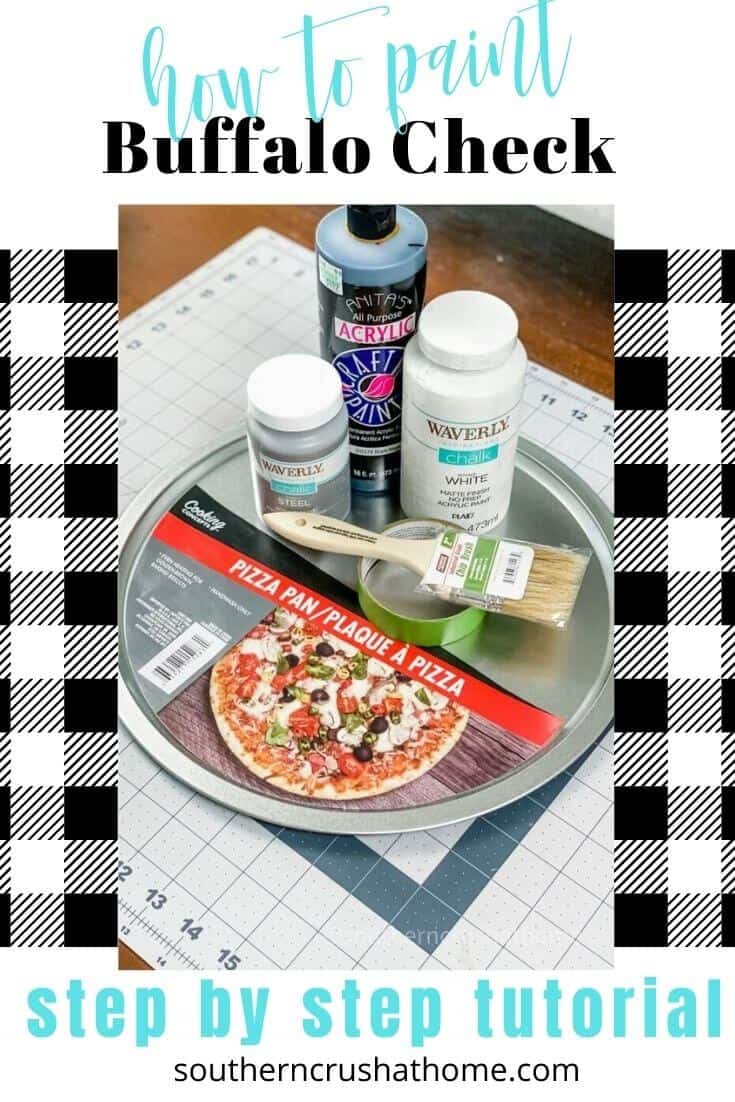
SUPPLIES to Paint Buffalo Check pattern
All the supplies needed can be found HERE in my Amazon Shop!
- Dollar Tree Pizza Pan
- Chalk Paint – white and steel gray
- Black Acrylic Paint
- Chip Brush
- Painter's Tape
HOW do you Paint Buffalo Check on a circle?
STEP BY STEP VIDEO TUTORIAL
If you are more of a visual learner you may want to see the exact step-by-step process, be sure to check out this video tutorial below over on my YouTube Channel!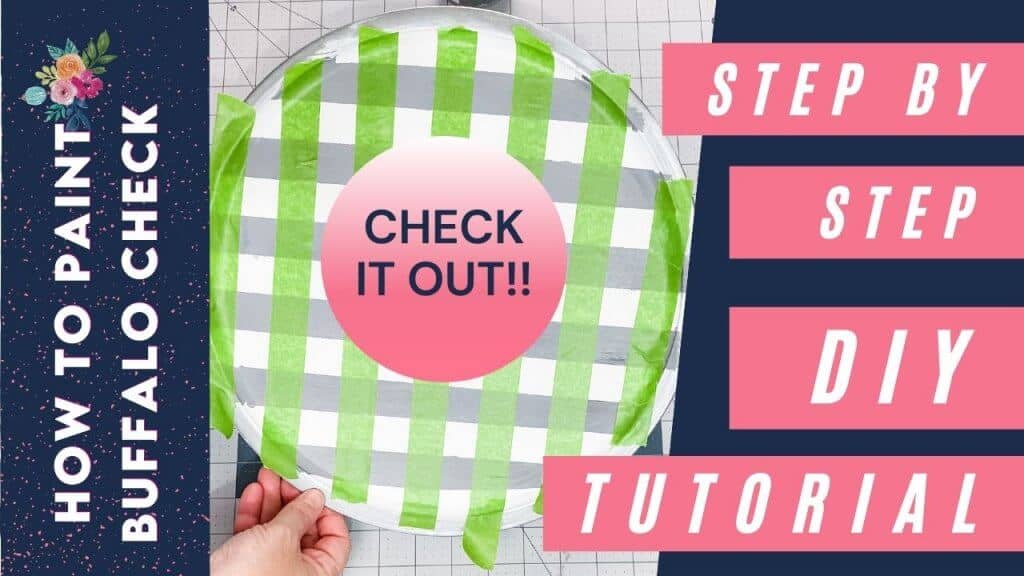
step by step instructions for painting buffalo plaid
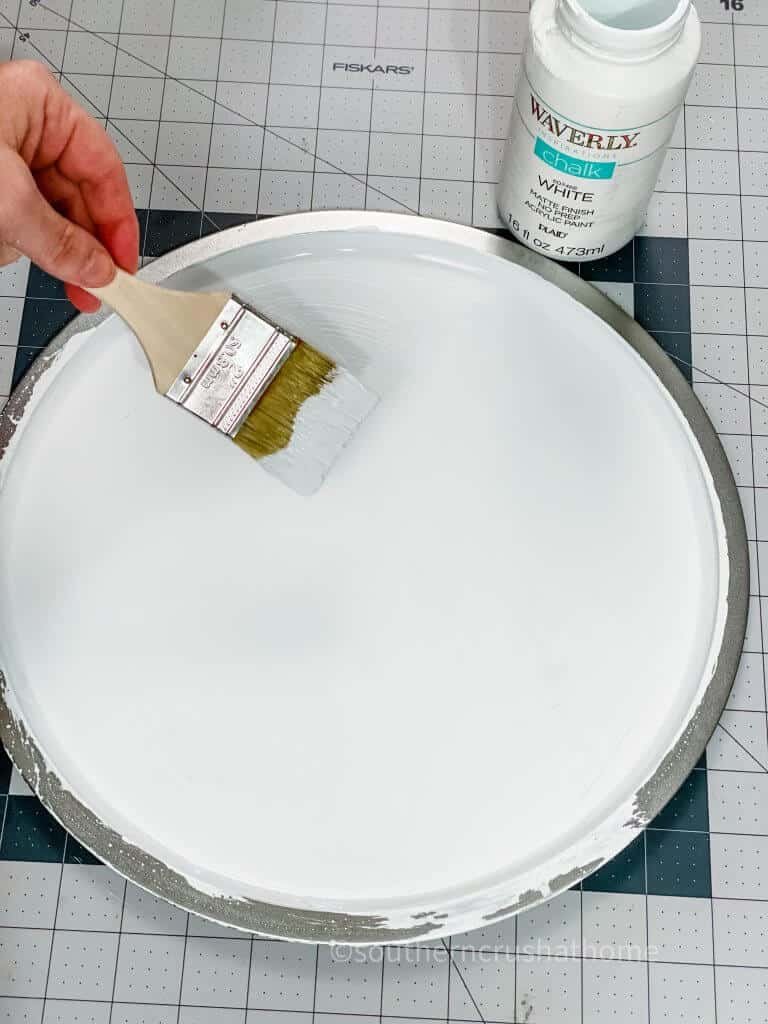
Step One
Start by painting the base of your circle shape with the lightest color choice of paint using your chip brush. You will probably need 2-3 coats for full coverage unless you use chalk paint. Allow to dry thoroughly.
NEXT…
Step Two
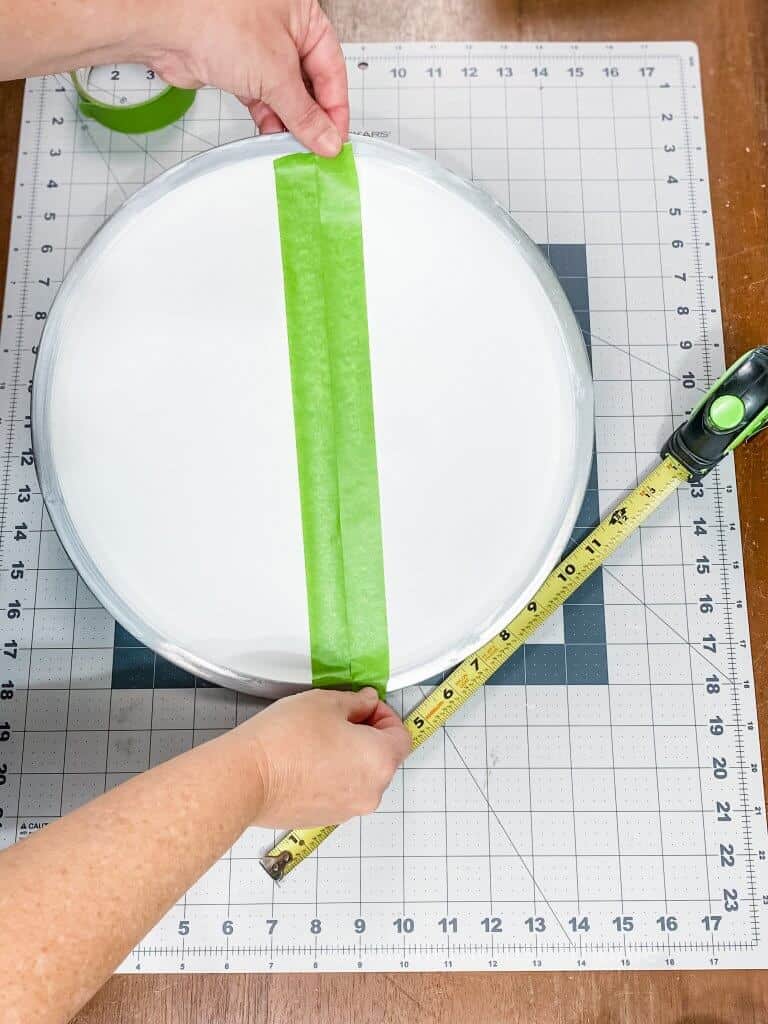
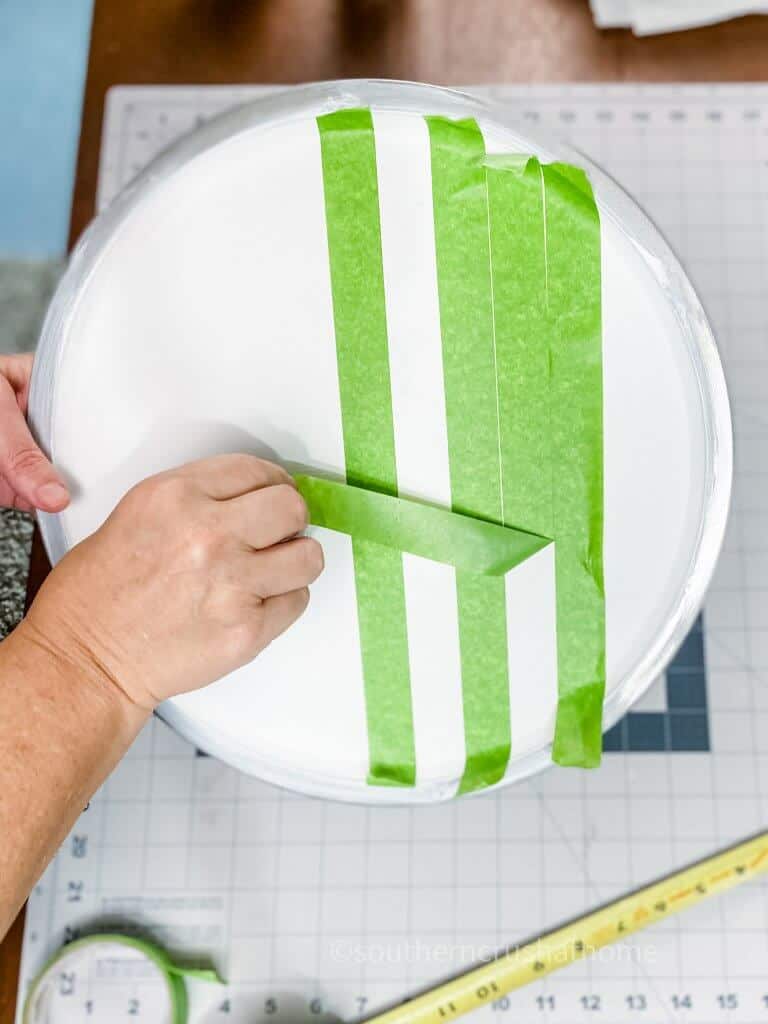
Measure the length of the pizza pan and mark the center starting just inside the lip. Place a strip of painter's tape right in the center.
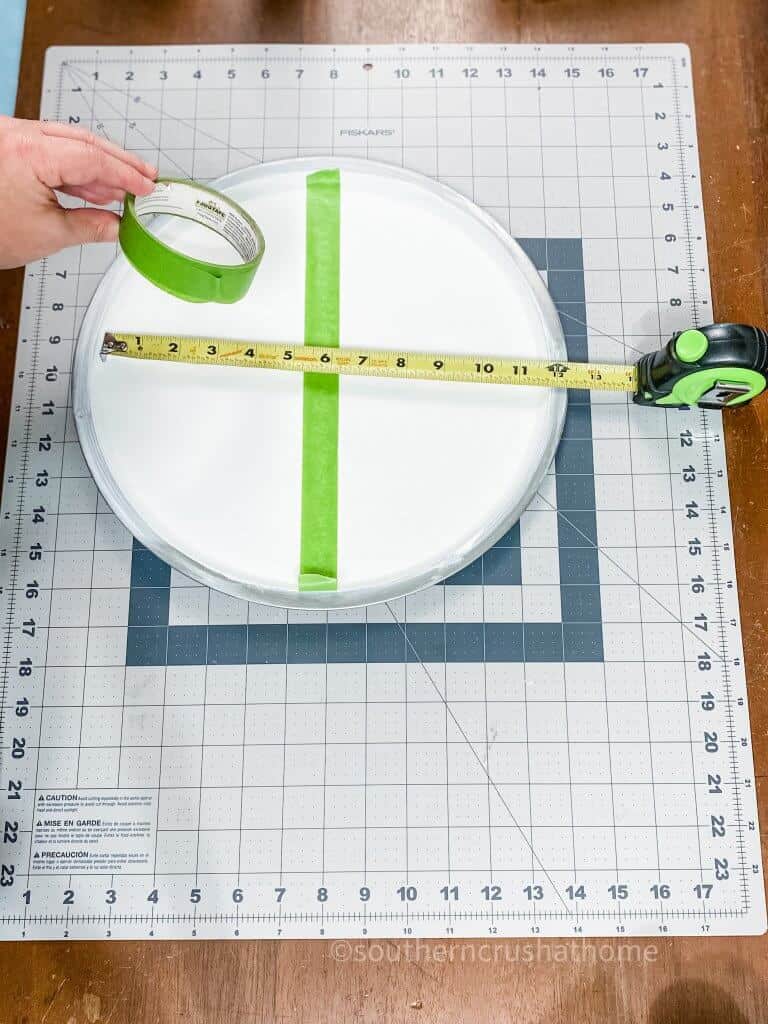
Painting Buffalo Check on a circle
Add another strip of painter's tape right next to the first strip of tap making sure not to overlap.
Now you want to add a third piece of painter's tape next to the other two pieces.
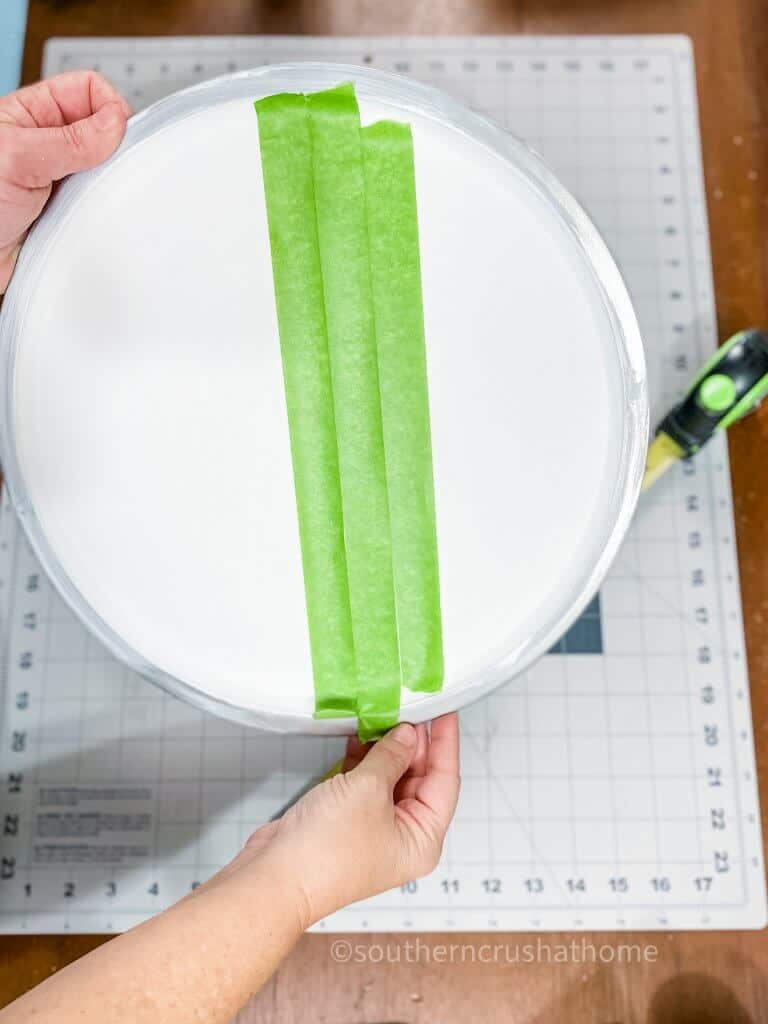
Remove the middle piece of tape. This will give you a nice evenly spaced base for painting the stripes.
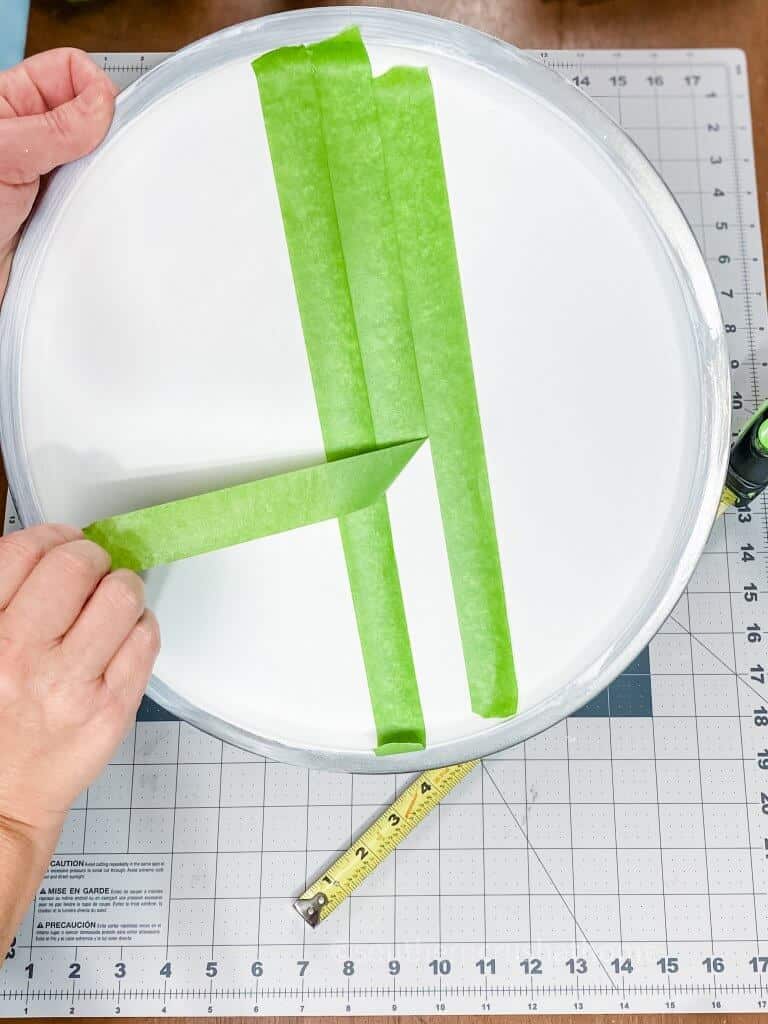
repeat process…
Continue adding the painter's tape across the pan in strips of three, removing the middle piece. Continue this process until the entire pan is covered.
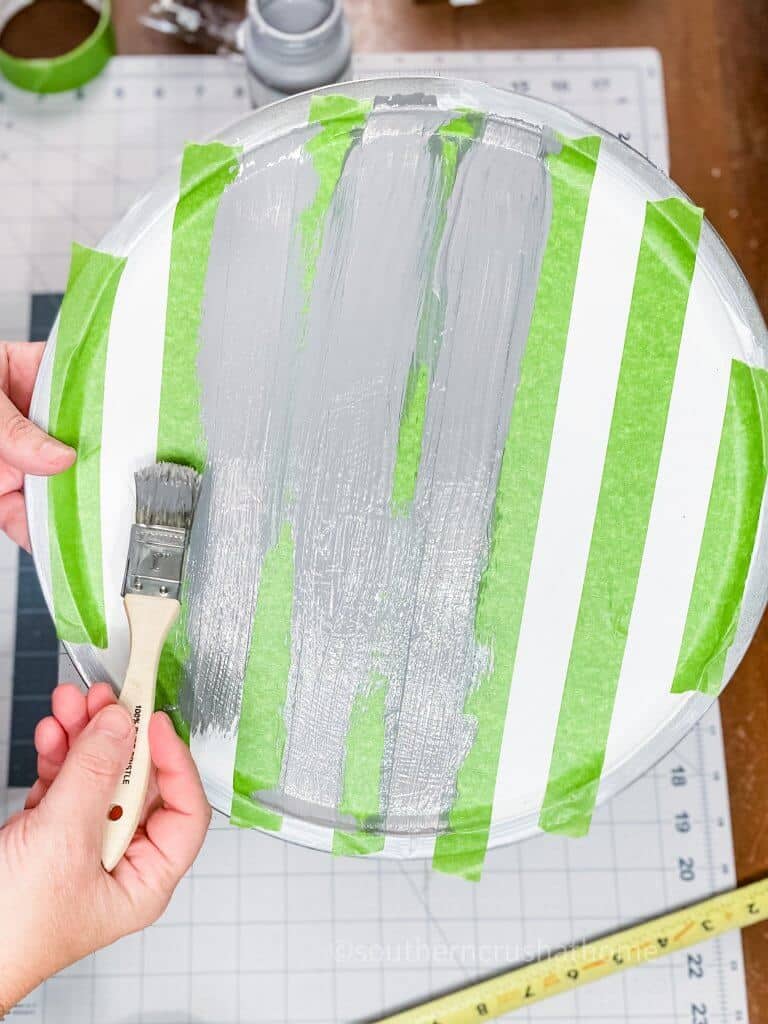
Step Three
Use the gray chalk paint to paint across the pan inside the untaped sections. You can paint on the edges of the tape without worry as the tape will give it a nice clean finish. Let the paint completely dry. I used a heat gun to dry each layer of paint in between.
Once completely dry, be patient… carefully remove the tape strips to reveal the stripes. DO NOT toss these tape strips. Keep them for the final step. I stuck them along the edge of my table to dry while I completed the next step.
Step Four
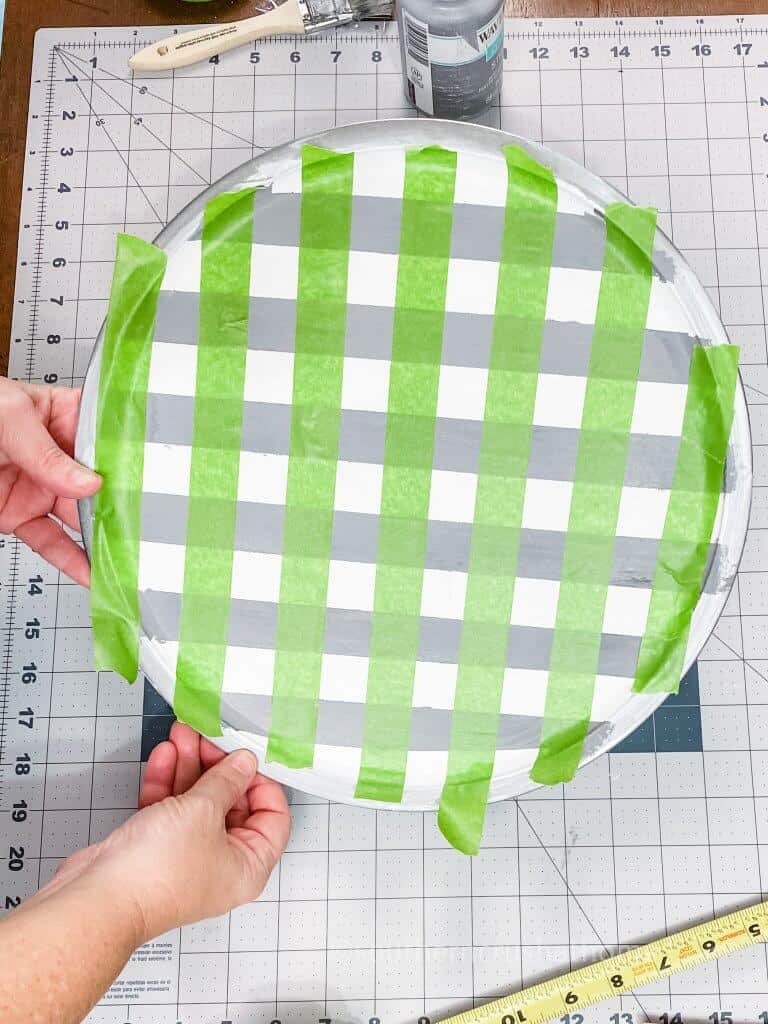
Turn your pan so the gray stripes are horizontal. Add painter's tape following the exact same steps as in the initial steps. You can see how the buffalo check is coming together already!
Paint these new openings with the same gray chalk paint and allow to dry completely.
Step Five
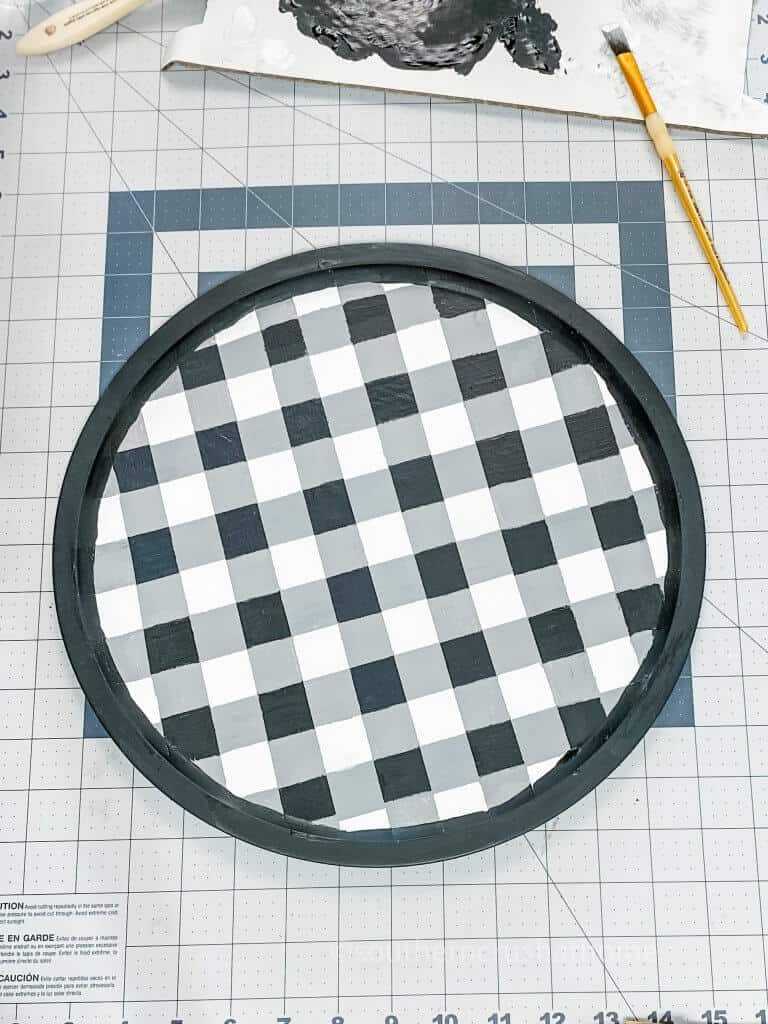
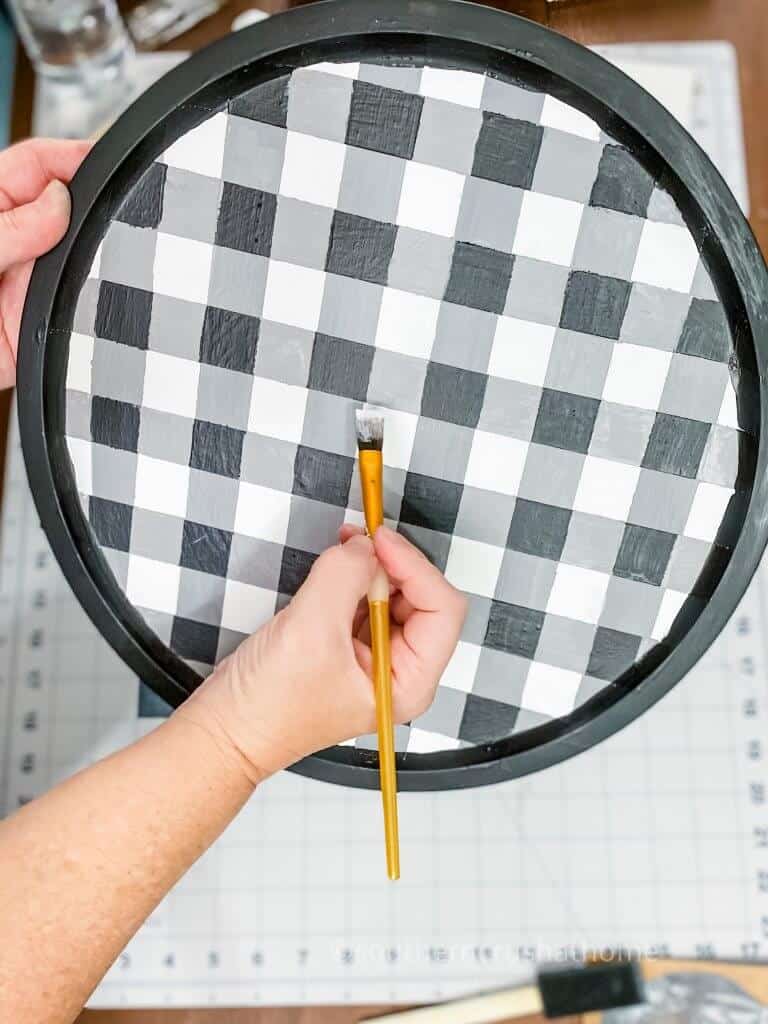
Now you need to add the original tape strips back into their place. You should be able to still see where they go easily. Next paint the open square areas with your darkest color choice. I used black acrylic paint. Let dry.
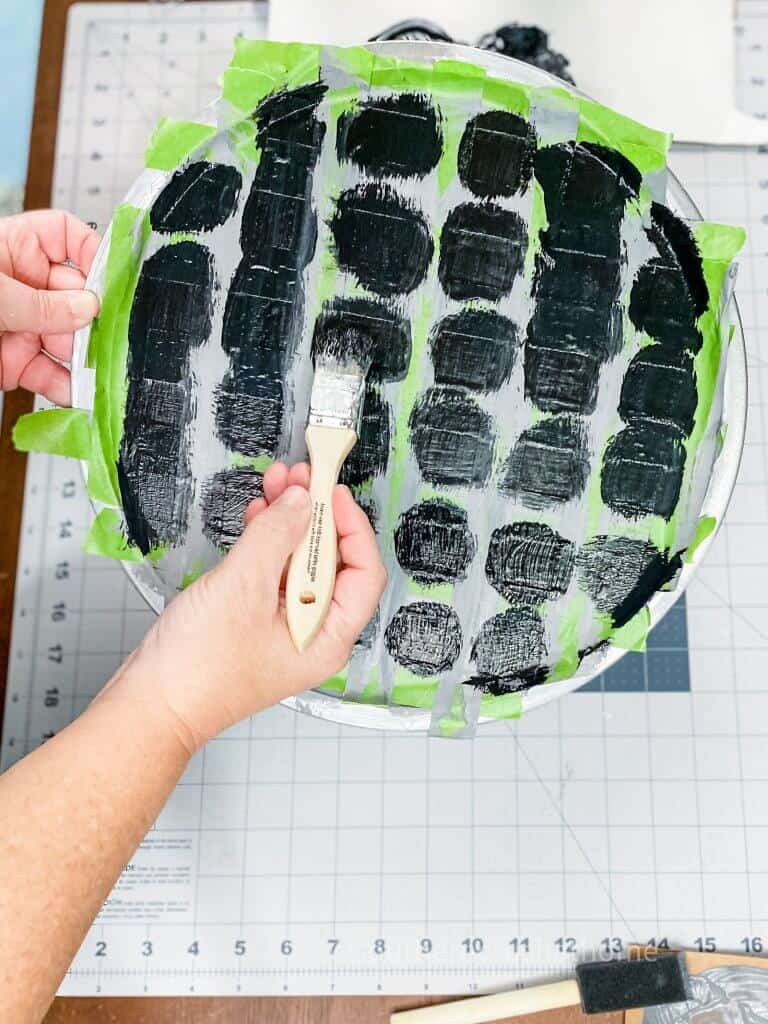
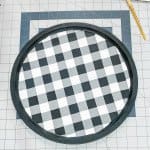
This is the best part! Carefully remove the tape and you will have a beautifully covered design. Take a smaller artist paint brush and paint the rim of the pizza pan black to make the design really pop and of course cover up any oopsies.
If you have any bleeding or spots you do not like, you can go back in with a small paint brush and touch it up with the same color paint. Easy peasy!
What I love best about knowing how to paint buffalo check is that now I can paint it on anything! Now that you've conquered the most difficult shape; a circle, you're ready to paint buffalo check on literally anything… any piece of furniture or any home decor, even my favorite, anything from a thrift store!
What do you think? Is this something you can see yourself trying? Wouldn't this look great on a tabletop?
Be sure to PIN this for later!
How to Paint Buffalo Check on a Dollar Tree Pizza Pan
Materials
- Dollar Tree Pizza Pan
- Chalk Paint - white and steel
- Black Acrylic Paint
- Chip Brush
- Painter's Tape
Instructions
Start by painting the pizza pan with white chalk paint using your chip brush.
- Measure the length of the pizza pan and mark the center.
- Add another strip of painter's tape in the center of the pan.
- Add a third piece of painter's tape next to the other two pieces.
- Remove the middle piece of tape.
- Continue adding the painter's tape across the pan in strips of three, removing the middle piece.
- Continue this process until the entire pan is covered.
- Use your gray paint to paint across the pan in the untaped sections.
- Turn your pan so the gray stripes are horizontal. Add painter's tape just as you did in the initial steps.
- Paint the open areas with black acrylic paint. Let dry.
- Remove the tape and decorate!