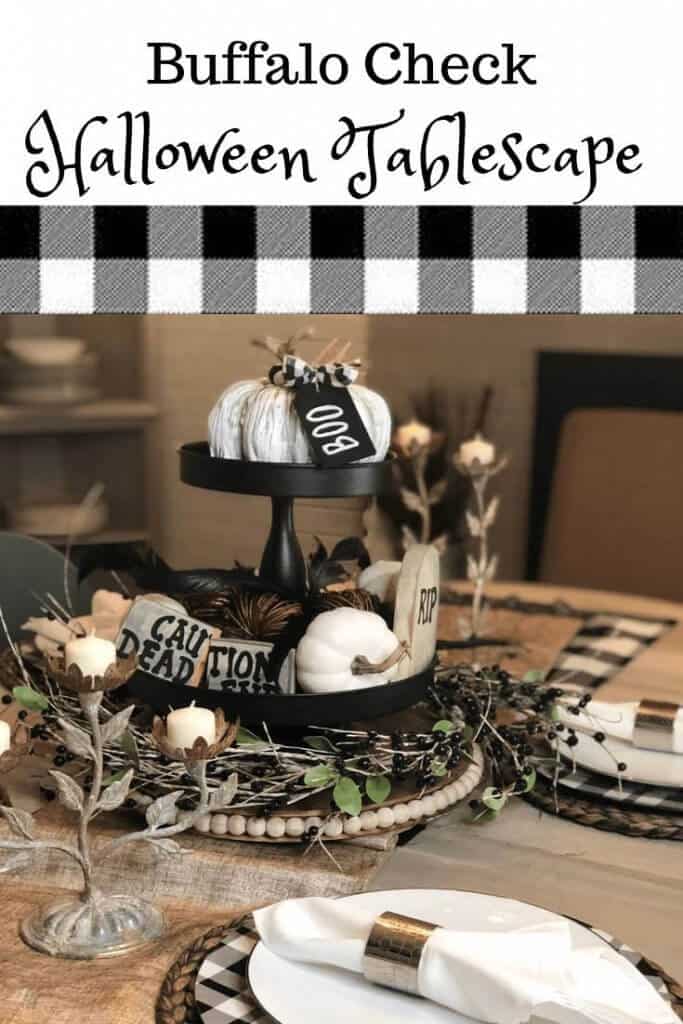
Halloween Table Decor With Buffalo Check Accents
This upcoming Halloween, I challenged myself to make some new Halloween decor pieces that were a bit unordinary and I have to say- I’m impressed! Learn how to make some not-so-frightening Halloween table decor with charming buffalo check accents. Hint: The centerpiece is completely DIY.
The spooks come out at night, or so they say. Halloween can be a super fun time to decorate for little ones.
Well, my little ones aren’t so little anymore. So, when it comes to decorating for the holidays like Halloween, I get the freedom to try new and different things and that is how this buffalo check themed Halloween tablescape came about. It started with an idea of going a more neutral route for this traditionally orange and black holiday by using mostly white and black accessories.
It turned out beautifully in my opinion.
This buffalo check Halloween tablescape was really easy to create. See it all unfold here!
Ya’ll, don’t forget to pin this for later!
How To Style Your Own Halloween Table Decor
Whether you celebrate Halloween or not, decorating for fall is a lot of fun!
I love all the fall colors – black, orange, yellow, and red. For this specific fall project, creating your own table decor is really easy and it leaves so much room for creative expression. There really isn’t a right or wrong way to do it. That being said, there are a few methods that will help your table decor all flow easier and stand out.
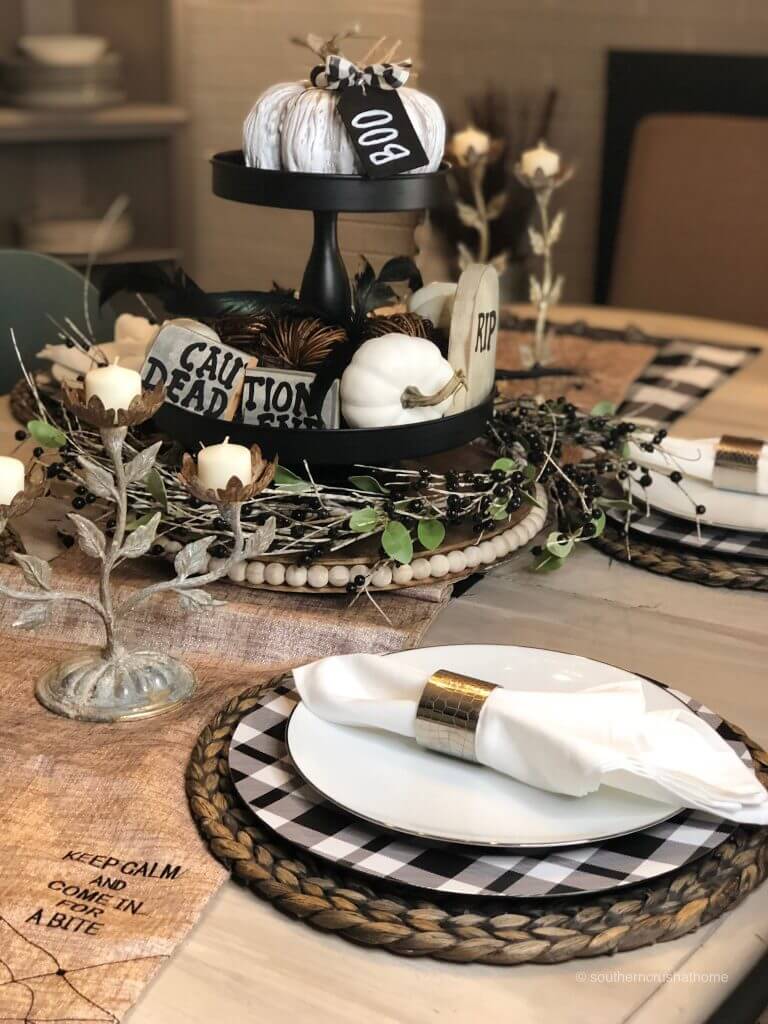
Make the Centerpiece stand out
The best Halloween tablescapes will have one main centerpiece that draws all the attention. The best way to make the centerpiece stand out is to make it tall. I used a tiered tray to give mine height and depth.
It’s so easy to change the tray for each holiday, too!
Use A Color Theme
I highly recommend deciding on which colors you are going to use before you start buying a bunch of different supplies. This way, everything will effortlessly tie in together.
I went with a simple black and white theme with green accents. It’s really easy to decorate with black and white – almost too easy!
Stick To A Decor Theme
The last thing that will help your tablescape to stand out and look amazing is if you pick a theme and decorate around it. I decided to go with a rustic theme – you know, bringing the outdoors inside.
Even my candleholders have leaves on them!
By the way, Do you love black and white buffalo check decor?
If so, consider joining my FREE Facebook Group “Buffalo Check Obsessed” where we share all things buffalo check all the time!
Step by Step Tips On decorating your Halloween Tablescape
Now that you know how to style your Halloween table decor, I have a few step-by-step pictures and tips that I hope helps you when it comes to your Halloween tablescape.
By the way- The entire tutorial is in a printable card at the bottom of this post!
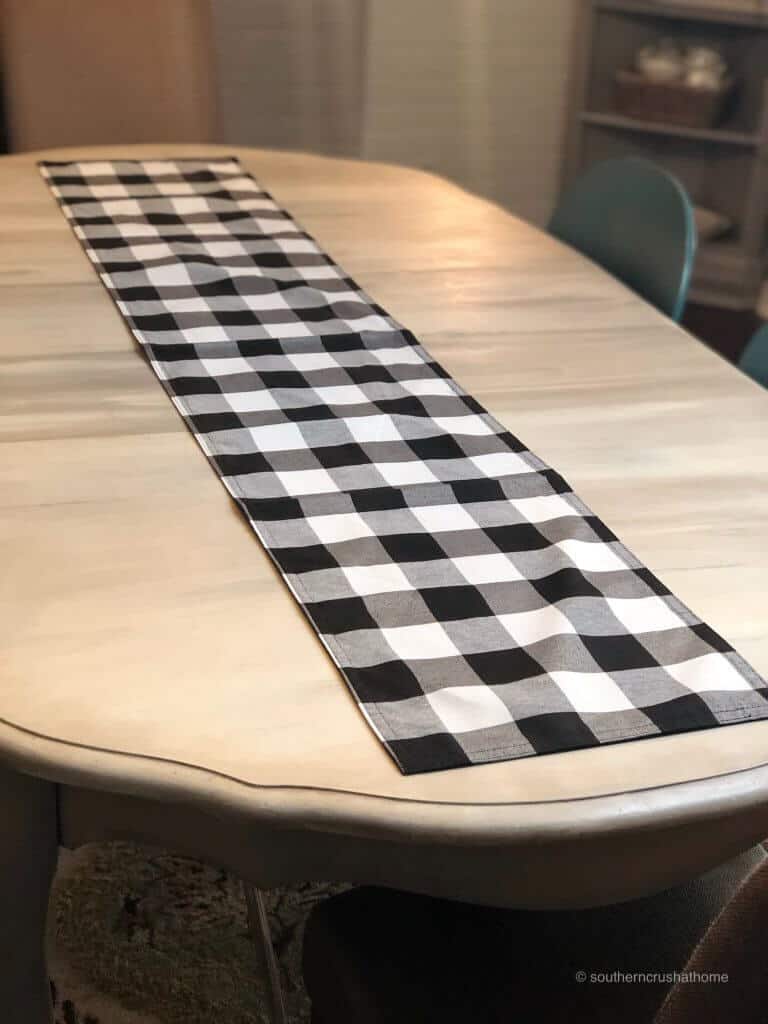
Use A Halloween Table Runner
When you are decorating a table for Halloween, pick out a table runner that matches your theme. This is the first layer in your masterpiece! I used a black and white buffalo check table runner from Hobby Lobby.
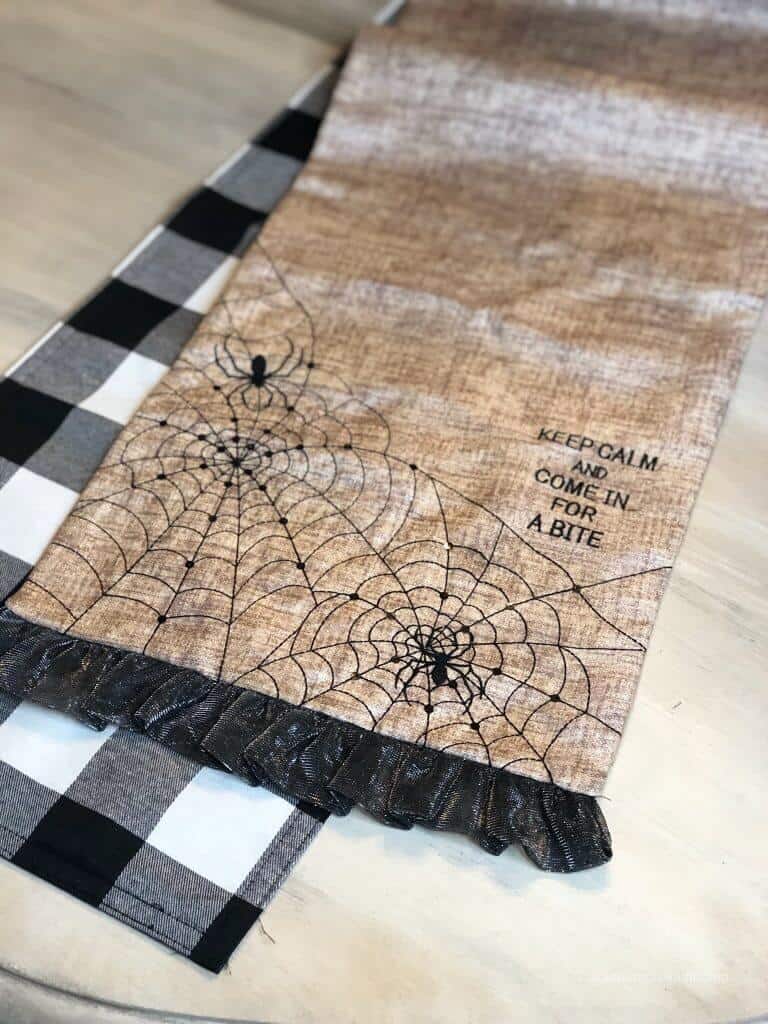
Layer Different Table Runners
Another thing you can do is layer different runners on top of each other. I fell in love with this neutral Halloween themed runner with the words “Come in for a bite” written on each end along with spider webs and ruffles. It is perfect for Halloween!
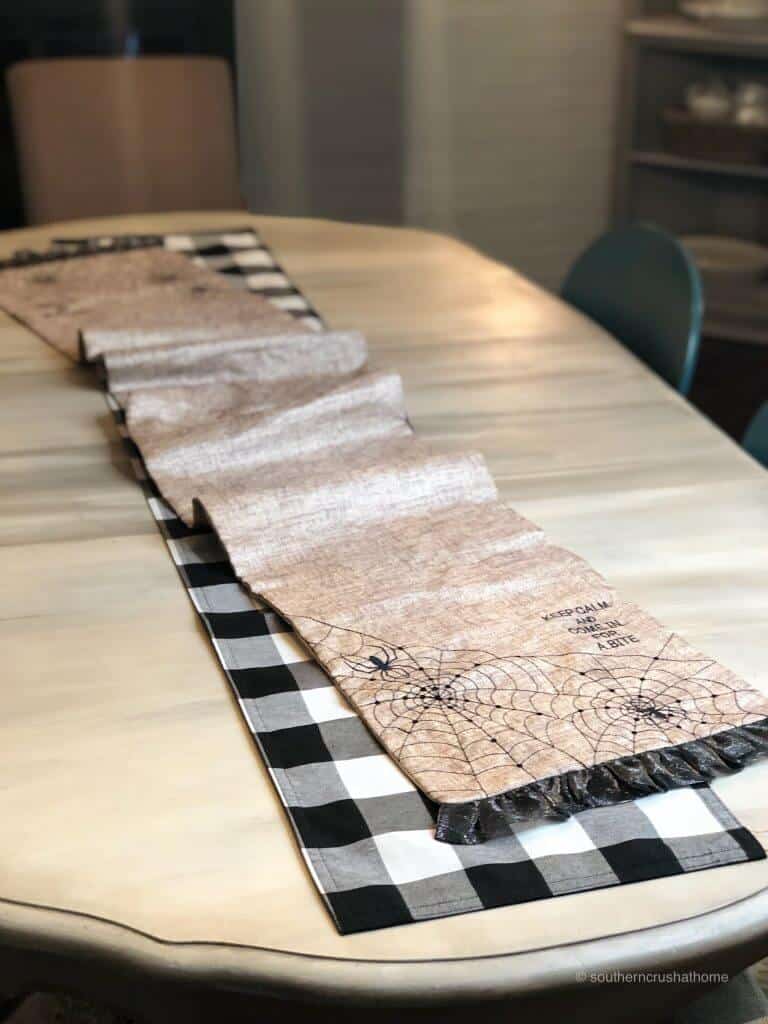
I layered it in a bunched-up, loose way. This was old and I cannot remember where it was from; however, any cute runner will do just fine. Definitely get creative here!
Layer Your Centerpiece for Extra Height
You can choose to just use a tiered tray, but when I added the “gather” lazy susan platter from Hobby Lobby, it helped my centerpiece really stand out! I also love the wooden ball trim on the edges. I wasn’t worried about the wording as I knew it would be covered up.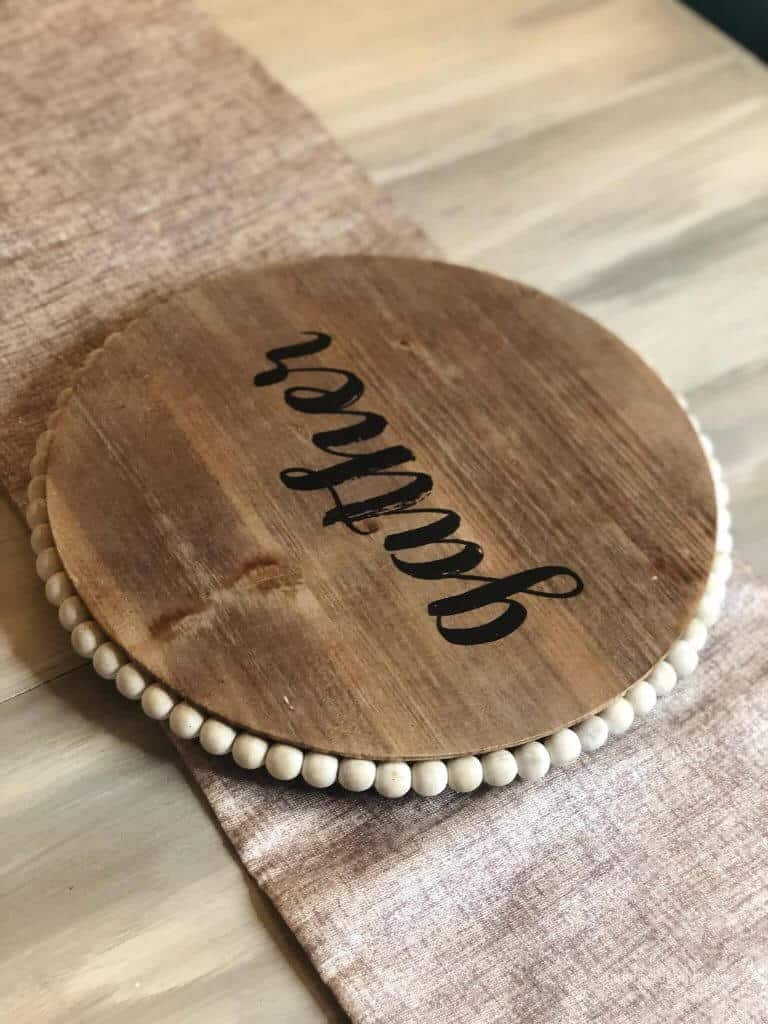
Add Some Greenery to the centerpiece
Next comes a fun black beaded floral wreath from Hobby Lobby. This adds texture and helps to cover some of the top of the lazy susan. 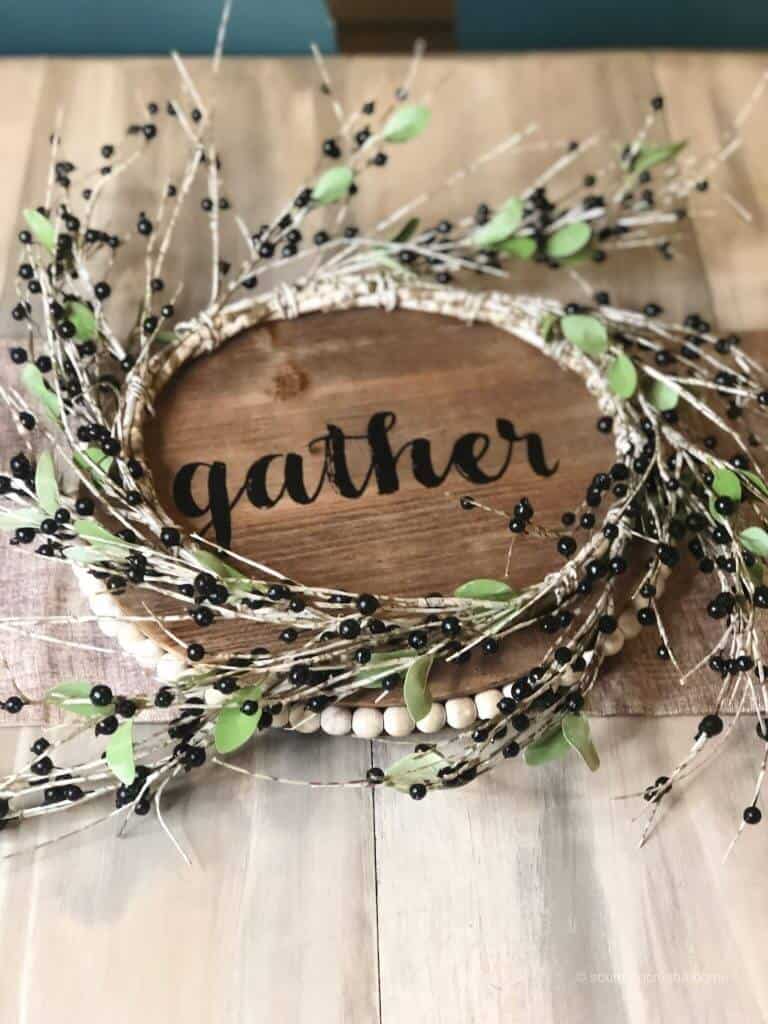
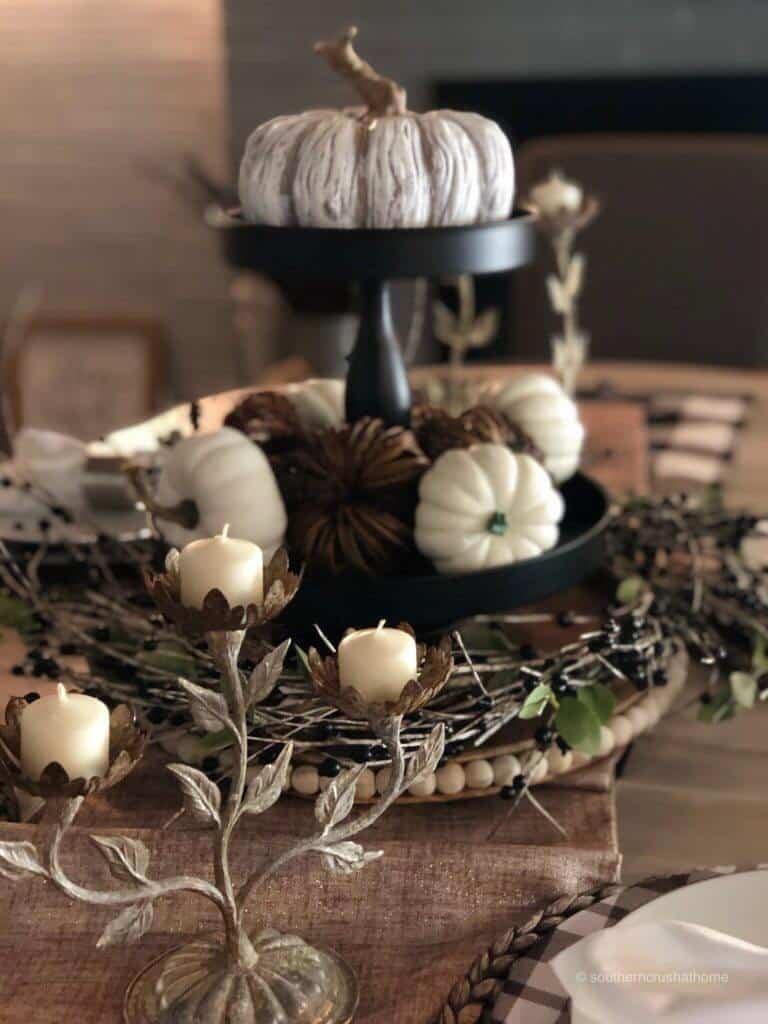
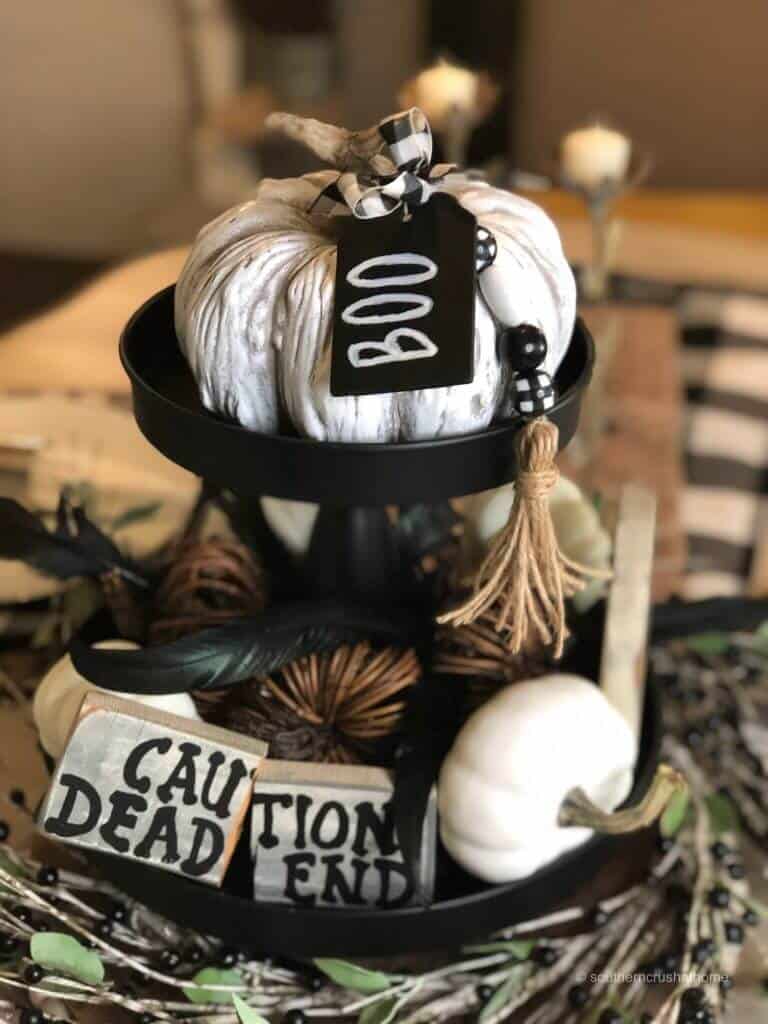
Start Building the tiered centerpiece
The tiered tray is the true centerpiece of this arrangement. This is a simple black metal two-tiered tray from, you guessed it, Hobby Lobby.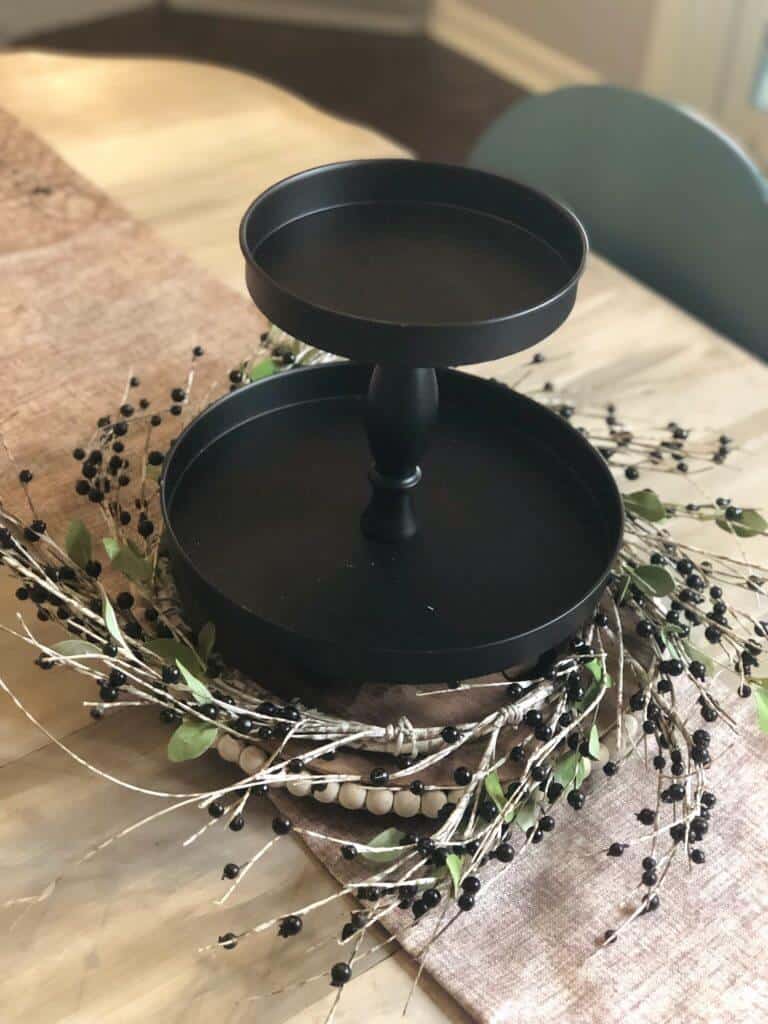
Start Adding Items To the Tray
The first decor I added to the tray was some wooden rattan pumpkin picks from Hobby Lobby. I just placed them around the center of the bottom tier on the tray.
The additional pumpkins were added around the tray bottom and the larger pumpkin was added to the top. All of the pumpkins were from Hobby Lobby! The mix of different textures and colors lends to the appeal of this arrangement. I suggest playing around and getting creative with the colors of pumpkins you want to use.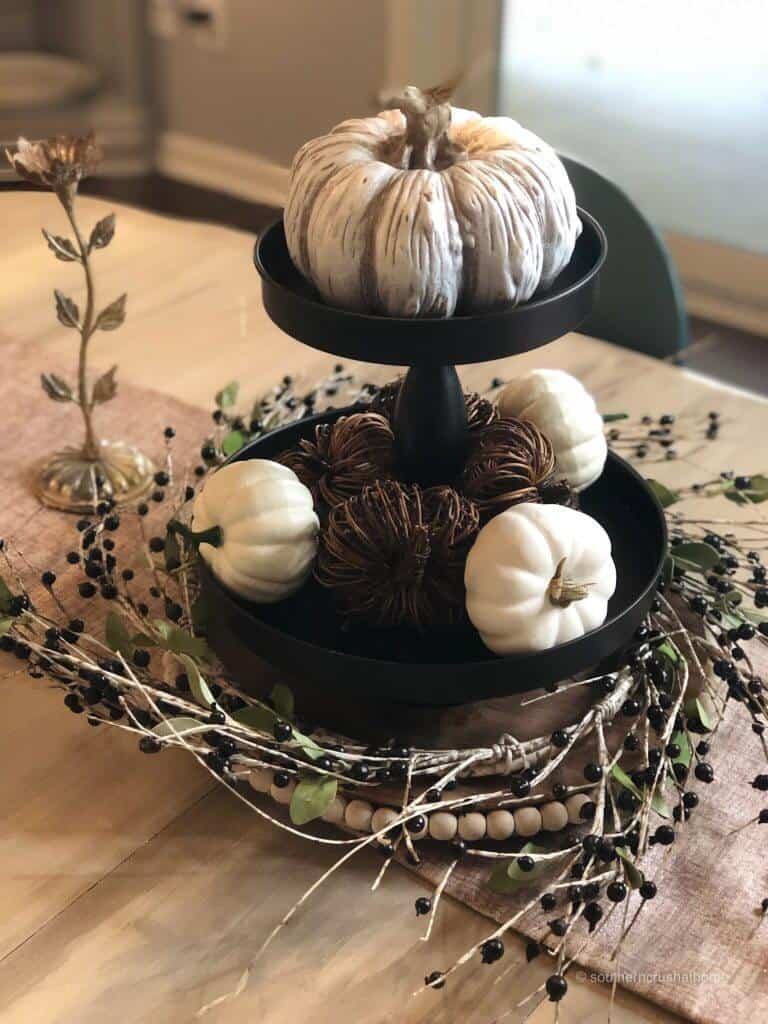
Place Candlesticks on the table
I also added a few antique candlesticks, two on one side, one on the other for added balance to the table. I personally think the tall centerpiece needed a bit of balance on my long table.
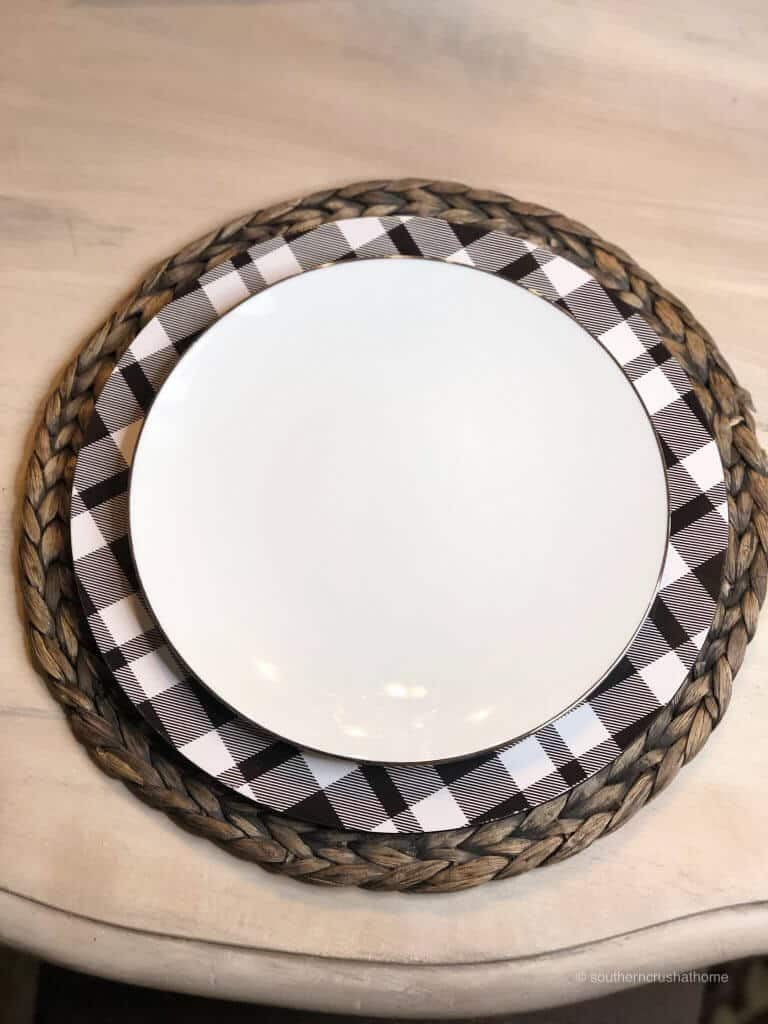
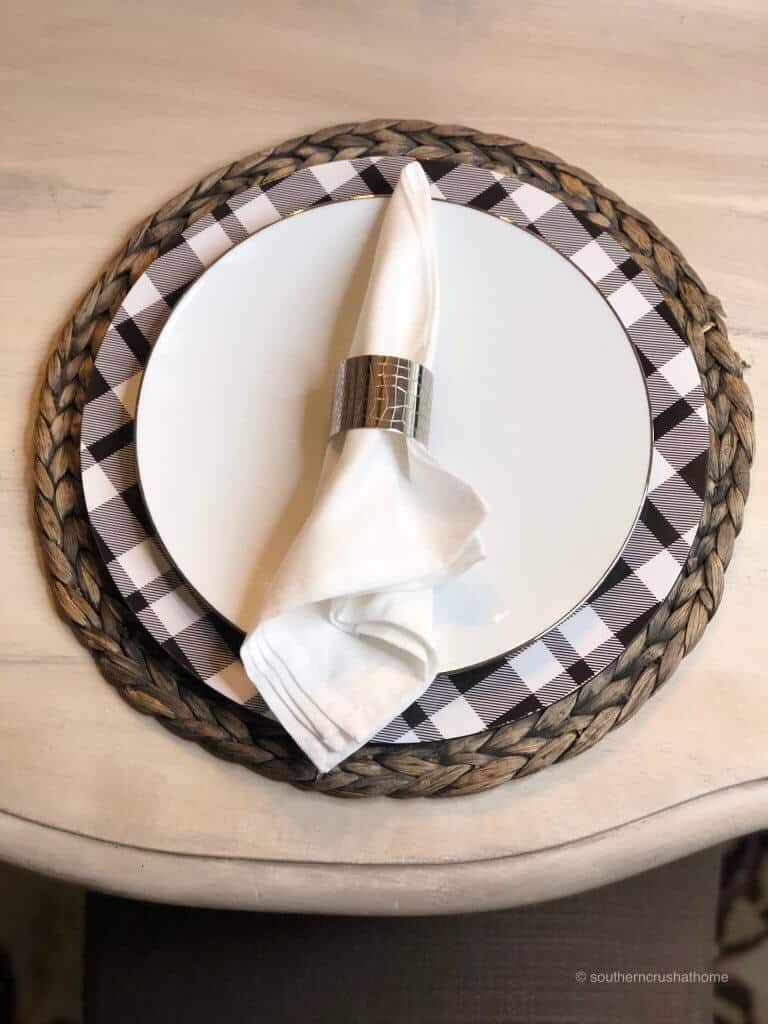
Layer The Place Setting
The best place settings will have multiple layers because this adds depth and a variety of textures and colors.
The place settings were as follows:
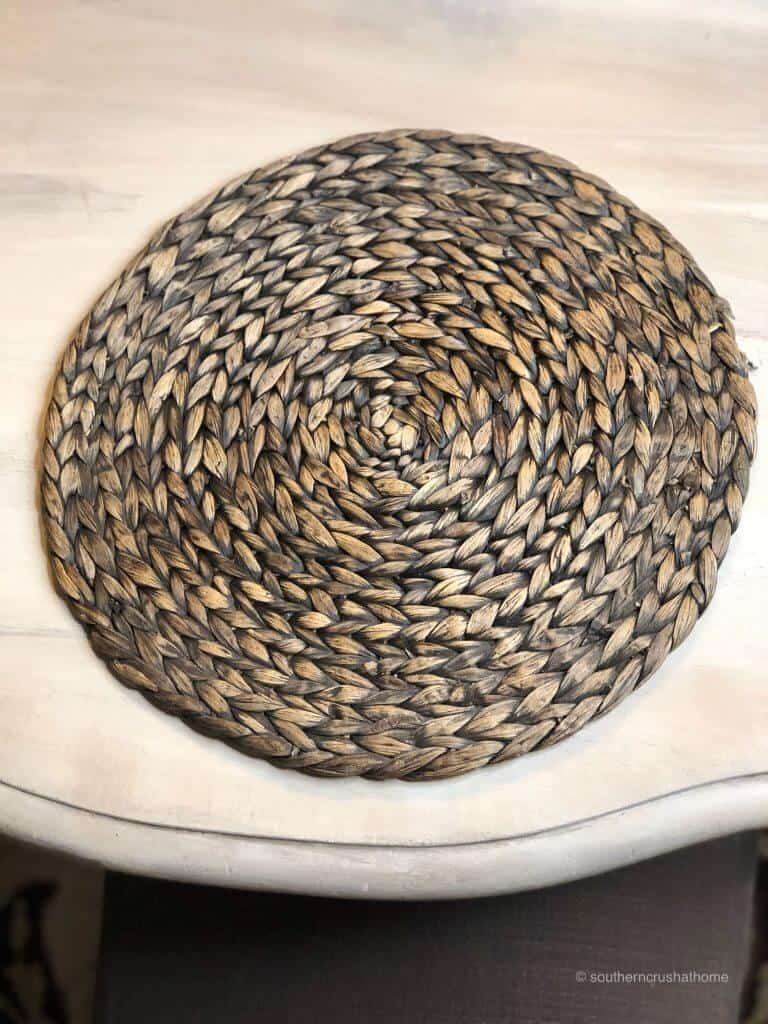
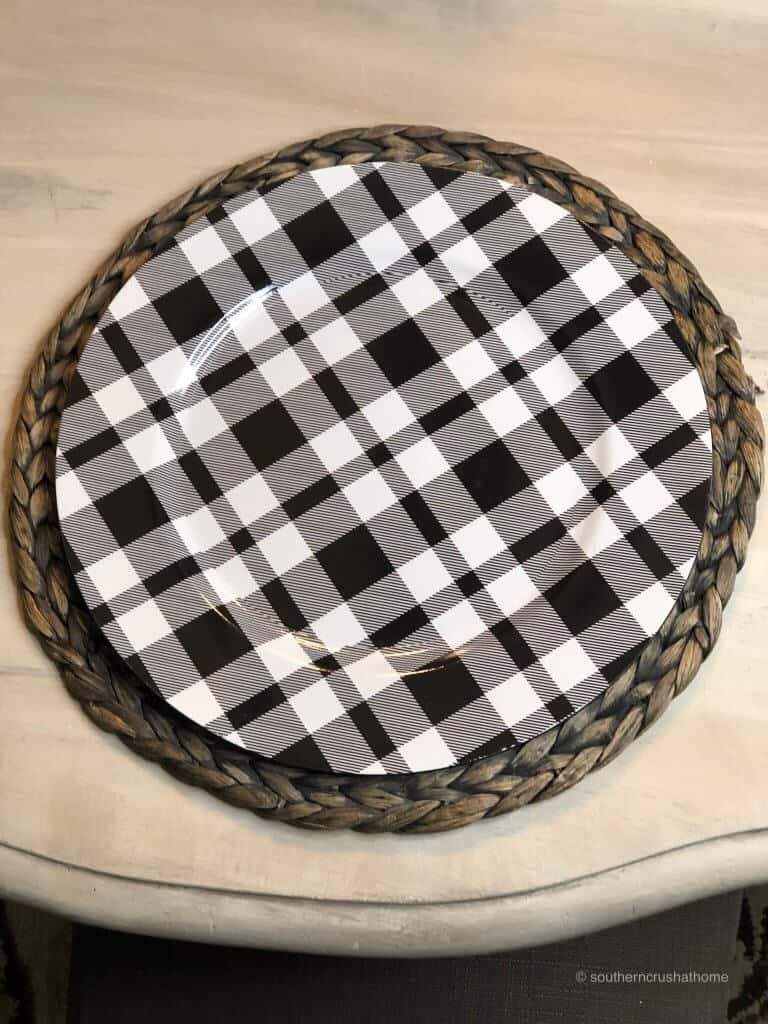
- Woven charger
- Buffalo check charger
- White china
- White napkin with a silver napkin ring.
I found all of these decor pieces at Hobby Lobby but I’m sure you can also find them at Michael’s.
Add More Decor to the centerpiece
This is the part where you just have fun with it!
I added a few wooden block signs and some black feathers to the bottom of the tray for added character, detail, and texture. 
The top pumpkin received an added wooden beaded tassel with the tag that reads “BOO”.
A video of Halloween Table Decor
If you want to see a video version of it all coming together, you can view that video tutorial above!
This is such a fun and easy table setting to re-create on your own! Use what you have and add a little extra.
Most of the pumpkins as well as the candlesticks will be re-purposed for my Fall Tablescape in a few short weeks. Saving both time and money when decorating… I love that part!
More HALLOWEEN AND fALL dECORATIONS
I love this time of year! Here are some more fun home decor crafts that are perfect for Halloween.
Sign up for emails and Join the group
If you love this kind of DIY project, you need to be getting my emails, friends! Each week I send out a couple of emails that include updates, crafts, shopping experiences, and decor inspiration. Be sure to get yourself signed up below. I can’t wait to meet you!
>>Leave your thoughts below in the comments, please… BTW— Life is short—Enjoy the mess!
Melanie Ferguson thank you for inspiring me to brave the craft world. I found so many neat things at Hobby Lobby today at 90% off!!
I have so many ideas thanks to you !! I’m so happy I stumbled onto your page on Facebook!
My husband was killed in an airplane crash and now I spend my evenings crafting and making my home home again.♥️
God Bless!!
Jeanne Meyer
Oh my goodness! I’m so sorry for your tragic loss. I’m glad you found me and I’m glad you’re here! I appreciate you!
I am in love with this. Melanie you are amazing! Thank you for sharing your amazing talent.