Easy DIY Halloween Doormat without a Stencil
Personalize and make your own DIY Halloween doormat with some stencils and paint. That's all you need! Follow this simple tutorial and decorate your front door with a witchy style.
Halloween may only come once a year, but this easy stenciled doormat can be made to fit any season! That's why I love it so much.
This is a great DIY for anyone who does not own a silhouette or a Cricut machine. You can do this technique to improvise using some regular white chalk and chalk markers.
It is one of the easiest DIY projects ever and I hope you'll try it for yourself!
How To Make Your Own Halloween Doormat
This is such a fun craft! You can create it to say whatever fun and spooky words you want. Since I don't own a vinyl cutting machine like a Cricut, this tutorial will show you how to make a doormat without one!
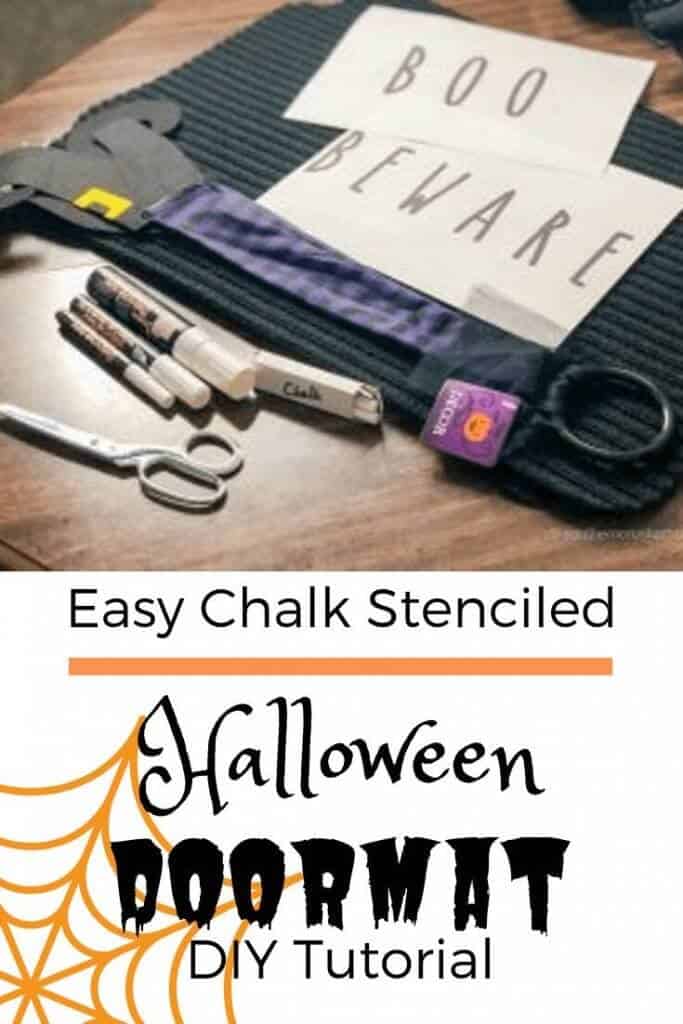
I created a printable craft card at the bottom of this post with all of the supplies and instructions.
SUPPLIES FOR STENCILED DOORMAT
Here is what you need to make a Halloween doormat just like mine.
- Plain ribbed doormat from Dollar Tree
- Rae Dunn Font
- Pair of witch's legs from Dollar Tree
- Variety of white chalk pens
- White chalk
- Scissors
- Painter's Tape
- Old pencil or flat edge
Y'all, don't forget to pin this for later!
TIPs on how to DIY a Doormat for your home
Before I share the printable card with all the steps, I have some photos and tips I want to share that I think will really help you do this tutorial.
Print any wording you want
I'm going to show you how to make your own stencil with whatever wording you want. I found some really funny ideas online and some of my favorite ones are:
- The Neighbors Have Better Candy
- Watch Out Behind You
- Come In My Pretties
- Trick Or Treat Yo' Self
- Run Away!
- Hey Boo!
- We're All Mad Here
If you want larger letters, use one sheet of paper for a single letter or just a couple of letters at a time. Then, combine them with tape for your project.
Color in each letter with chalk on the back
This is how you create your own stencil without cutting anything! Flip over your print out and begin going over the letters filling them in using your regular white chalk. You can lightly blow the excess off if it bothers you.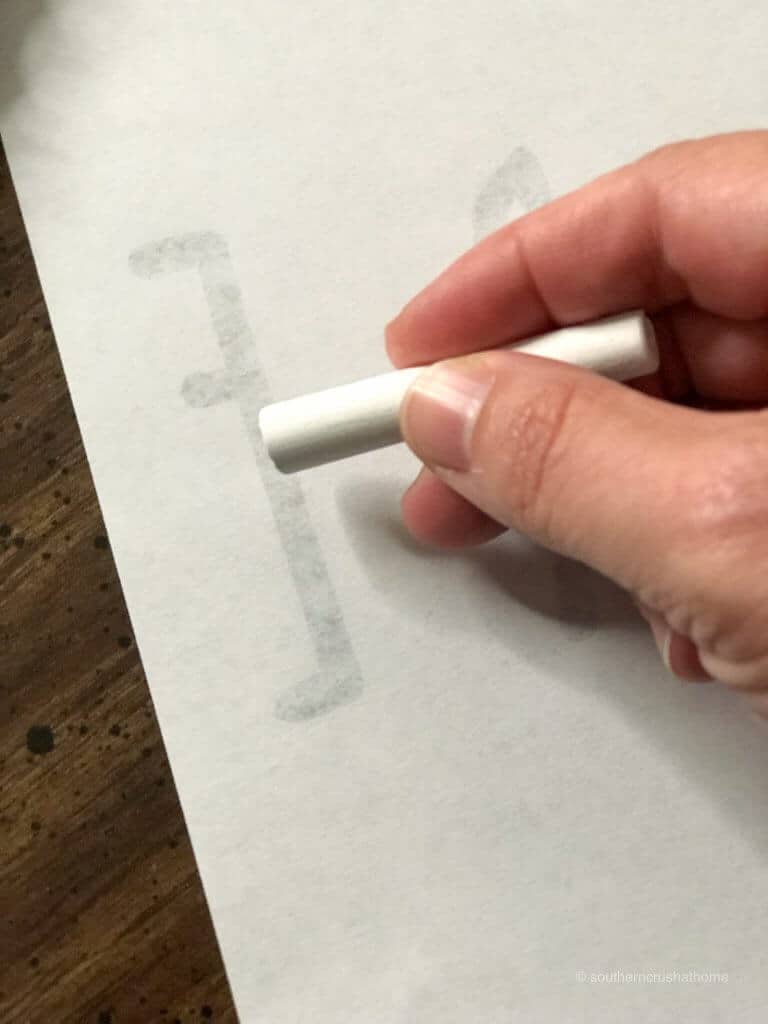
Attach The stencil to your doormat
Next, flip back over your print out and place onto your doormat into the desired position and secure with painters tape.
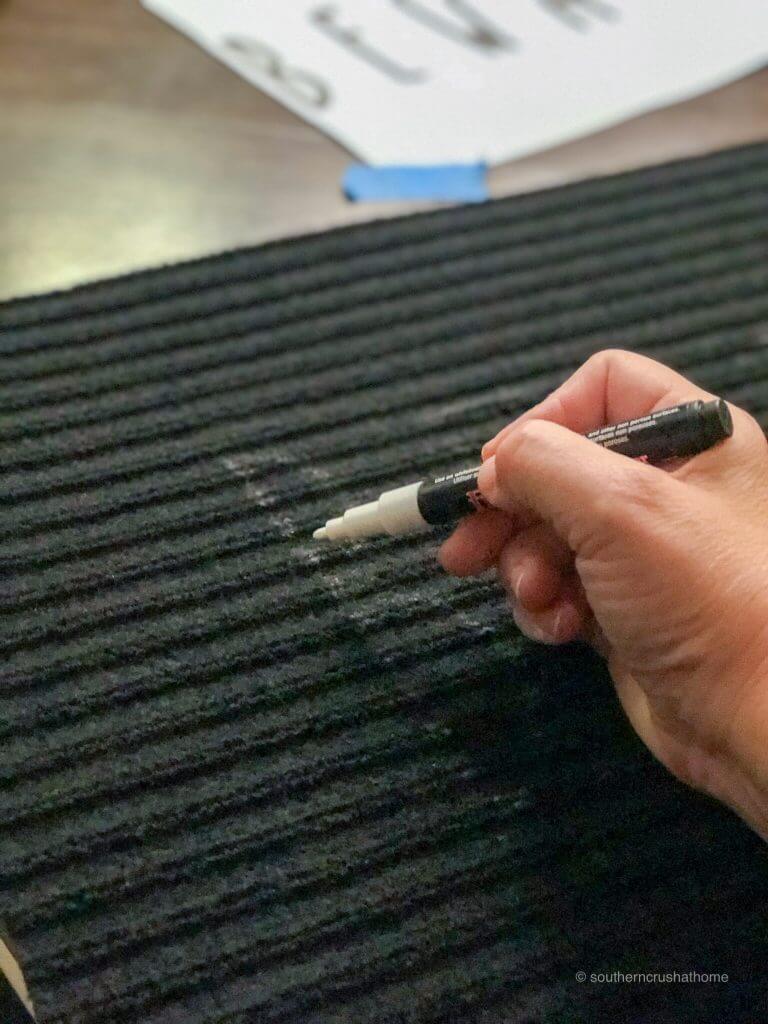
Transfer the words from the chalk
Make sure to go back over your letters with a flat edged tool. I used an old mechanical pencil without an eraser.
Just firmly rub over the letters one at a time, trying to be sure to keep your paper in its original position.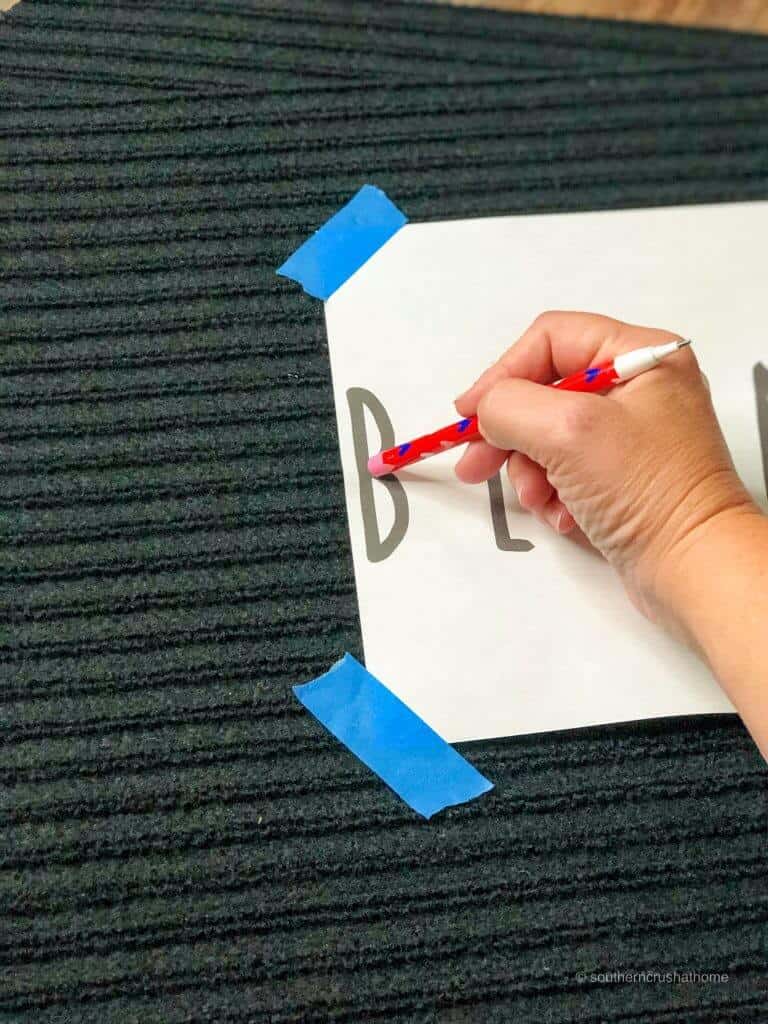
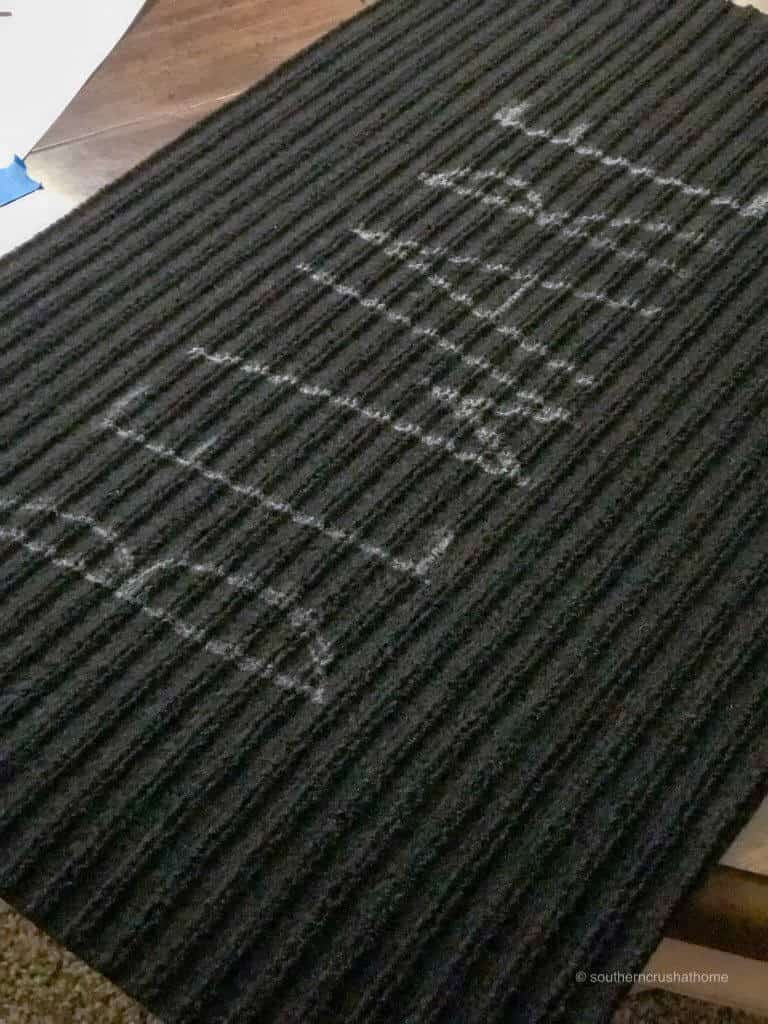
Fill in the letters with chalk markers
Remove your paper and the lettering should be left behind by the chalk. Go back over your design with your favorite chalk markers until your desired result is reached.
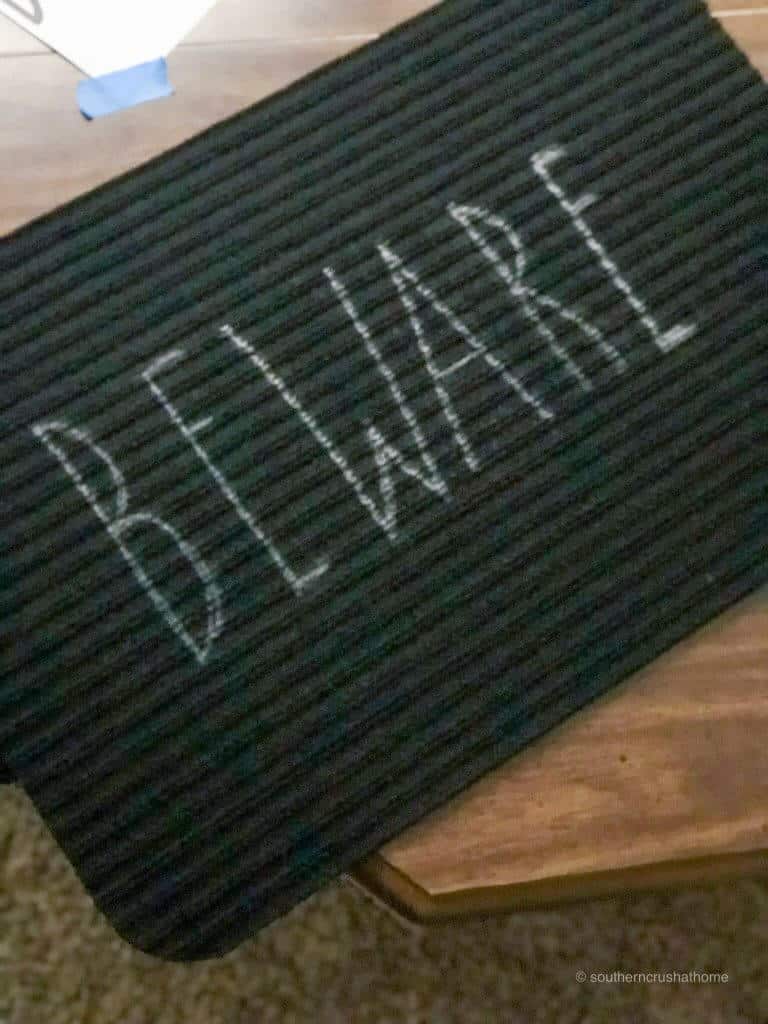
Here is what that process looks like.
Keep going over it with your chalk pen until it is dark enough. It might take a few coats.
WATCH Halloween Doormat Tutorial Video HERE
If you prefer to see the video tutorial for this DIY, grab a seat and watch it!
Extra Decorations you can add
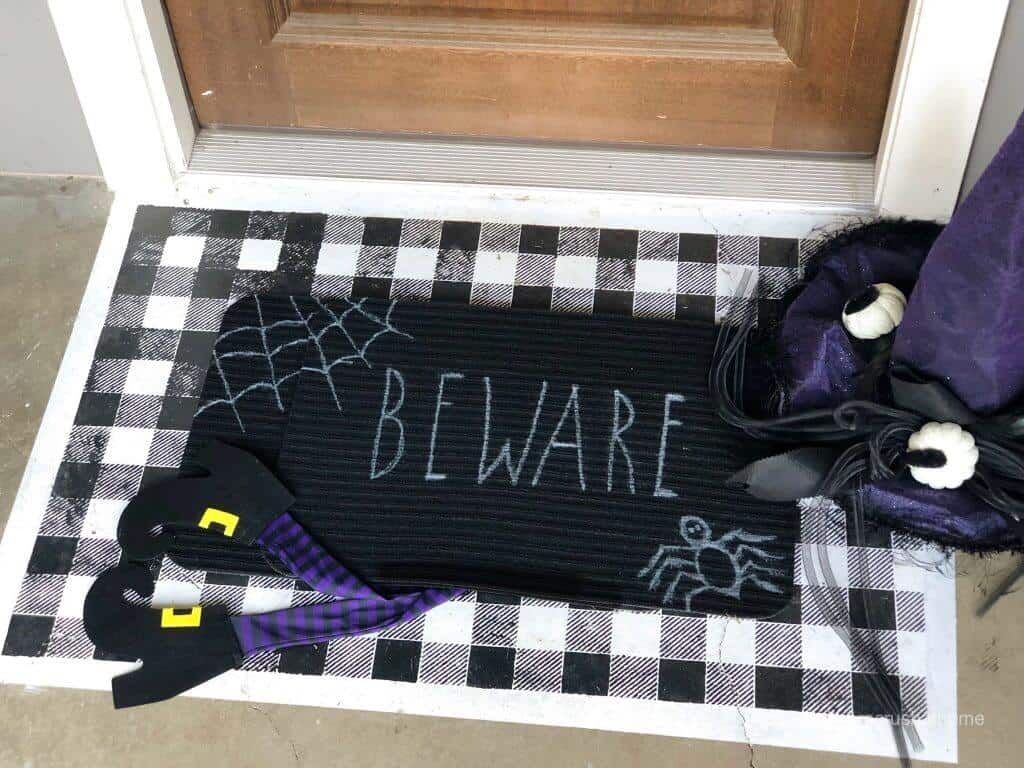
This was quick, fun, and easy – the three ingredients to a great DIY project. I added a spider and a spider web freehand with my chalk markers. It's supposed to be a fun project, so just get creative with it and make it your own.
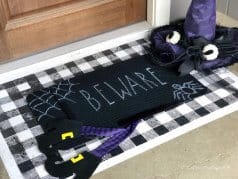
Don't forget to add your witch's legs underneath the mat for an added spooky effect! You can cut the ring off and glue them to the back of your mat in any position you desire.
My favorite part is the idea that this technique of using the chalk as my stencil without a silhouette or Cricut machine opens the door for tons of doormat projects. This doormat from Dollar Tree was only $1.00 and that makes it a budget-friendly project, too! My doormat usually gets a lot of wear and tear throughout the holiday season, so the idea that I can change it out all of the time sounds like a good deal!
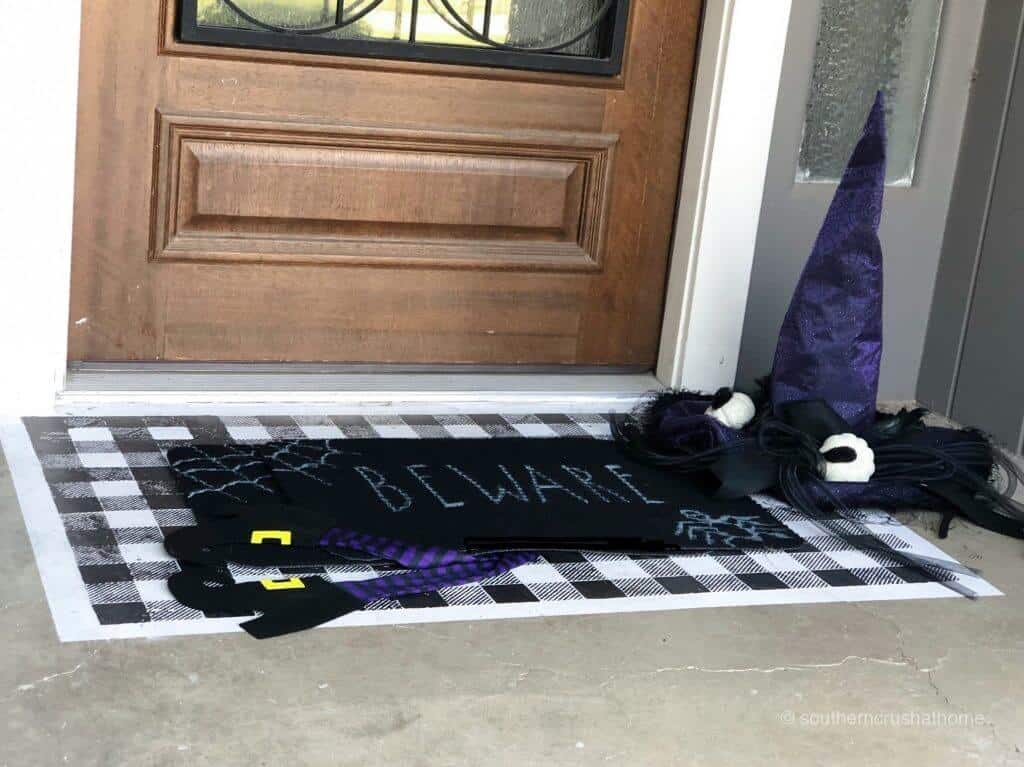
I also added a fun witch's hat for added effect. Ha! It literally looks like the witch was squished under the doormat! It's a great warning to others to “BEWARE”! Happy Halloween my pretties, at least I think that is what she would've said.
DIY Doormat Tutorial
Here is the printable card with all of the instructions and supplies. Please, pin this post and share it with your friends!

DIY Halloween Doormat
Equipment
- scissors
- Painters Tape
- Flat Edge
- Rae Dunn Font
Materials
- 1 plain ribbed doormat
- 1 pair Witch's Legs
- 1 set White Chalk Pens
- 1 box White Chalk
Instructions
- Print out your desired wording with your favorite font (bold print is best) onto regular printer paper.
- Flip over your print out and begin going over the letters filling them in using your regular white chalk.
- Flip back over your print out and place onto your doormat into desired position and secure with painters tape.
- Go back over your letters with a flat edged tool, I used an old mechanical pencil without an eraser. Just firmly rub over the letters one at a time, trying to be sure to keep your paper in its original position.
- Remove your paper and the lettering should be left behind by the chalk. Go back over your design with your favorite chalk markers until your desired result is reached.
- Add witch's legs and any other Halloween decorations to your mat.
Easy Stenciled Halloween Doormat
Some days are so crazy that you may feel like this poor witch that was crushed underneath the doormat. It's comforting to know that we don't have to worry about what the world will throw our way in this life. John 16:11 says “In me you have peace. (BEWARE), in the world, you will have trouble, but don't worry; I have overcome the world.”.
So when those troubling trials come, you can take heart and choose peace! Be an encourager and share a recent trial you've overcome below.
More Halloween Tutorials
Fall is the best time for crafts! Here are some more tutorials you'll enjoy next.
If you love this kind of DIY project, you need to be getting my emails, friends! Each week I send out a couple of emails that include updates, crafts, shopping experiences, and decor inspiration. Be sure to get yourself signed up below. I can’t wait to meet you!
>>Leave your thoughts below in the comments, please… BTW— Life is short—Enjoy the mess!
This is the cutest Halloween doormat that I’ve ever seen!