DIY Halloween Coffee Table Tray Decor
Make your own cute and chic Halloween coffee table tray decor – it’s easier than you might think and doesn’t cost a lot of money!
PIN this for later!
Trays are such a fun piece of decor to add to any space and to use for any occasion! This DIY Halloween tray decor in particular was super fun and easy to create and can be personalized any which way you like.
Get creative with this project and add your own spin! Mine turned out a little farmhouse, a little modern and trendy looking.
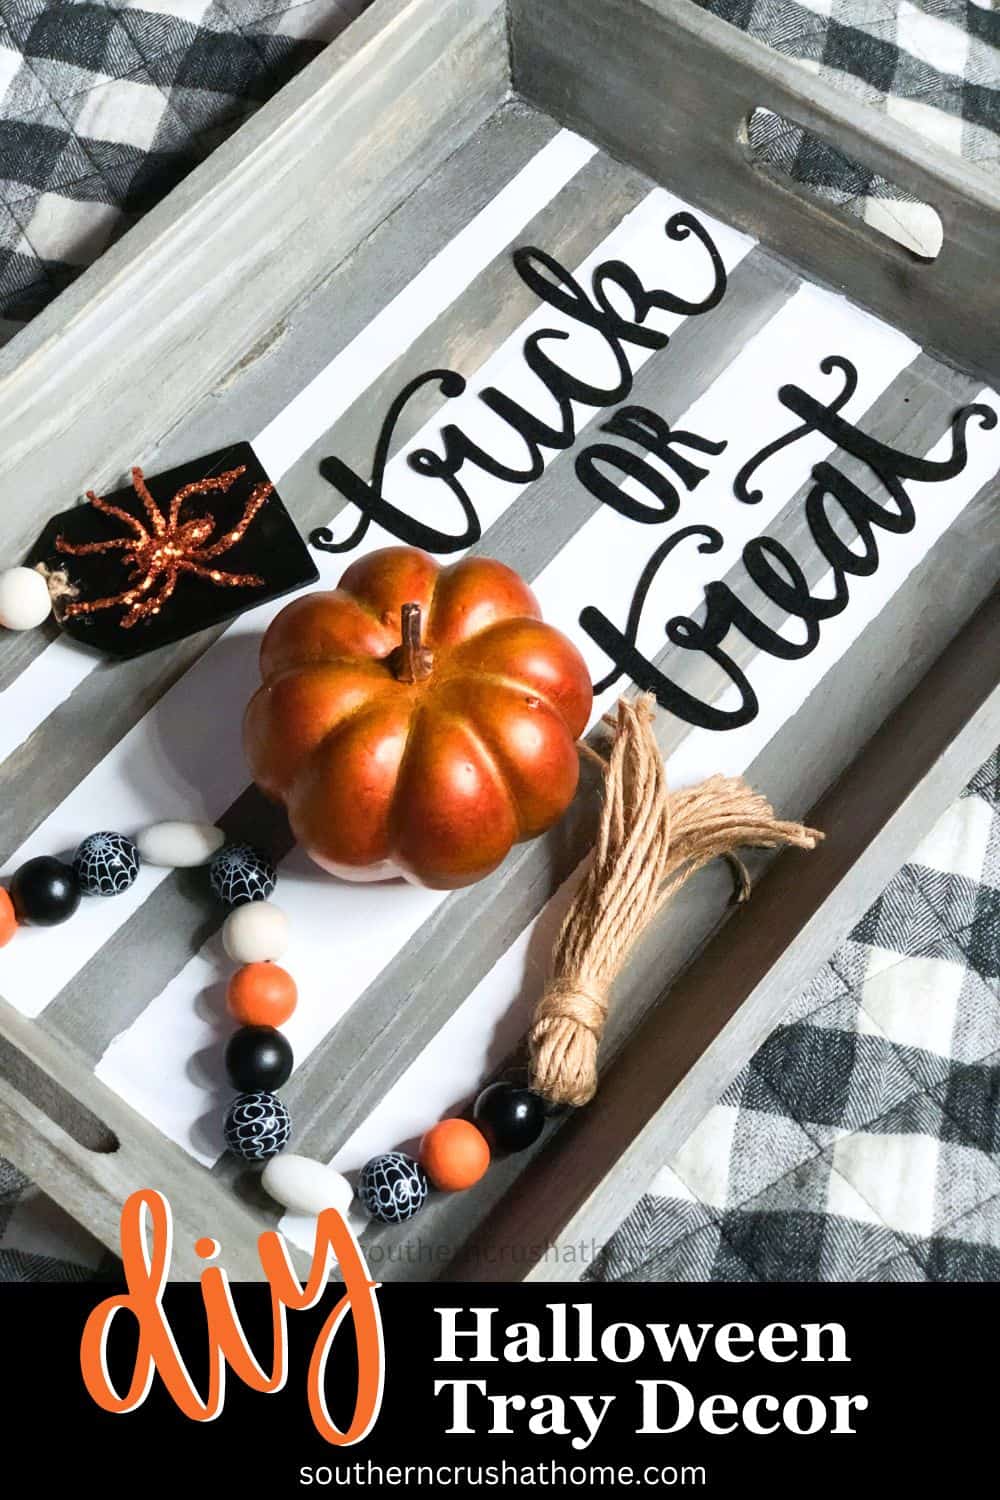
Halloween is upon us and this tray was the perfect addition to my “coffee ottoman” as a unique piece of decor once I paired it with my handmade Halloween beaded tassel and a simple orange pumpkin from the Dollar Tree!
Ya’ll, don’t forget to pin this for later!
This blog post contains affiliate links. The opinions are wholly my own from my own experience. I may earn a small commission from clicks through to the websites that end in a purchase.
Coffee Table Tray Decor
One of my favorite ways to decorate my house is with coffee table trays. I could spend hours just browsing Pinterest for decorative tray ideas!
The best thing about coffee table trays is that you can literally change them for every single season and holiday without much effort or money. In fact, you can even get a wooden tray from Dollar General.
In this tutorial, I will show you step by step pictures, a video tutorial, and a printable card with all of the instructions on it!
How To Save Money on Halloween Decor
One of my favorite ways to save money on Halloween decorations is to buy them on November 1st. Almost every single store has their Halloween decorations on a super steep discount the day after Halloween.
What kind of things do you like to use in your Halloween decorations?
I love all things pumpkin! Oh, and anything that reminds me of the harvest, too. That could be corn or wheat. I’m not a personal fan of creepy or gothic decor – no spiderwebs or witch decor for me.
What about you? Let me know in the comments!
Supplies for DIY Halloween Coffee Table Tray Decor
This tutorial will show you how to paint and decorate a simple wooden tray so that it is ready for Halloween! What you put on top of it is completely up to you and your imagination.
Here is what you’ll need before you start.
- Wooden tray (this one was from Dollar General)
- Paint (mine was DecorArt from Walmart in white)
- Painters Tape
- Paint Brush
- Halloween Style Pumpkin Decorating Stickers here or here

Halloween Tray Tips
The entire tutorial is in the printable craft card at the bottom of this post. First, I have some step-by-step pictures and tips that will help you be more successful.
If you have any more questions that I didn’t answer, please leave them in the comments.
Measure The Area For the Stripes First
Measure out where you would like your stripes to go. I completely ‘eye-balled’ mine, but I don’t recommend this method if you’d like them to be straight or a particular way.
You can go with one, two, three, or even four stripes like I did. A variety of sizes is fun, too!
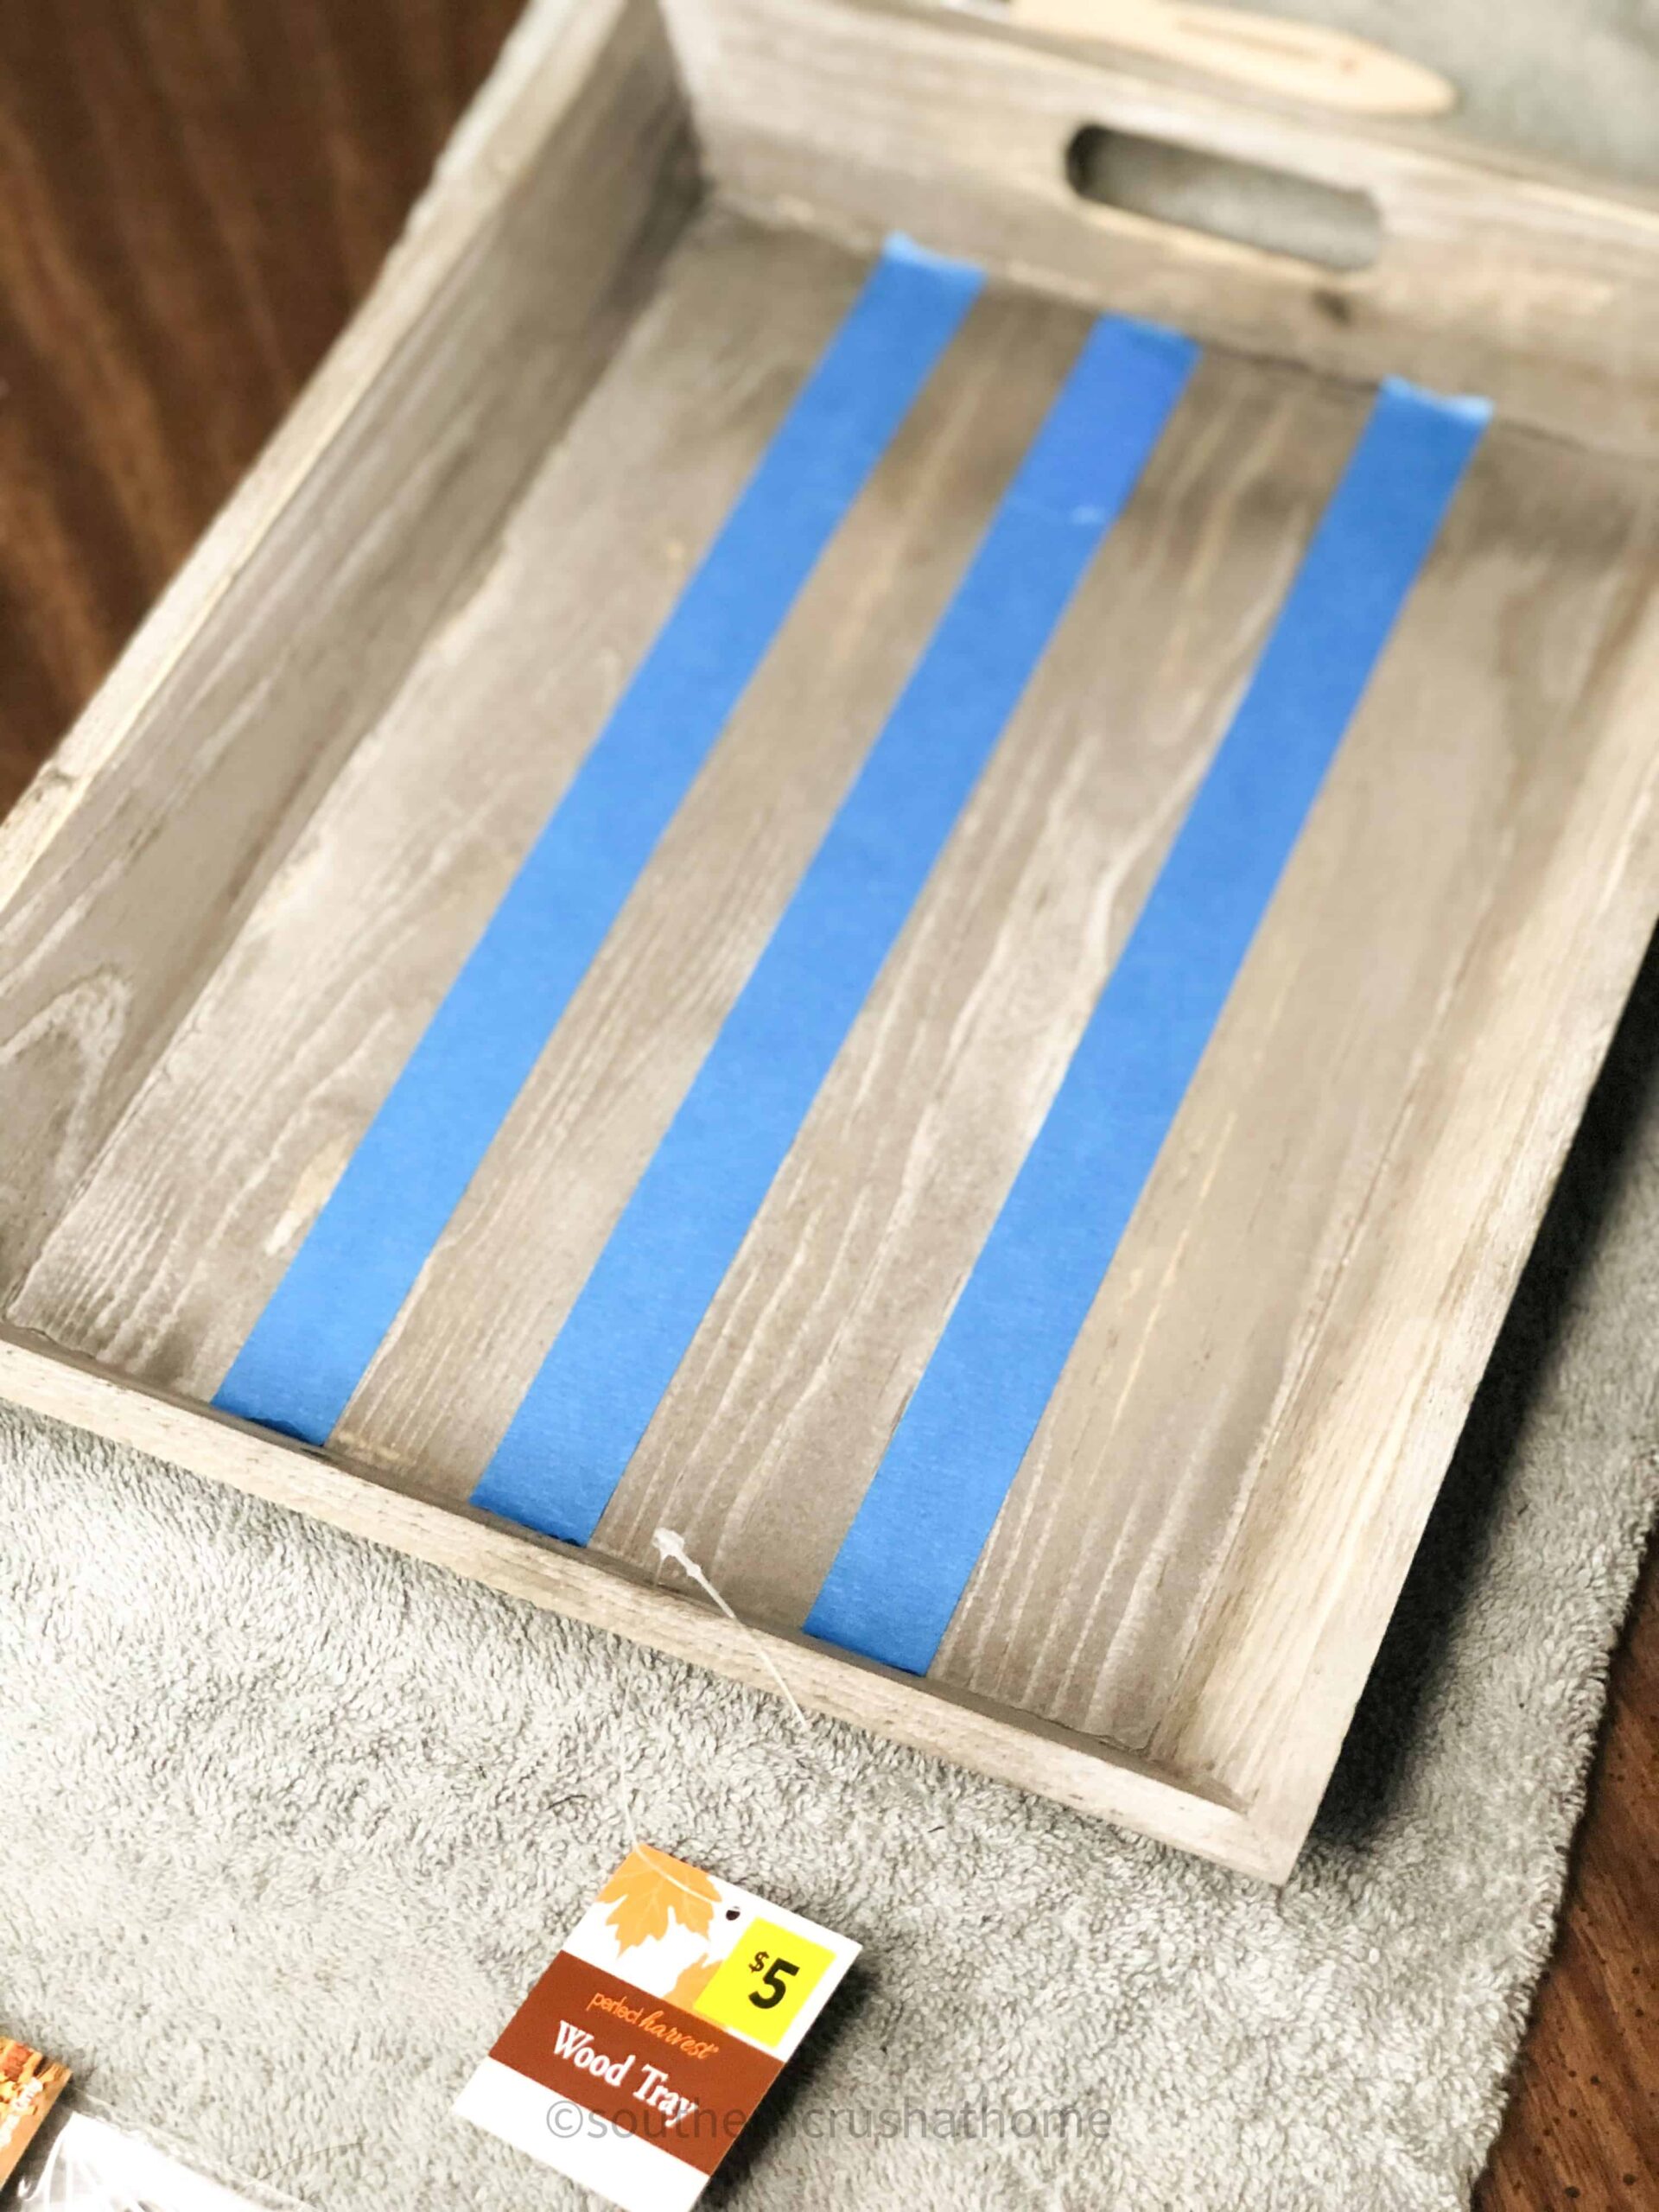
Place the blue painter’s tape in between where you would like the paint to be and press down pretty hard to avoid bleeding.
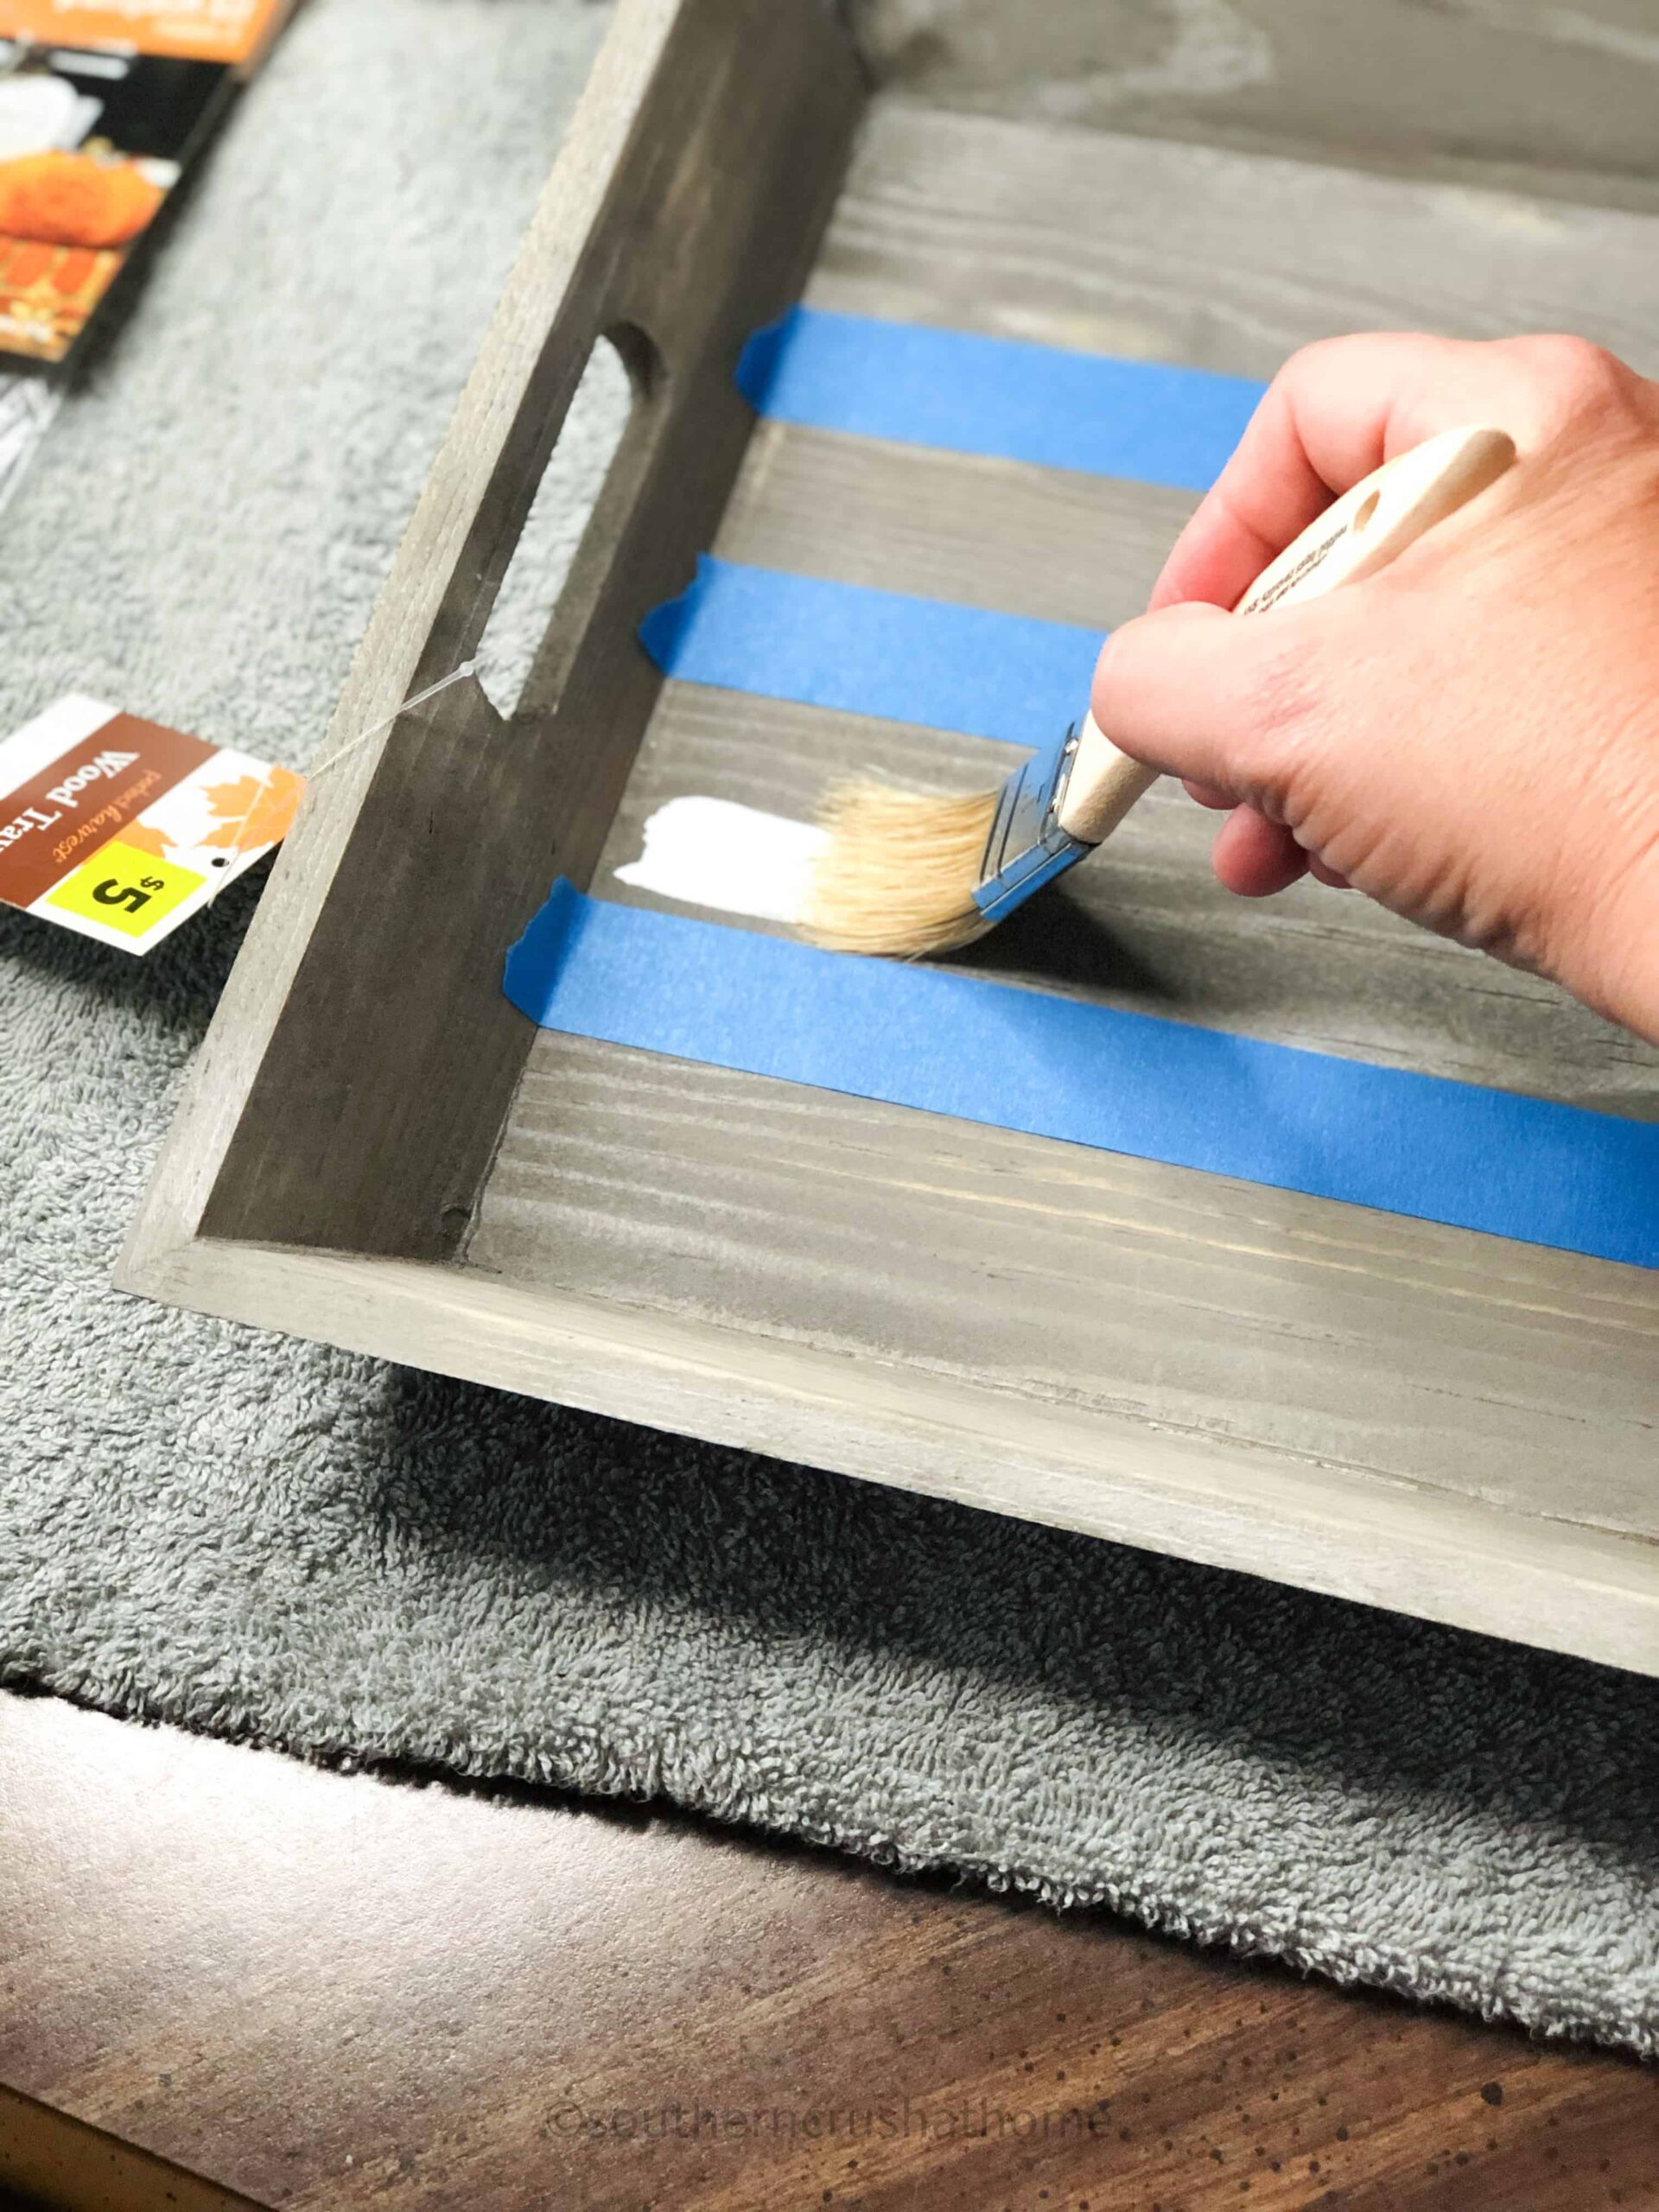
Let It Dry Before Removing the Tape
Paint your accent color (I used white) in between the painter’s tape and allow to dry thoroughly before attempting to remove the tape–it’s tempting, I know.
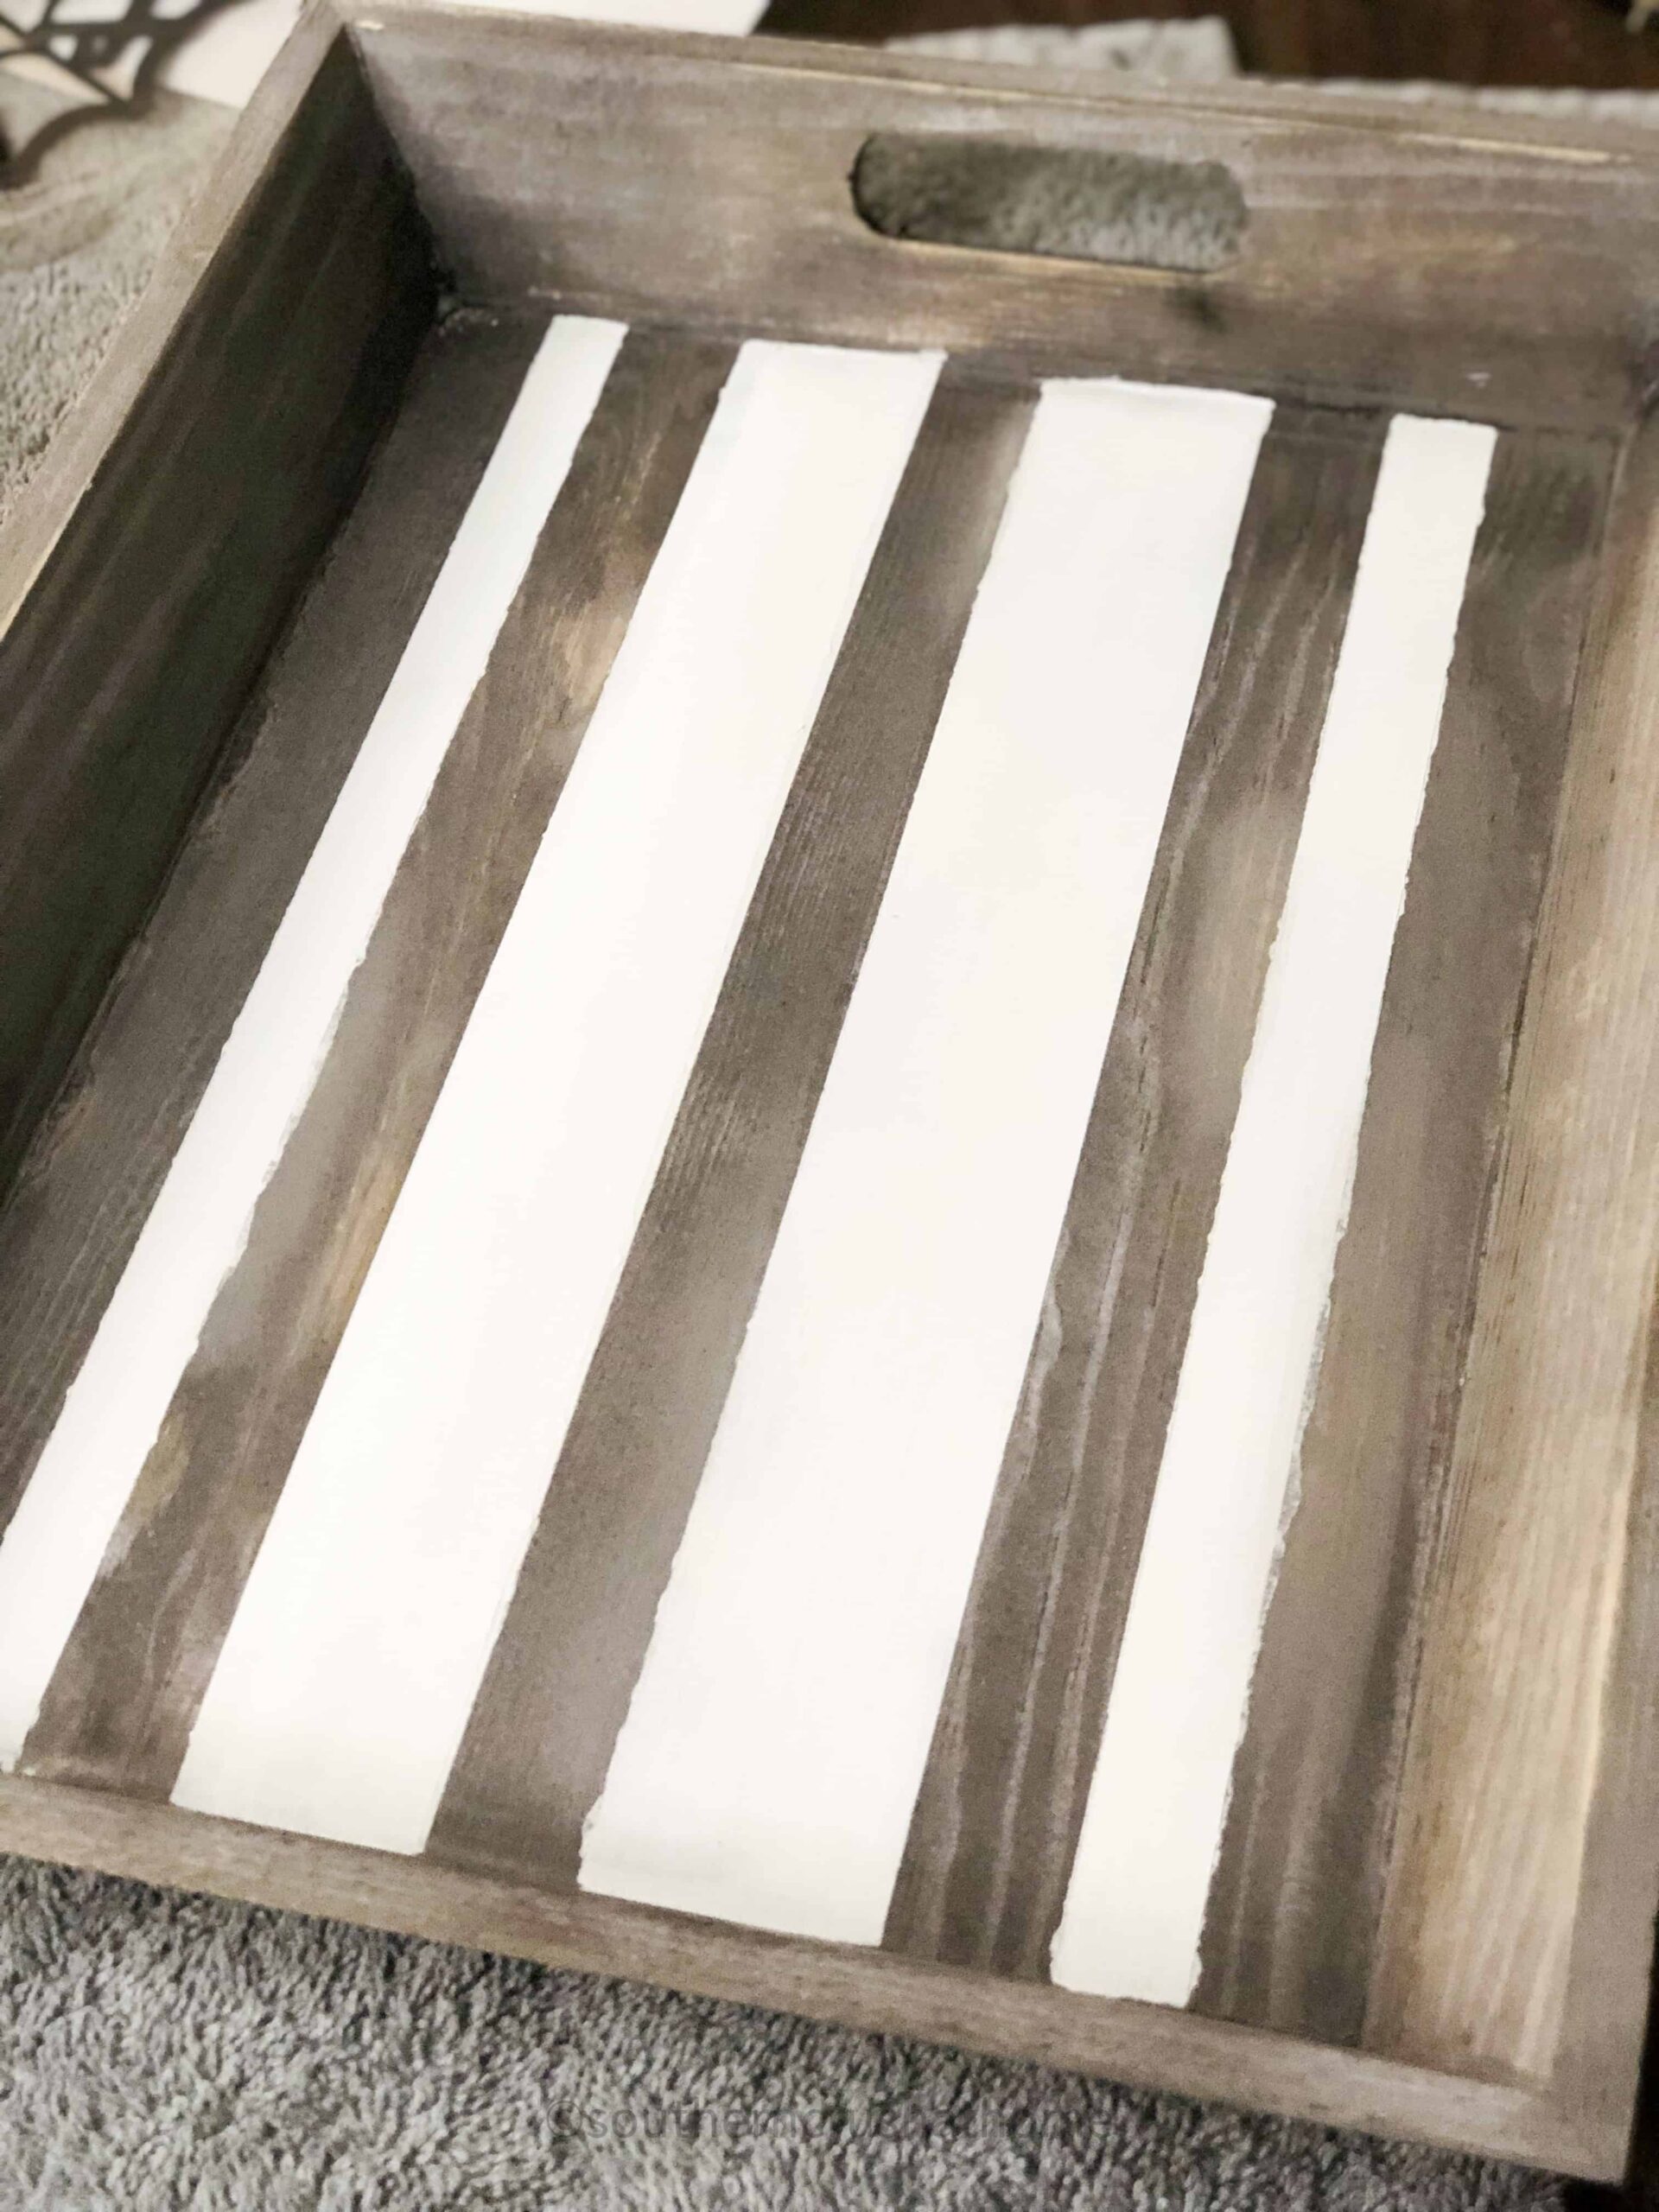
Use Sandpaper To Clean Up The Lines
Use a light sanding with 120 grit fine sandpaper over any areas where the paint bleeds out from underneath the tape in order to clean up your lines.
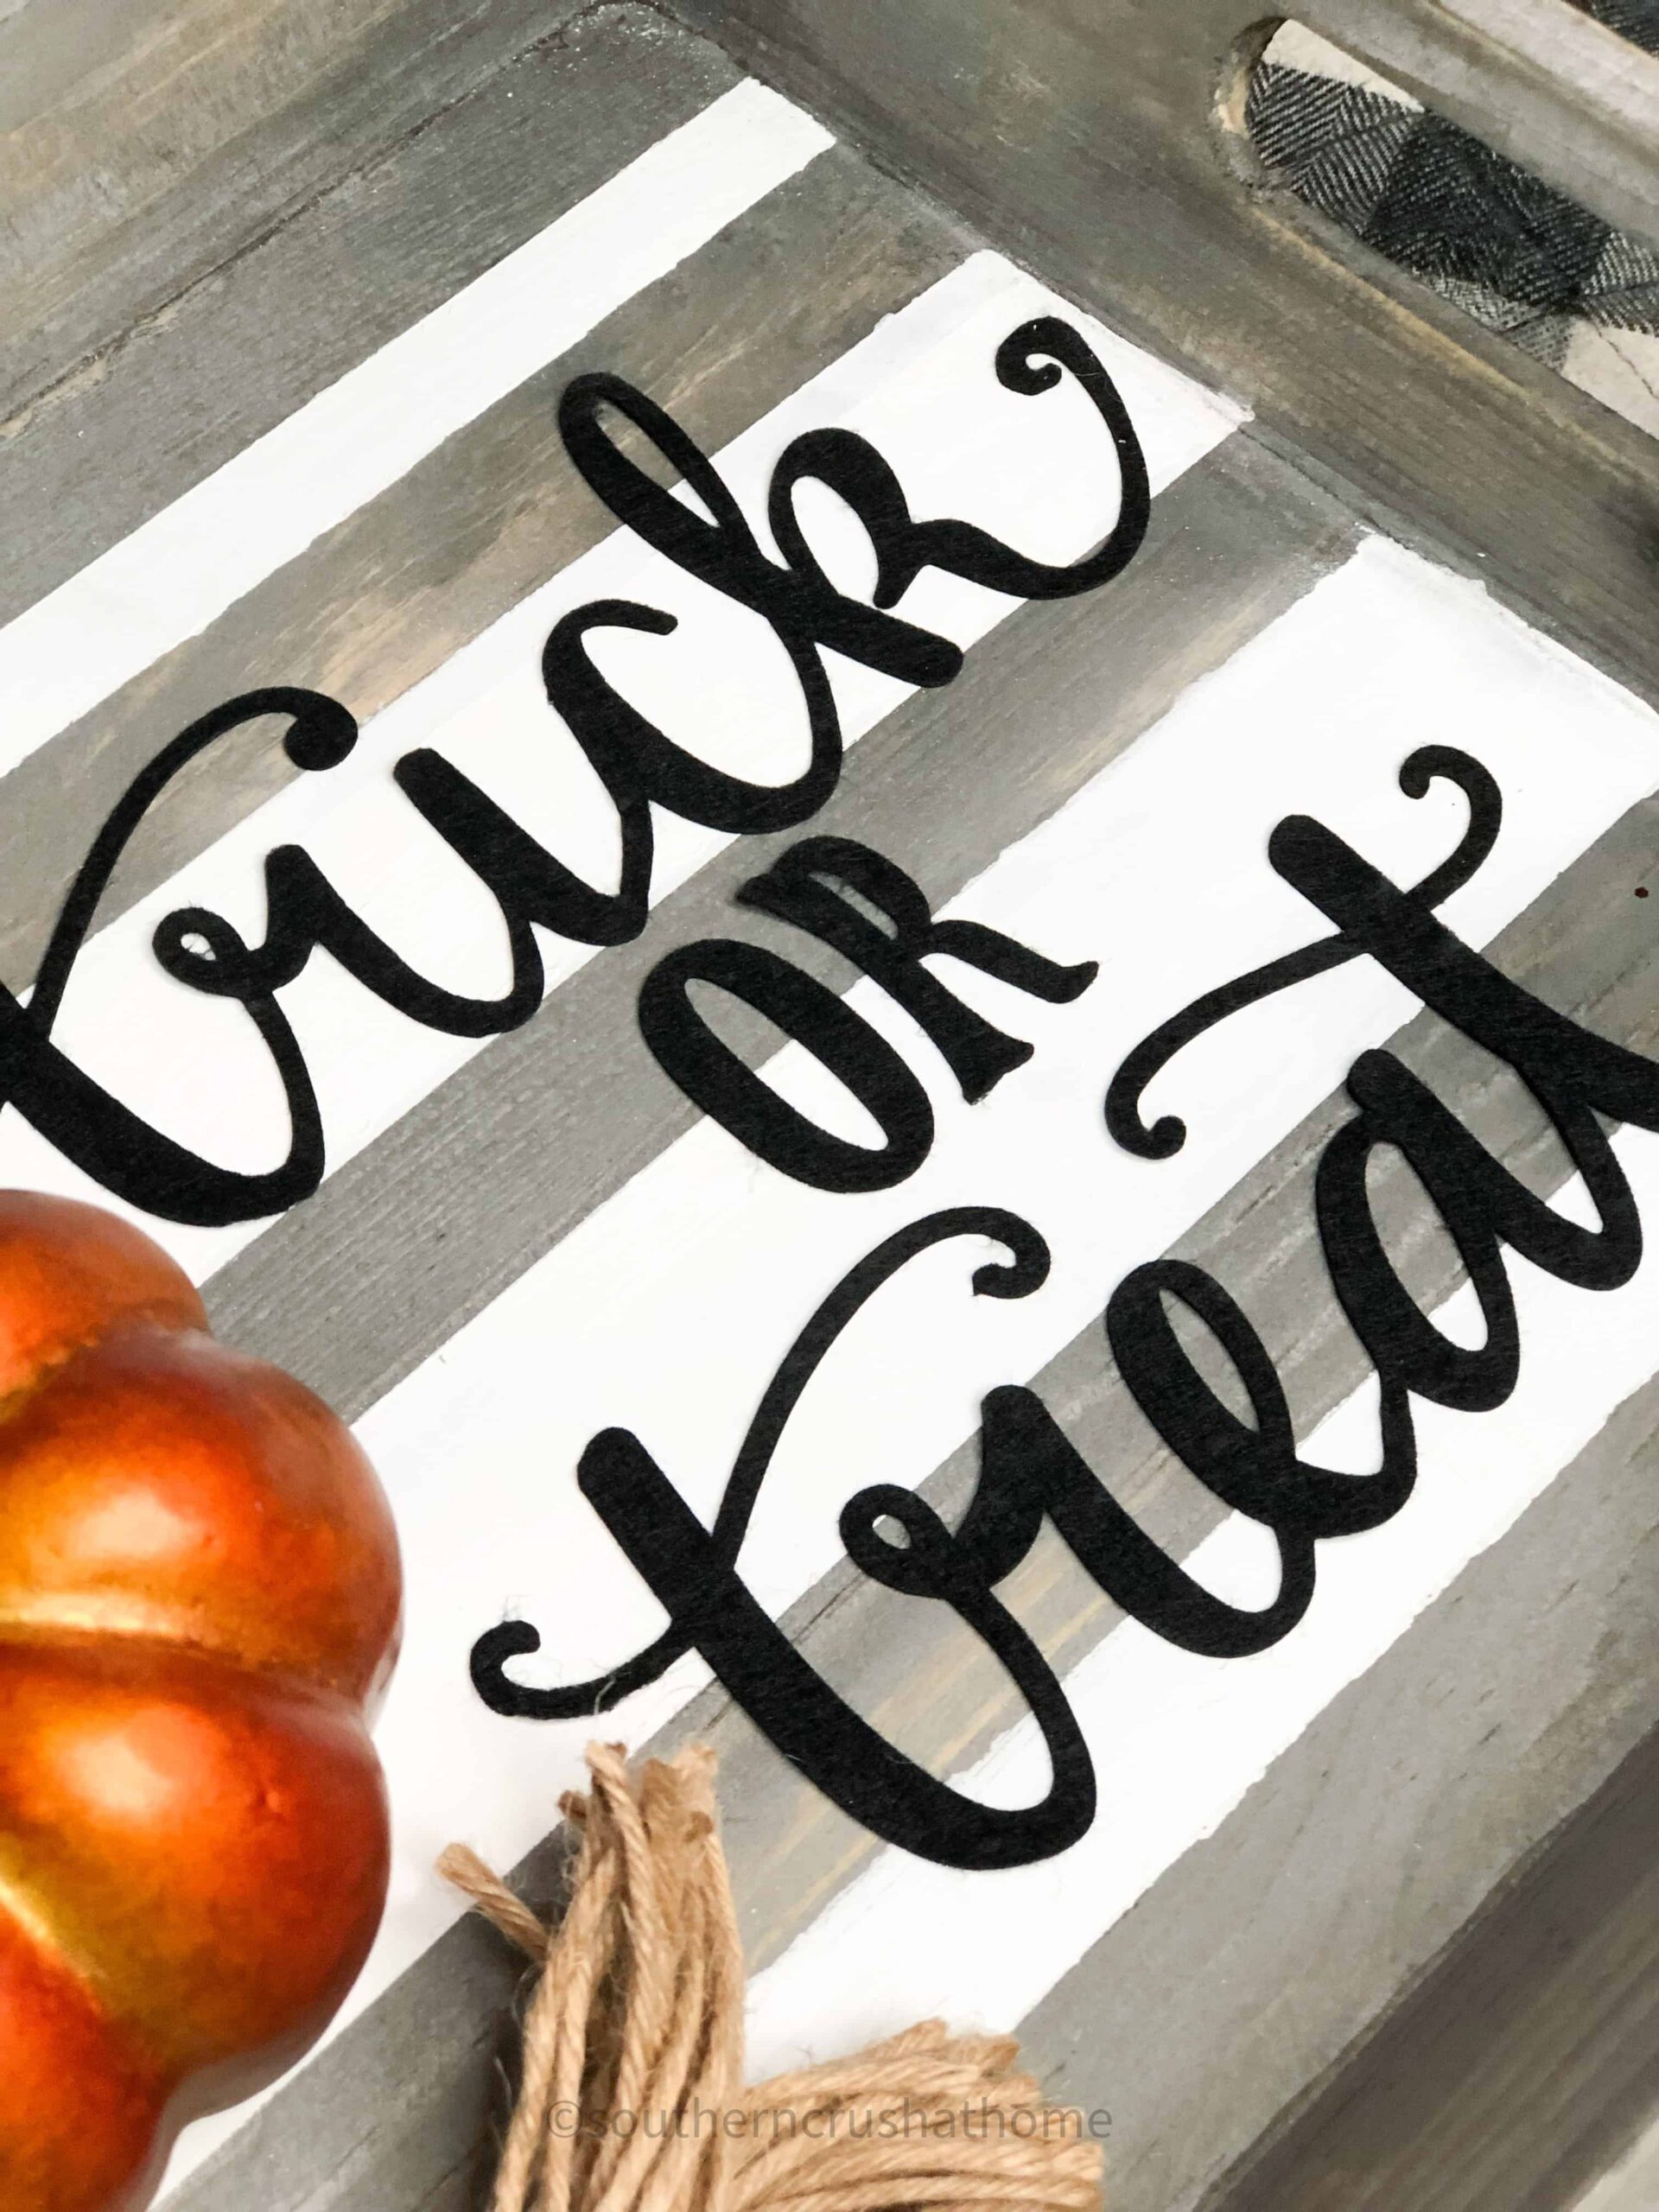
Add Halloween Stickers
Choose your favorite Halloween pumpkin decorating stickers and peel and place it on your desired location on the tray one section at a time.
These stickers were originally intended to be used by kids on no-carve Halloween pumpkins in lieu of carving or painting.
These are heavy duty stickers with a felt front to them.
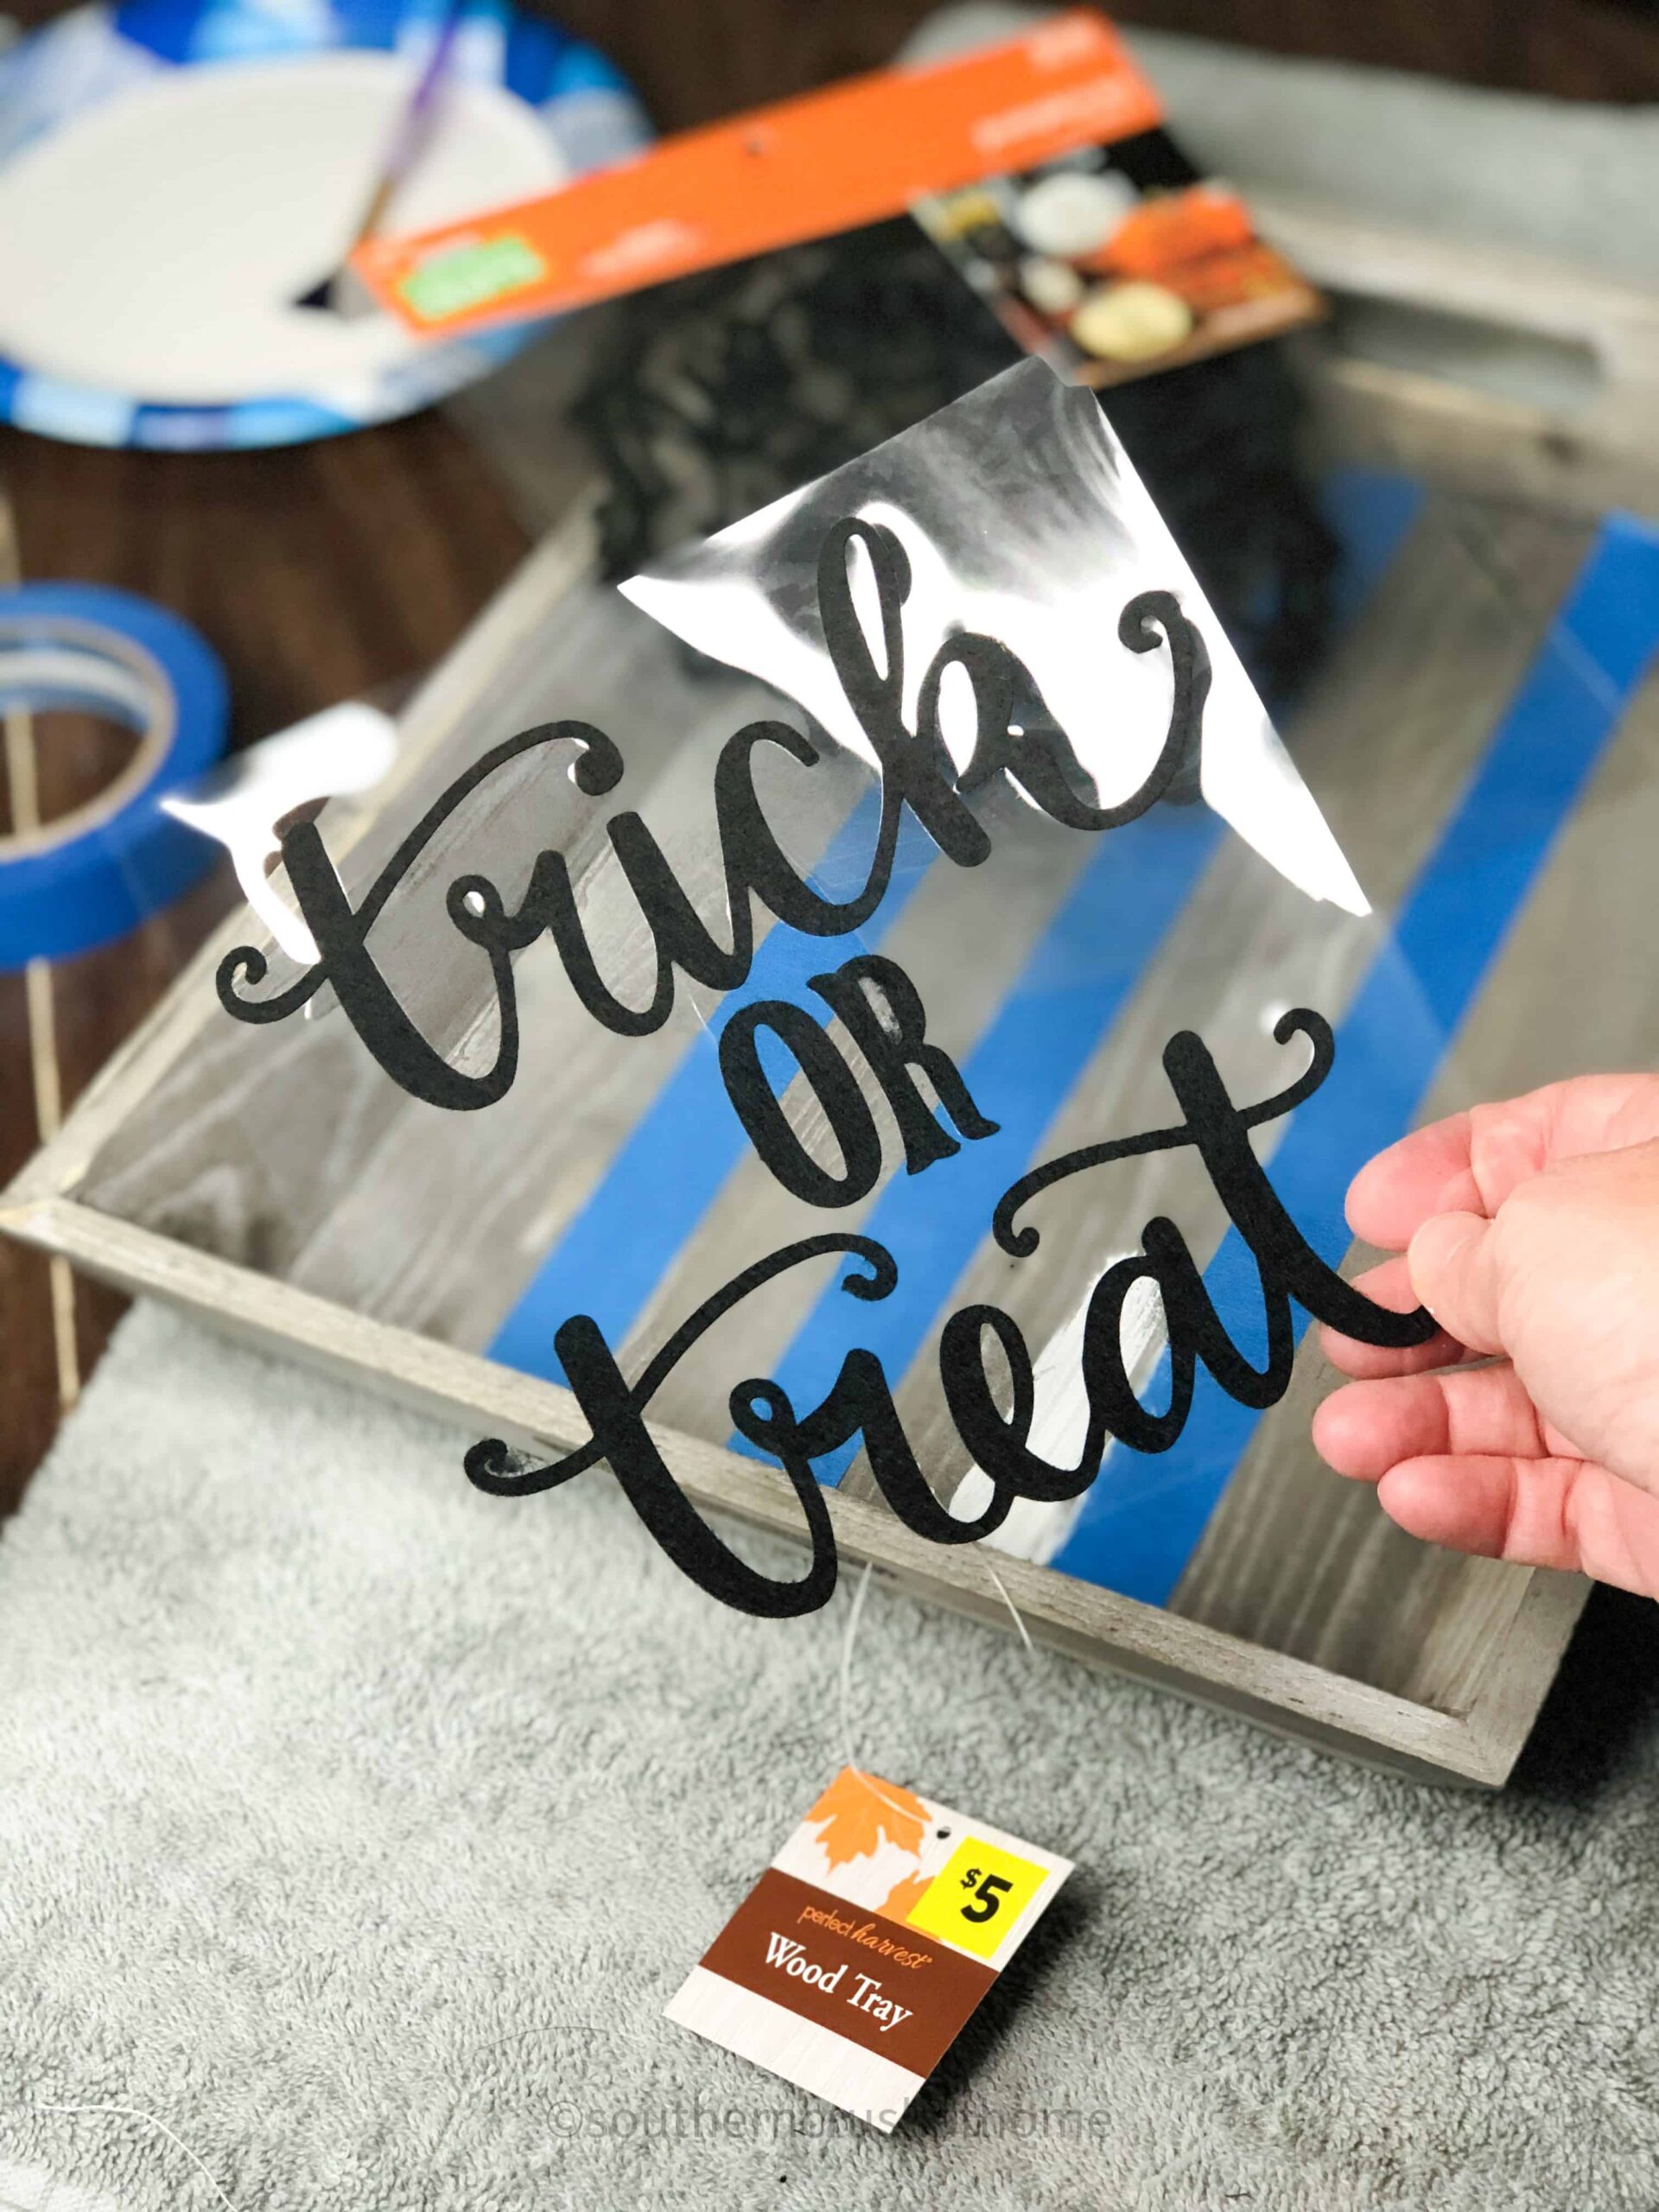
Use extreme care when peeling them off of their backing as they tend to want to stay stuck and if you pull too hard, they will tear.
You can quickly repair them by putting them exactly into place.
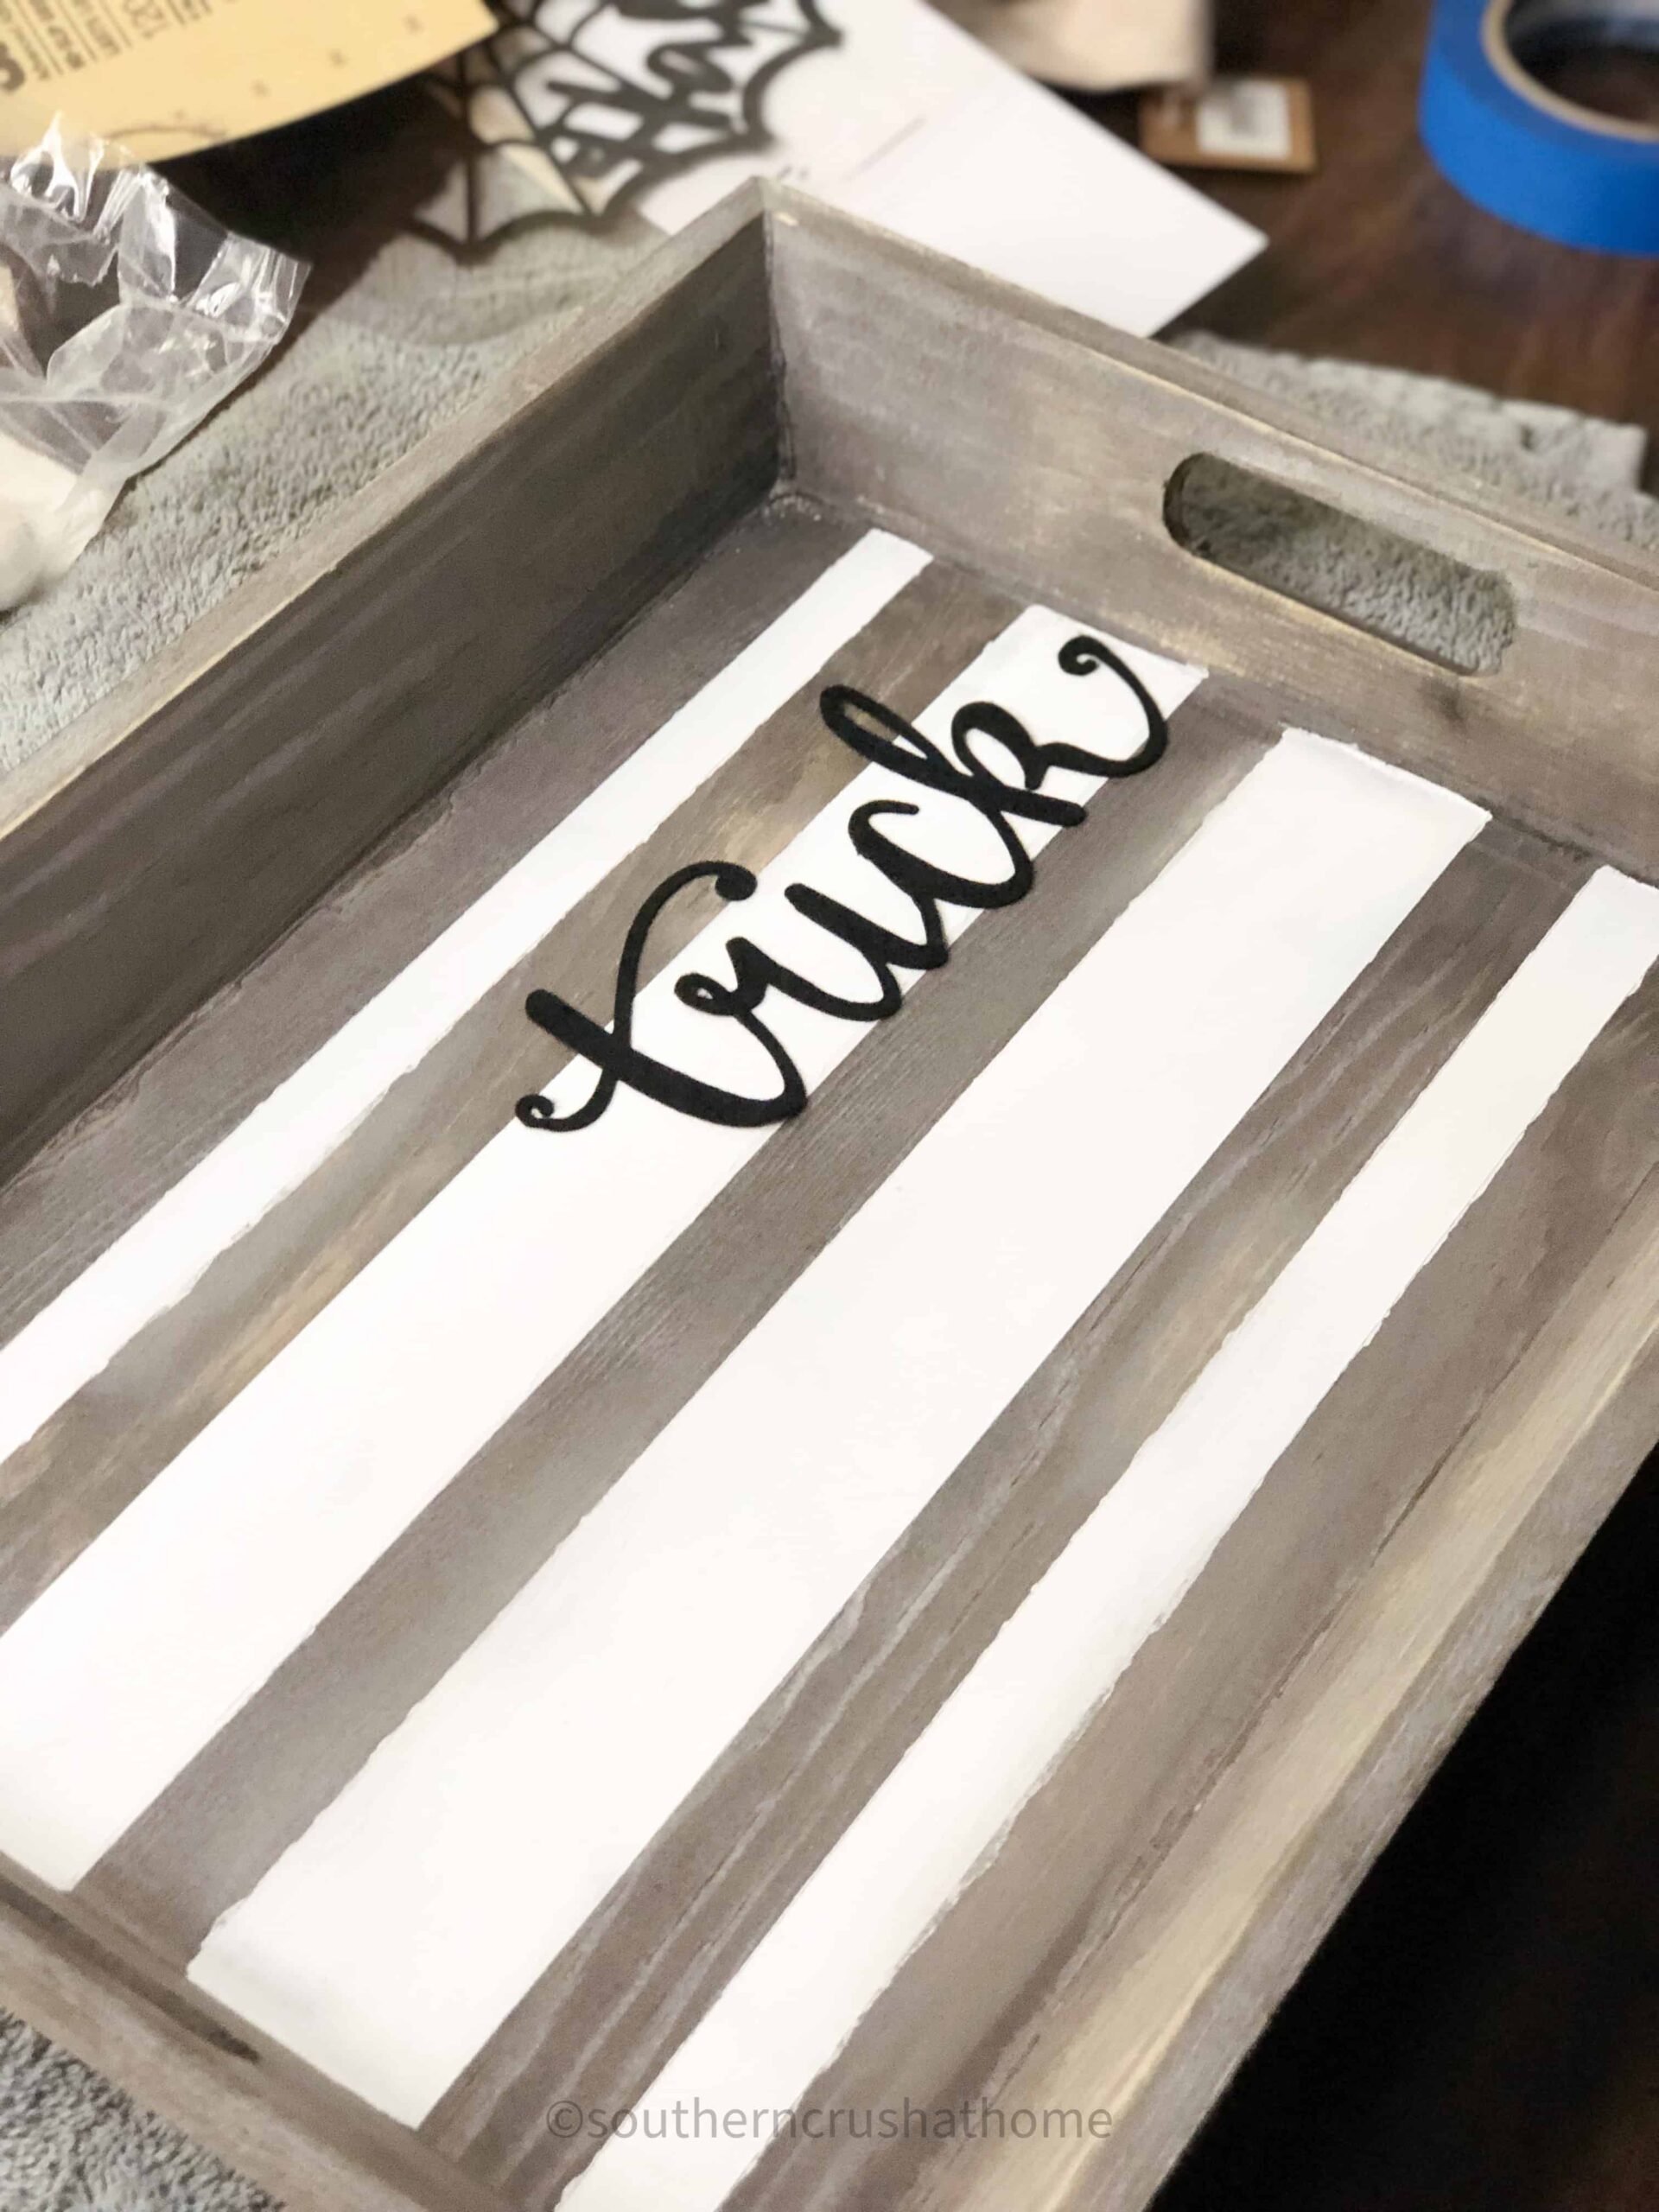
There really aren’t any rules for where to place the stickers- use your imagination!
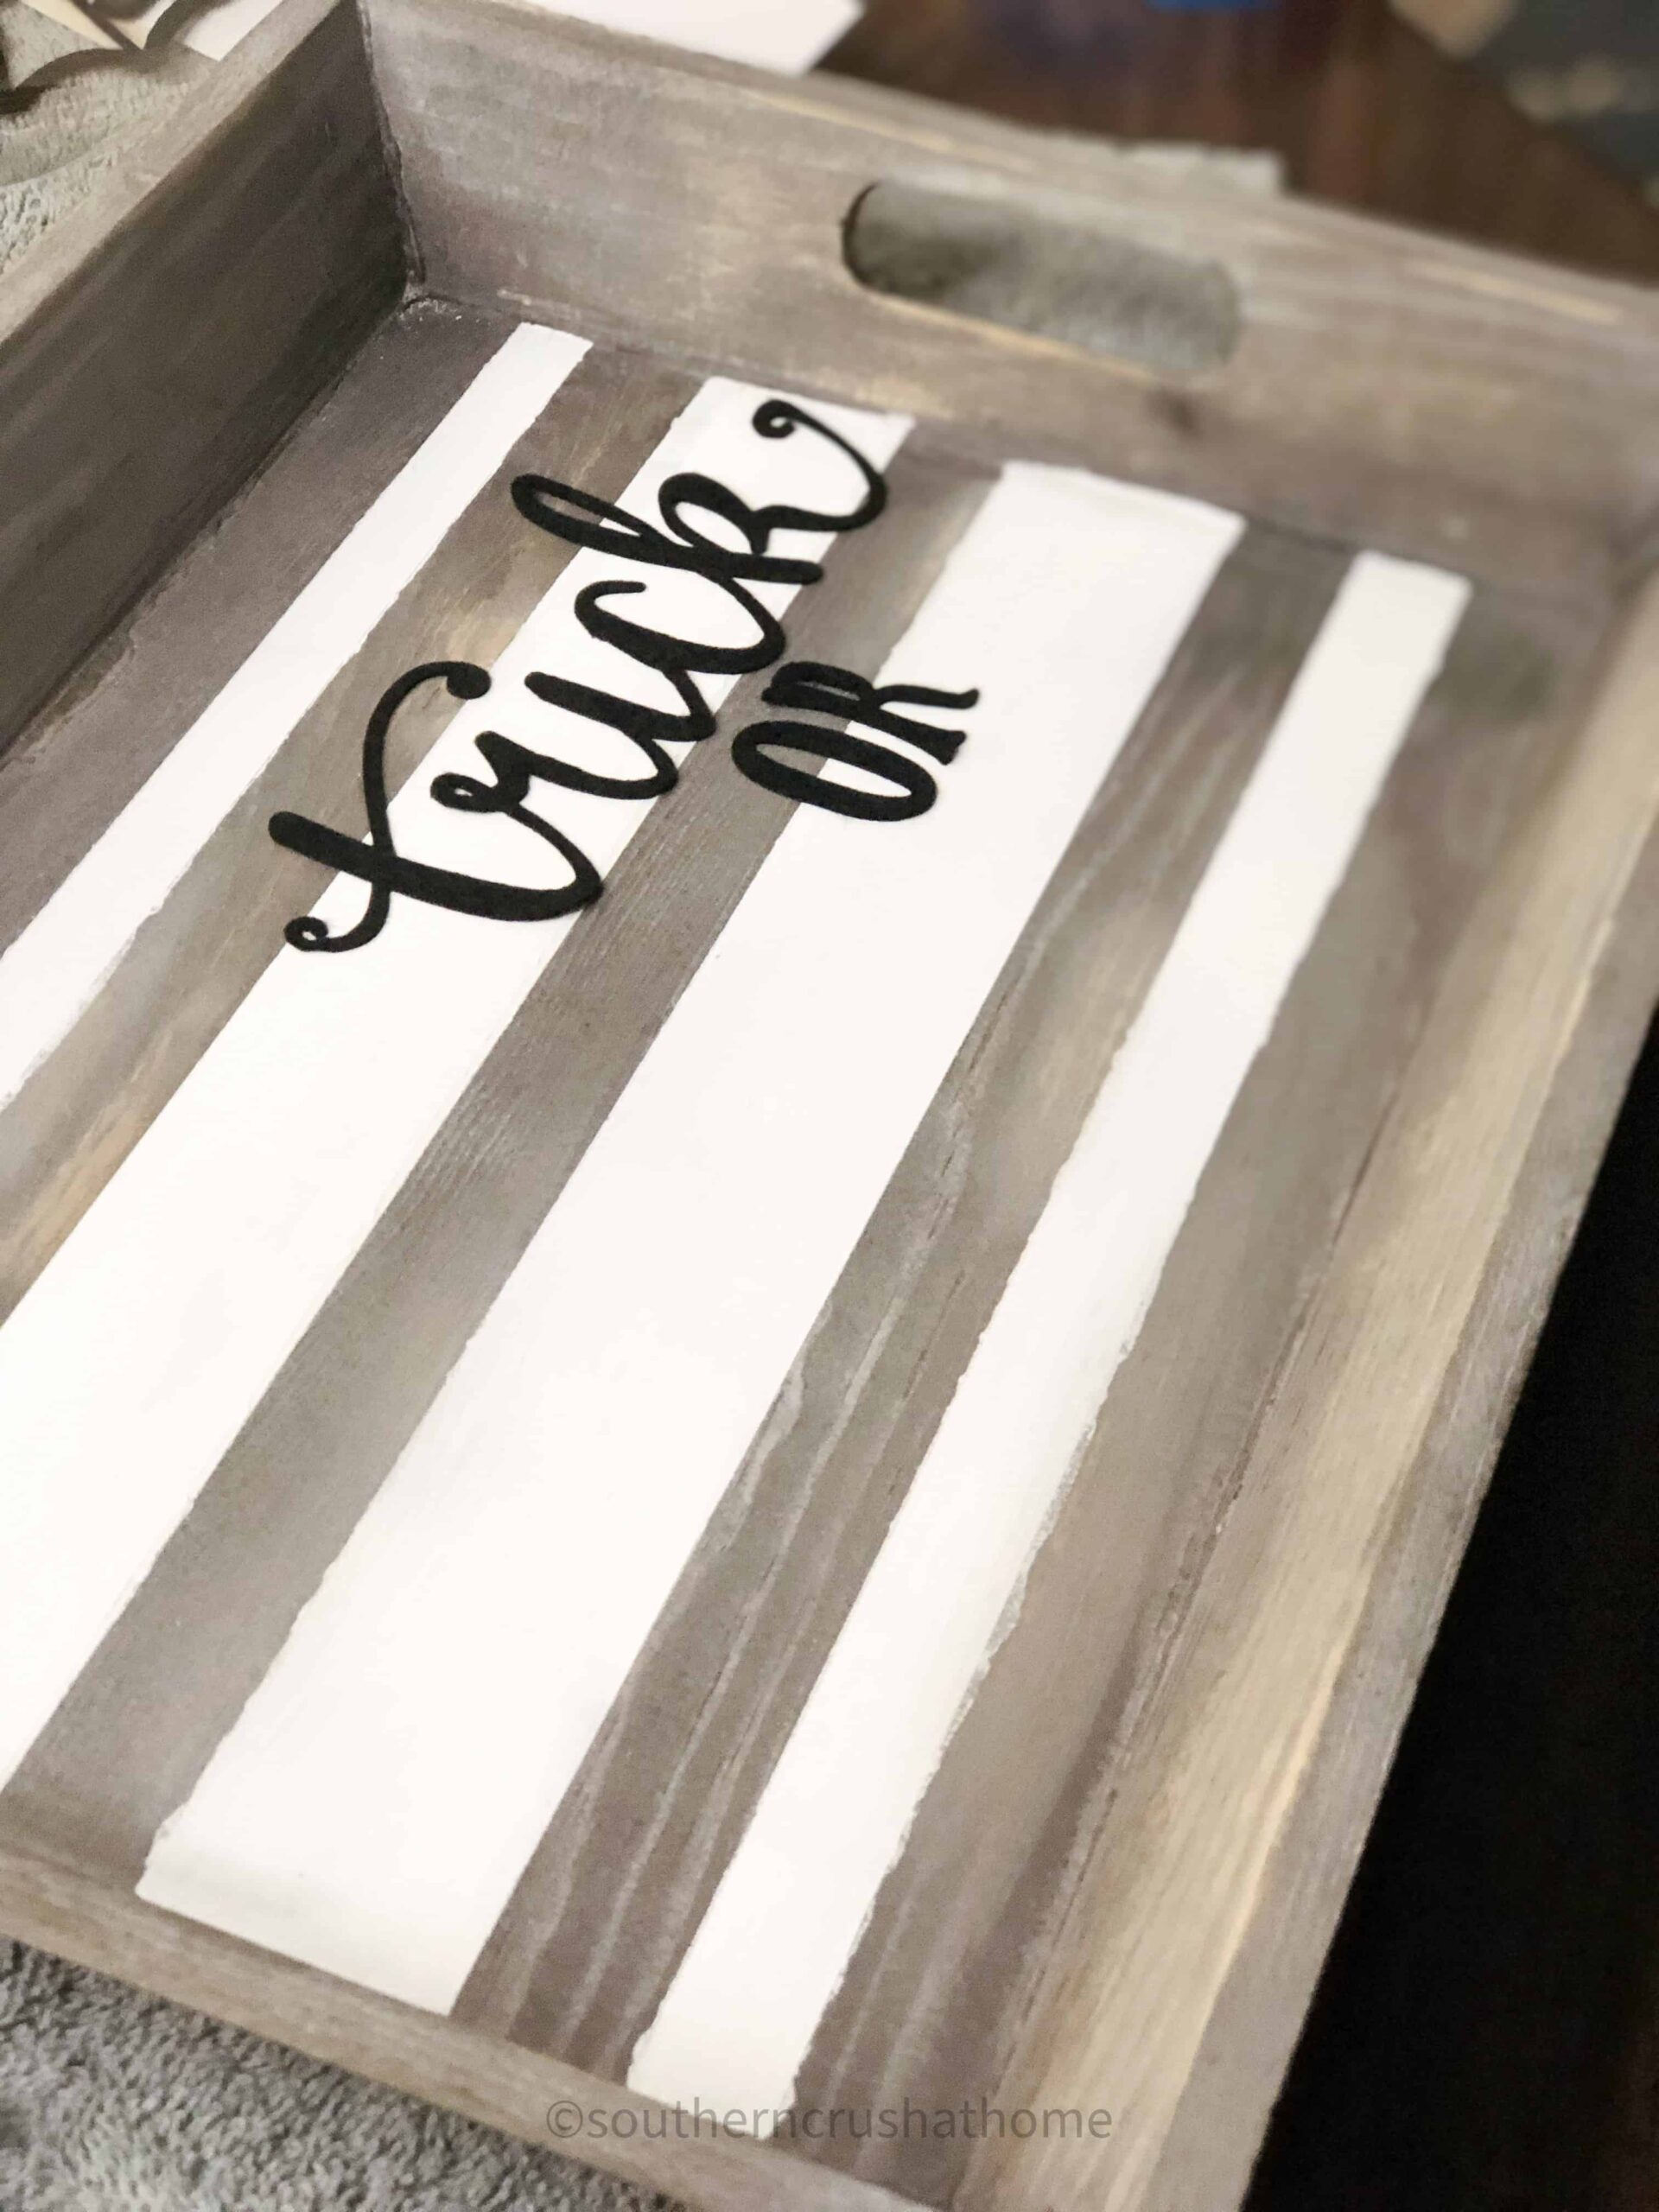
You can trace where you want to place your stickers before you put them down, or you can just wing it like I usually do!
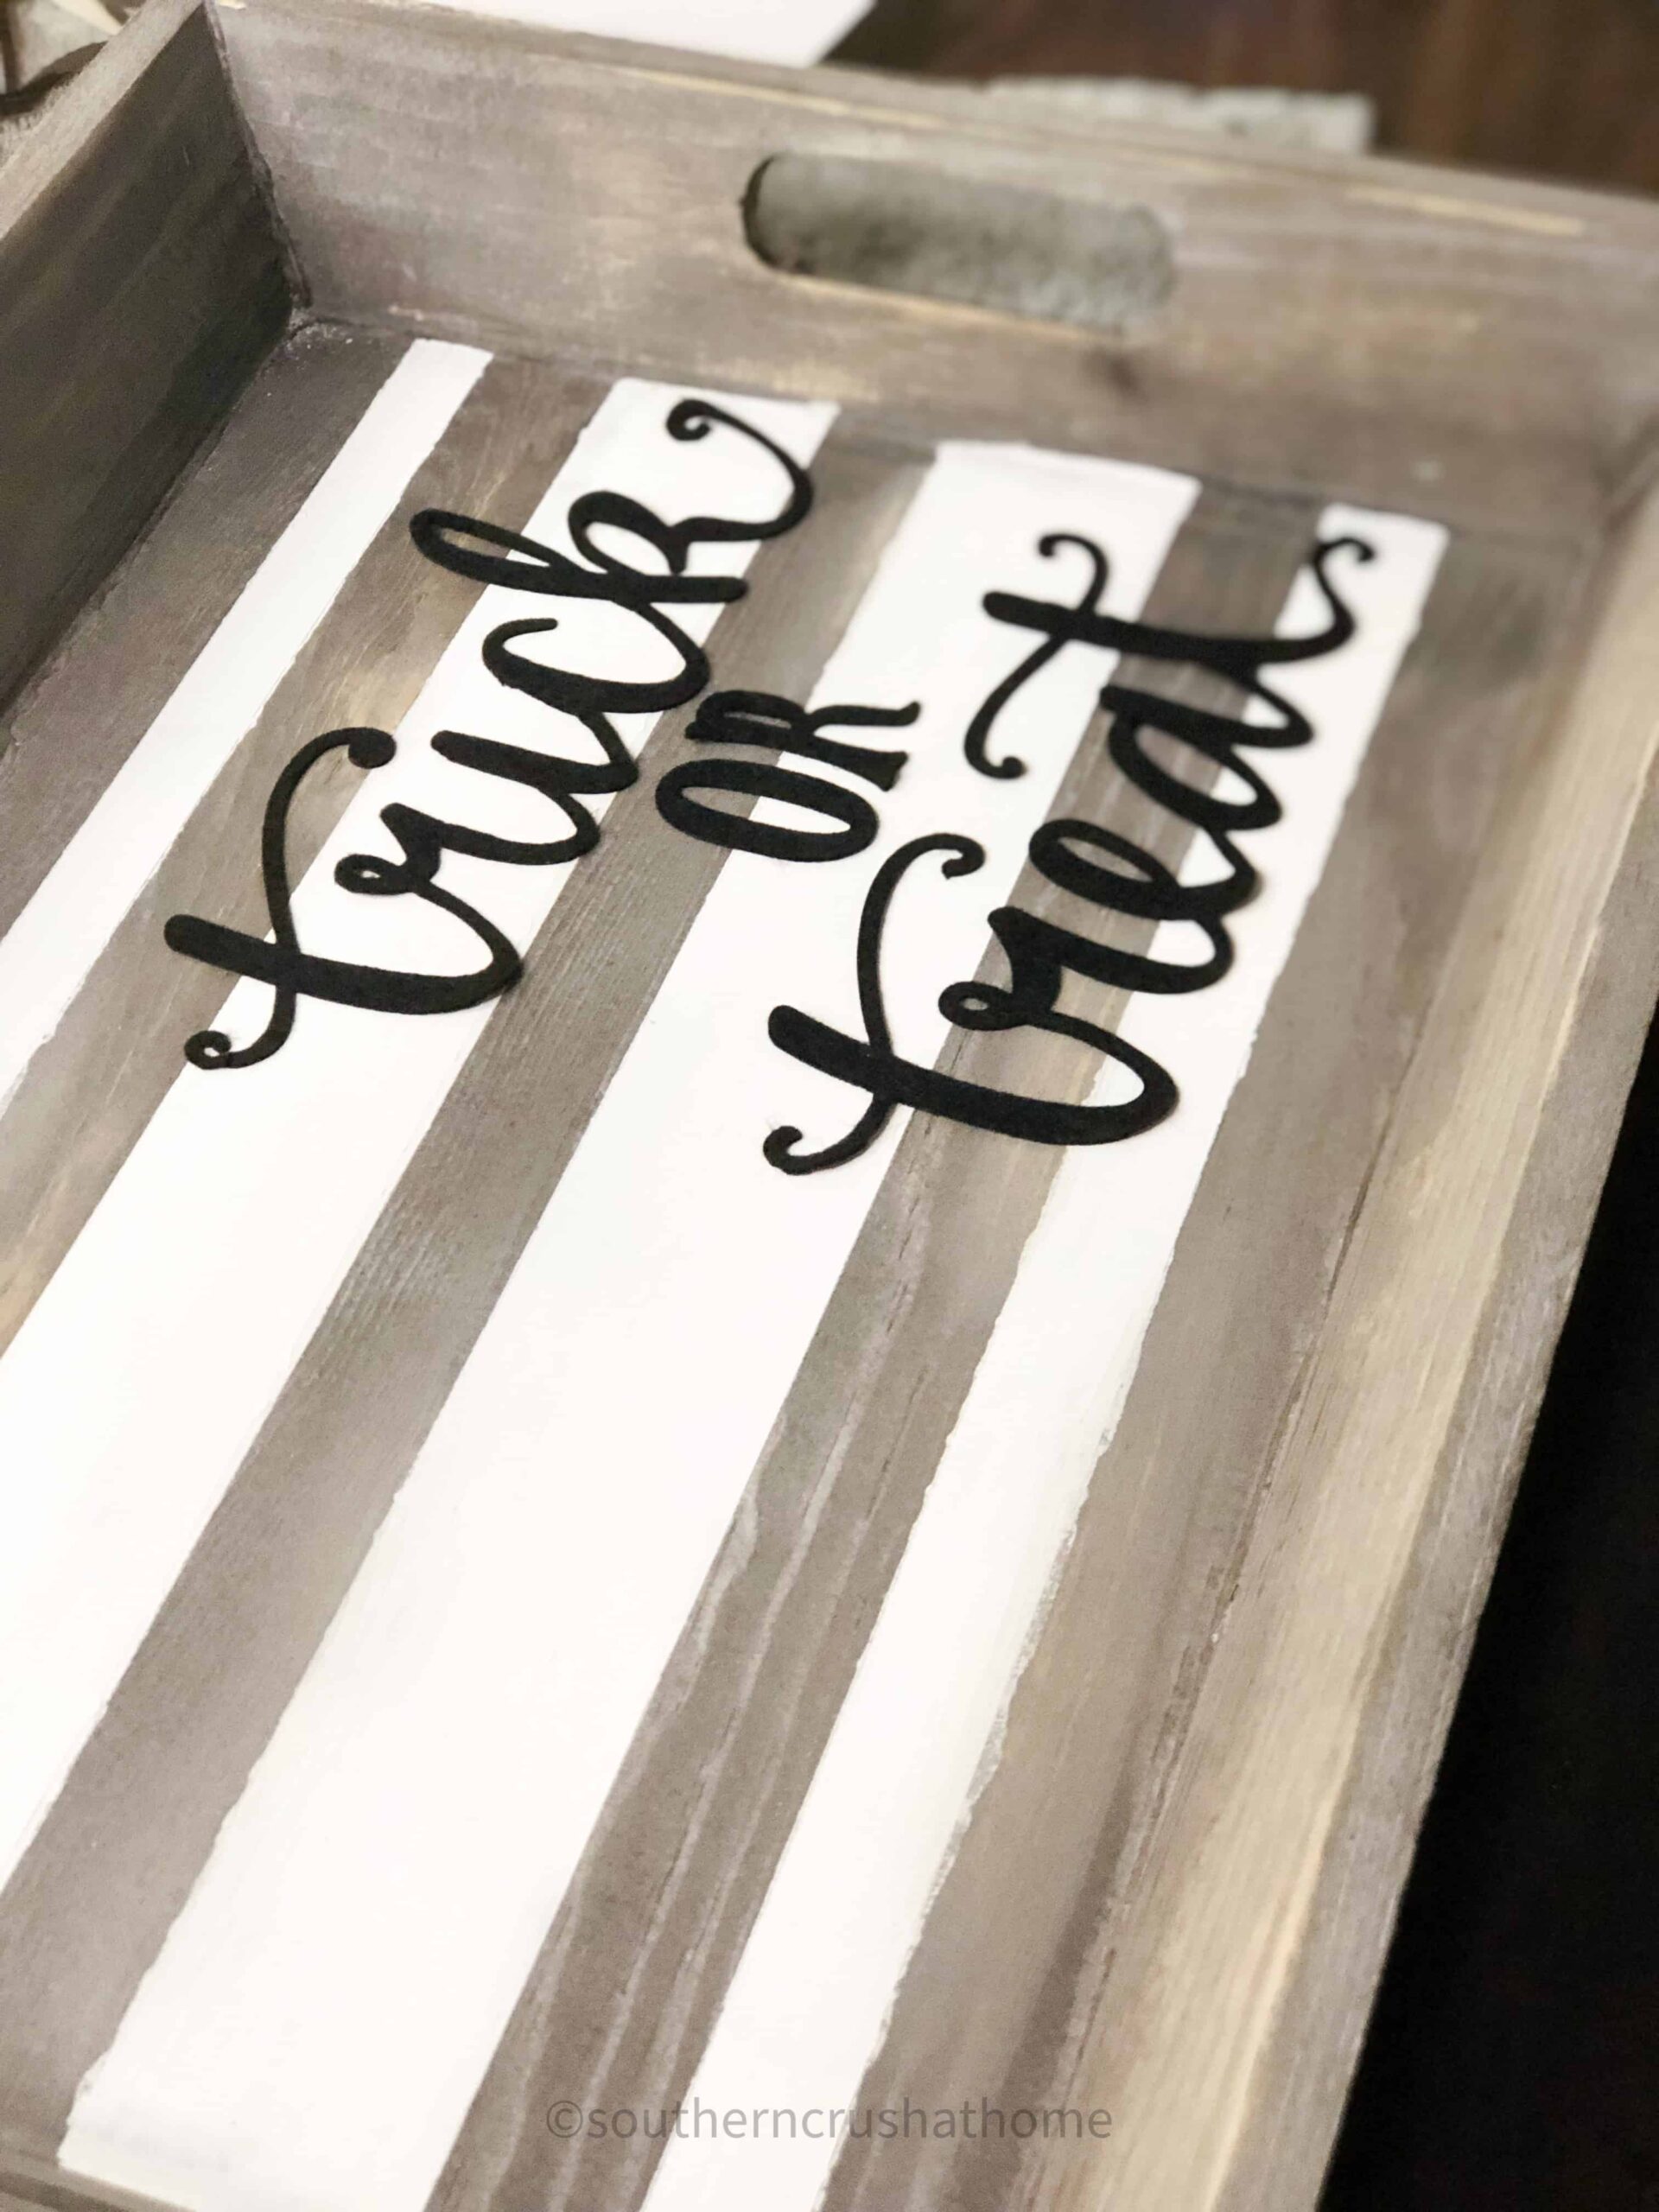
I place the words clear on one side. You could also place them in one horizontal line too.
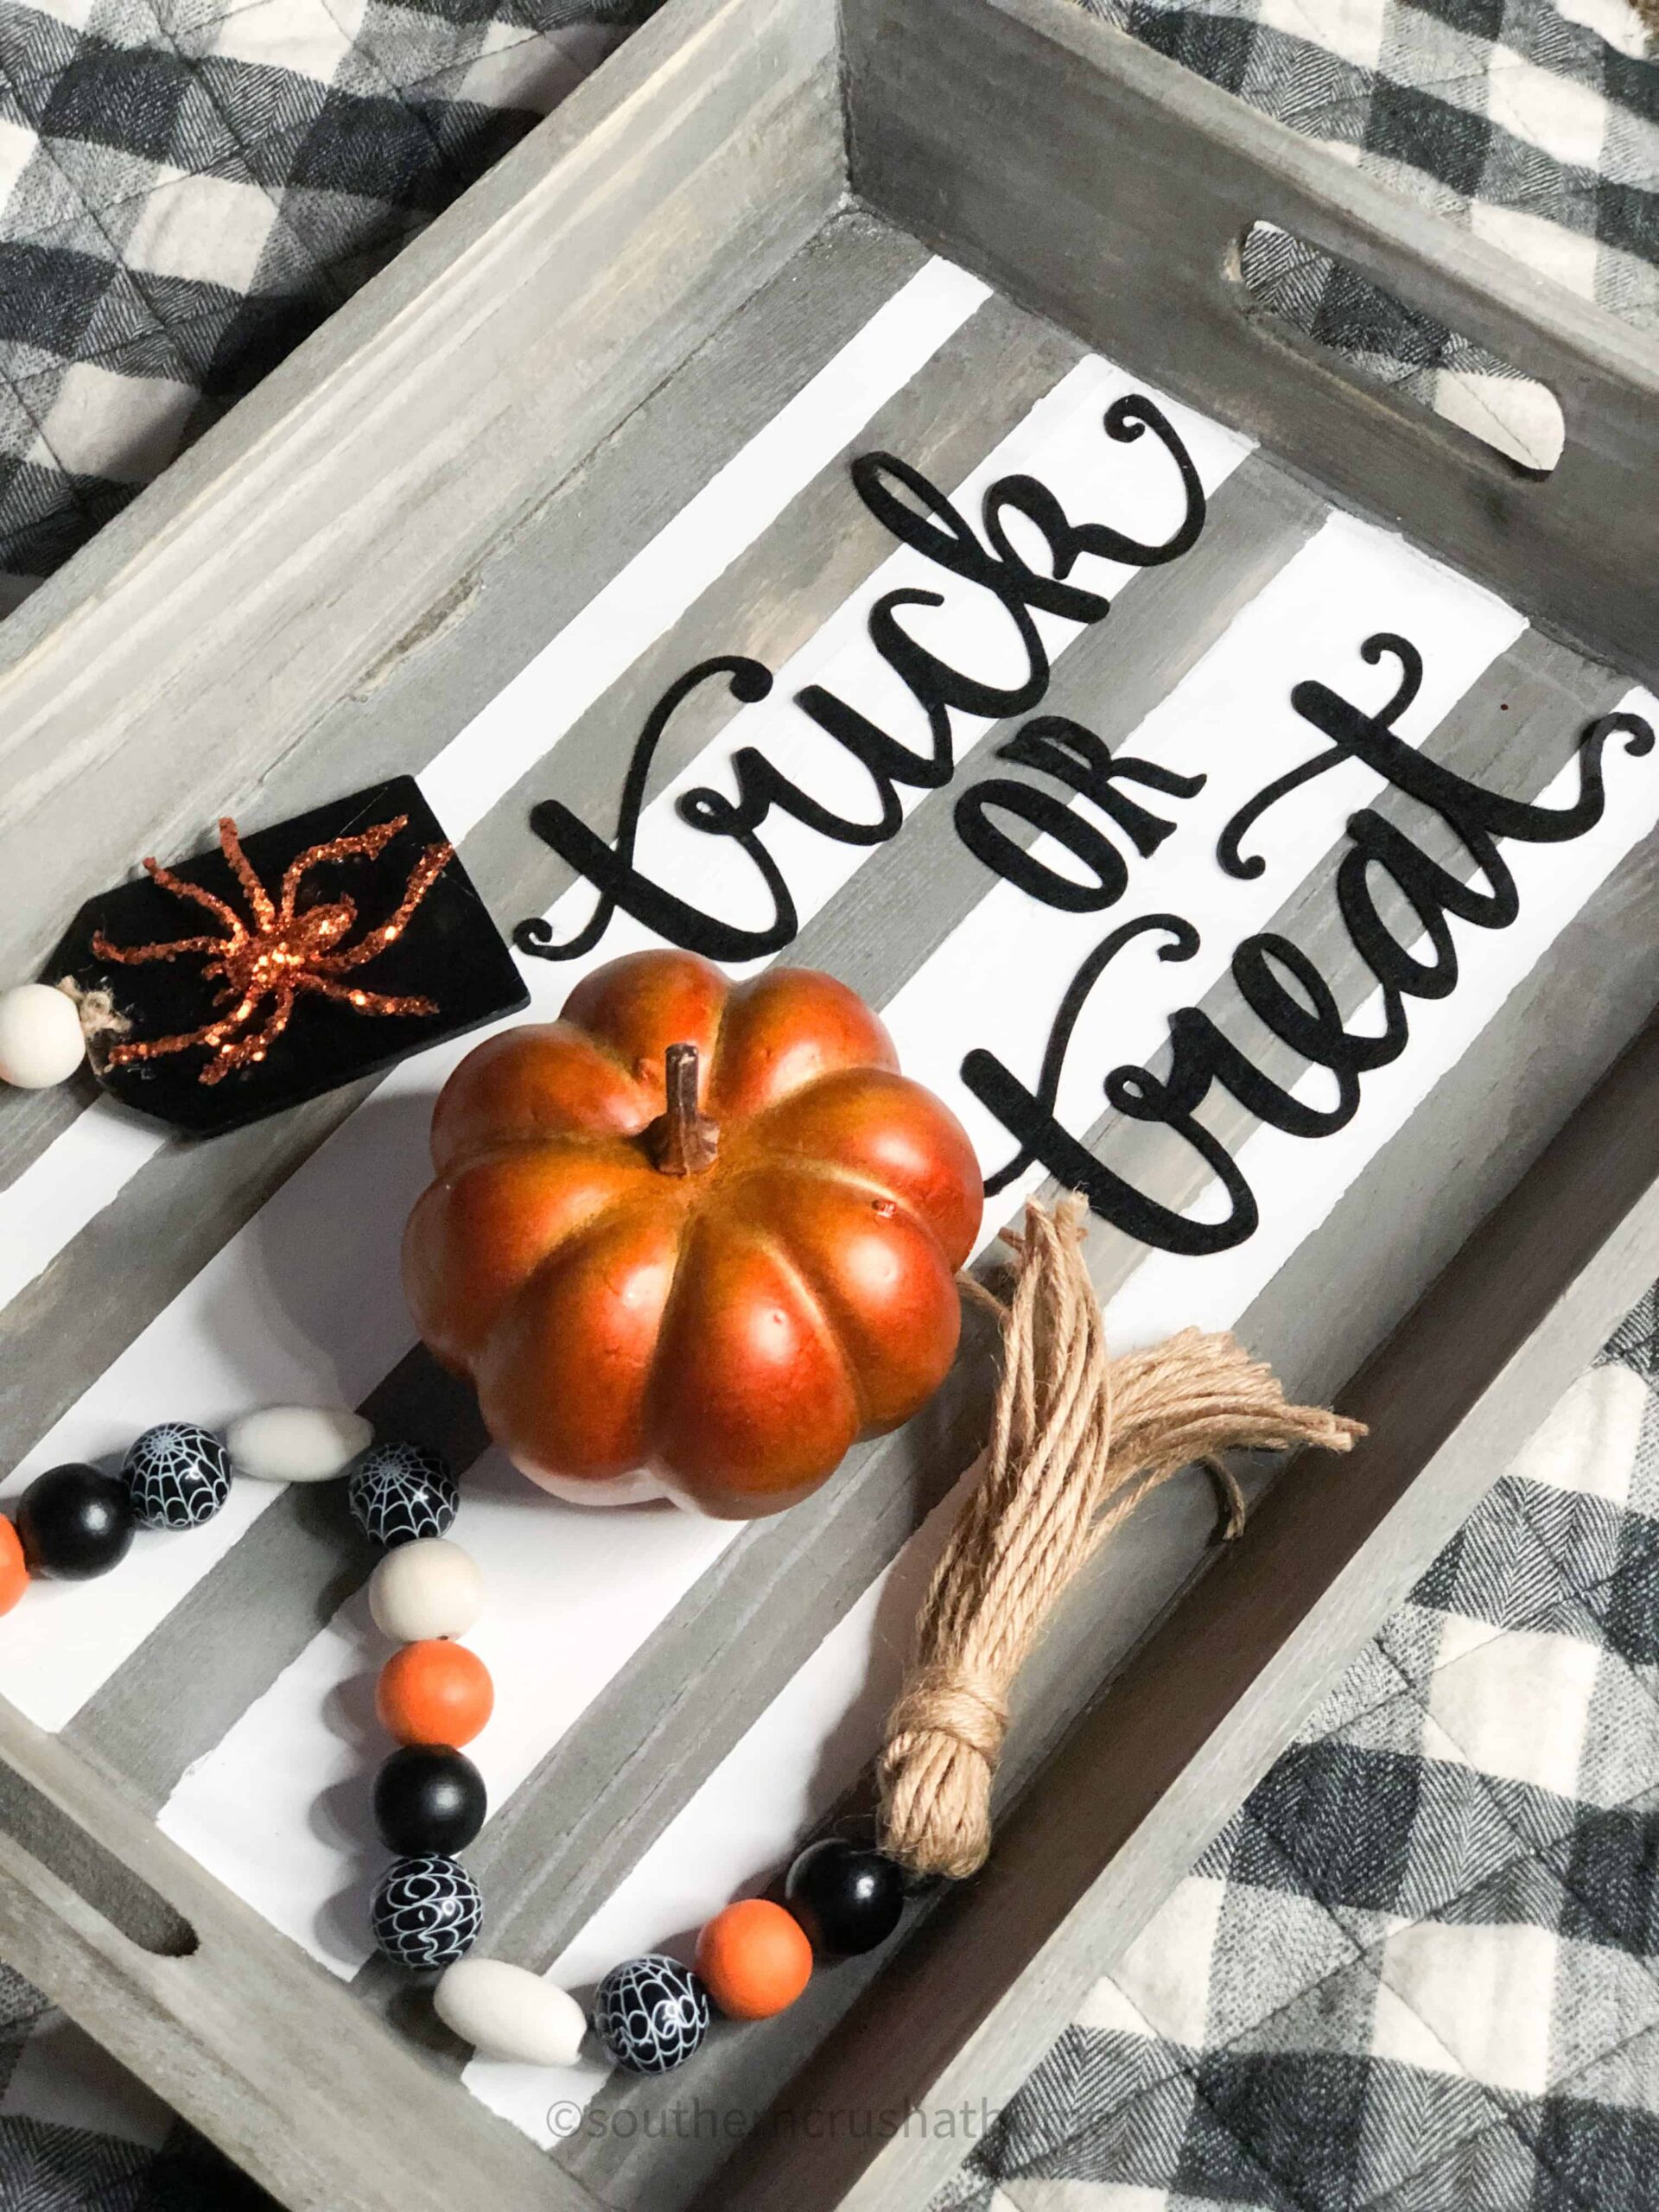
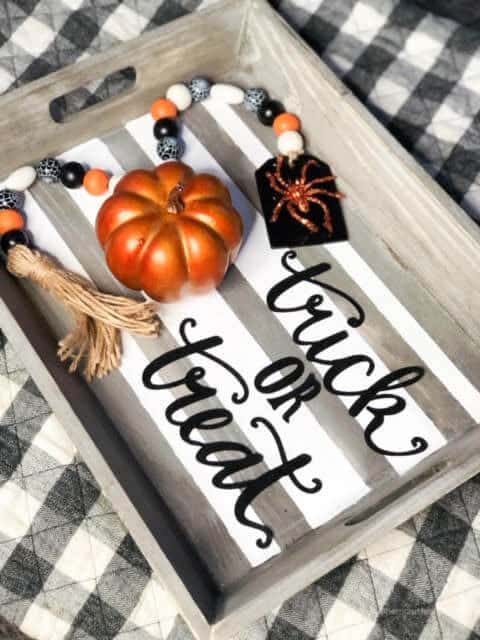
Decorate Your Tray
This is the fun part in my opinion! Decorate your tray with your favorite pumpkin decor or DIY Candles.
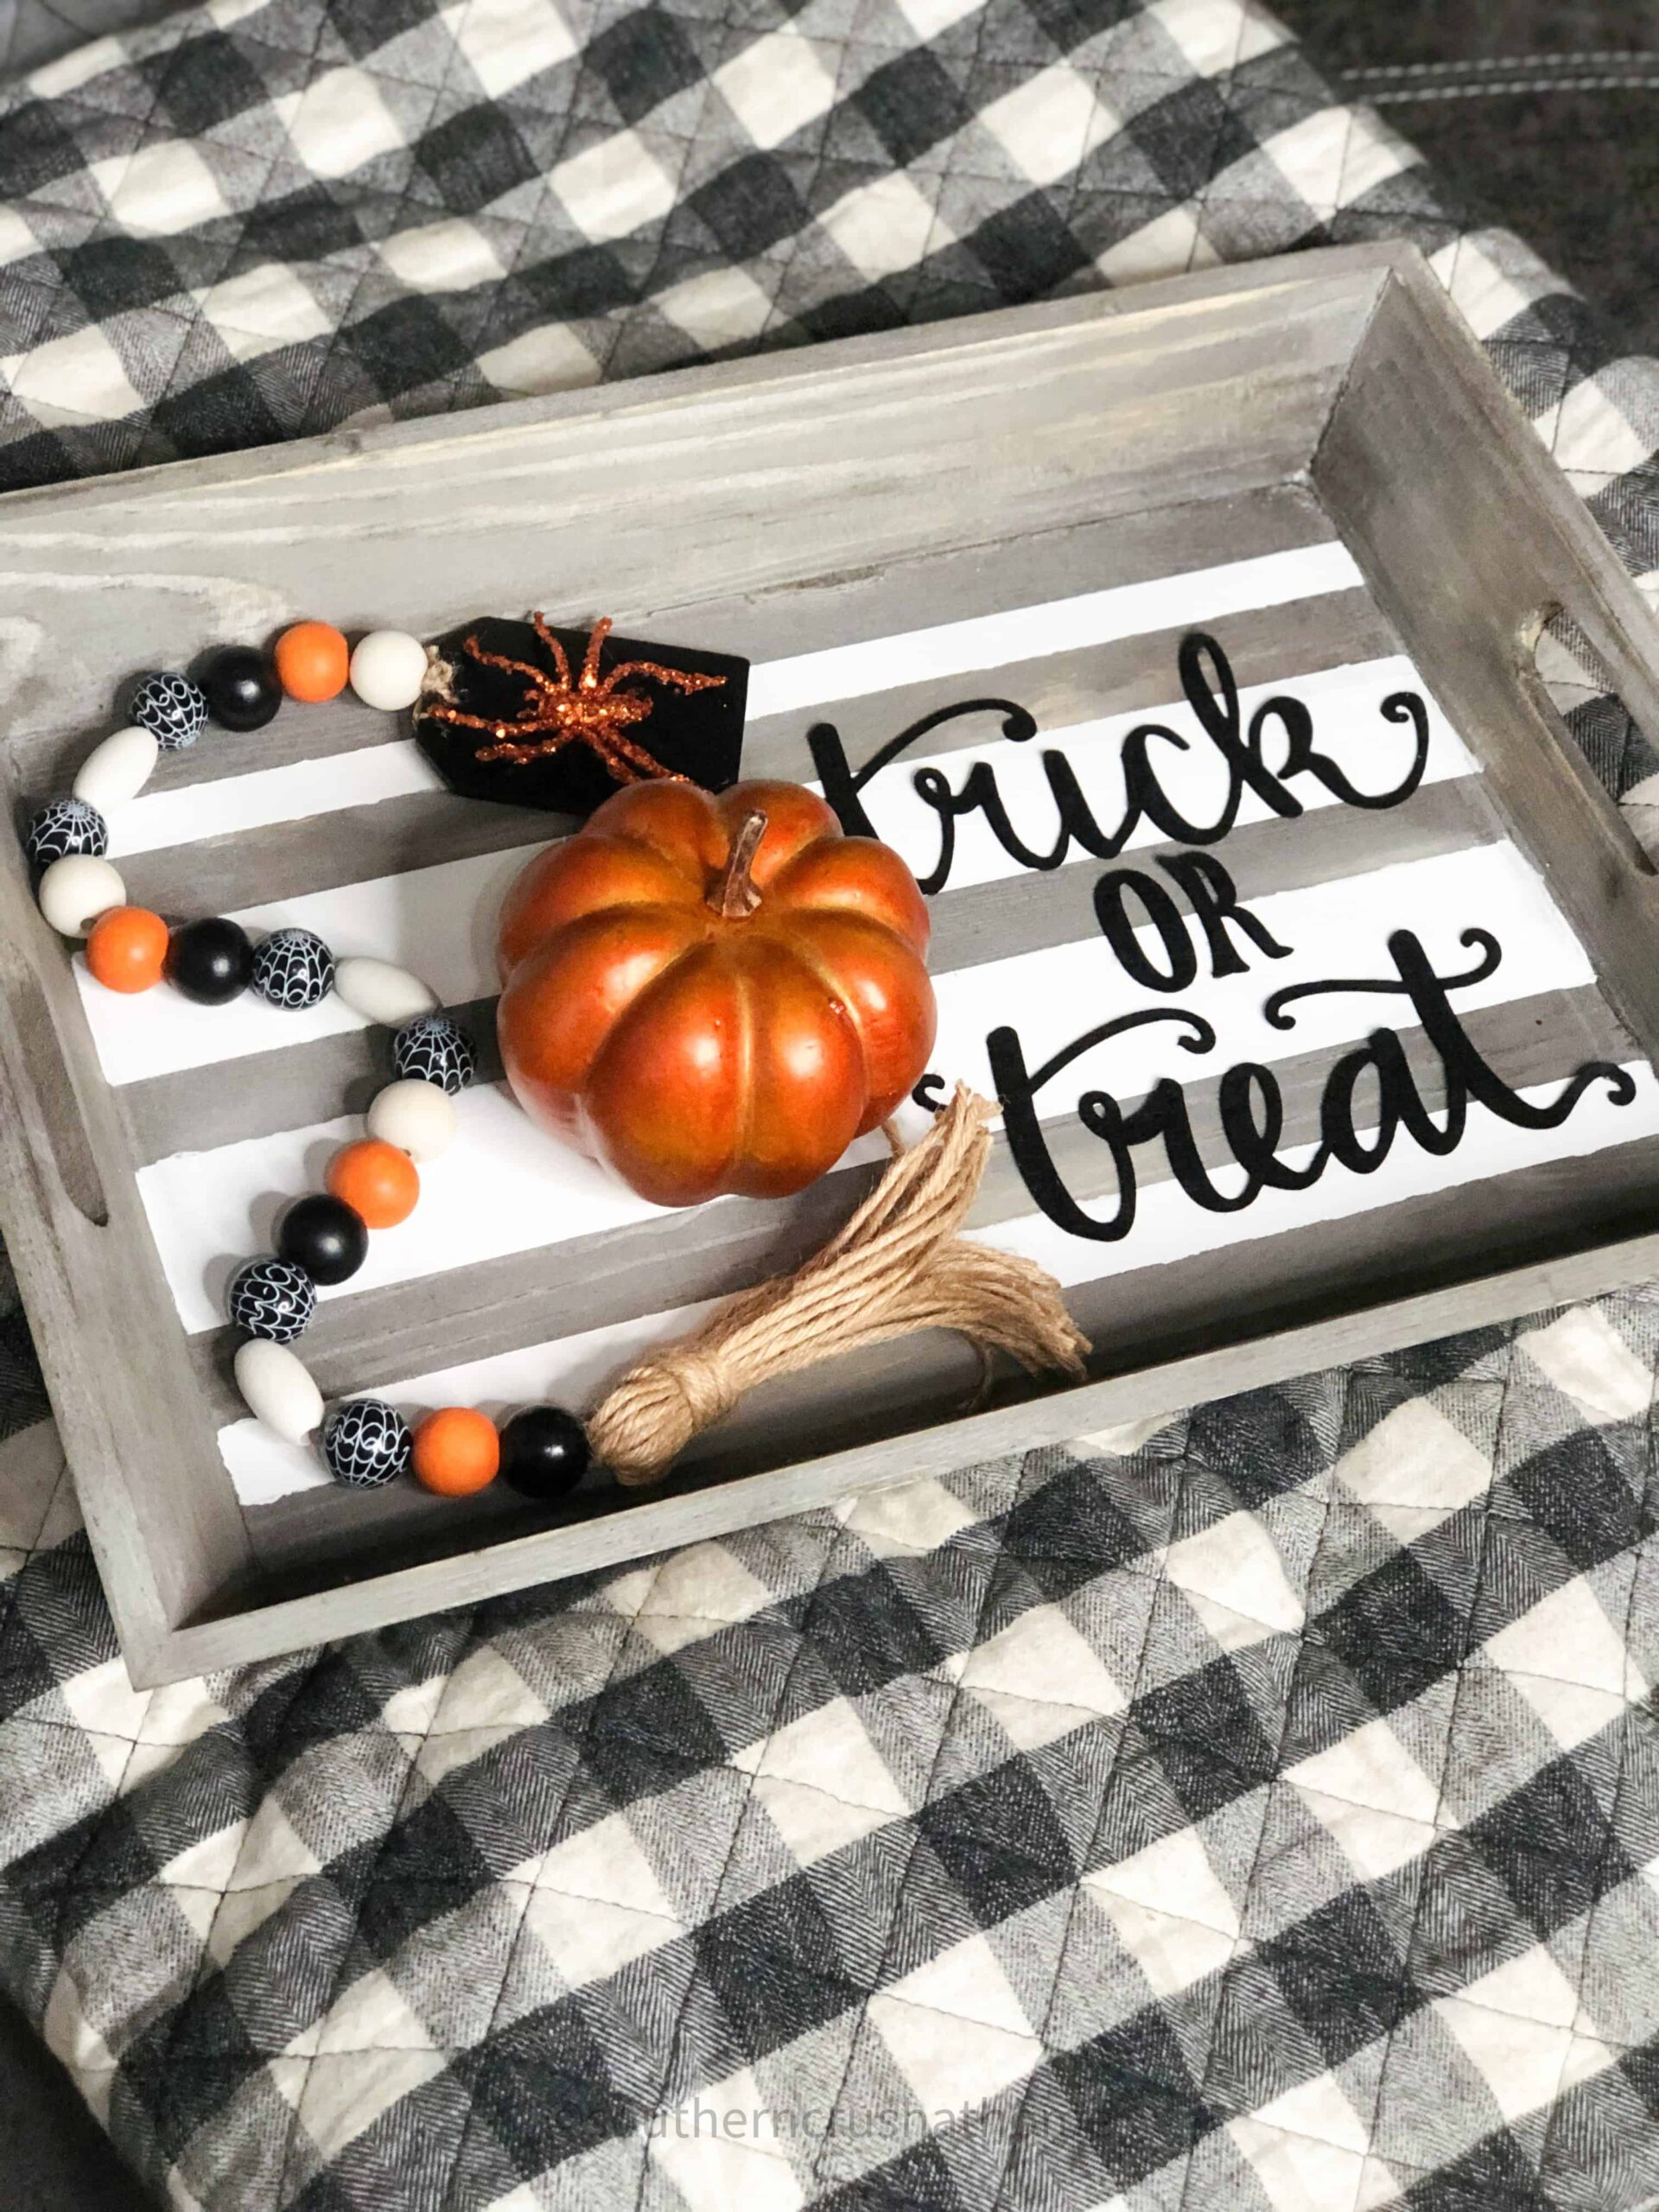
Decorate and accessorize your tray.
I used a handmade Halloween wooden beaded tassel and an inexpensive plastic orange Dollar Tree pumpkin, that will later be replaced with a bowl of Halloween candy after these pictures were taken.
Watch the previously live video tutorial over on my YouTube Channel
While you’re there hit that subscribe button to follow along for all of the DIY seasonal ideas!
The Perfect Trick or Treat Tray
It’s wonderful to know that we don’t have to choose in life whether we want a ‘trick’ or a ‘treat’.
So, no tricks for me please, I’ll take all treats! How about you?

Here is another view of this fun DIY project!

Easy DIY Halloween Decor
This project was so easy and reminds me of another Halloween tabletop project seen here. The felt sticker lettering makes it look like it was professionally made.
If you cannot find the stickers, you can always easily cut similar lettering from a Cricut machine.
The hardest part of this DIY was waiting for the paint to dry! Oh, and some of the stickers were a little tough to remove from their backing. Other than that, I highly recommend giving this one a try.
The tray is ready for entertaining on October 31st with either a bowl of dip or a cute bowl with ‘trick or treat’ candy!
If you love this kind of DIY project, you need to be getting my emails, friends! Each week I send out a couple of emails that include updates, crafts, shopping experiences, and decor inspiration. Be sure to get yourself signed up below. I can’t wait to meet you!
More Halloween Ideas


Halloween Coffee Table Tray Decor
Equipment
- Painters Tape
- paint brush
Ingredients
- 1 wooden tray
- 1 bottle DecorArt paint
- 1 sheet Halloween Decorating Stickers
Instructions
- Measure out where you would like your stripes to go.
- Place the blue painters tape in between where you would like the paint to be and press down pretty hard to avoid bleeding.
- Paint your accent color (I used white) in between the painter’s tape and allow to dry thoroughly before attempting to remove the tape.
- Use a light sanding with 120 grit fine sand paper over any areas where the paint bleeds out from underneath the tape in order to clean up your lines.
- Choose your favorite Halloween Pumpkin Decorating Sticker from the package of three and peel and place in your desired location on the tray one section at a time.
- Decorate and accessorize your tray.
Turned out really cute. Thank you for posting.
Wow thank you!!!
This a really cute idea. My son made me a wooden tray. I may try putting the transfer on glass (like your picture frame) and lay the glass in the tray. Then I can change out for the holidays. May not be as cute, but I definitely want to give it a try. Thanks for the idea!
What a great idea! I love making things reusable! ❤️
I think his is so cute!