Easy Dollar Tree Pumpkin Wreath with Pumpkin Patch Sign
Fall is practically here and it is the perfect time to decorate your home with a beautiful and festive Pumpkin Wreath with supplies from the Dollar Tree, of course!
One of the best things about fall is pumpkins and with this easy DIY tutorial, you can create a gorgeous pumpkin wreath for your front door that will put a smile on all of your visitors.
This project will not only save you money, but it is also a great way to create a personalized wreath for fall.
So gather your materials and let's get started!

PIN this for later!
The internet is so full of fun pumpkin ideas! Here are a few of the ones that have been the most popular on my blog.


This blog post contains affiliate links. The opinions are wholly my own from my own experience. I may earn a small commission from clicks through to the websites that end in a purchase.
Supplies Needed
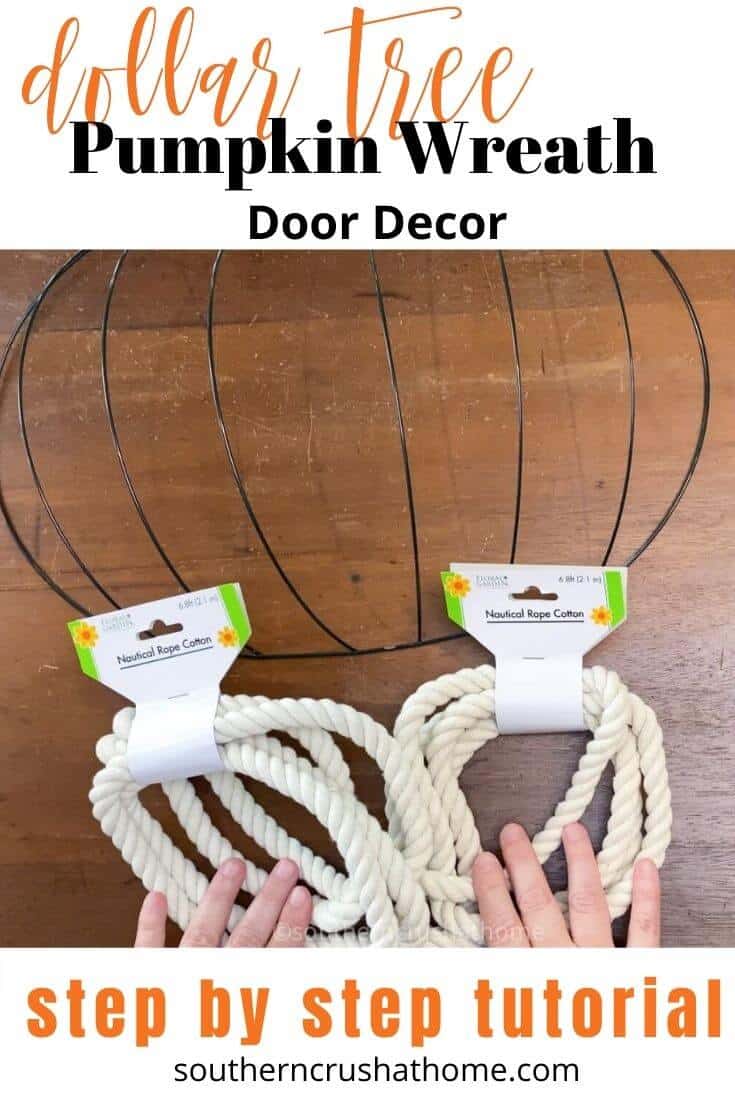
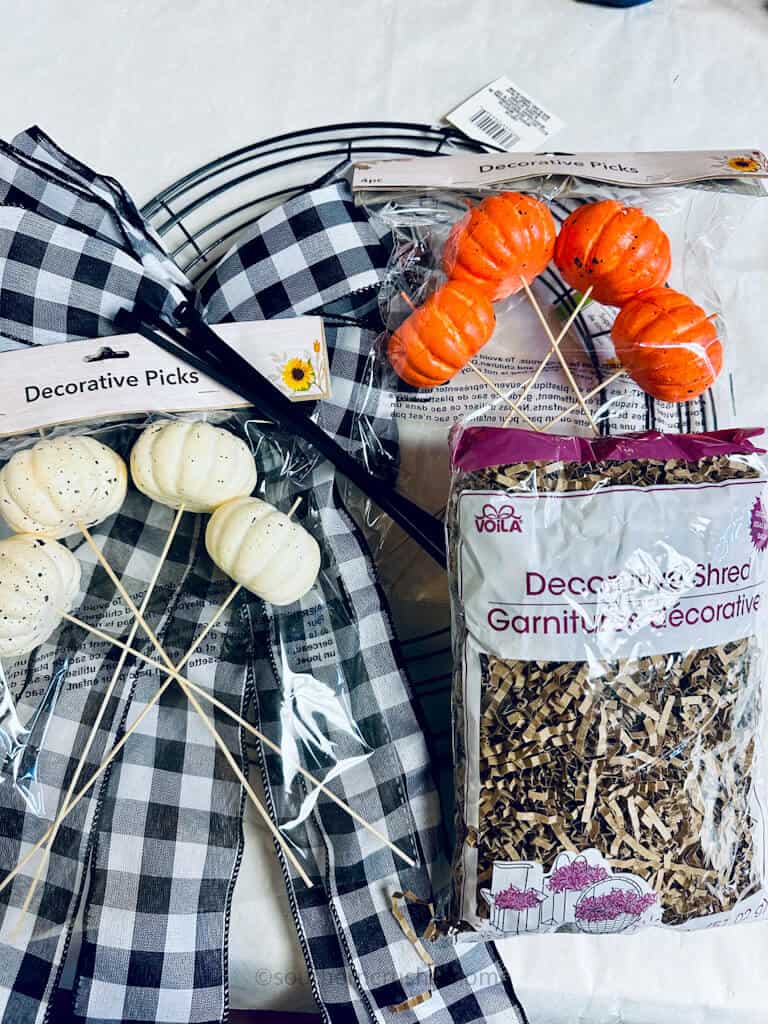
The first thing you will need to do is gather all the materials needed for this project. All the items that you need can be purchased from Dollar Tree, making this project cost-efficient and easy on your wallet. Here is a list of things you will need:
- (2) 14-inch Dollar Tree wire wreath frames
- 1 package of Dollar Tree decorative crinkle cut paper shred in the color brown
- 4 zip ties (I found black ones at Dollar Tree and they matched the black wreath form
- 2 packages of small pumpkins (they are on skewers) I got one in orange and one in white
- 2 packages of small Orange and white pumpkin picks
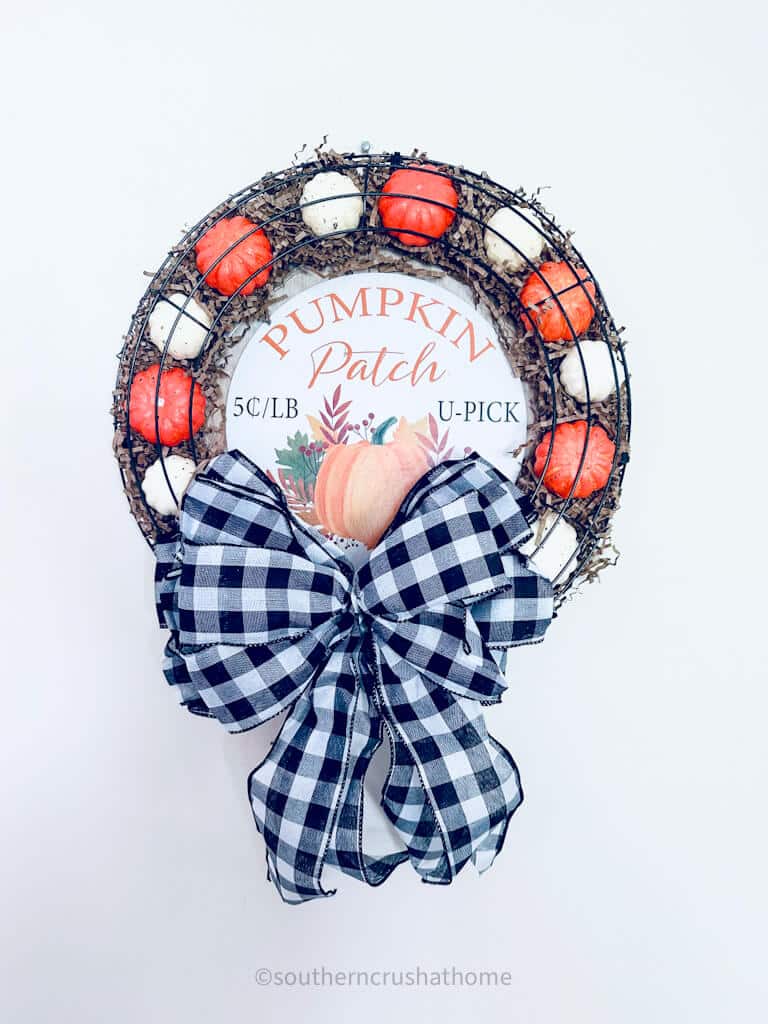
- Pumpkin patch sign
- Hot glue gun
- Glue sticks
- Wire cutters
- 1 wreath bow (see my tutorial below)
How to Make a Dollar Tree Pumpkin Wreath
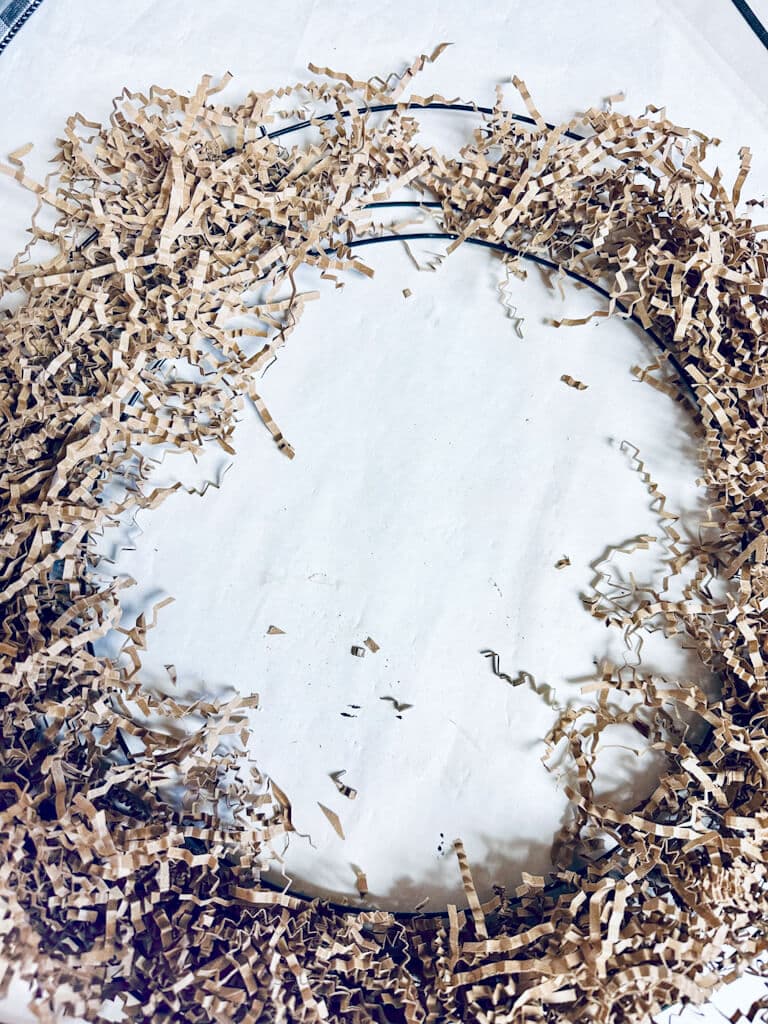
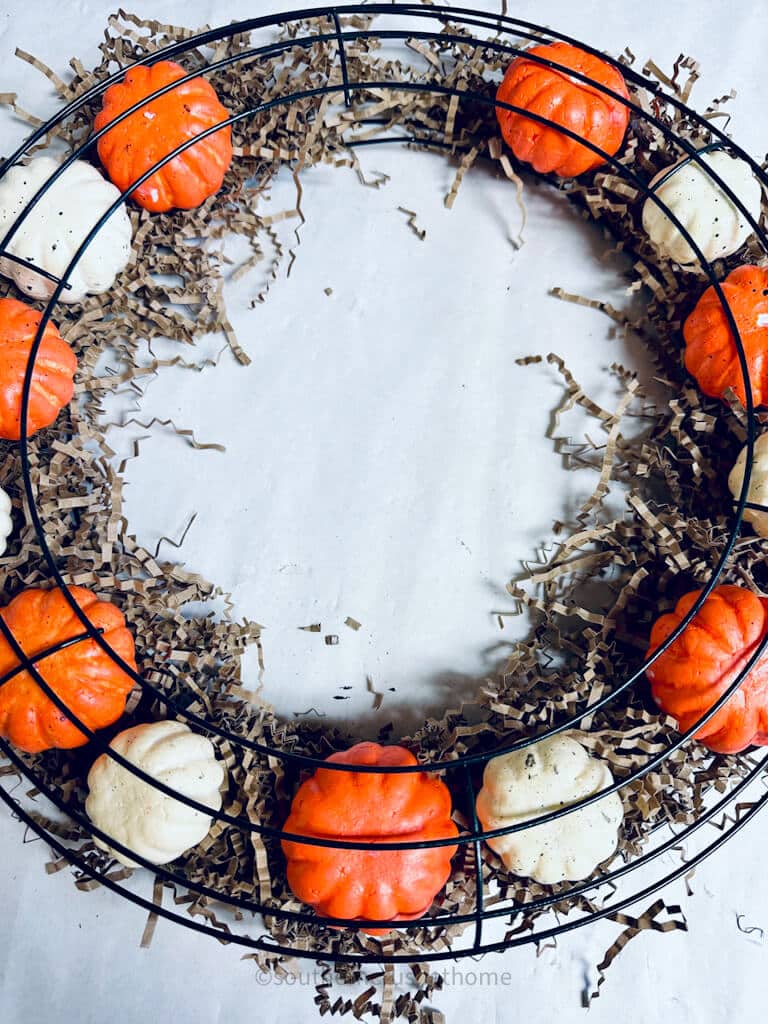
Start by flipping one of the wire wreath forms over so the rounded top section is on the bottom (this will create the cage-like effect)
Step 1: Add Decorative Shred to the wreath
Next, add a layer of the decorative crinkle-cut paper shred, you won’t use even half of the bag so save it for another project.
Step 2: Arrange Your Pumpkins on the Wreath Frame
Now you can start choosing your pumpkin colors and design. It is fun to choose different colors for the pumpkins to add depth and contrast to the wreath.
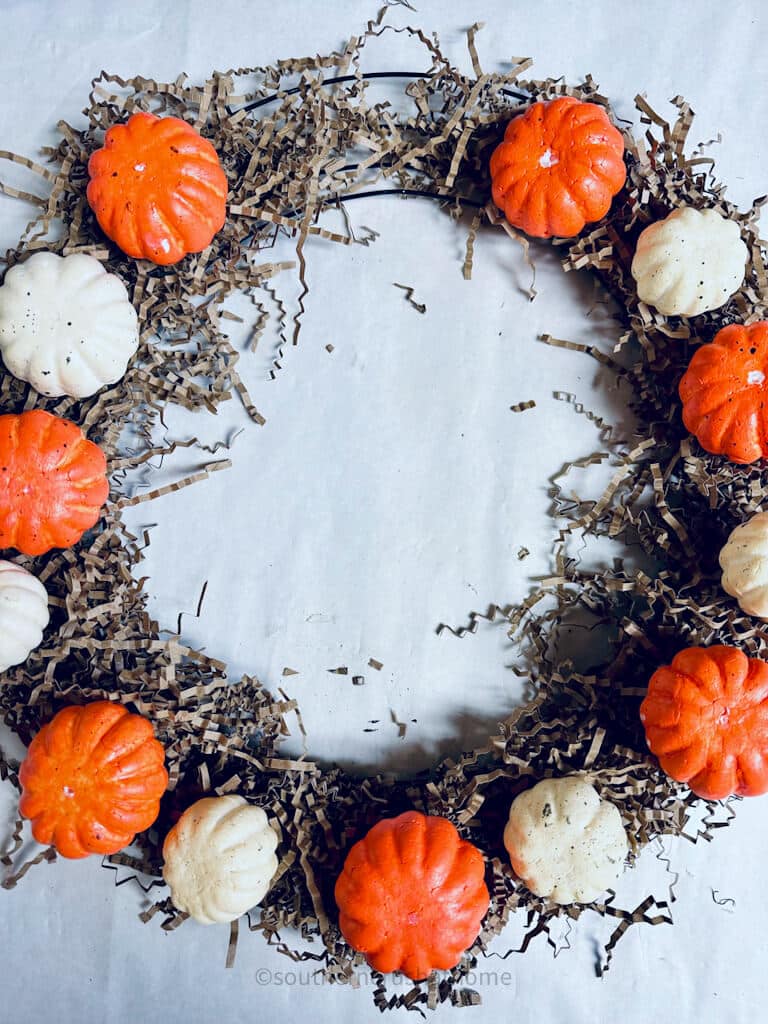
Next, gently pull the skewer from the pumpkin and arrange the pumpkins on top of the decorative crinkle-cut paper shred. (I alternated the colors)
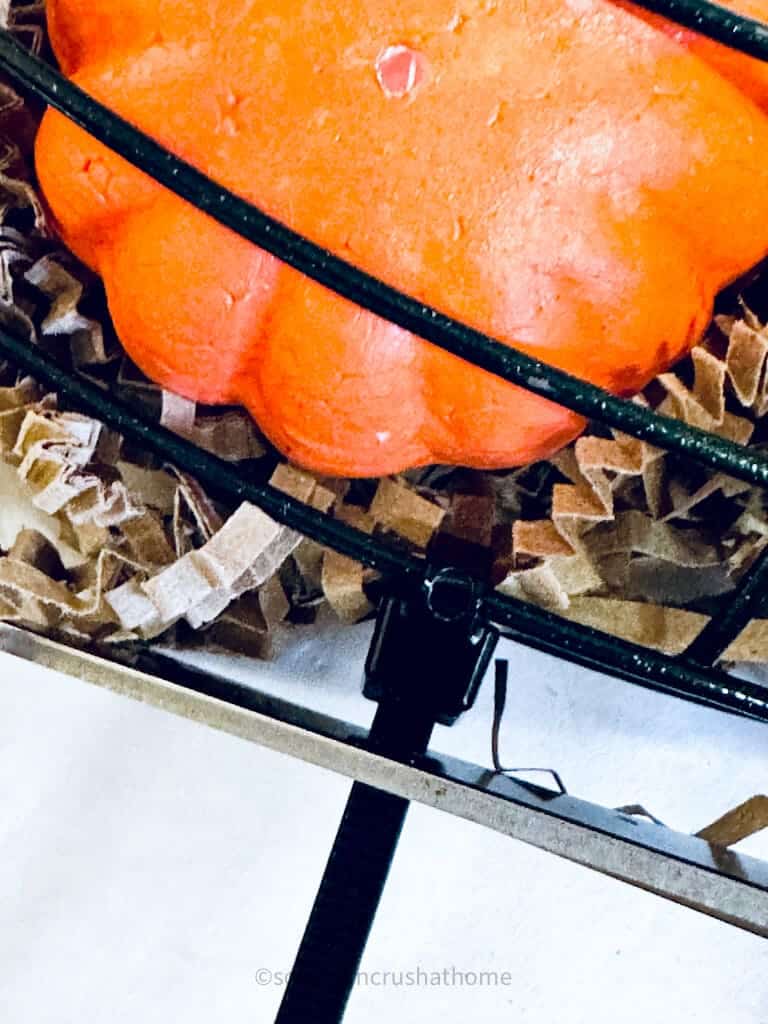
Step 3: Secure the Pumpkins inside the wreath
Place the other wire pumpkin wreath form on top.
Secure a zip tie on the top, bottom, and side of the wreath frame pulling tight to secure the pumpkins inside the wire wreath frames. Snip off excess with wire cutters or scissors.
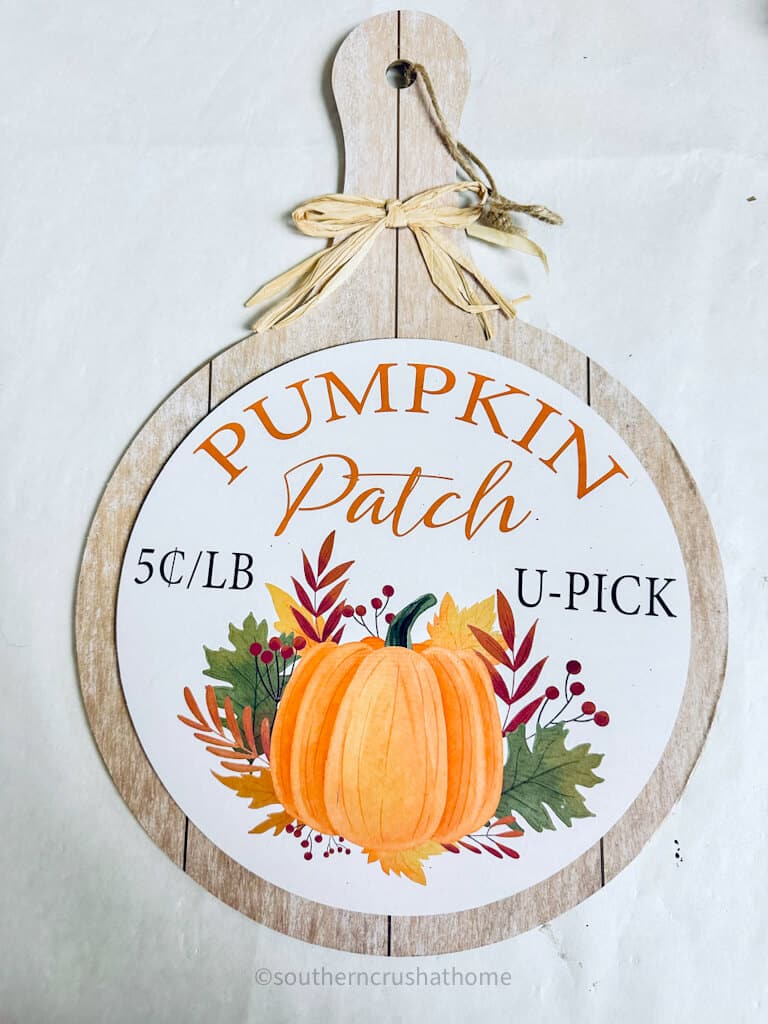
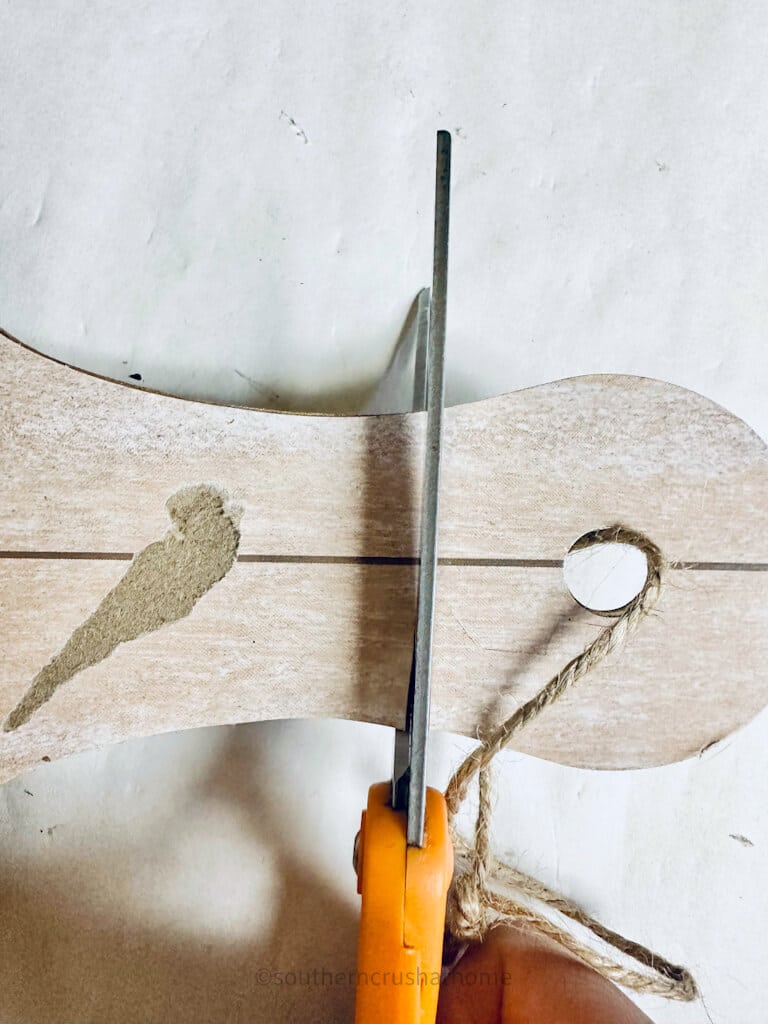
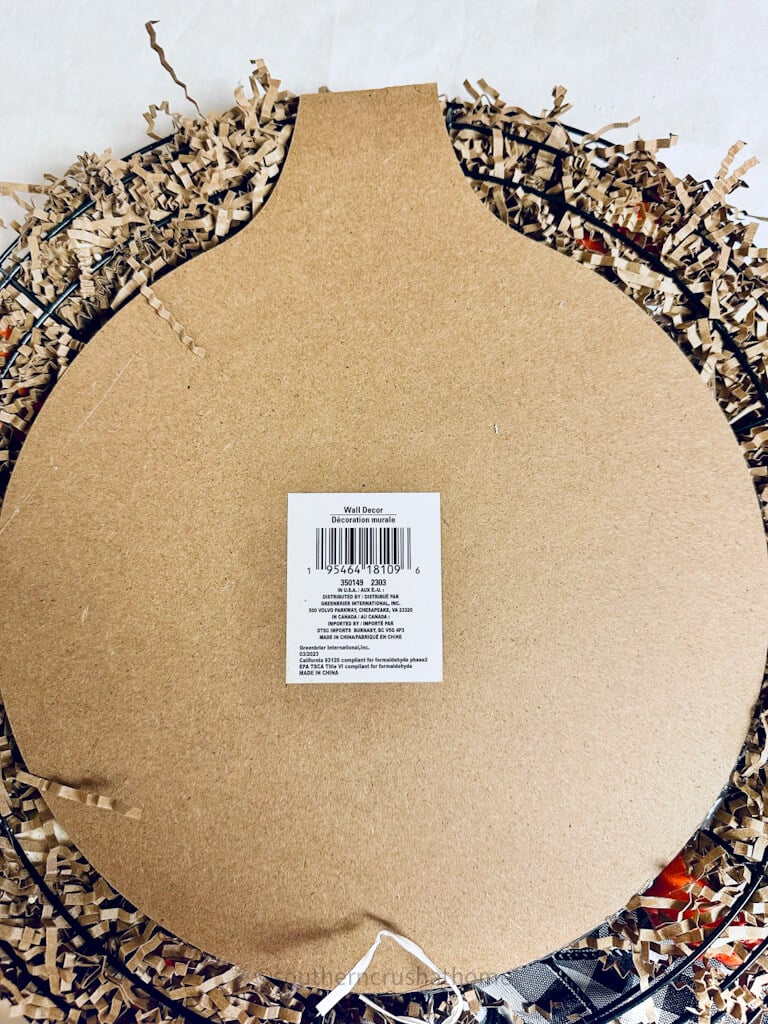
Step 4: Add Your Pumpkin Patch Sign
Add a cute Pumpkin Patch faux wood sign.
Cut off the top handle using scissors.
Put a generous amount of hot glue on the back of your pumpkin patch sign and place it in the center of the back of the wreath. Once the glue has dried, you can add the finishing touches.
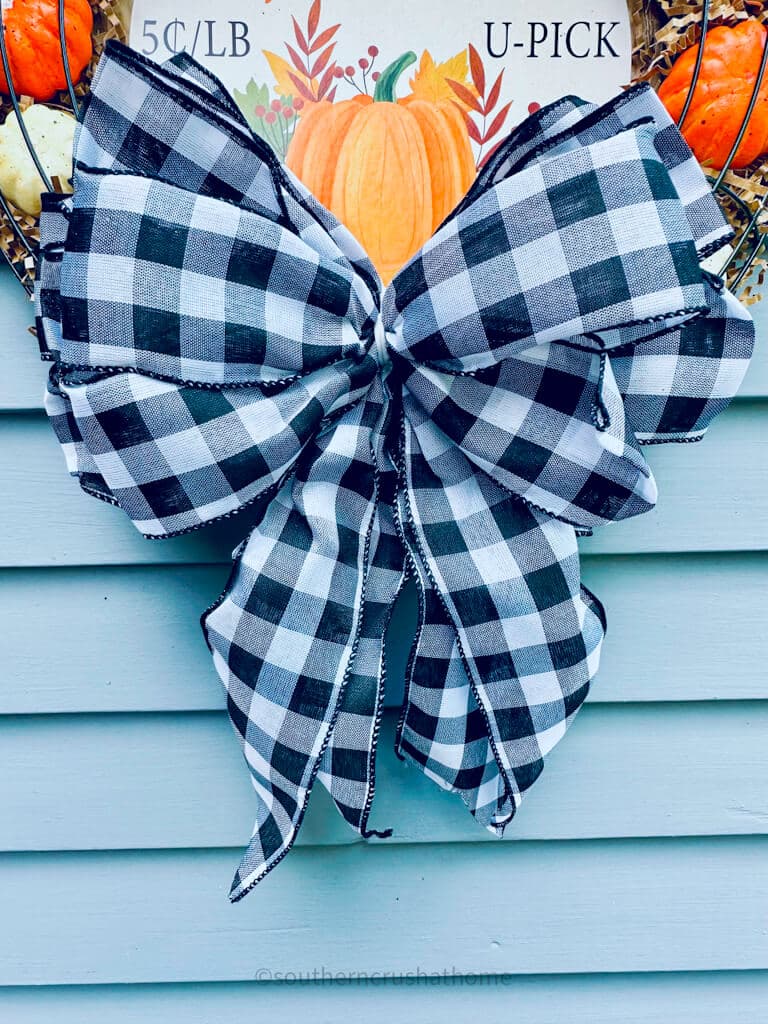
Step 5: Add a Buffalo Check Wreath Bow
Finally, add a pretty wreath bow using a pipe cleaner on the back of the bow.
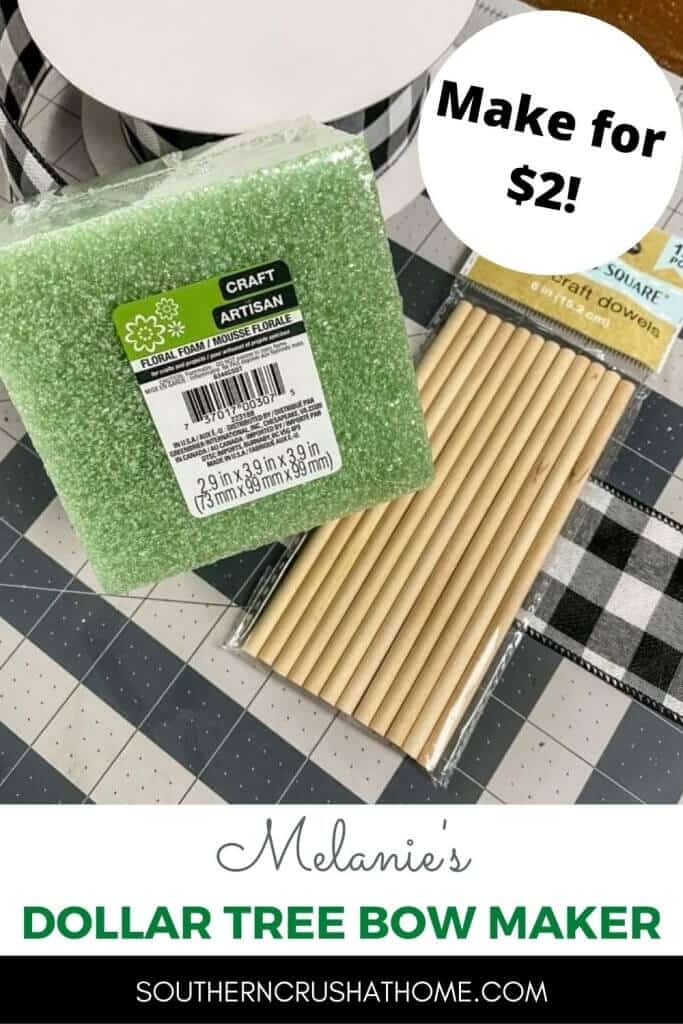
YouTube Video Tutorial for Making a Wreath Bow
Watch my complete and easy-to-make bow tutorial below:
or you may want to try your hand at this faster 5-minute wreath bow below:
You may also want to make your own DIY Bow Maker! See How to Tutorial below:
Step 6: Hang Your Wreath
Finally, you can hang your wreath on your front door! You can use a wreath hanger like any of these or simply a thumbtack and a ribbon to hang it like below.
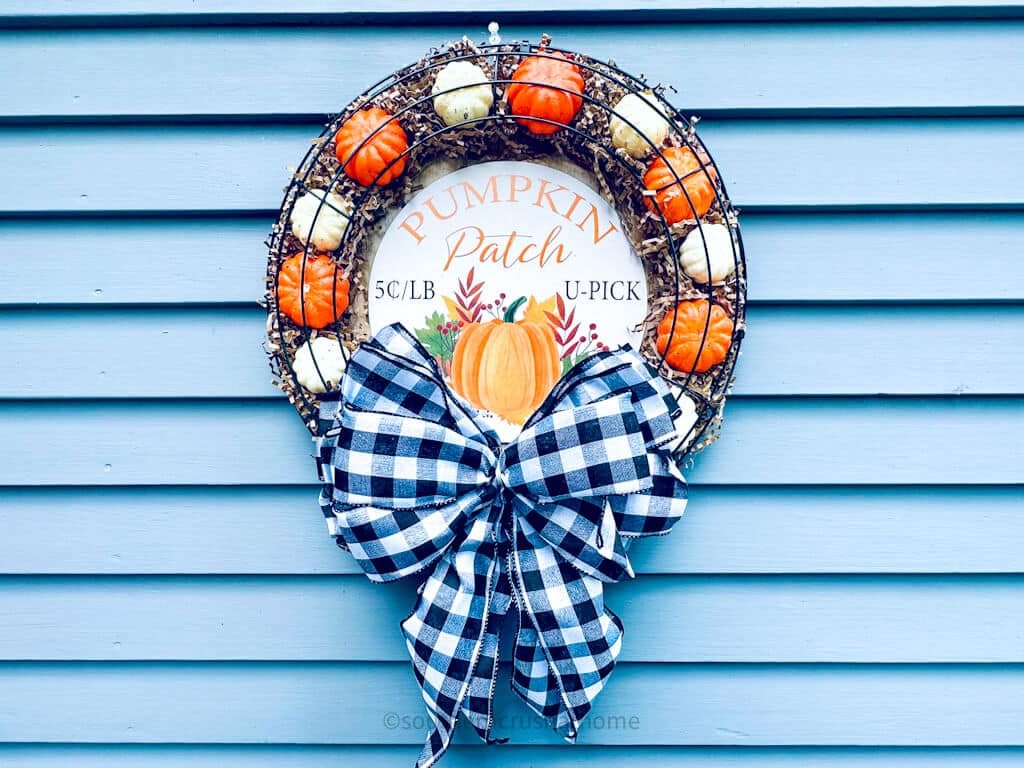
Make sure to hang it at eye level so that it is easily seen by all who enter your home. You can even add some extra decorations, like fall leaves or a fall welcome mat, to complete the look.
PIN this for later!
Creating a DIY project is always a fun and rewarding experience, especially when it is budget-friendly. This easy Dollar Tree pumpkin wreath tutorial is the perfect way to decorate your home this fall without breaking the bank. With just a few materials and some creativity, you can have a beautiful and festive wreath that your family and guests will love. So go ahead and get started on your pumpkin wreath today, and enjoy the fall season!

Dollar Tree Pumpkin Patch Wreath
Equipment
- Wire cutters
Materials
- 2 14-inch Dollar Tree wire wreath frames
- 1 package of Dollar Tree decorative shred in the color brown
- 4 zip ties (I found black ones at Dollar Tree and they matched the black wreath form
- 2 packages of small pumpkins they are on skewers I got one in orange and one in white
- 2 packages of small Orange and white pumpkin picks
- Pumpkin patch sign
Instructions
- Turn over one of the wreath forms, rounded side facing down.
- Add a layer of the decorative shred, you won’t use even half of the bag so save it for another project.
- Now you can start choosing your pumpkin colors and design. It is fun to choose different colors for the pumpkins to add depth and contrast to the wreath.
- Next, gently pull the skewer from the pumpkin and arrange the pumpkins on top of the decorative shred. (I alternated the colors)
- Place the other wire pumpkin wreath form on top.
- Secure a zip tie on the top, bottom, and side of the wreath frame pulling tight to secure the pumpkins inside the wire wreath frames. Snip off excess with wire cutters or scissors.
- Add a cute Pumpkin Patch faux wood sign.
- Cut off the top handle using scissors.
- Put a generous amount of hot glue on the back of your pumpkin patch sign and place it in the center of the back of the wreath. Once the glue has dried, you can add the finishing touches.
- Finally, add a pretty wreath bow using a pipe cleaner on the back of the bow.
- Finally, you can hang your wreath on your front door! You can use a wreath hanger or ribbon to hang it.
These would be cute with the wreath form painted copper or gold, too!
This is really different! You could use the same idea for Easter eggs for Easter decor.
Oh my goodness, this is SO cute!
Cute!