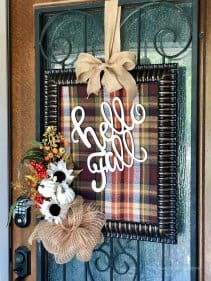
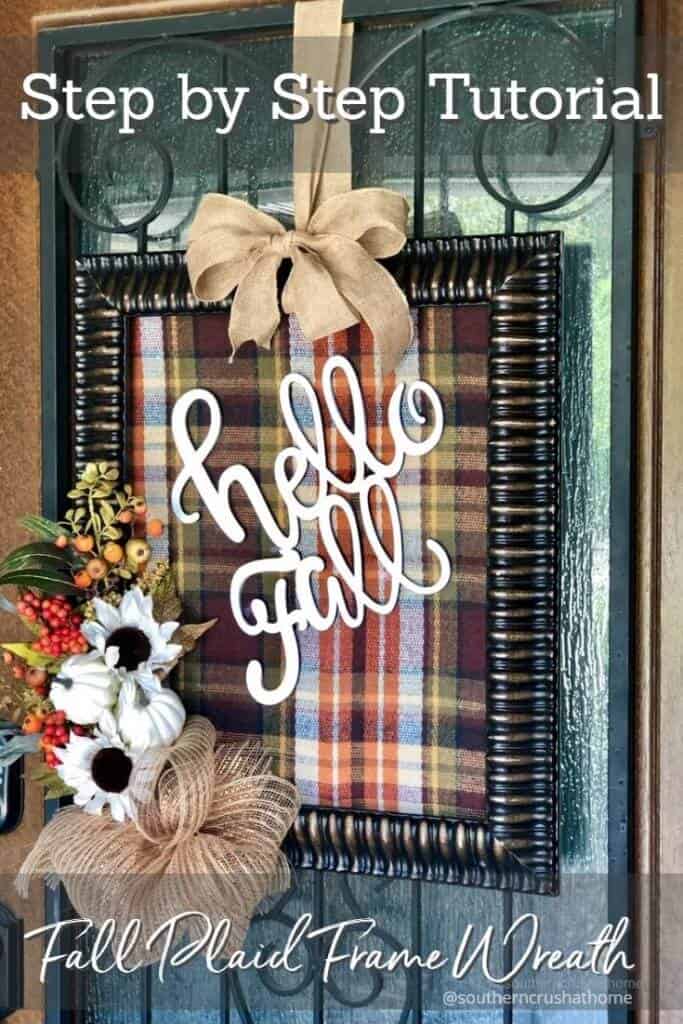
DIY Picture Frame Wreath With Fall Plaid Decor
Decorate your door with this cute DIY picture frame wreath. Use popular fall colors and your favorite plaid accents.
When you think of front porch Fall decorating, what comes to mind? Maybe pumpkins, hay, scarecrows, or of course a Fall wreath for your front door! Sometimes you just want something different, something unique for your front door decor.
Well if you have an old print, photo, or framed piece of artwork you don't use or just don't have a place for anymore, then this is where the Fall plaid frame wreath comes in! Fall is officially here and it's time to get busy decorating the front door. Sometimes I think my favorite color is plaid, is that a thing? With its warm plaid colors, pretty florals, and pumpkins, this fall frame wreath is the perfect solution! Let's make this.
How To Make a Fall Picture Frame Wreath
This tutorial is for anyone that struggles and doesn't enjoy making round wreaths. Forget about all the twisting and tying – this picture frame wreath couldn't be any easier. If you know how to use a hot glue gun and paintbrush then you can make this wreath!
In fact, the fun part about this wreath is that you can literally let your imagination go crazy at the craft store and use all your favorite fall accents! I'll show you how.
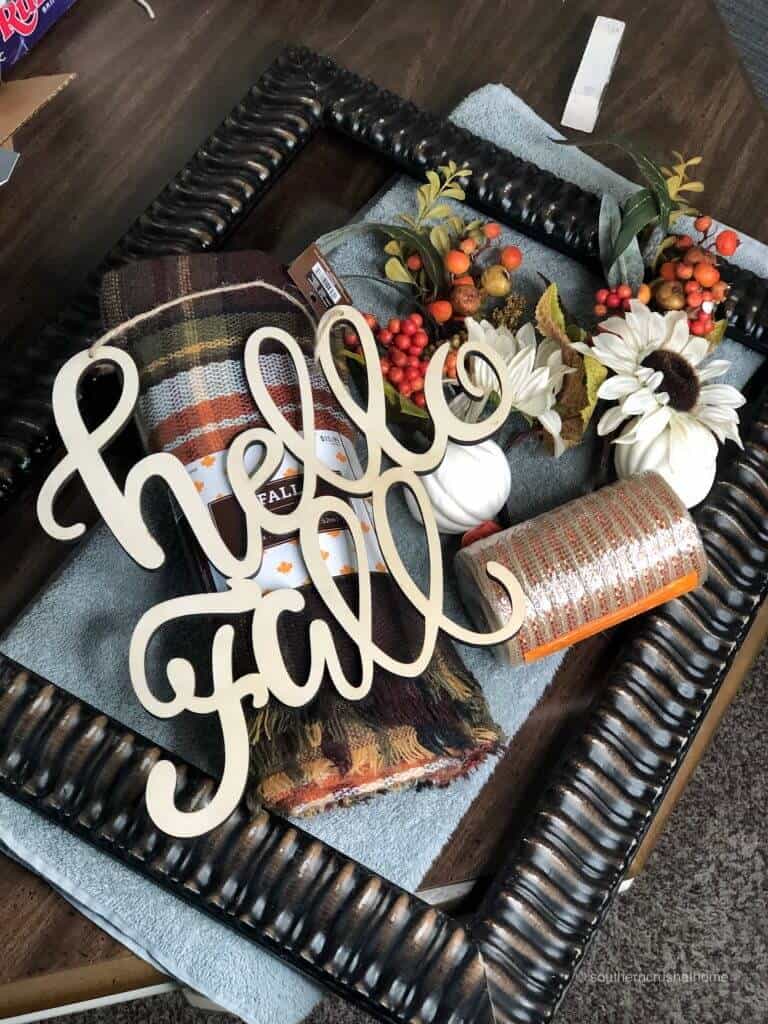
Supplies Needed
- Old picture frame from artwork or print or photo of choice
- Fall plaid throw, blanket or flannel material of choice
- Wooden wording cutout
- Few Fall floral picks
- Mesh ribbon
- Ribbon
- Scissors
- Acrylic Paint
- Paintbrush
- Hot glue gun
- Floral wire
Step-by-step photos of making a picture frame wreath
I have the entire tutorial in a printable craft card at the bottom of the post. First, I have some photos of the project process along with some tips that I think will help you out along the way.
Prepare the Picture Frame
The very first thing you need to do is prepare the picture frame to become a wreath. To do this, remove the old picture and glass insert from the frame, leaving only an empty frame behind.
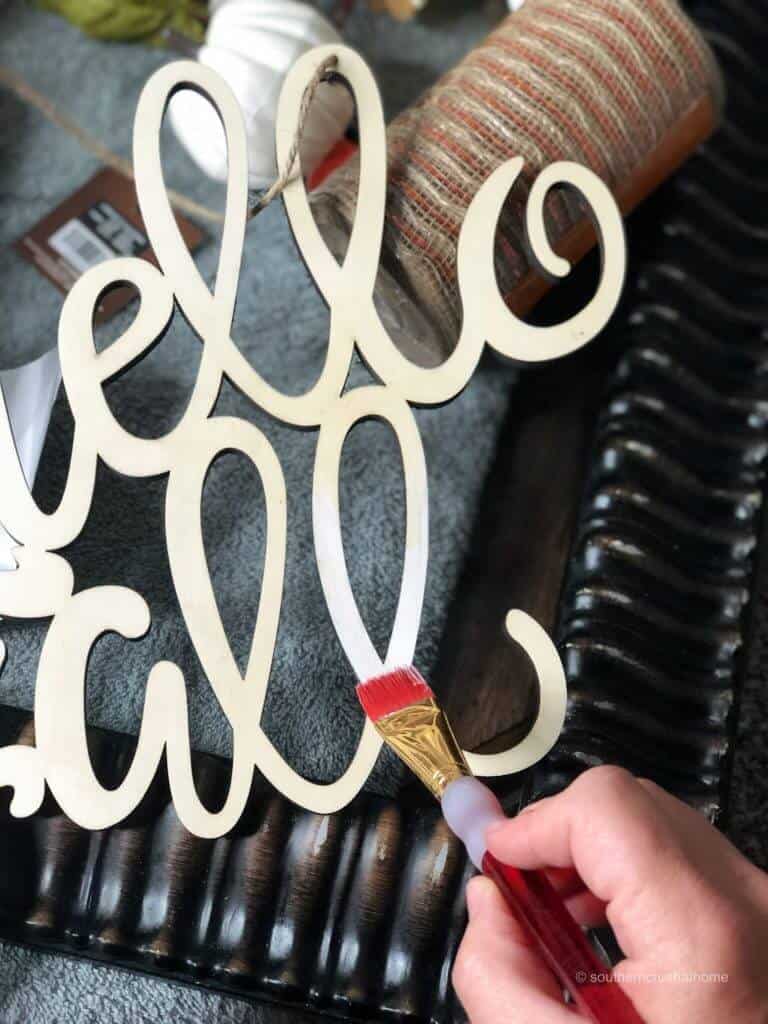
Paint the wooden cutout
Paint your wooden cutout with white acrylic paint or your color of choice and let dry. Since it's a small cutout, you can just use acrylic paint and a small paintbrush. Spray paint is a lot faster (and a lot more fun) if you want to do it that way.
Make a Floral Bouquet
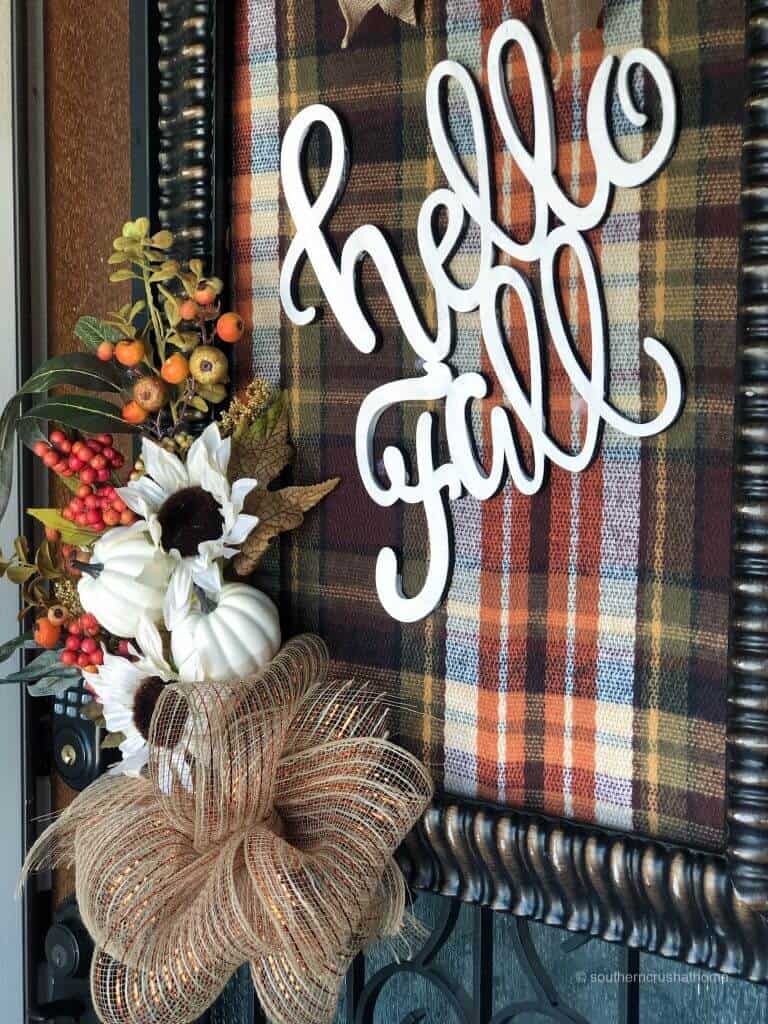
Next, I wanted to add a small fall bouquet in the corner of my picture frame. So I tied a bunch of fall floral picks together with floral wire. 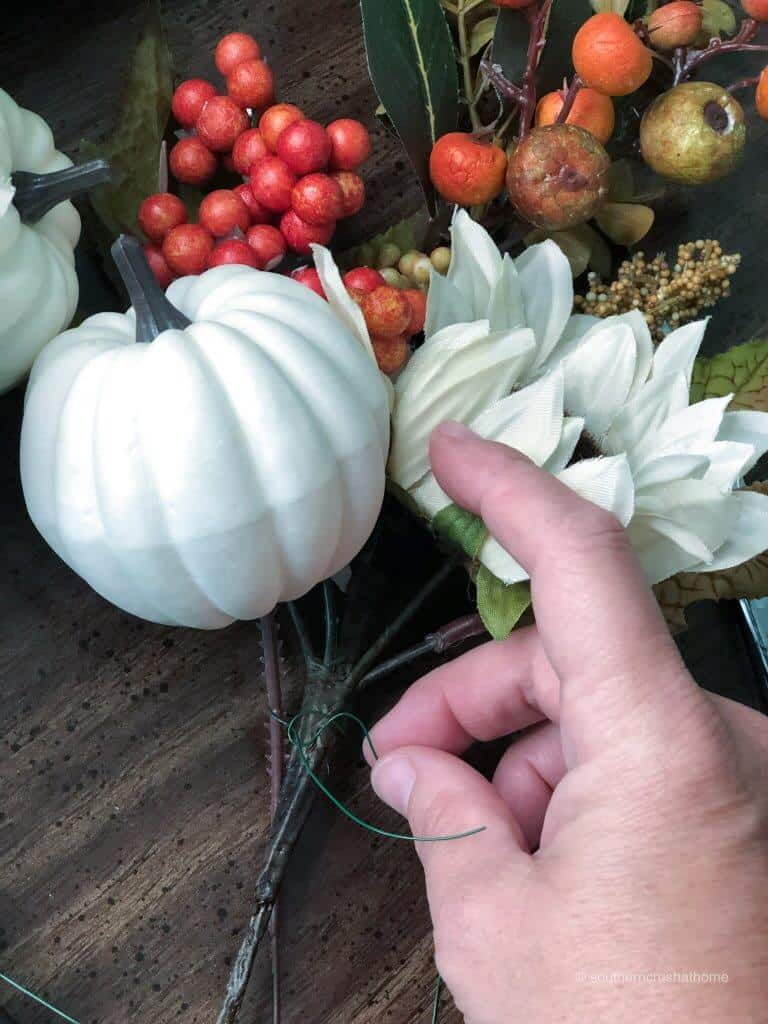
Make an Easy Mesh Bow
Make your bow out of the mesh ribbon and secure it with floral wire.
Bows are often some of the most frustrating things to make. They don't have to be! Check out my easy mesh bow video tutorial and follow along so you can make your own.
Attach the floral bouquet to the backside of the frame
Secure picks and bow to your frame using the floral wire. Tuck stems towards the backside of the frame.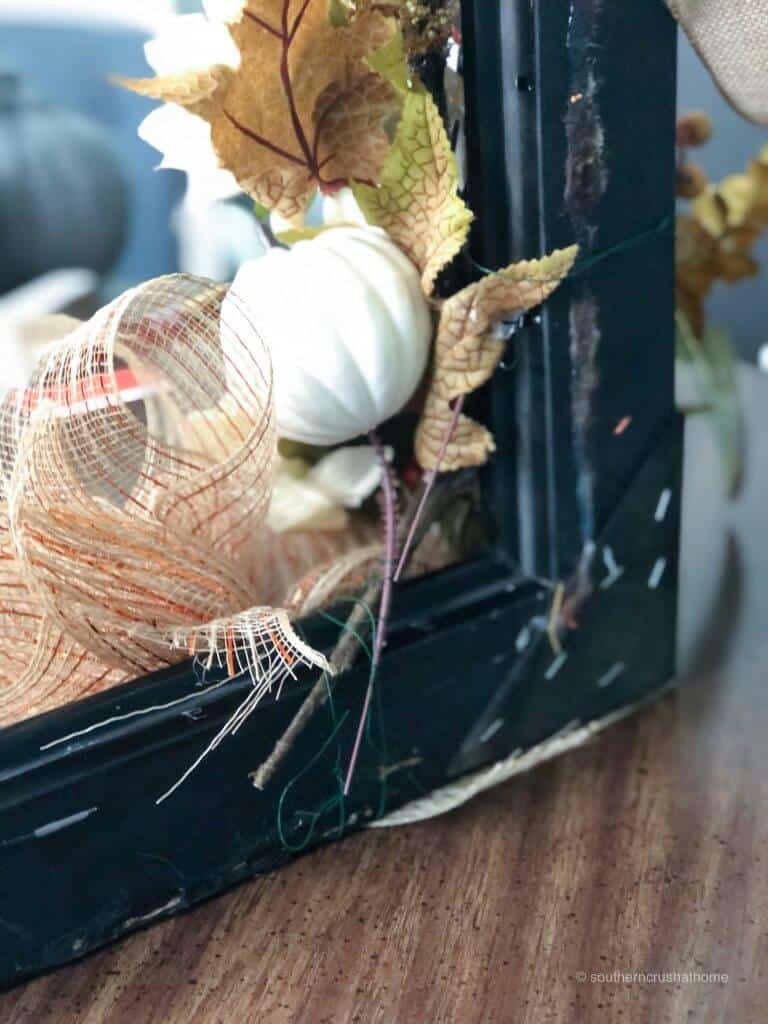
Add the hanging ribbon to the top of the frame
Thread your ribbon at the top through the frame opening, for hanging the wreath later. Secure with a drop of hot glue on the back.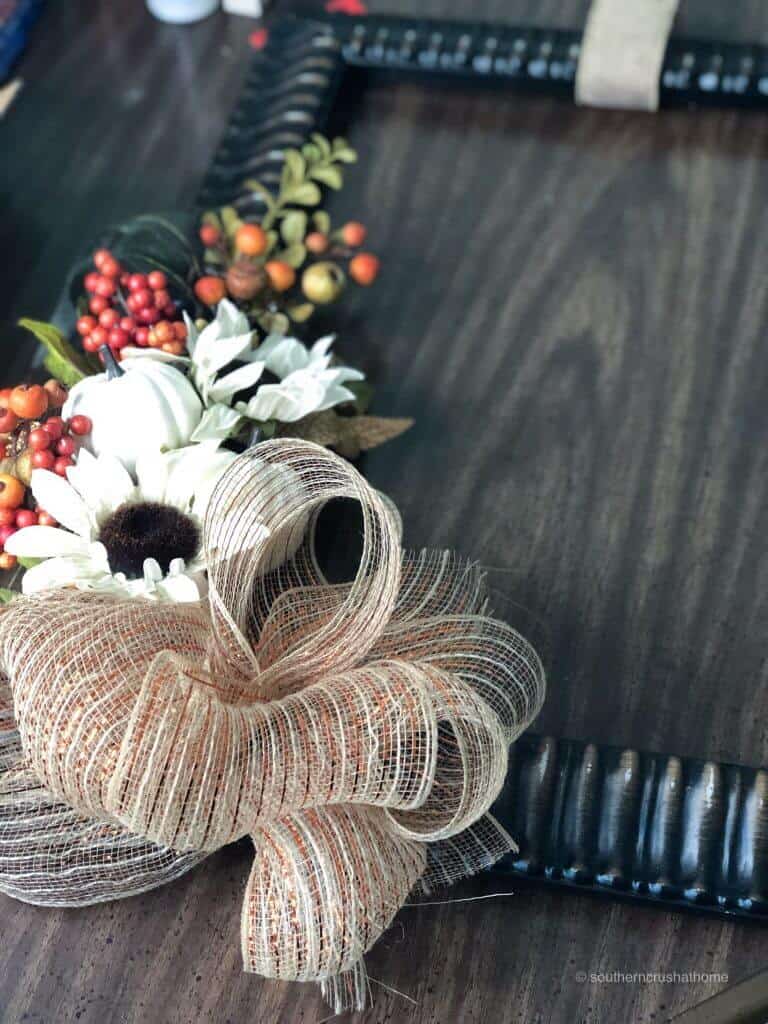
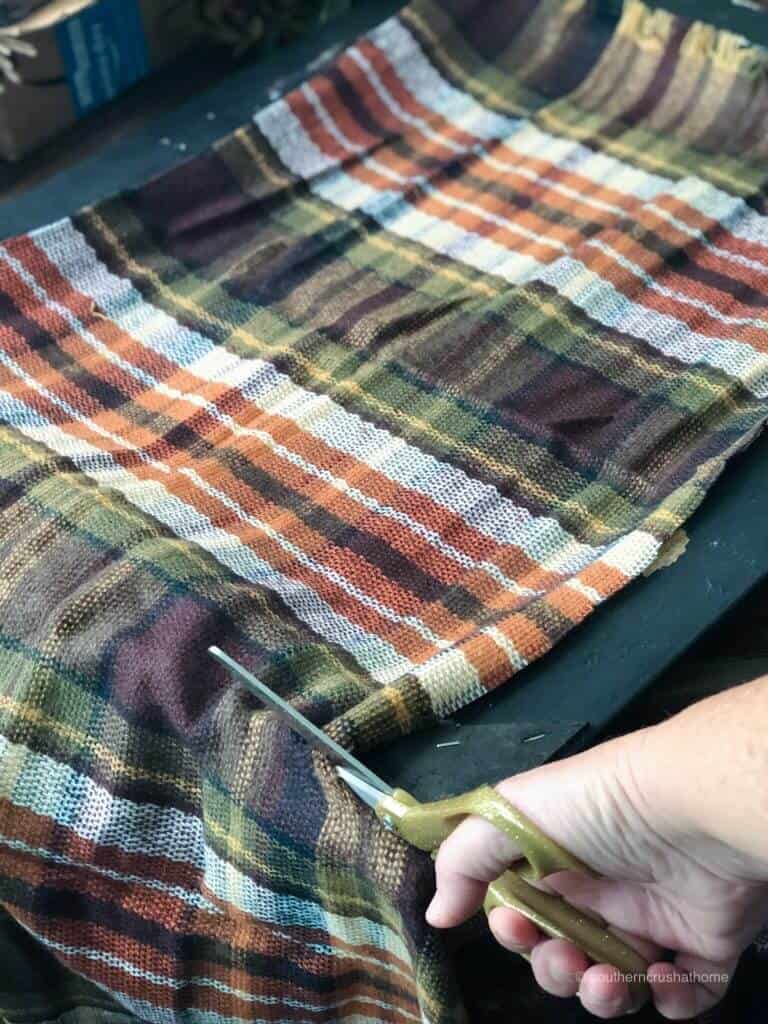
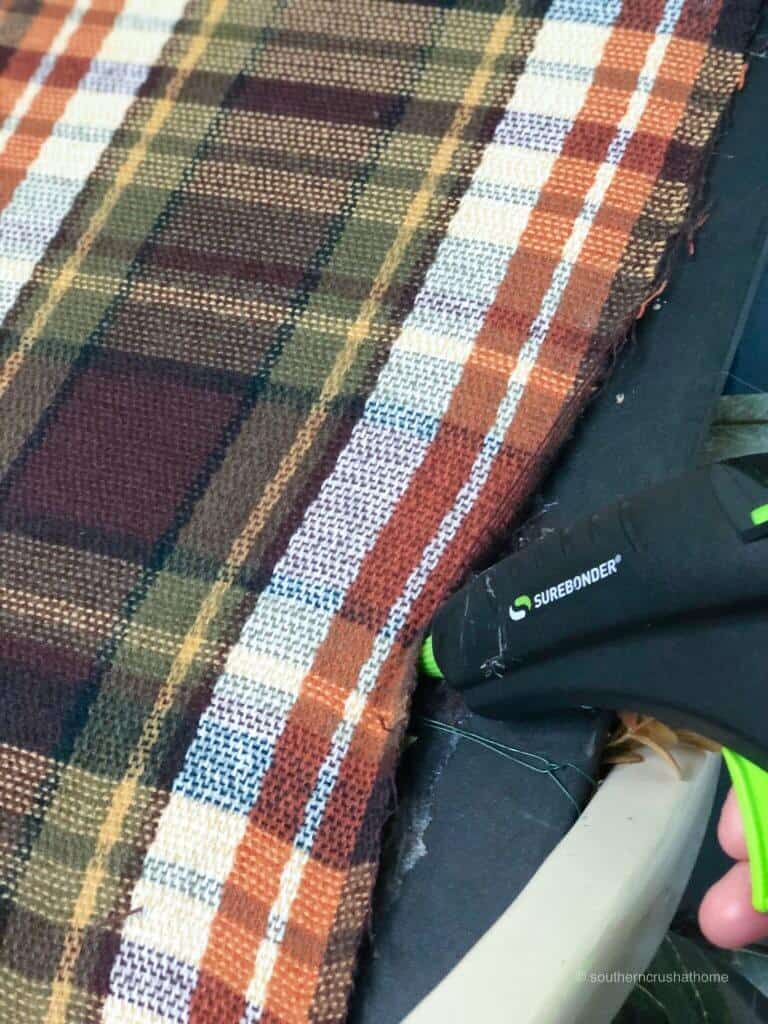
Cut the plaid the direction you want to show in the frame
Cut out your desired section of the throw to work with keeping in mind the direction of the plaid pattern. If you want the plaid lines to go across the frame horizontally, then cut it out so the lines go that way.
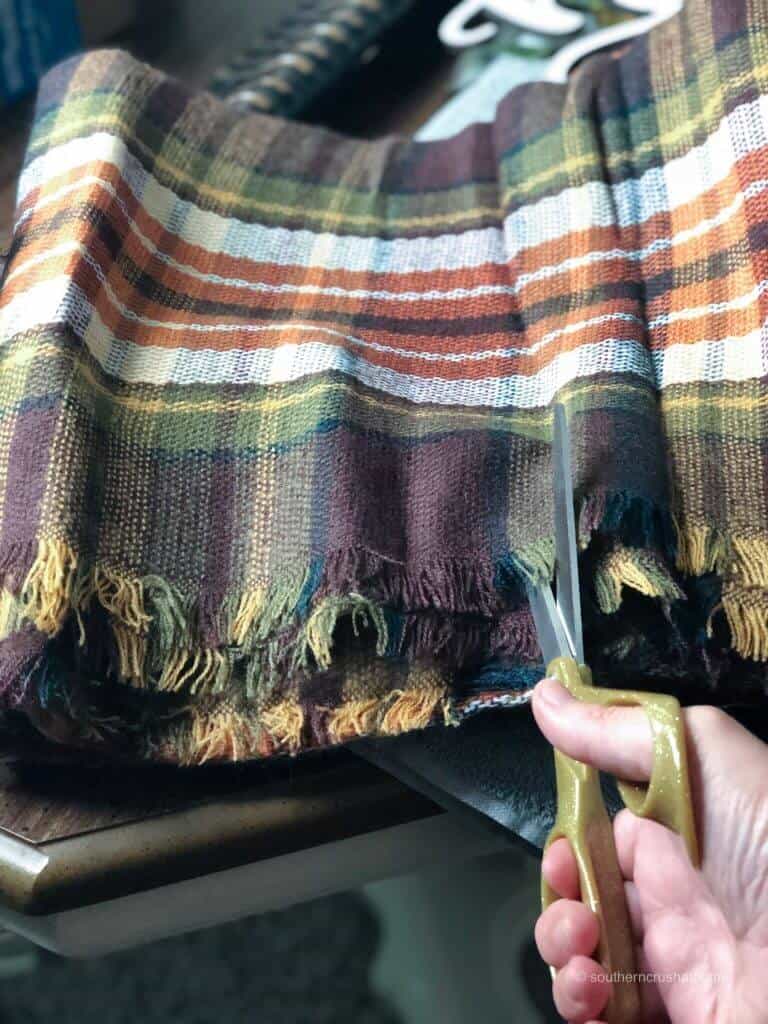
Trim down the material to fit your frame. Make sure the material reaches all edges and can be pulled tight to fit without distorting your plaid pattern.
Hot Glue the Fabric After you trim it
Hot glue your material onto the backside of your frame in sections, pulling taught as you go. If you don't pull it tight, it will have bumps and waves on it, so pull that fabric.
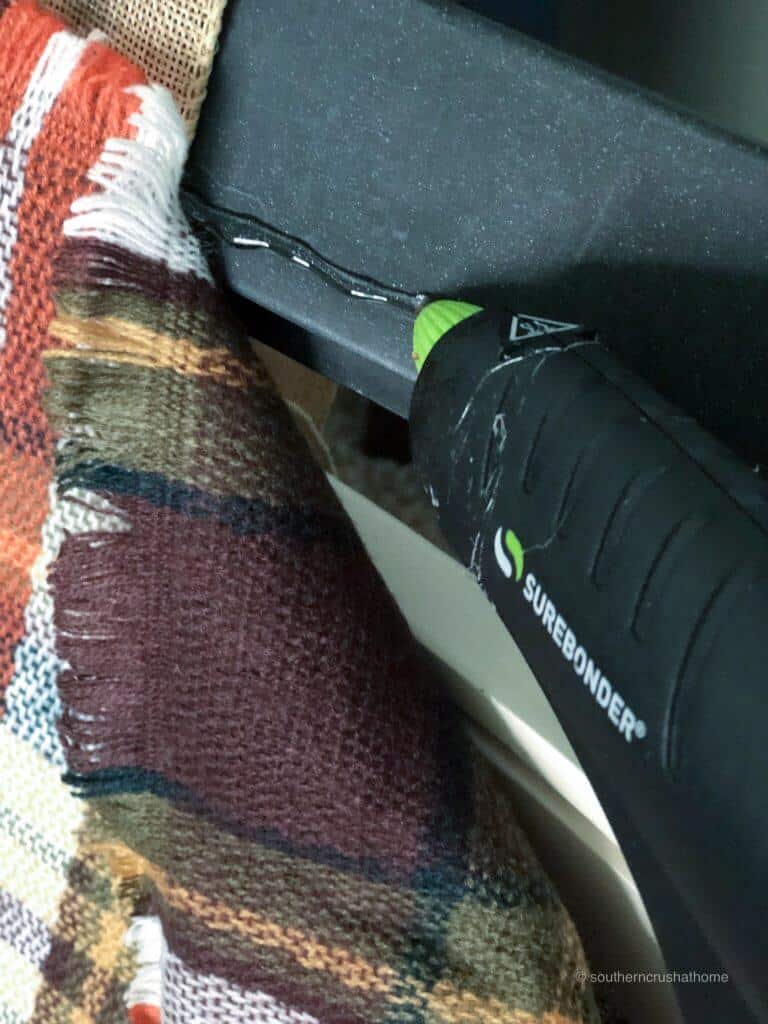
It might help to let each section of glued fabric dry before you pull it tight and glue the rest. Patience will pay off with this project.
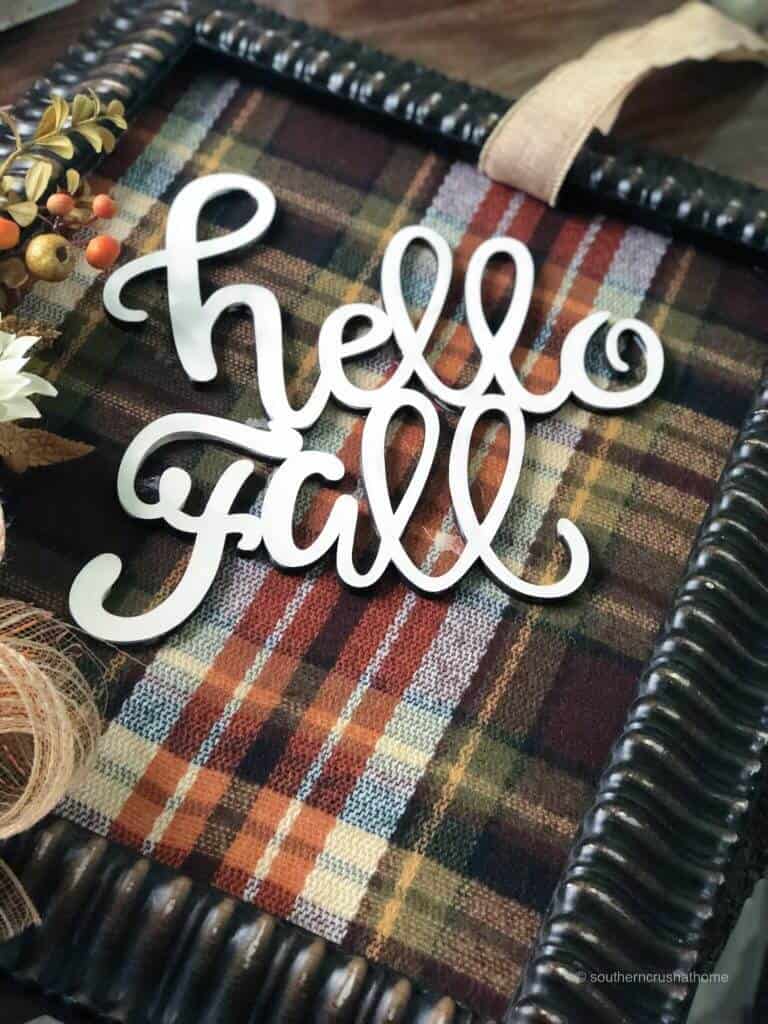
Attach the wooden cutout
Hot glue your wooden cutout to the front of the wreath in the place you desire. It will look fabulous anywhere on the frame – this part is entirely up to you.
Hang it up
Hang the wreath using the ribbon you placed at the top of the frame.
Picture Frame Wreath Video Tutorial
If you missed the live video tutorial, you can still see it below. It is in two parts, so be sure to catch it all!
VIDEO ONE LET'S GET STARTED
VIDEO TWO LET'S FINISH UP
Fall Picture Frame Wreath
Here are the detailed instructions in a printable craft card. Don't forget to pin this post for later!
DIY Picture Frame Wreath With Fall Plaid Colors
Equipment
- scissors
- Acrylic Paint
- paintbrush
Materials
- 1 old picture frame
- 1 fall plaid throw blanket or flannel material
- 3 fall floral picks
- ½ yard mesh ribbon
- ½ yard fall ribbon
- floral wire
Instructions
- Remove old picture and glass insert from frame, leaving only empty frame behind.
- Paint your wooden cutout with white acrylic paint or your color of choice and let dry.
- Secure floral picks together with floral wire.
- Make your bow out of the mesh ribbon and secure with floral wire.
- Secure picks and bow to your frame using the floral wire. Tuck stems towards the backside of the frame.
- Thread your ribbon at the top through the frame opening, for hanging the wreath later. Secure with a drop of hot glue on the back.
- Cut out your desired section of the throw to work with keeping in mind the direction of the plaid pattern.
- Trim down the material to fit your frame. Make sure the material reaches all edges and can be pulled tight to fit without distorting your plaid pattern.
- Hot glue your material onto the back side of your frame in sections, pulling taught as you go.
- Hot glue your wooden cutout to the front of the wreath in the place you desire.
- Hang wreath using the ribbon you placed at the top of the frame.
A PICTURE PERFECT WREATH!
I'm in love with this unique decor and fun twist on the traditional Fall wreath! It was so easy and fun to make that anyone can do this! Get creative, what old frames do you have laying around that could be re-purposed into a fun Fall craft? This project could even double as a cute addition to your seasonal gallery wall! Speaking of gallery walls, have you checked out the post that shares all the details on starting your very own gallery wall? If not, it's here Gallery Wall. I hope you'll check it out and come back to share yours!
More Fall DIY Crafts
If you enjoyed making this craft, check out these other fall crafts you can make next! Keep the good times rolling!
Ya'll don't forget to pin this project for later!
If you loved this project, you need to be getting my emails, friend! Each week I send out a couple of emails that include updates, crafts, and decor inspiration. Be sure to get yourself signed up below. I can’t wait to meet you!
Love this ! Realky different.
Txs
Thank you!!
Thank you so much ?
Thank you so very much for this Fall Wreath, I think I well try and make one but not as big as yours!!!! This is my very first time watching you.
You’re very welcome! I’m glad you’re here!
It’s beautiful. Does it move a lot when you open and close the door?
Thank you! I did have to secure it with floral wire.
This is SO cool. I may do a Christmas theme Frame Wreath.
You did an excellent job!
Oh that is a wonderful idea!!! Be sure to share your creation over in our creative club!