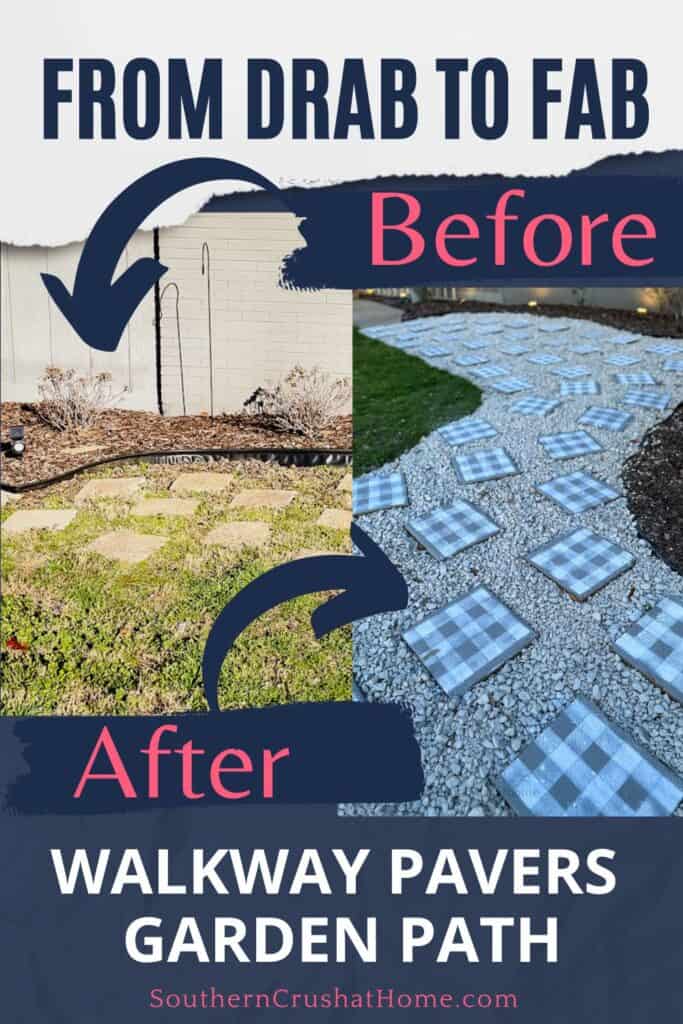
How to Make an Outdoor Garden Pathway Using Walkway Pavers
Making your outdoor space more beautiful and functional doesn't have to be hard. Let me show you how we can added an outdoor garden pathway made from concrete stepping stone walkway pavers.
Be sure to PIN this for later!
It not only enhanced the appearance or our space, but also added the convenience and ease we needed to navigate through the garden. It’s one of the easiest DIY garden projects, that requires no special skills or tools.
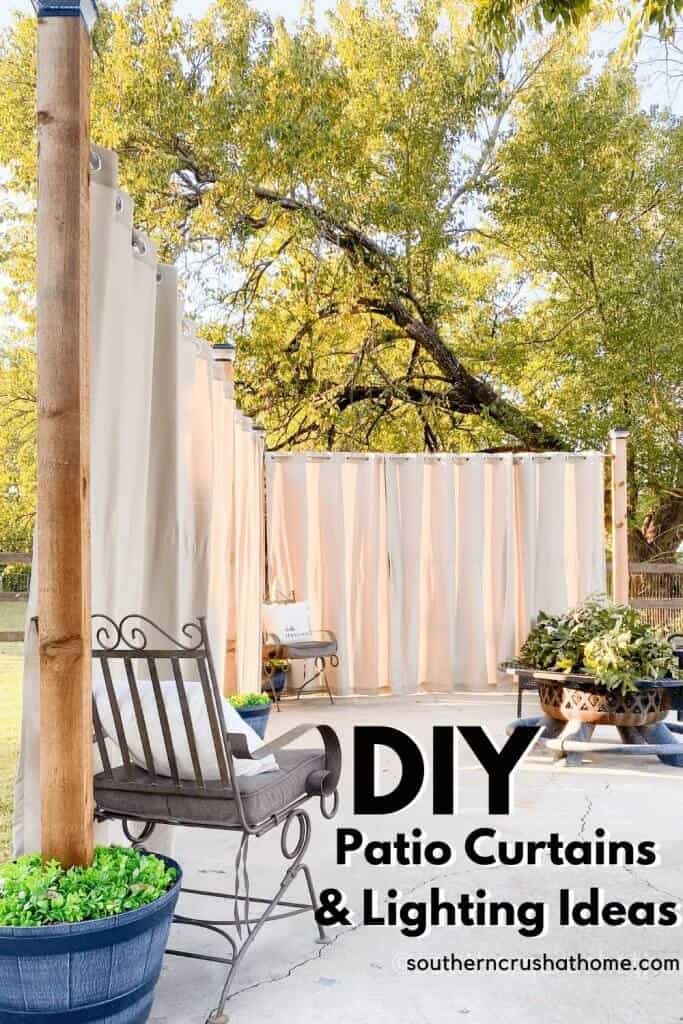
In case you missed it, this patio project below was quite a hit as it went viral on Pinterest as well as here on the blog.
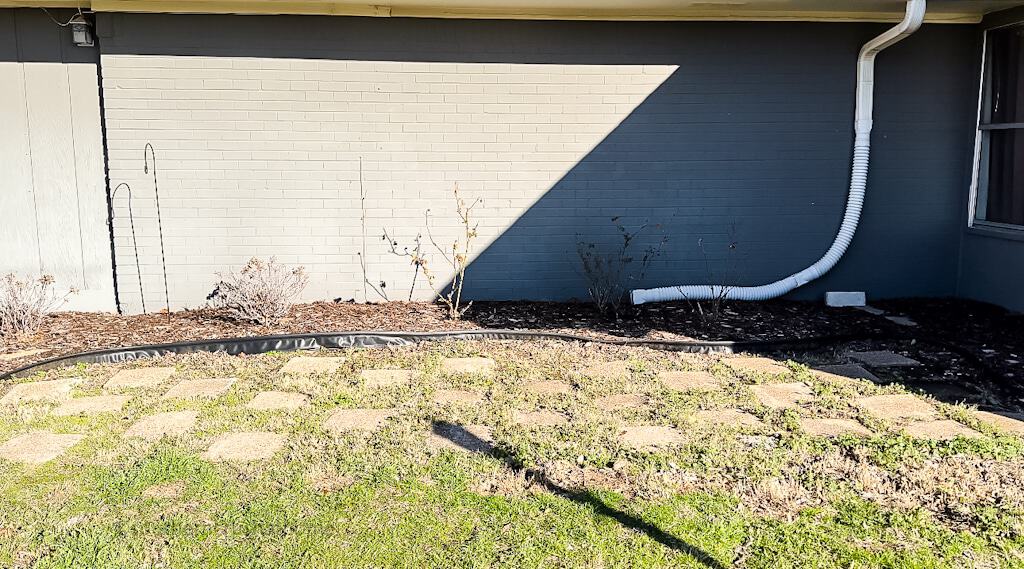
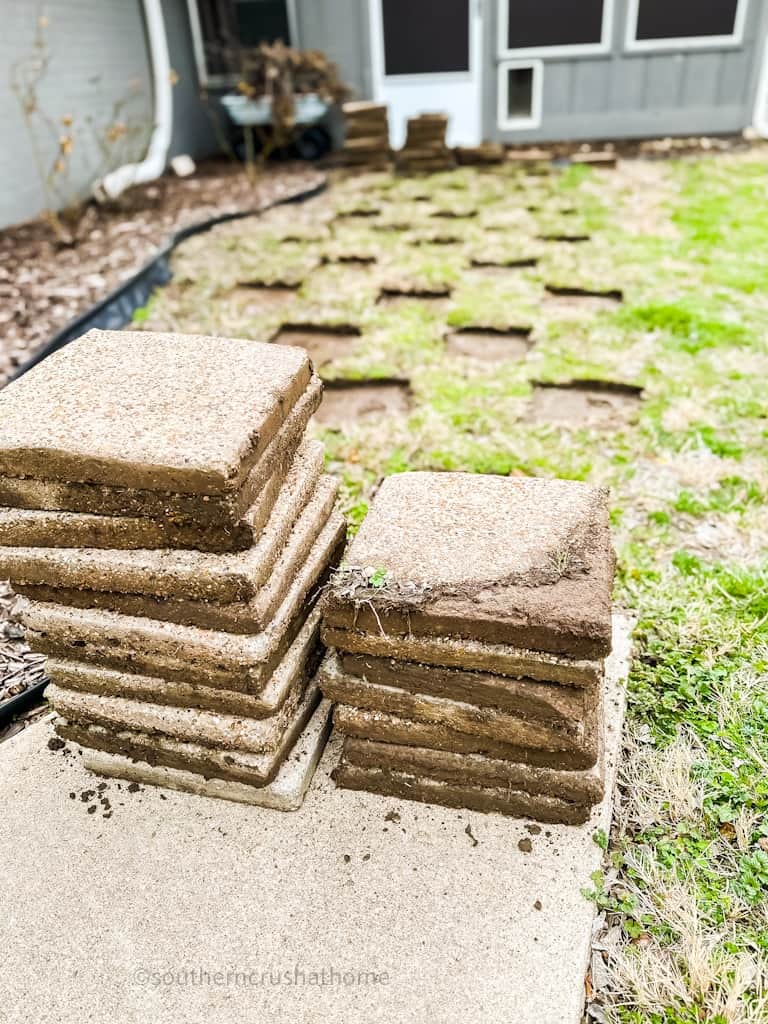
In this post, I will take you through the steps of making an outdoor garden pathway using walkway pavers. Here is a great “before” picture of my sad walkway for reference before we made the easy updates.
This blog post contains affiliate links. The opinions are wholly my own from my own experience. I may earn a small commission from clicks through to the websites that end in a purchase.
Supplies Needed
- Walkway pavers or concrete stepping stones
- Loose gravel
- A shovel or a hoe
- Measuring Tape
- Paint (optional)
- Stencil (optional)
- Solar lights (optional)
Create a Beautiful Garden Path With Walkway Pavers
Step 1: Removing the Old Walkway Pavers
The first step in creating an outdoor garden pathway is to make sure any old rocks, debris, or old concrete stepping stones are removed. You want to start with a completely clean slate.
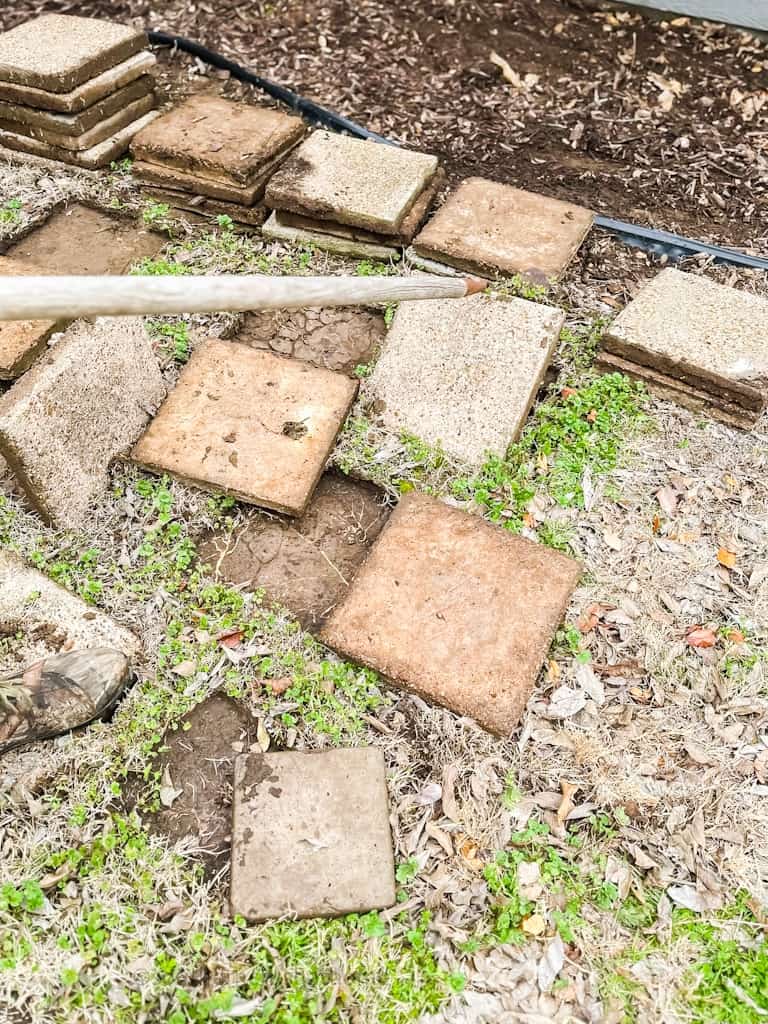
We used a garden hoe to lift up the old walkway pavers and stacked them neatly out of the way.
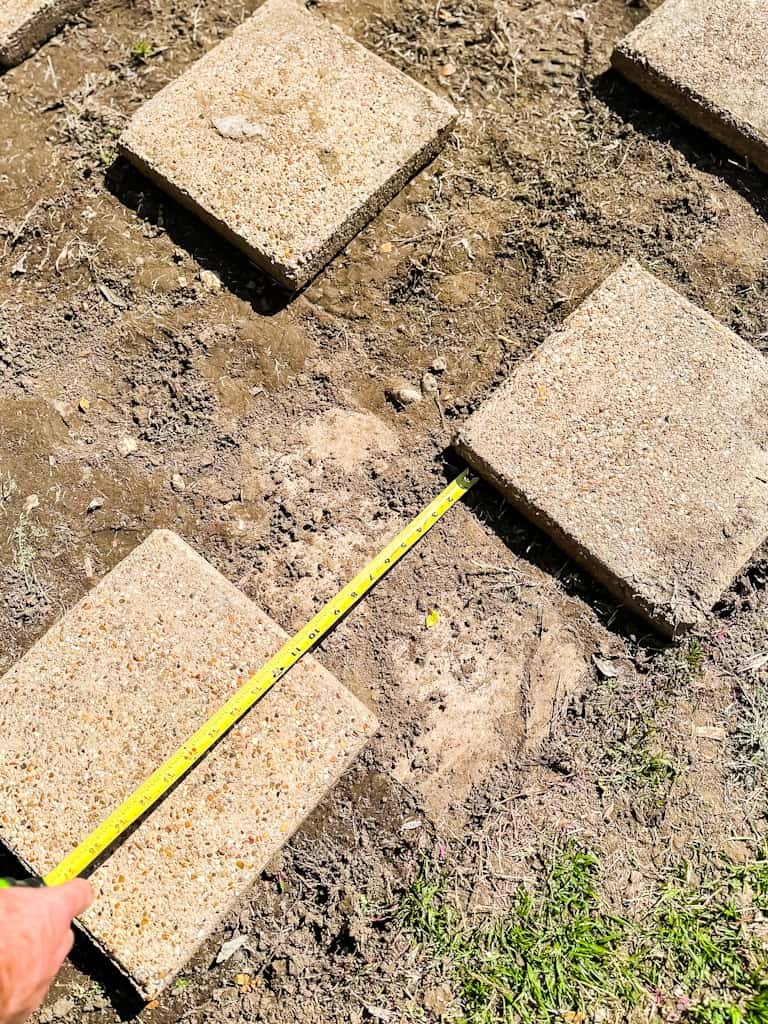
Step 2: Measure and Lay Out a Design
Sketch out a design that will fit your garden area. You can draw rough sketches for different design patterns or even mix and match different types of walkway pavers for unique designs. Keep in mind that your final layout will ultimately depend on the shape of your garden and the style you want to achieve.
Measure the space between each walkway paver to ensure they are evenly spaced out. We don't want any tripping hazards!
Step 3: Start Installing the Walkway Pavers
Use a shovel to dig a shallow trench where you want to place the pavers, ensuring you dig evenly and remove enough soil to accommodate the pavers. Add a layer of sand if needed to level it.
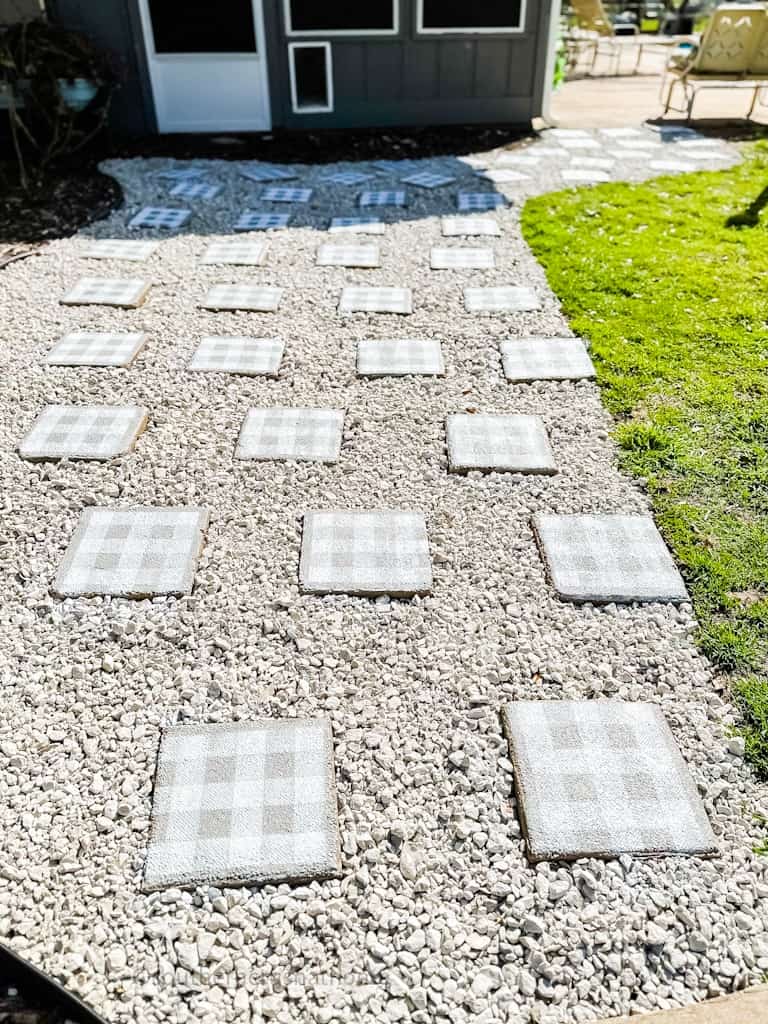
Begin placing the walkway pavers in the space as you designed. Add in the pea gravel or rocks that you desired in between each of the concrete stepping stones. This will help keep them in place and prevent weeds from growing between them.

Step 4: Add Finishing Touches
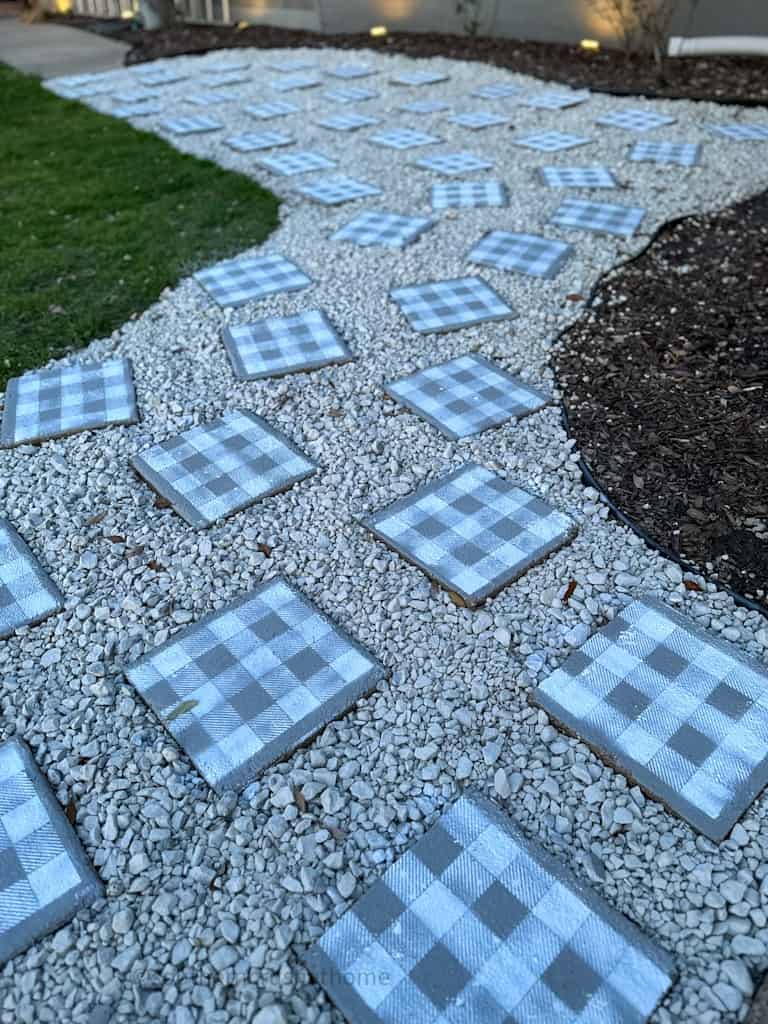
Once you have all the pavers in place, you can paint them. Start by adding your favorite color paint. I used leftover paint we had on hand from painting the interior of our home.
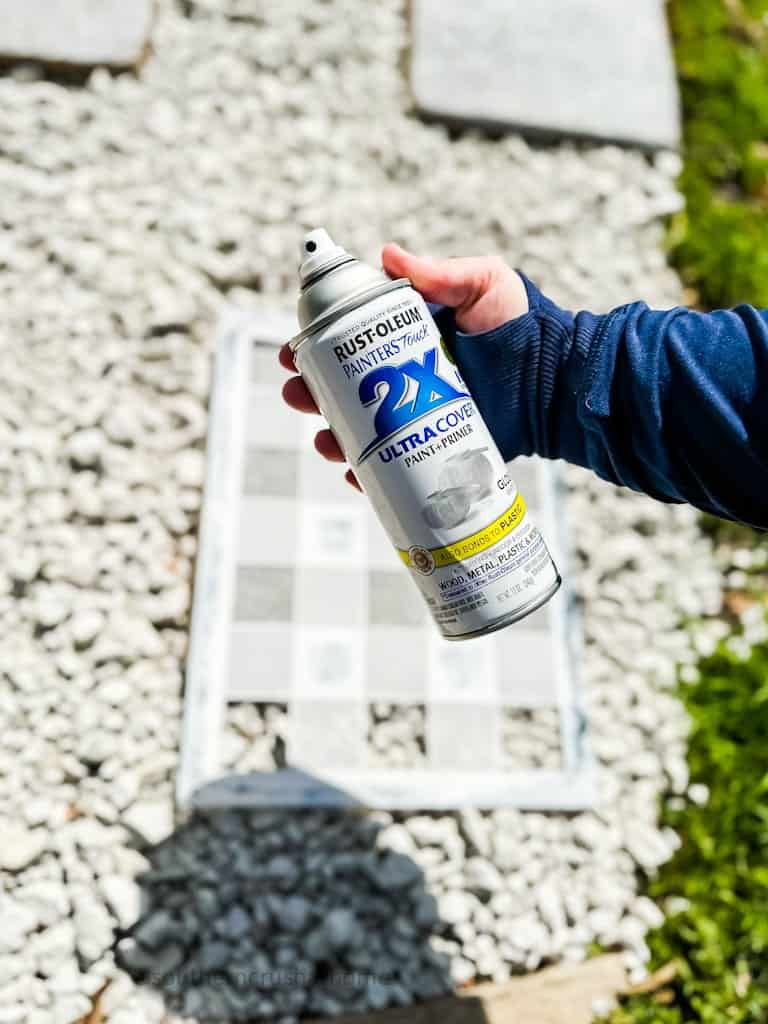
Next, I added a stencil with a buffalo check pattern (of course) and used white Rust-Oleum spray paint to create the design on each walkway paver.

Lastly, we added solar lights to the rose garden area to light it up at night, and wow! It turned out amazing! What do you think? Let me know in the comments below.
Step 5: Maintenance
Finally, your garden pathway is complete. However, like any other outdoor projects, your garden pathway needs a certain level of maintenance too, by keeping it clean and checking for any loose or wobbly pavers. Also, regularly adding or replacing gravel helps keep the pathway intact.
If you're feeling even more industrious, you can try one of these projects below as well!
An outdoor garden walkway made from walkway pavers is an excellent addition to any outdoor space. By following the steps above, which are easy to follow, you can create a beautiful, functional garden pathway in no time. So, sketch your design, measure your garden, lay your pavers, add some paint, and clean and maintain it regularly to ensure it remains beautiful and functional for years to come.