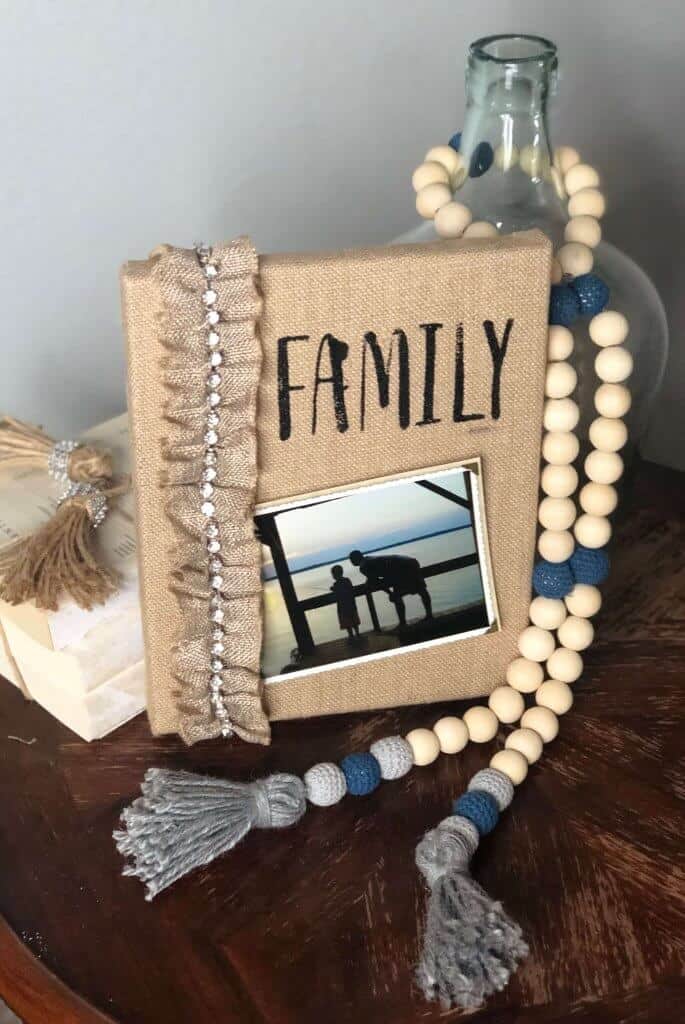
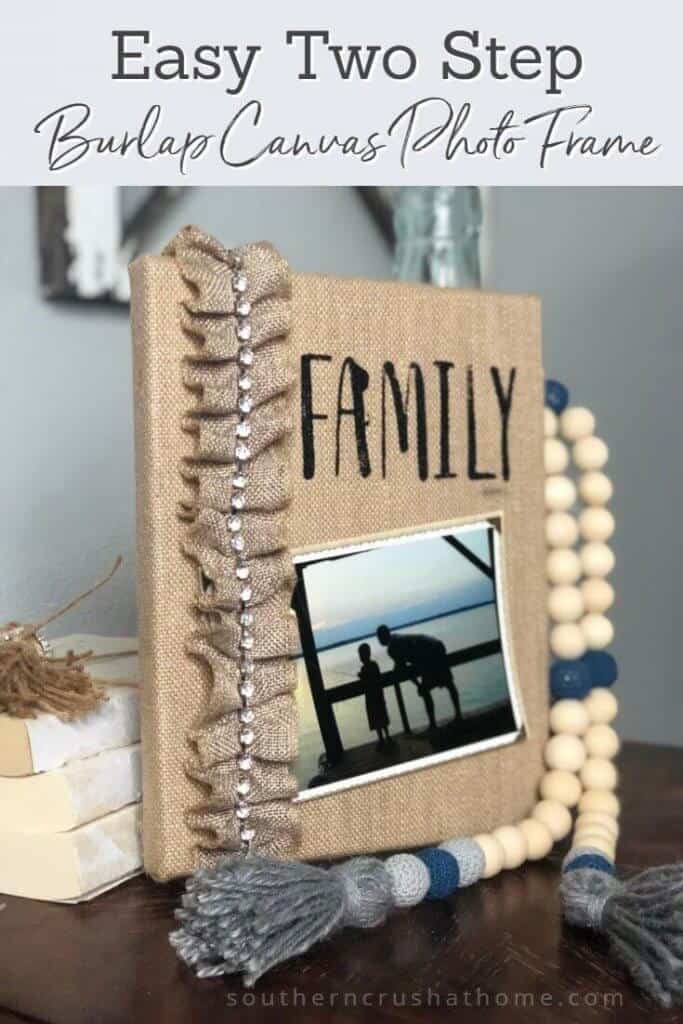
Easy Two-Step Burlap Canvas Photo Frame
Super easy DIY burlap frame to display your favorite family photos in a casual way! You can choose your stencil, your ink color and your photo of course! Change out your photo to instantly update the look! Let me show you how this is made in only two easy steps!
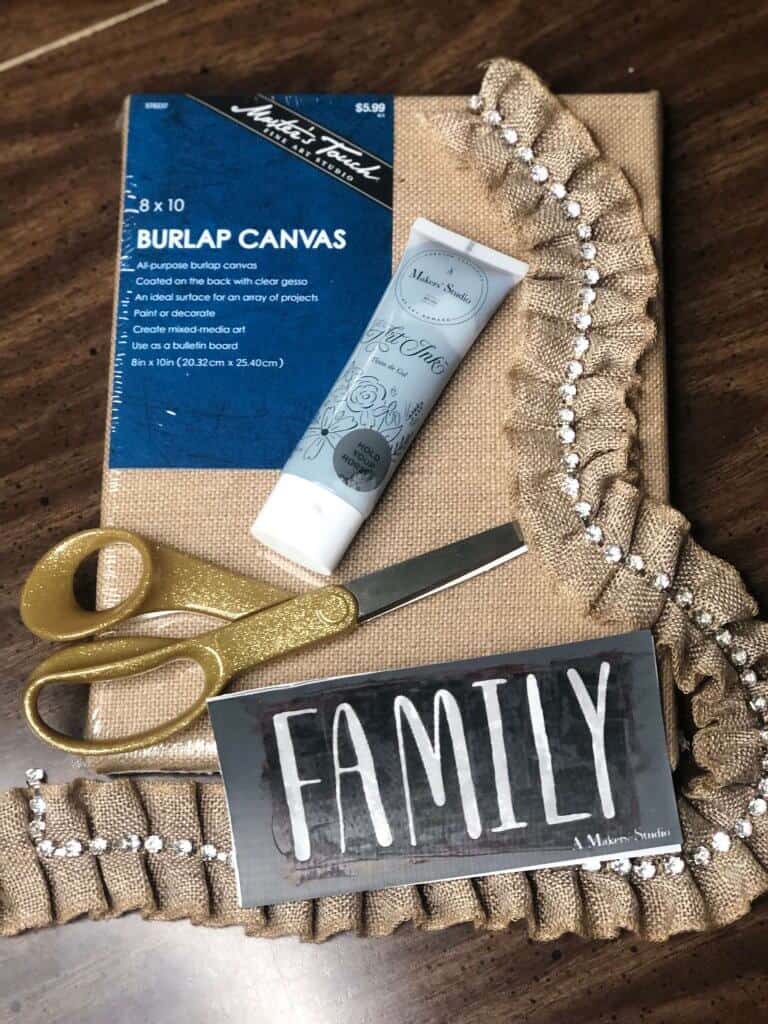
SUPPLIES FOR BURLAP PHOTO FRAME
- Burlap Canvas from craft store
- Bling burlap ribbon from craft store
- Stencil from A Makers Studio
- Gel Ink from A Makers Studio
- Cordless Glue Gun
- Scissors
STEP ONE
Apply gel art ink in color of your choice with a scraper or spatula tool over the stencil of your choice on top of the burlap. Make sure to leave room for the photo to be placed and still be able to see the stencil.
STEP TWO
Attach burlap bling ribbon or scrap ribbon of your choice to the canvas using hot glue.
>>>BE SURE TO PIN THIS FOR LATER!<<<
That’s it! Easy Two Step Burlap Canvas Photo Frame that can be used for displaying your favorite photo! Be sure to apply your ink lightly to avoid the bleeding affect that I got on mine. I don't mind it on mine. It looks hand made and a bit rustic, too! Display your photo frame with a cute stack of books and a wooden bead tassel as seen here.
I just loved making this and it reminded me of this other photo frame DIY!
don't miss a single diy PROJECT
>>>Leave your thoughts below in the comments please… BTW— Life is short—Enjoy the mess!
Furthermore, if you liked this project, you should check out my most recommended DIY Dollar Tree Craft Supplies!
**P.S. Please join us over on our Facebook Page to see more fun projects “Live”.
Love it!! Love all your Beautiful Ideas! You are Amazing!! Try to catch you live but don’t always do !!
Thank you so much!