Dollar Tree Easter Bunny Banner
In this blog post, I'll show you how to make your own Easter bunny banner using dollar store materials. Happy Easter decorating!
Dollar Tree is the perfect stop for all of your Easter decorating supplies. This year, I made a bunny banner using items from Dollar Tree. It was so easy and looks adorable hanging on my mantel!
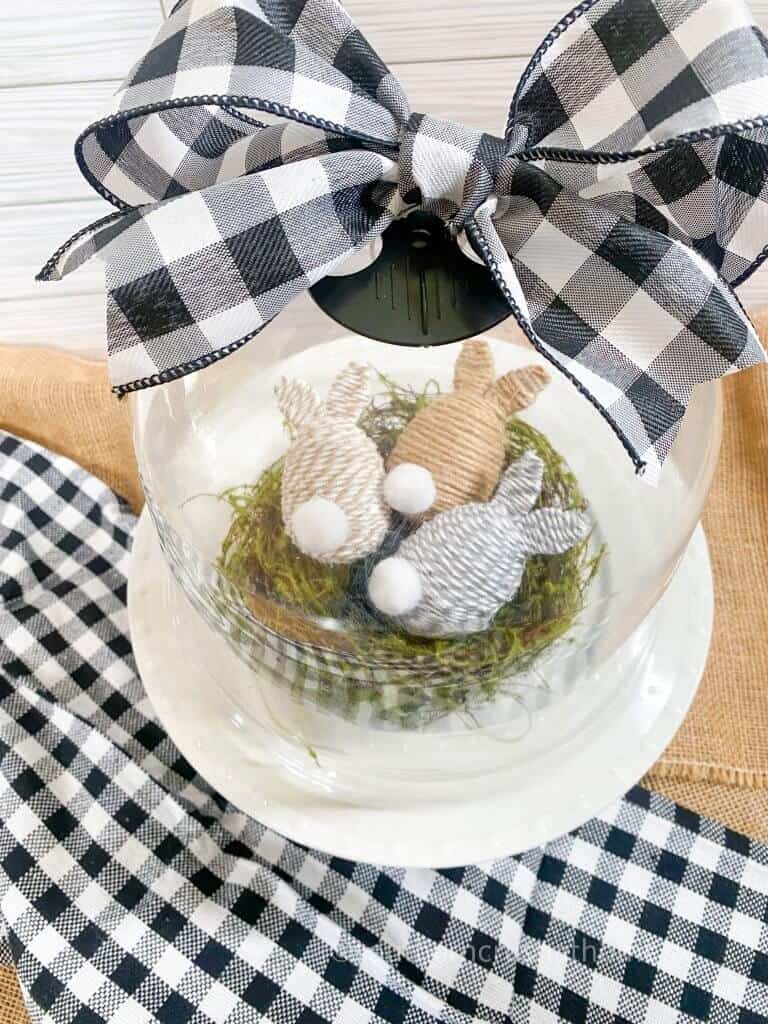
Did you see all nine of my Dollar Tree Easter Decor Ideas? One of them was these cute Quick and Easy Dollar Tree Bunny Easter Eggs!
See all nine ideas here on my YouTube video!
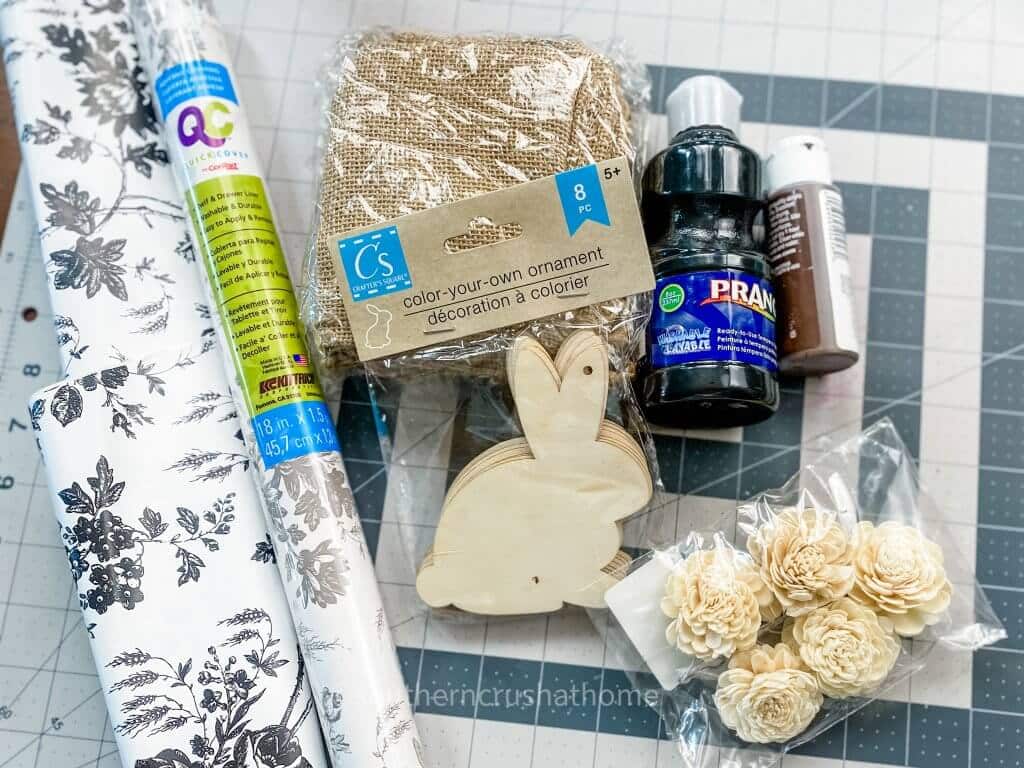
Supplies Needed to Make a Bunny Banner
All the supplies needed can be found HERE in my Amazon Shop!
- Burlap Bags
- Toile Contact Paper
- Bunny Ornaments
- Paint
- Ribbon
- Sola Flowers
How to Create a Bunny Banner
Step 1. Trace the bunny
Place one of the bunnies onto the toile contact paper and trace around it with a pen.
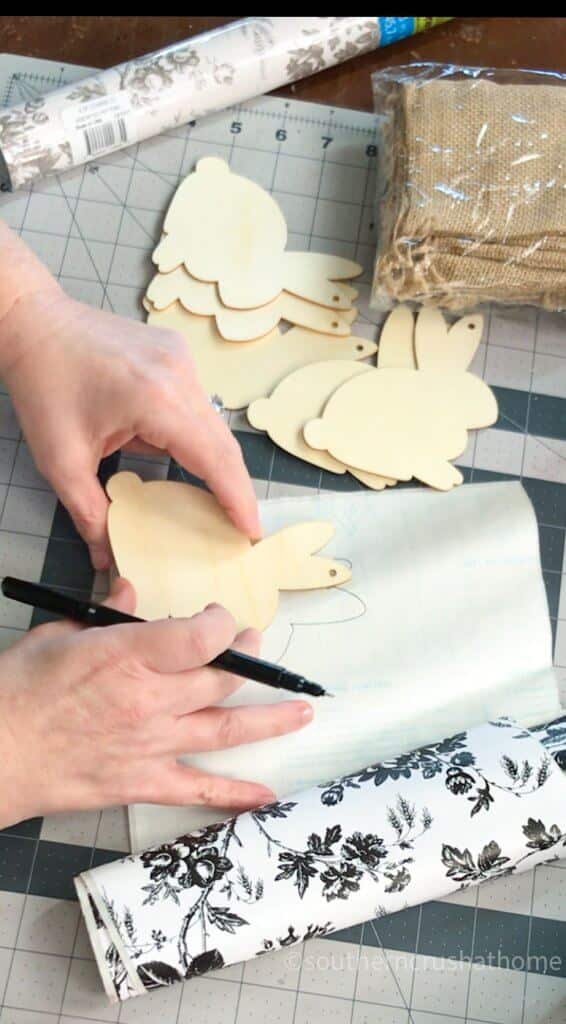
Step 2. Cut out the bunny
Use your scissors to cut out the bunny. Repeat for as many bunnies as you will be using.
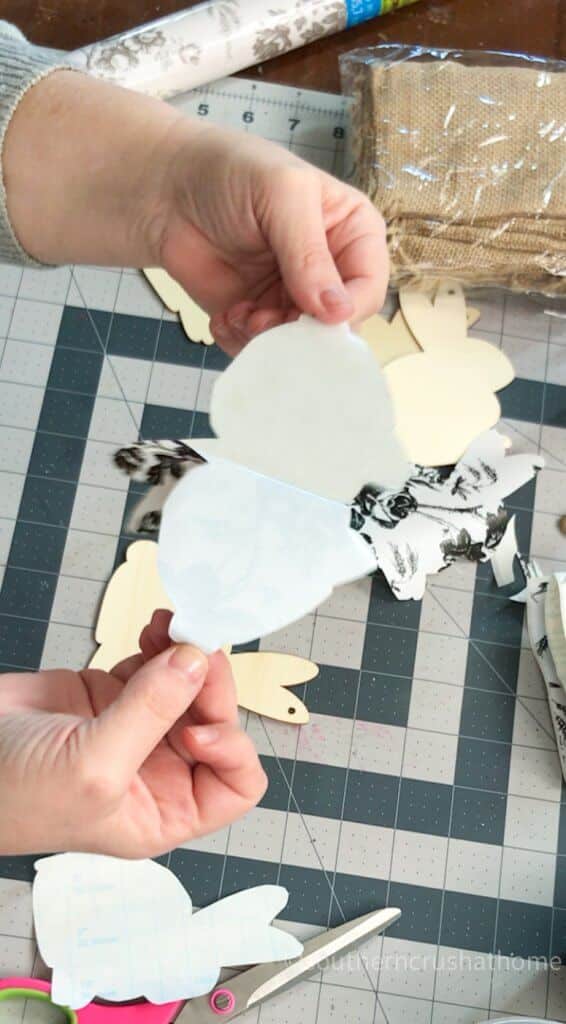
Step 3. Removing the backing
Remove the backing from the contact paper and place it on the wood bunny. This contact paper is so pretty and is such an easy way to update wood cut-outs.
Step 4. Color the flowers
Now it's time to color the sola flowers. You can use whatever color you like. Since I am going with a neutral Easter decor, I used brown and black. This is also perfect for the design of the contact paper.
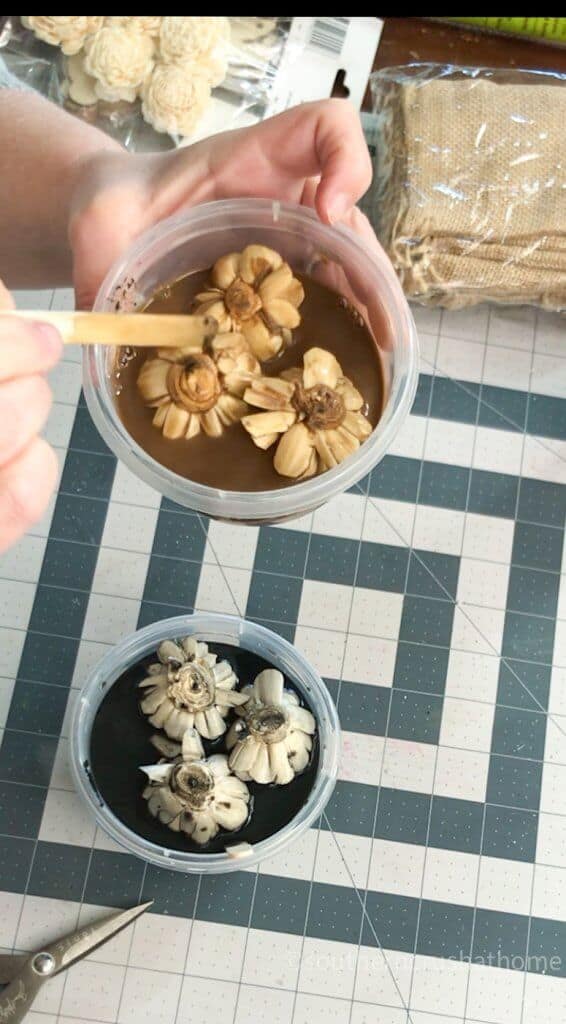
The longer you let them sit in the paint, the darker they will get. I let them sit for about 30 minutes.
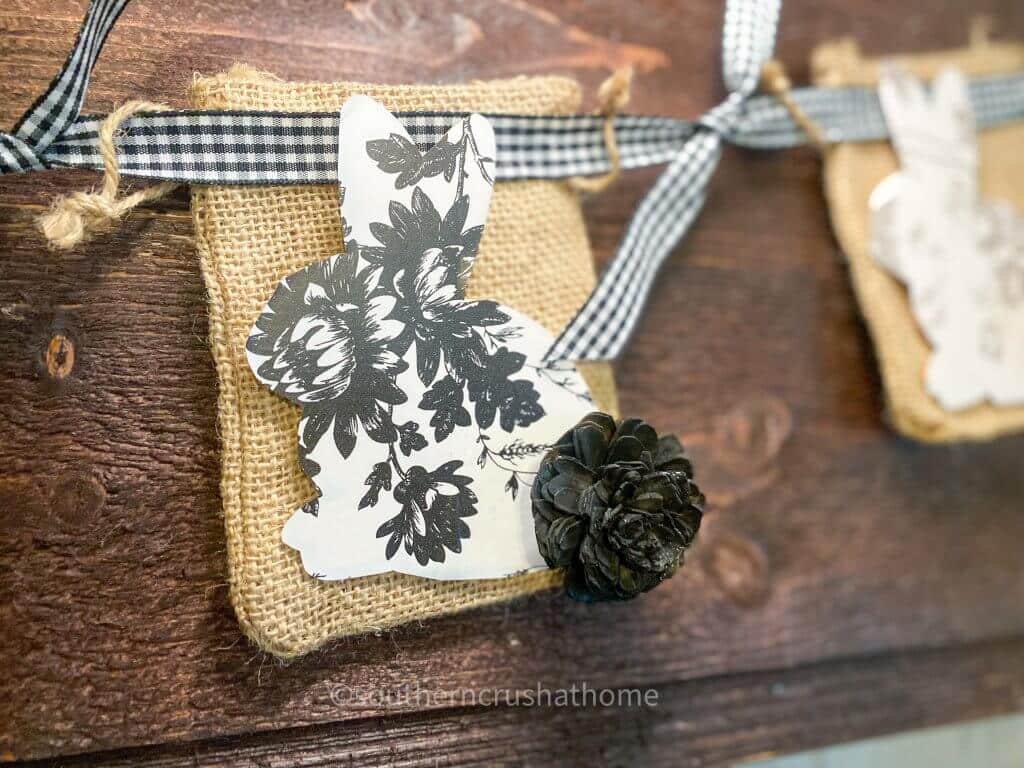
Step 5. Glue the bunnies to the burlap bags
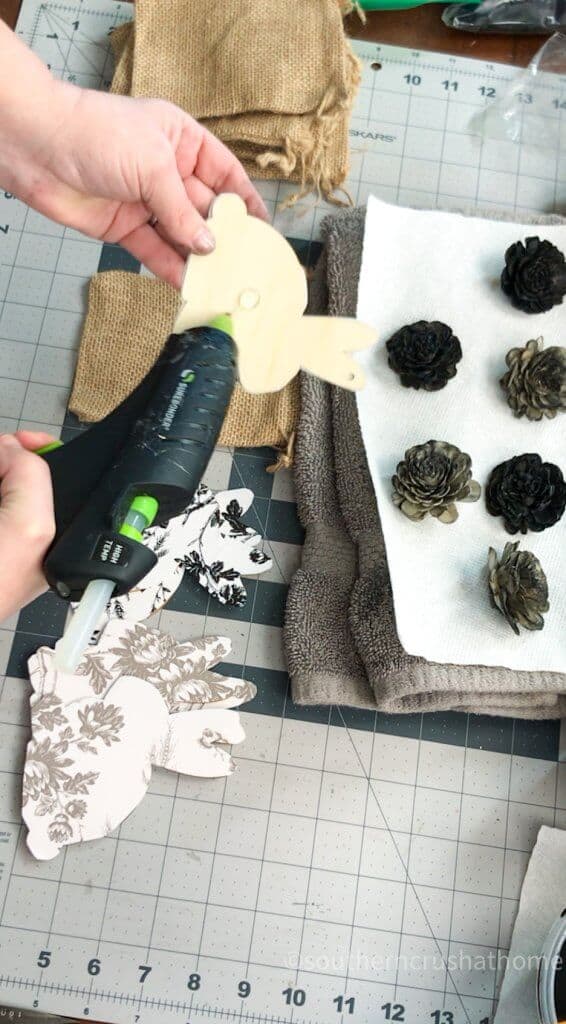
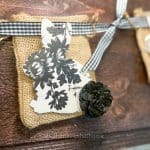
Use a hot glue gun to attach a bunny to each burlap bag. These bags are the perfect size for a banner!
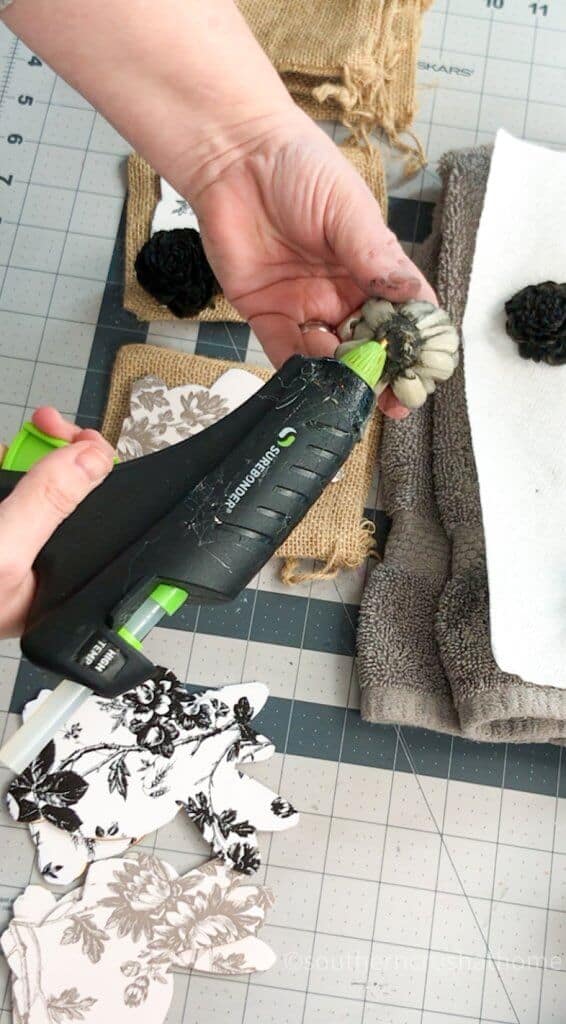
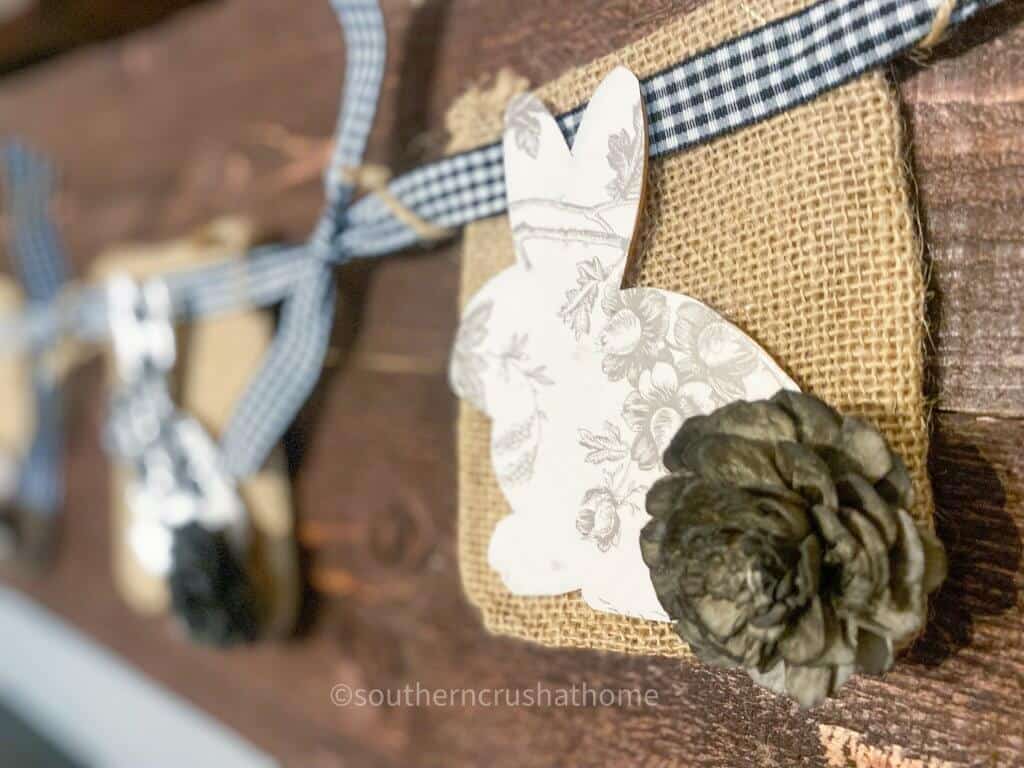
Step 6. Hot glue the flowers
Once the flowers are dry, hot glue them to the bottom of the bunny for the bunny tail. So cute!
Step 7. Add ribbon
Now you can run your ribbon across the length of your bunny banner. I found pretty buffalo plaid ribbon, but you can use whatever style you like.
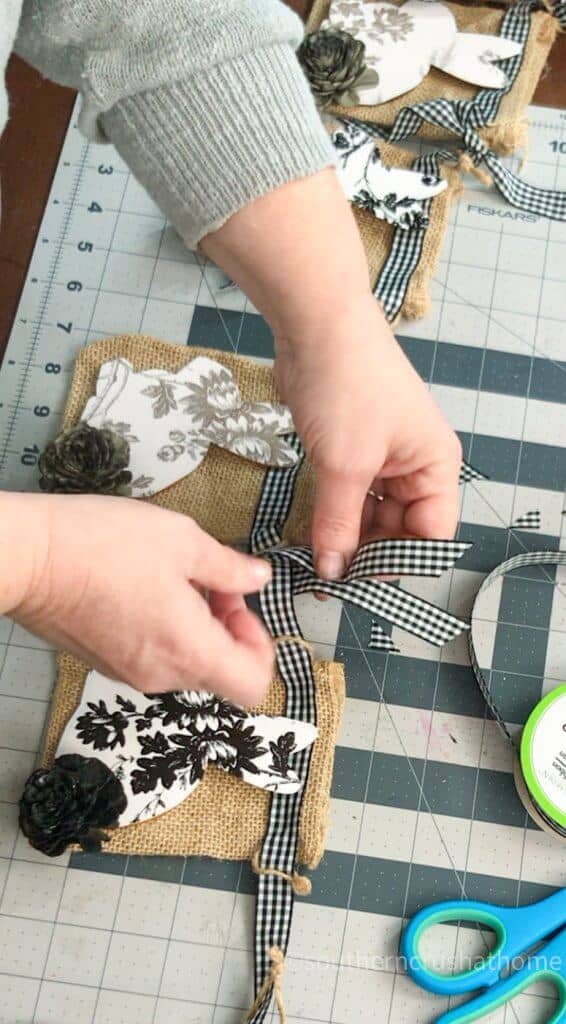
Tie an extra bow in between each bunny for a little extra detail.
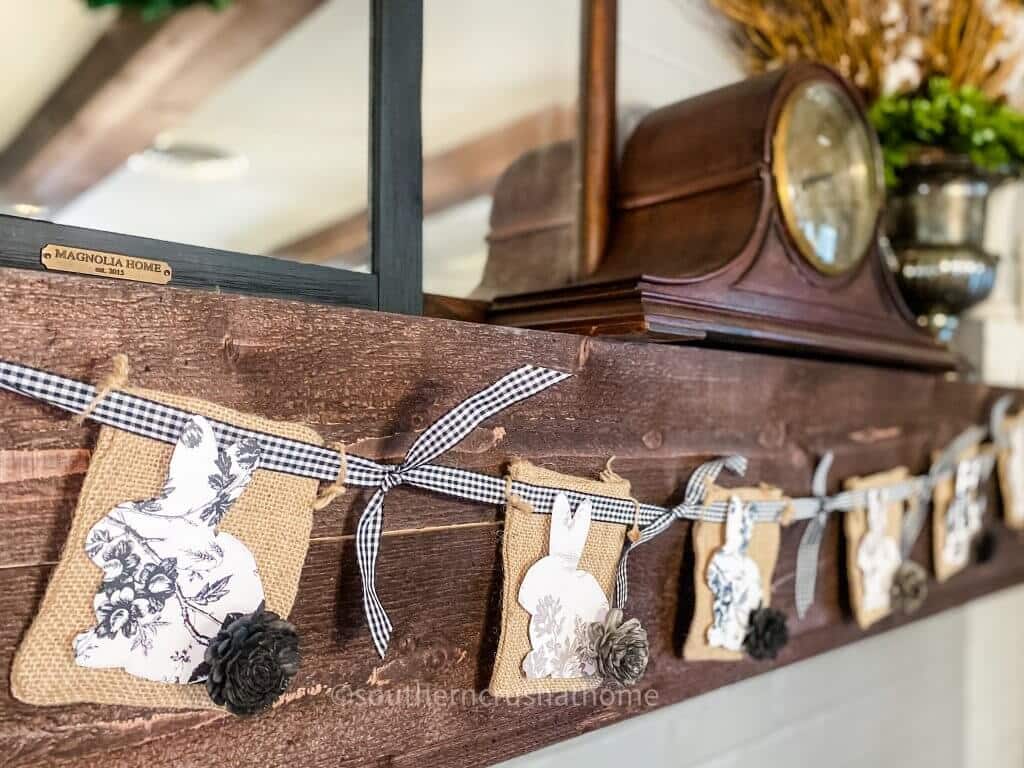
Isn't this the cutest Easter banner? I'm so excited about how it turned out. Here it is displayed on my mantel:
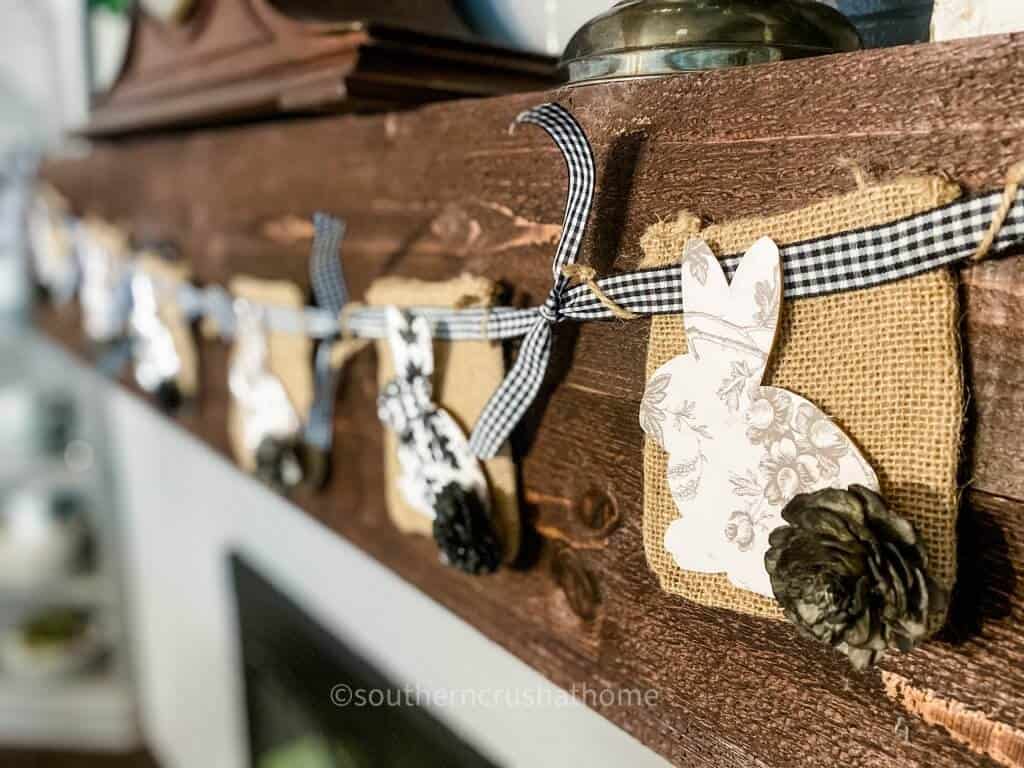
Display Your Dollar Tree Easter Bunny Banner
There are so many fun ways to decorate with your bunny banner. You can hang it across a buffet table, or drape it over a doorway. Where would you hang this sweet bunny banner?
step by step video tutorial
If you want to see the exact step-by-step process, be sure to check out this video tutorial below over on my YouTube Channel!

Be Sure to PIN this for Later!
TAKE A LOOK AT SEVERAL OTHER BUNNY EASTER PROJECTS I’VE SHARED:
- Bunny Butt Easter Wreath
- How to Make an Easter Bunny Wooden Tag DIY
- Dollar Tree Paddle Ball Bunny Craft
- How to Make a Dollar Tree Sun Hat Bunny Wreath
Dollar Tree Easter Bunny Banner
Equipment
- scissors
Materials
- Wood Bunnies
- Sola Flowers
- Ribbon
- Burlap Bags
- Paint
- Contact Paper
Instructions
- Trace the wood bunny onto the contact paper and cut out.
- Remove the backing on the cut-out paper and stick to the bunny. Repeat for as many that you need.
- Hot glue the bunnies onto the burlap bags.
- Color the sola flowers in paint. Let sit until you are happy with the color. Let dry.
- Hot glue a sola flower onto each bunny for the tail.
- Hang the decorated burlap bags onto your ribbon to create a banner.
- Tie ribbon bows in between each bunny.
- Hang and enjoy!
Hands down my favorite is the Toile Bunny Banner! Using the burlap bags with handles is so clever! Thank you for the inspiration!
WOW! Thank you so much for the kind words! I appreciate you so much and look forward to continuing to inspire!