Easy Pumpkin Fall Table Decor
Hey hey my friend, can we just take a moment to appreciate how everything looks better when…
there’s a gorgeous pumpkin involved?
Especially when it’s the star of your fall or thanksgiving table!
This little DIY turned out even prettier than I expected—it’s one of those easy projects that instantly makes your table look like you spent hours styling it when really…
you just got a little creative.
Whether you’re hosting Thanksgiving, Friendsgiving, or just want something beautiful to greet you every time you walk by, this one’s for you.
Let’s make this Easy Pumpkin Fall Table Decor so you can wow your guests this season.
This blog post contains affiliate links. The opinions are wholly my own from my own experience. I may earn a small commission from clicks through to the websites that end in a purchase.
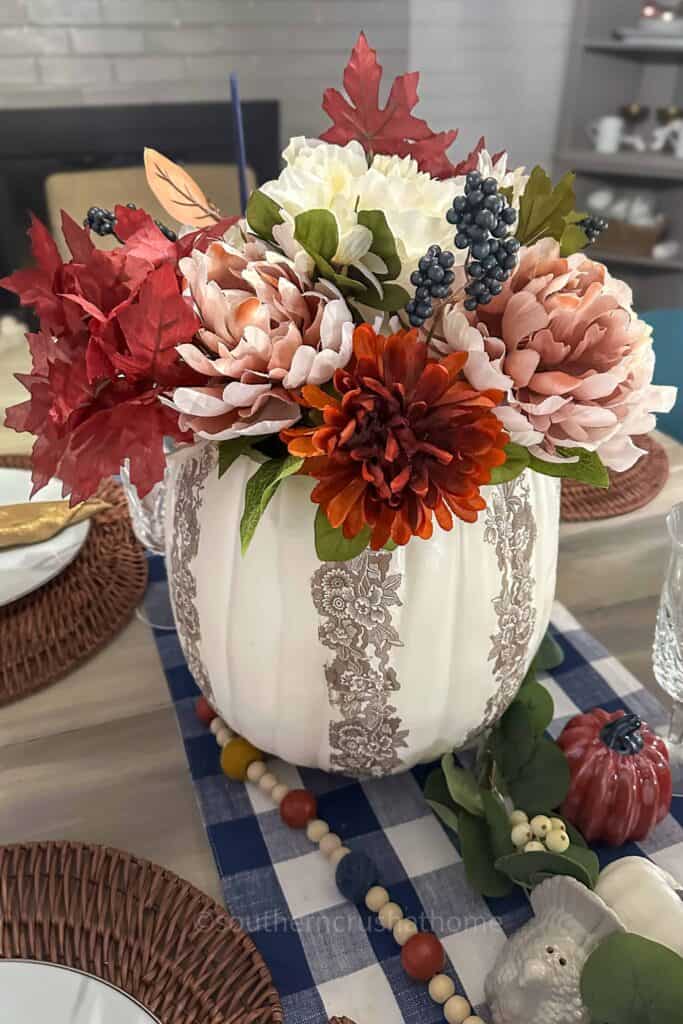
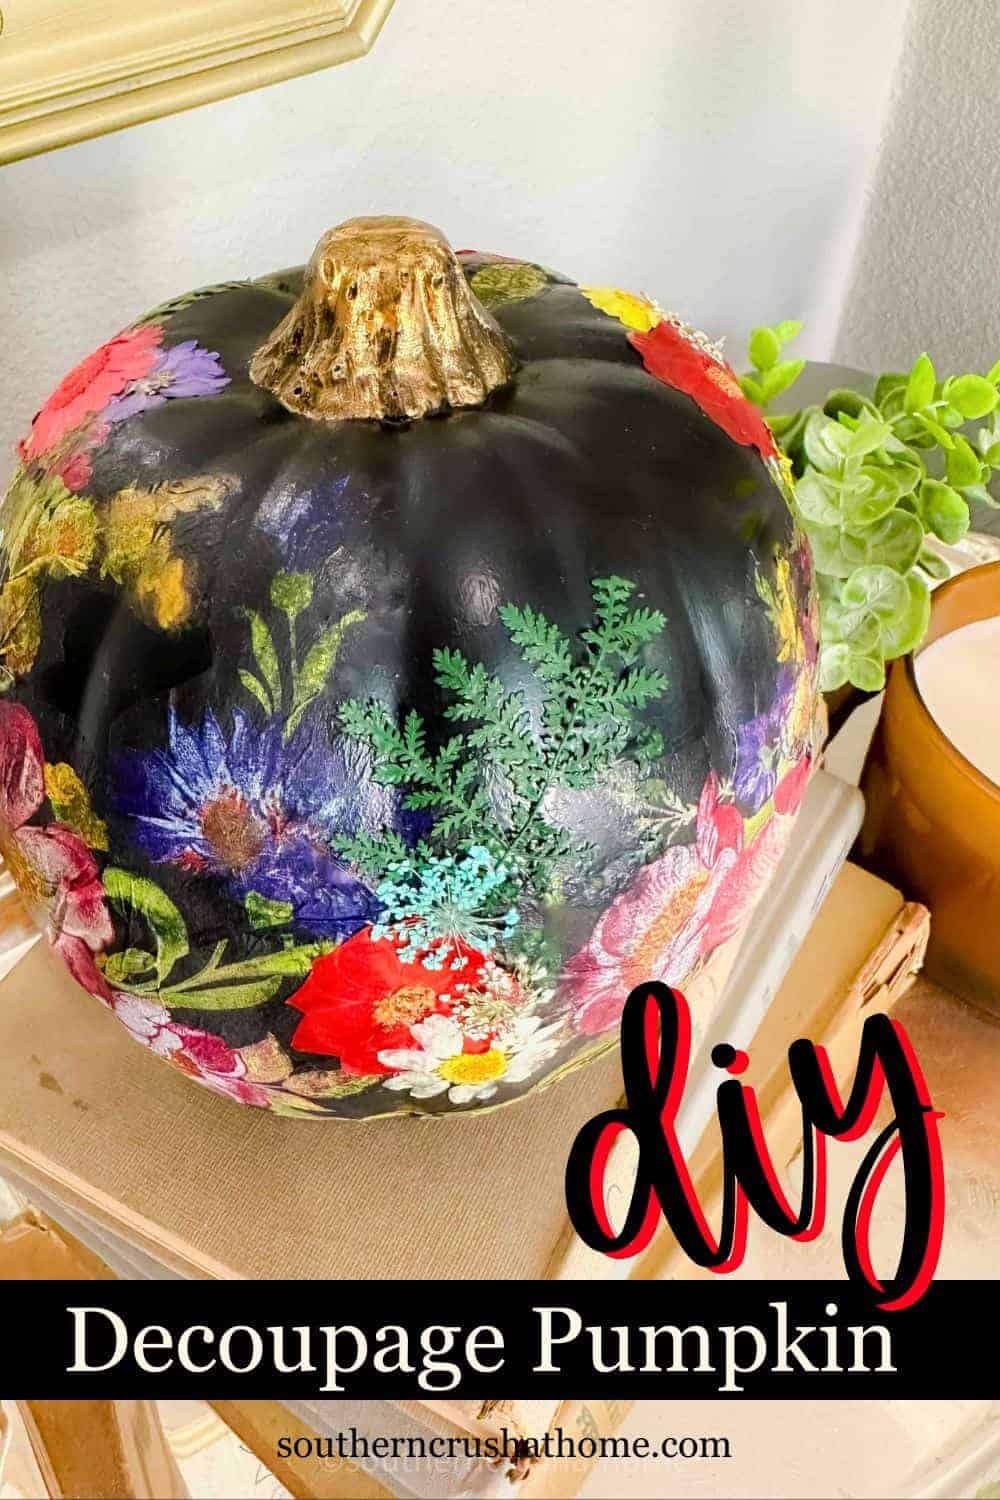
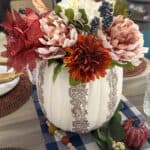
There’s something so satisfying about taking a plain faux white pumpkin and turning it into a custom, lace-covered fall centerpiece. The best part? You can totally personalize it with your favorite napkin patterns—florals, lace, even plaid if that’s your vibe.
This Decoupage Pumpkin Centerpiece inspired by Cindy Long DIY Beautify
Supplies You’ll Need
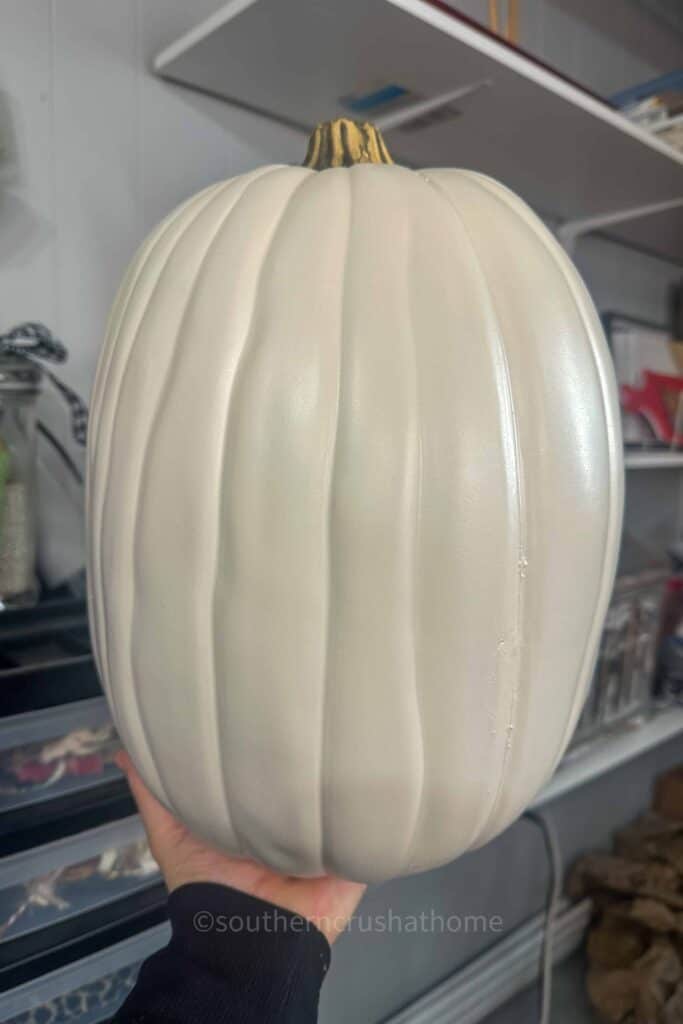
- White faux pumpkin (mine is 18 inches from Michael’s)
- Small handsaw or craft knife
- Mod Podge
- Paintbrush and dry brush
- Decorative fall napkins (mine was Woodland pattern by Spode that looked like lace)
- Styrofoam square
- Fall floral stems of your choice
- Hot glue gun (optional for securing the Styrofoam)
YouTube Video Tutorial
Step 1: Prep the Pumpkin
Start by using a handsaw or cutting knife to carefully remove the top portion of your faux pumpkin.
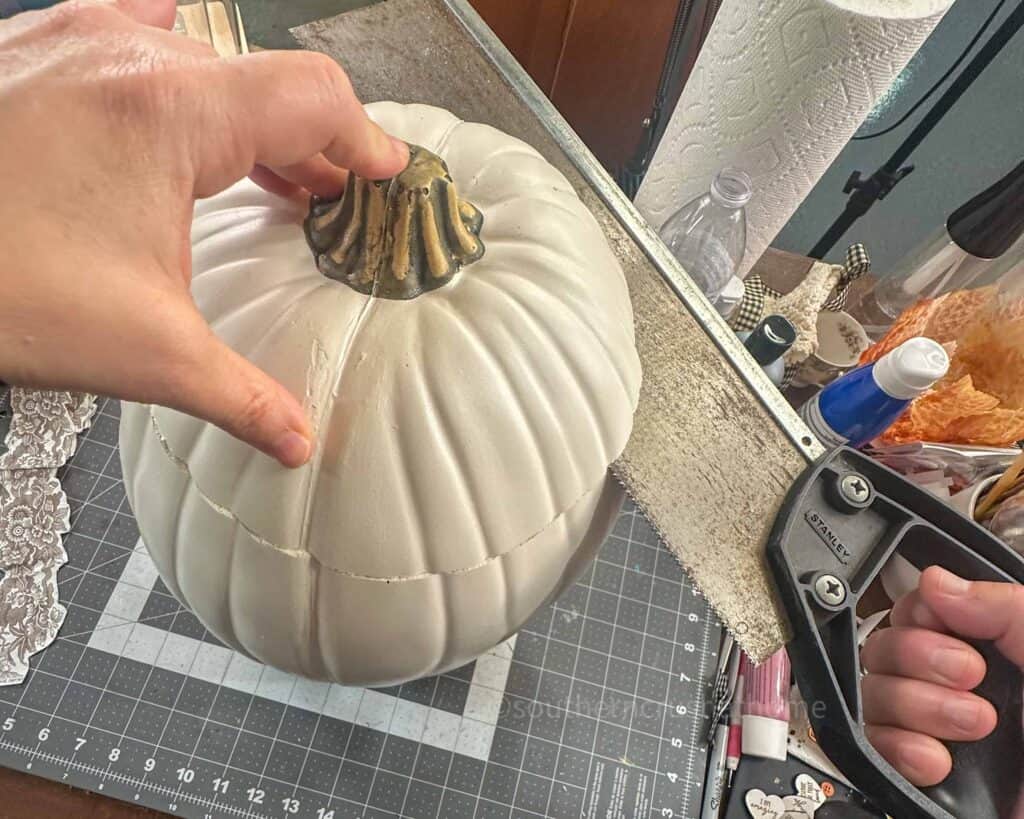
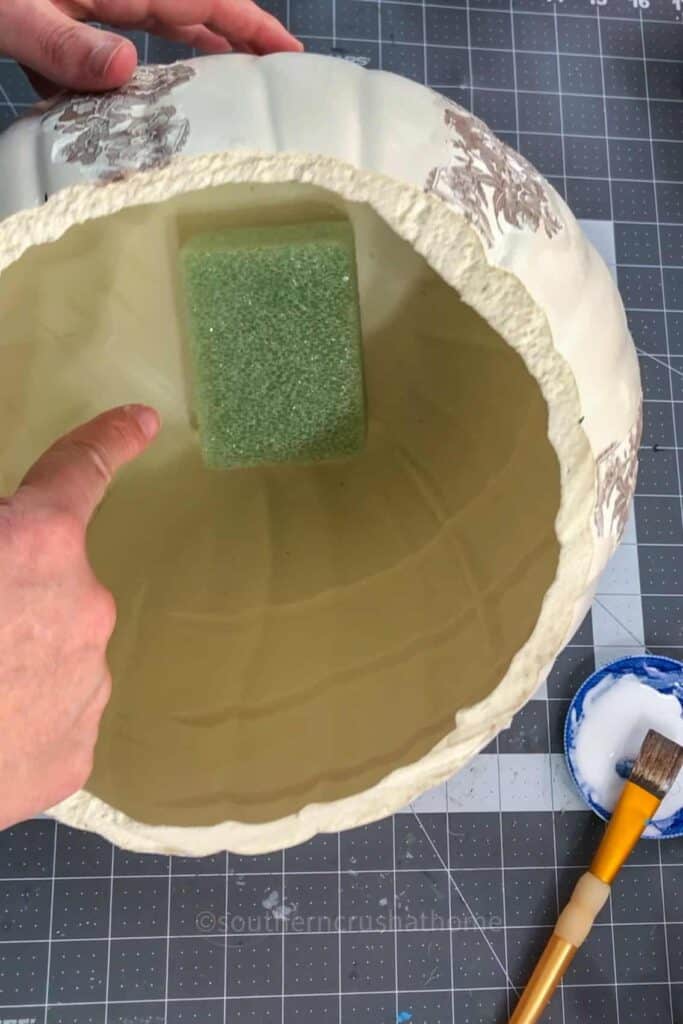
You want to leave a hollow center so it’s open at the top like a vase. This is where your floral stems will go later, so make sure there’s enough room inside for your styrofoam and florals.
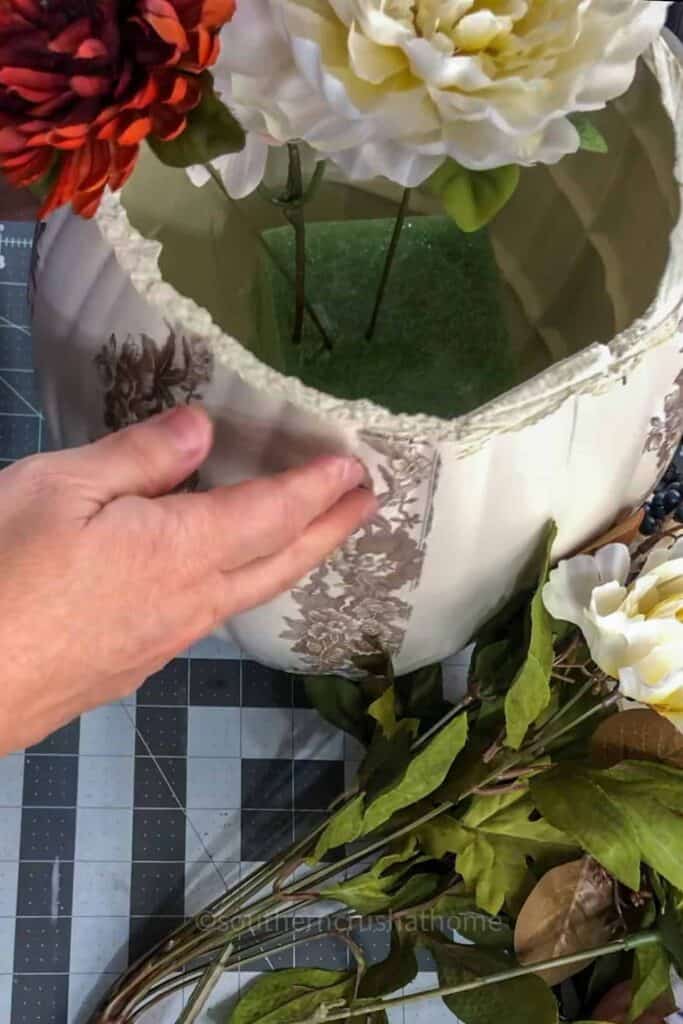
Step 2: Add the Decorative Napkins
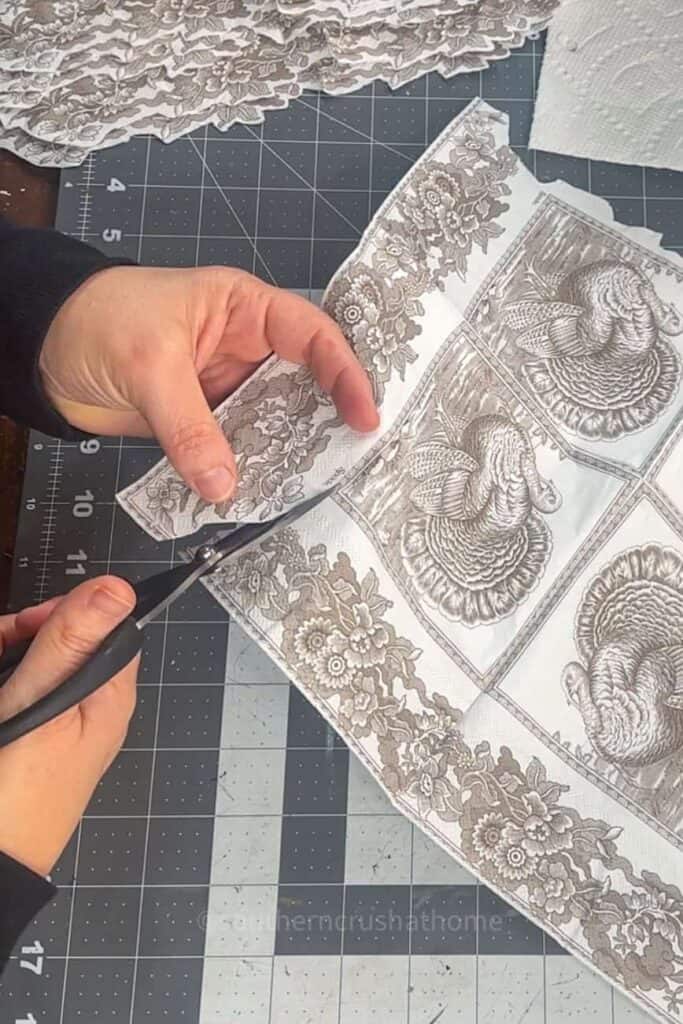
Measure around your pumpkin where you’d like your napkin strips to go—mine were spaced about three inches apart.
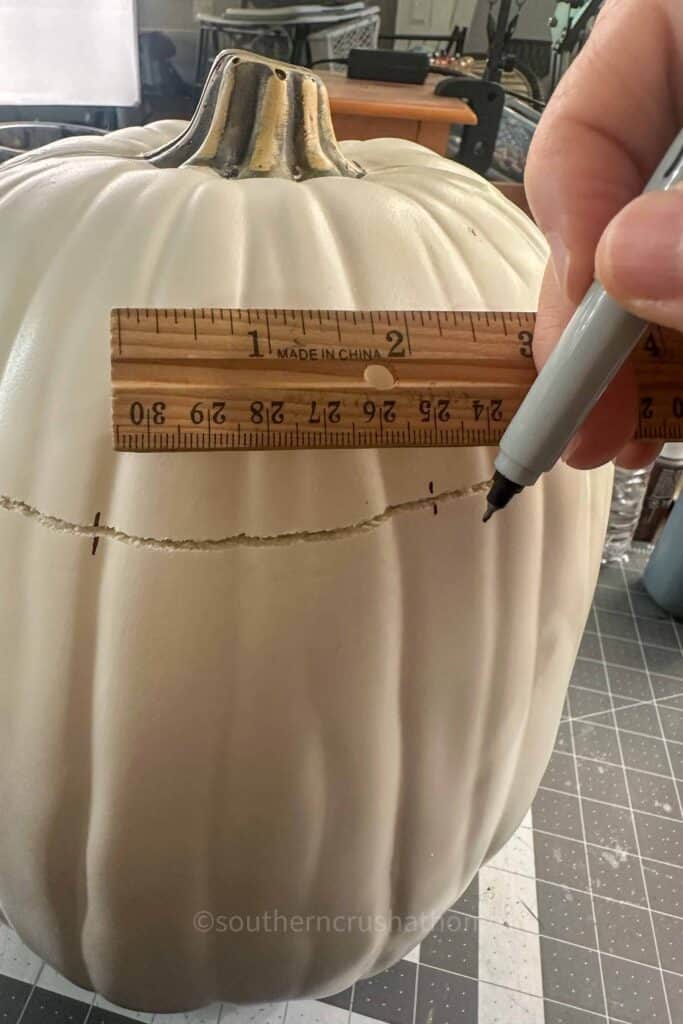
Cut out the designs from your napkins (you can trim around the shapes or use entire strips depending on your design).
Brush on a thin layer of Mod Podge and gently press your napkin piece into place.
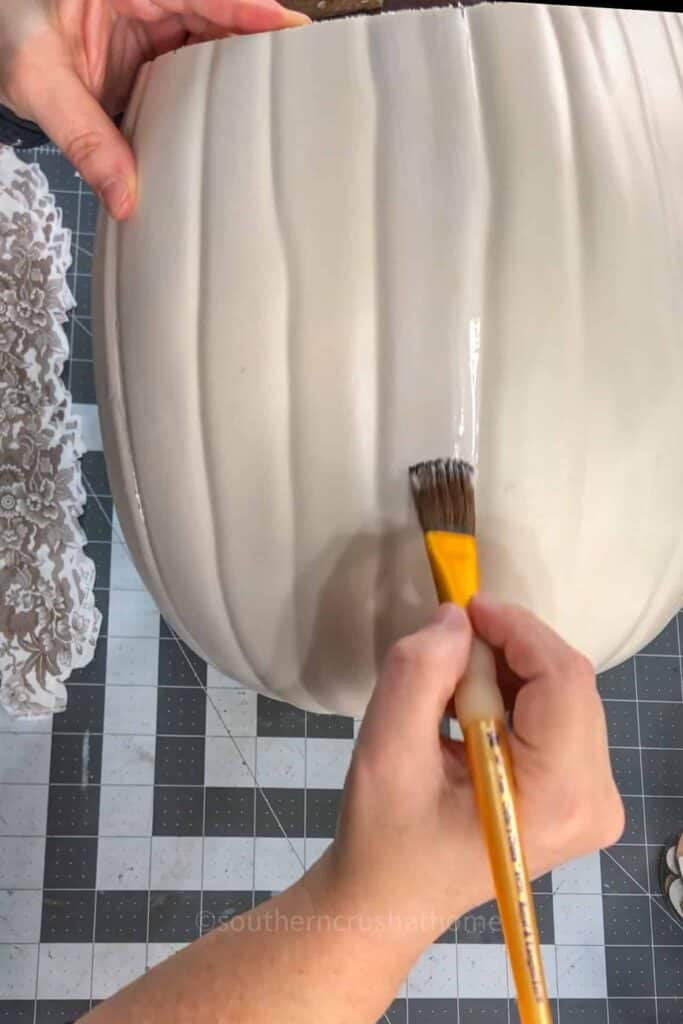
Use a dry brush to smooth it out so it doesn’t tear or wrinkle.
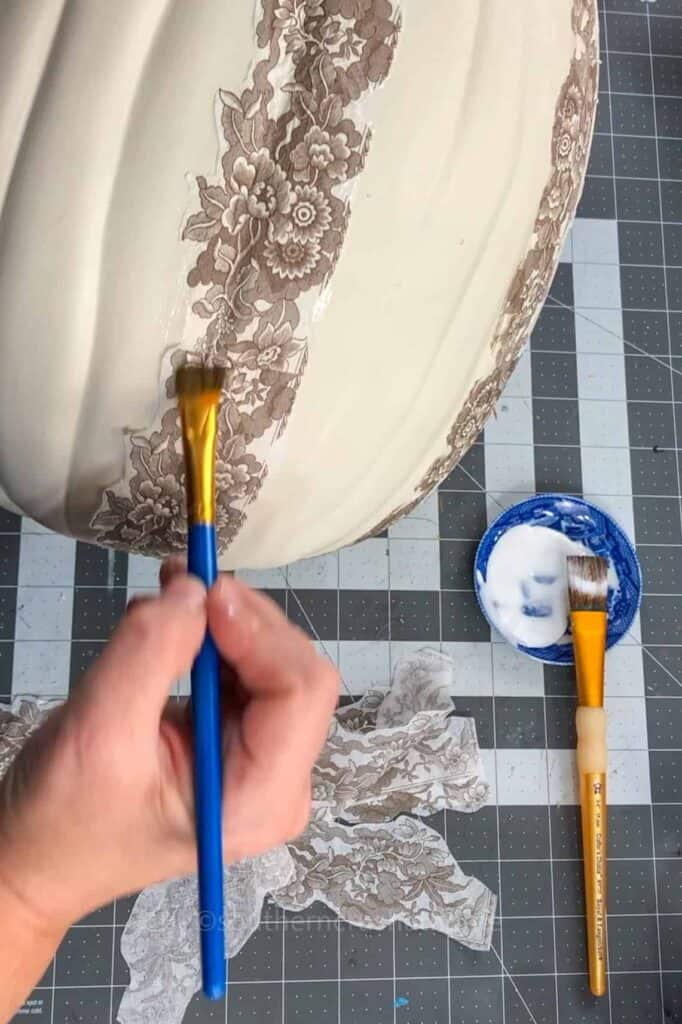
Once the entire pumpkin is covered and dry, go back over the design with a light topcoat of Mod Podge to seal it and give it a soft sheen.
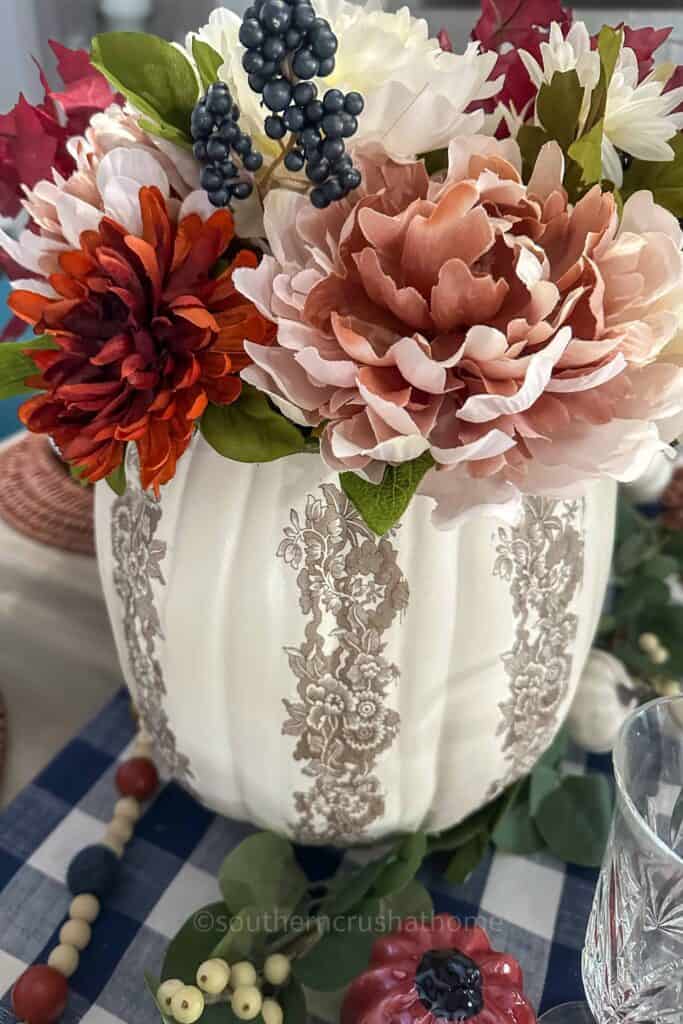
Step 3: Create the Floral Base
Glue your Styrofoam square to the inside bottom of the pumpkin. This will help elevate your floral arrangement and keep your stems in place.
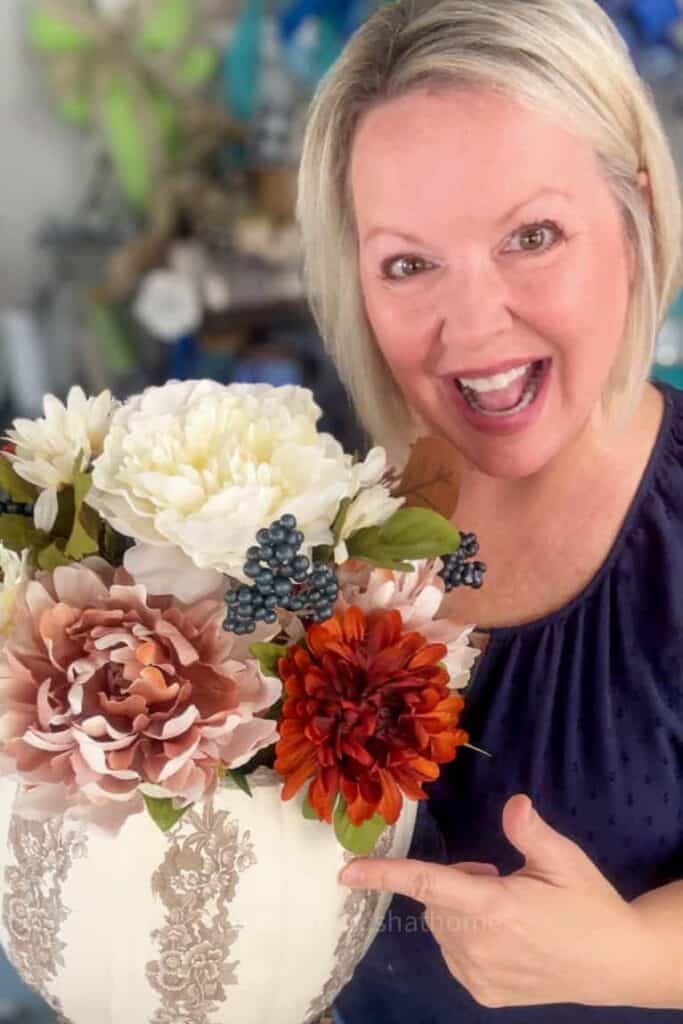
Once the glue dries, start adding your fall florals—think warm tones, creamy whites, navy, and a little greenery for contrast.
Poke each stem into the foam until you’re happy with the fullness.
Step 4: Style Your Centerpiece
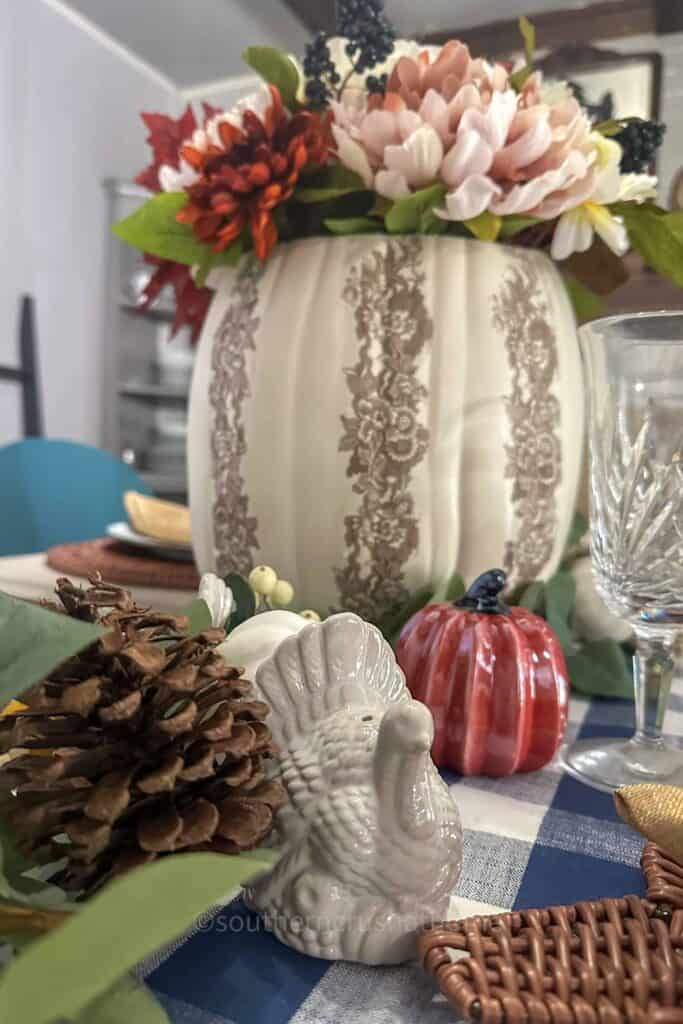
Now for the fun part—styling! Set your pumpkin centerpiece right in the middle of your dining table or buffet.
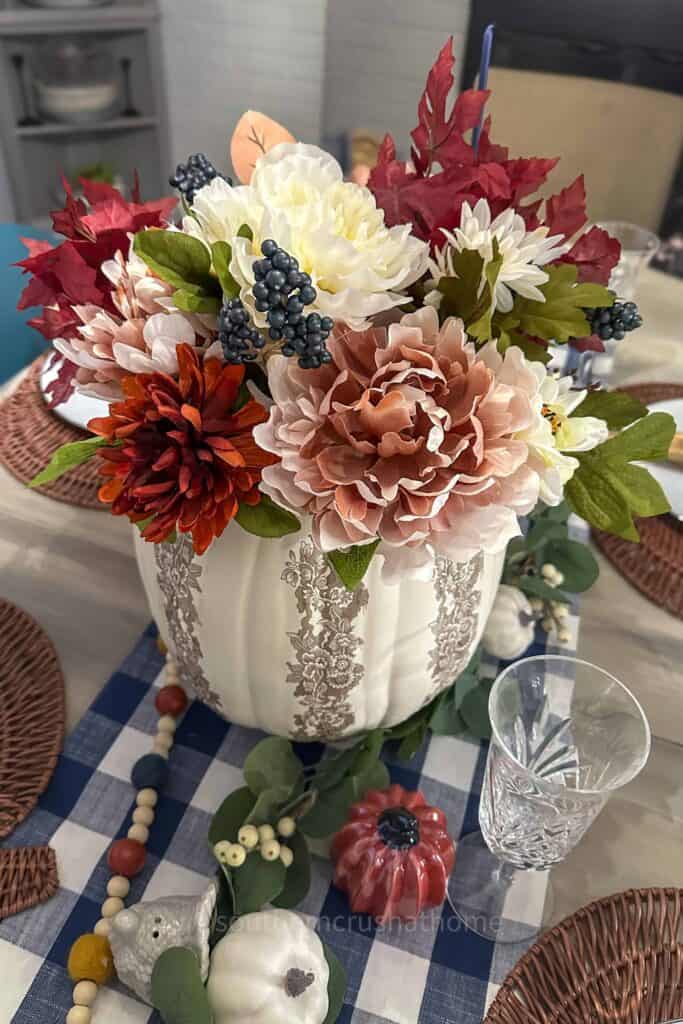
For extra fall flair, surround it with mini pumpkins, a wood bead garland, or a few flickering candles.
If you’re hosting Friendsgiving, you can even make a few smaller versions for each guest table or gift one to your host!
This project is simple, elegant, and perfect for creating that cozy autumn vibe we all love. I love how it is giving brown transferware vibes!
It’s a great reminder that you don’t need fancy décor to make your home feel festive—just a little creativity, a pumpkin, and a touch of Mod Podge magic.
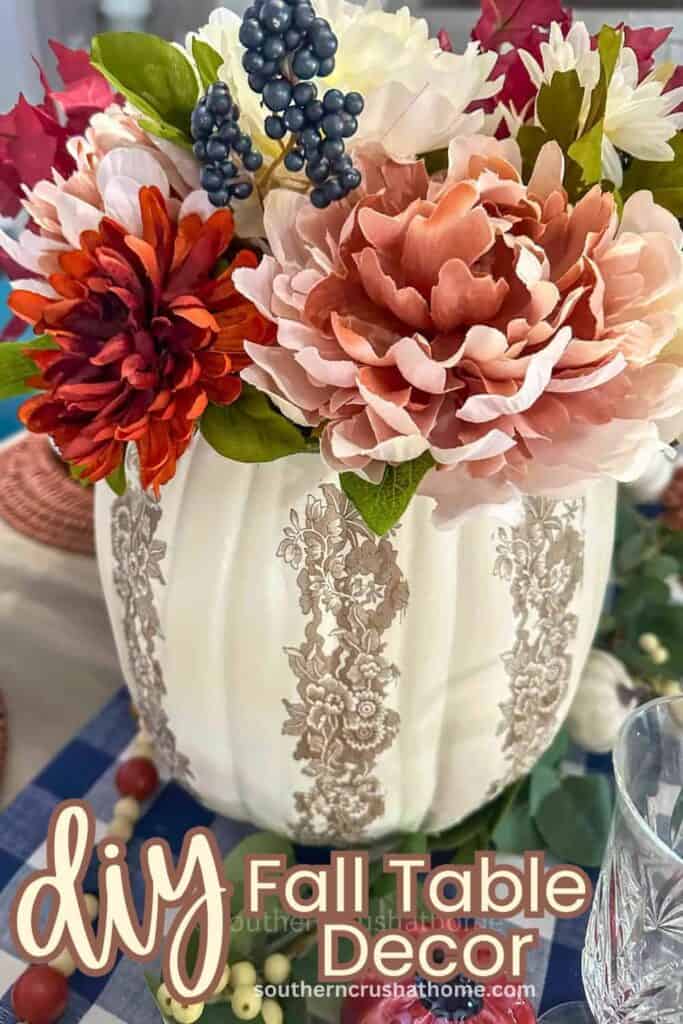
PIN this for later!
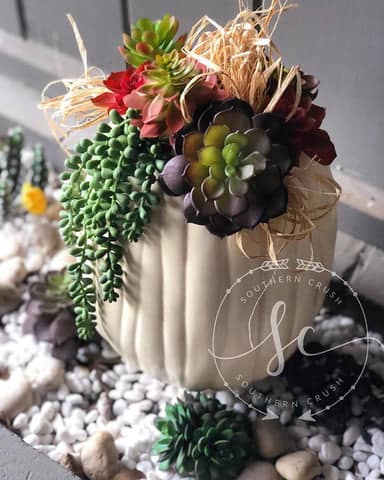
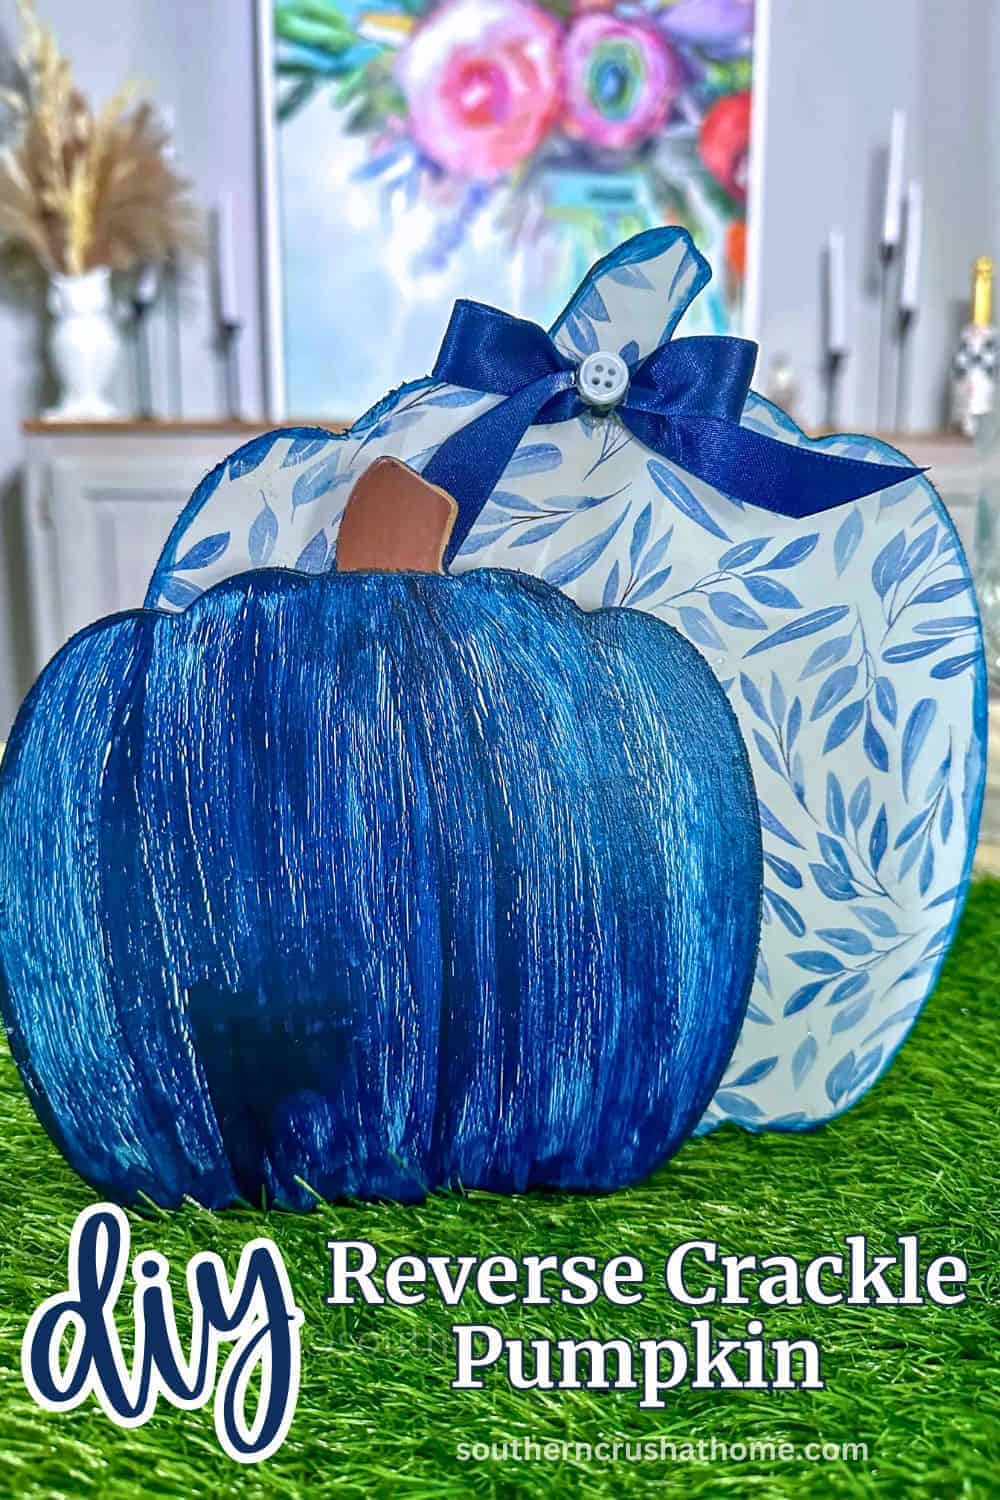
Other Easy Pumpkin Ideas for your Fall Table
Easy Pumpkin Fall Table Decor
Materials
- White faux pumpkin mine is 18 inches from Michael’s
- Small handsaw or craft knife
- Mod Podge
- Paintbrush and dry brush
- Decorative fall napkins mine looked like lace
- Styrofoam square
- Fall floral stems of your choice
- Hot glue gun optional for securing the Styrofoam
Instructions
Step 1: Prep the Pumpkin
- Start by using a handsaw or cutting knife to carefully remove the top portion of your faux pumpkin. You want to leave a hollow center so it’s open at the top like a vase. This is where your floral stems will go later, so make sure there’s enough room inside for your Styrofoam and florals.
Step 2: Add the Decorative Napkins
- Measure around your pumpkin where you’d like your napkin strips to go—mine were spaced about three inches apart. Cut out the designs from your napkins (you can trim around the shapes or use entire strips depending on your design).
- Brush on a thin layer of Mod Podge and gently press your napkin piece into place. Use a dry brush to smooth it out so it doesn’t tear or wrinkle. Once the entire pumpkin is covered and dry, go back over the design with a light topcoat of Mod Podge to seal it and give it a soft sheen.
Step 3: Create the Floral Base
- Glue your Styrofoam square to the inside bottom of the pumpkin. This will help elevate your floral arrangement and keep your stems in place. Once the glue dries, start adding your fall florals—think warm oranges, creamy whites, golds, and a little greenery for contrast. Poke each stem into the foam until you’re happy with the fullness.
Step 4: Style Your Centerpiece
- Now for the fun part—styling! Set your pumpkin centerpiece right in the middle of your dining table or buffet. For extra fall flair, surround it with mini pumpkins, a wood bead garland, or a few flickering candles. If you’re hosting Friendsgiving, you can even make a few smaller versions for each guest table or gift one to your host
What a great idea! Thanks for sharing!
Thank you so much!