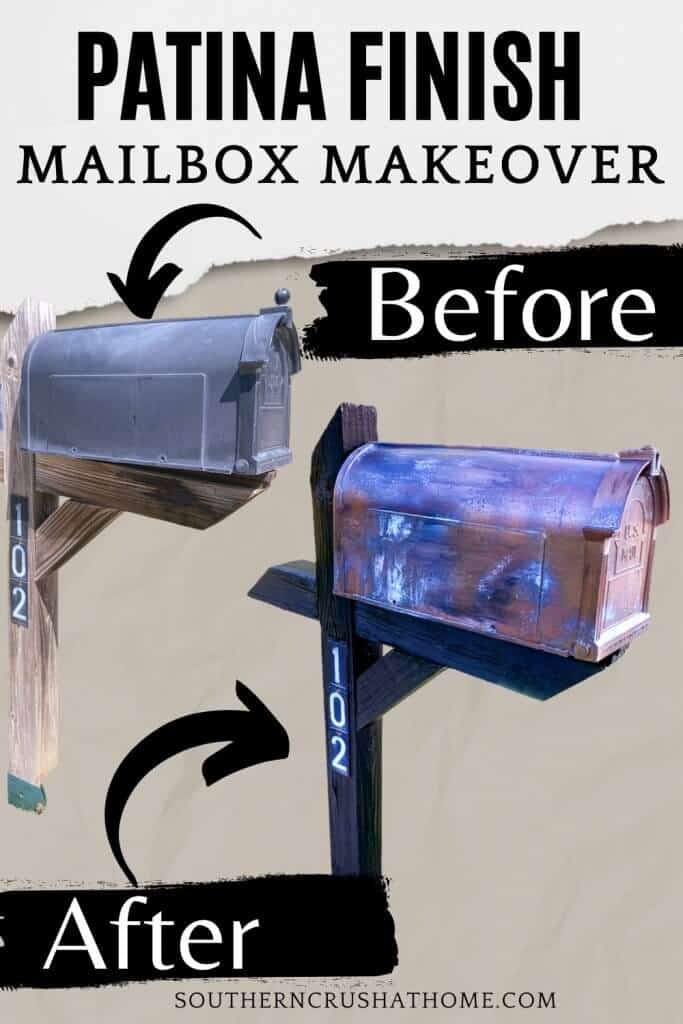
How to Patina a Plastic Mailbox (using Metal Effects Patina Kit)
If your old, plastic mailbox looks a little lackluster, give it an easy facelift with this Metal Effects patina kit from Modern Masters. This DIY project will add instant charm to your home's curb appeal.
Your mailbox will be the envy of the neighborhood in no time!
This post may contain affiliate links at no extra cost to you. *This post is sponsored by Modern Masters. Please see my full disclosure here.
This blog post contains affiliate links. The opinions are wholly my own from my own experience. I may earn a small commission from clicks through to the websites that end in a purchase.
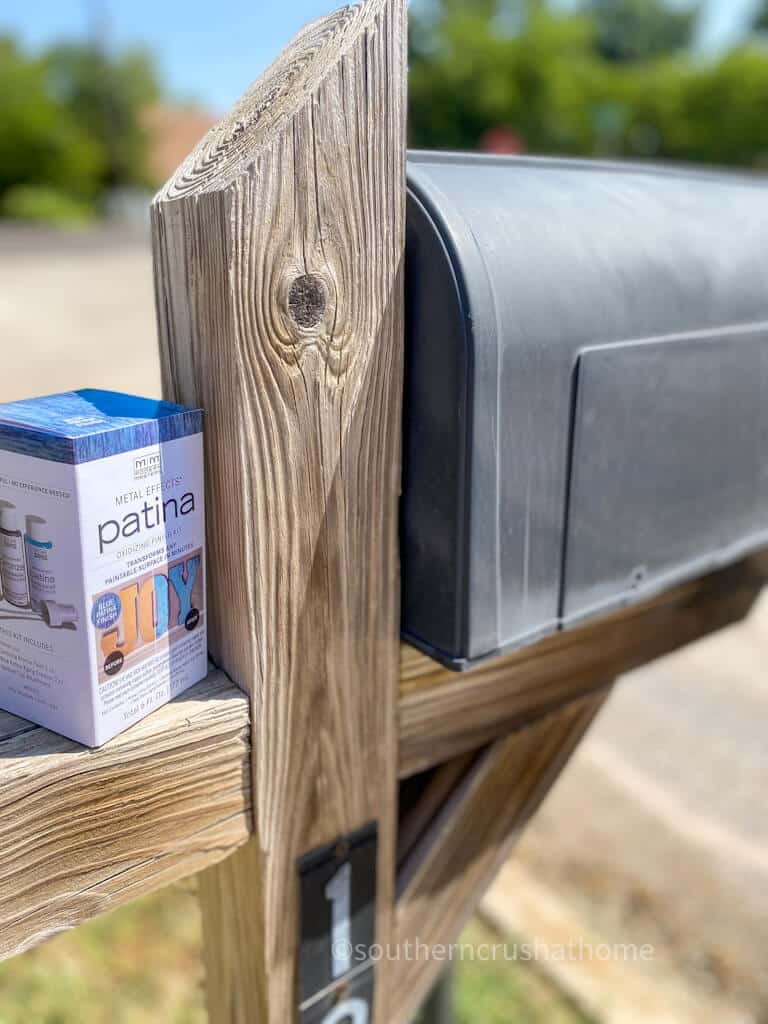
Supplies Needed to Create Patina Finish
- Old Mailbox or a New one that is basic
- Sponge Brush
- Modern Masters Metal Effects Patina Oxidizing Finish Kit (includes: Primer, Oxidizing Bronze Paint, and Blue Patina Aging Solution) and can be found at these local retailers:
Joann – https://www.joann.com/modern-masters-patina-metal-effects-paint-oxidizing-kit-blue/16343238.html Amazon – https://www.amazon.com/Modern-Masters-Effects-Patina-Copper/dp/B000QD9JU8?th=1 The Paint Store – https://www.thepaintstore.com/Modern-Masters-2-Oz-Metal-Effects-Kit-p/30629.htm
How to Patina a Plastic Mailbox
Transform your mailbox from mundane to marvelous with this easy patina paint project. In just minutes, you can add a touch of elegance and charm to your home's curb appeal.
Step by Step Video Tutorial
If you prefer a video tutorial on how to create this bronze patina metal effect on a plastic mailbox, watch my YouTube video below.
How to Patina a Plastic Mailbox
Step One
Remove the old plastic mailbox from its post and give it a good cleaning with soapy water and a sponge. Rinse it well and let it dry completely.
Step Two
Protect your surface with kraft paper or painter's drop cloth.
Apply first coat of Metal Effects Primer by Modern Masters. Apply with a sponge applicator in thin, light strokes to cover the entire mailbox.
Allow to dry for at least 30 minutes.
Step Three
Apply a second coat of Primer. This time allow for a generous layer to fill in any missing areas of the first layer.
Allow to dry for at least 30 more minutes.
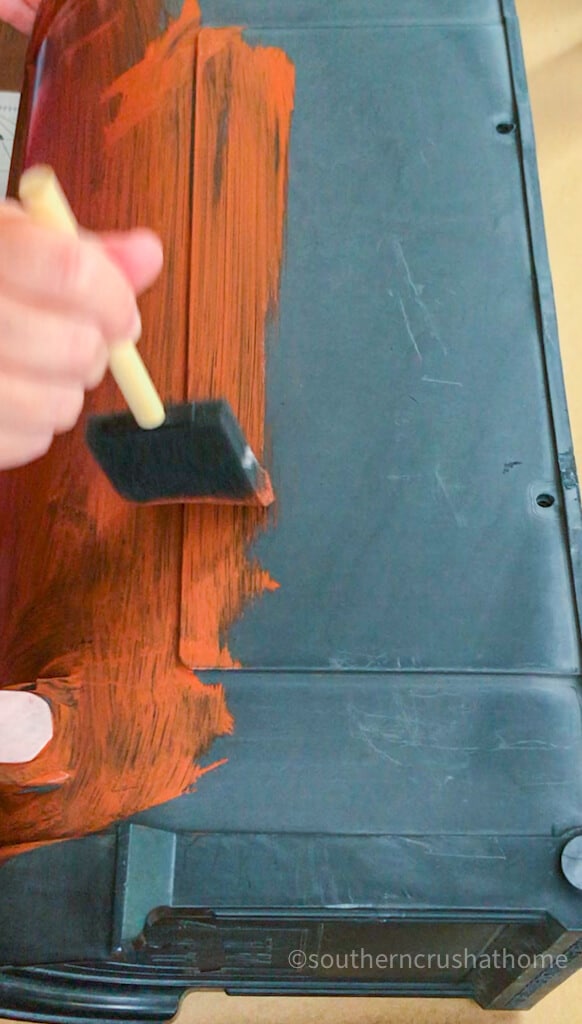
Step Four
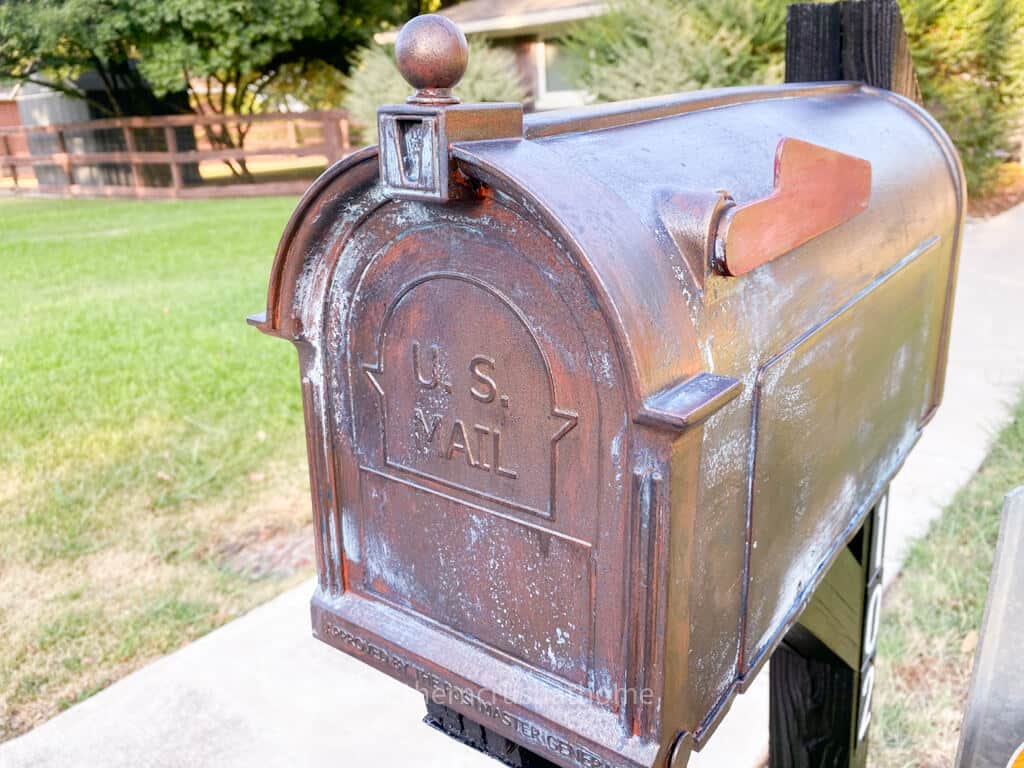
Using a new sponge brush, apply a first coat of the special oxidizing bronze paint. This is where the ordinary plastic mailbox turns into a more high-end metal-looking mailbox.
Dry mailbox for another 30 minutes.
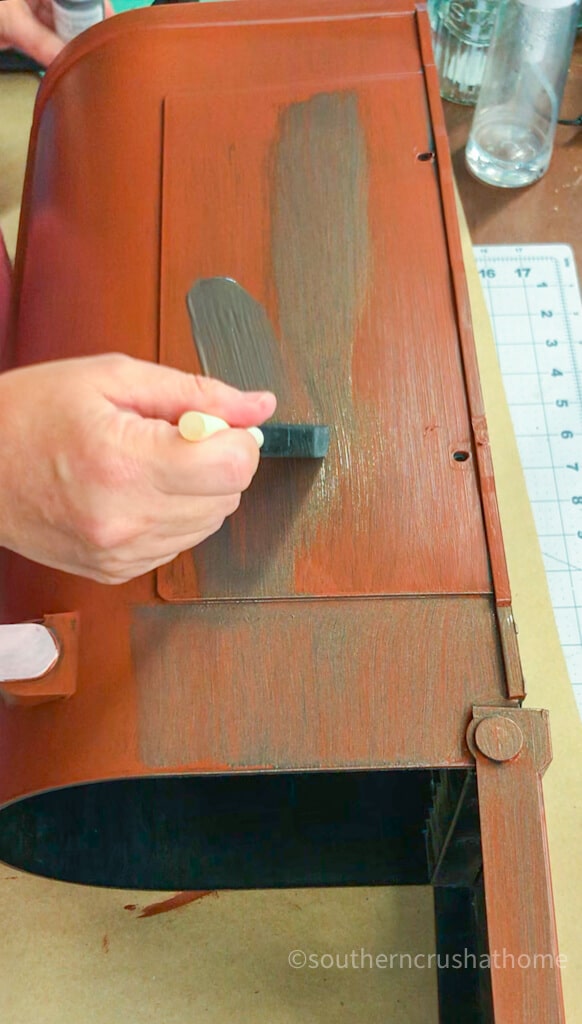
Step Five
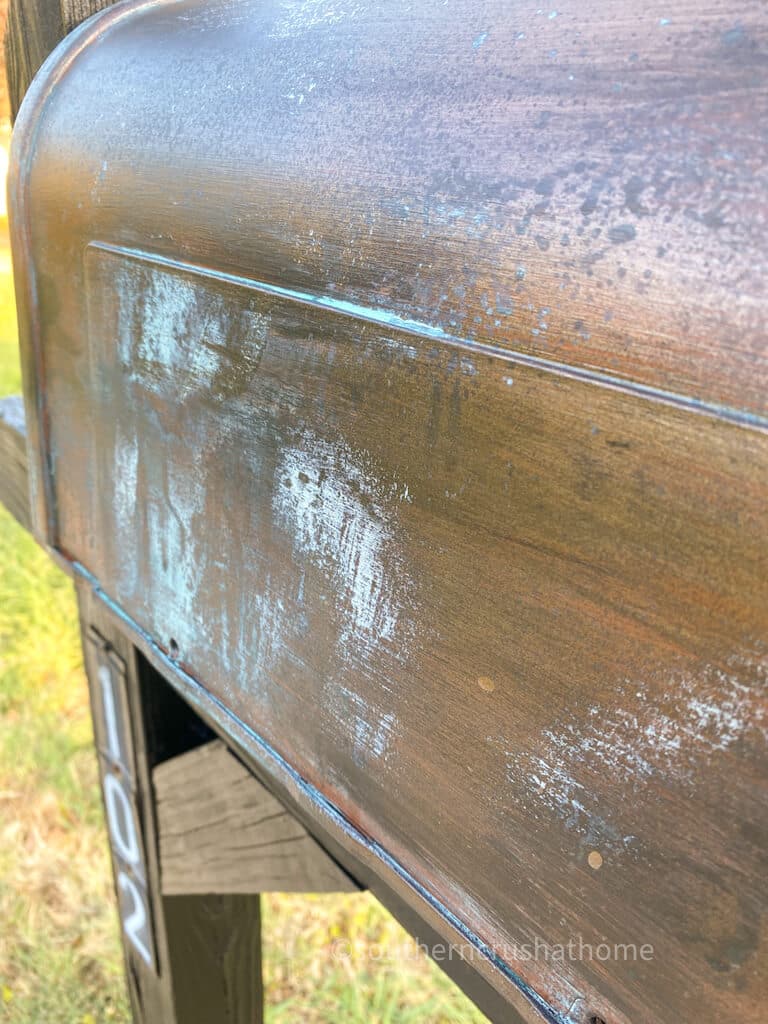
For the final coat of bronze paint, apply in small sections at a time.
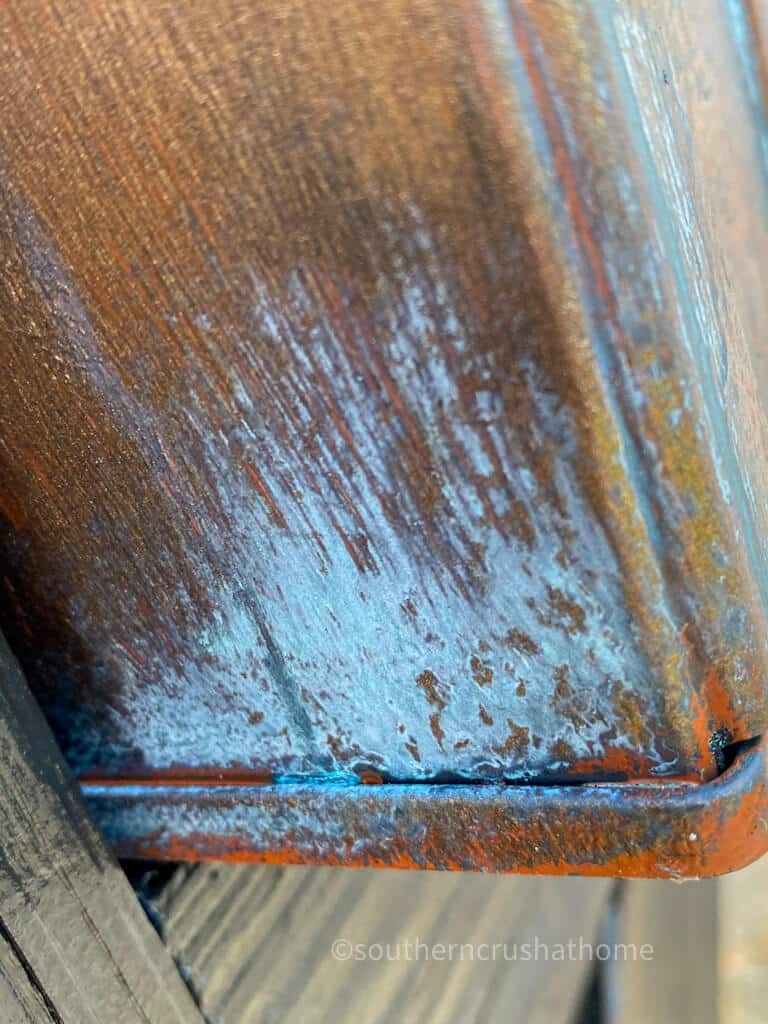
After applying a few strokes of paint, spritz the blue patina aging solution over the wet paint area.
Get creative and experiment by varying the sprays of the aging solution from a light, airy spray at a distance to a closer more concentrated spray that leaves pretty drip marks behind.
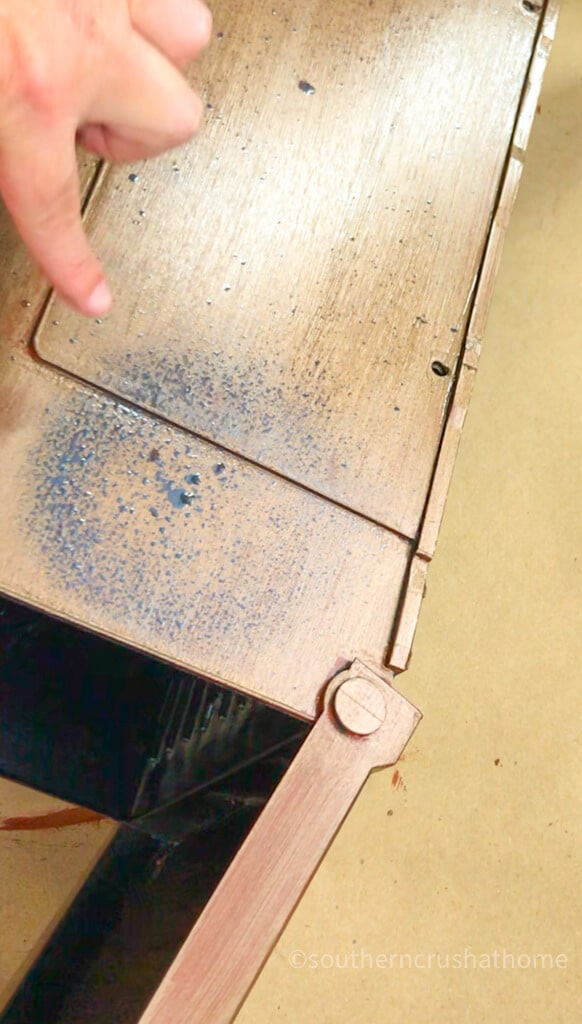
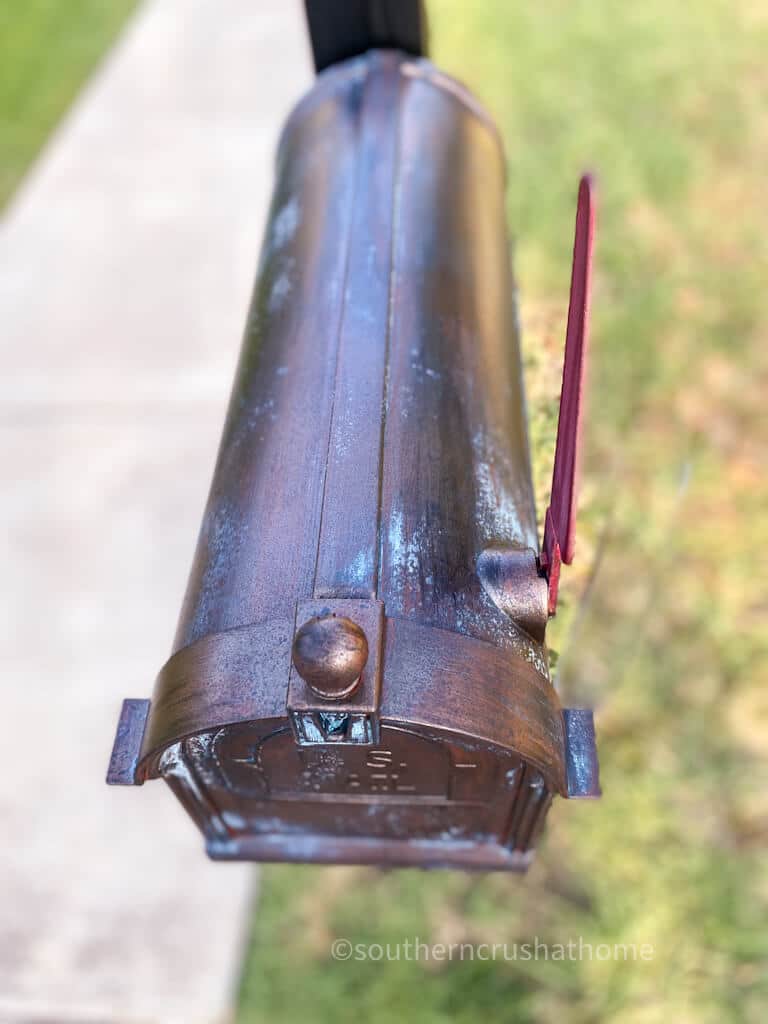
This is where the magic happens. The patina aging solution will begin to change the bronze paint into an aged patina!
So pretty and amazing!
Step Six
Paint your mailbox post if it needs a refresh and reattach your mailbox! This would be a good time to replace old address numbers, too!
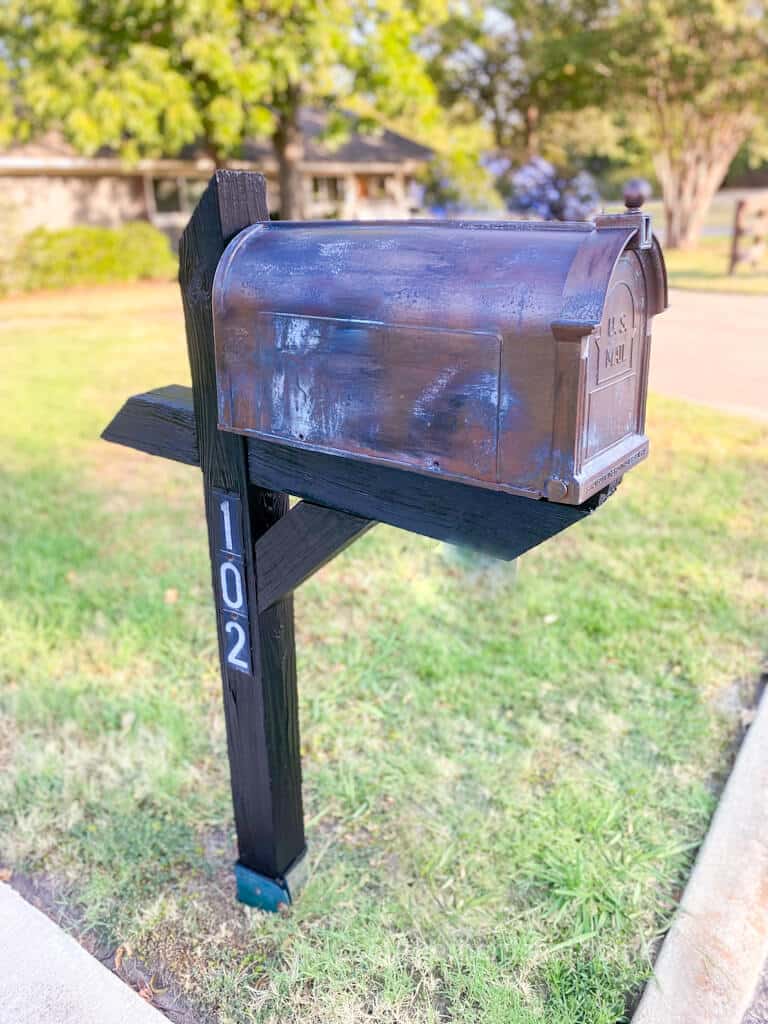
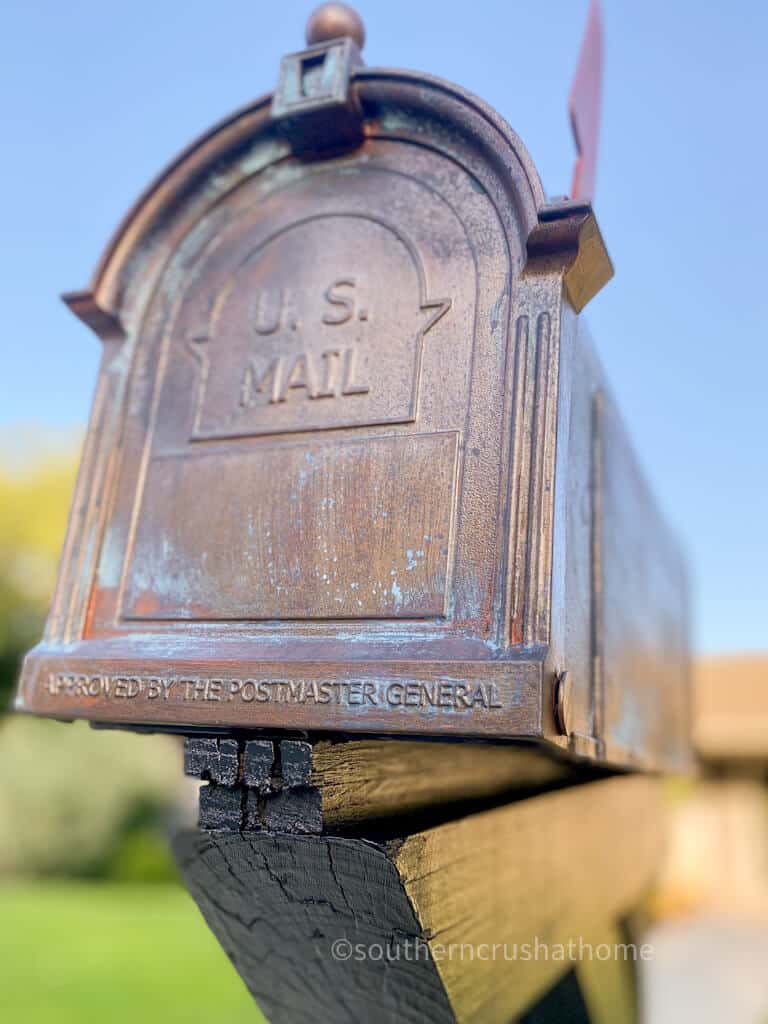
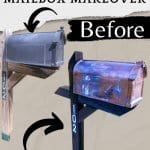
Isn't the transformation amazing?
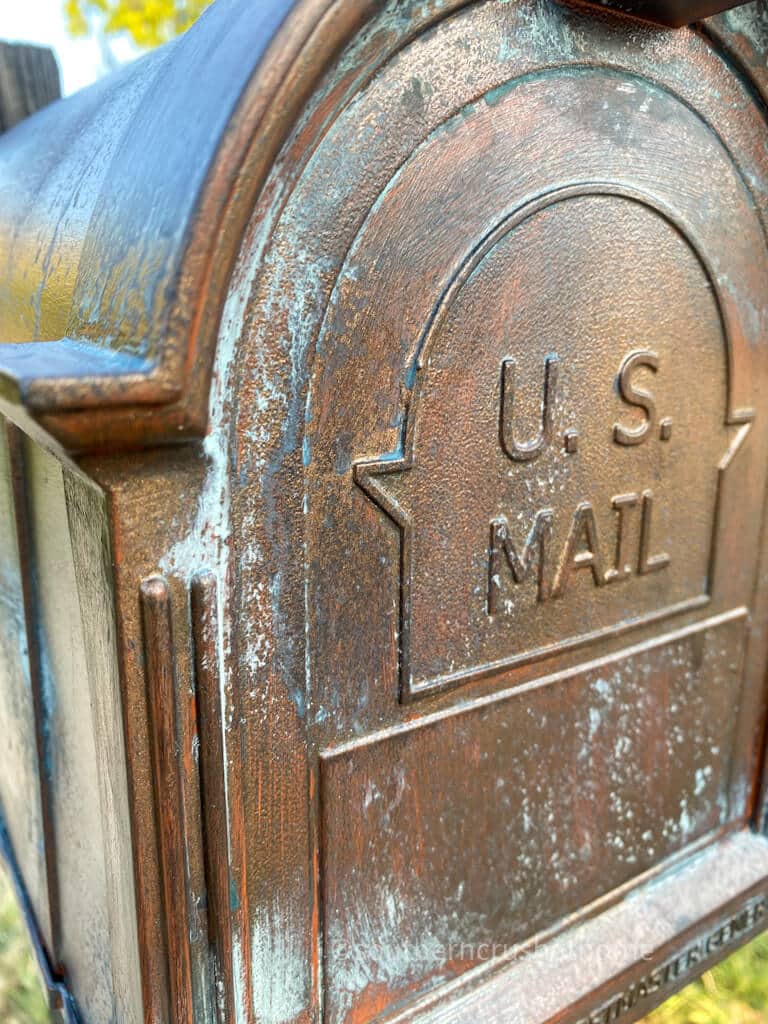
The Blue Bronze Patina effect turned this mailbox from drab to fab in minutes!
With this easy-to-use kit and instructions, the possibilities are endless!
Transform your mailbox from mundane to marvelous with this easy patina paint project. In just minutes, you can add a touch of elegance and charm to your home's curb appeal.
This project is simple to do and doesn't require any special skills, trust me anyone can do it.
This mailbox makeover was such an easy and inexpensive update!
What is patina?
The patina finish is defined as a “green or brown film formed on copper and bronze by oxidation, typically produced naturally by exposure to the air or chemicals.” In other words, it’s that beautiful weathered look that metal gets over time. Some refer to it as rust.
Is patina the same as rust?
Patina and rust are not the same things. Patina is a thin layer of oxide that forms on the surface of the metal, and it is often considered to be visually appealing.
Rust, on the other hand, is a form of corrosion formed from oxygen and moisture in the air that can cause the metal to weaken and break down over time.
Patina comes with age, but rust can show up in just a few short days or weeks. Rust can be dangerous, but the patina isn't.
What color is patina?
Patina comes in a large range of colors due to the fact that they are created by nature and each patina color is unique. However, there are a few popular patina colors that are often soft after in the way of patina finishes. These are the blue, bronze color used in this project and the green, copper patina. Both are gorgeous!
“Patina” is a term that refers to the blue-green layer of corrosion that develops on the surface of copper when it is exposed to sulfur and oxide compounds. The word is derived from the Latin term for a shallow dish.
What is the difference between tarnish and patina?
The difference between tarnish and patina is that tarnish is a film that forms on the surface of silver, copper, or brass when they are exposed to the air, while patina is a green or brown film that forms on copper and bronze. Both tarnish and patina are caused by oxidation.
Most of us like the look of a patina and don't like the tarnish!
Can I paint my plastic mailbox?
Yes, you can! Most paints will require a primer. This Metal Effects Patina kit by Modern Masters comes complete with everything you need to paint your plastic mailbox including a special primer.
Other DIY Transformation Projects You May Love!
- How to Turn an Old Mirror into a Modern Gold Mirror the Easy Way
- Dresser Mirror Idea – Turn a Mirror Into A Shelf
- Basic Cooking Measurements & Kitchen Conversions Chart DIY (featuring Rust-Oleum Imagine)
Be sure to PIN this one for Later!
How to Patina a Plastic Mailbox (using Metal Effects Patina Kit)
Materials
- Old Mailbox
- Sponge Brush
- Metal Effects Patina Oxidizing Finish Kit
Instructions
- Remove the old plastic mailbox from its post and give it a good cleaning with soapy water and a sponge. Rinse it well and let it dry completely.
- Protect your surface with kraft paper or painter's drop cloth.
- Apply first coat of Metal Effects Primer by Modern Masters. Apply with a sponge applicator in thin, light strokes to cover the entire mailbox.
- Allow to dry at least 30 minutes.
- Apply second coat of Primer. This time allow for a generous layer to fill in any missing areas of the first layer.
- Allow to dry at least 30 more minutes.
- Using a new sponge brush, apply a first coat of the special oxidizing bronze paint. This is where the ordinary plastic mailbox turns into a more high-end metal looking mailbox.
- Dry mailbox for another 30 minutes.
- For the final coat of bronze paint, apply in small sections at a time.
- After applying a few strokes of paint, spritz the blue patina aging solution over the wet paint area.
- Paint your mailbox post if it needs a refresh and reattach your mailbox! This would be a good time to replace old address numbers, too!
I love this idea. Just wondering if this will work on a plastic mail box? Watching the Live now on making the pumpkin. Love this idea!
This IS a plastic mailbox my friend. It’s super simple. Thank you!
Love the mailbox
Thank you so much!
Love it!♥️
Thanks my friend!
Very cool way to update an old mailbox. I love the patina color. And what a great way to achieve that color.
Thank you so much! I appreciate you!
OOPS! I guess I didn’t read the instructions or just ignored that it WAS a plastic mail box. lol
It sure doesn’t look plastic. Great job!
WOW! Thank you! YES, it was a plastic mailbox to start with that was super transformed with patina!
I love the patina kit.
I’m so glad! Thank you for being here!
This is so amazing. Such a transformation
The transformation is amazing, isn’t it?
Love this so much.
I’m so glad! I appreciate you!
I love the patina effect. I would love to try it.
You’ll love it, too!
The Patina kit looked super easy to use. I couldn’t believe how cute the pizza pan pumpkin turned out.
It is definitely super easy to use! Thanks for watching!
Love the patina kit!
Thank you! I love it too!
Looks amazing. I have a one piece plastic includes the post. Would the kit be enough to cover? Also wondering how you did the flag on it. it also looks aged and not in a faded plastic way.
Did you get a chance to watch the YouTube video? https://youtu.be/EgJFTeY9_30
I painted the flag to blend in with the “new” old mailbox. The kit goes a really long way, I think yours will be great!