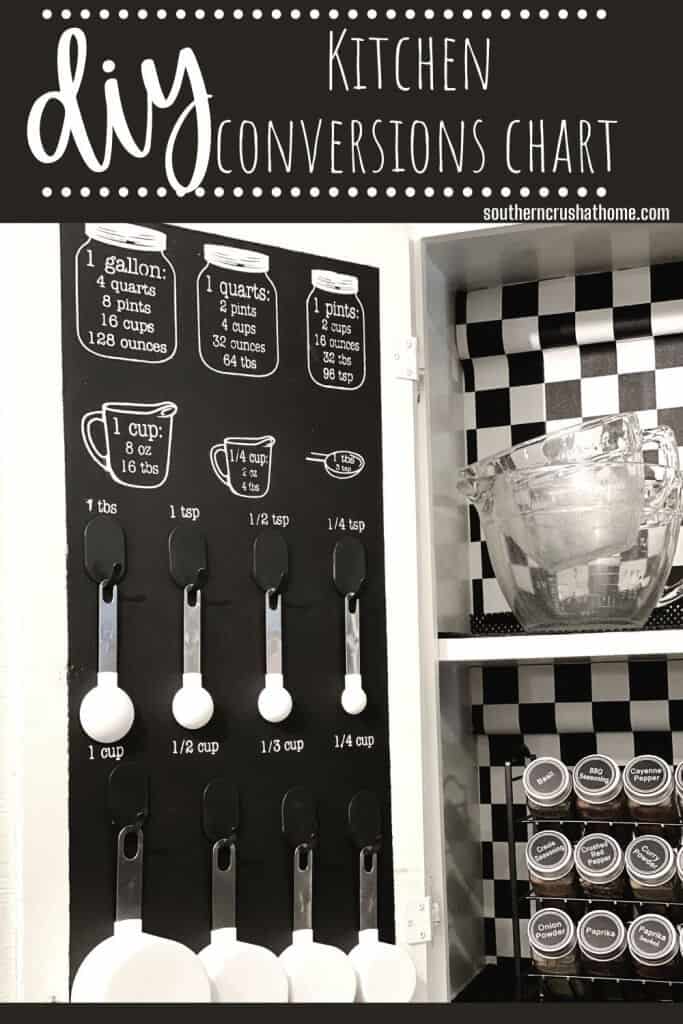
Basic Cooking Measurements & Kitchen Conversions Chart DIY (featuring Rust-Oleum Imagine)
I am always looking for ways to make cooking easier and more enjoyable. So I turned my kitchen cabinet door into a basic cooking measurements and kitchen conversions chart. You can make one too, and take the guesswork out when preparing your favorite recipes any time of year.
This is a sponsored post written by me on behalf of Rust-Oleum. All opinions are 100% mine.
This post may contain affiliate links at no extra cost to you. *This post is sponsored by Rust-Oleum. Please see my full disclosure here.
There are so many things that we need to measure when we cook, and it can sometimes be a pain to find the right thing at the right time. This chalkboard chart with all of the most commonly used measurements is the perfect solution! You can use this as a reference or print it out and hang it on your fridge. Happy cooking!
SUPPLIES YOU’LL NEED TO MAKE THIS MEASUREMENTS & CONVERSIONS CHART CABINET CAN BE FOUND HERE IN MY AMAZON SHOP
- Drill or screwdriver
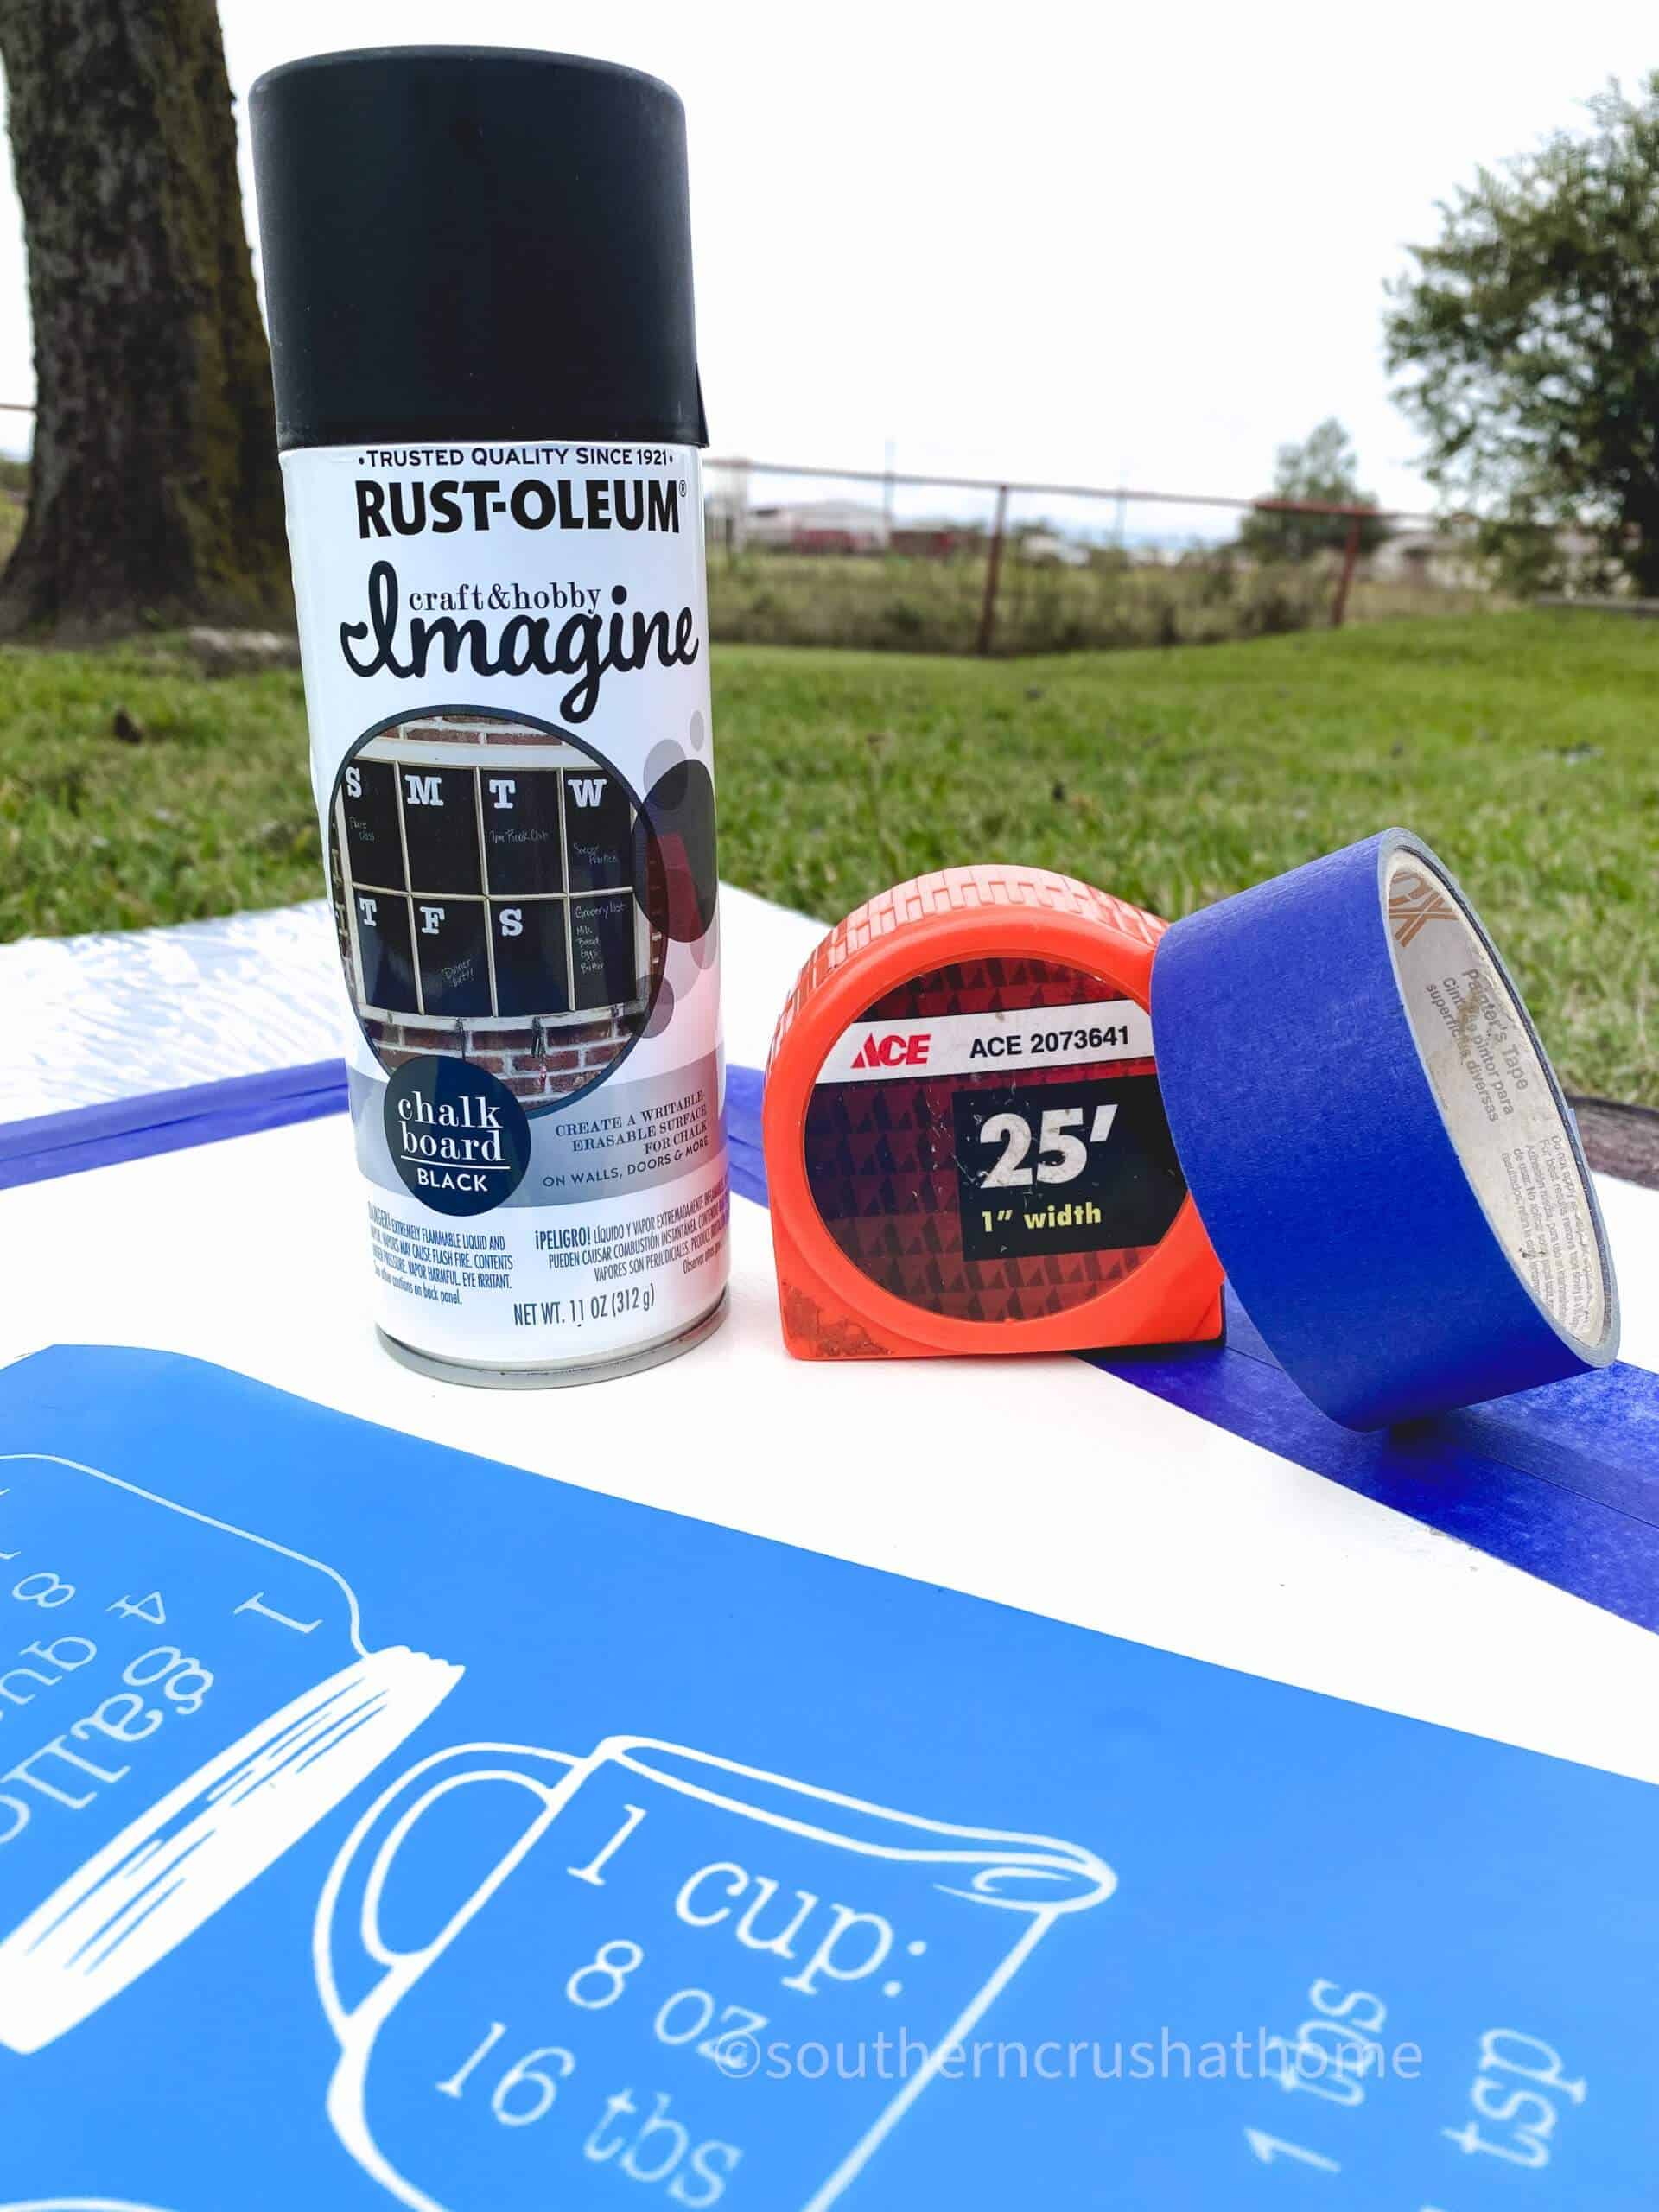
- Painter’s tape
- Rust-Oleum Imagine chalkboard paint in black which can be found at the following retailers: Meijer, JoAnn, as well as Target
- Measurement & Conversion stencils
- Chalkpaste
- Optional chalk paint pens
- Adhesive hooks
- Goof off
STEP BY STEP TUTORIAL FOR MAKING A MEASUREMENTS CHART
First step…
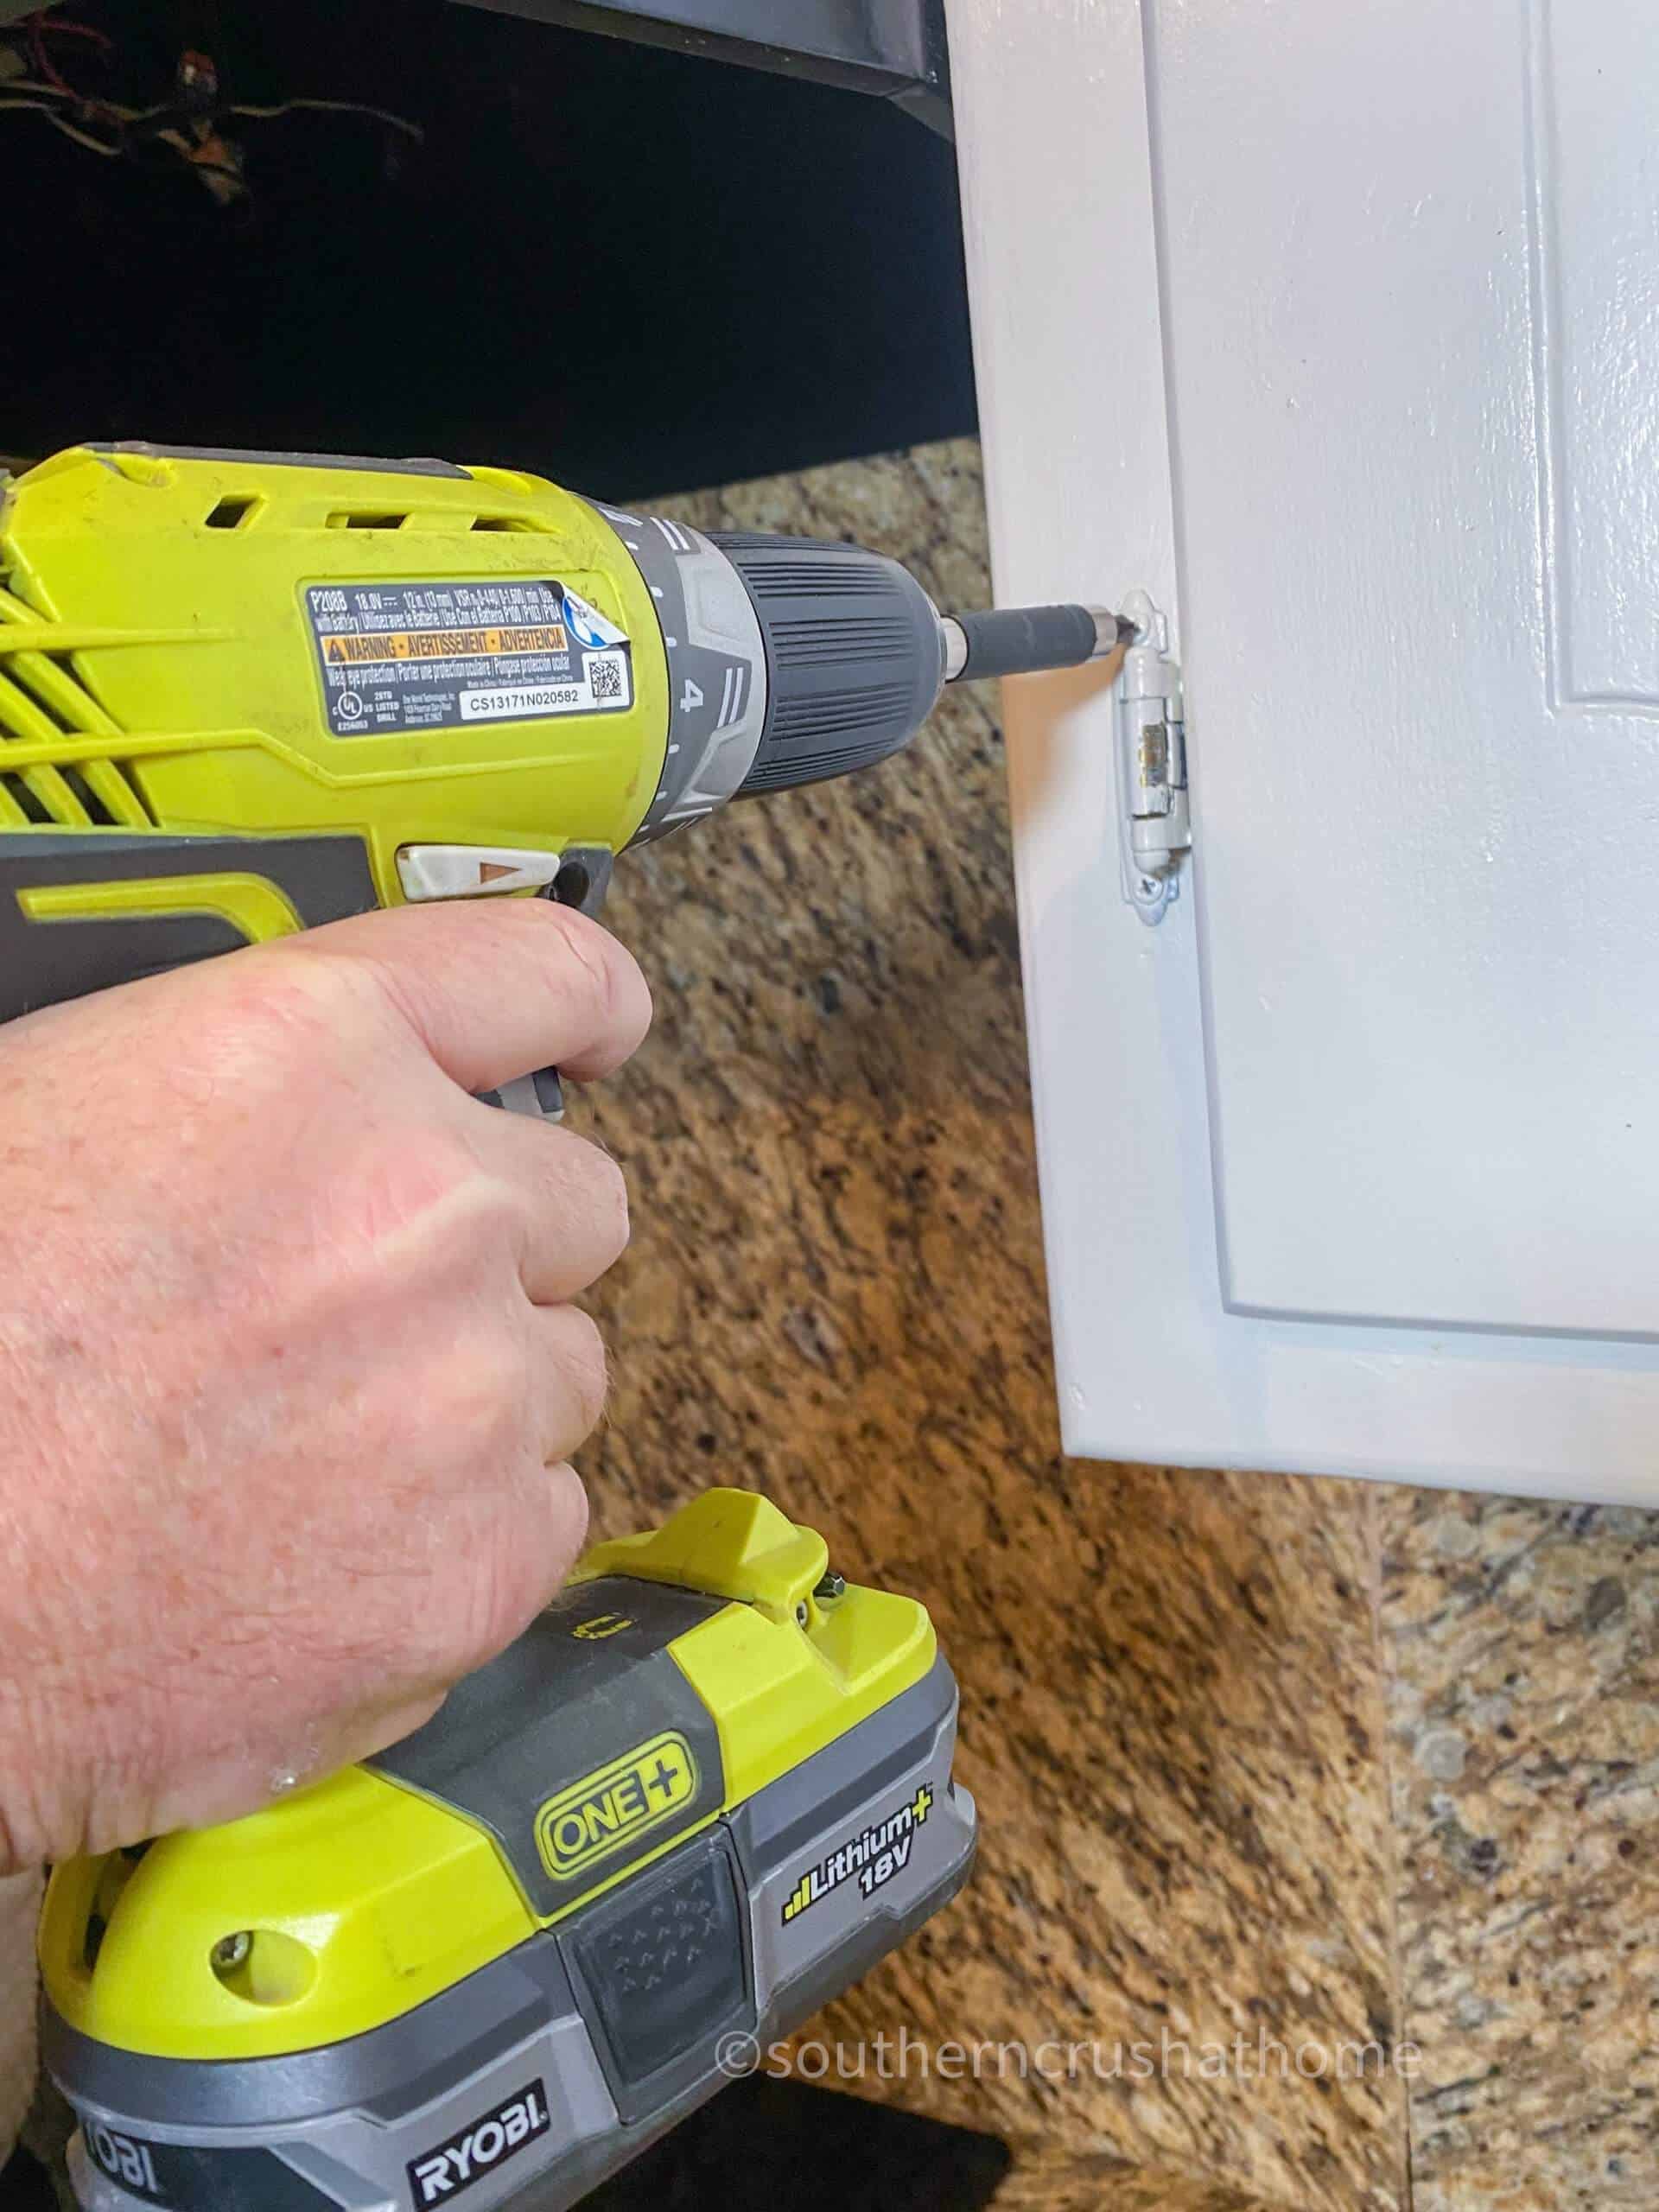
Remove the kitchen cabinet from it’s hinges using a screwdriver or a power drill. If you have an older home like I do, your cabinet hinges may be painted over. Take an exacto knife and etch around them prior to removing the cabinet door.
Next
Using painter’s tape, tape the parameter of the cabinet door and make sure to cover outside edges as well to prevent any overspray. I used two layers of tape for my project.
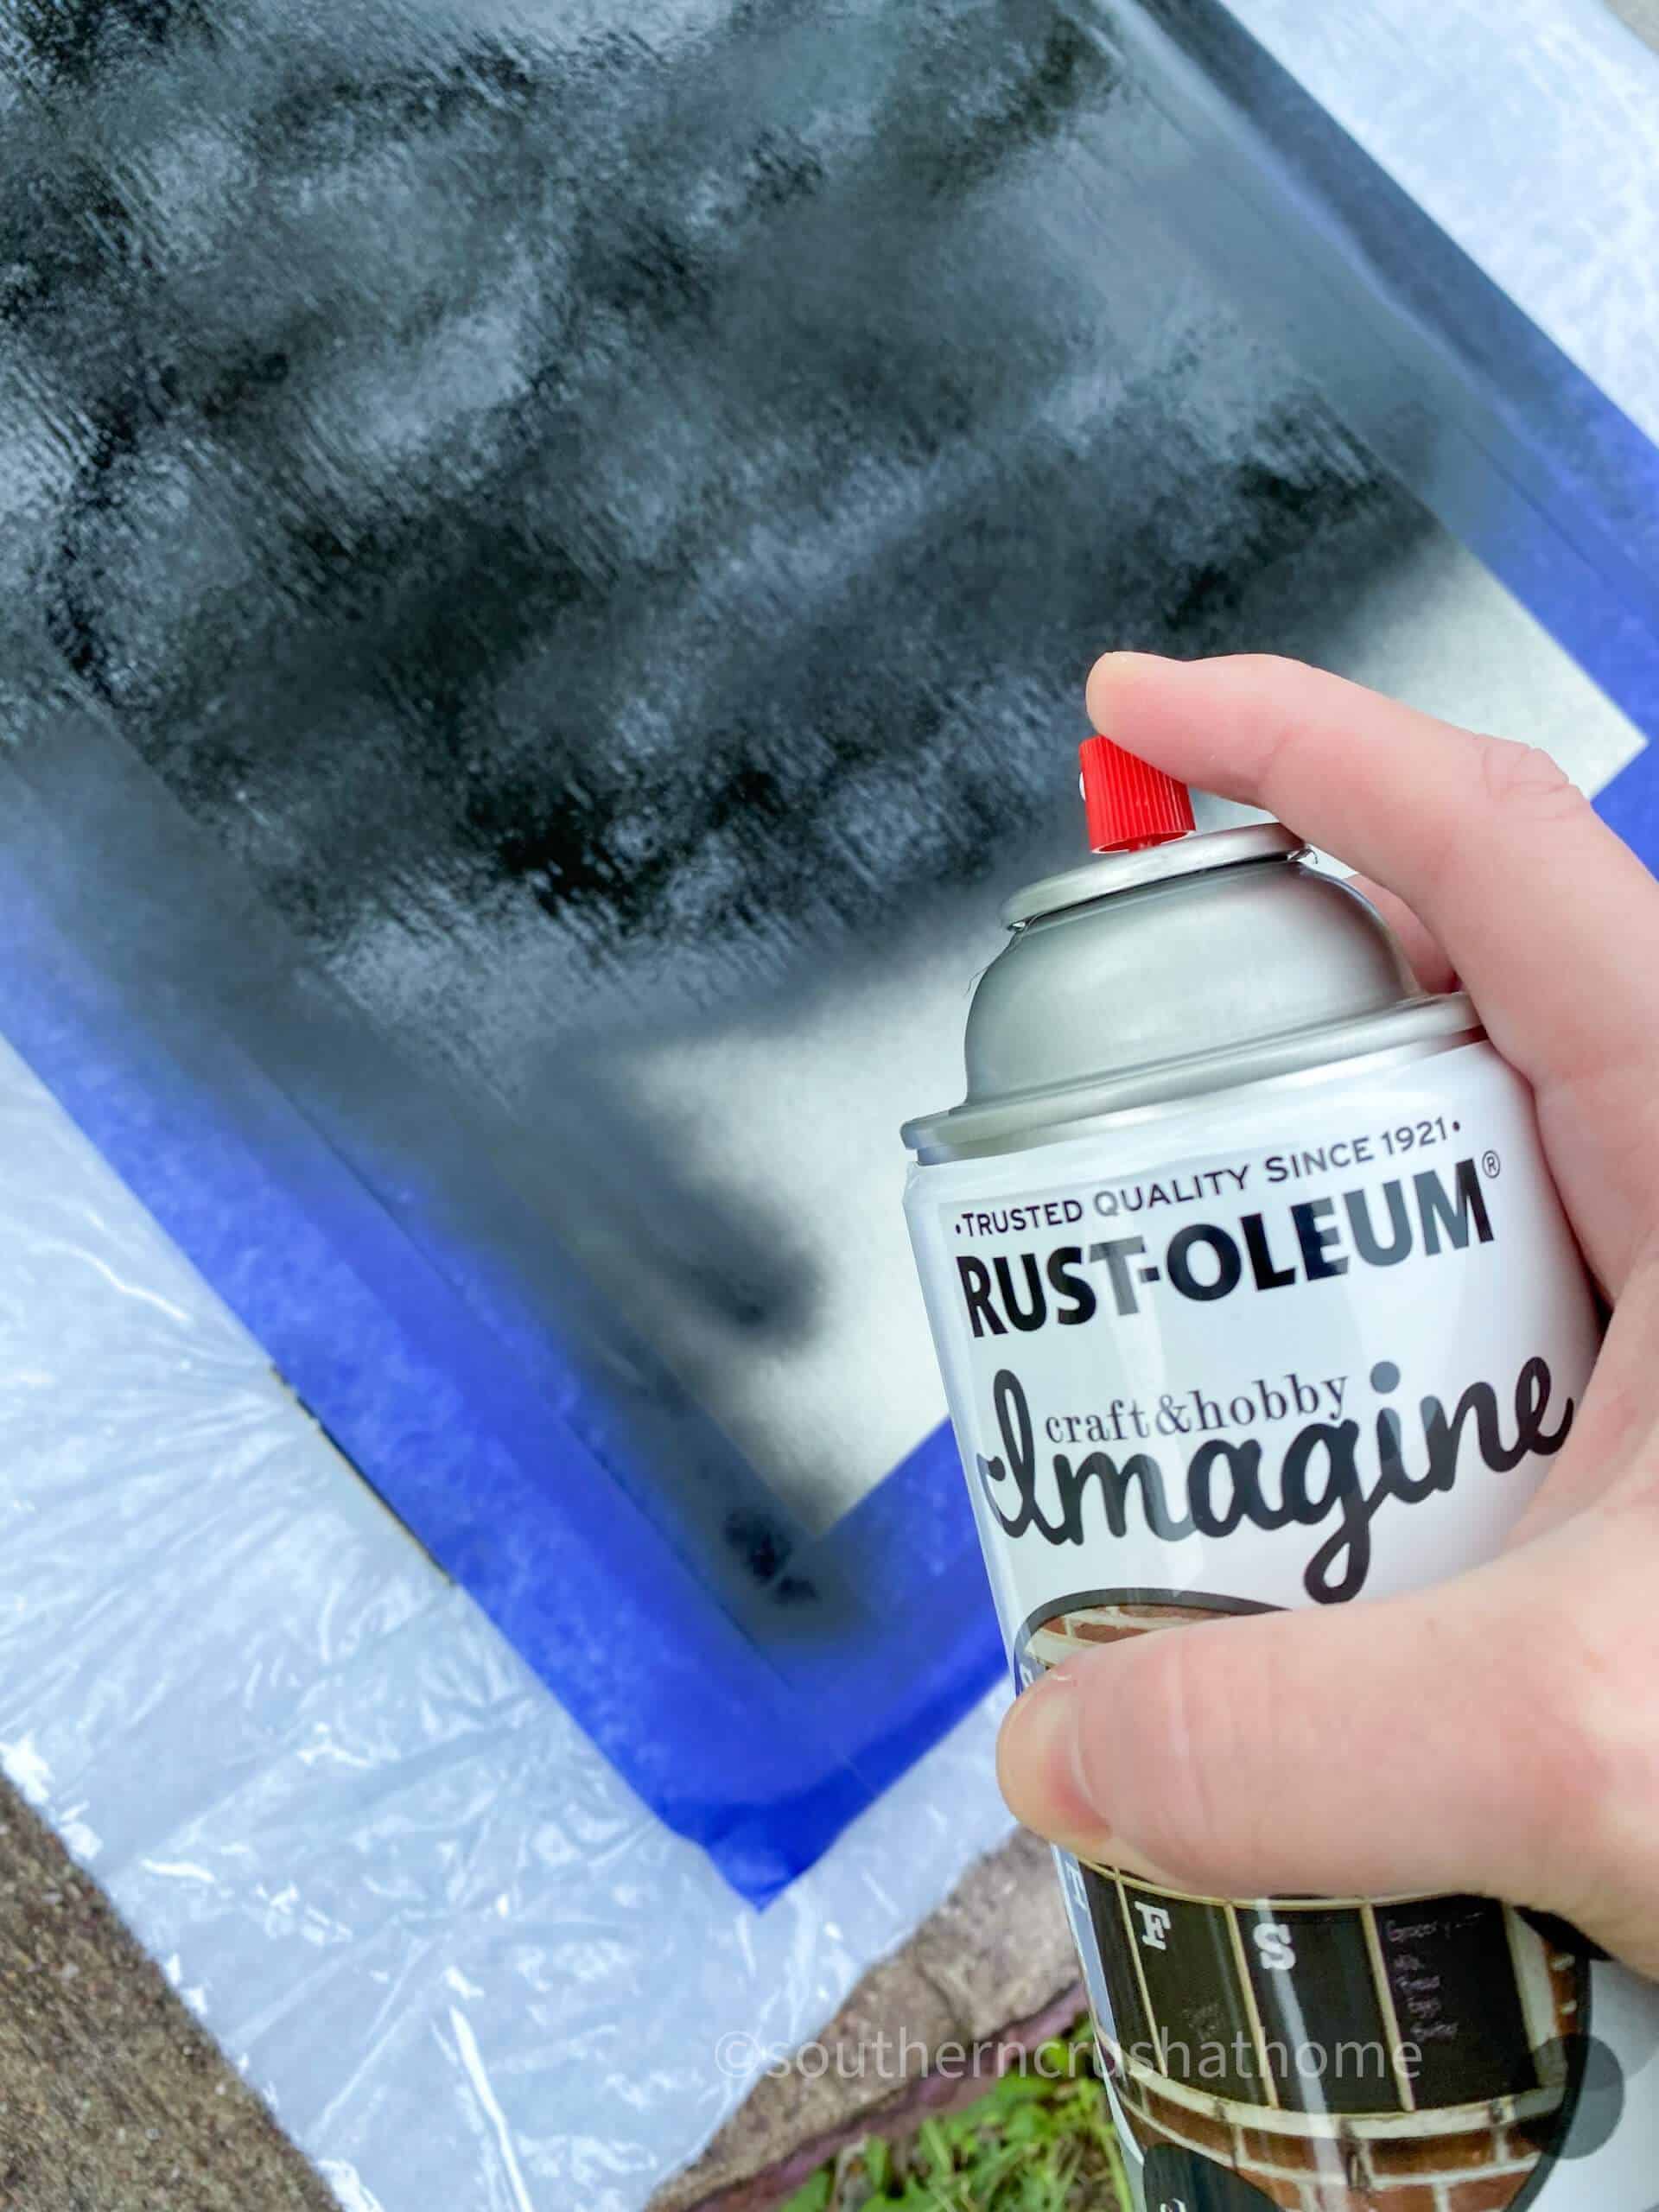
Once your project is taped off, take the cabinet outdoors. It’s best to work with spray paint in a ventilated area and outside is best.
step three
Spray Rust-Oleum’s Imagine Chalkboard Spray paint in smooth even strokes across the cabinet door. Apply a thin layer and allow it to dry an hour. Then add a second thin layer and allow it to dry completely.
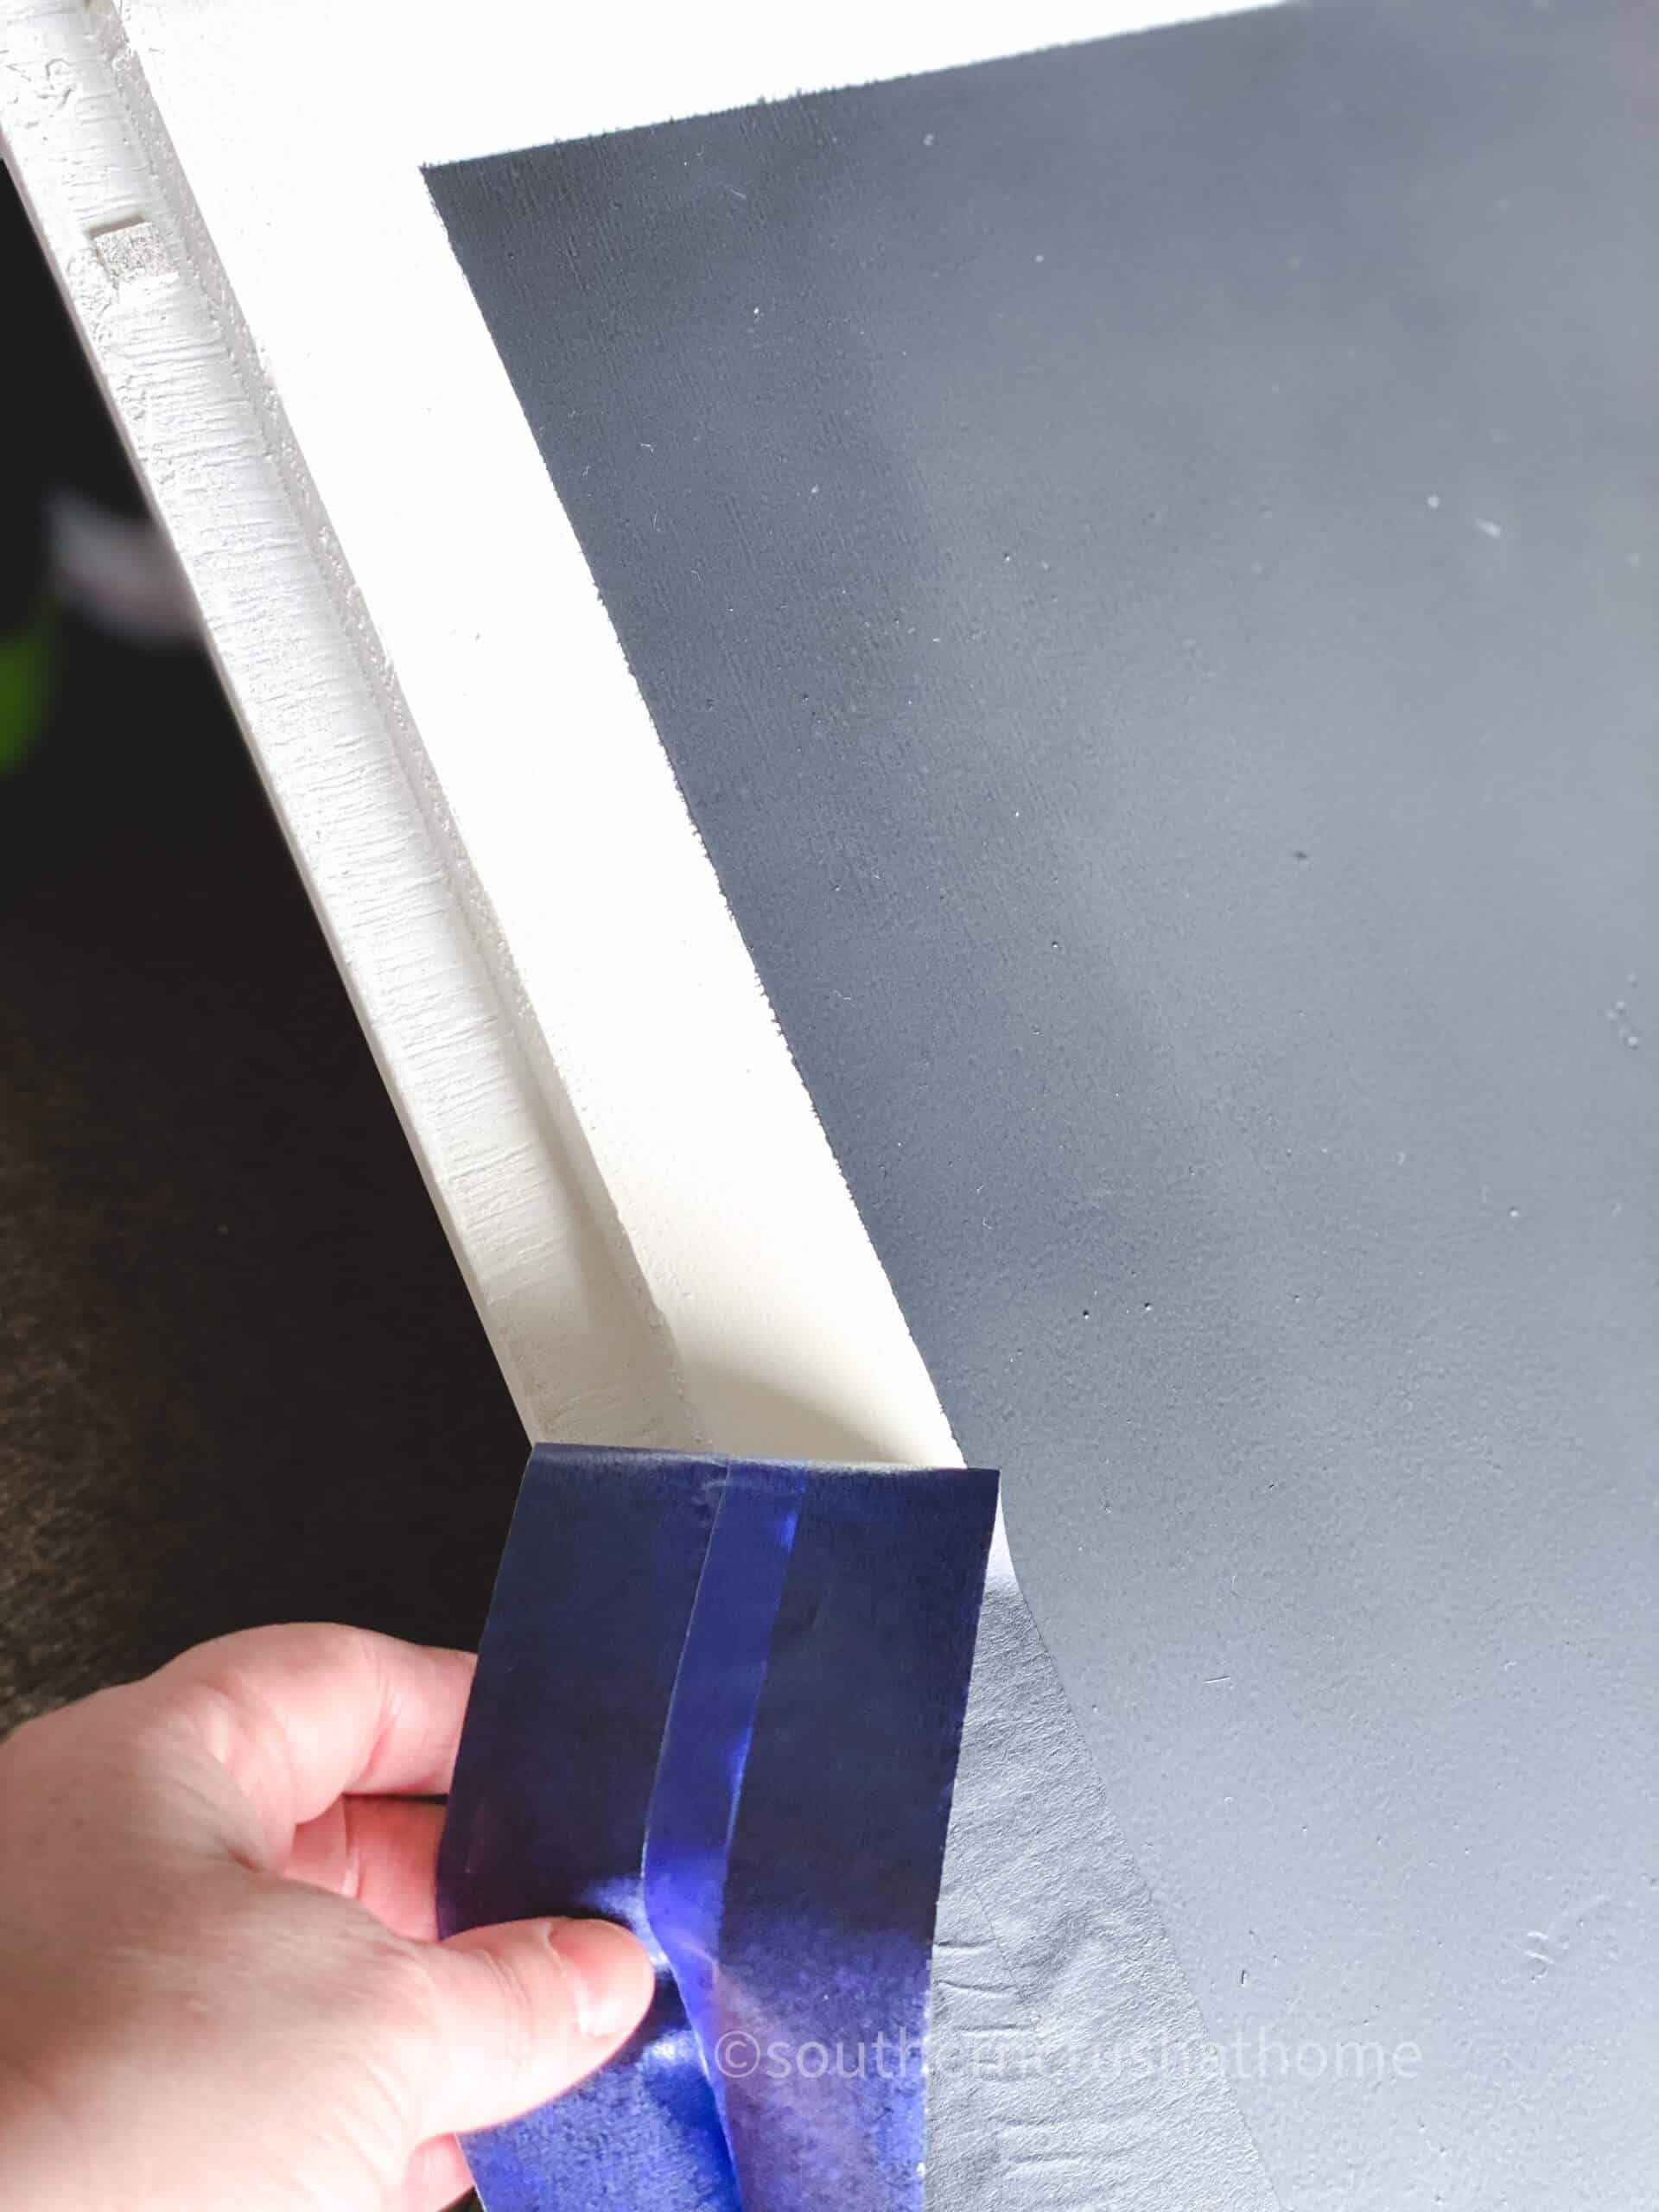
step four
that the Rust-Oleum Imagine chalkboard spray paint is completely dry; carefully remove the painter’s tape from the edges.
step five
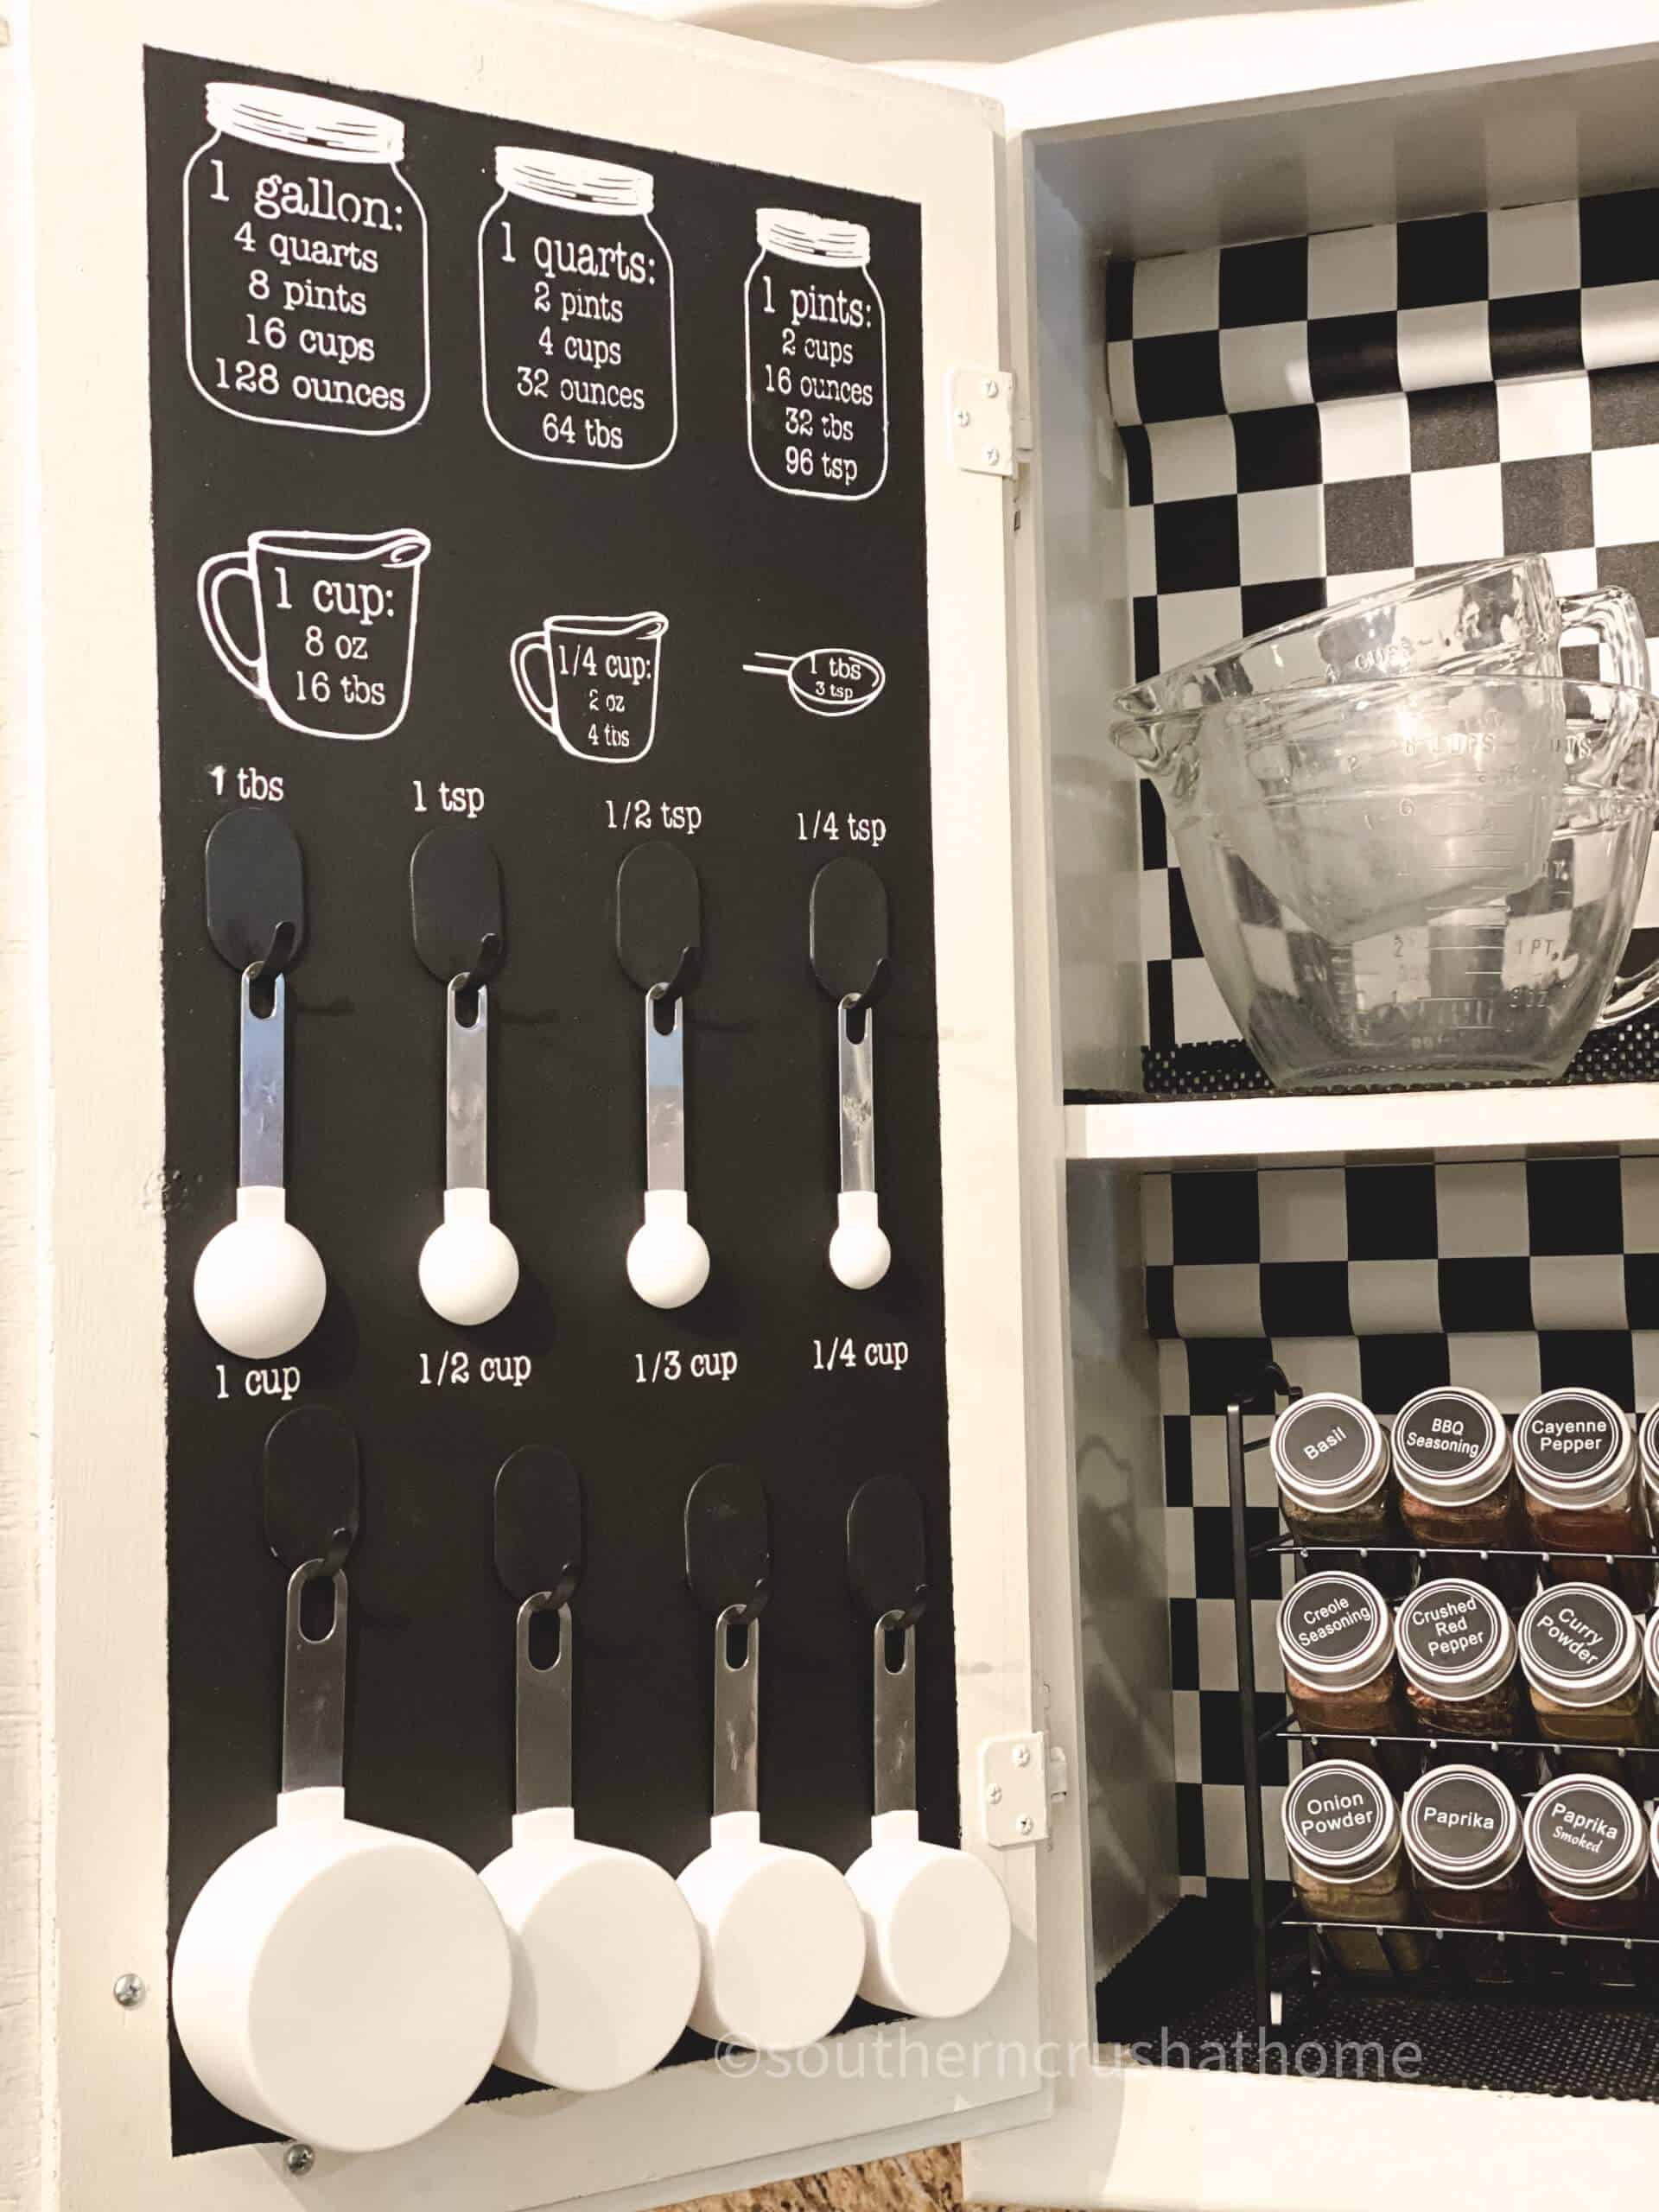
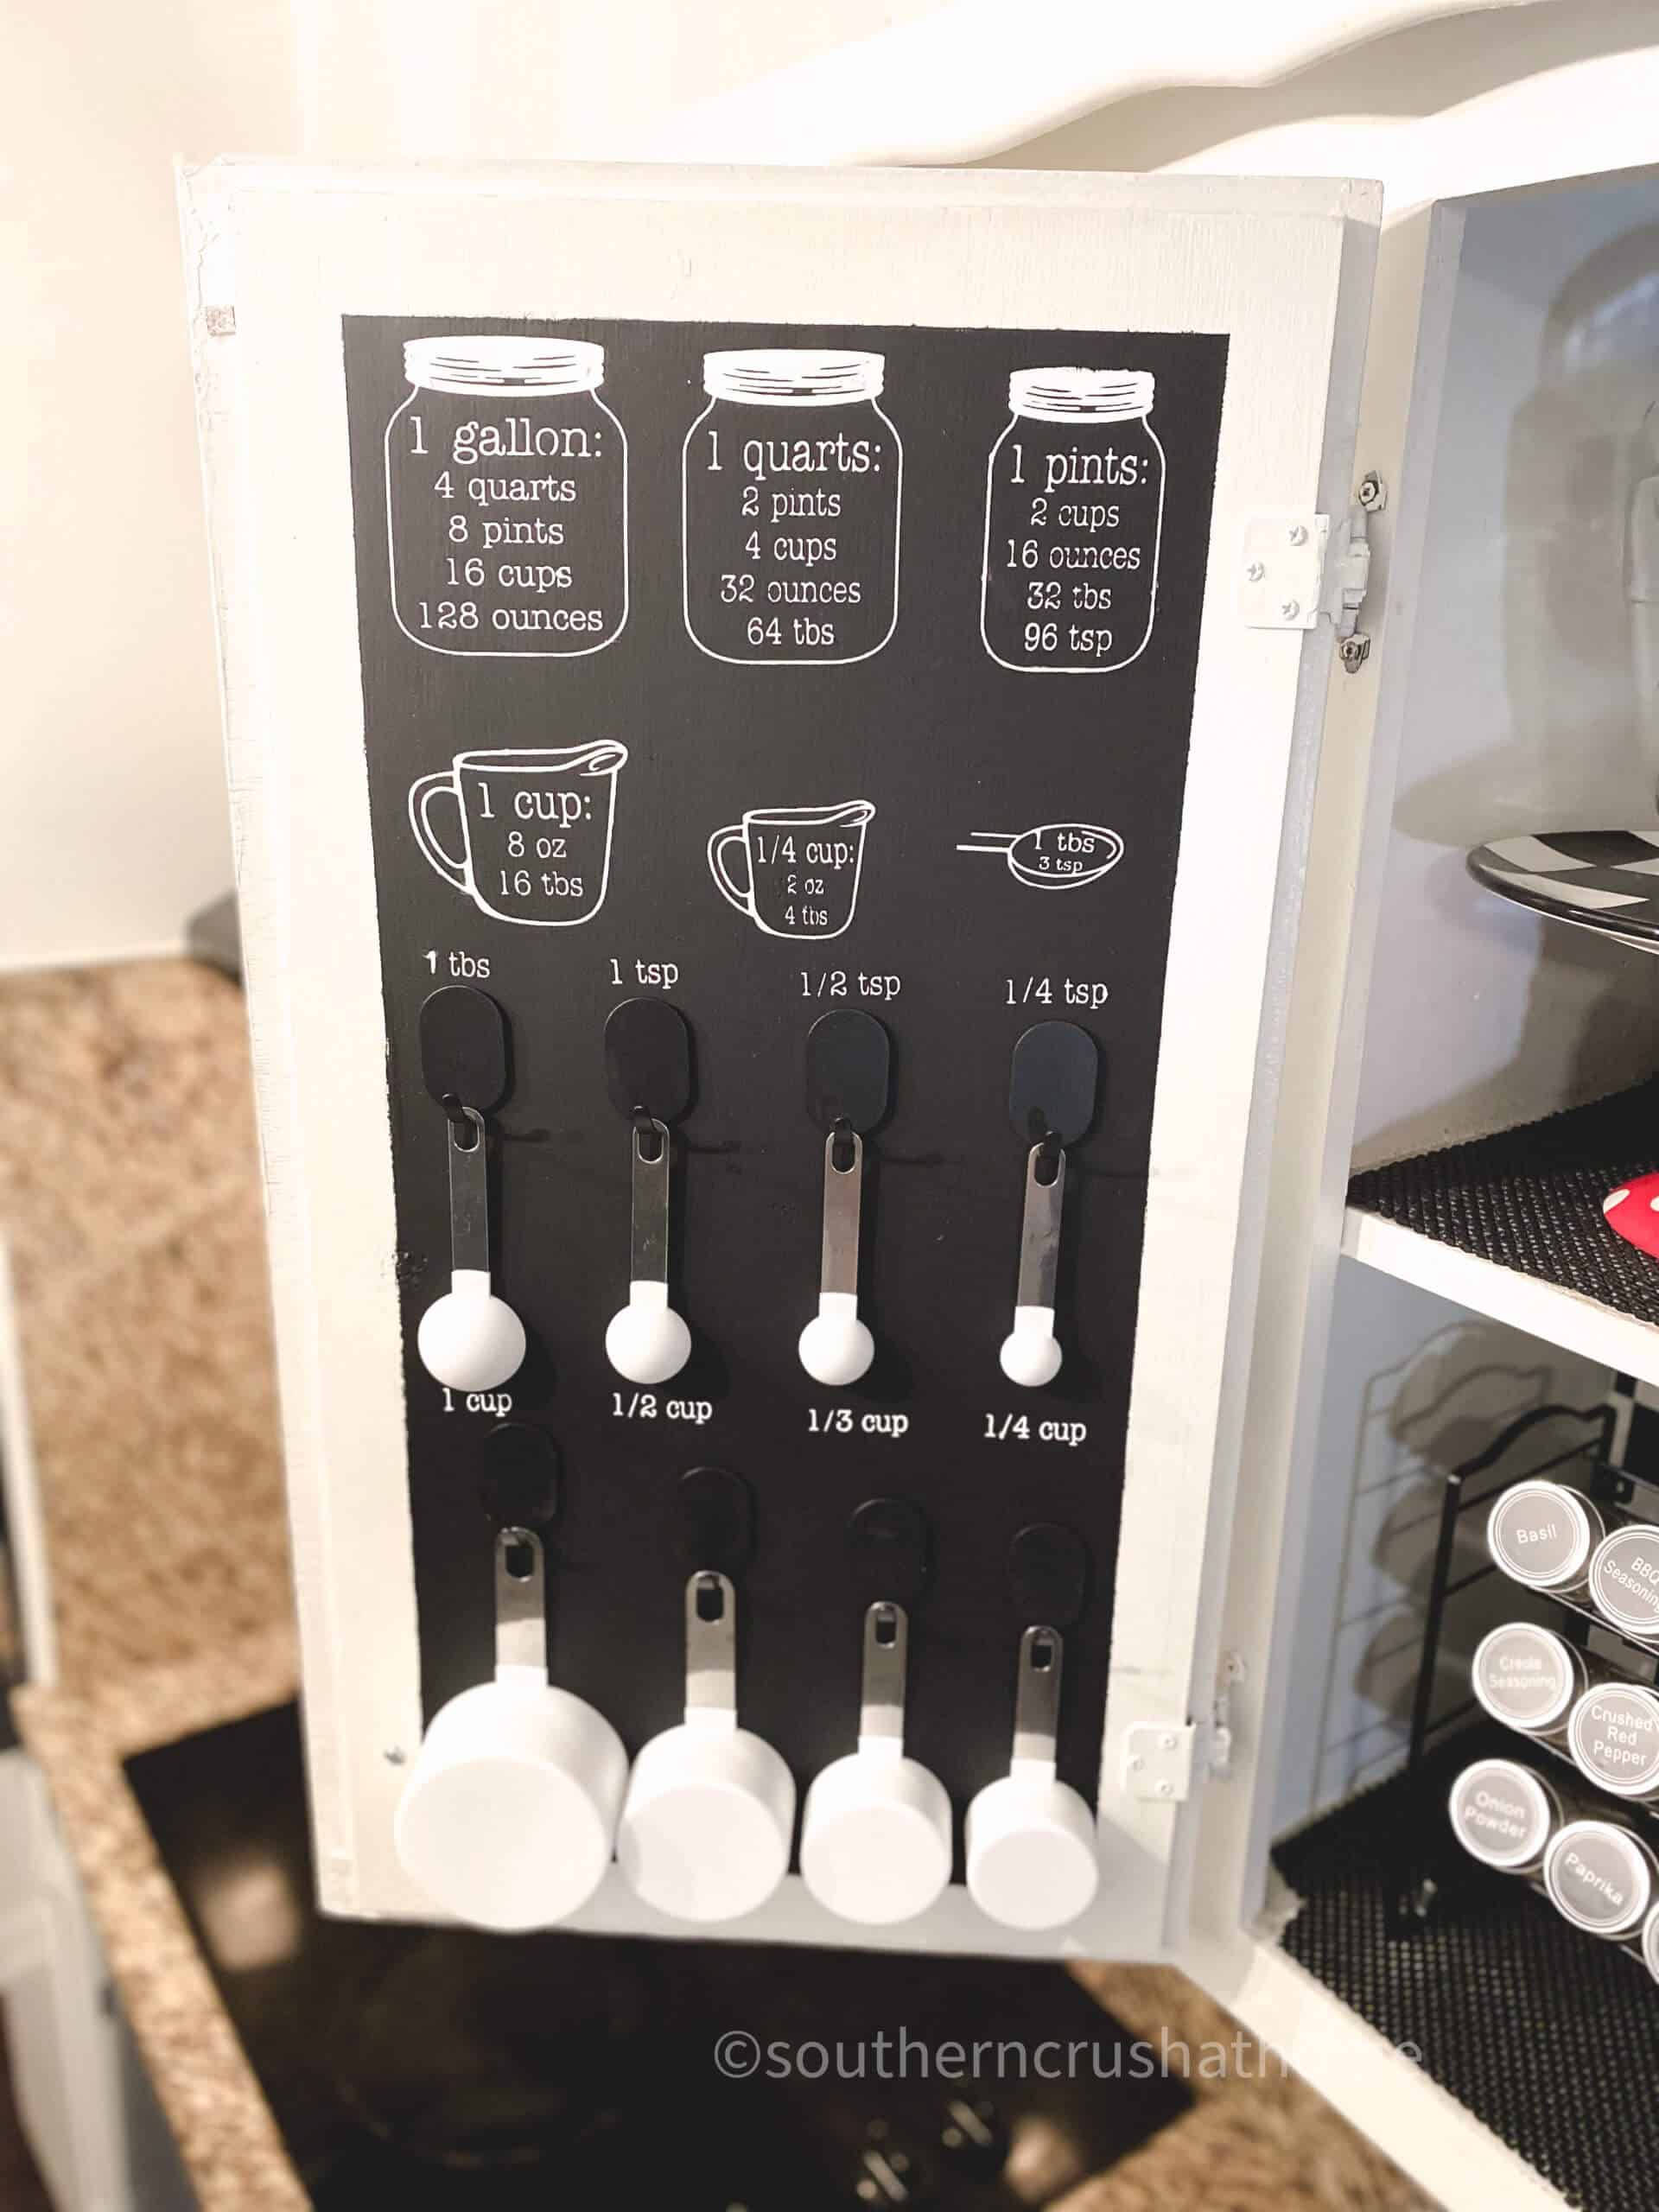
Grab your favorite measurements & conversions chart or use this one for FREE!
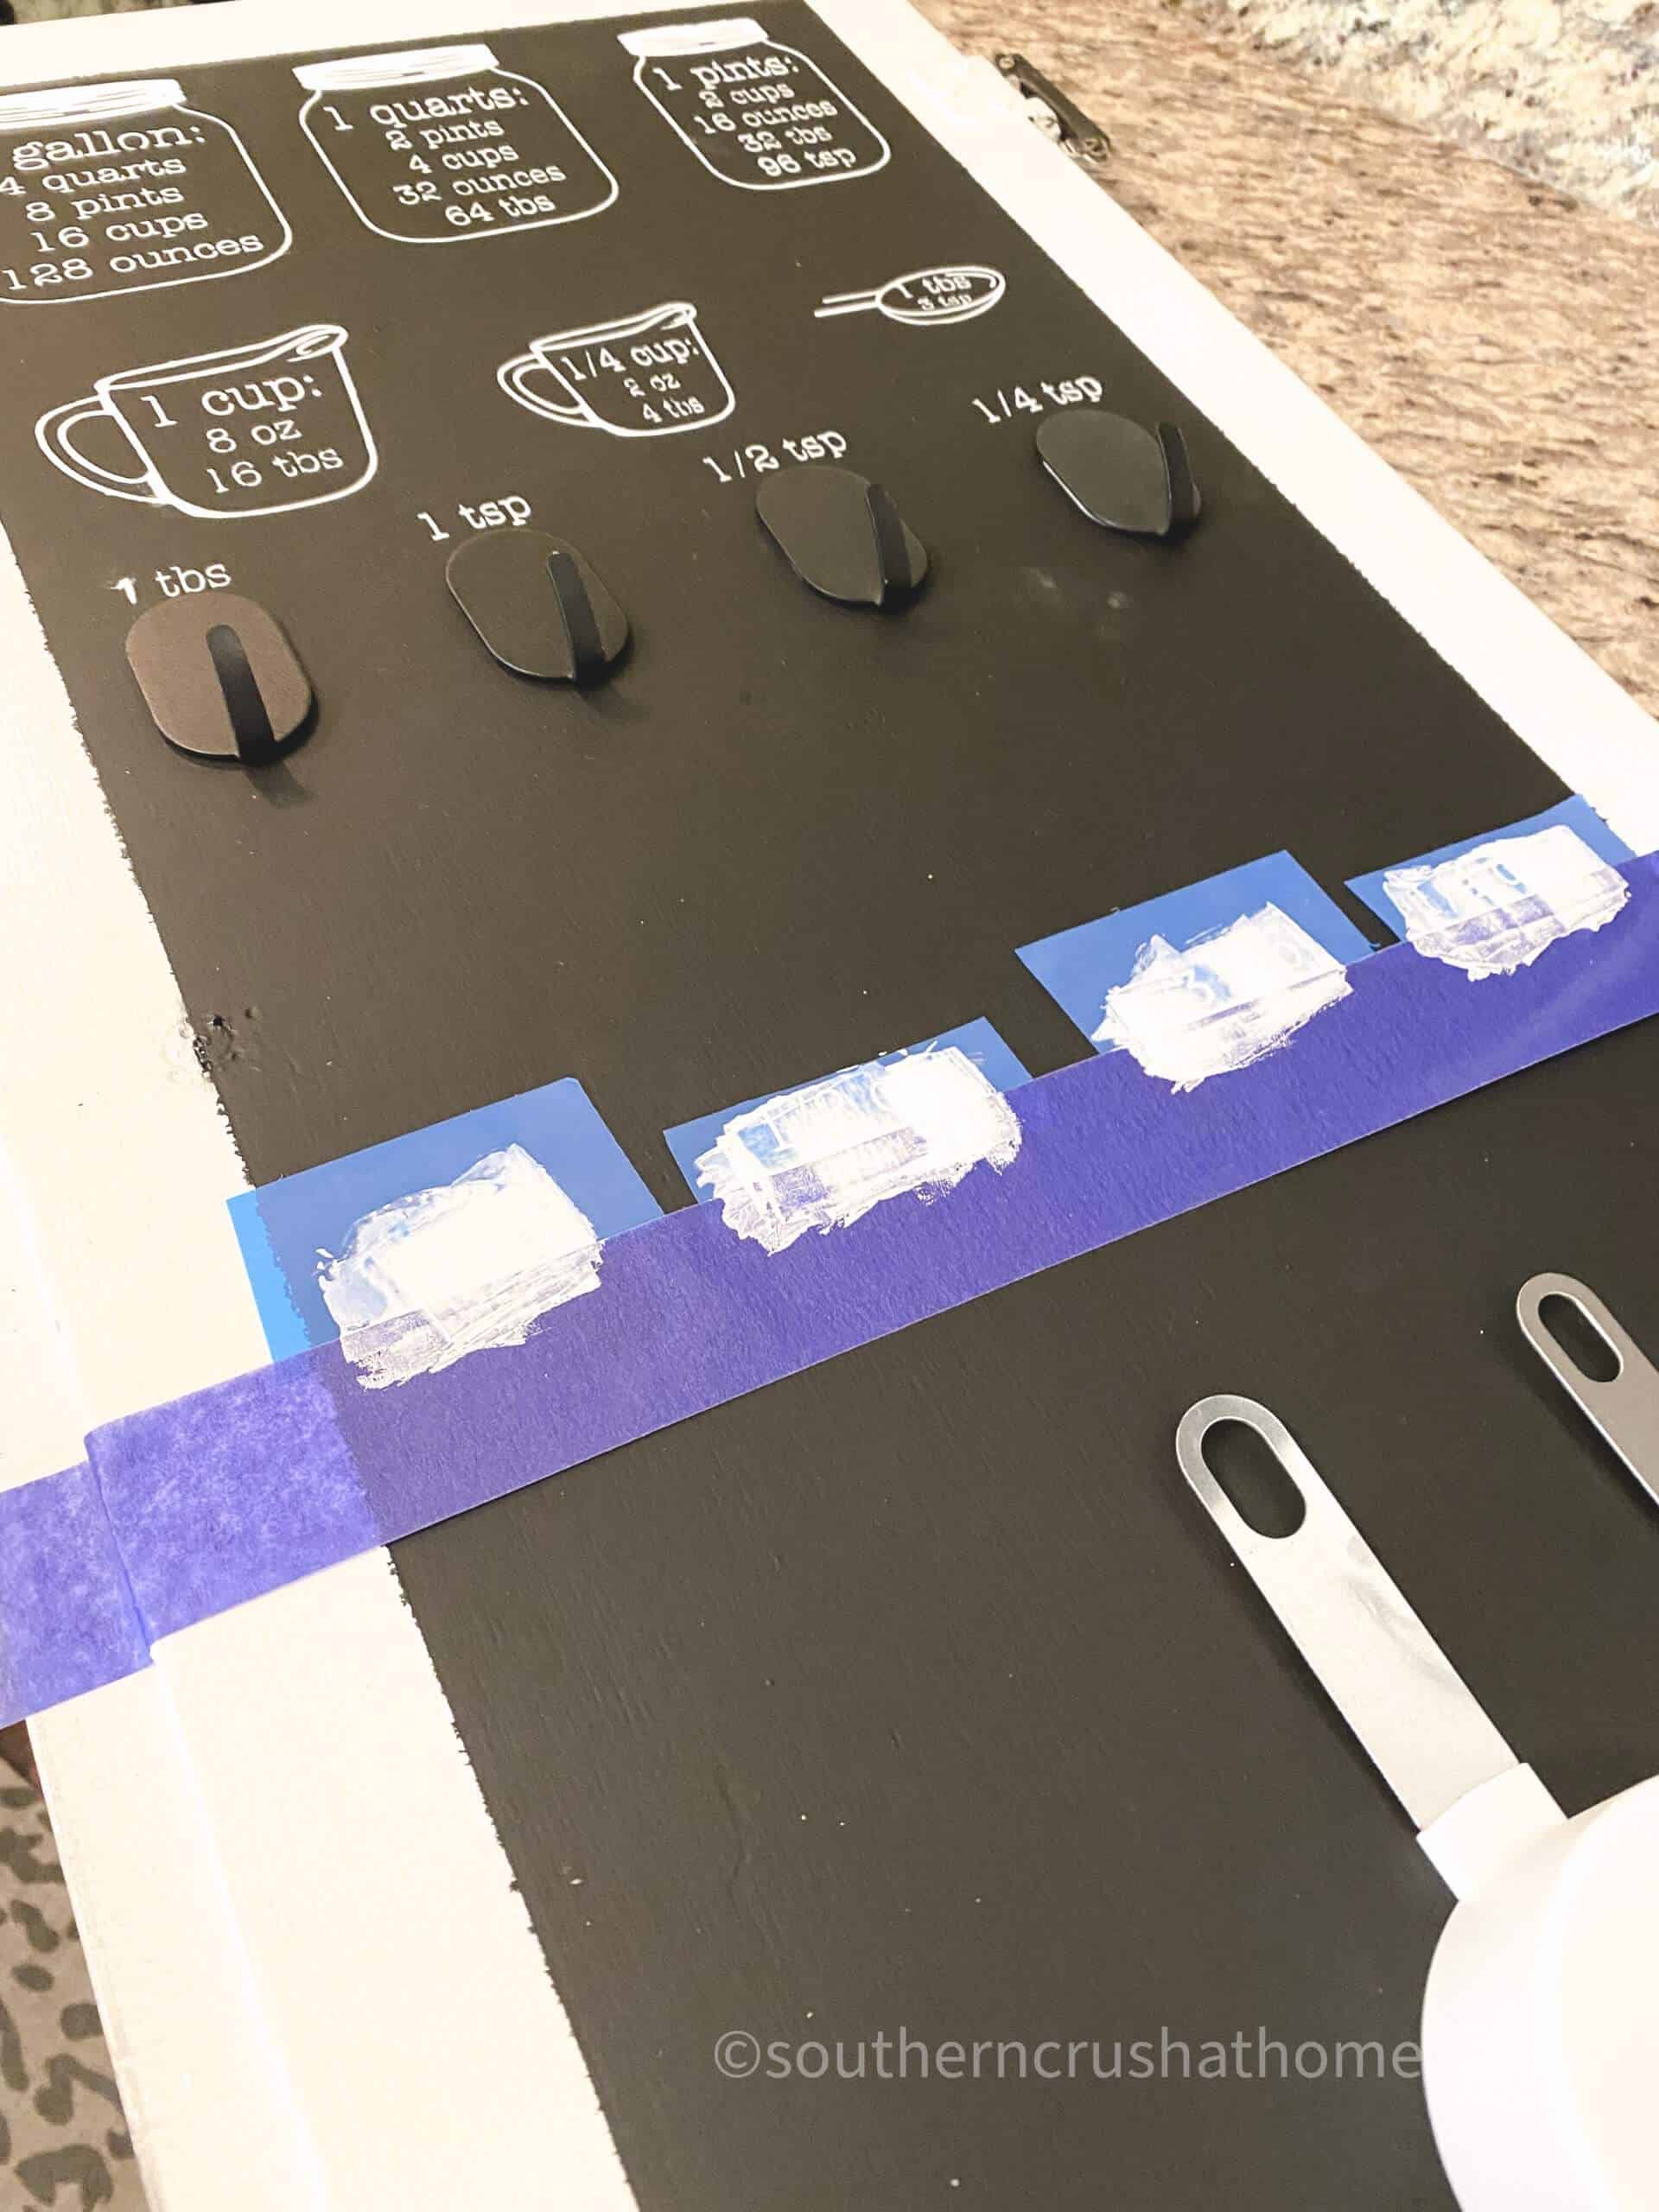
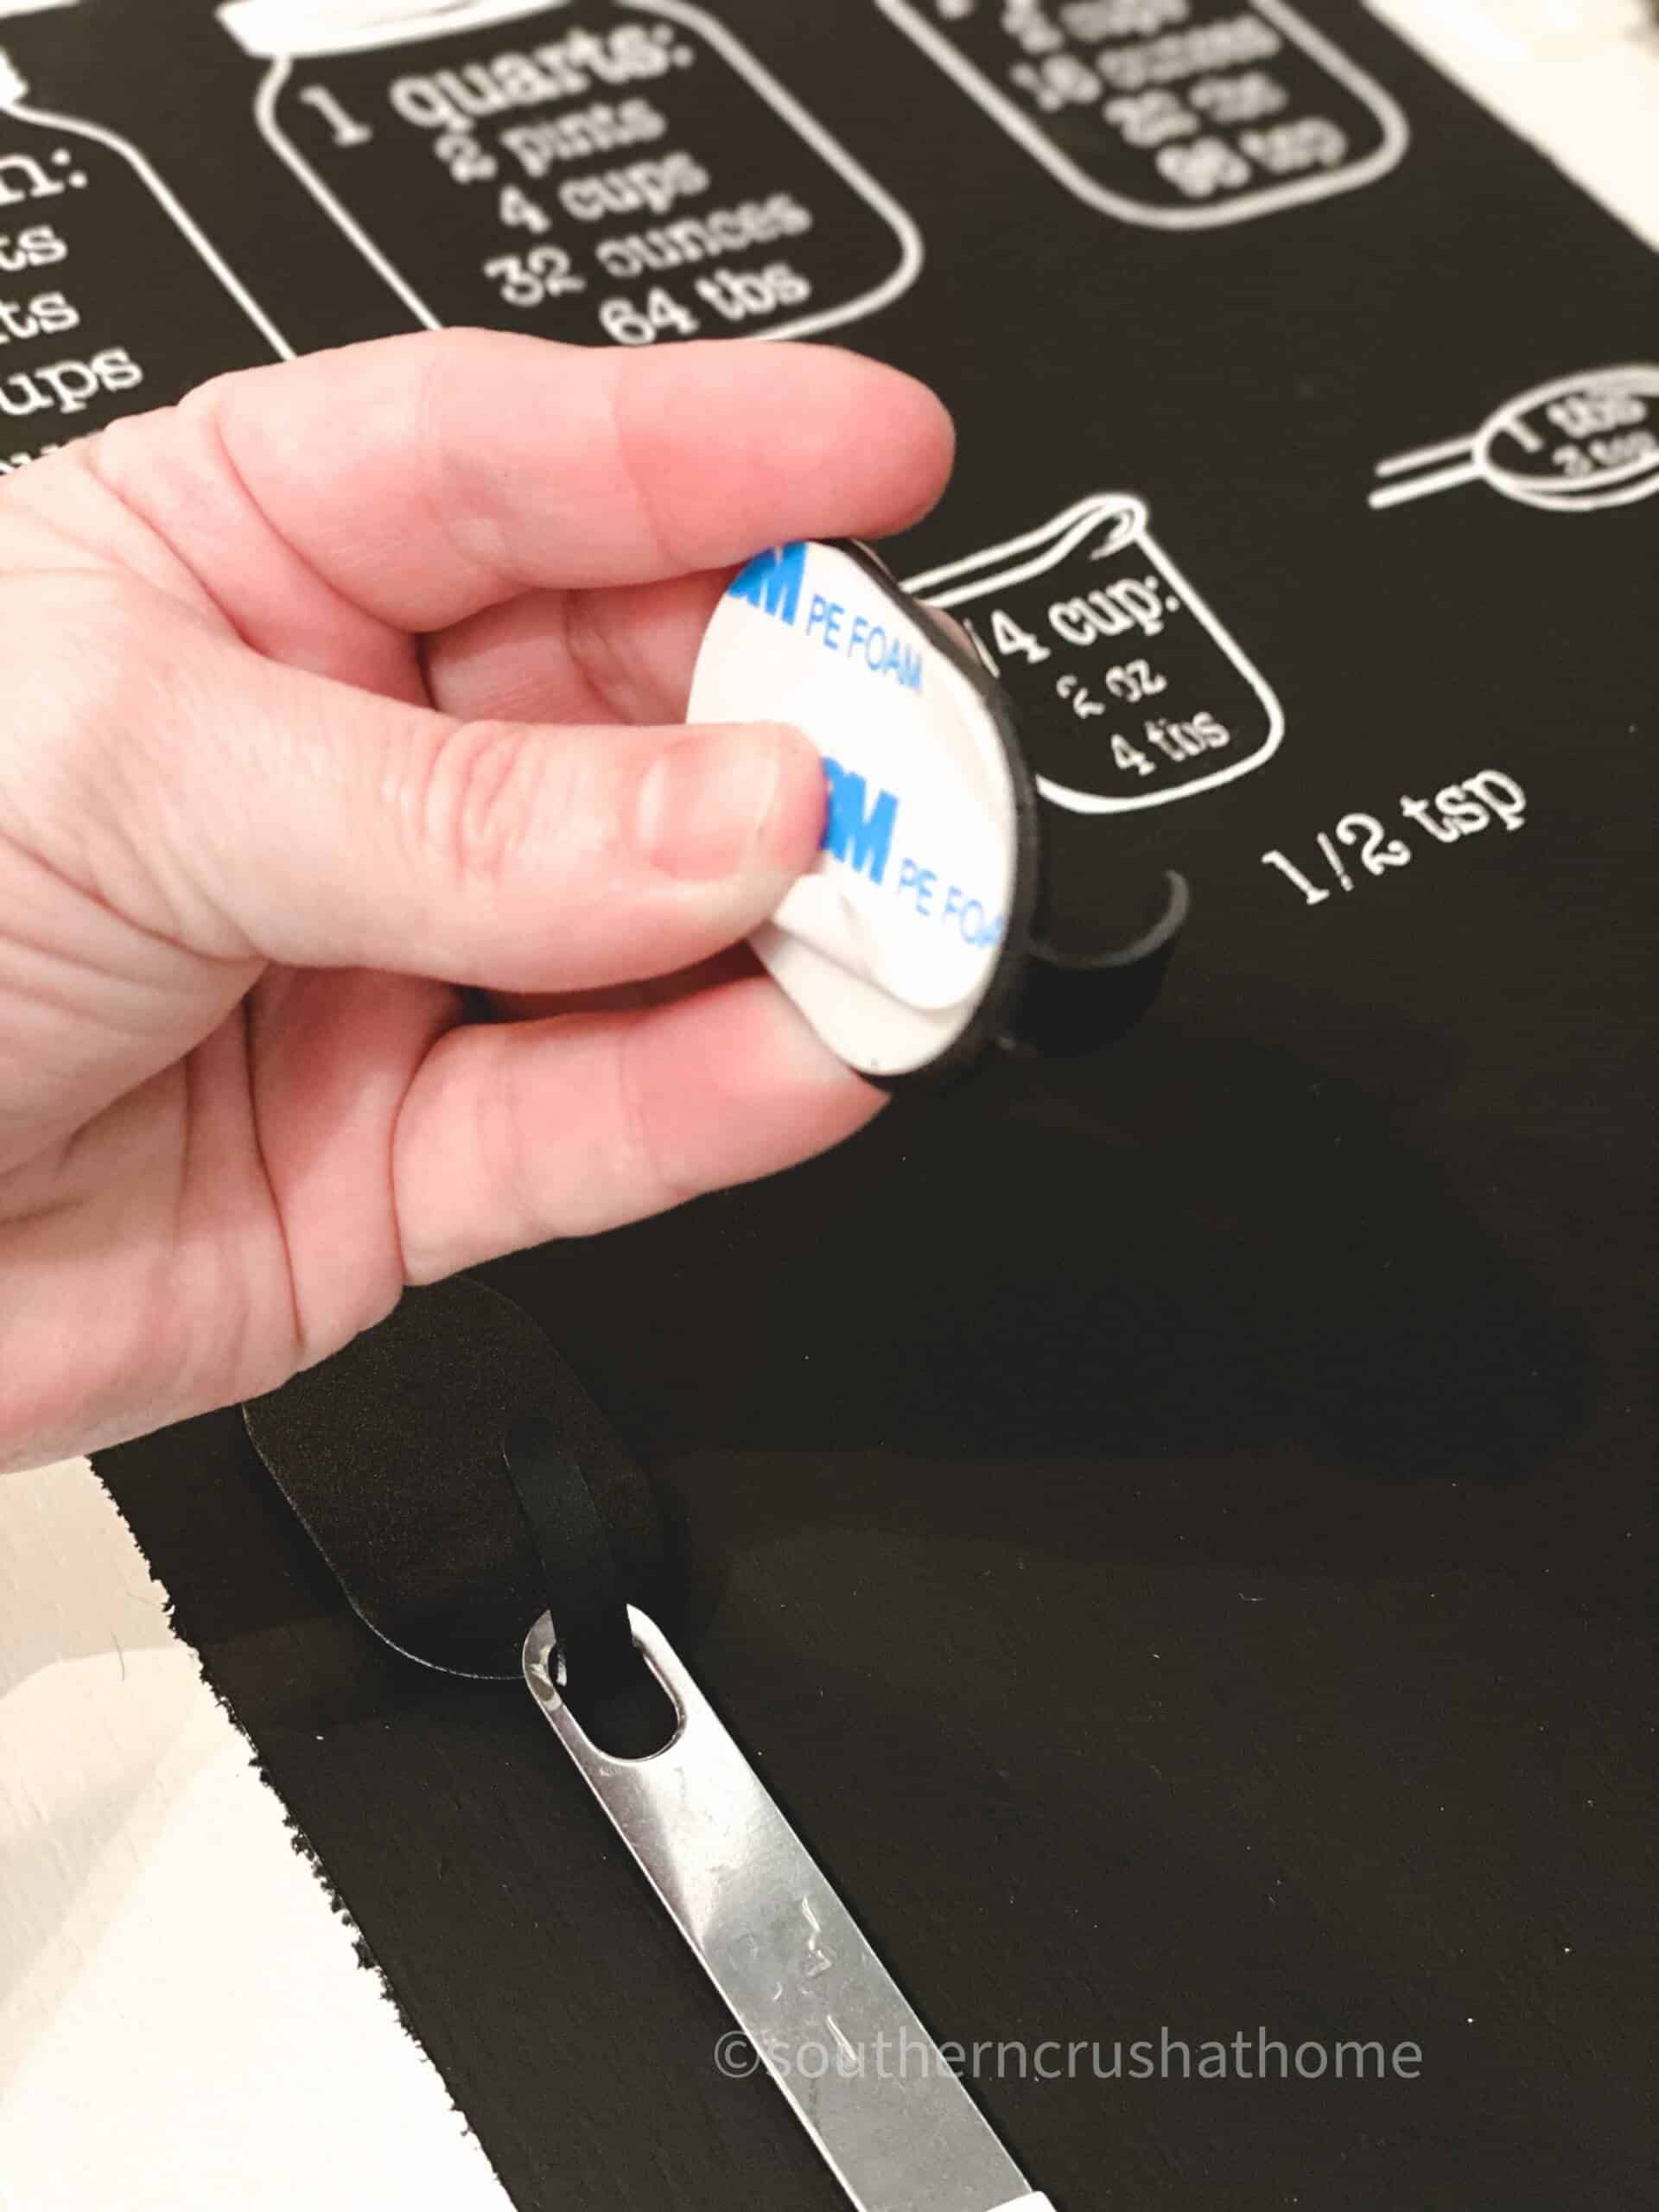
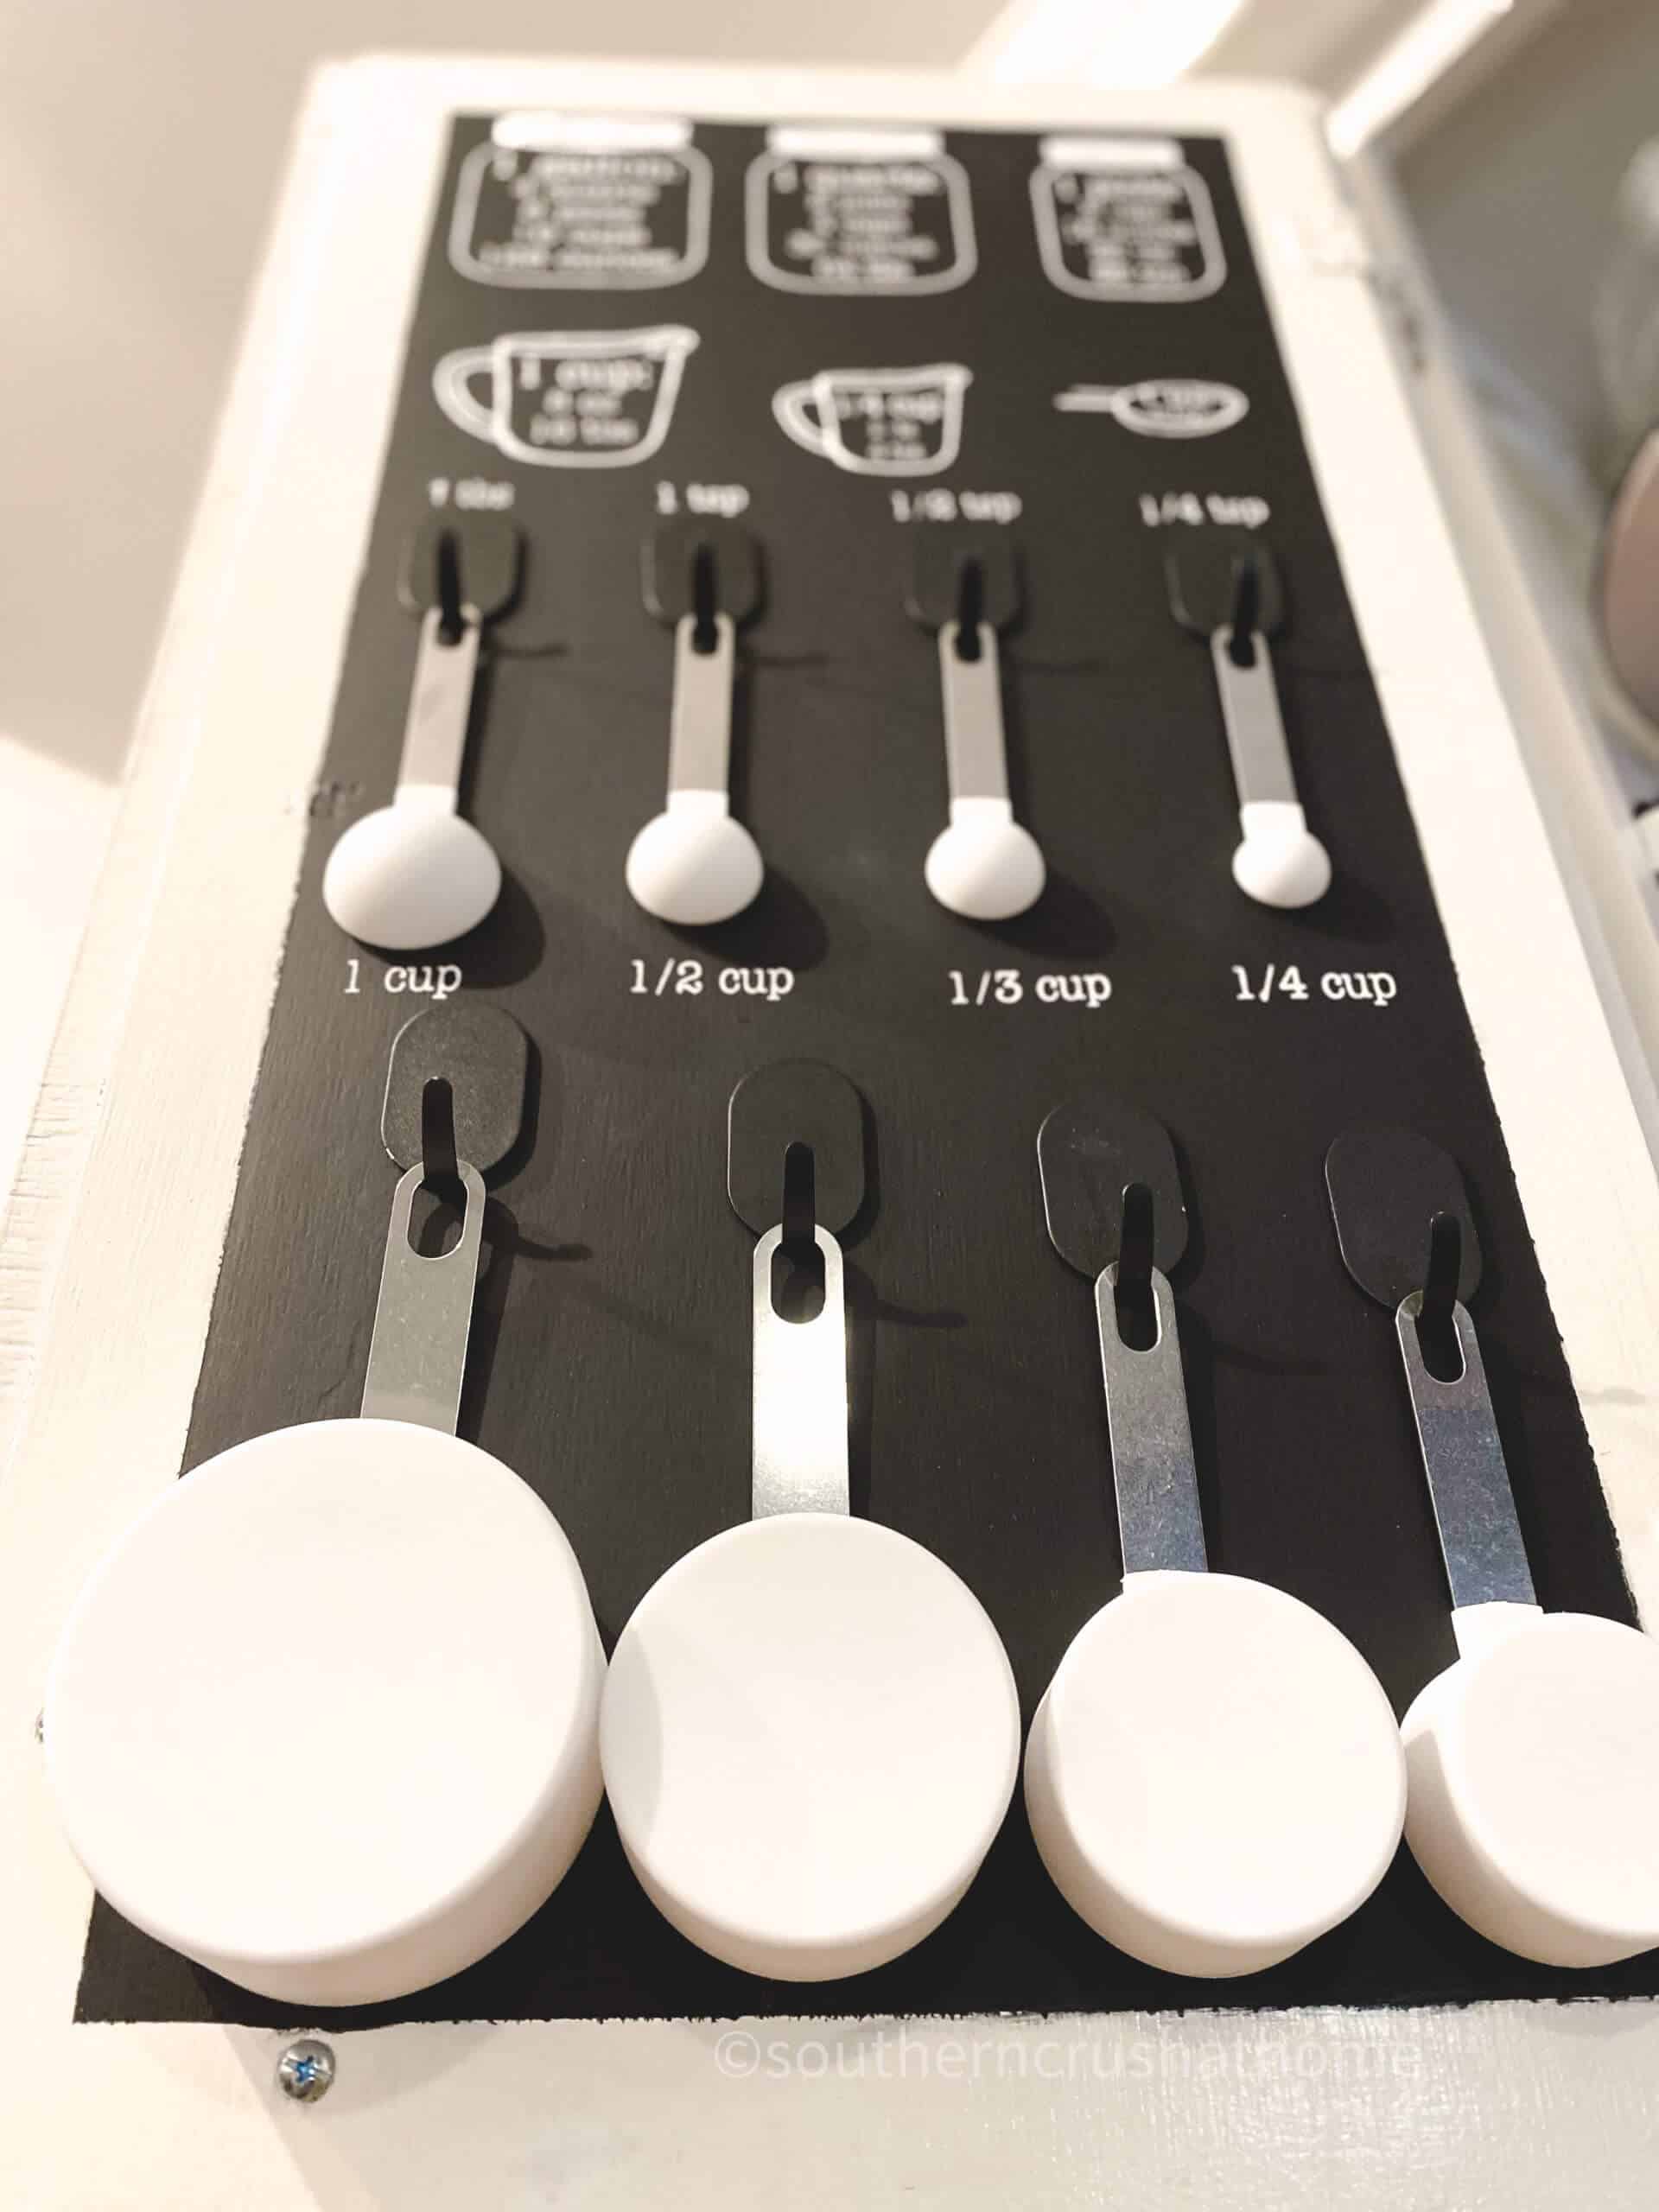
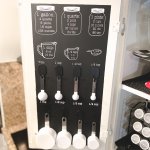
Create a stencil using a cutting machine or a LED stencil maker. Line up the stencils onto the top of the chalkboard section of the cabinet door making sure to space them out to include hooks and measuring cups.
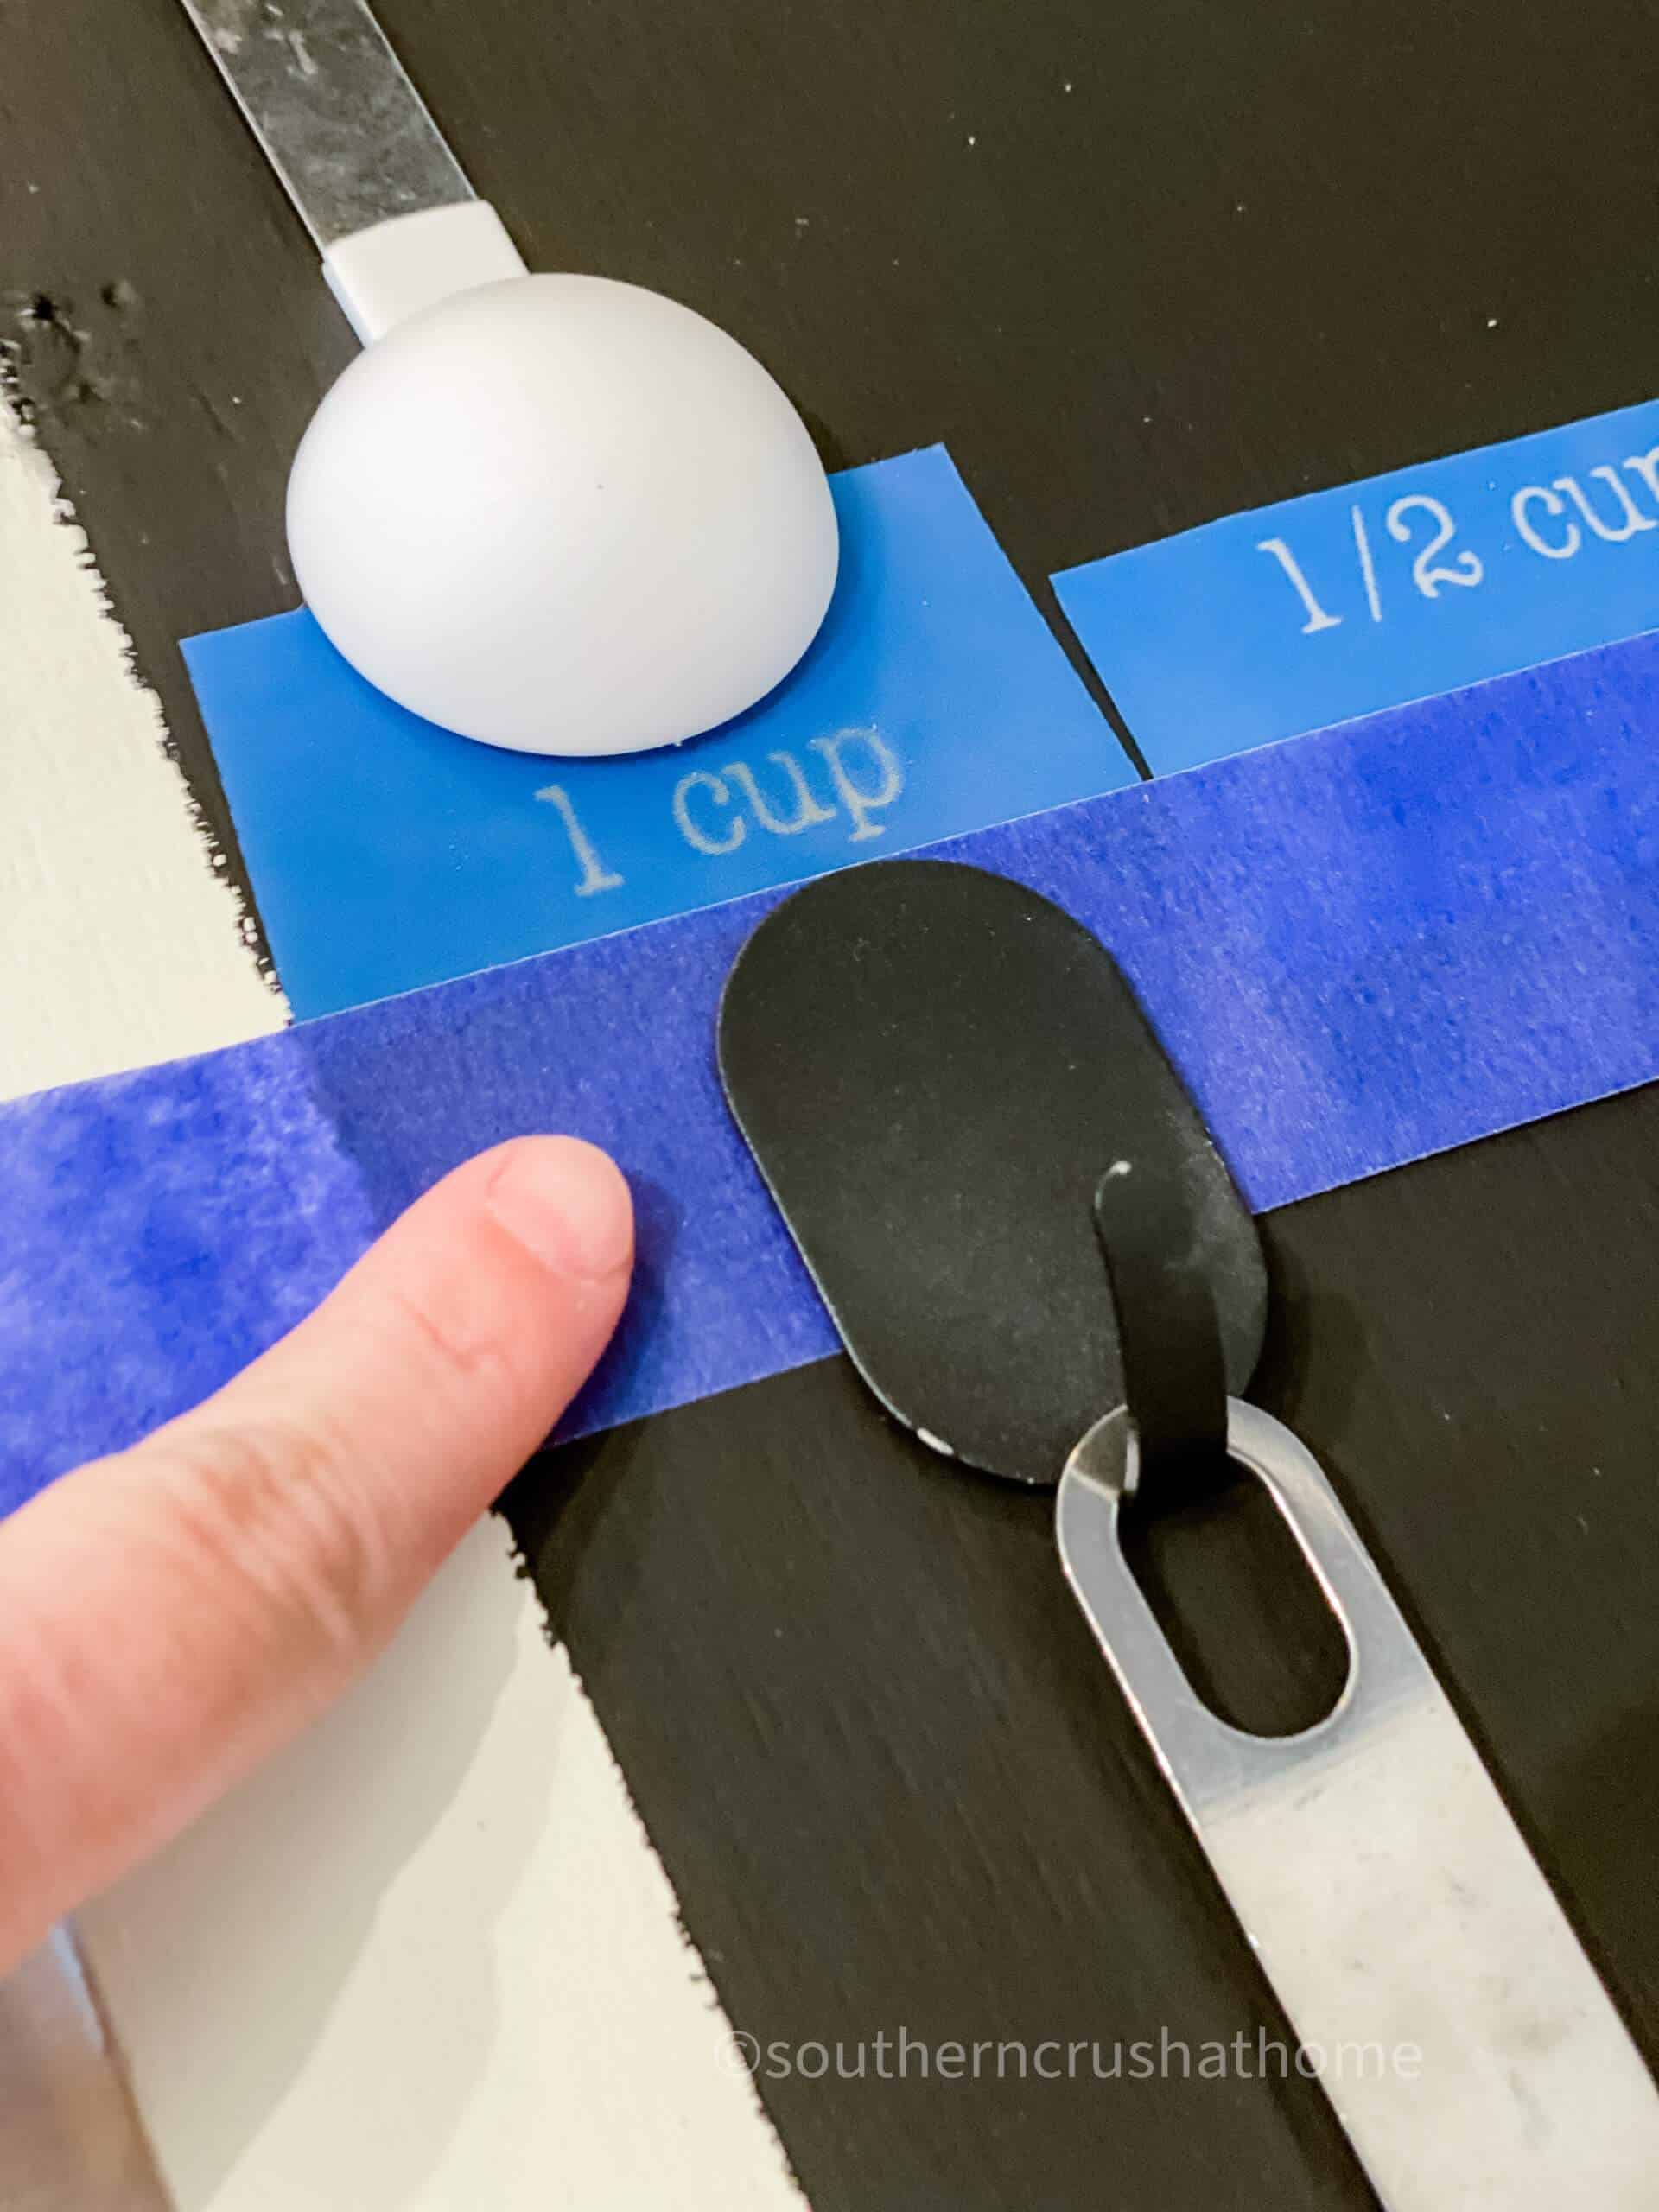
next step
Line up each row using a strip of painter’s tape as a guide. Apply chalk paste to stencils one at a time. Use an artist brush dipped in water for any oopsies!
last step
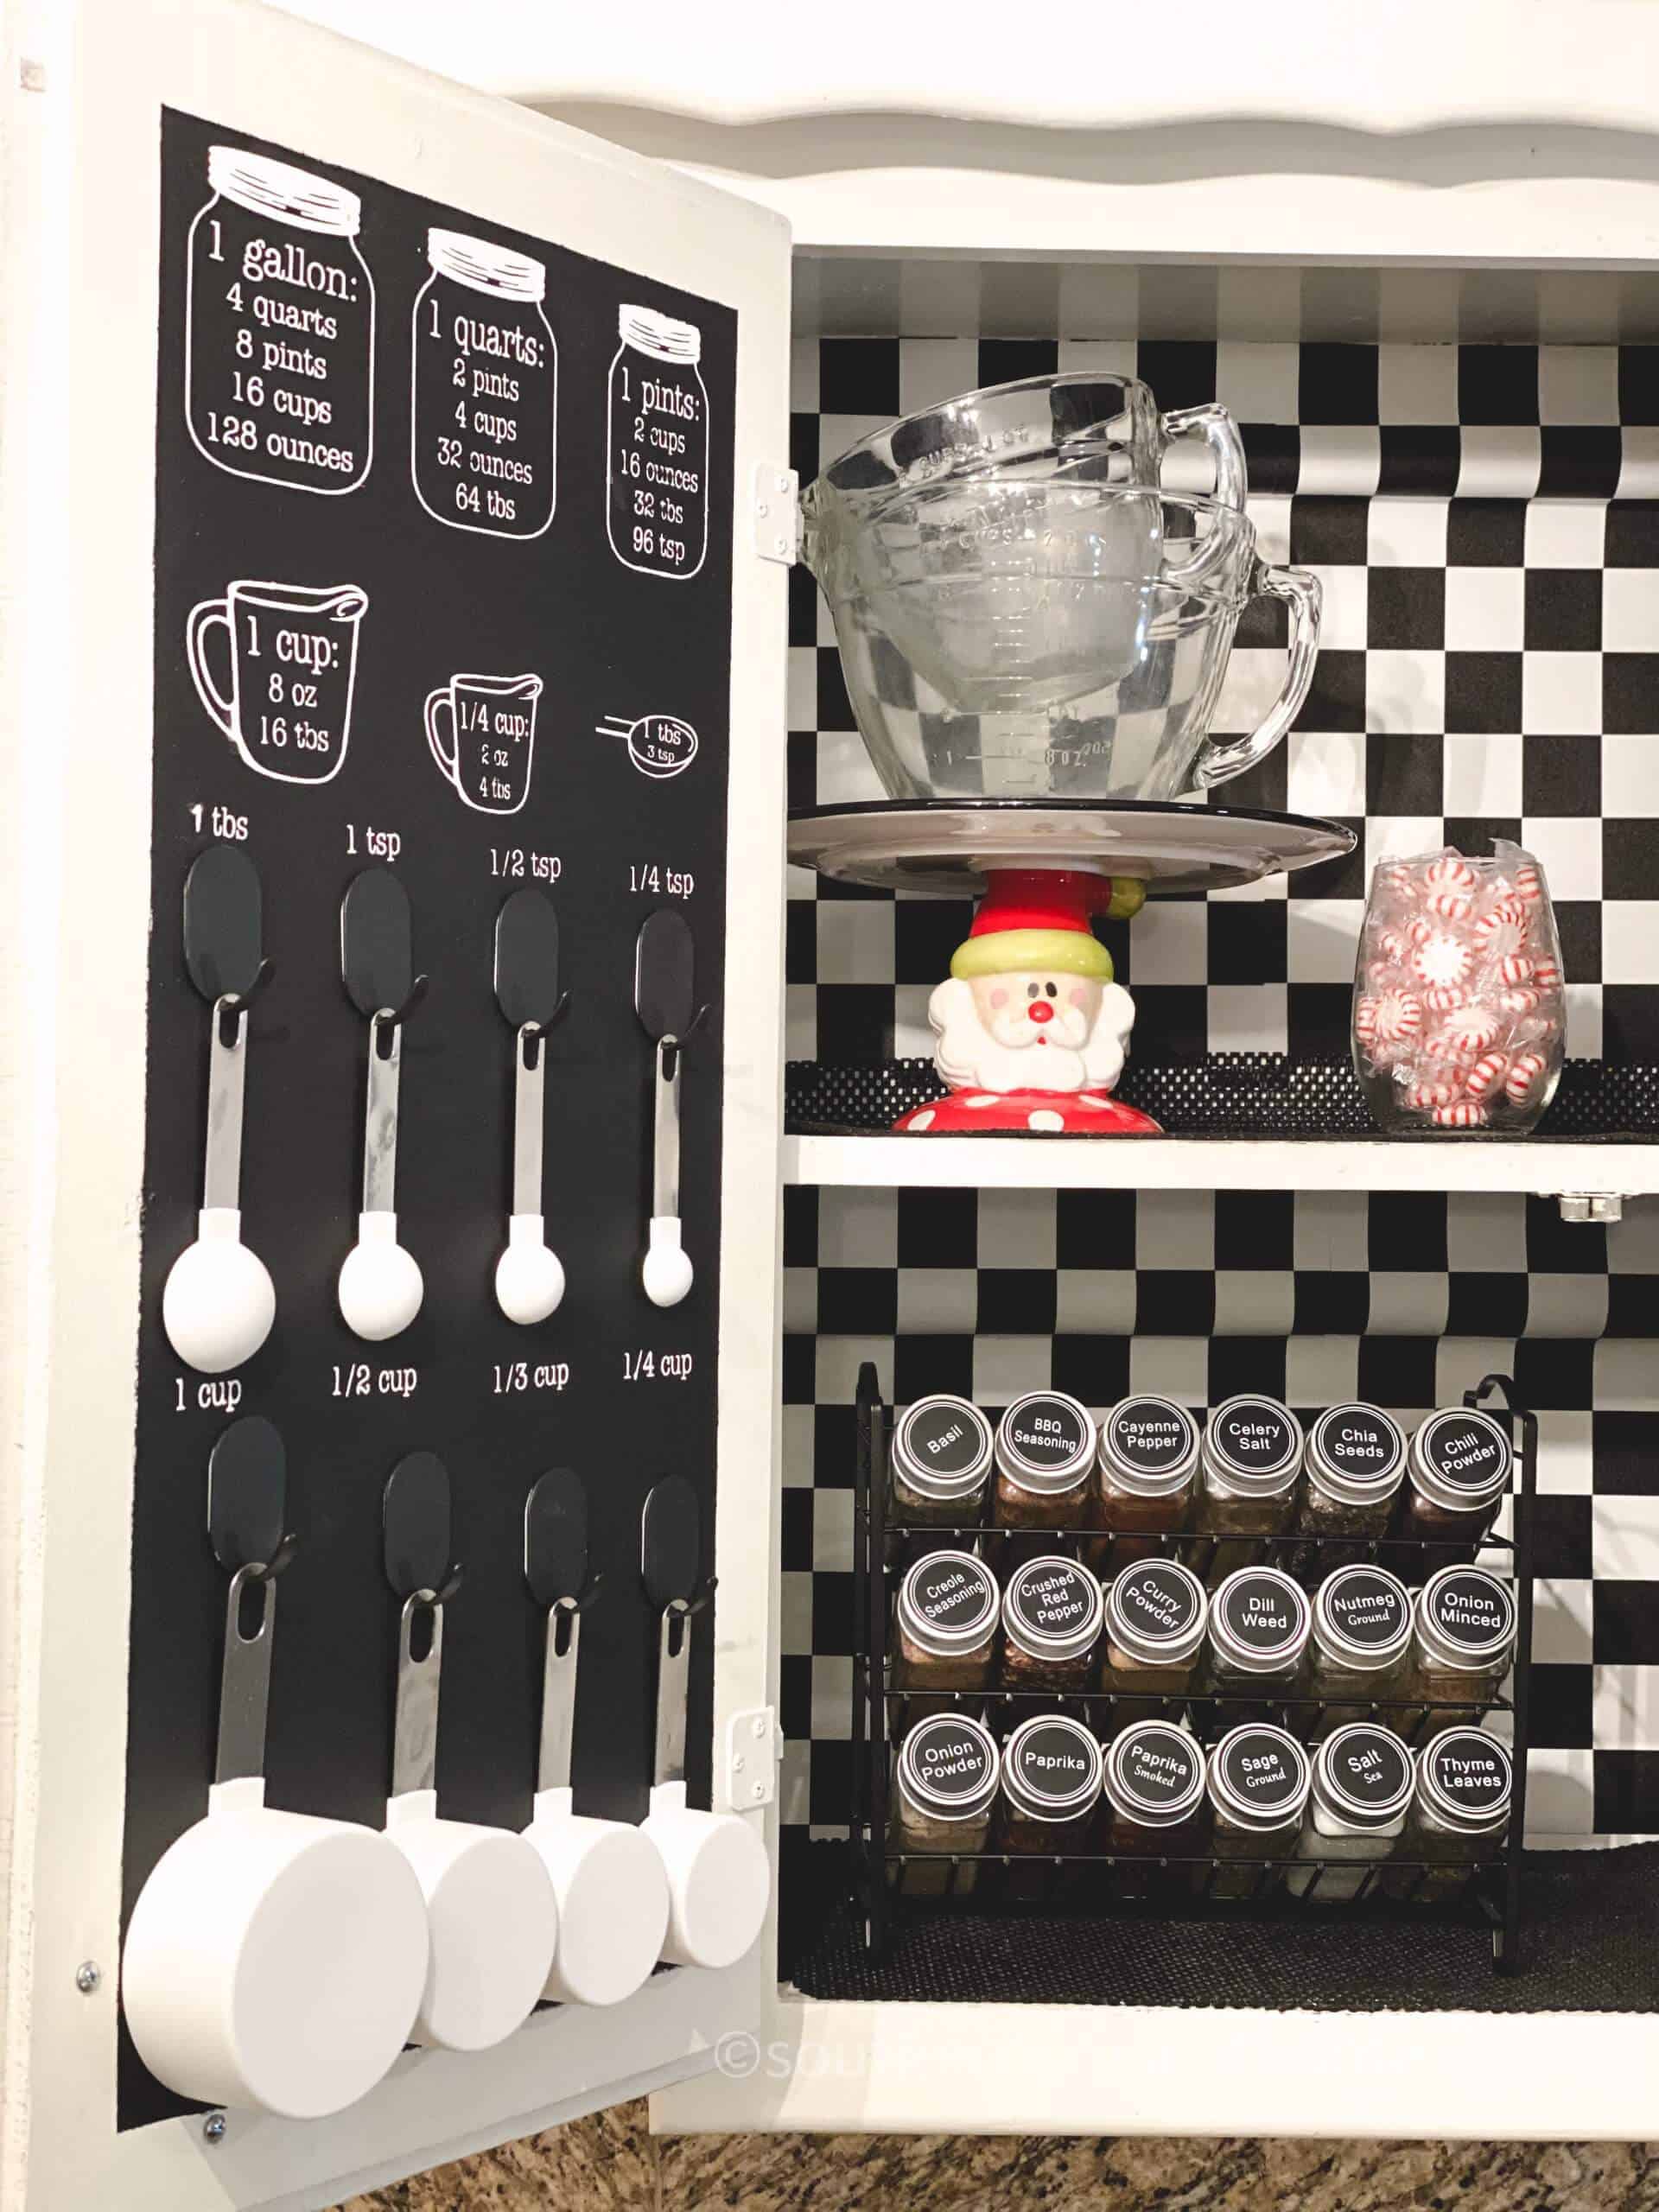
Add adhesive hooks under each cooking measurement and hang measuring spoons and measuring cups! Most sets come with at least 4 spoons (sizes ¼ tsp, ½ tsp, 1 tsp, and 1 Tbsp) and 4 cup sizes: ¼ cup, ⅓ cup, ½ cup, and 1 cup.
- 1 Quart = 4 Cups
- 1 Quart = 2 Pints
- 1 Pint = 2 Cups
- 1 Cup = 8 Ounces
- 1 Cup = 16 Tbsp
- 1 Tbsp = 3 Tsp
I use this conversion below all of the time!
Butter
1 cup butter = 2 sticks = 8 ounces = 230 grams = 8 tablespoons
what does 1 cup equal?
- 1 cup = 8 fluid ounces
- 1 cup = 16 tablespoons
- 1 cup = 48 teaspoons
- 1 cup = ½ pint
- 1 cup = ¼ quart
- 1 cup = 1/16 gallon
- 1 cup = 240 ml
Helpful Tip…
Use goof off to remove any black paint mishaps. It works perfectly applied to a paper towel and gently swiped on the edge of the white cabinet door.
Speaking of tips, you may be interested in reading my top 4 ideas for making meal planning less stressful!
Now, let’s get to applying those adhesive hooks and hang the measuring cups and spoons!
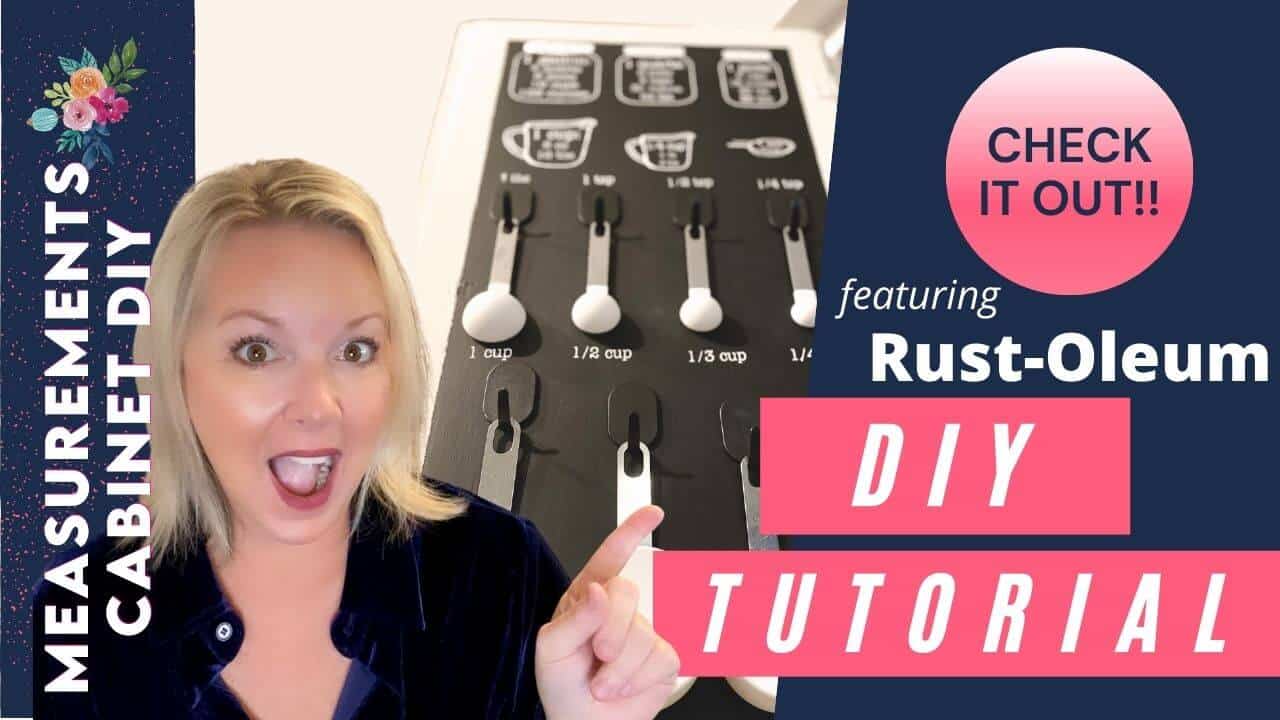
STEP BY STEP VIDEO TUTORIAL
If you are more of a visual learner you may want to see the exact step-by-step process, be sure to check out this video tutorial below over on my YouTube Channel!
cooking and baking chart cabinet door DIY
I can’t wait to bake and cook again with ease! This handy dandy chart is conveniently located right next to my stovetop.
This DIY project took a bit of patience “measuring” all of the spaces on the measuring chart, but I think it turned out amazing thanks to Rust-Oleum Imagine chalkboard paint! I cannot believe it took me so long to do one of these for myself!
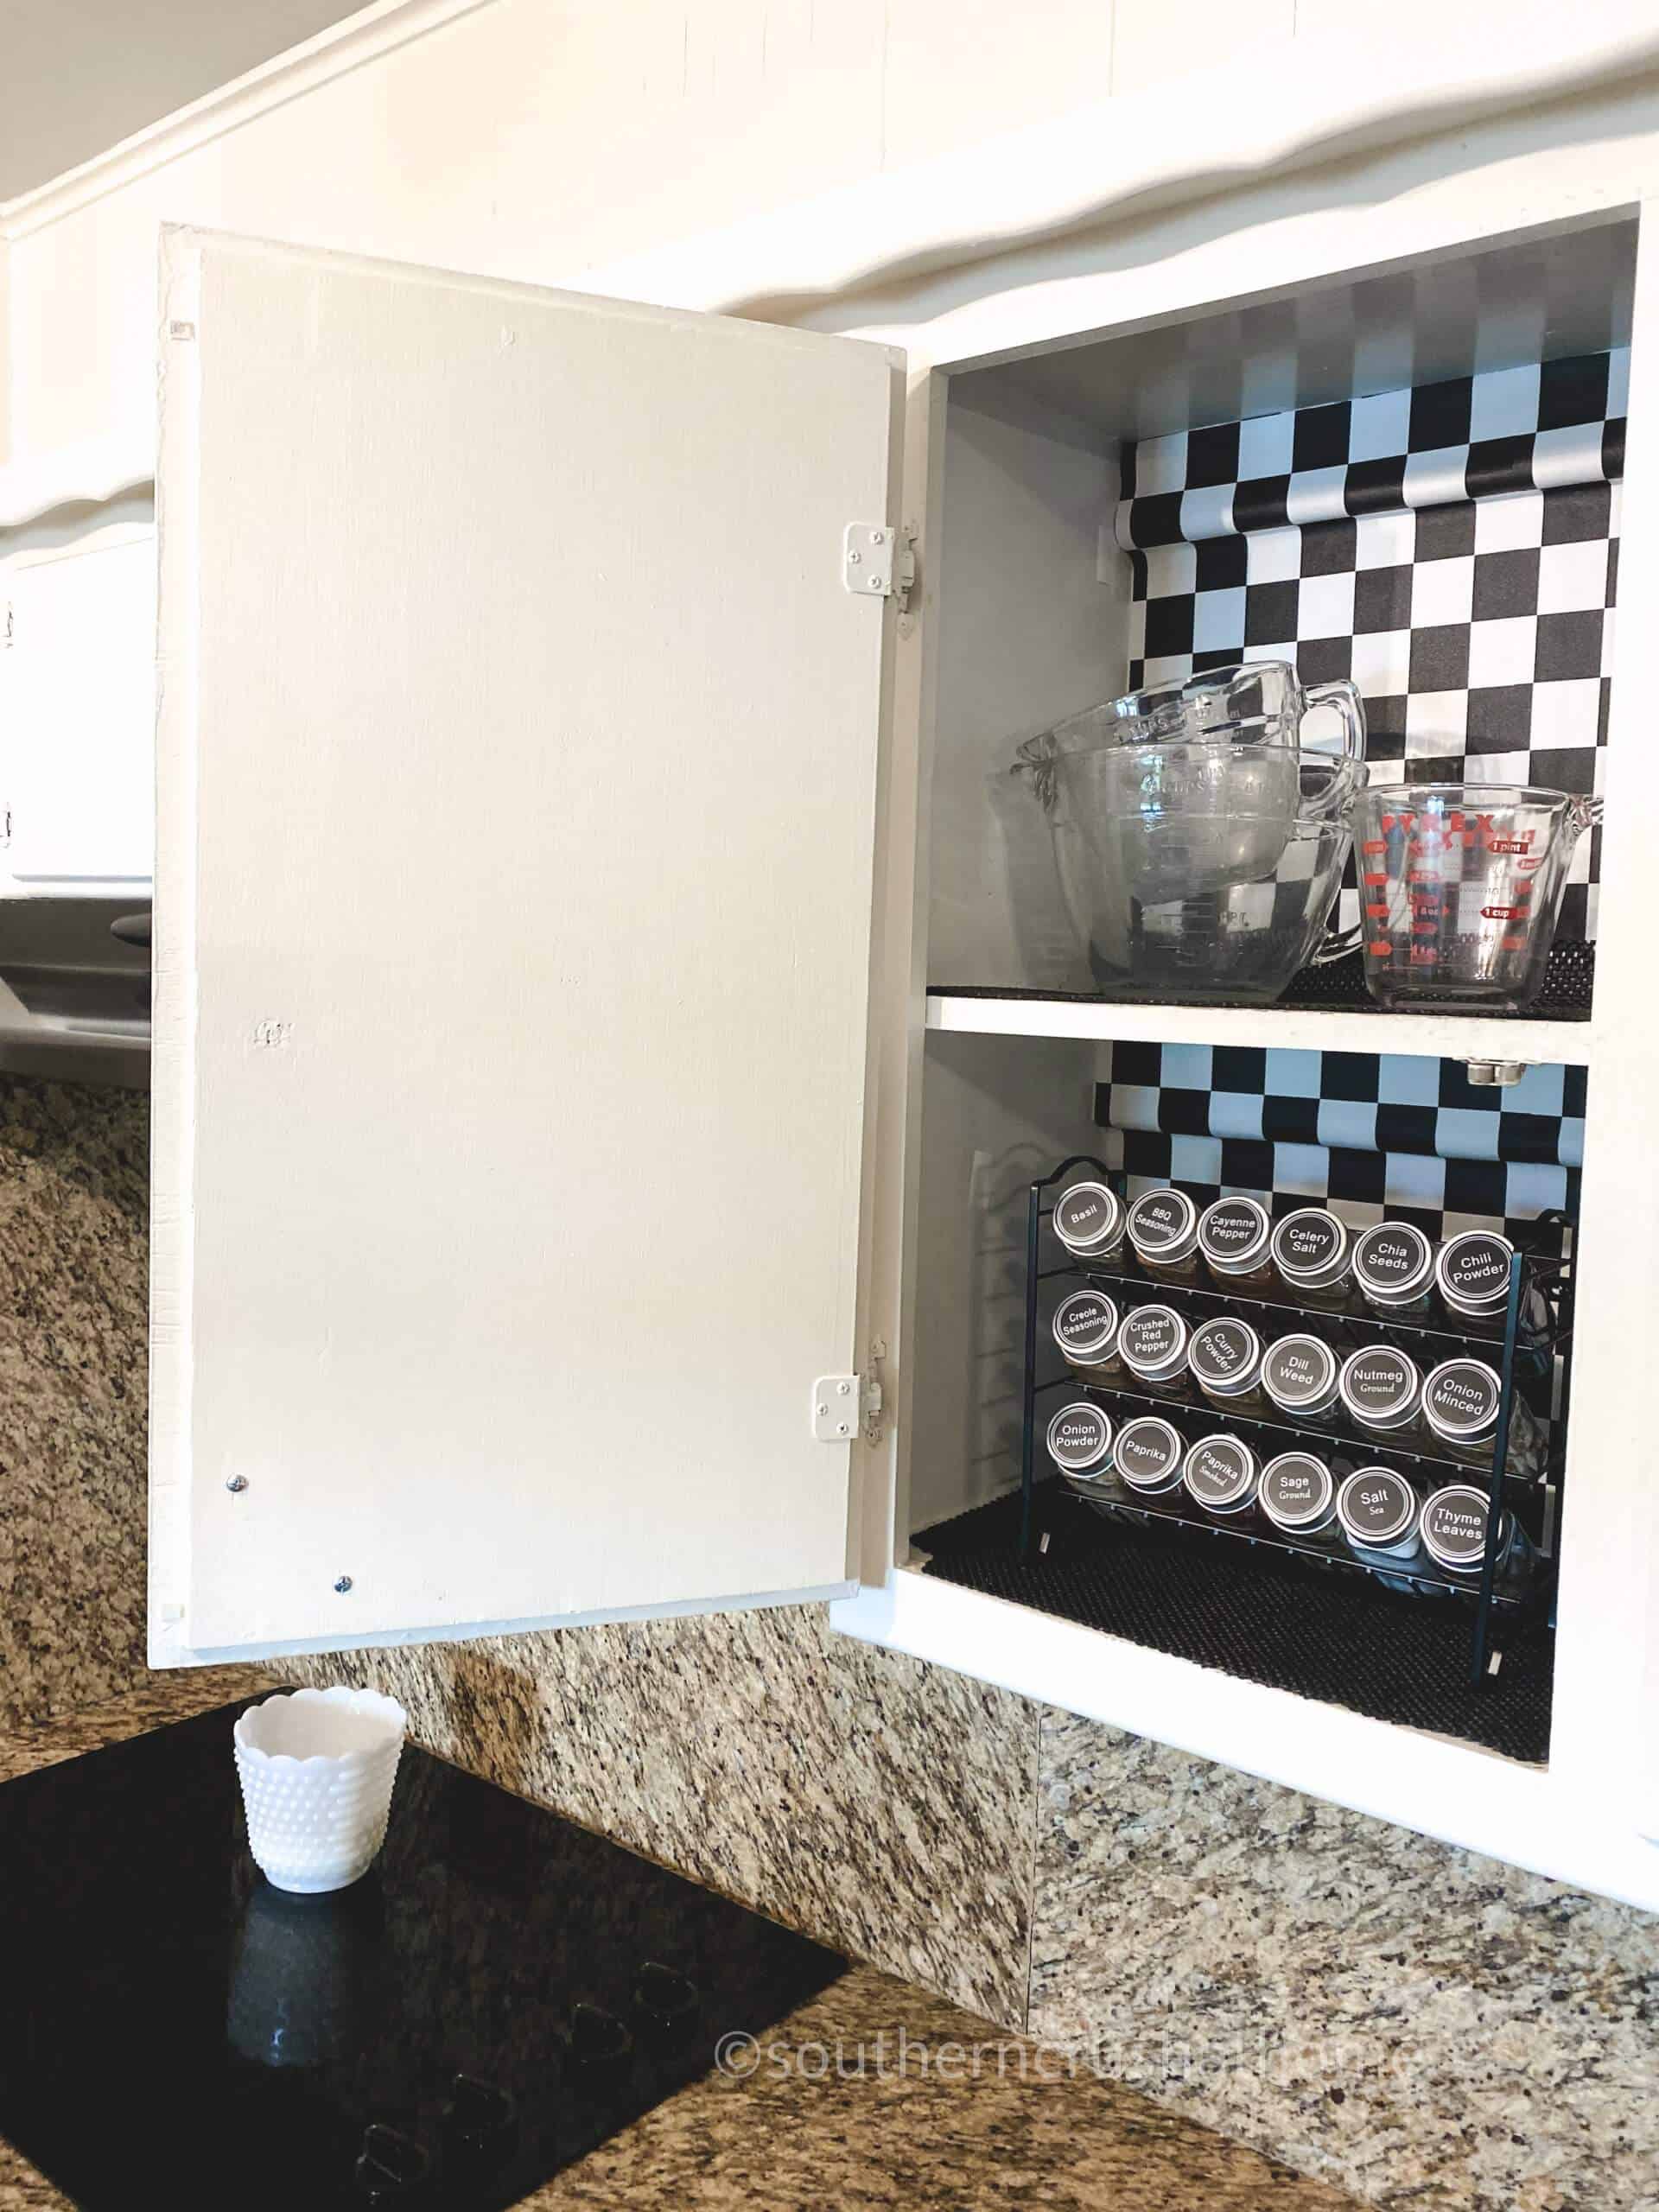
Cooking and baking for the holidays will be so much easier! No more searching for all of those scattered measuring spoons and missing measuring cups. They are all in one pretty spot now! I’m in love… it even matches my new spice organizer!
If you like projects like this, you’ll love how easy it is to organize your refrigerator in 5 simple steps HERE.
Here are my favorite holiday recipes
- Pumpkin Spice Cake for Thanksgiving
- Easy Pumpkin Spice Drop Cookies
- 3 Ingredient Chocolate Fudge for Christmas
- 3 Ingredient Christmas Tree Fudge
Do you like to bake or cook better? What are your favorite holiday recipes? Would one of these chalkboard measuring and conversion charts be an amazing addition to your kitchen? Let me know in the comments below.
Be sure to PIN this one for later!
#rustoleum, #rustoleumimagine, #christmasbaking, #christmasdecor, #holidayseason, #holidaybaking, #bakingfromscratch, #sponsored
Basic Cooking Measurements & Kitchen Conversions Chart DIY (featuring Rustoleum)
Equipment
- drill or screwdriver
Materials
- Painter’s tape
- Rustoleum chalkboard paint
- Measurement & Conversion stencils
- Chalkpaste
- Optional chalk paint pens
- Adhesive hooks
- Goof off
Instructions
- Remove the kitchen cabinet from it's hinges using a screwdriver or a power drill.
- Using painter's tape, tape the parameter of the cabinet door and make sure to cover outside edges as well to prevent any overspray.
- Spray Rustoleum's Chalkboard Spray paint in smooth even strokes across the cabinet door. Apply a thin layer and allow it to dry an hour. Then add a second thin layer and allow it to dry completely.
- carefully remove the painters tape from the edges.
- Grab your favorite measurements & conversions chart or use this one for FREE!
- Create a stencil using a cutting machine or a LED stencil maker.
- Line up the stencils onto the top of the chalkboard section of the cabinet door making sure to space them out to include hooks and measuring cups.
- Line up each row using a strip of painter's tape as a guide. Apply chalk paste to stencils one at a time.
- Add adhesive hooks under each cooking measurement and hang meauring spoons and measuring cups!
I would love to get one of the stencils for the kitchen conversion chart. I couldn’t find the price for this. Please let me know how to order it.
Thank you,
The stencil was made with my Ikonart machine as a single stencil and I do not make them currently for sale. There is a printable in the ‘freebies’ section of my site that you can use to make a stencil for your cutting machine.