How to Make an Easy Deco Mesh Wreath (using a kit)
If you’ve ever wanted to make a deco mesh wreath; but, weren’t sure how to do it then this is the tutorial for you! A super cute wreath on your front door can make such a difference in your curb appeal and is sure to spread joy to the entire neighborhood. You’ll love the feeling of creating your very own showstopper deco mesh wreath for your door. Making a wreath has never been this beautiful and easy.
*This post contains affiliate links. If you make a purchase using one of my links I may be paid a small commission. This in no way affects your pricing.

Be sure to PIN this for later!
supplies needed for making deco mesh wreath
- Unique in the Creek Wreath Board (round or triangle) 100% recycled plastic and includes pre-drilled guide holes to securely and reliably affix your deco mesh
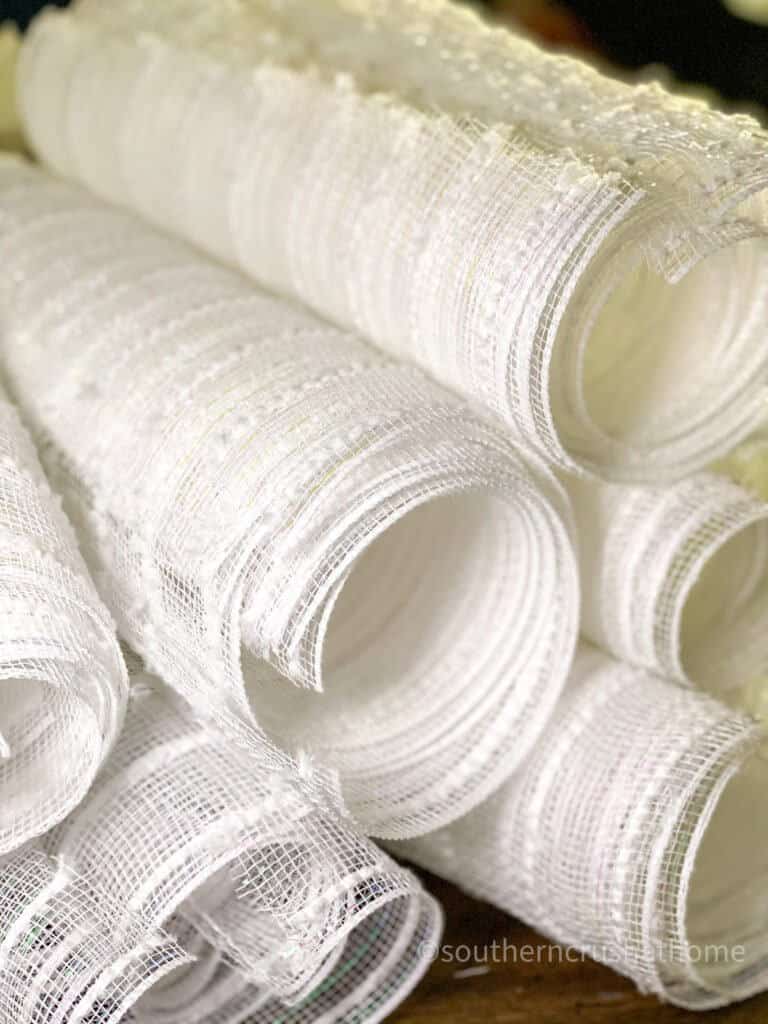
- Two rolls of 10″ deco mesh
- Zip ties approx 100 small
- Wired Ribbon your choice
- Sign
- OR JUST BUY A UNIQUE IN THE CREEK WREATH KIT which contains everything you need
how to make a deco mesh wreath step by step using a kit
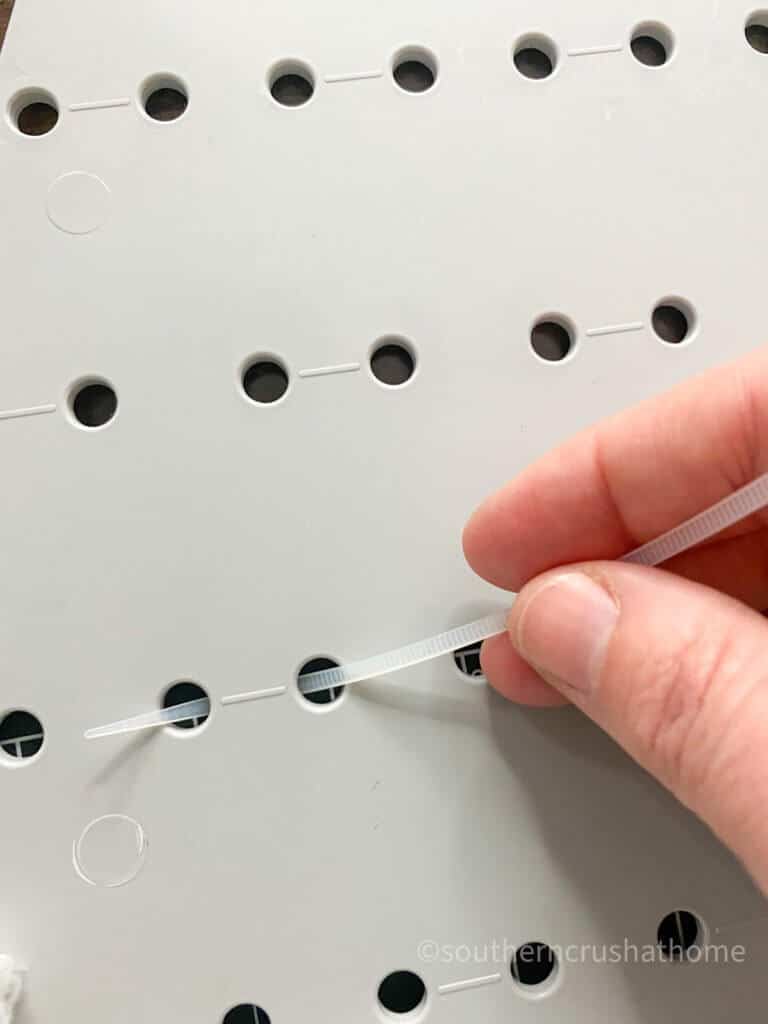
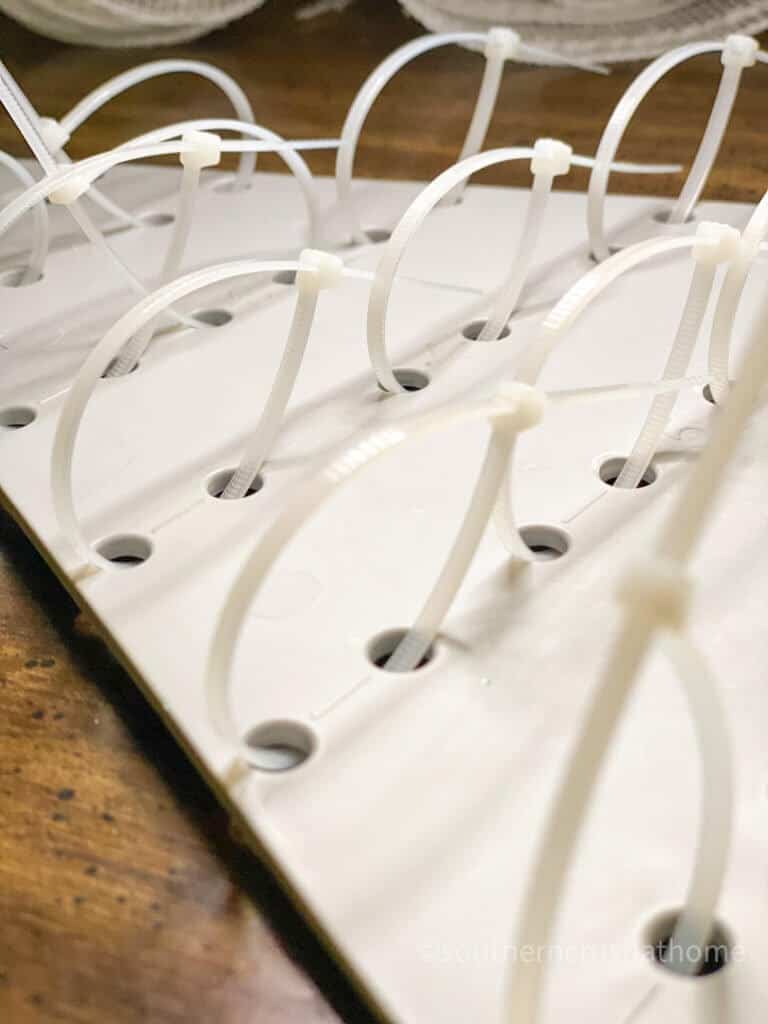
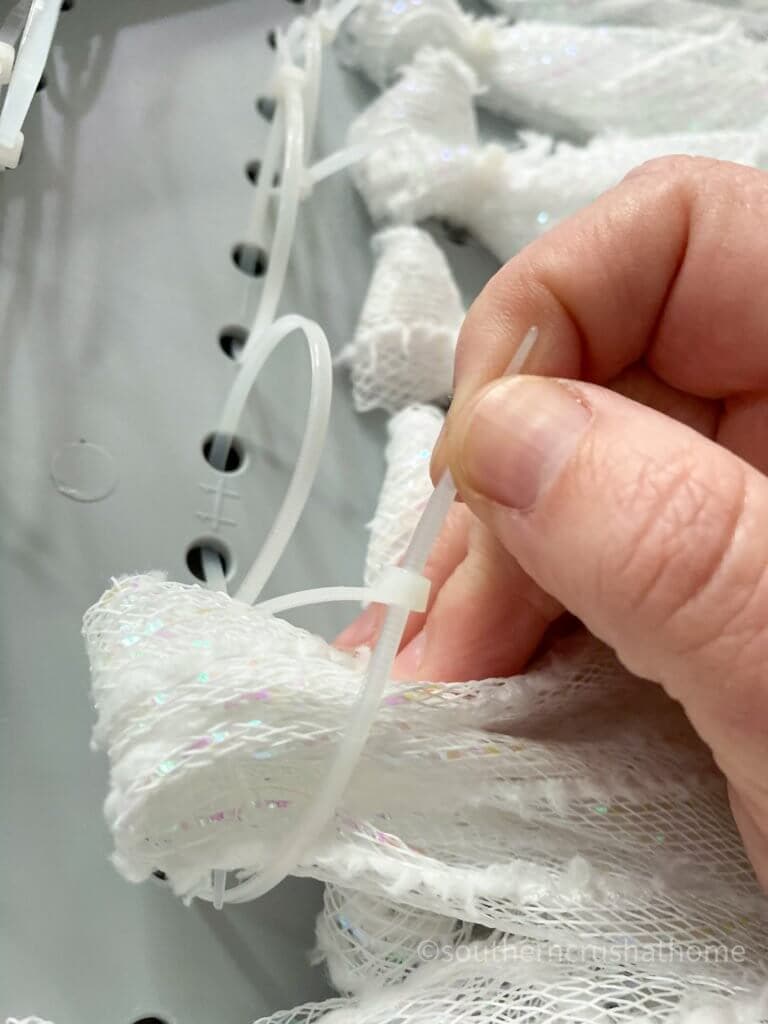
- Using the pre-drilled holes on your board surface, fish your zip tie through and secure loosely as shown, continuing until board is complete.

- Cut your deco mesh into approx 10″ strips.
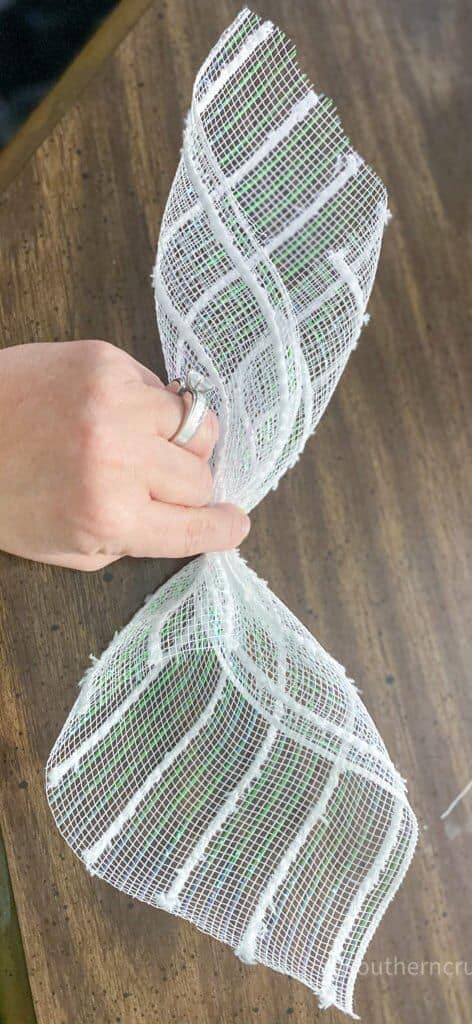
- Fold in the opposite corners of your deco mesh and scrunch to the center.

- Fold piece in half and tuck underneath a zip tie hoop.
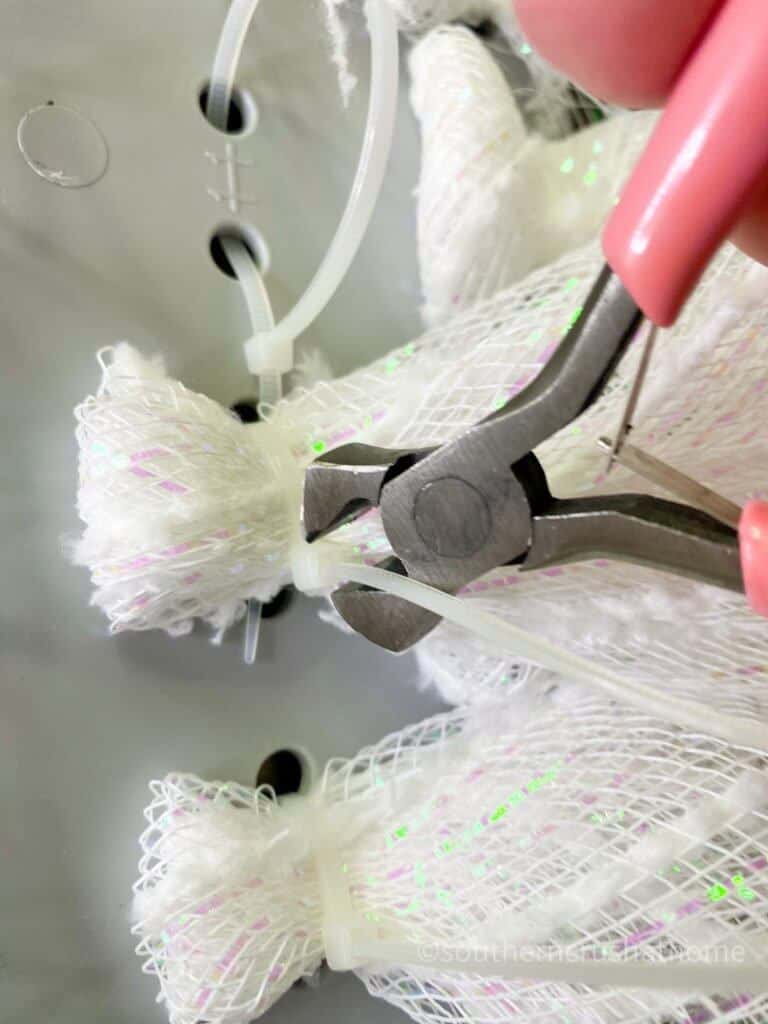
- Tighten zip tie until secure and nip off the excess zip tie.
- Continue until board is full.
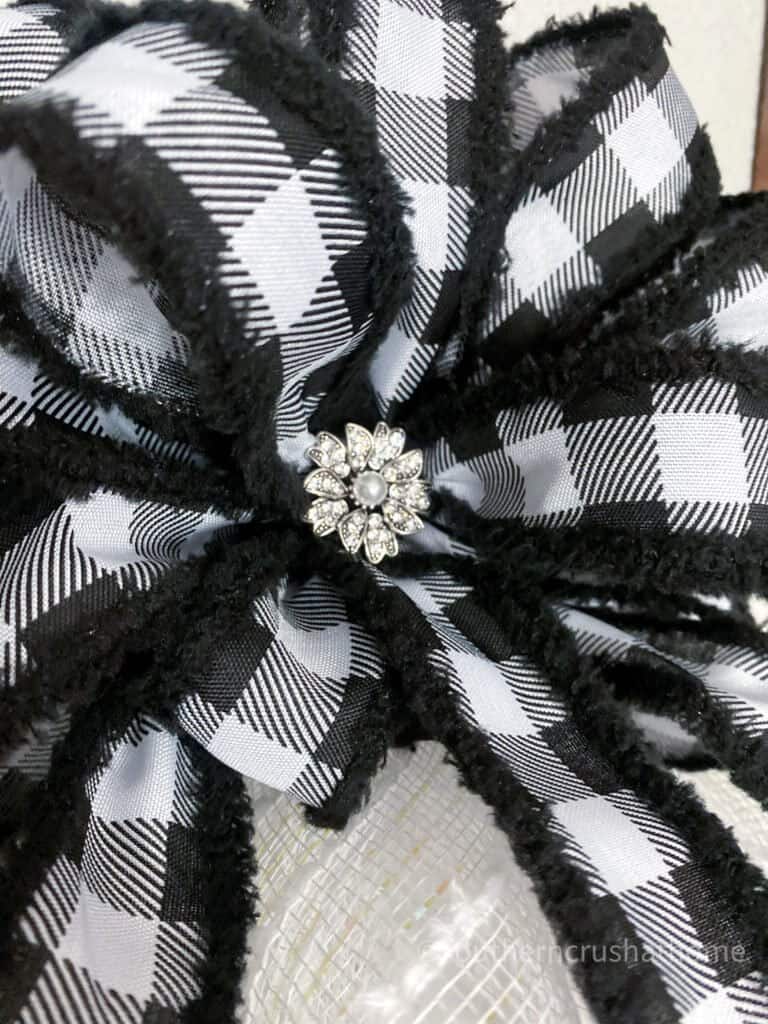
- Add bow to the last holes of your wreath. (I added bling to the center of my bow)
- Place sign on board using zip ties.
video tutorial on how to make a deco mesh wreath
If you missed the video tutorial and would like to see it, I’ve linked it HERE for you!
10 inch deco mesh wreath
This streamlined kit process makes wreath making so easy and fun! Ideas to make with the Unique in the Creek triangle board include candy corn, gnomes, and Christmas trees. The finished board makes a wreath that is approximately 24″x 20″.

other diy wreaths you might like:
- DIY Picture Frame Wreath With Fall Plaid Decor
- Easy Dollar Tree Front Door Bandana Wreath
- Summer Sun Hat Wreath + FREE Printable
ways to display a deco mesh wreath
- The most obvious way to display a wreath is the front door; but this can include the back door or any door in the house that needs to be made pretty!
- A Gallery Wall is a great place to display a deco mesh wreath! Let it become the conversation piece you always wanted.
- Hanging it above the mantle is a wonderful way to show off a pretty deco mesh wreath.
- If it is small enough, wreaths are an unexpected welcome when displayed on the back of a dining chair.
- Along a stairway leading up is another unusual place to add a touch of whimsy by hanging a wreath.
- Inside of a glass hutch with complementary colored items is a fun way to display a wreath.
- Hang smaller wreaths on the outside of kitchen cabinet doors for a statement.
- The dining room table is a wonderful place to display a wreath as part of a centerpiece.
- Place a wreath over the top of a mirror or an old pane glass window for instant art.
sign up for my emails
If you love these kinds of DIY ideas, you need to be getting my emails, friend! Each week I send out a couple of emails that include updates, crafts, shopping experiences, and decor inspiration. Be sure to get yourself signed up below.
I can’t wait to meet you! Leave your thoughts below in the comments, please… BTW— Life is short—Enjoy the mess!

How to Make an Easy Deco Mesh Wreath
Materials
- 2 rolls Deco Mesh
- 1 Unique in the Creek Board
- 1 Ribbon of your choice
- 65 small Zip Ties
Instructions
- Using the pre-drilled holes on your board surface, fish your zip tie through and secure loosely as shown, continuing until board is complete.
- Cut your deco mesh into approx 10" strips.
- Fold in the opposite corners of your deco mesh and scrunch to the center.
- Fold piece in half and tuck underneath a zip tie hoop.
- Tighten zip tie until secure and nip off the excess zip tie.
- Continue until board is full.
- Add bow to the last holes of your wreath.
- Place sign on board using zip ties.
Enjoyed the Tree wreath.
How much is the kit.
all kits are here –>> https://www.southerncrushathome.com/uitc