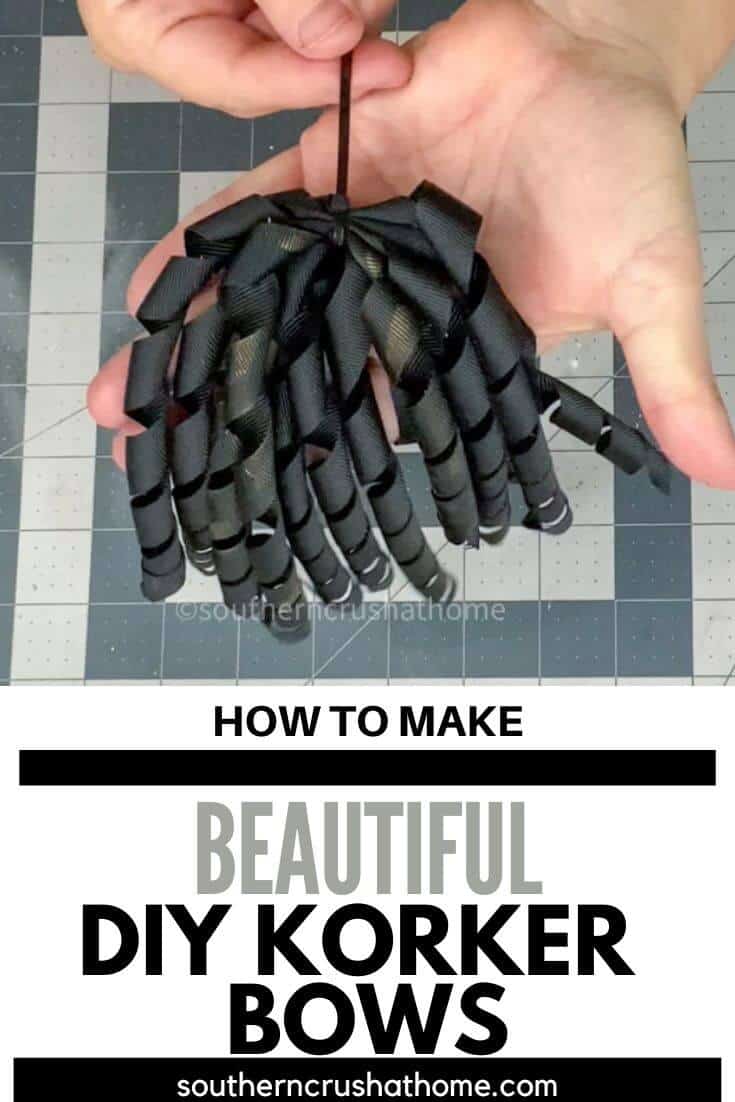
How to Make a Korker Bow
Looking for a fun and easy way to spruce up your gift-giving? These simple tips will show you how to make a DIY korker bow in no time! It's perfect for festive occasions or homemade gifts!
Be Sure to PIN this for Later!
This blog post contains affiliate links. The opinions are wholly my own from my own experience. I may earn a small commission from clicks through to the websites that end in a purchase.
I'm so excited to share this simple tutorial for a fun DIY korker bow. You can whip up several in no time and create different colors. With gift-giving season just around the corner, this is the perfect time to learn how to make bows. So let's get to it!
Supplies Needed to Make A Korker Bow
- Clothespins
- Ribbon
- Dowels
- Zip Ties
- Scissors
- Foil-wrapped Sheet Pan
How to Make a Korker Bow
Step by Step Video Tutorial
If you prefer you can watch my live step-by-step video tutorial below.
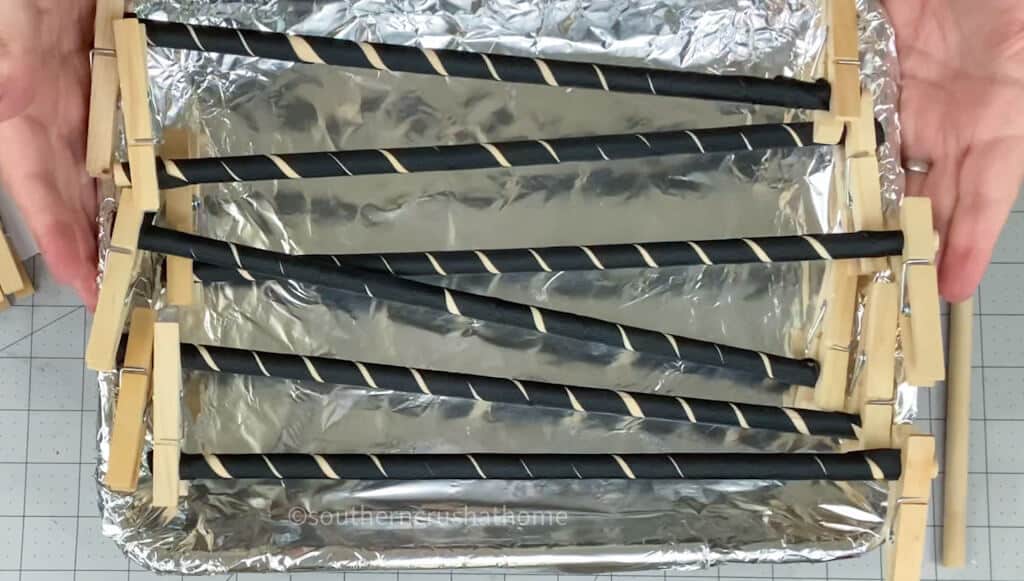
Step 1. Line a Sheet Pan
Cover a cookie sheet pan with aluminum foil. Bet you never thought you would be baking your bows did you?!
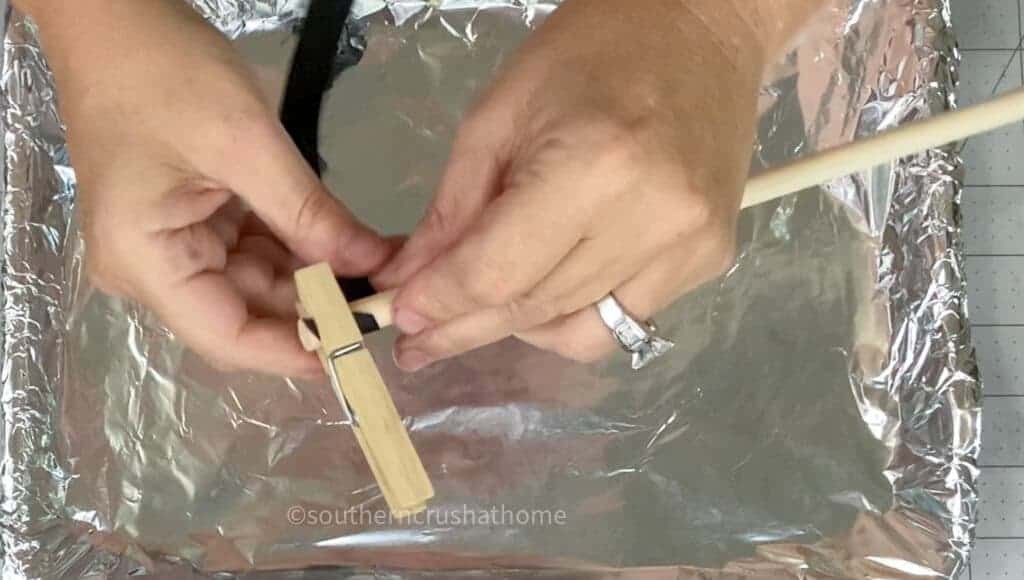
Step 2. Hold Ribbon with a Clothespin
Start by placing the end of the ribbon on the dowel and secure it with a clothespin. You can find clothespins at the dollar store making this a very budget-friendly craft.
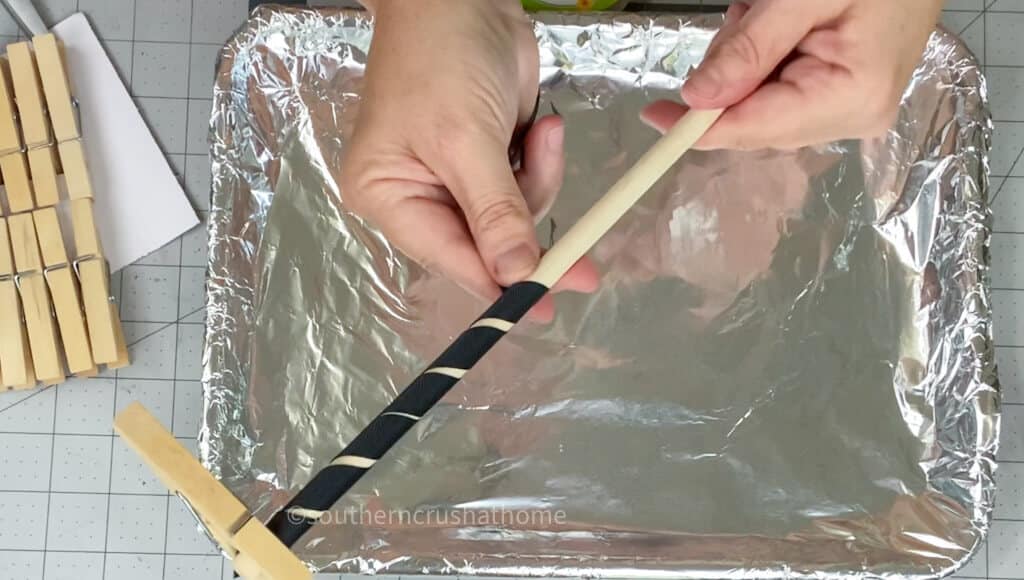
Step 3. Wrapping the Ribbon
Next up, begin wrapping the ribbon around the dowel pulling it tightly. You want to make sure you get those nice tight curls that make a korker bow.
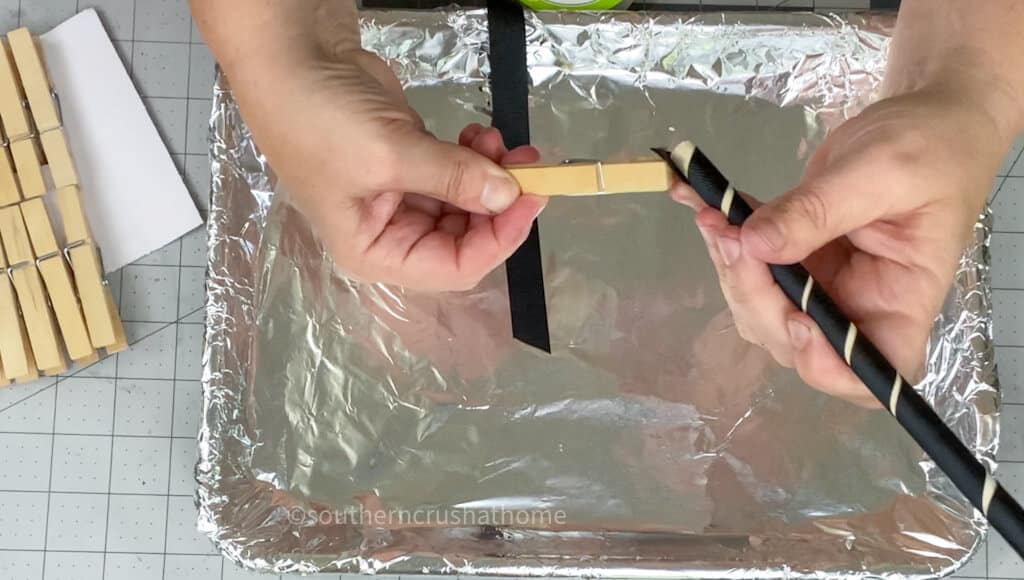
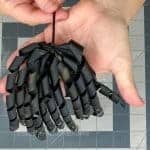
Step 4. Attach A Second Clothespin
Once the ribbon is fully wrapped around the dowel and pulled tightly, secure another clothespin to the opposite end of the dowel.
Step 5. Bake the Dowels
Place the ribbon-wrapped dowels in a pre-heated oven at 250 degrees for 20 minutes.
Step 6. Remove the Ribbon
Let the dowel cool for a few minutes, then slowly remove the ribbon and enjoy the magic that is korker bows!
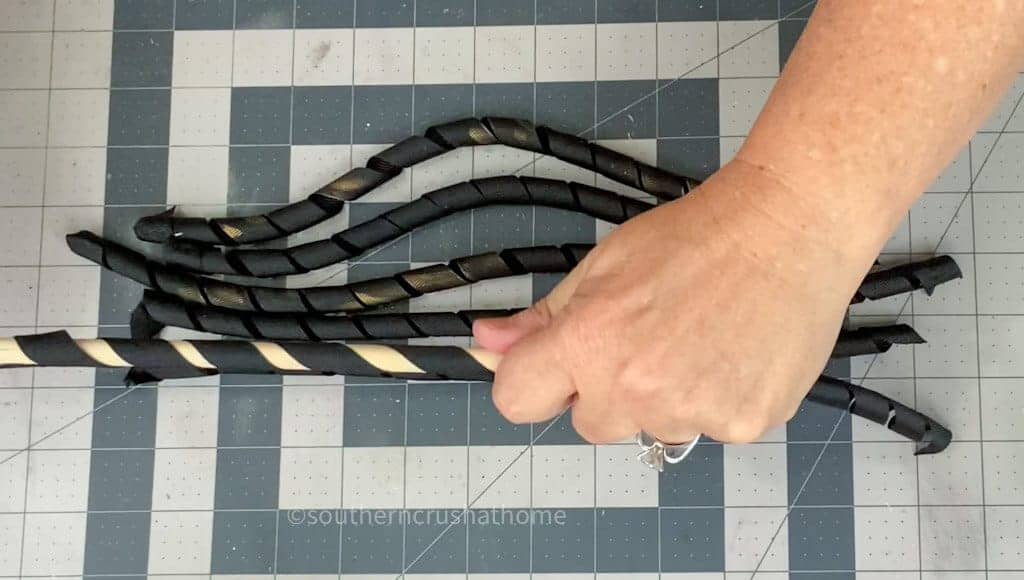
It really is cool to see how they turn out!
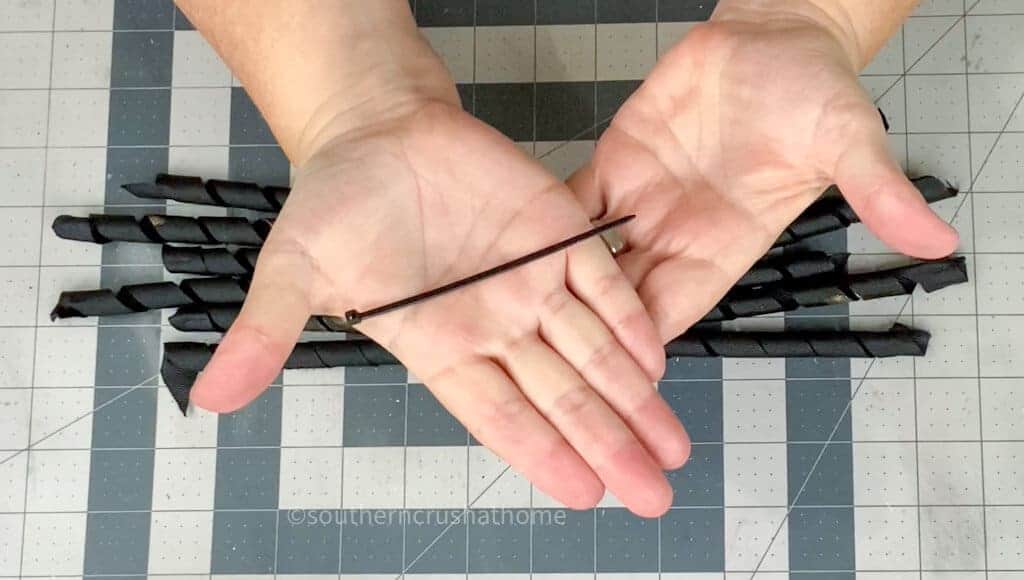
Step 7. Secure With a Zip Tie
For the final step, fold the ribbon pieces in half and secure with a zip tie pulled nice and tight.
If there is one thing I always have in my crash stash it's zip ties. I use them for so many craft projects. A little one of my crafting tips.
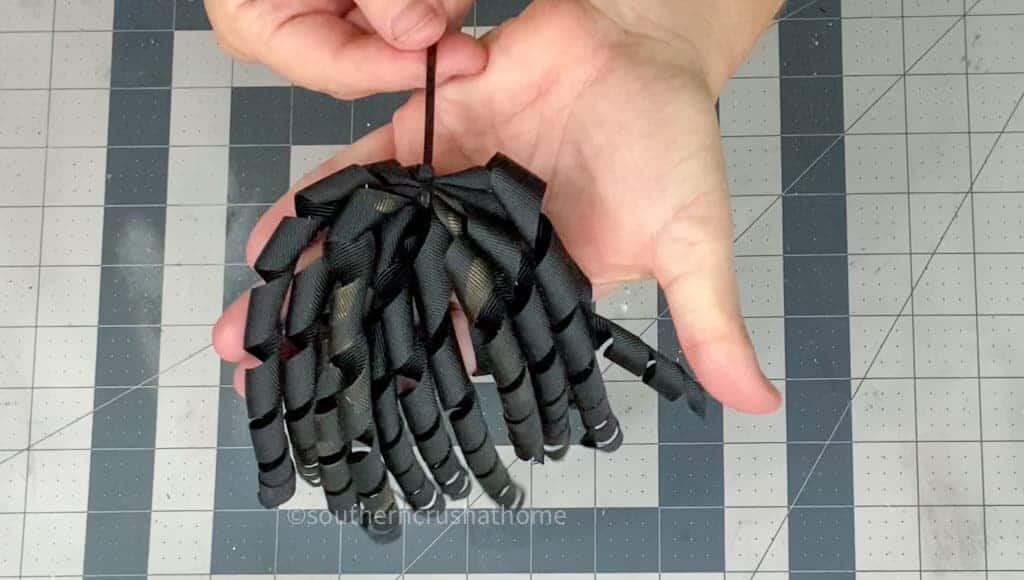
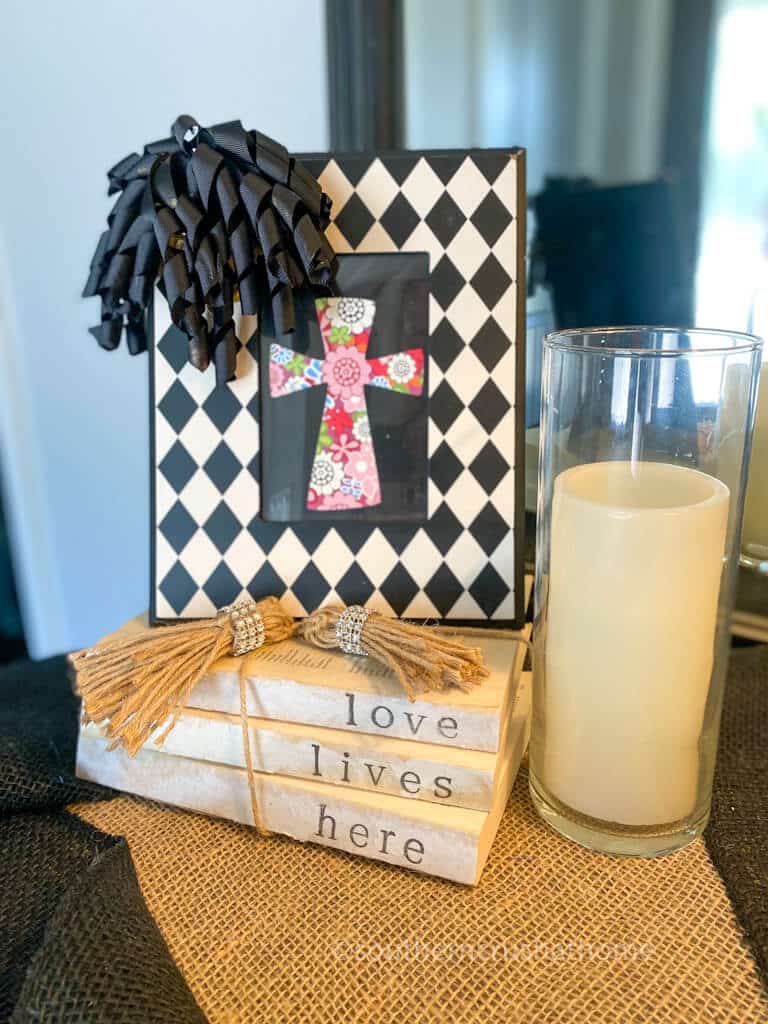
That's all there is to it! A beautiful DIY korker bow that will wow friends and family. These beauties can be used on more than just gift packages.
Look at how pretty it looks attached to a picture frame:
Several Ways to Decorate With Korker Bows
- Decorate a package to use as a gift topper
- Add to wreaths and door hangers
- Make several to decorate a Christmas Tree
- Place one on each end of a banner to decorate a mantel or buffet table.
- Create hairbows by attaching them to barrettes or hair clips
To use it as a gift topper, tie the bow around the center of the gift. Add a bit of ribbon or string to the back of the bow so that it’s easy to attach to the gift.
If you’re attaching the bow to a wreath, start by threading a second zip tie underneath the first one in the center of the bow. This will make it easier to attach to the wreath.
To decorate a Christmas tree, start by tying the center of the bow around one of the branches. Take a piece of string or ribbon and tie it around the back of the bow. Then you can use this loop to hang the bow on the tree.
How would you decorate with this pretty bow? Leave a comment below and let me know. And, if you make one I'd love to see it! Happy crafting.
More Easy Bow Tutorials
- How to Make an Easy 5 Minute Bow for a Wreath (Step by Step Instructions)
- 7 Easy DIY Bows Anyone Can Make
- How to Make a DIY Burlap Bow in Five Minutes
- How to Make an Easy Mesh Bow (for a Wreath)
- How to Make a Denim Messy Bow
- How to Make a Mesh Ribbon Bow
How to Make a Korker Bow
Equipment
- scissors
- Sheet Pan
Materials
- Clothespins
- Ribbon
- Dowels
- Zip Ties
- Aluminum Foil
Instructions
- Cover a cookie sheet pan with aluminum foil.
- Place the end of the ribbon on the dowel and secure it with a clothespin.
- Begin wrapping the ribbon around the dowel pulling it tightly.
- Once the ribbon is fully wrapped around the dowel and pulled tightly, secure another clothespin to the opposite end of the dowel.
- Place the ribbon-wrapped dowels in a pre-heated oven at 250 degrees for 20 minutes.
- Let cool for a few minutes, then slowly remove the ribbon.
- Fold the ribbon pieces in half and secure with a zip tie.
Love these bows, thank you for the tutorial. Will for sure be making these.
YaY! That makes me so happy! Thank you for letting me know! I appreciate you!