How to Make a Kitchen Christmas Tree (with Dollar Tree supplies)
It’s beginning to look a lot like Christmas, and today I’m showing you how to make the cutest kitchen Christmas tree. With just some Dollar Tree supplies you can have the perfect little holiday centerpiece for your kitchen.
This DIY project is so easy, but it takes your kitchen from ordinary to extraordinary in one fell swoop. Read on for more information about how to make this easy craft! You can’t go wrong with handmade holiday decorations!
This kitchen Christmas tree will make you want to grab several Dollar Tree Christmas trees before they sell out.
Let me show you how I made this festive holiday craft.
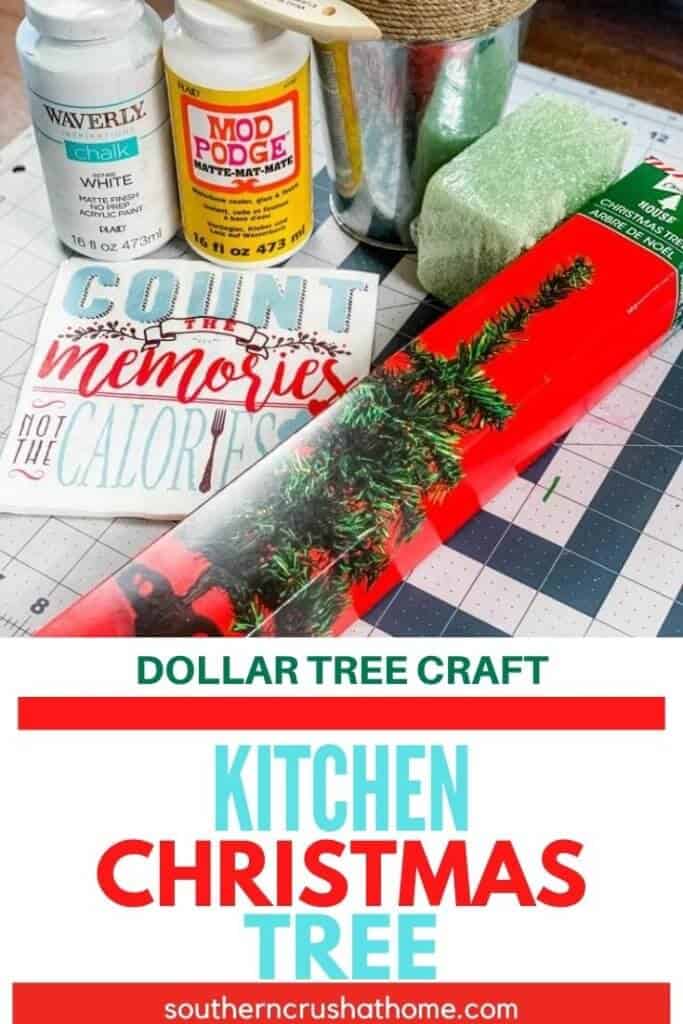
SUPPLIES needed for a Kitchen Christmas Tree
All the supplies needed can also be found HERE in my Amazon Shop!
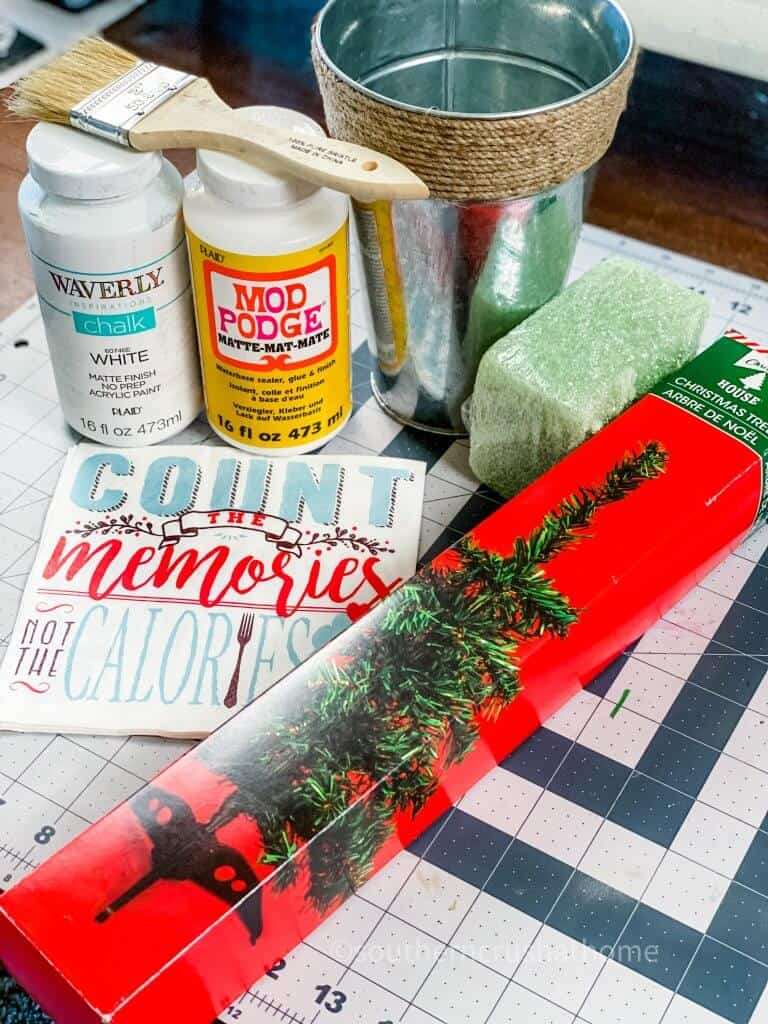
- Dollar Tree Christmas Tree
- White Chalk Paint
- Mod Podge
- Floral Foam
- Chip Brush
- Metal Bucket
- Holiday Napkins
- Heat Gun
- Craft Scissors
How to make a Kitchen Christmas Tree
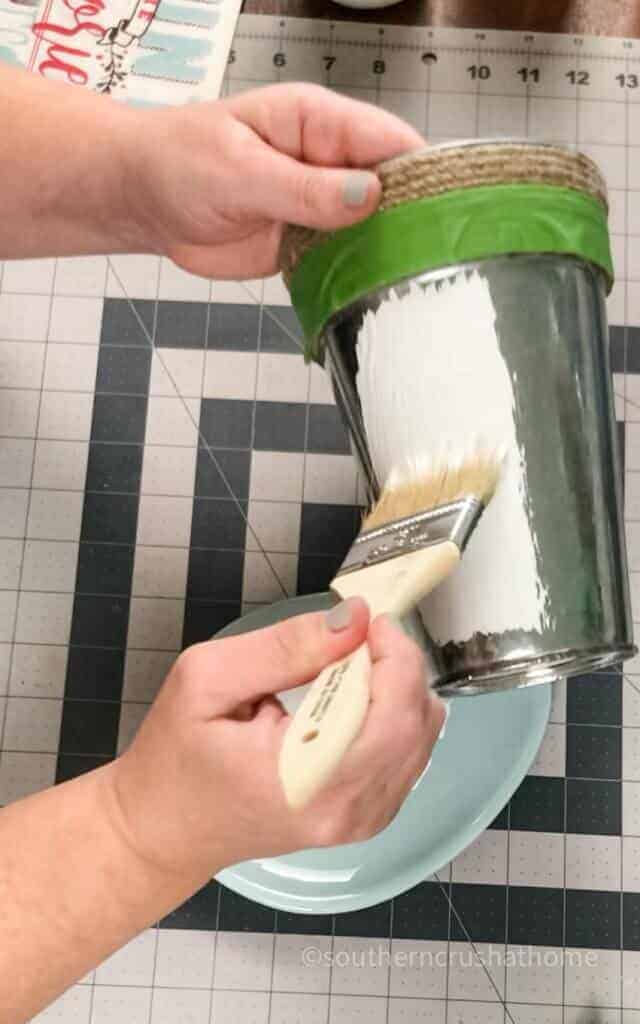
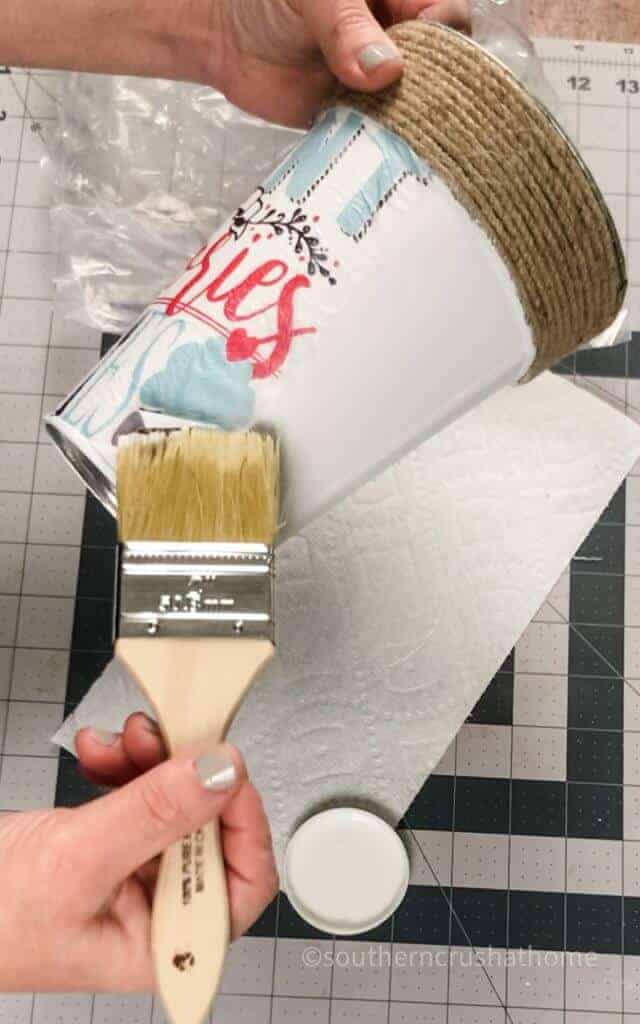
PAINT THE BUCKET
Step 1.
Tape off the bottom part of the twine so you don’t get any paint on it. Use your chip brush to paint the bucket with white chalk paint. Let dry.
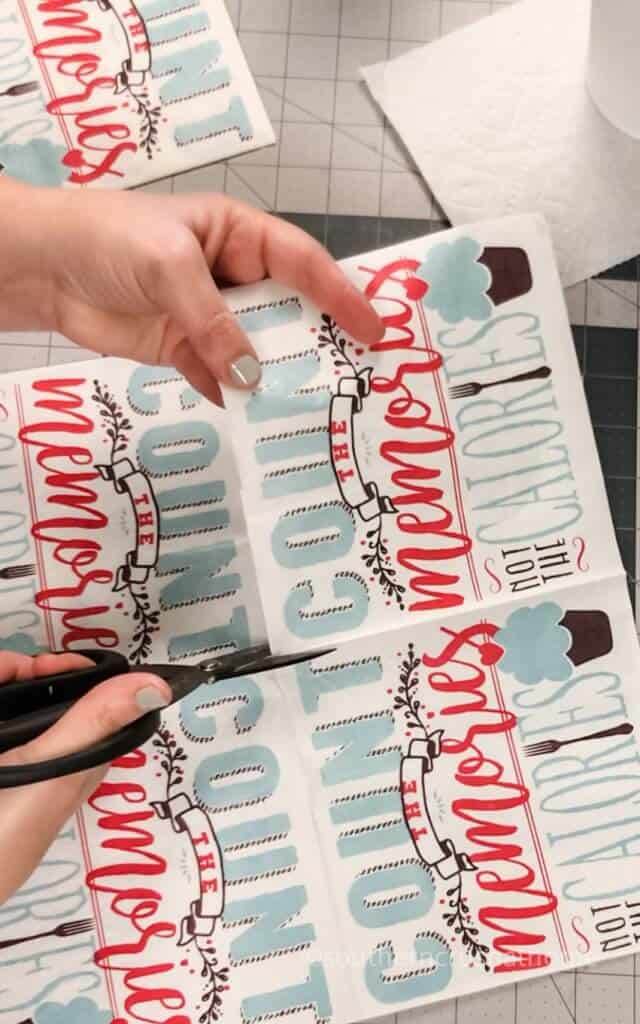
cut the NAPKINS
STEP 2.
Start by cutting the holiday napkin in half, then in half again. If the napkin is 2-ply, remove the top layer. You only want to use the printed napkin.
Quick tip: to make it easier to separate the napkin, place a piece of scotch tape in one corner. When you pull it away the tape will help separate it.
MOD PODGE THE NAPKIN
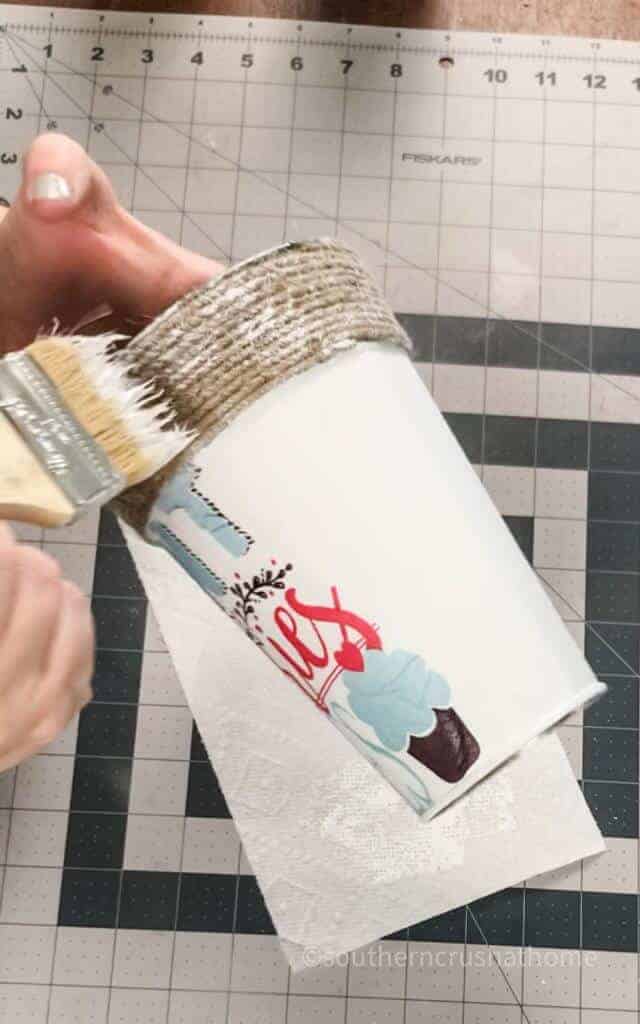
add chalk paint to twine
STEP 4.
Lightly paint over the twine with your chip brush and chalk paint. You don’t want to cover it completely with paint. Just give it a touch of white so it blends better with the painted bucket.
add the Christmas tree
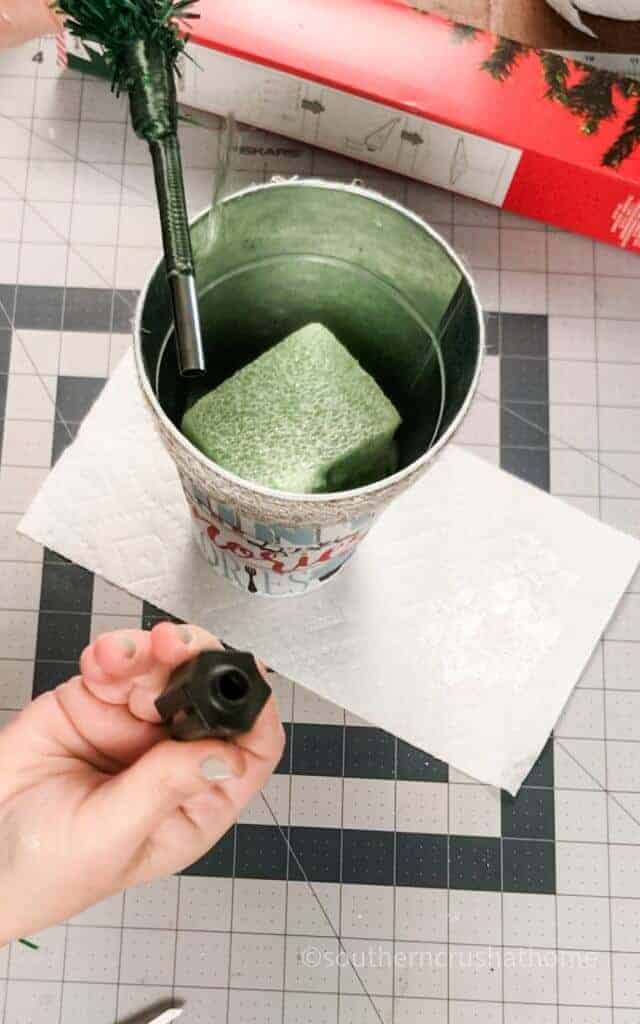
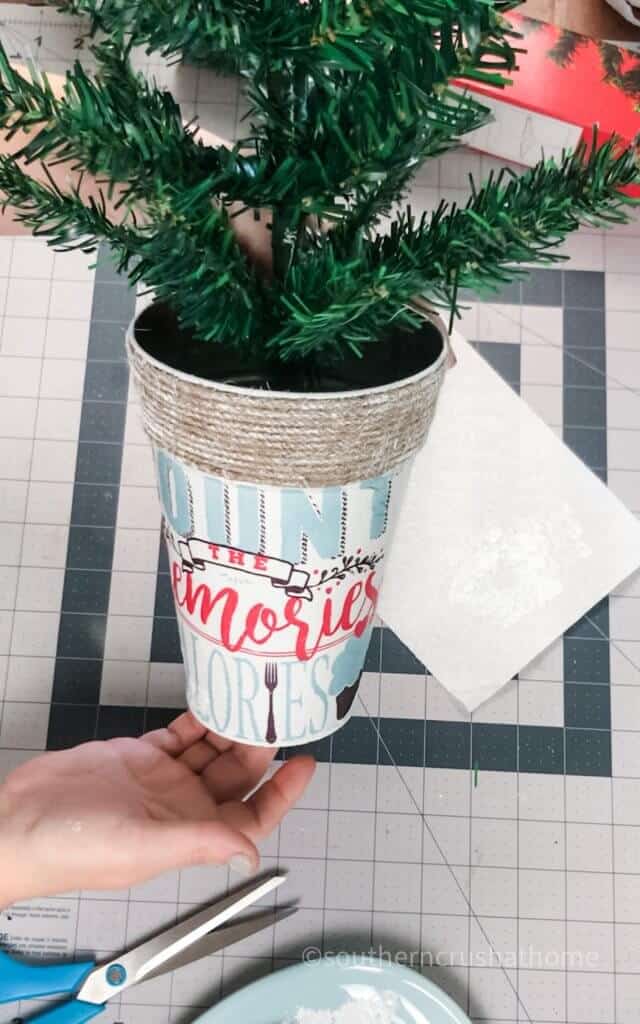
STEP 5.
Place floral foam into the bucket. Remove the bottom of the tree stand. Secure the tree into the floral foam. Just push the bottom of the stand into the foam until it is steady. You can use a little hot glue if needed.
It’s already looking so pretty!
decorate your Kitchen Christmas Tree
STEP 6.
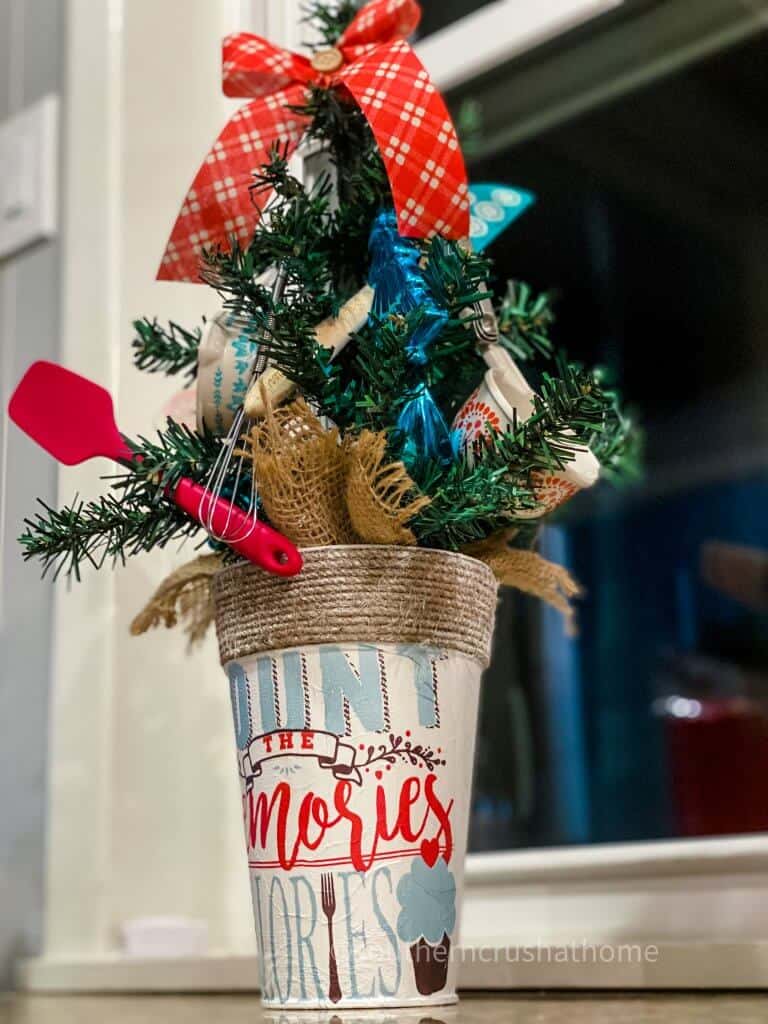
Now comes the fun part-decorating! Since this is a kitchen Christmas tree, add fun kitchen utensils and ornaments. You can find plenty of dollar store kitchen items to add to your tree. Measuring cups and baking tools look so cute!

add a pretty bow tree topper
STEP 7.
Create a simple bow to add to the top of the Christmas tree. You can even buy a pretty pre-made one at Dollar Tree to save time.

Your adorable little kitchen Christmas tree is ready! I LOVE how sweet it looks in my kitchen…
Kitchen Christmas Tree
Here are a few other ways to decorate with your kitchen tree.
- Display it on a kitchen island.
- Place it next to a hot cocoa bar. You can even add hot cocoa-themed items to the tree.
- Create one as a gift with the kitchen utensils given as part of the recipient’s gift. Great for a new homeowner!
BE SURE TO CHECK OUT THESE OTHER DIY CHRISTMAS IDEAS!
- Pool Noodle Christmas Candles
- Christmas Lantern and Santa Mailbox
- Easy $2 Dollar Tree Snowman Candle DIY
- 21 Ways to Repurpose Old Ornaments
- DIY Angel Ornament
Be sure to PIN this for later!

Dollar Tree Kitchen Christmas Tree
Equipment
- scissors
- heat gun
Materials
- Dollar Tree Christmas Tree
- White Chalk Paint
- Mod Podge
- Craft Foam
- Chip Brush
- Metal Bucket
- Holiday Napkins
Instructions
- Tape off the bottom part of the twine so you don't get any paint on it.
- Use your chip brush to paint the bucket with white chalk paint. Let dry.
- Cut the holiday napkin in half, then in half again.
- Add mod podge on the bucket and lightly add the napkin where you want it to go.
- Add a light coat of mod podge on the top of the napkin using your chip brush.
- Paint over the twine with your chip brush and chalk paint.
- Place floral foam into the bucket. Remove the bottom of the tree stand. Secure the tree into the floral foam.
- Decorate your kitchen Christmas tree with fun kitchen utensils and ornaments.
- Create a simple bow to add to the top of the Christmas tree.