How to Bleach Wood (without using bleach)
Are you looking for a way to bleach wood in order to achieve that trendy natural ash white wood look without using bleach? If so, you're in luck! In this post, I'll show you how to bleach wood the easy way!
Welcome to this month's #upcyclesquad challenge where you will find lots of great ideas for taking a thrift store find and giving it new life! I found this old globe on the Facebook Marketplace for only $15 and knew right away I could turn it into something really cool to use as home decor.
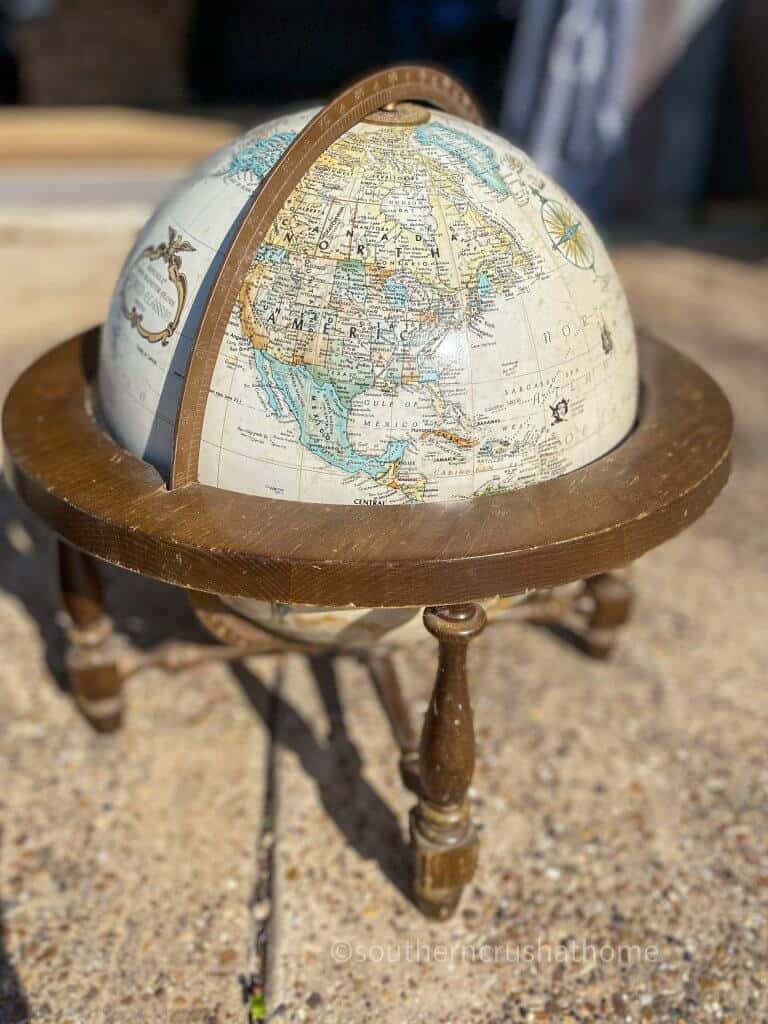
It just needed a little love to cover up the scratched wood and make it a little more modern. I tried a new (to me) bleach-free solution and I am loving the results!
How Do I Make Wood Look Bleached?
Do you love the look of bleached wood, but not the idea of using stripper or chlorine bleach for bleaching wood? I found out how to bleach wood in a way that achieves that same look using oven cleaner! Let me show you how to bleach wood furniture pieces the easy off way.
Supplies Needed to Bleach Wood
- Easy-Off Oven Cleaner
- Rotary Sander
- 80-120 Grit Sandpaper
- Clear Wax
- Soft Rag
- Piece of furniture or wood accent piece that is made of real natural wood (this won't work on veneer)
How to Create a Bleached Wood Look
Step 1.
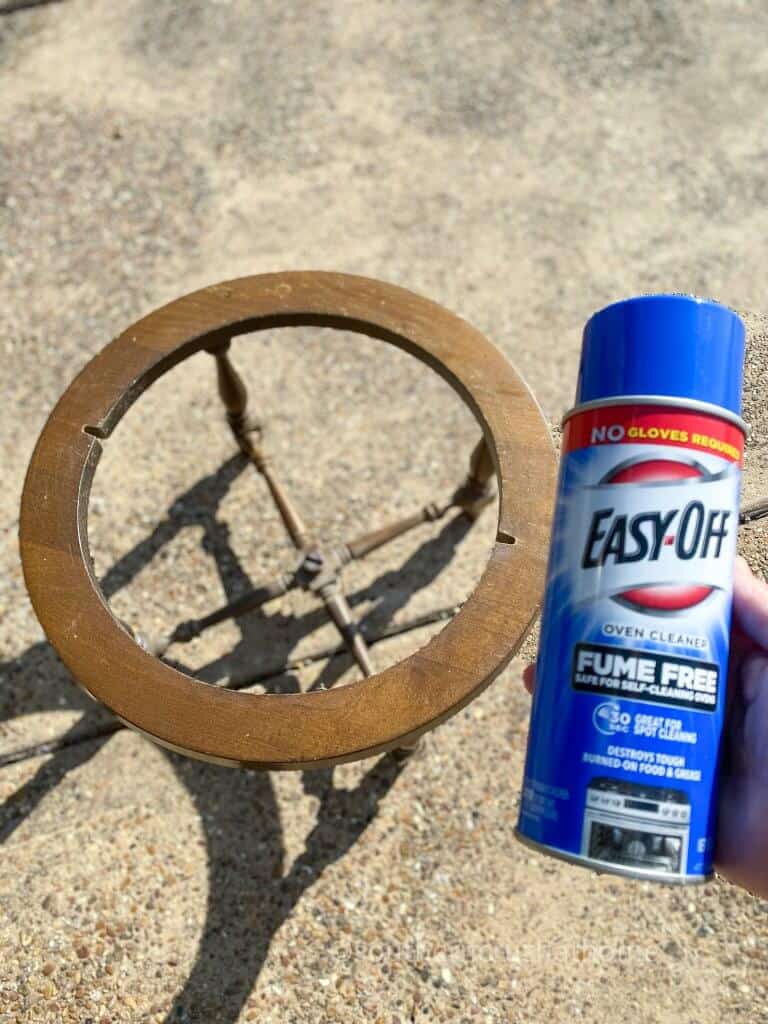
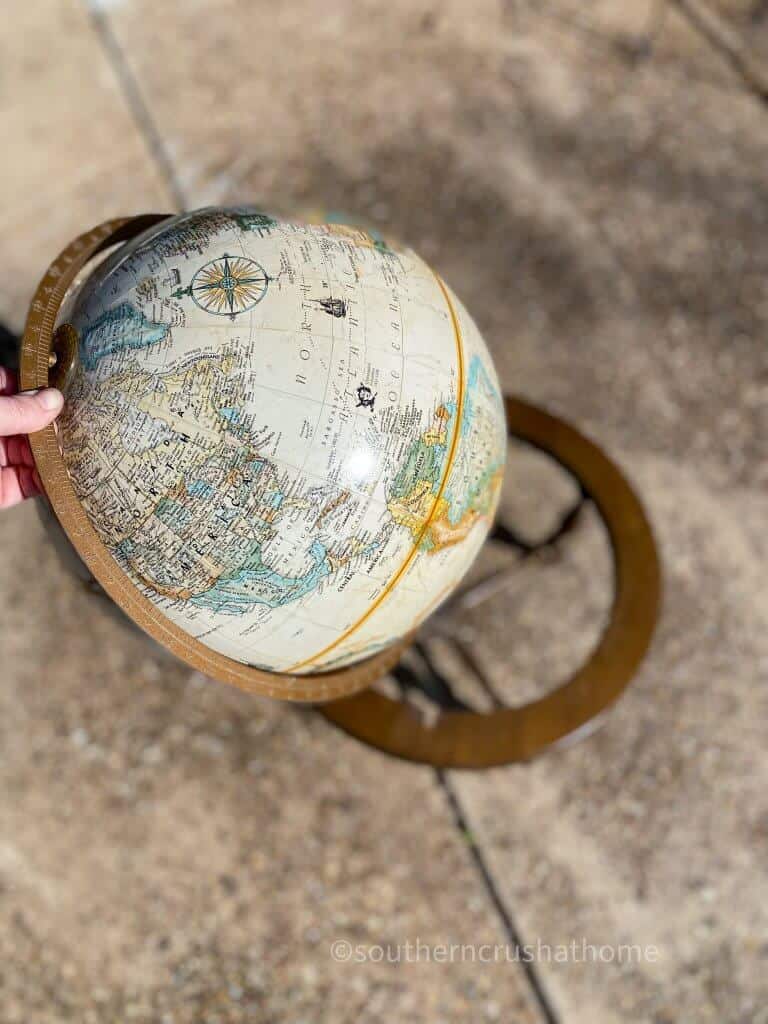
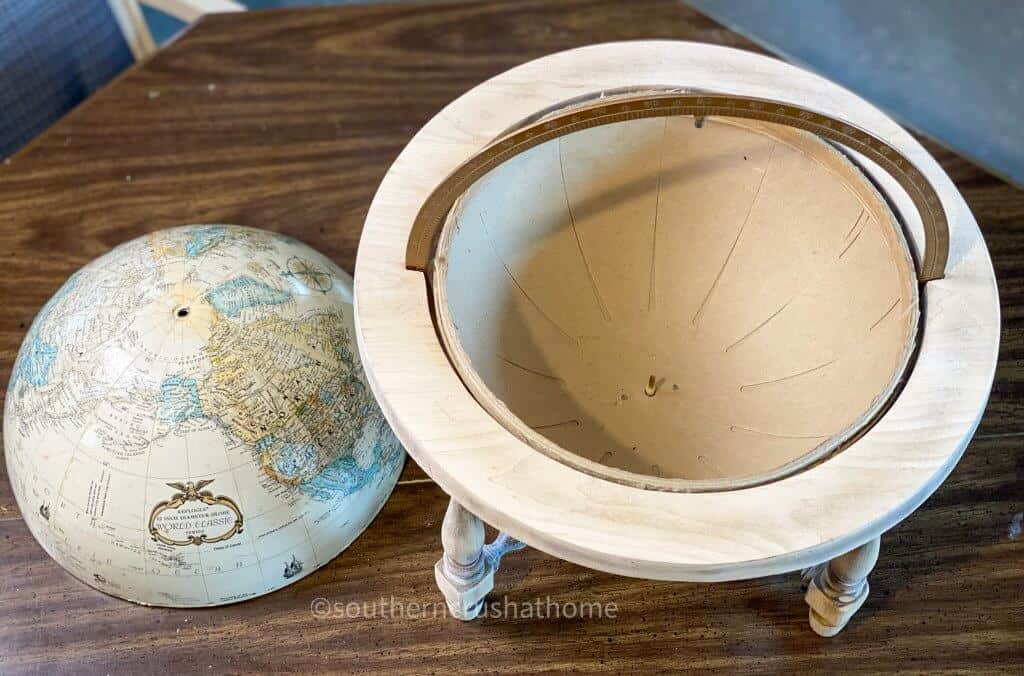
Start by lifting the globe from the wooden base in order to separate the two pieces. Don't get rid of the globe! We are still going to use it.
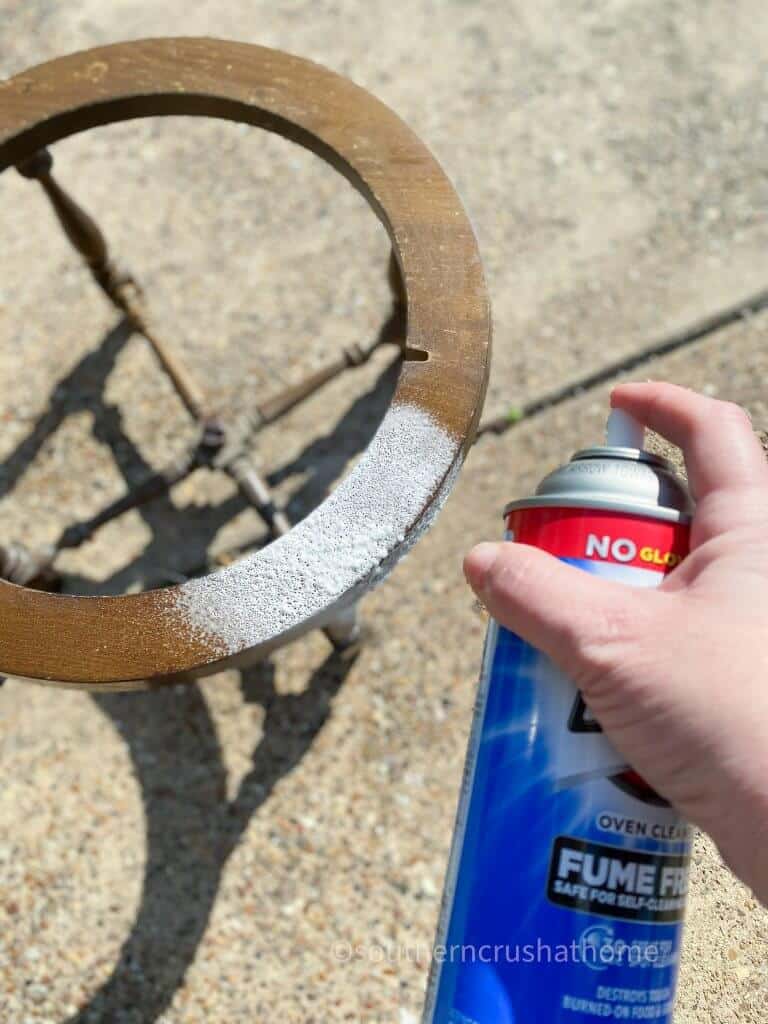
Step 2.
Next, you need to spray the wood with a thick even coat of heavy-duty Easy-Off oven cleaner and then let it sit. Be sure you are outside or in a well-ventilated area when you bleach wood furniture.
How Long Does it Take To Lighten the Wood?
It's best to let the oven cleaner remain on the wood piece for at least 30 minutes. If you can set it out in the sunshine; that's even better! You will do this process twice so be sure to start early enough so that you have enough daylight.
You can see how the oven cleaner combined with the sunshine erodes the stain and changes the color of the wood. It's literally bleaching wood without household bleach. Isn't that cool?
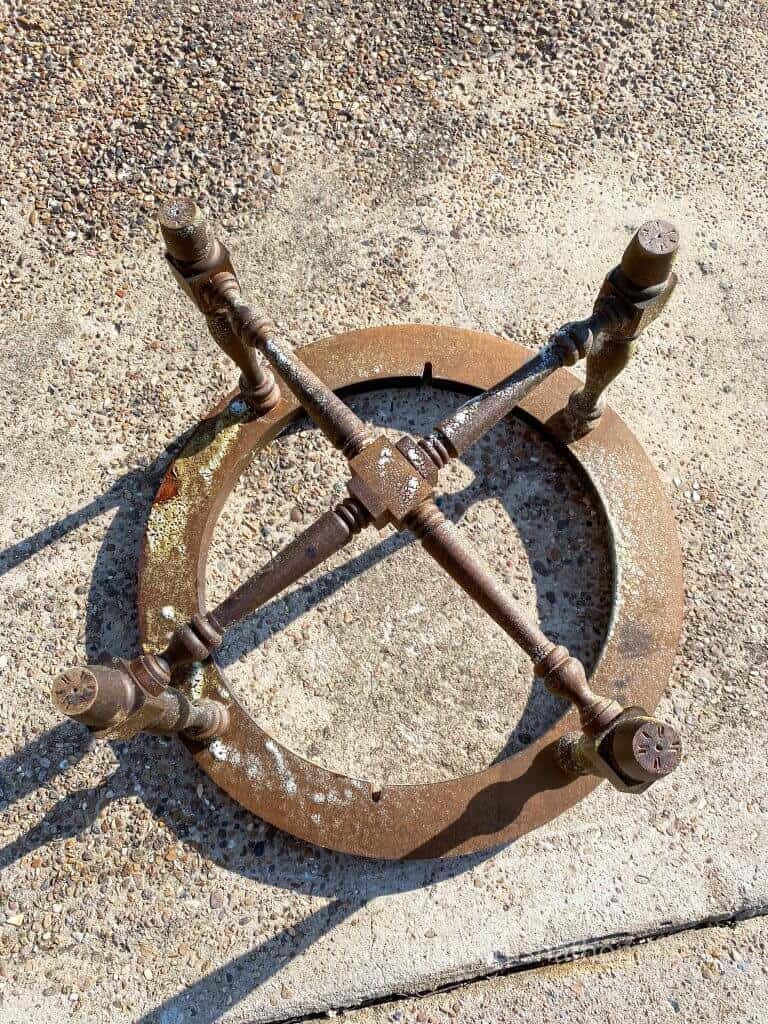
Repeat this application process twice to your wood piece or wood furniture. Be sure to wipe off the wood with a cloth as you rinse off the wood with soapy water and allow to dry in-between applications.
Step 3.
Now you want to give the wood a light sanding with a rotary sander using 80-120 grit sandpaper.
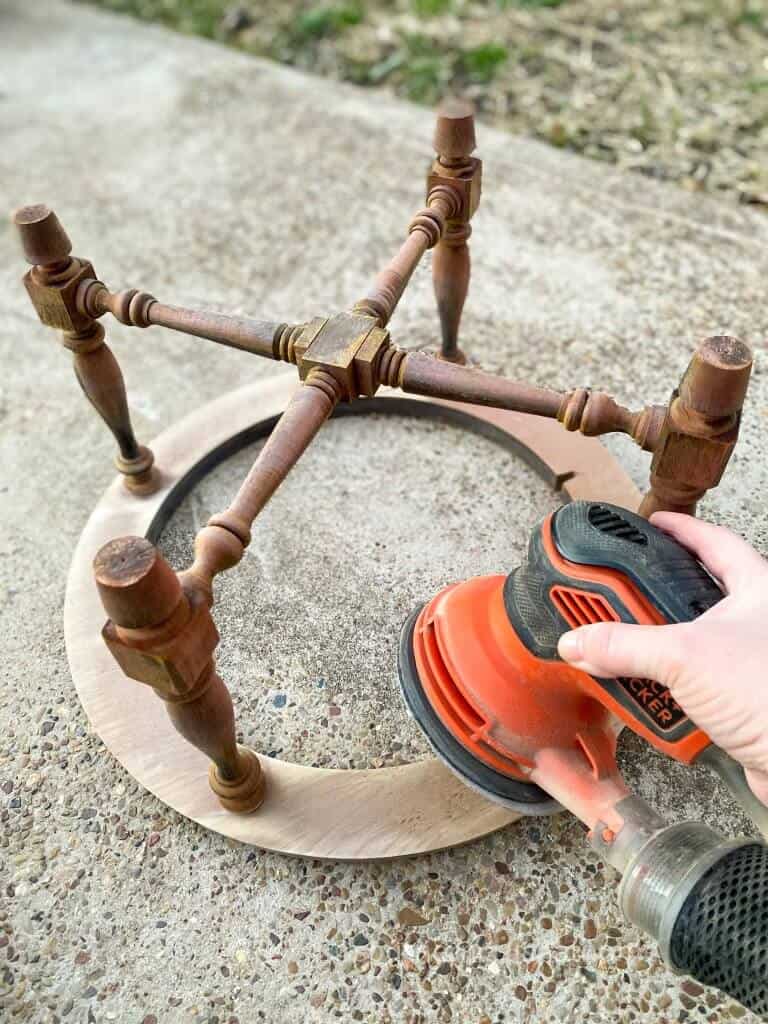
This gives your wood a nice, smooth wood grain finish. This is halfway through sanding.
Be careful not to “over sand” your piece taking it past the raw wood stage. I recommend you sand only until the first layer of raw wood color starts to peek through.

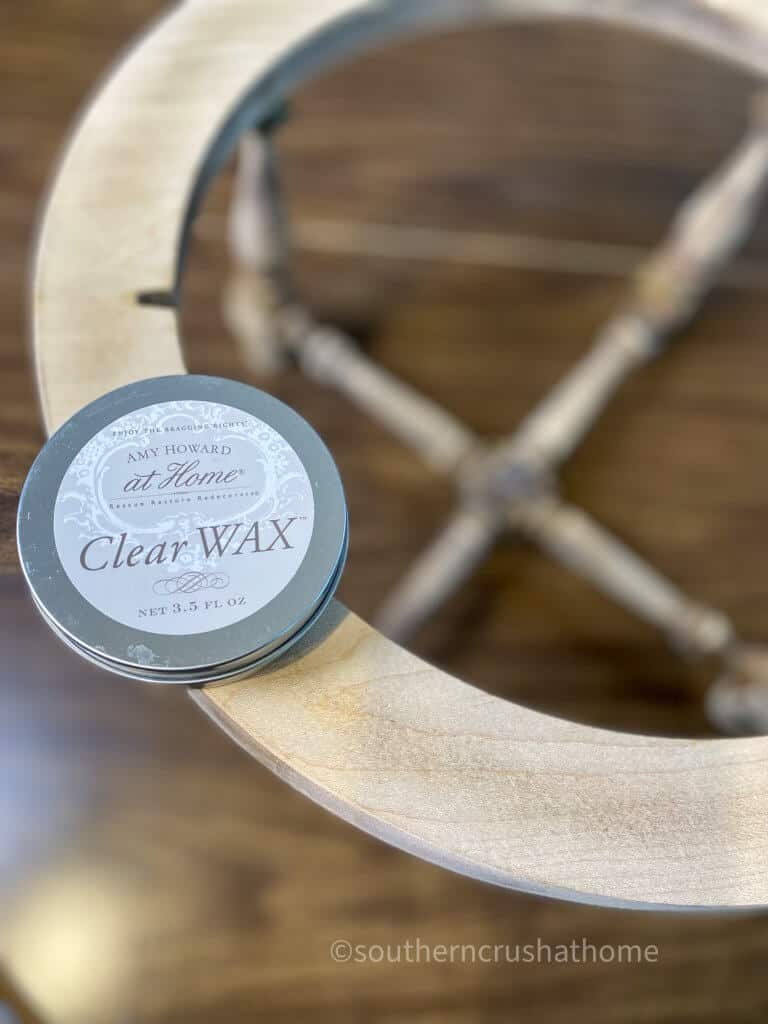
Step 4.
Use a paper towel to remove any dust from sanding. Seal it by applying a clear wax with a soft rag, cloth or a soft paintbrush. Wipe it on and buff it off.
For an even lighter wood look, use a white tinted wax.
You want to make sure you follow this same process for the entire project. I LOVE how the “bleached” wood looks and will definitely be using this technique again!
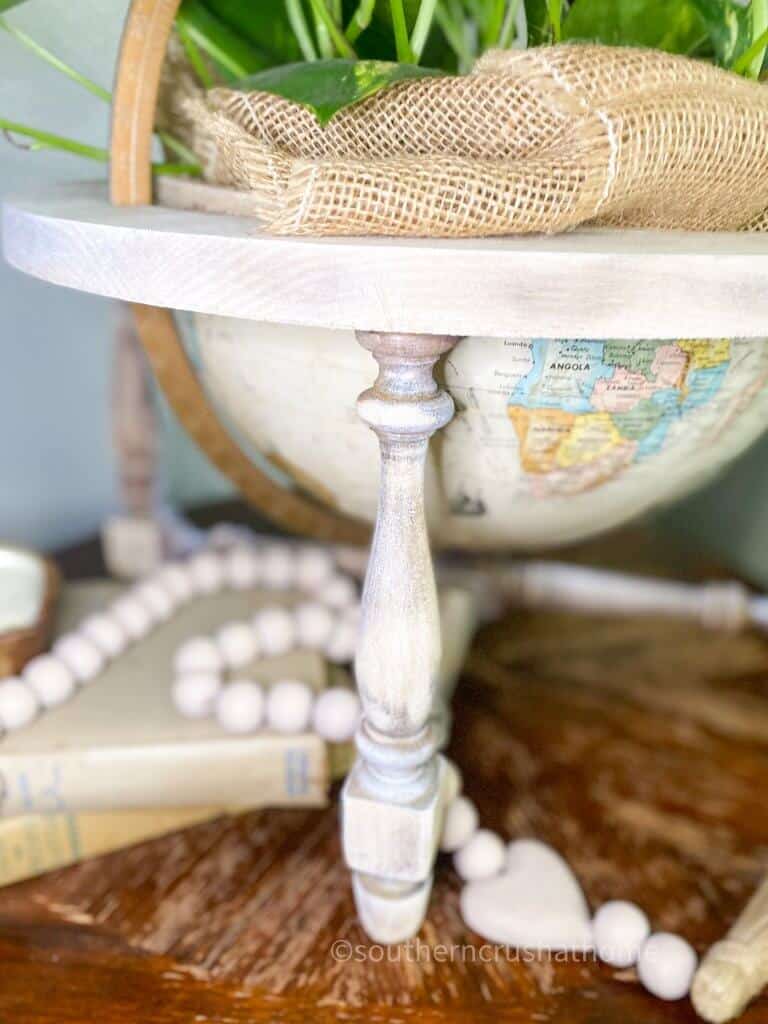
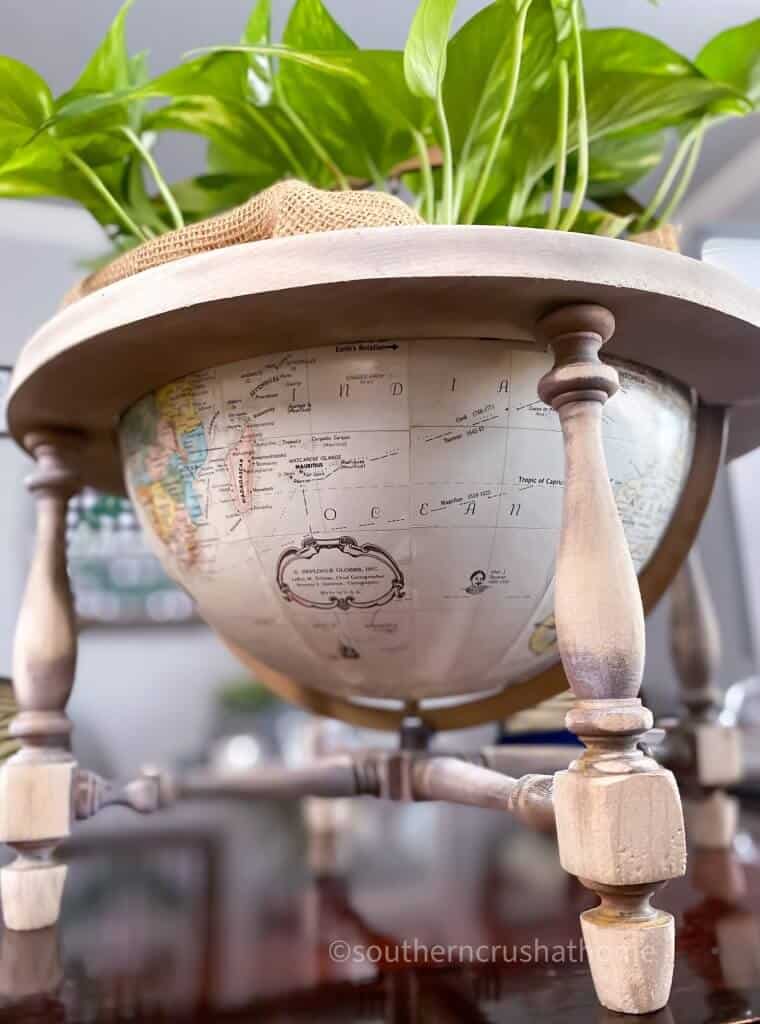
So now that I have the globe updated, it's time for the fun part…decorating! I decided to use my new “bleach look” wood globe base as a fun planter. It was just the perfect size.
Step 5.
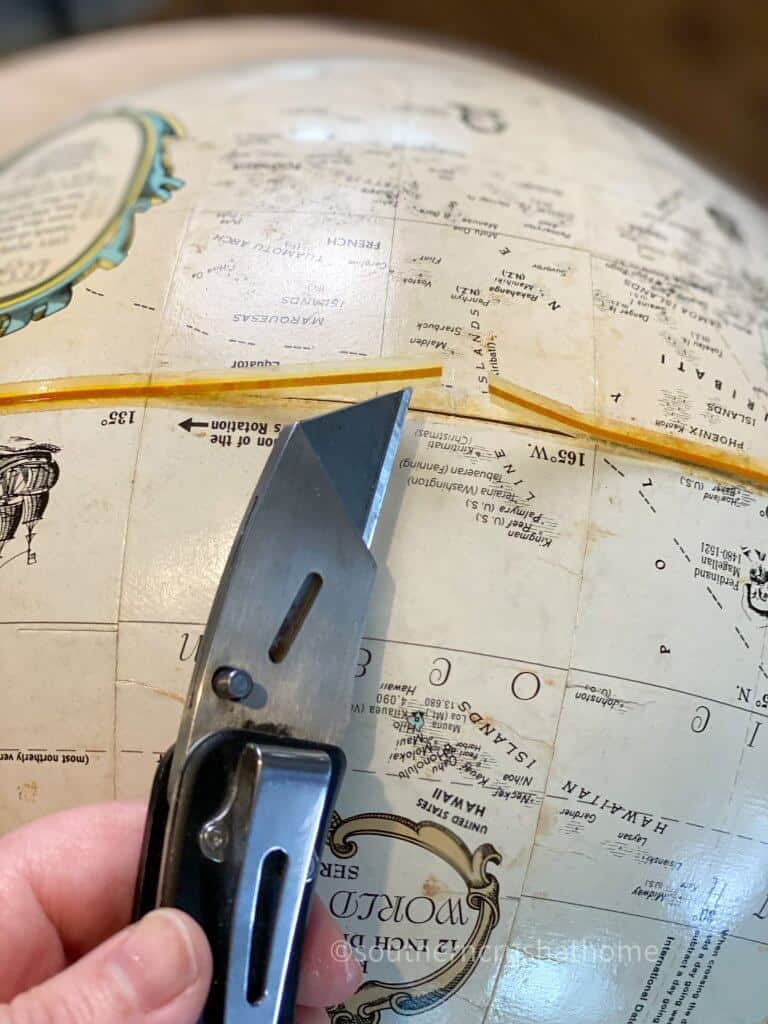
Simply snip the tape off from around the center of the globe to remove the top half of the globe. (Save it for a future project!)
See what I mean about the globe being the perfect base for a planter?
Step 6.
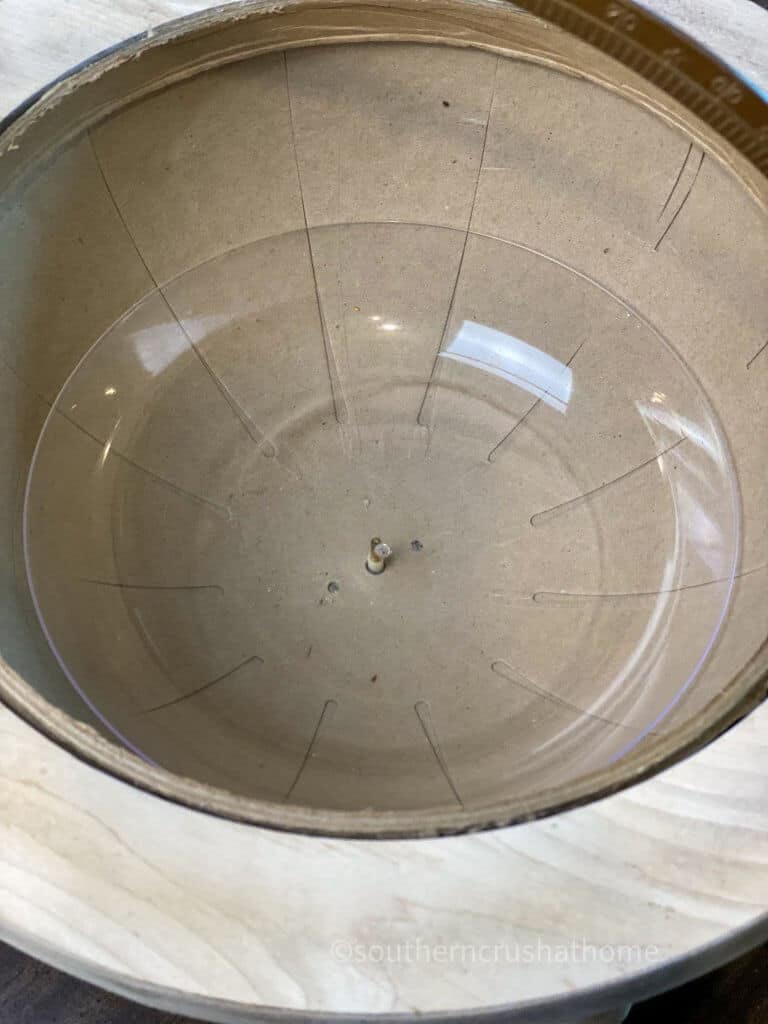
I was trying to think of what to use to protect the inside of the globe from moisture. Thankfully, I was able to find a clear plastic drip bowl that was just the right size at the Dollar Tree. Don't you love when a project comes together like that?
Step 7.
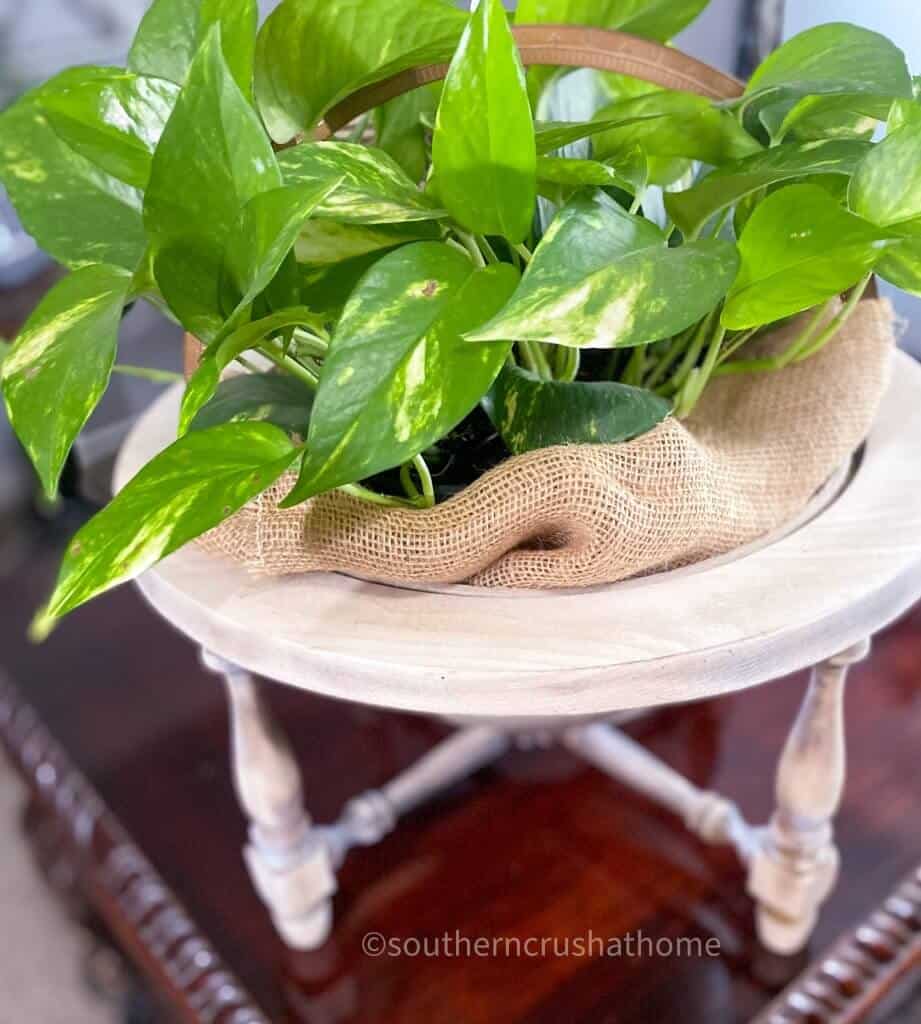
Place a piece of burlap in the bowl for a little extra texture. Then simply add your favorite plant!
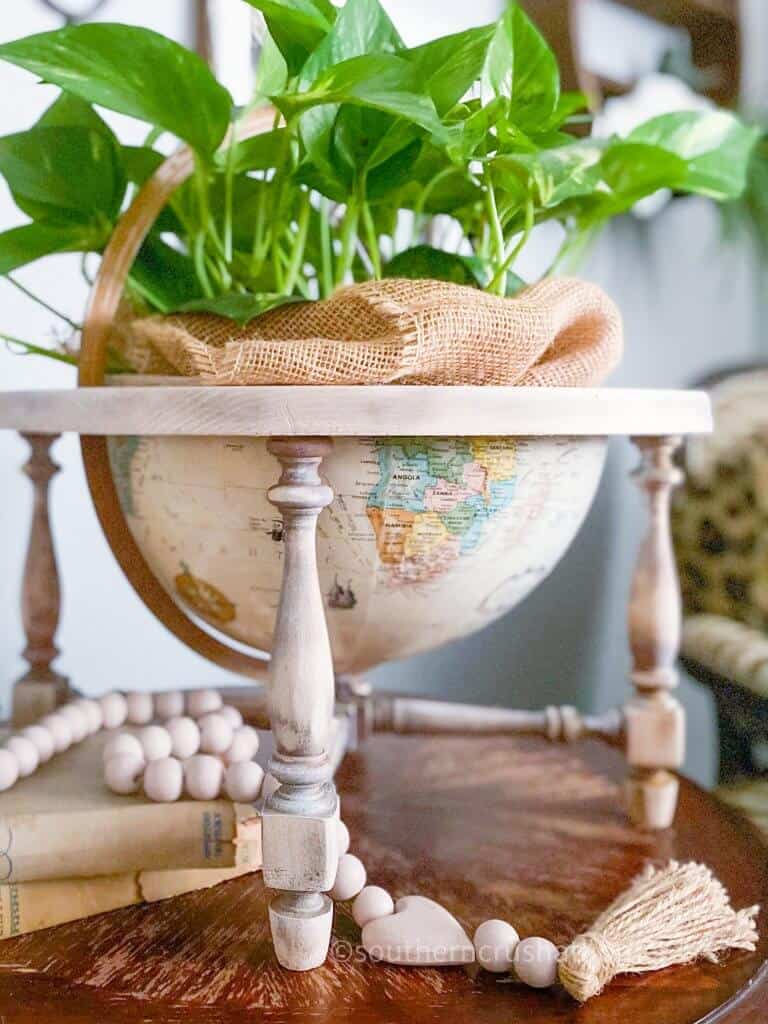
Isn't this DIY globe planter so pretty? The bleached wood look really makes the details stand out and gives it a farmhouse feel or even a coastal look.
Is this something you could see yourself making? How would you decorate with your upcycled globe?
Now I'm on the search for more free or inexpensive wood furniture maybe even something vintage and fun to use this bleach wood furniture solution on.
Now you know how to bleach wood so be sure to keep your eyes open for an old globe the next time you are thrifting. And, don't forget we still have the top half of the globe to upcycle! Any ideas?
Can I Bleach Wood Furniture?
Yes, this bleaching technique can be used on wood accents like this DIY project as well as larger pieces to create bleached wood furniture like a dresser or a dining table.
Just be prepared to use a lot more of the oven cleaner. It took an entire can of oven cleaner to coat this small wood piece twice.
This DIY bleach technique is great for bleaching wood home decor like this globe or wood furniture makeovers!
Bleaching wood furniture would be a great technique to keep in mind for my back porch dresser. It got a bit of paint, stain, and a decoupage napkin method instead, but I still think it turned out great.
Can I Bleach Wood with Household Bleach?
Yes! That is the most obvious way to create a bleached wood look. Simply scuff up your piece first, then apply a coat of bleach solution (one part bleach and nine parts water) and set it out in the sunshine for an added lightening effect.
The bleach application may need to sit in the sun for hours and be repeated using household bleach to get the desired color of the wood you want.
Bleaching wood furniture with actual bleach is something you would definitely want to do outside on a warm sunny day.
Gel bleach is a great solution for this bleaching method as well.
Always be careful when working with bleach, as it can be harmful if ingested or inhaled. Always wear gloves and goggles when working with bleach, and avoid getting it on your skin or clothes.
Keep bleach in a safe place away from children and pets.
Keep in mind, whichever DIY bleaching method you choose, always test the bleach or oven cleaner on a small area of the wood first to make sure it doesn’t damage the surface.
Tips for Bleaching Wood

Be sure to PIN this for later!
#upcyclesquad collaboration
This post was part of an exciting collaboration with some of my favorite upcycling blogger friends. If you like this little DIY, then be sure to check out all of the other #upcyclesquad members’ creative, amazing projects below. On the 4th Thursday each month, our squad will be sharing some awesome projects with you!

Brooke Johnson with The Junk Parlor
I haven’t been able to find a church attendance board, so I decided to DIY one!
Hilary Prall with Hilary Prall Blog
Are you looking for something fun and unique to put on your front door this season? I’m sharing three Spring door hangers that are easy to make, using items you either have already or can be found at the thrift store!
Renee Cormier with Faux Your Eyes Only
One man's trash is another man's treasure” should definitely be my life motto. After all, my favorite hobby is going thrifting and finding items on their way to the landfill and making them into some gorgeous Home Decor!! Do you also enjoy going thrifting and DIYs?? Then this Antique to Chic DIY will speak to your heart just as much as it speaks to mine, soul sista!!
Lora Bloomquist with Lora B Create and Ponder
A curbside plastic bunny becomes the cutest DIY Easter centerpiece.
Elizabeth Jones with The Country Peony
Wreaths don't have to be expensive. See how I transformed this thrifted wreath into a charming carrot wreath for Easter for less than $15. Happy Crafting!

How to Bleach Wood (without using bleach)
Equipment
- Rotary Sander
- x-acto Knife
Materials
- Easy-Off Oven Cleaner
- 80 Grit Sandpaper
- Clear Wax
- Soft Rag
Instructions
- Separate the globe from the wood base.
- Spray the wood with TWO coats of heavy-duty Easy-Off oven cleaner.
- Rinse off the wood with soapy water in-between applications.
- Give the wood a light sanding with a rotary sander using 80 grit sandpaper.
- Apply a clear wax.
- Snip the tape on the center of the globe to cut the globe in half.
- Place a clear plastic pan in the globe bottom for a plant.
- Add burlap fabric and your favorite plant. Enjoy!
this might surprise you but I have YET to try the oven cleaner stripping method!! I love how this piece turned out! So, creative!
Hmmm. That definitely surprises me! You’ve got to try it!
Thank you so much for the compliment!
This is such a fun project! I love globes and plants both!
Me too! We are soul sisters when it comes to all the things!
This turned out really cute! Love the globe on the stand. I’m hoping to try out the oven cleaner method this summer when it’s warm here. The raw wood look is really trending.
Thank you, my friend! Yes, this is definitely a warm-weather project for a sunny day outside!
I love this project! Such a creative use for a thrifted globe! I will have to try the wood bleaching as well. Thank you for sharing!
I’m so glad you like and will try it! Let me know how yours turns out.