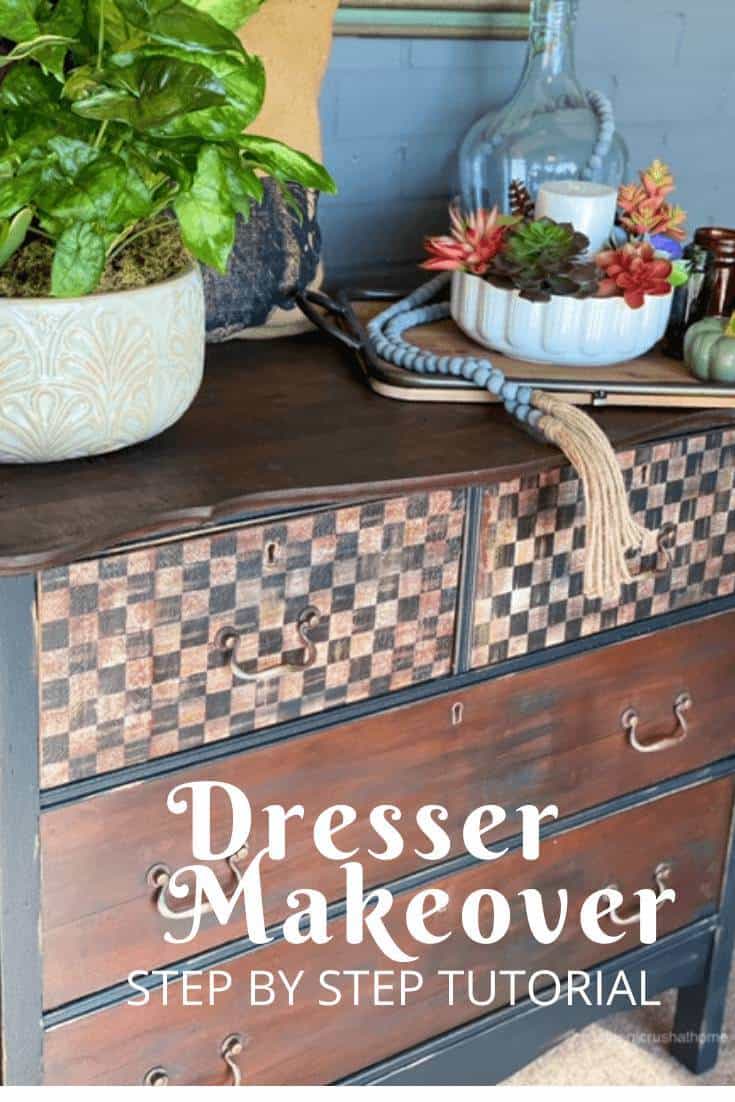
Simple DIY Dresser Makeover
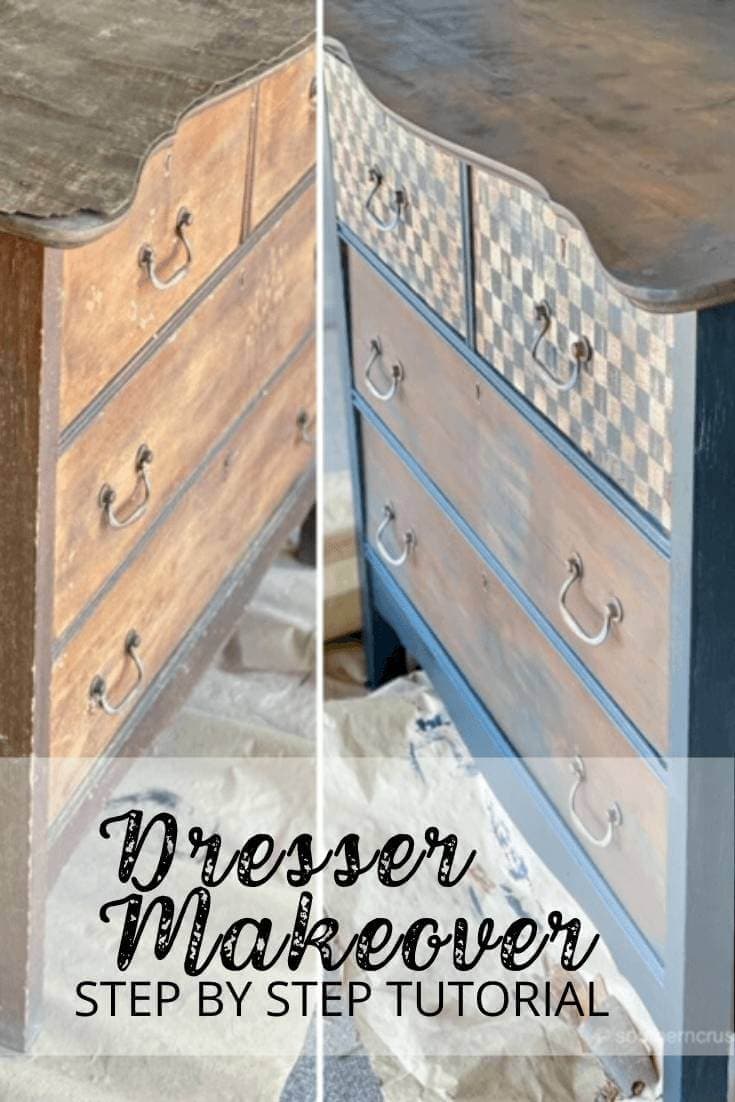
This is how to transform a worn-out dresser and make it look completely brand new! This DIY dresser makeover is easy enough for beginners too.
What a true ‘trash to treasure' story for this vintage dresser on my back porch. The elements got the best of this piece, but instead of the trash, this dresser got a makeover! This is a step by step tutorial using MacKenzie Childs napkins and Java Gel Stain in order to salvage this amazing piece of vintage furniture. This dresser was part of another DIY project we completed making a DRY SINK SHELF.
Don't forget to pin this post so you can find it later!
Where To Buy An Old Dresser
Before we get into this easy tutorial, let me tell you where to look for really low-priced furniture.
My favorite places are thrift shops and consignment stores. The worse shape the dresser is in, the lower the price!
Keep your eyes open for any estate sales and auctions in the area too. Furniture goes for really low prices at these places and you can usually snag a deal or two.
I recommend avoiding apps like Craigslist. It's just not safe to meet complete strangers.
DIY Dresser Makeover Tutorial
Here's how to completely transform an old dresser and give it a new look. I have tons of photos of the entire process, and even better, I used inexpensive materials so this won't cost you a ton.
supplies for a dresser makeover
- TSP cleaner
- Old t-shirt
- Sandpaper
- Screwdriver
- General Finishes java gel stain
- Sherwin Williams gauntlet gray paint
- Orbital sander
- MacKenzie Childs courtly check napkins
- Scissors
- Mod podge
- Sponge roller
- Paintbrush
- Gold paste wax
step by step instructions
Just follow these steps to update a worn-out dresser and make it look like new.
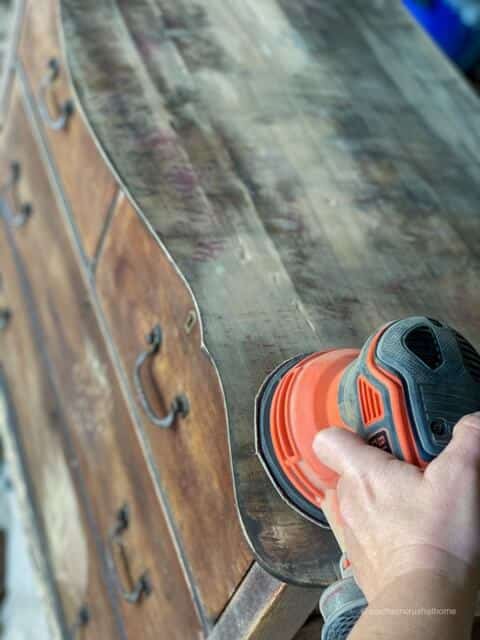
- Remove the veneer from the top of the piece and then sand down with a hand or orbital sander.

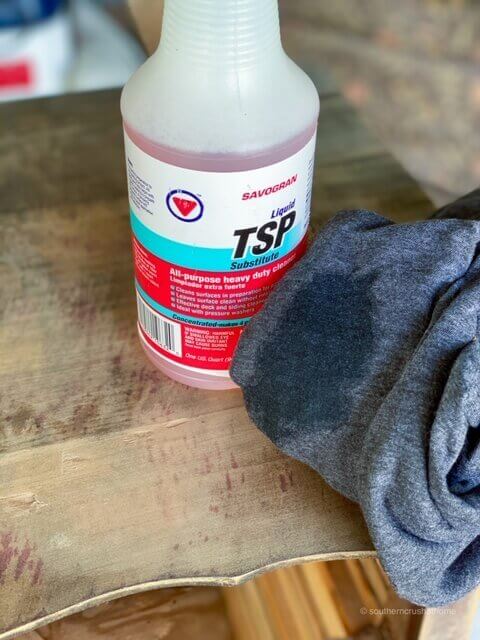
- Clean the furniture piece thoroughly with an old t-shirt and some TSP cleaner for the best results.
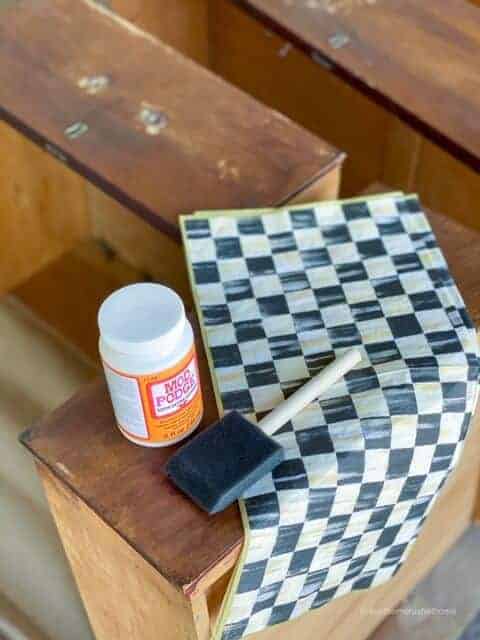
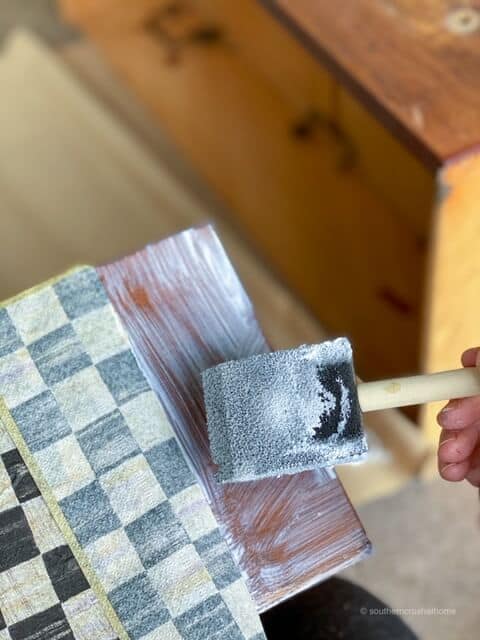
- Decoupage your favorite napkins (mine were the MacKenzie Childs courtly check pattern) using mod podge and a foam brush to the front of desired drawers.
- Go slowly and do small sections at a time. Be sure to get a coat of mod podge on the drawer first, then lay a single layer of the napkin down and continue until covered. Once covered with a napkin, go back over with another thin coat of mod podge. Allow it to dry completely.
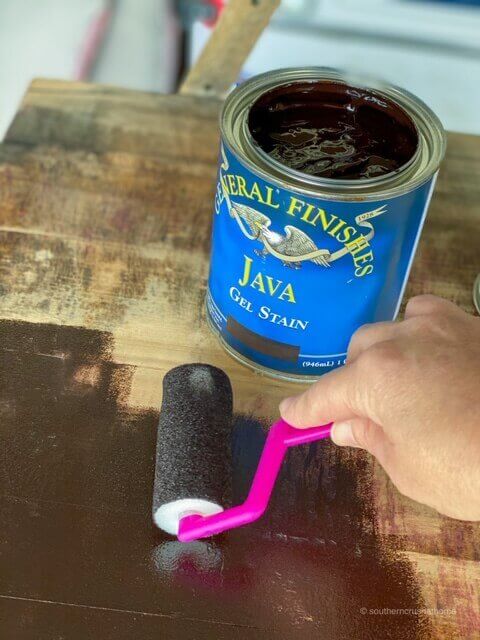
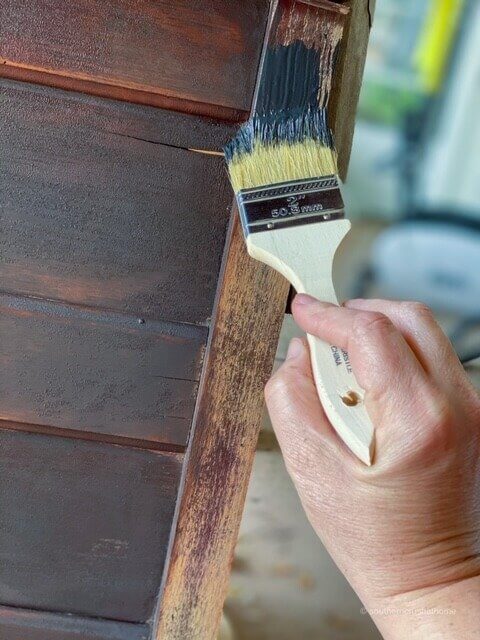
- Apply java gel stain from General Finishes by using a foam roller in small sections. Then go back over it using an old t-shirt to rub and reveal the stained wood top.
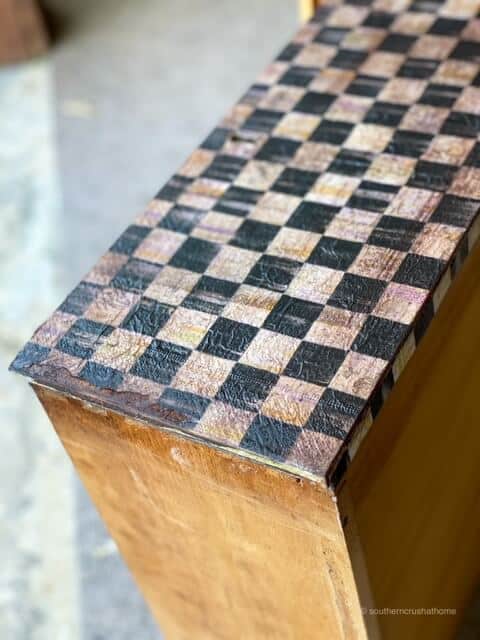
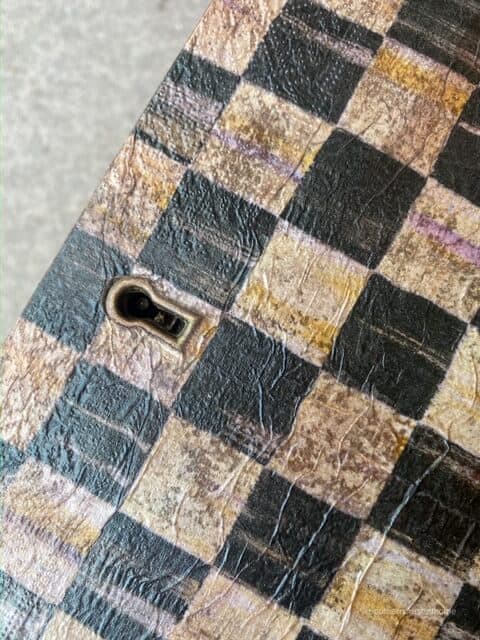
- Once the napkined drawers are dry, use sandpaper to lightly distress the edges if desired. Go over the keyhole with sandpaper lightly to show the opening.
- Paint the trim of the dresser with Sherwin Williams paint using a chip brush or another similar paintbrush.
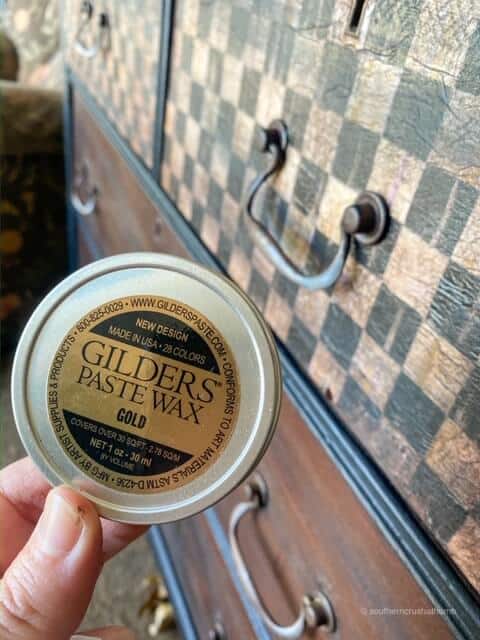
- Using Gilder's paste wax in gold, lightly rub across all the hardware, the fronts of the napkined drawers, and the trim areas of the dresser for a ‘shimmery' effect.

WATCH THE VIdeo tutorial for a DIY dresser makeover HERE
Here is a video tutorial of the entire dresser makeover. Follow along and update your own dresser with me!
Dresser Makeover Ideas
My tutorial is just one way to makeover an old dresser. Be creative – paint different shapes and use a variety of colors and themes. Here are a few dresser makeover ideas that you can try to use on other old pieces of bedroom furniture.
Add New Drawer Knobs
It's pretty amazing what a difference changing the hardware can make. Repaint the knobs or go to your home improvement store and buy something funky and different. Some people even create their own knobs out of upcycled materials like old rope.
Paint With Stencils
Have you ever painted furniture with stencils? It is so much fun! Paint some floral stencils on the fronts of the drawers. Or, choose a trendy pattern (like chevron) and paint it on the top and sides.
Stencils take some time and there is a technique to painting with them. Once you get the hang of it, they can create some stunning designs.
Use bright-colored Paint
Be bold. Repaint the dresser in jeweled green or purple tones for a dramatic statement. Browse ideas online and find some color palettes that match your decor theme. For example, if you have a nautical theme in your bedroom, paint the dresser navy blue and green.
Wallpaper the drawers
I used napkins, but some people prefer to use wallpaper on the drawer fronts. This is a really fun idea because there are some stunning wallpapers out there. Add a watercolor wallpaper for a dreamy boho look.
Paint Bold Stripes
Another easy idea is to use painter's tape and section off areas of the dresser. Then, paint multi-colored stripes on the dresser that either goes from top to bottom or side to side.
Depending on where you are going to store this dresser, you can use colors as vibrant or muted as you desire. For example, you might paint primary colors like red, green, and yellow in a child's bedroom.
Make It Ombre
Another idea is to give the dresser an ombre look. Start at the bottom and paint a really bold shade. Then, add a little more white to the color the higher you go to the top. This is a really easy way to add a splash of color to a room that has muted greys and whites in it!
Give the Dresser a New Purpose
Finally, you can always take the drawers out and give the dresser a completely new purpose like a bookshelf. You can also turn an old dresser like this one into an end table in an entryway. This project turned an old dresser into a bench with extra storage – what a creative idea!
Final Thoughts
I'm in love with how this makeover turned out! How about you? The courtly check design on the napkins, combined with the gold Gilder's paste wax makes this piece pop and seem fancier than it is!
>>>BE SURE TO PIN THIS FOR LATER!<<<
If you love these kinds of DIY ideas, you need to be getting my emails, friend! Each week I send out a couple of emails that include updates, crafts, shopping experiences, and decor inspiration. Be sure to get yourself signed up below. I can’t wait to meet you!
>>Leave your thoughts below in the comments, please… BTW— Life is short—Enjoy the mess!
More DIY Ideas
If you enjoyed this tutorial, then check out these next.
DIY Dresser Makeover
Materials
- old dresser
- TSP cleaner
- Old t-shirt
- Sandpaper
- Screwdriver
- General Finishes java gel stain
- Latex paint I used Sherwin Williams gauntlet gray paint
- Orbital sander
- MacKenzie Childs courtly check napkins or napkin of your choice
- Mod podge
- Paintbrush
- Sponge roller
- Gold paste wax
Instructions
- Remove the veneer top of your dresser (if applicable) and sand it down with the orbial sander.
- Clean the dresser using a t-shirt and TSP cleaner.
- Decoupage your favorite napkins onto the front of the drawers using mod podge. Make sure to use thin coats.
- Add gel stain in small sections with a foam roller brush. If desired, distress the top by using an old t-shirt to rub through the stain a bit.
- Distress the drawers as desired.
- Paint the sides of the dresser with paint.
- Using Gilder's paste wax in gold, lightly rub across all the hardware, the fronts of the napkined drawers, and the trim areas of the dresser for a 'shimmery' effect.
I love this. I
Hope to have a big porch to do this one day.
I love the way this turned out a true trash to treasure.
my saving grace is working on big projects like this I luv crafting but may luv doin things like this more lol turned out cute
Love turning trash to treasures! ????
This is gorgeous and I have a dresser I could do this to. Have to find those napkins though. They make the piece.
Yay!! I’m so glad!