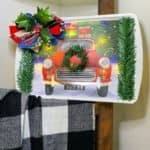
Dollar Tree Grill Pan Christmas Decor
Never in a million years did I guess that this fun Dollar Tree Grill Pan Christmas Decor would go viral on social media.
Nonetheless, this was a blast to create and I hope that you will make one for your own.
The little vintage red truck that lights up is my favorite part; although, I do love my signature “messy” bow that is used as well.
The steps are easy to follow and you’ll be amazed at how it will turn out…

PIN this for later!


what you’ll need to make a grill pan christmas decoration
- Dollar Tree grill pan with holes
- White Acrylic Paint
- Glitter
- Mod Podge
- Scissors
- Dollar Tree gift bag
- Dollar Tree battery operated lights (I used the flat kind)
- Scotch tape
- Dollar Tree faux branches
- Hot glue and Glue gun
- Messy Bow (See this tutorial HERE)
steps to make grill pan diy
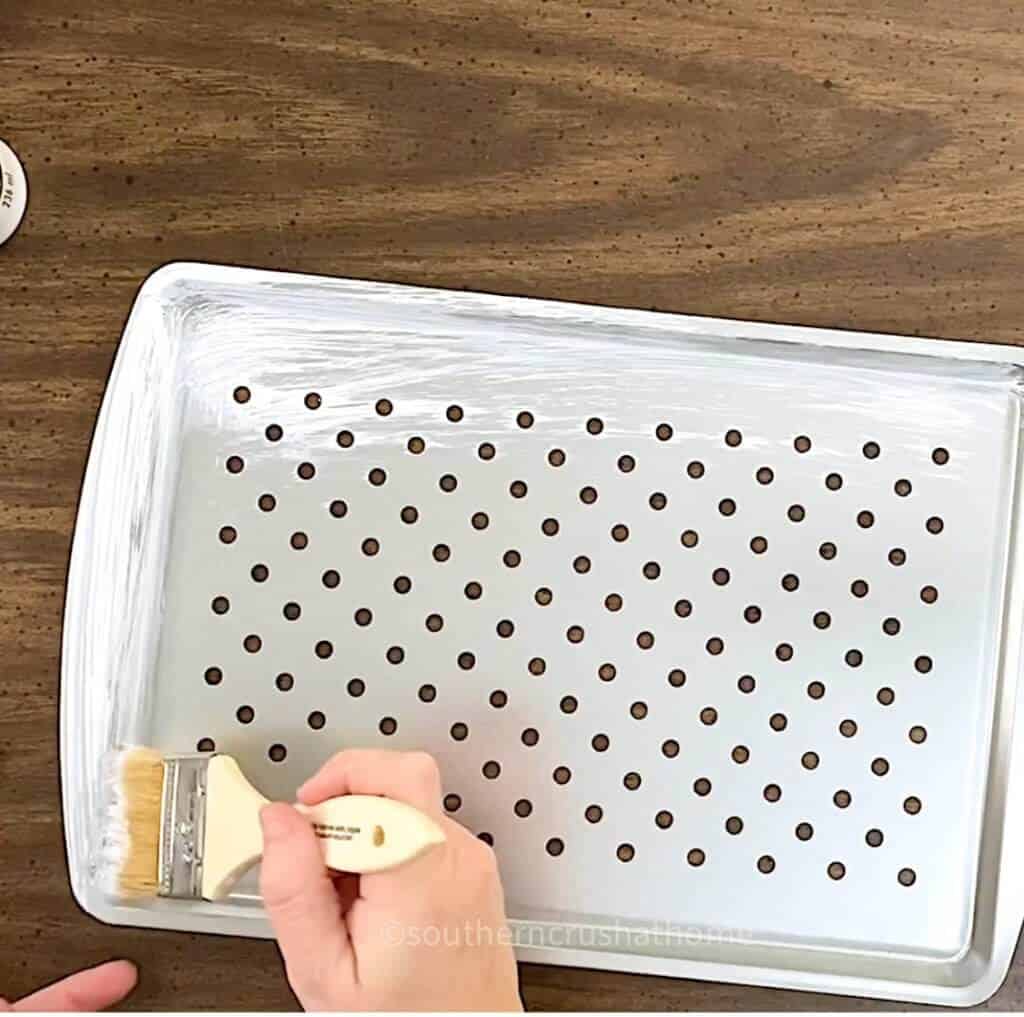
- Paint the grill pan white or whatever color you choose. If not using chalk based paint, then two coats will be needed. You may like to check out my DIY Chalk Paint recipe here for a shortcut.

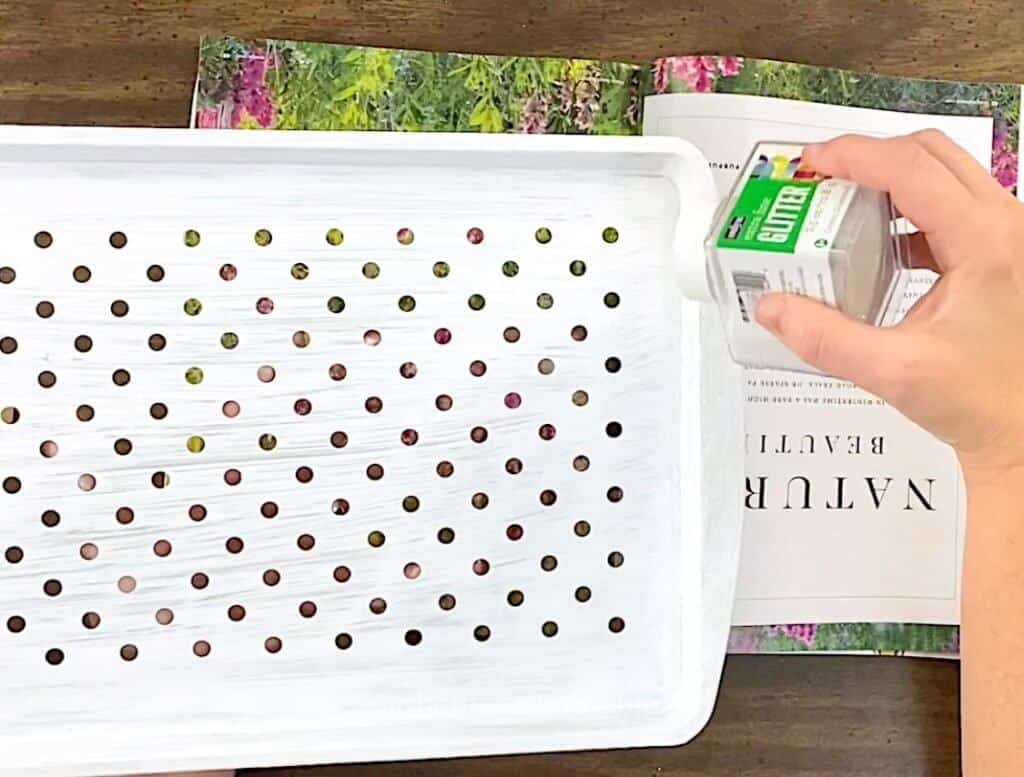
- Add a thin layer of mod podge onto the sections of your pan you want to add glitter. I did the ends.
- Sprinkle glitter lightly over your mod podged areas being careful to catch the glitter in a handy magazine underneath.

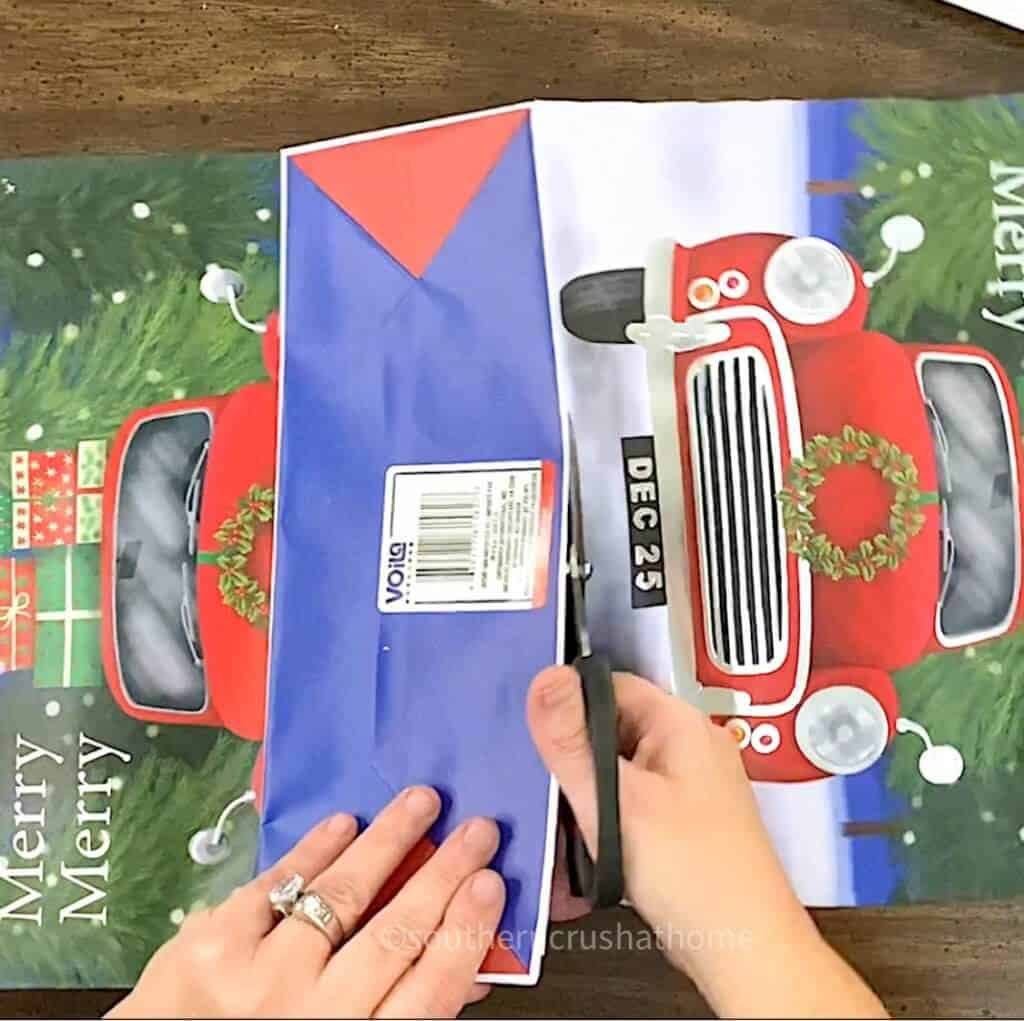
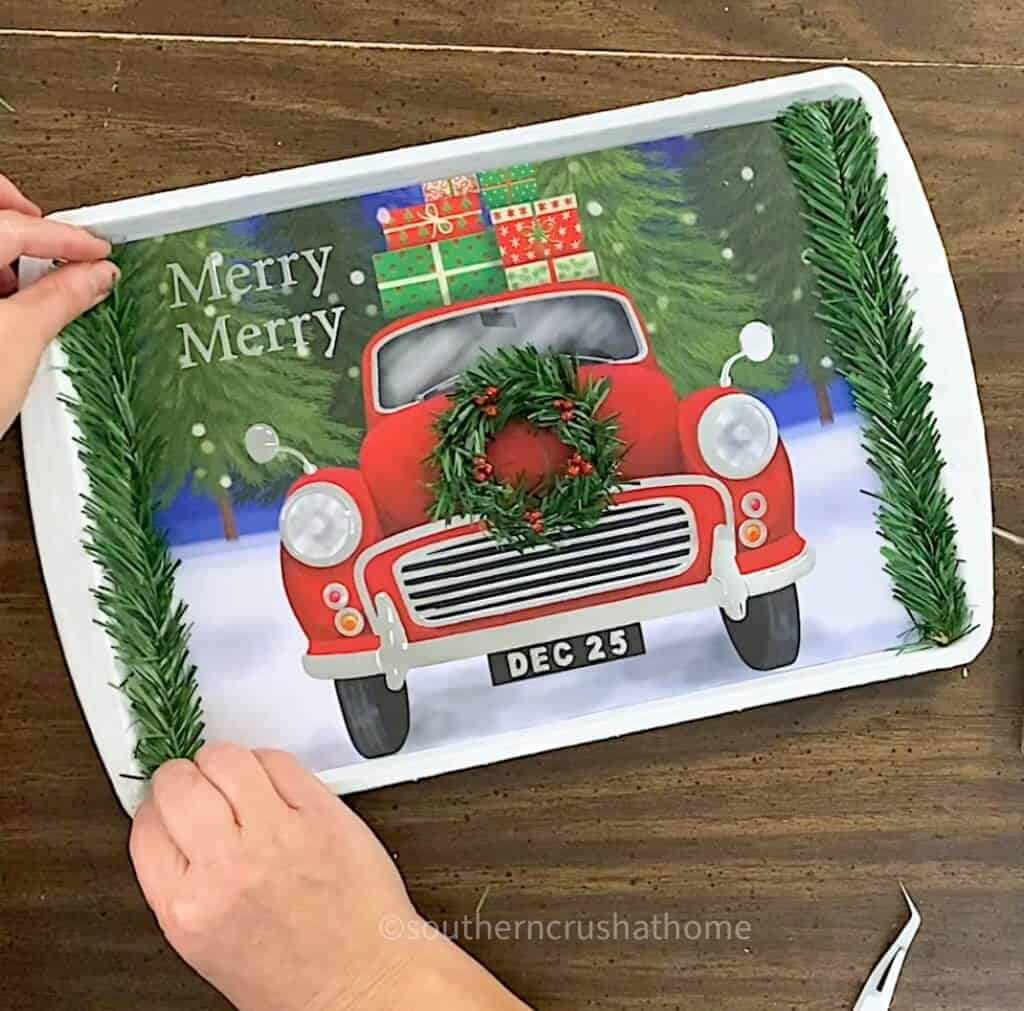
- Cut out the section of the gift bag scene you love most that fits the grill pan.

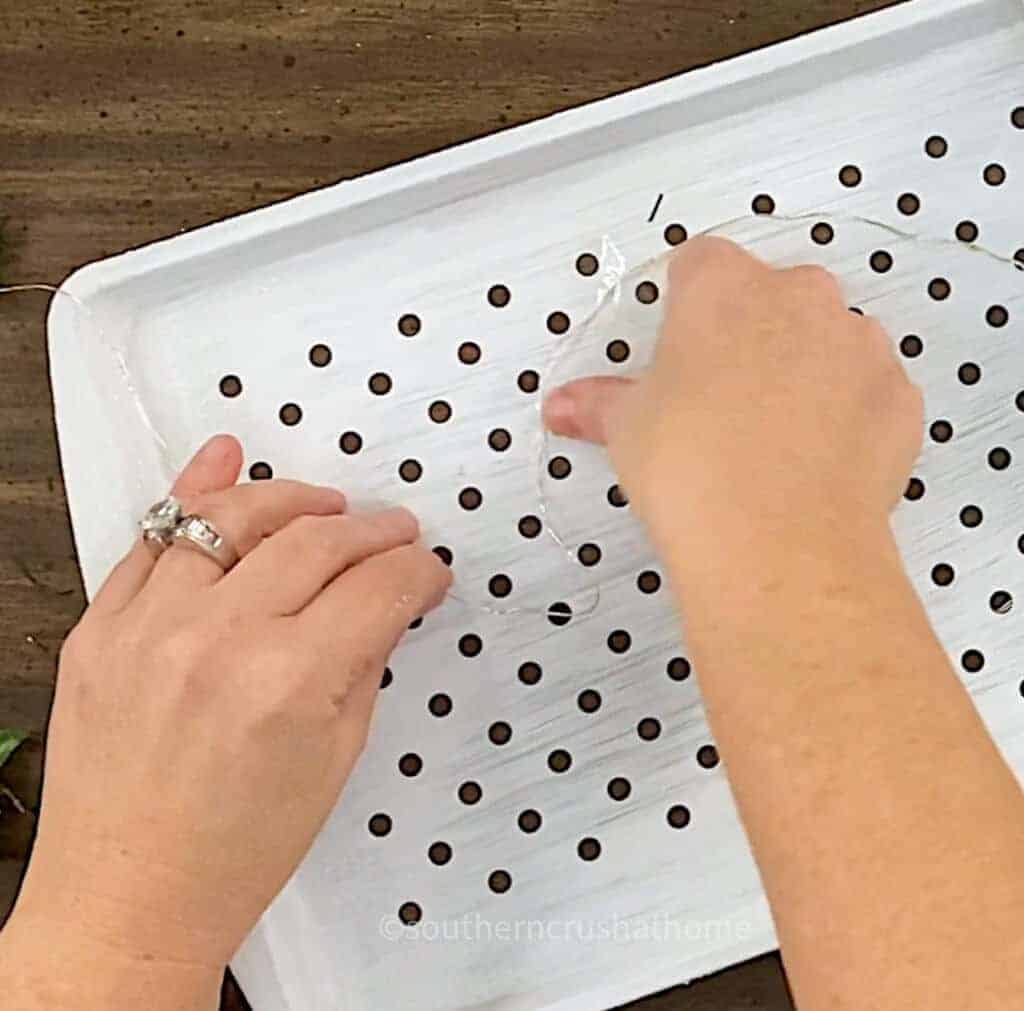
- Weave the battery operated lights through the holes in the grill pan and tape them down. The flat lights come in handy for this part.

- Glue your gift bag scene on top of the lights.

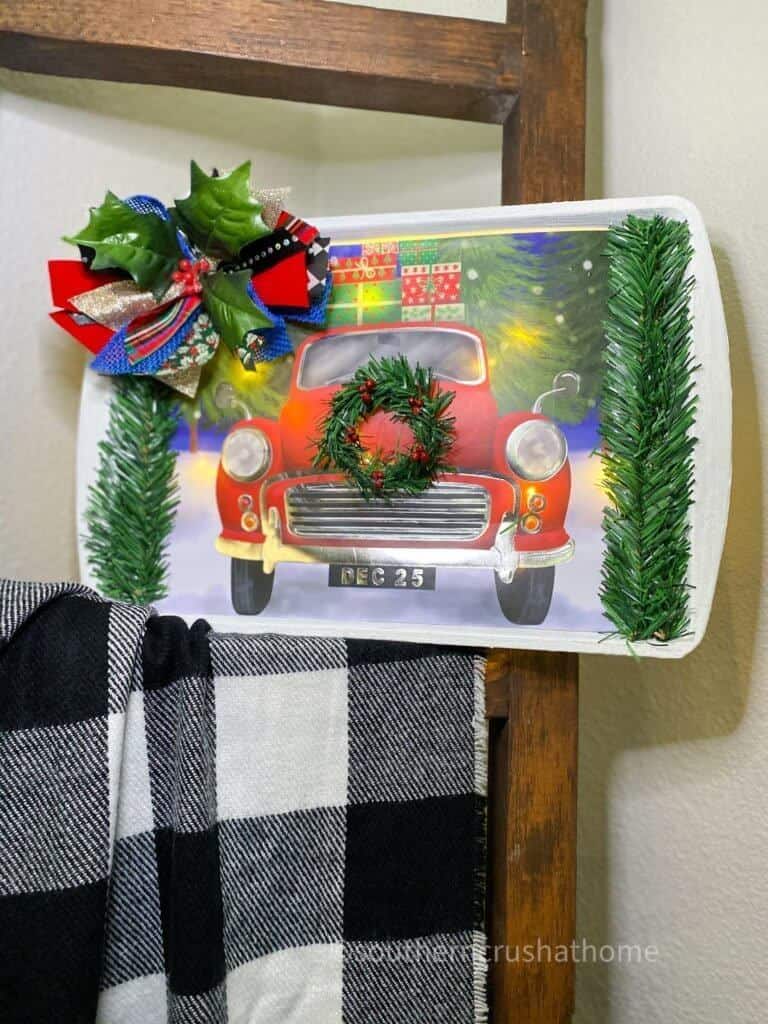
- Add faux branches to the sides of the grill pan as desired. And anywhere you want a 3-D look. I added a faux wreath.
- Brush white paint over the branches if you desire a “snowy” look.
- Make an optional ‘messy’ bow for the grill pan decoration. See tutorial HERE.

if you missed the 3 minute video tutorial, you may want to check it out here.
turn on the lights to your grill pan christmas decor

This was a really fun DIY project to create and I highly recommend getting creative with hunting down just the perfect gift bag scene and making one for your own Christmas decor!
other dollar tree diy’s you’ll love!
- Dollar Tree Christmas Card DIY
- Tabletop Christmas Cone Trees (Using a Mop Head)
- Dollar Tree Christmas Gift Bag Decor DIY
SIGN UP FOR MORE DIY’S
If you love these kinds of DIY ideas, you need to be getting my emails, friend! Each week I send out a couple of emails that include updates, crafts, shopping experiences, and decor inspiration. Be sure to get yourself signed up below.
I can’t wait to meet you! Leave your thoughts below in the comments, please… BTW— Life is short—Enjoy the mess!
Dollar Tree Grill Pan Christmas Decor
Equipment
- scissors
Materials
- 1 Dollar Tree grill pan with holes
- White Acrylic Paint
- Glitter
- Mod Podge
- 1 Dollar Tree gift bag
- 1 Dollar Tree battery operated lights I used the flat kind
- Scotch tape
- Dollar Tree faux branches
- Messy Bow See this tutorial HERE
Instructions
- Paint the grill pan white or whatever color you choose. If not using chalk based paint, then two coats will be needed. You may like to check out my DIY Chalk Paint recipe here for a shortcut.
- Add a thin layer of mod podge onto the sections of your pan you want to add glitter. I did the ends.
- Sprinkle glitter lightly over your mod podged areas being careful to catch the glitter in a handy magazine underneath.
- Cut out the section of the gift bag scene you love most that fits the grill pan.
- Weave the battery operated lights through the holes in the grill pan and tape them down. The flat lights come in handy for this part.
- Glue your gift bag scene on top of the lights.
- Add faux branches to the sides of the grill pan as desired.
- Brush white paint over the branches if you desire a “snowy” look.
- Make an optional ‘messy’ bow for the grill pan decoration. See tutorial HERE.
This is adorable! Amazing what you can do with a DT grill pan! ????
Thank you so much!