Repurposed Vintage Cheese Grater Wall Decor
Antiquing is one of my favorite things to do! When I came across this vintage cheese grater I knew it could be repurposed into one-of-a-kind Wall Decor! At first glance, you'd just see an old cheese grater; however, with a little paint and mod podge this decorative wall decor came to life!
Be Sure to PIN this for Later!
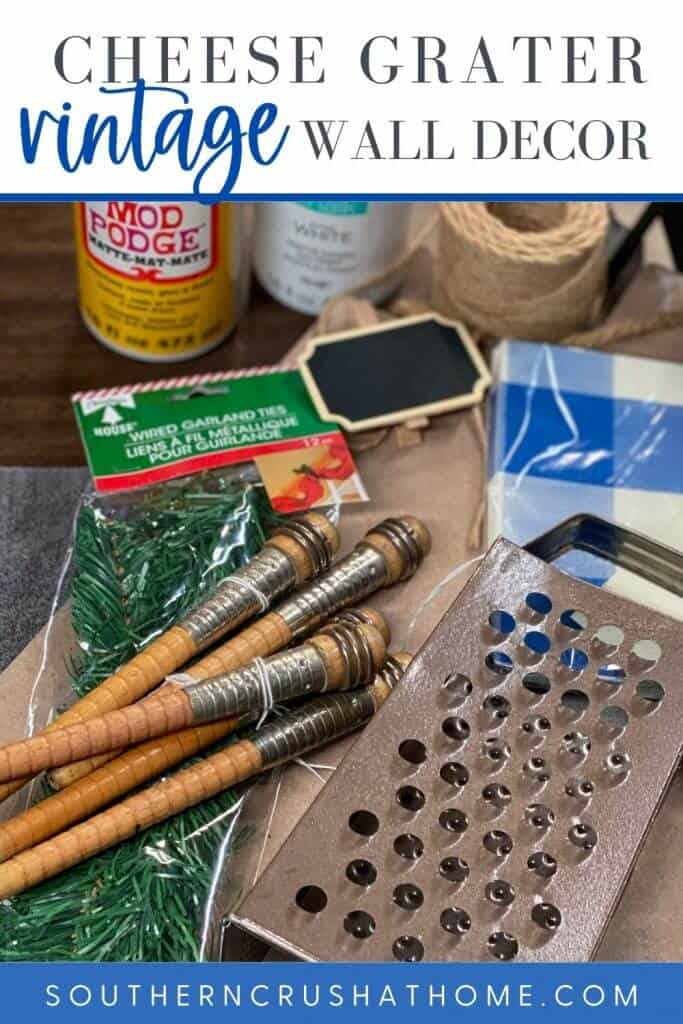
What you'll need to make this wall decor
- Vintage Cheese Grater (or of course any cheese grater will do just fine)
- Wood plank or cutting board a bit larger than the cheese grater
- White chalk type paint or acrylic paint (choose a background paint that compliments the colors in your napkins)
- Mod Podge
- Decorative Napkins (choose colors that compliment your space)
- Sandpaper block
- Baggie or Saran Wrap
- Heat Gun (optional)
- Paint Brush
- Scissors
- Zip Tie
- Wire cutters
- Hot Glue
- Scrap Burlap
- Wired Garland Ties
- Vintage bobbins for carrots HERE or HERE
- Jute
- Ribbon for hanging
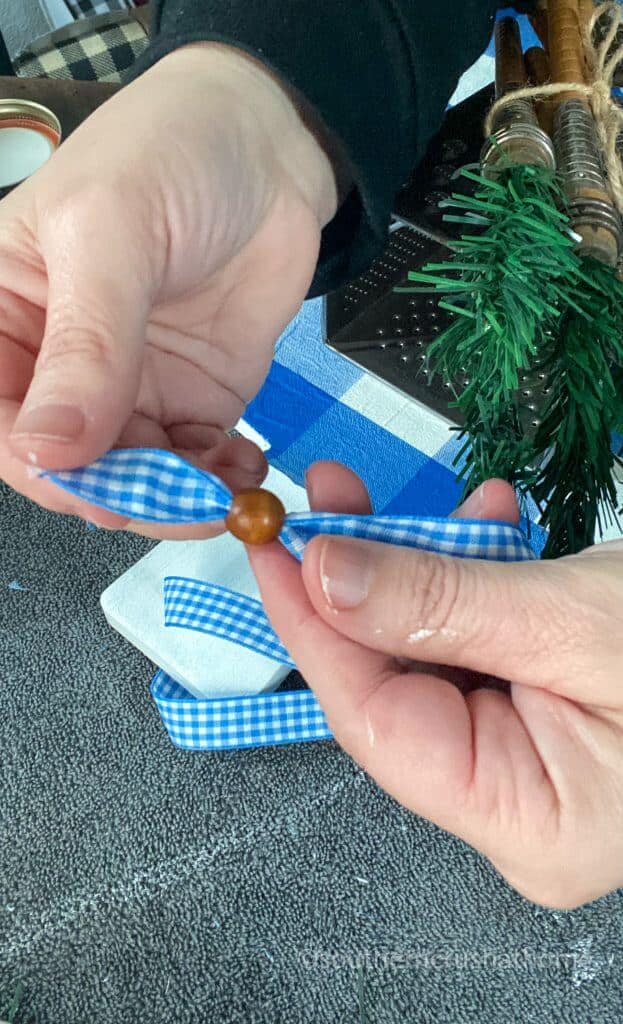
- Wood beads for embellishment (optional)
- Kitchen towel or tea towel
My friend Miss Tracy has an awesome “napkin club” if you love napkins as much as I do! Each month she sends you a bundle of fun napkins and then shows you what to make with them!
how to make vintage cheese grater decor
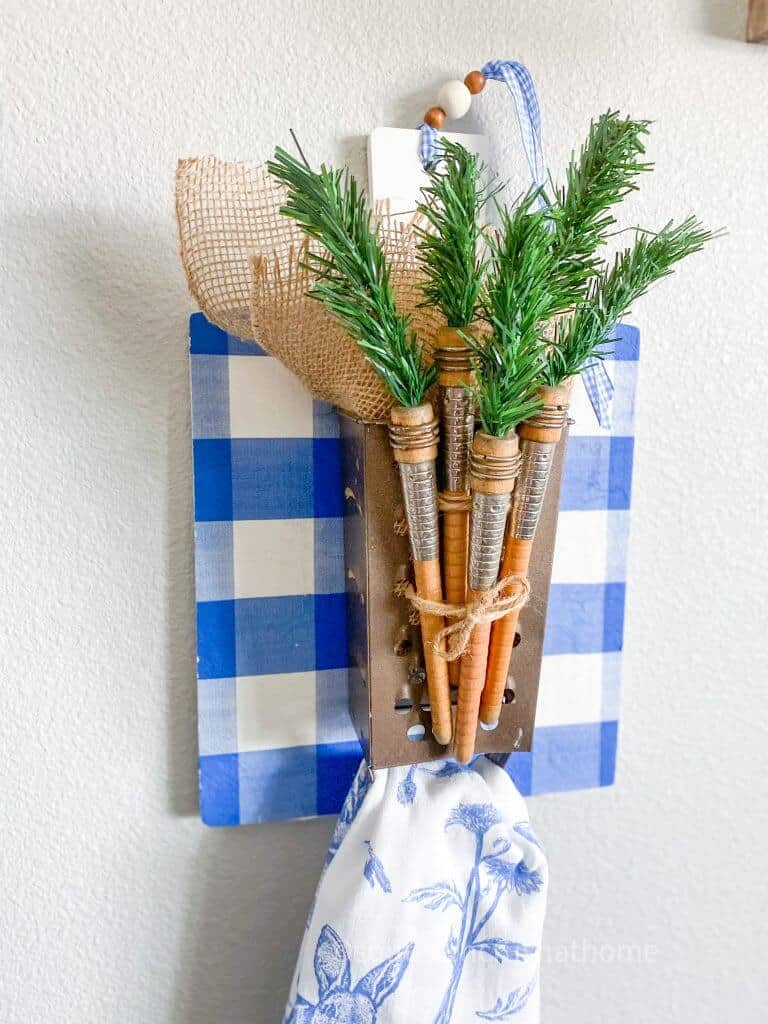
Paint a thin light coat onto the wood background to compliment the napkin colors.
Dry completely using heat gun if needed.
Apply a thin layer of mod podge and apply a single napkin layer.
Use a baggie or saran wrap to smooth over the napkin and remove any bubbles.
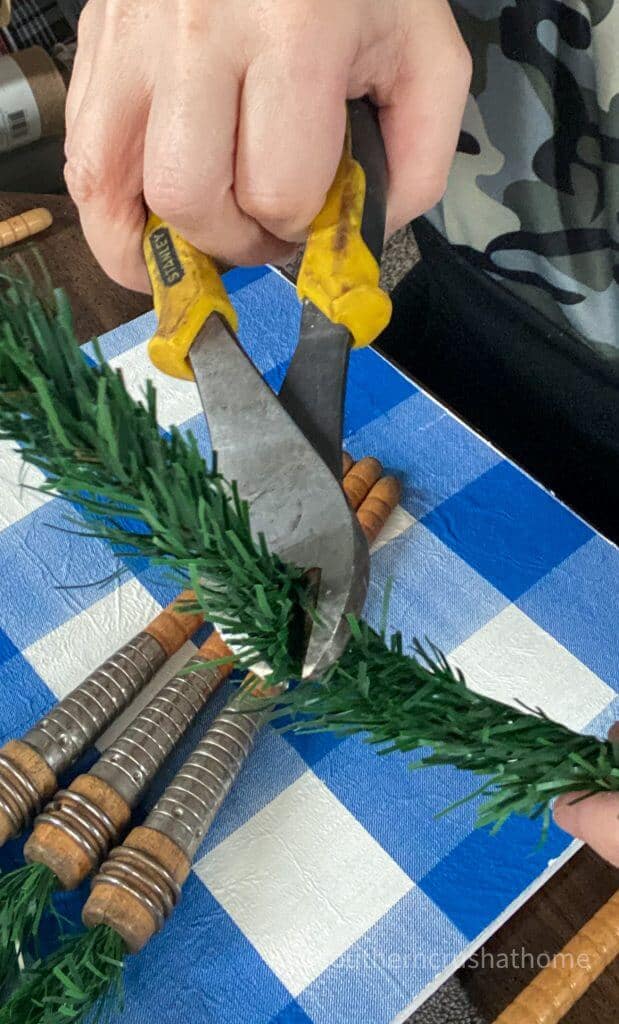
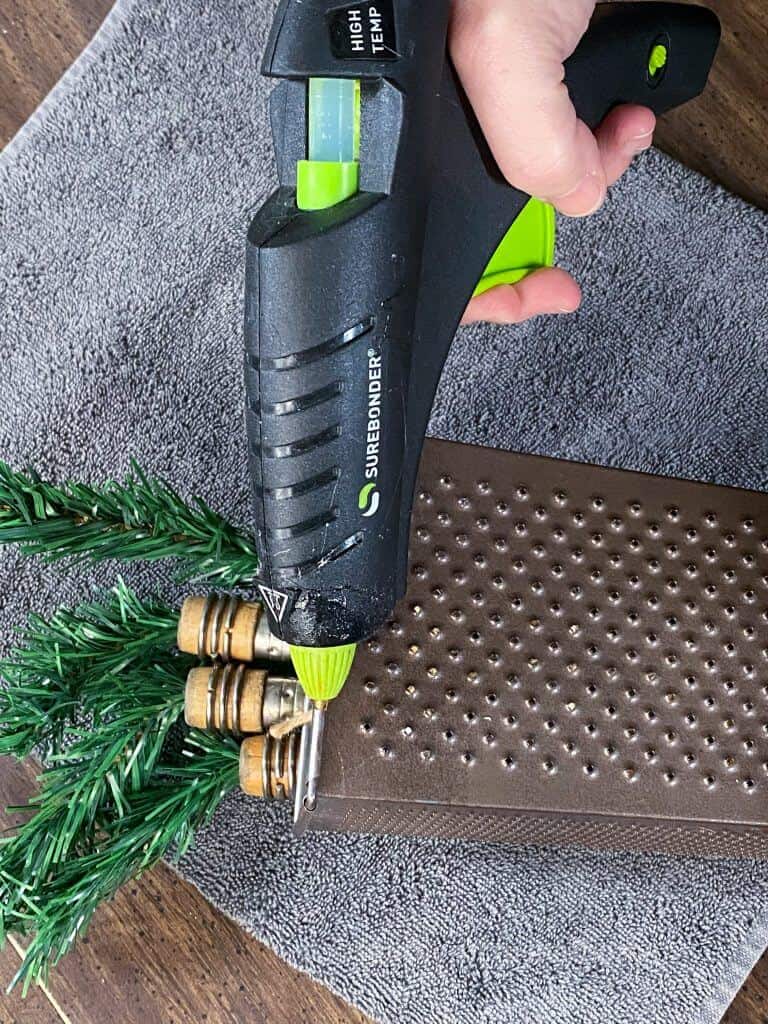
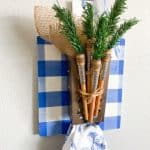
Snip faux fir garland ties greenery in half using scissors or wire cutters.
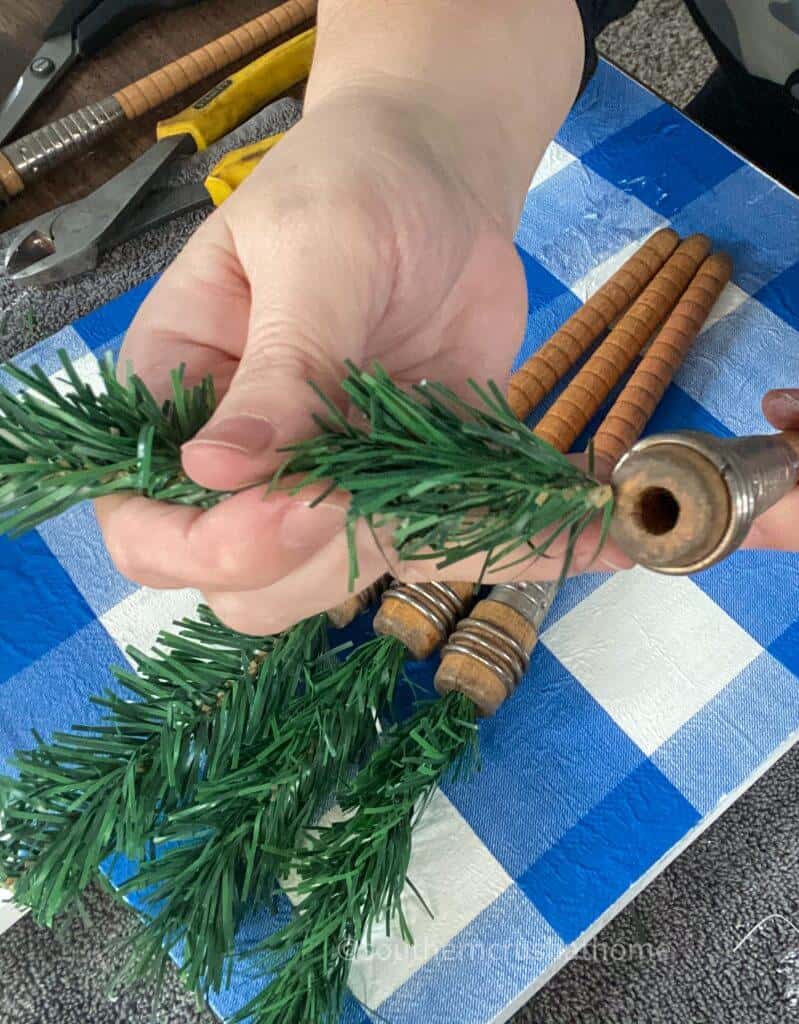
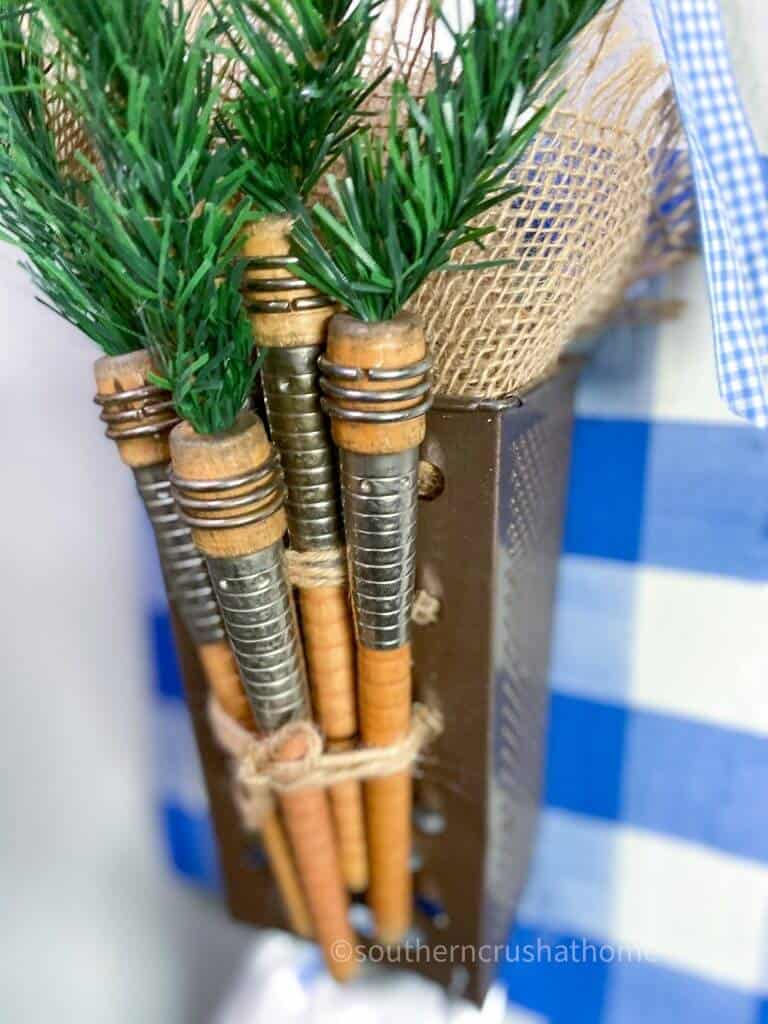
Tuck piece of greenery into the top of bobbins to resemble carrots.
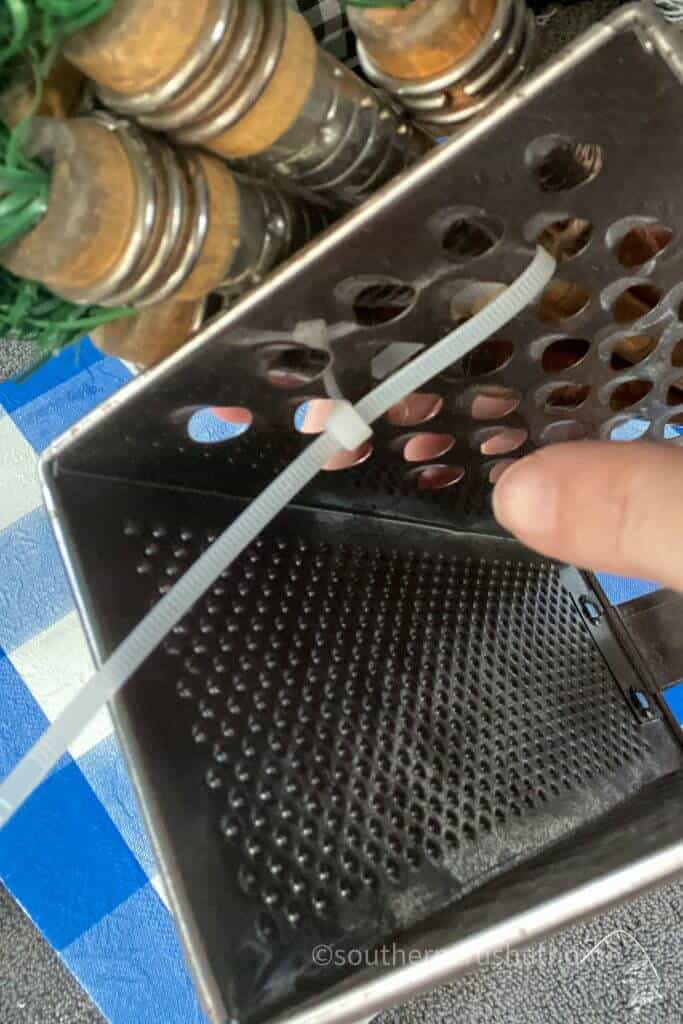
Zip tie the carrots to the cheese grater.
Cover zip tie with jute and tie a bow.
Secure the cheese grater to the wood backing by either hot glue or screws.
Tuck a piece of scrap fabric or burlap in the large opening of the cheese grater.
Embellish the wall decor by stringing wooden beads to a complimentary ribbon.
Add a favorite kitchen towel or tea towel to the bottom!
easy vintage cheese grater craft
This turned out so cute! I hope you'll make a one for your home, too! I'm hoping to update this DIY with small tweaks to decorate for every single season.

be sure to check out these other repurposing ideas!
- Here’s a Quick Way to Repurpose Starbucks Drink Bottles
- Dresser Mirror Idea – Turn a Mirror Into A Shelf
- Simple DIY Dresser Makeover
GET DIY EMAILS
If you love DIYs and Ideas like these as well as seeing all the fun things I find out shopping, you need to be getting my emails, my friend! Each week I send out a couple of emails that include updates, crafts, shopping experiences, and decor inspiration. Be sure to get yourself signed up below. I can’t wait to meet you!
Repurposed Vintage Cheese Grater Wall Decor
Equipment
- Heat Gun (optional)
- paint brush
- scissors
- Wire cutters
Materials
- Decorative Napkins choose colors that compliment your space
- Sandpaper block
- Baggie or Saran Wrap
- Zip Tie
- Hot Glue
- Scrap Burlap
- Christmas faux fir stems from Dollar Tree
- Vintage bobbins for carrots
- Jute
- Ribbon for hanging
- Wood beads for embellishment optional
- Kitchen towel or tea towel
Instructions
- Paint a thin light coat onto the wood background to compliment the napkin colors.
- Dry completely using heat gun if needed.
- Apply a thin layer of mod podge and apply a single napkin layer.
- Use a baggie or saran wrap to smooth over the napkin and remove any bubbles.
- Snip faux fir greenery in half using scissors or wire cutters.
- Tuck piece of greenery into the top of bobbins to resemble carrots.
- Zip tie the carrots to the cheese grater.
- Cover zip tie with jute and tie a bow.
- Secure the cheese grater to the wood backing by either hot glue or screws.
- Tuck a piece of scrap fabric or burlap in the large opening of the cheese grater.
- Embellish the wall decor by stringing wooden beads to a complimentary ribbon.
- Add a favorite kitchen towel or tea towel to the bottom!
2 Comments