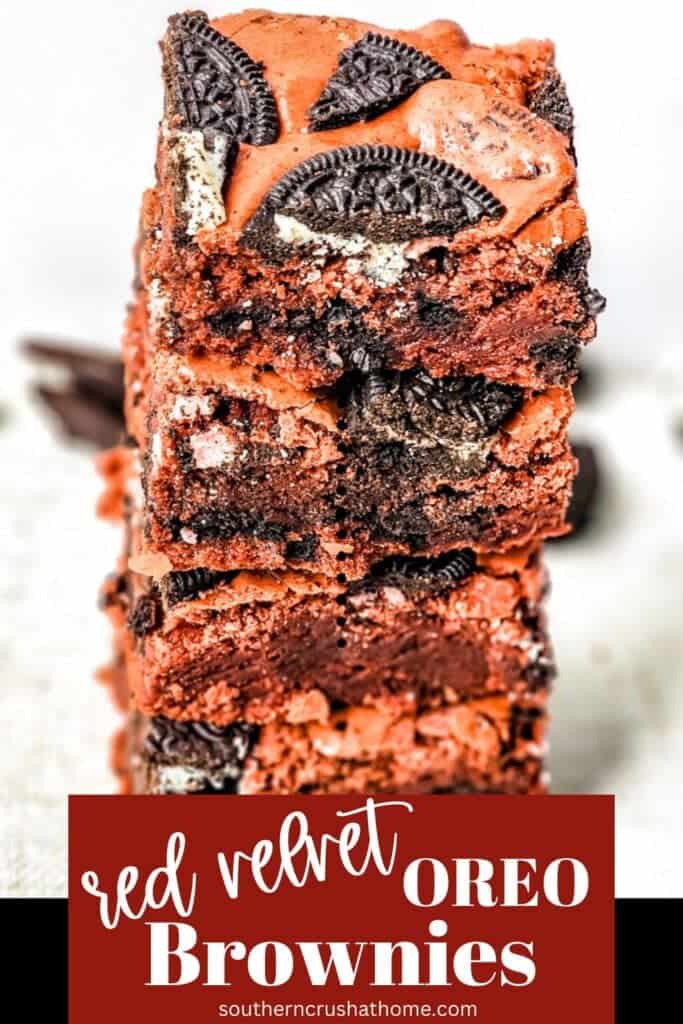
Fun Twist on a Traditional Oreo Brownies Recipe
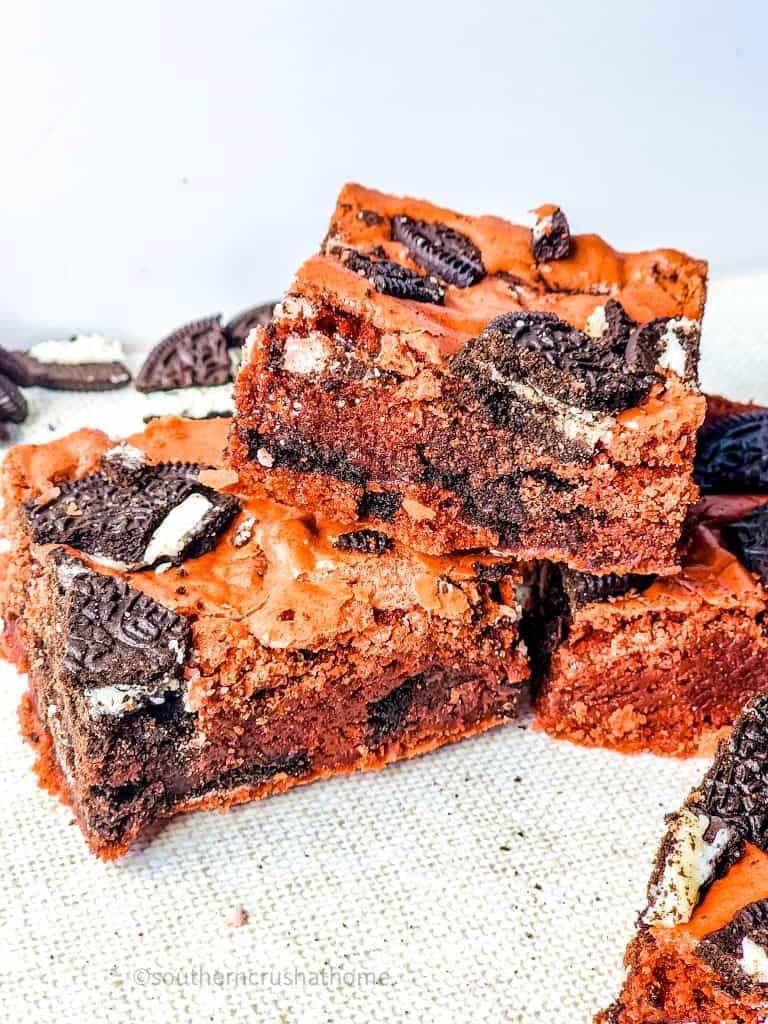
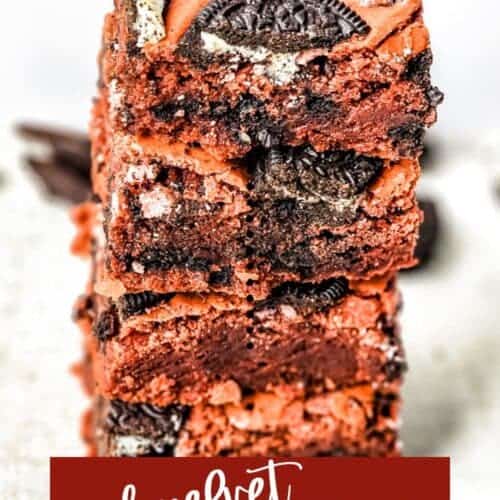
If you are a brownie lover, who isn't really? You will absolutely love these Oreo Brownies. They're a twist on traditional fudgy brownies with added chopped Oreo cookies and red food coloring mixed into the brownie batter to make these red velvet brownies yummy and gorgeous.
If you are looking for a change of pace from the traditional Oreo brownie recipe this variation is perfect. Make them for special occasions, family get-togethers, or just when you are craving fudgy Oreo brownies.
Be Sure to PIN this for later!
Make a batch of this brownie recipe a few days before you want to serve them as they will keep well on the kitchen counter for up to 3-4 days. Or you can freeze oreo brownies and defrost them when you want to serve them. Either way, they'll taste great.
If you are as big a fan of dessert as I am you'll find loads of amazing dessert recipes on my website. If you are looking for more red velvet desserts try this Easy No Bake Red Velvet Fudge or this Red Velvet Cake. Or if fudgy brownies are more what you are in the mood for these Fudgy S'Mores Brownies are over-the-top good and so gooey.
This blog post contains affiliate links. The opinions are wholly my own from my own experience. I may earn a small commission from clicks through to the websites that end in a purchase.
Why You'll Love This Brownie Recipe
- Fun, festive and colorful treat
- These are easy to make decadent brownies
- Perfect make ahead-of-time dessert
- One bowl dessert means less to clean up
Equipment Needed
- Stand Mixer or Whisk
- 9×9 Baking Pan
- Parchment Paper (optional)
- Measuring cups and spoons
Ingredients for Oreo Brownies
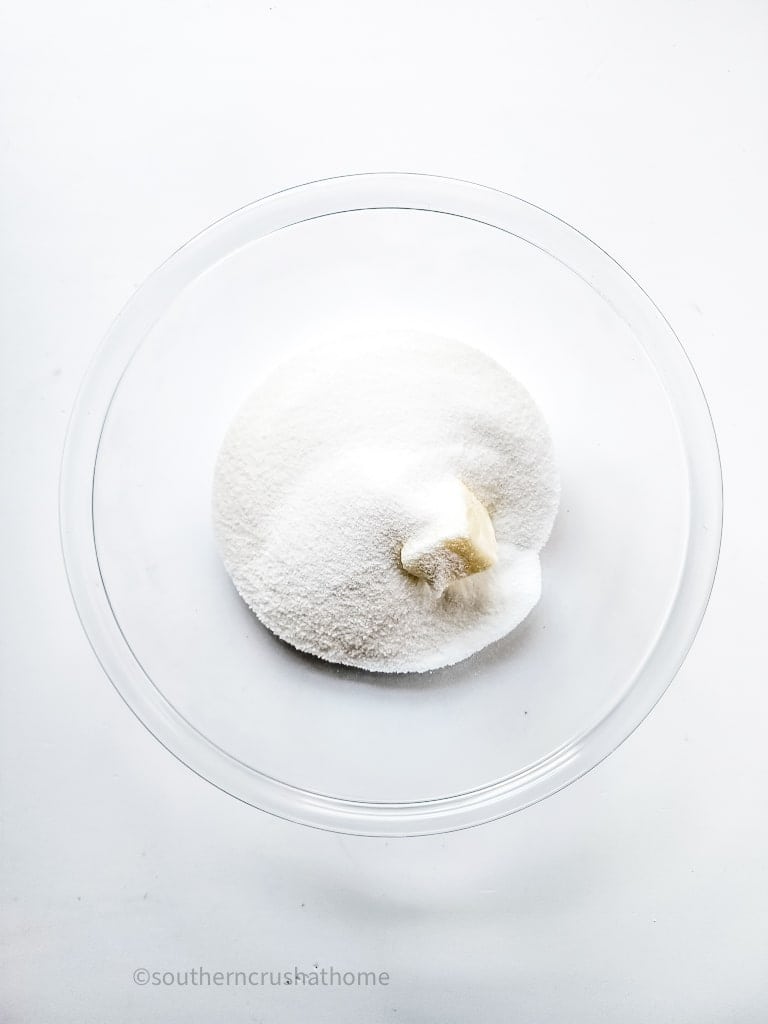
- ¼ cup unsalted butter
- 1 ½ cups white granulated sugar
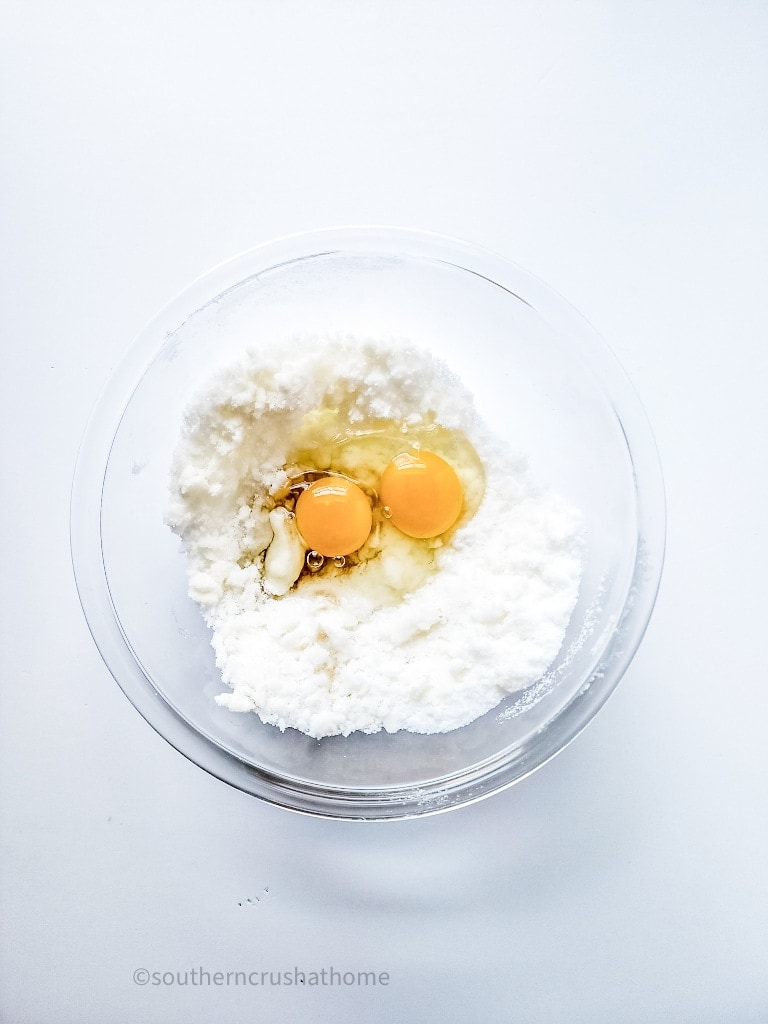
- 2 eggs
- 1 teaspoon vanilla extract
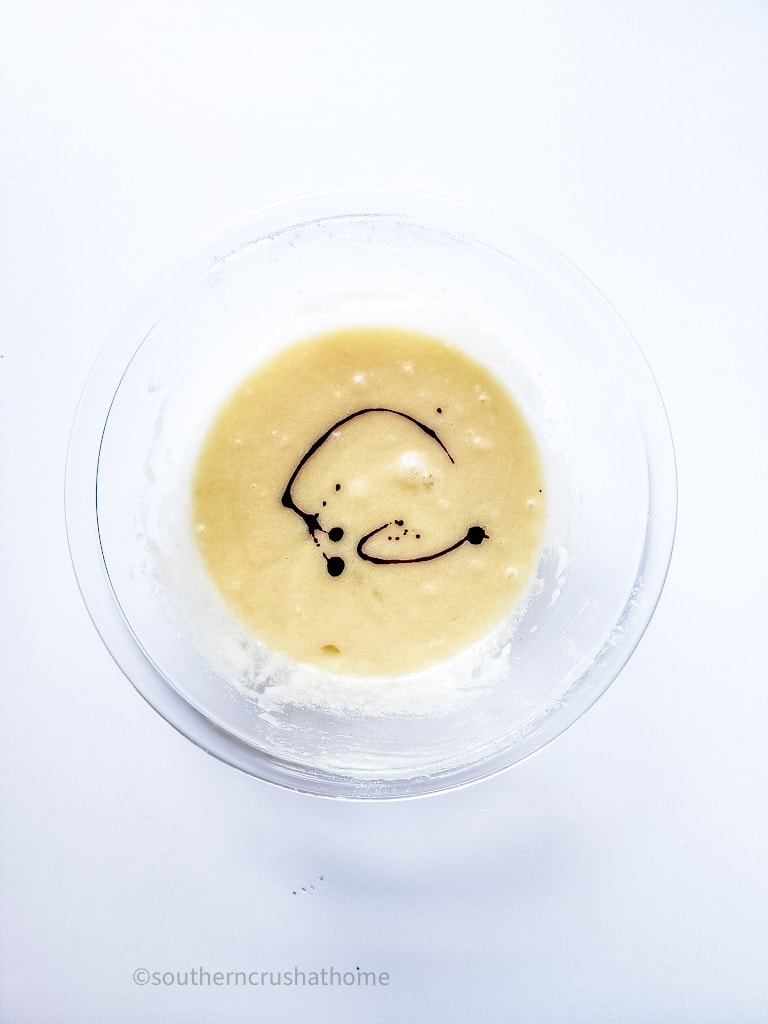
- 3-4 drops of red food dye
- ¼ cup oil
- ¼ teaspoon salt
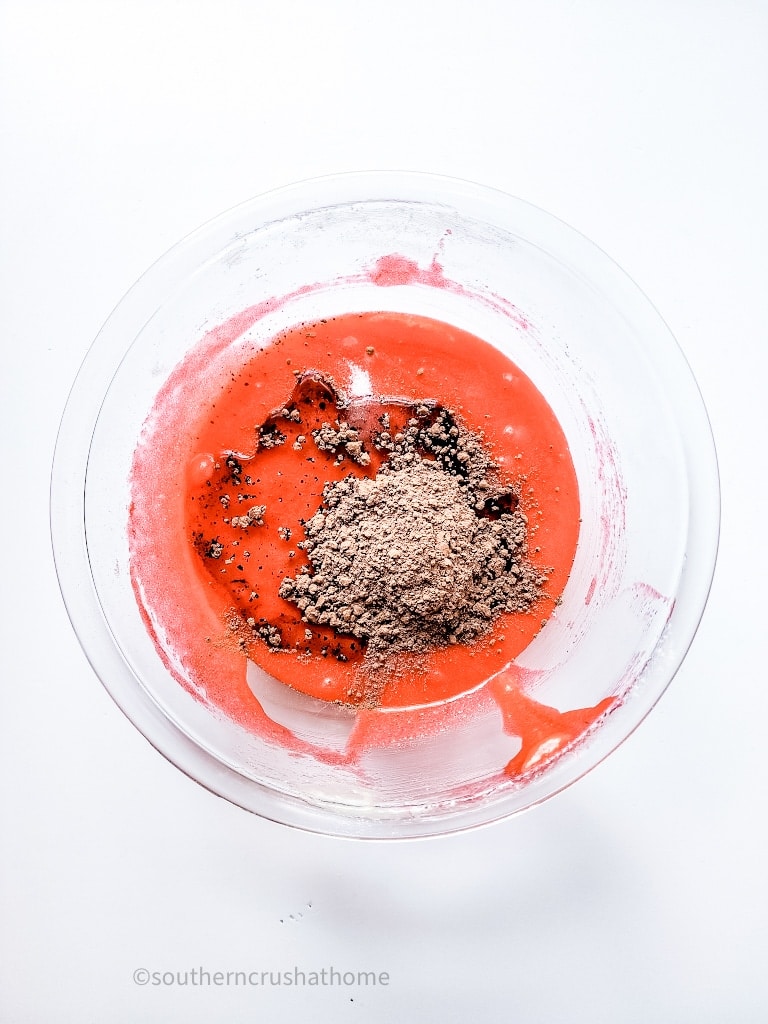
- 3 tablespoons unsweetened cocoa powder
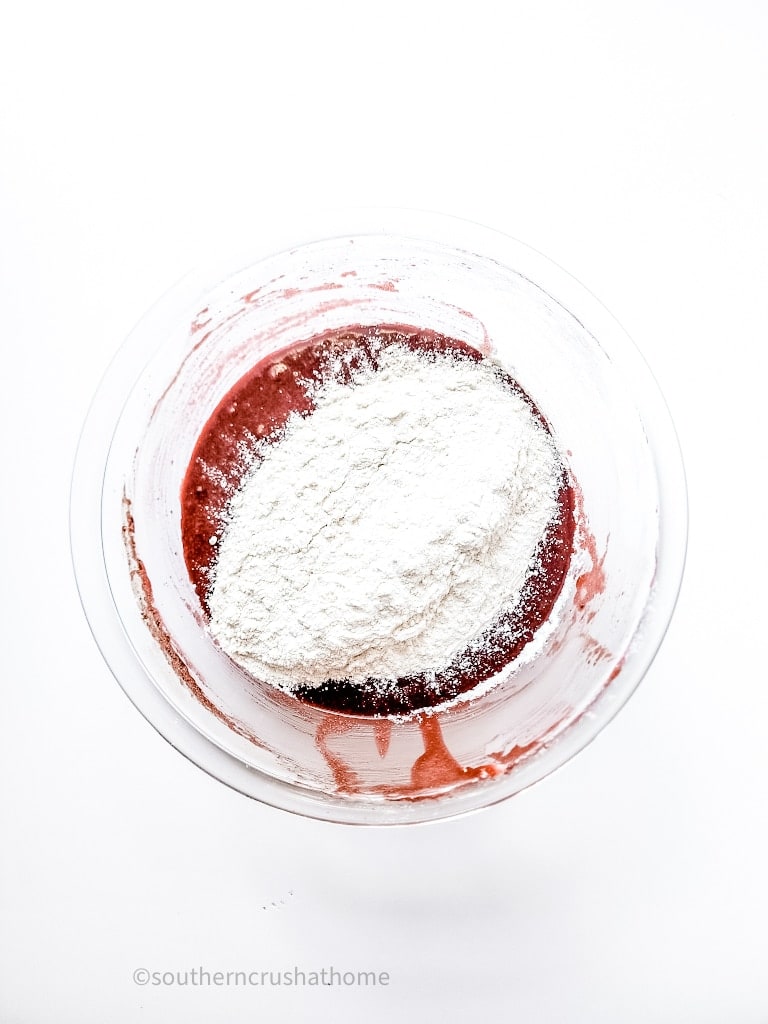
- 1 ¼ cups all-purpose flour
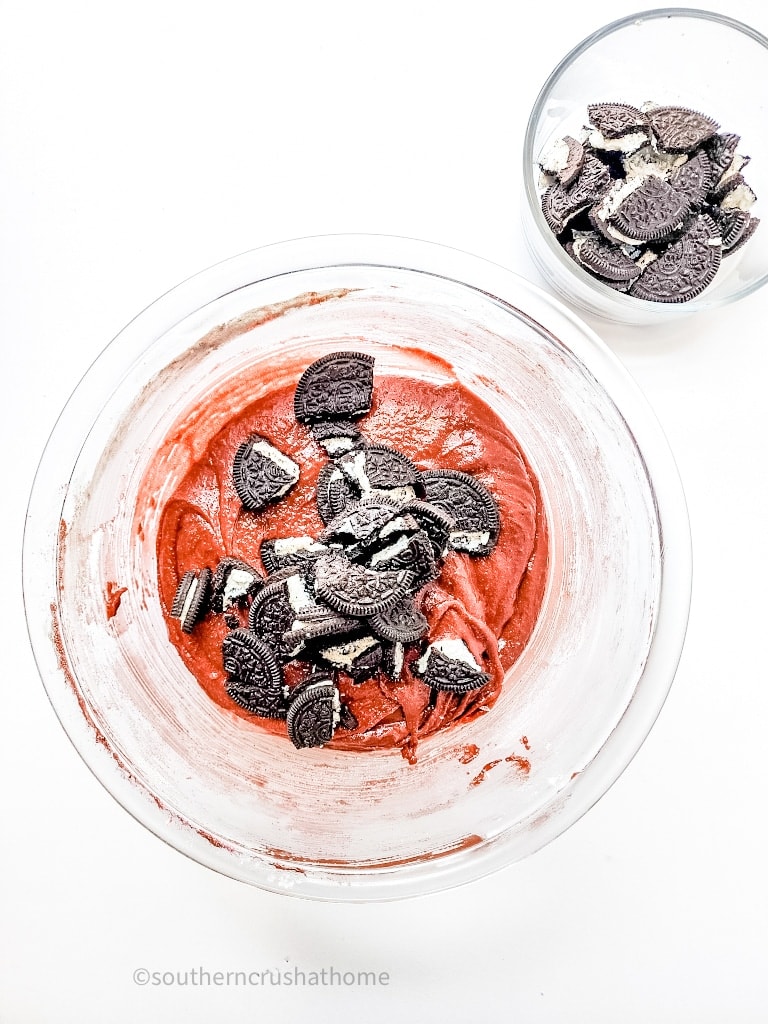
- 1 cup large Oreo pieces, chopped
- Extra whole Oreos
Note: This recipe does not call for baking powder or baking soda.

How To Make Fudgy Oreo Brownies
- Preheat the oven to 350 degrees Fahrenheit.
- Prepare a baking pan with baking spray or parchment paper and set aside.
Brownie Batter
- Prepare brownie batter in a mixing bowl; beat the butter and sugar together.
- Add the eggs and vanilla extract to the mixing bowl and mix until blended.
- This is where the recipe is different from a traditional oreo brownie recipe. Pour in about 3-4 drops of red food dye and mix. Start with less and add more if needed. You are looking for a bright red color in your batter as the cocoa powder will darken the color of the brownies.
- Add the oil, salt, and cocoa powder, and mix the batter again.
- Pour in the flour and fold together until completely incorporated. Add more flour if you prefer cakey brownies; less if you want more milk chocolate fudgy oreo brownies.
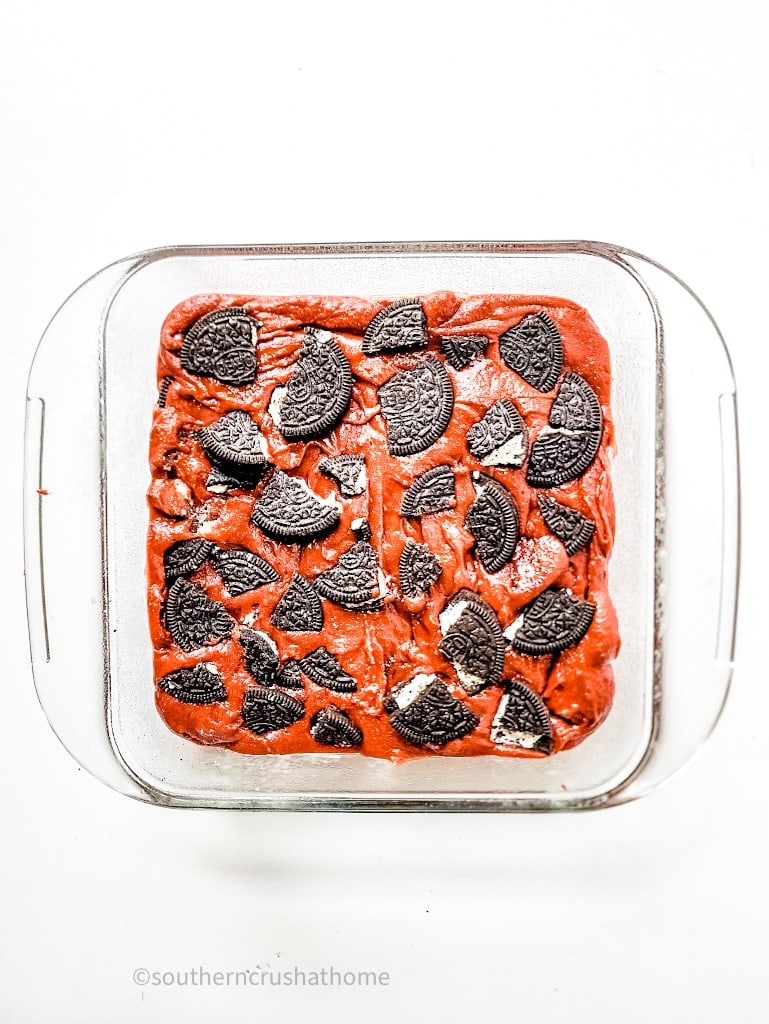
- Add ¾ of the chopped Oreos into the red velvet brownie batter.
- Pour the batter into the prepared pan with parchment paper or nonstick cooking spray.
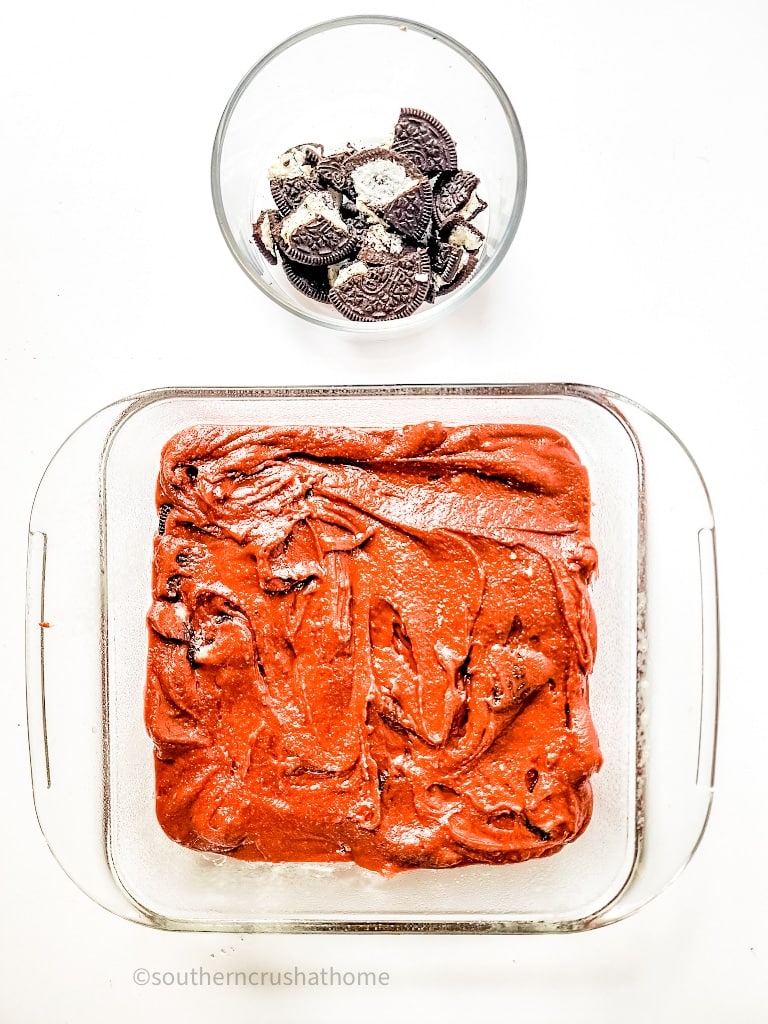
- Place the rest of the Oreo pieces on top in an even layer.
- Place in the oven for 45 minutes or until a toothpick inserted into the batter comes out clean.
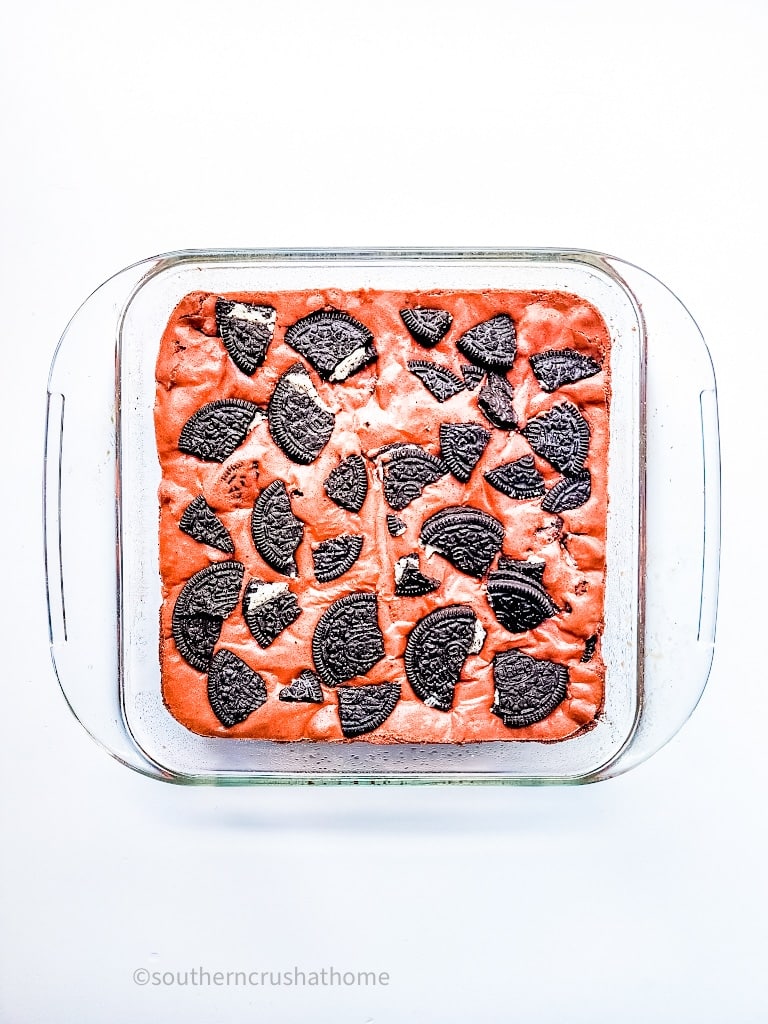
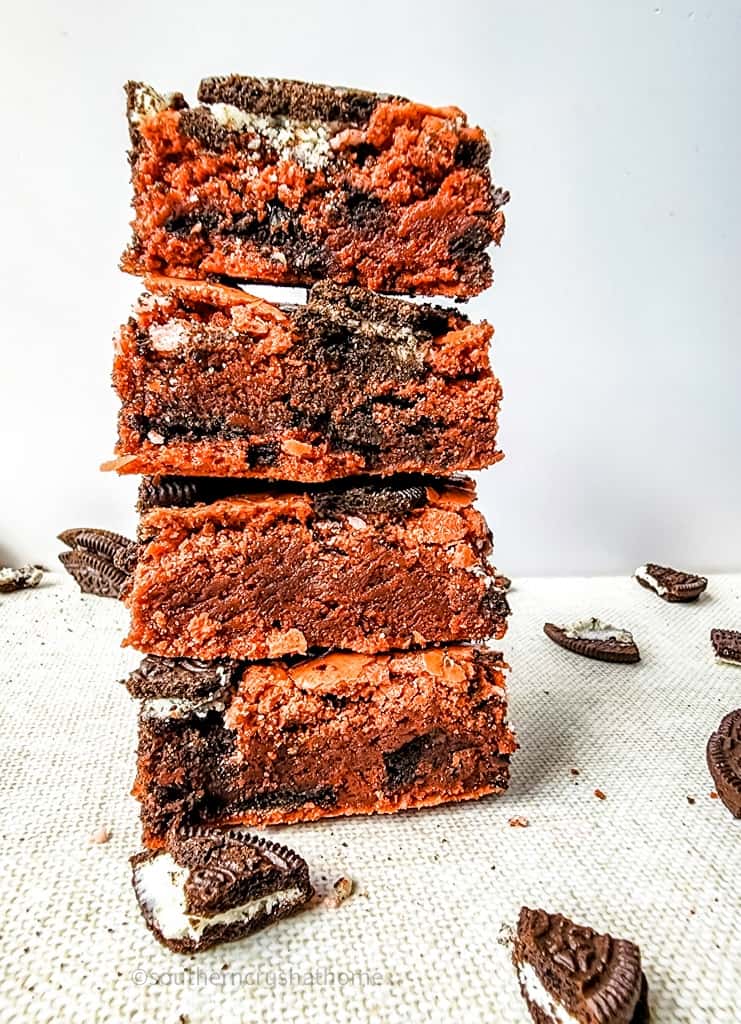
- Let cool completely for at least 20 minutes and then cut into serving pieces. Serve with additional remaining Oreo cookies if desired.
- Top with a yummy Oreo frosting recipe like Oreo buttercream if you want Oreo overload!
- Store brownies by covering them with plastic wrap or placing cut brownie pieces into a tightly sealed airtight container at room temperature.
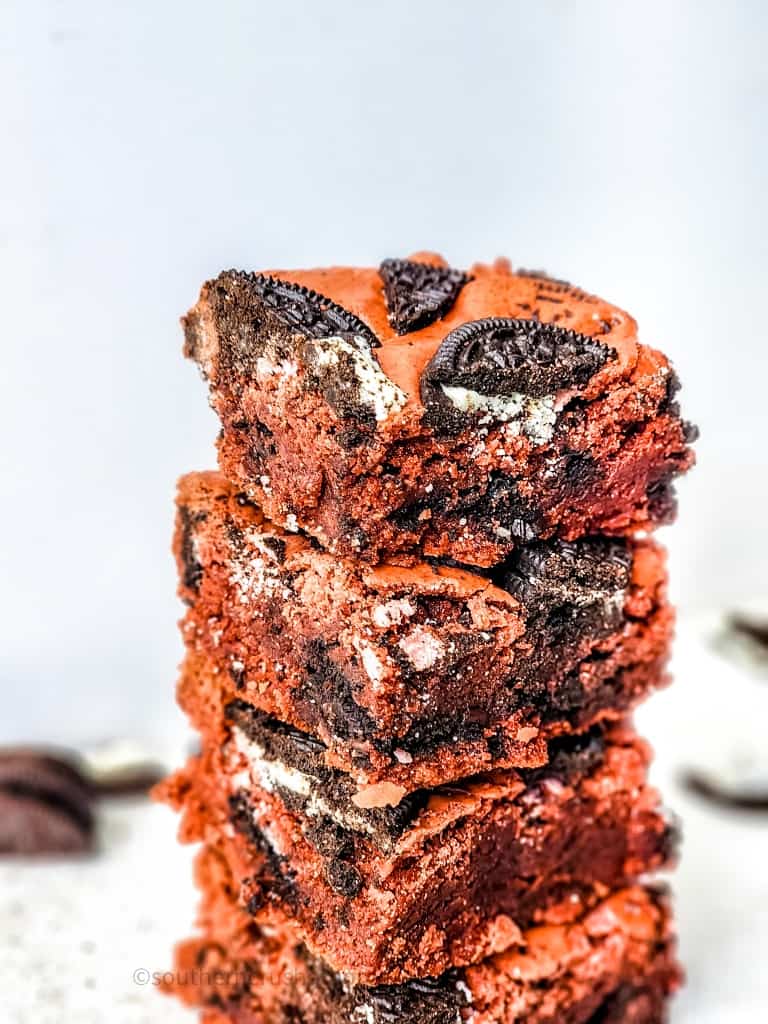
This is one of my favorite brownie recipes! It could be the best brownie recipe out there, in my opinion. They'll definitely make an Oreo lover out of you!
I hope you will try out these fudgy Oreo brownies for yourself! Come back and let me know how your Oreo cookie brownies turned out in the comments below.
Variations
- Choose a different kind of chocolate cookie, chop it up, and add the chunks to the red velvet batter. You can use a different Oreo cookie or any other chocolate cookie you like. Even homemade cookies will work.
- Throw in some M&Ms, peanut butter cups, dark chocolate chips, other colored candies, or even pieces of your favorite candy bar to add some chunks and flavor.
- For extra fudgy brownies with a super rich chocolate flavor, add chocolate chips; milk, semi-sweet, dark or white chocolate chips will all work. Or cover with a melted chocolate drizzle and extra Oreo crumbs.
- Top with your favorite chocolate buttercream frosting and garnish with more Oreo cookies.
- Chopped pecans or walnuts will also add more flavor and texture.
Tips and Tricks for Fudgy Brownies
- Let the butter and eggs come to room temperature before you begin making the brownies.
- Any kind of mild-flavored cooking oil will work; canola, grapeseed, or vegetable oil are all good options.
- You can place whole Oreo cookies in the food processor to chop them up if you aren't up for the task of cutting them by hand. Make sure not to overprocess as you want the chunks nice and big, almost bite-sized, and not be left with just a few moist crumbs.
Baking brownies can be a fun activity to do with kids, too! Making homemade brownies from scratch is so much better than using a boxed brownie mix.
FAQs
What kind of Oreo cookies work best in these Oreo Brownies?
I know there are so many types of Oreo cookies to choose from but I think the original Oreo cookie makes the best brownies. Of course, if you can't find the original Oreo you can substitute a different option and the cookies will still taste great. I do recommend you choose a chocolate-flavored Oreo as it will taste the best in these Oreo brownies.
Can I make these Oreo Brownies gluten-free?
If you want to make these brownies gluten-free I suggest you use one of the 1-1 gluten-free flour options. There are gluten-free Oreos so make sure to pick those up and you'll have a batch of gluten-free Red Velvet brownies. If you add chocolate chips make sure they're gluten-free as well!
Can I make these Brownies vegan?
Yes, you can. If you choose vegan Oreos and use vegan butter then these brownies will be suitable for those following a vegan diet.
Can I freeze Oreo Brownies?
Um, yes! These freeze great. Just take them out a couple of hours before serving! These are great warm and at room temperature both!
Easy Red Velvet Oreo Brownies
Equipment
- Measuring Cups and Spoons
- Baking Pan
Ingredients
- ¼ cup butter unsalted
- 1 ½ cups white granulated sugar
- 2 eggs
- 1 tsp vanilla
- 3-4 drops red food dye
- ¼ cup oil
- ¼ tsp salt
- 3 tbsp cocoa powder
- 1 ¼ cups flour
- 1 cup large Oreo pieces
- Extra Oreos
Instructions
- Preheat the oven to 350 degrees Fahrenheit.
- Prepare a baking pan with baking spray and set aside.
- In a bowl, beat the butter and sugar together.
- Add in the eggs and vanilla and mix until blended.
- Use about 3-4 drops of red food dye and mix. Start with less or add more if needed, you are looking for a bright red color in your batter, as the cocoa powder will darken the color.
- Add the oil, salt, and cocoa powder and mix again.
- Pour in the flour and fold together until completely incorporated
- Add ¾ of the chopped Oreos into the red velvet brownie batter.
- Pour the batter into the prepared baking pan and place the rest of the Oreo pieces on top in an even layer.
- Place in the oven for 45 minutes or until you place a toothpick into the batter and it comes out clean.
- Let cool for at least 20 minutes and then cut into pieces.
- Store by covering with plastic wrap or place cut pieces into a tightly sealed container.