Easy Red Velvet Whoopie Pies
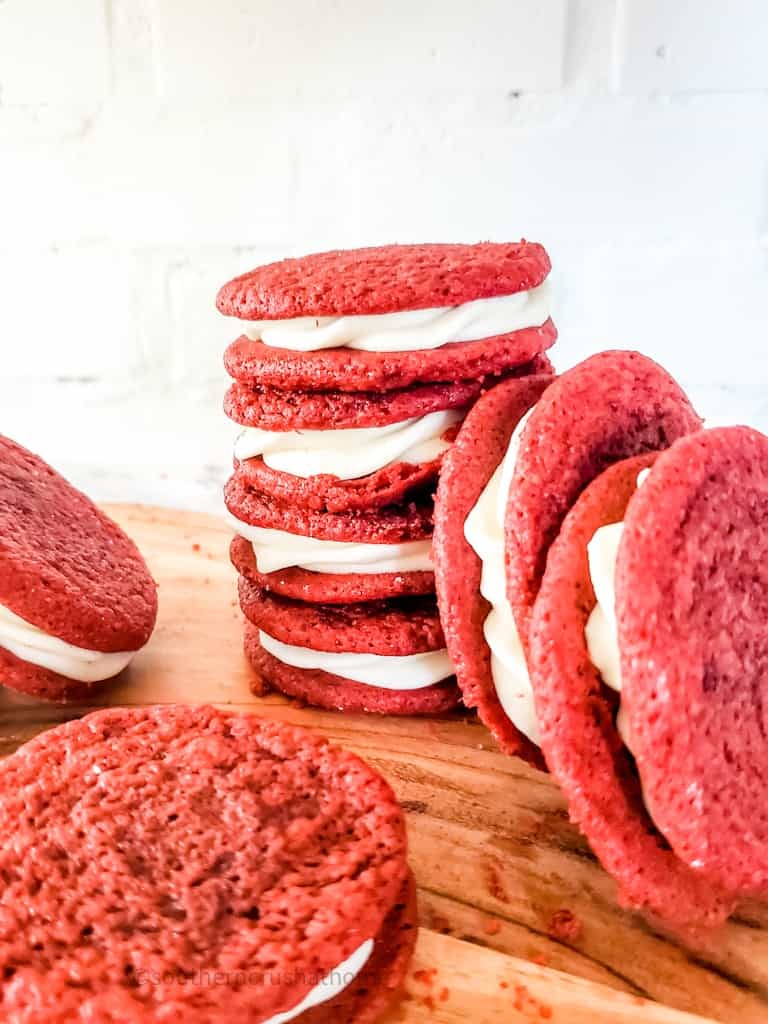
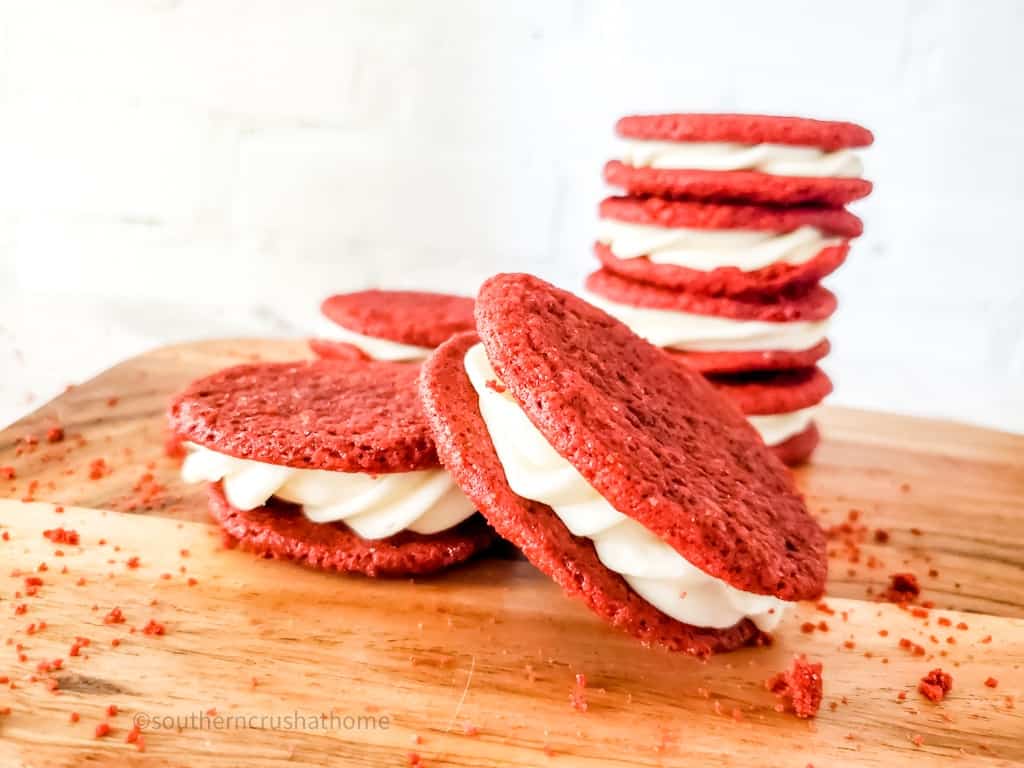
Easy Red Velvet Whoopie pies are made with chewy chocolate cookies stuffed with a sweet luscious cream cheese center for a mouthful of decadence. With a soft and pillowy texture and bright red color, these cookies are sure to make your day special.
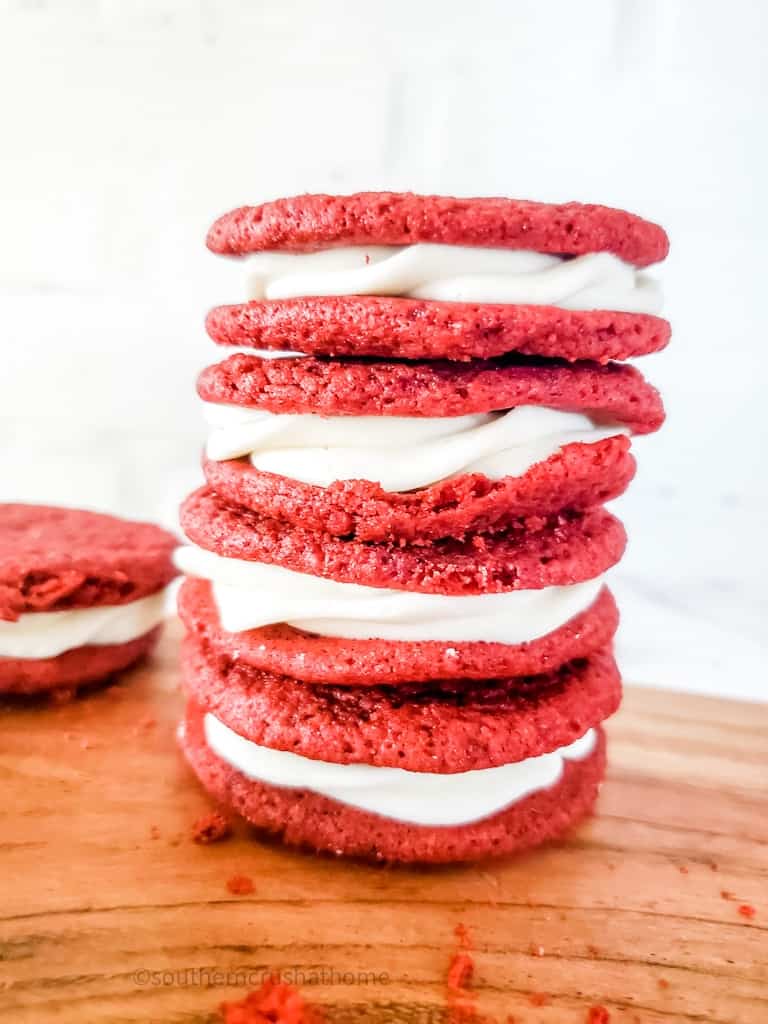
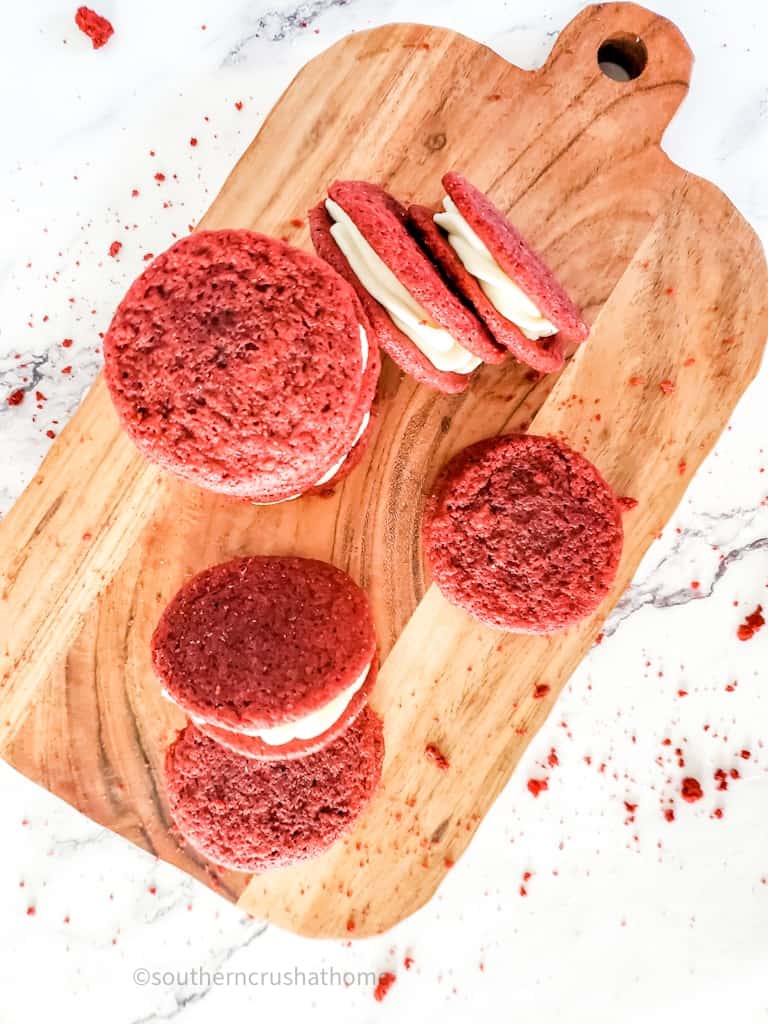
If you love red velvet cookies you will love these whoopie pies. A soft creamy filling sandwiched between two red chocolate cookies is the ultimate red velvet treat.
If you are looking to save some time, you can bake up the chocolate cookies a few days ahead of time and then whip up the cream cheese filling just before you want to serve them. Store any leftovers in the fridge for a few days but don’t leave them too long or the chocolate cookies may get a little soft due to the moisture from the cream cheese filling.
If you love these Red Velvet Whoopie Pies, you’ll love these red velvet recipes as well:


This blog post contains affiliate links. The opinions are wholly my own from my own experience. I may earn a small commission from clicks through to the websites that end in a purchase.

Be sure to PIN this one for later!
Why You’ll Love These Whoopie Pies
- Fun twist of a classic
- Decadent creamy filling
- Easy to prepare
Equipment Needed
- Large bowl
- Medium bowl
- Whisk or
- Electric Stand mixer (this is the one I use)
- Parchment paper
- 2 cookie pans
- Cookie spatula
- 1 Tablespoon cookie scooper ( I like this one)
- Rubber spatula
- Tall cup
- Piping bag
- Large open star tip
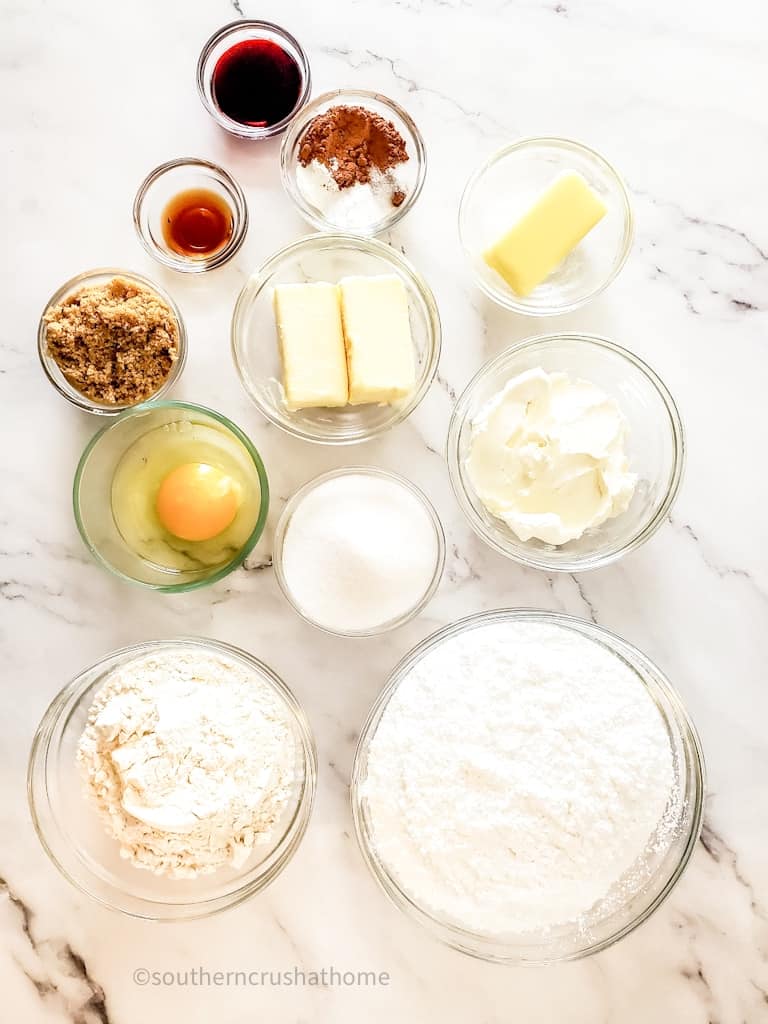
Ingredients To Make Red Velvet Whoopie Pies
Cookie Ingredients
- 1 1/3 cup (170 grams) all-purpose flour
- 2 tablespoons (10 grams) of unsweetened cocoa powder
- ½ teaspoon baking soda
- ½ teaspoon baking powder
- ¼ teaspoon salt
- ½ cup (113 grams) unsalted butter, room temperature
- ½ cup (100 grams) granulated sugar
- ¼ cup (50 grams) packed light brown sugar
- 1 large egg
- 1 teaspoon vanilla extract
- 1 tablespoon red liquid food coloring
Cream Cheese Filling
- ½ cup (110 grams) cream cheese, room temperature
- ¼ cup (57 grams) unsalted butter, room temperature
- 2 ½ cups (288 grams) confectioner’s sugar, sifted
- 1 teaspoon vanilla extract
How to Make Whoopie Pies
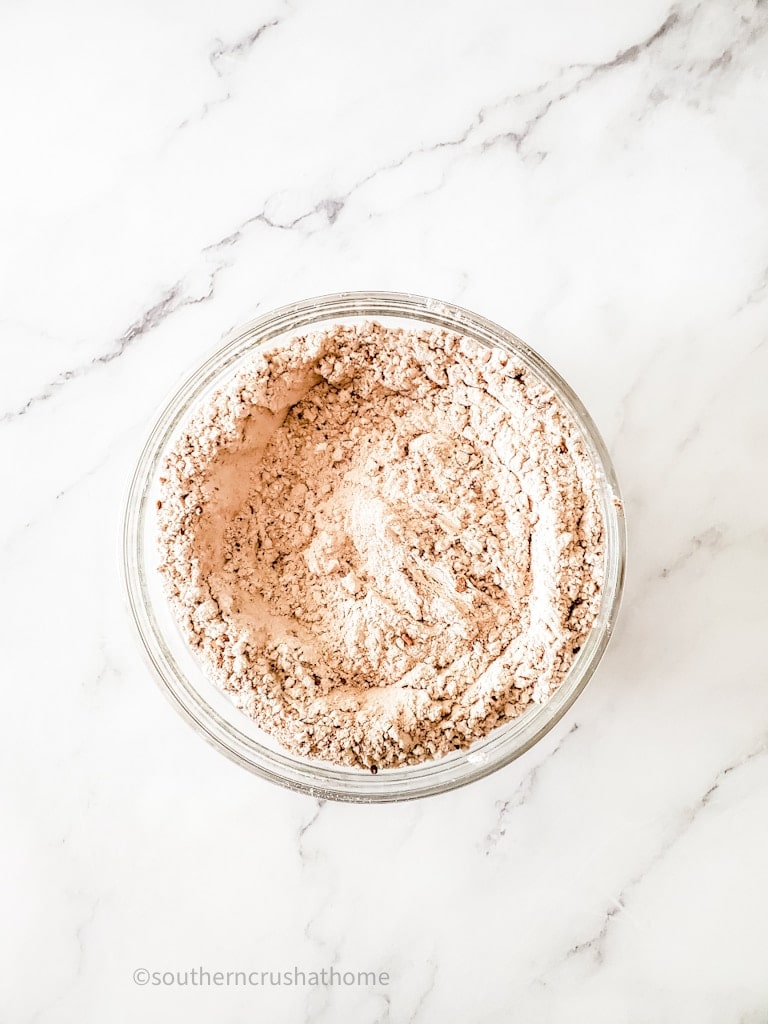
- In a medium bowl, whisk together the flour, cocoa powder, baking soda, baking powder and salt.
- Cream together the butter, sugar and brown sugar with an electric mixer in a large bowl, for about 3 minutes. The mixture will be light and fluffy and have lightened in color.
- Add in the egg and mix until just combined.
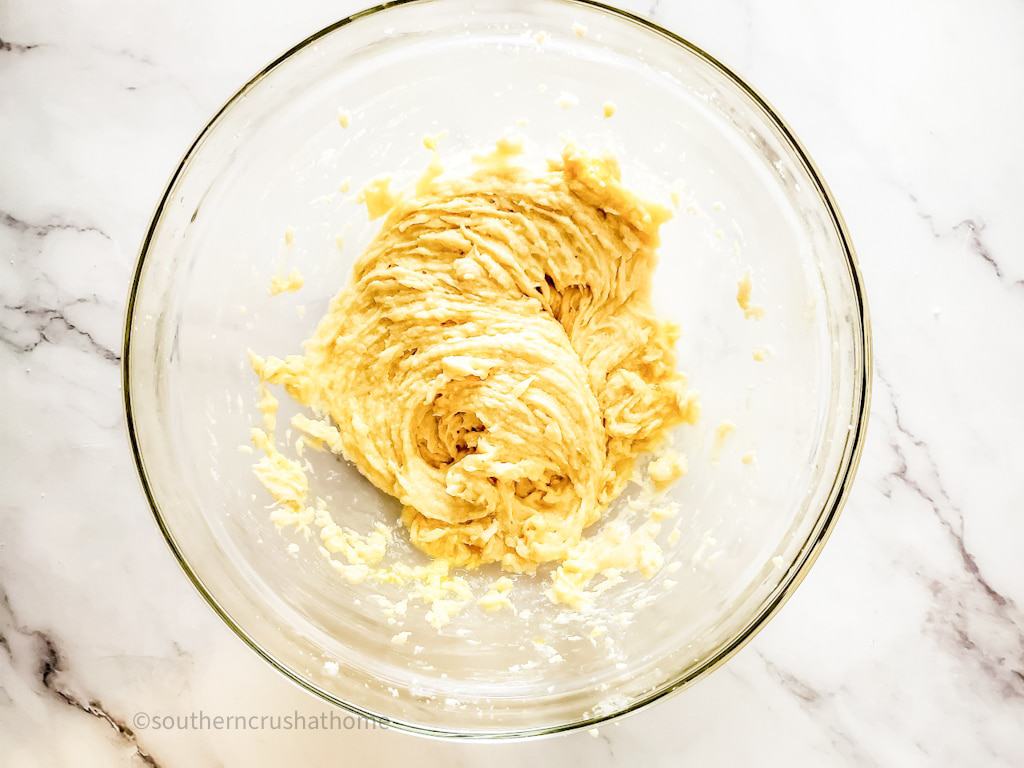
- Mix in the vanilla extract and food coloring until well disbursed.
- Add in the dry mixture until just combined. Cover and chill the bowl for 15-20 minutes.
- While the cookie dough is chilling, line two baking sheets with parchment paper and preheat the oven to 350°F/177°C. You can also prepare the filling while you wait.
- Use a spoon or cookie scooper, drop 1 tablespoon balls onto the tray.
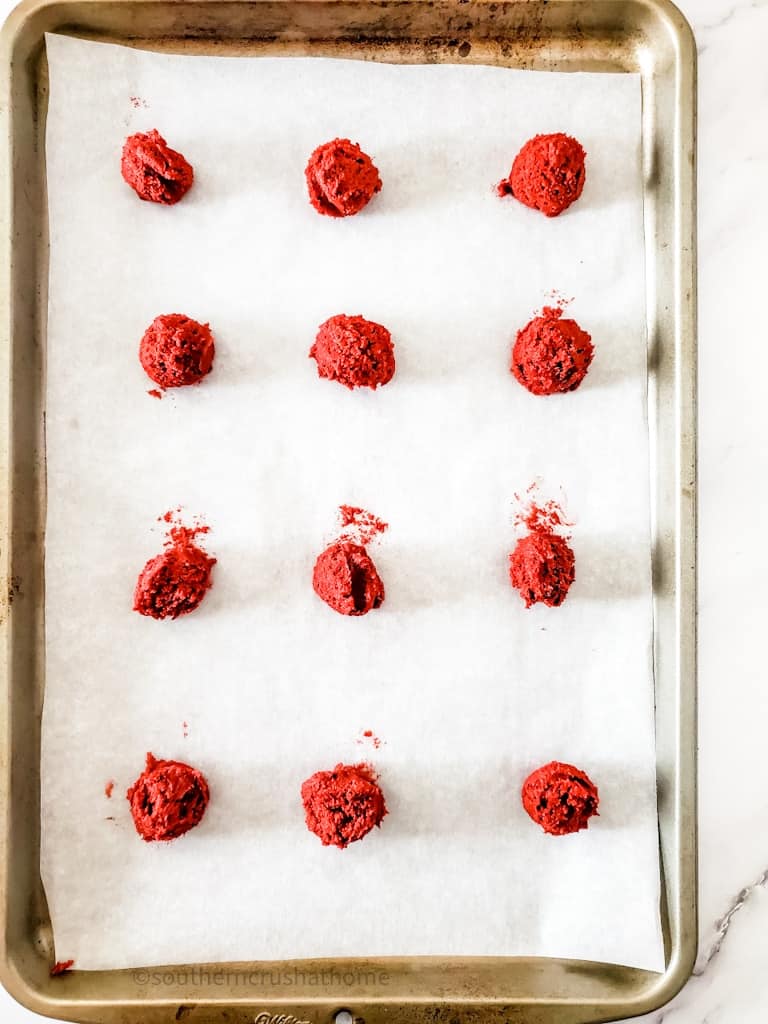
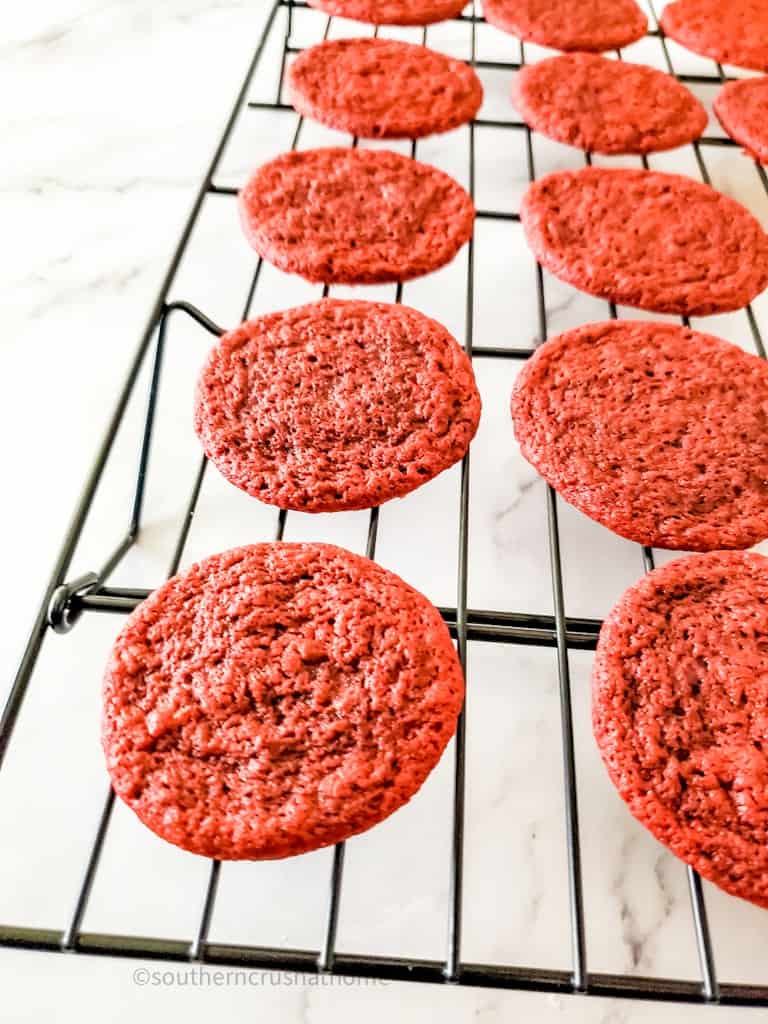
- It is ideal to use the scooper so that the cookies are uniform in size for the sandwiches. Allow about 2 inches between the dough balls to allow for spreading. Bake for about 8-10 minutes (the tops should look dry) on the middle rack.
- Let the cookies sit on the pans for about 10 minutes, then transfer to a wire rack to cool completely before frosting.
Filling:
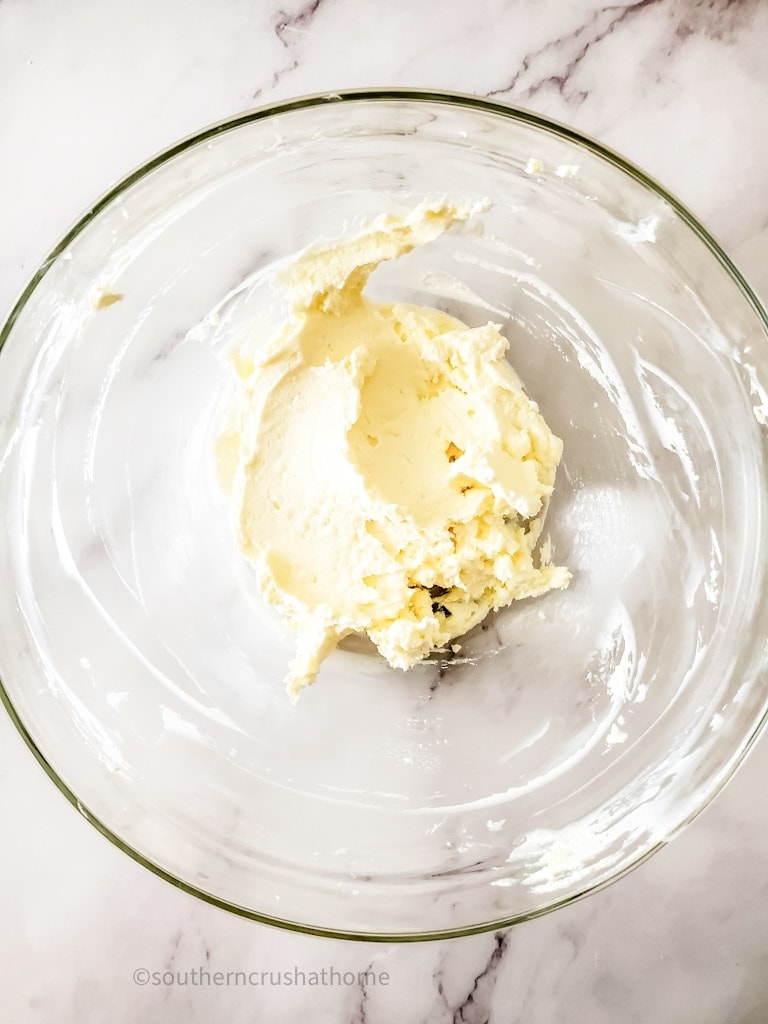
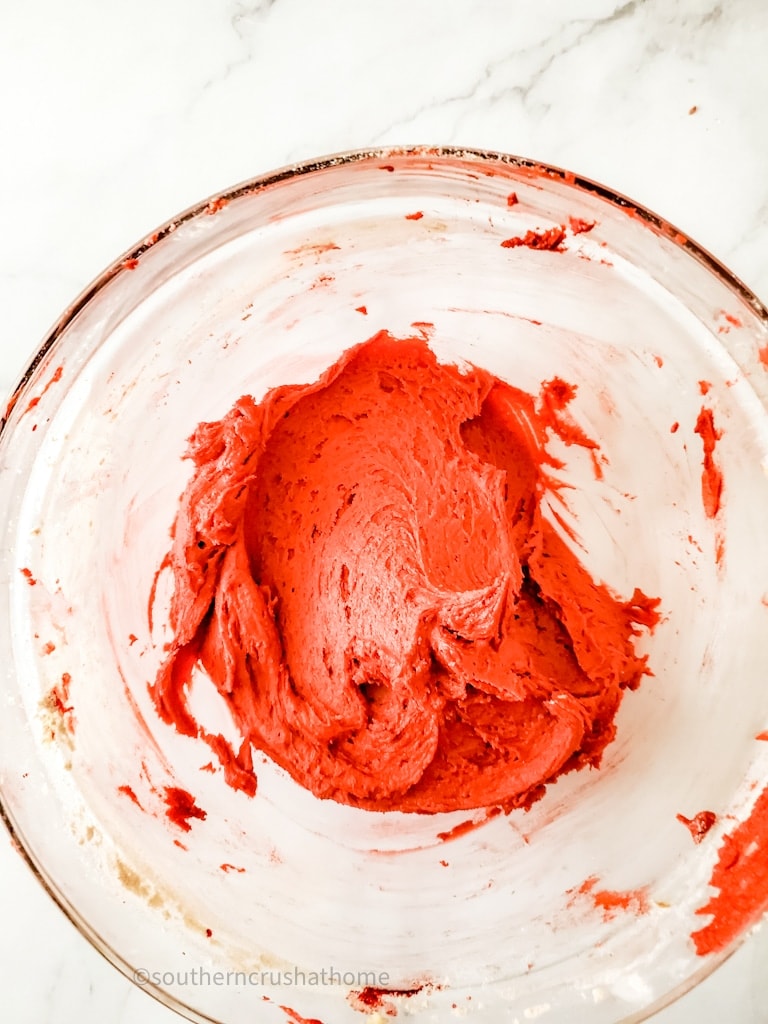
- In a medium mixing bowl, beat the butter and cream cheese until light and fluffy – about 3 minutes.
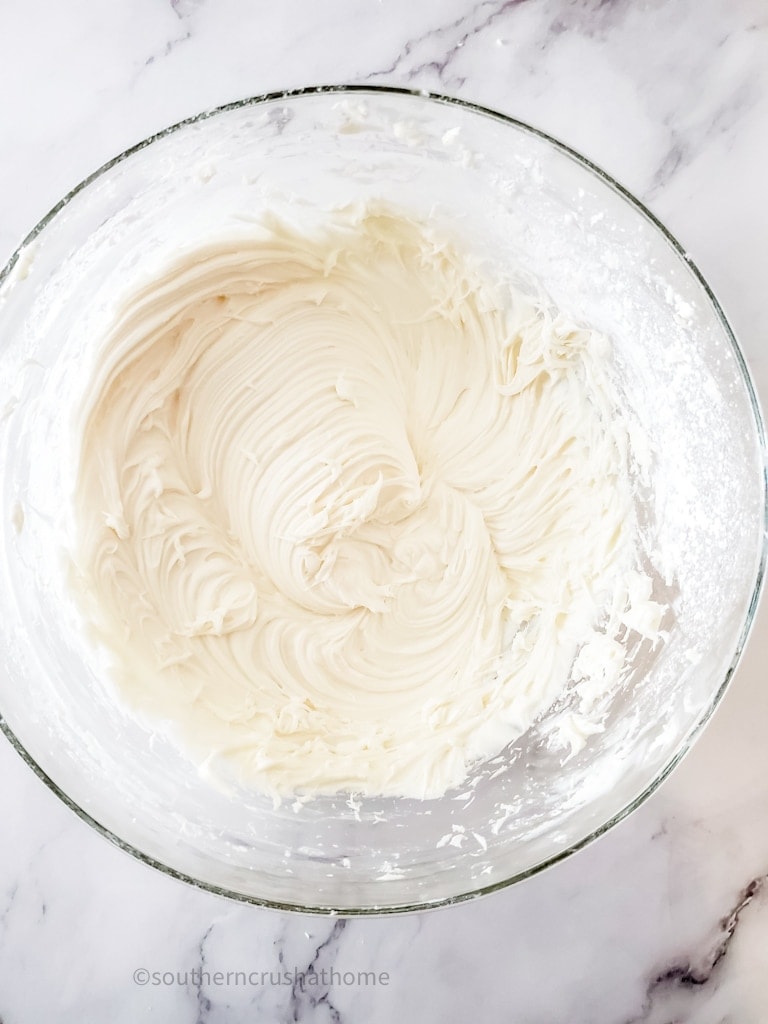
- Add the confectioner’s sugar in several additions until thoroughly combined.
- Add in the vanilla extract and continue to mix well.
Assembly:
- Cut the tip of a piping bag and drop in a large open star tip. Place the bag into a tall cup and fold the edges of the bag over the top of the cup. Scoop the filling into the bag and twist to close the bag.
- Pipe swirls onto the bottoms of half of the cookies.
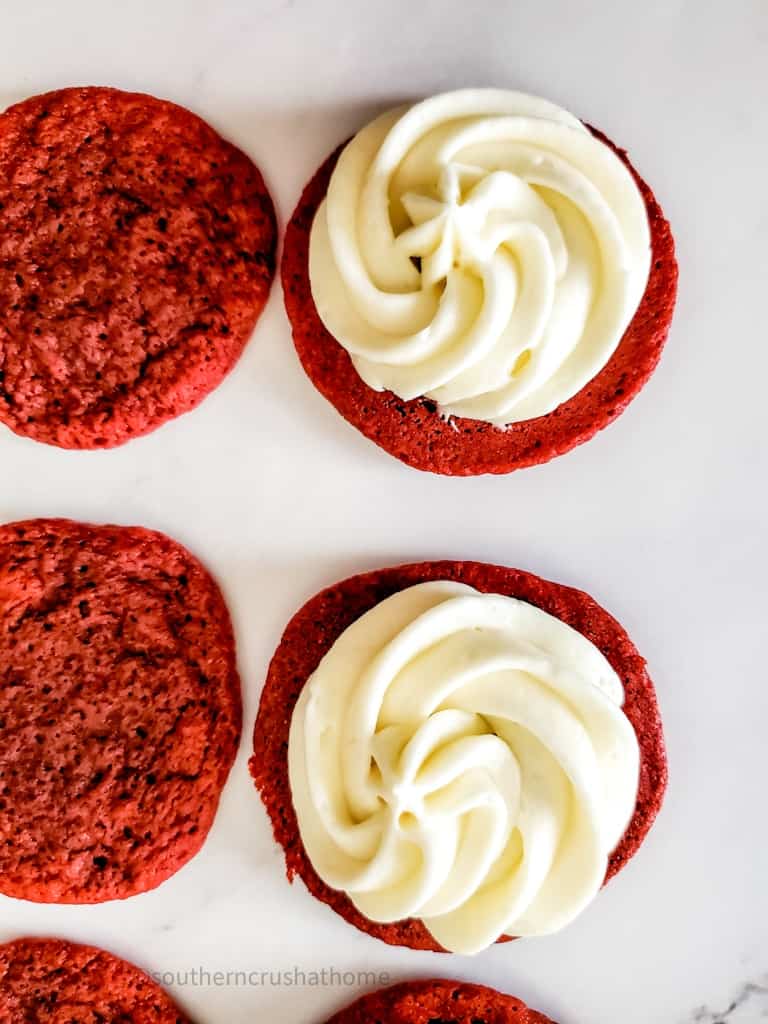
- Place the second cookie on top, bottom side down.
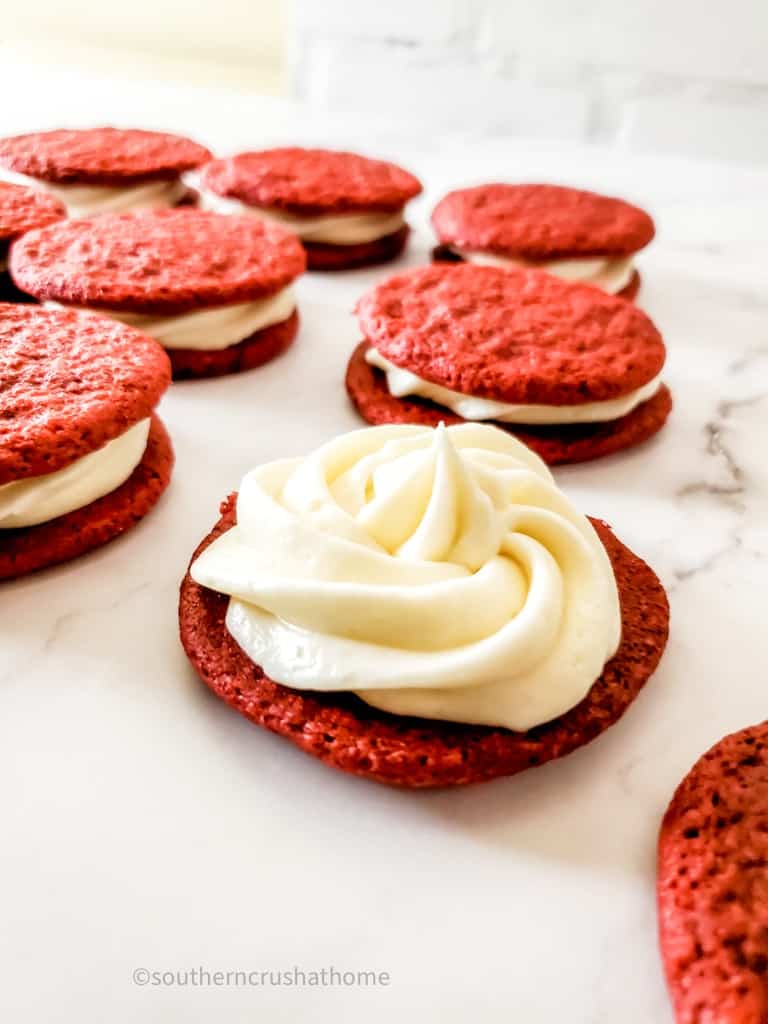
That’s it! Now enjoy your yummy creations!!!
Variations
- Change up the filling and add cocoa powder for a chocolate filling, espresso powder for a coffee-flavored filling or add a touch of mint extract for a minty filling.
- Garnish the cookies with a drizzle of vanilla glaze.
Tips and Tricks
- If you don’t want to pipe on the frosting, you can just swirl it on with a spoon.
- Store these whoopie pies in an air-tight container for up to 5 days in the refrigerator.
- These are soft cookies. While these are easy to make ahead and chill, you may find it best to assemble the same day as serving to prevent the cookies from getting too moist.
FAQs
What is whoopie pie filling made from?
Whoopie pie filling is usually a creamy, soft filling of vanilla buttercream, marshmallow cream or like this recipe a cream cheese filling.
How did whoopie pies get their name?
Seems these pies got their name from working men who received little pies in their lunchboxes from their wives. When they opened their lunch box and saw the treat they said ‘whoopie.’ Further research indicates the pies were invented by the Amish using leftover cake batter. They also claim that when the kids or working men found the pies in their lunches they said ‘whoopie’ as well. Who knows if any of this is true but the one thing we know is they do taste great.
Can I use low fat cream cheese in the filling?
Yes, you can substitute low fat cream cheese for the regular cream cheese in the filling though the texture and taste will not be the same. You may lose some of the decadence.

Easy Red Velvet Whoopie Pies
Ingredients
Cookies
- 1 ⅓ cups all purpose flour
- 2 tbsp cocoa powder unsweetened
- ½ tsp baking soda
- ½ tsp baking powder
- ¼ tsp salt
- ½ cup butter unsalted, room temperature
- ½ cup granulated sugar
- ¼ cup brown sugar light, packed
- 1 egg large
- 1 tsp vanilla extract
- 1 tbsp red food coloring liquid
Cream Cheese Filling
- ½ cup cream cheese room temperature
- ¼ cup butter unsalted, room temperature
- 2 ½ cups confectioner's sugar sifted
- 1 tsp vanilla extract
Instructions
Cookies
- In a medium bowl, whisk together the flour, cocoa powder, baking soda, baking powder and salt.
- Cream together the butter, sugar and brown sugar with an electric mixer in a large bowl, for about 3 minutes. The mixture will be light and fluffy and have lightened in color.
- Add in the egg and mix until just combined.
- Mix in the vanilla extract and food coloring until well disbursed.
- Add in the dry mixture until just combined. Cover and chill the bowl for 15-20 minutes.
- While the cookie dough is chilling, line two baking sheets with parchment paper and preheat the oven to 350°F/177°C. You can also prepare the filling while you wait.
- Use a spoon or cookie scooper, drop 1 tablespoon balls onto the tray. It is ideal to use the scooper so that the cookies are uniform in size for the sandwiches. Allow about 2 inches between the dough balls to allow for spreading. Bake for about 8-10 minutes (the tops should look dry) on the middle rack.
- Let the cookies sit on the pans for about 10 minutes, then transfer to a wire rack to cool completely before frosting.
Filling
- In a medium mixing bowl, beat the butter and cream cheese until light and fluffy – about 3 minutes.
- .Add the confectioner’s sugar in several additions until thoroughly combined
- Add in the vanilla extract and continue to mix well.
Assembly
- Cut the tip of an piping bag and drop in a large open star tip.
- Place the bag into a tall cup and fold the edges of the bag over the top of the cup.
- Scoop the filling into the bag and twist to close the bag
- Pipe swirls onto the bottoms of half of the cookies, and place the second cookie on top- bottom side down.