How To Make Decorative Rolling Pins
This is how to make your very own decorative rolling pins with sweet floral prints. They are the perfect touch of rustic decor in any room of your house!
I love to bake. Well, not from scratch. I'm more of a 50/50 baker. Fifty percent homemade; fifty percent from a box. LOL!
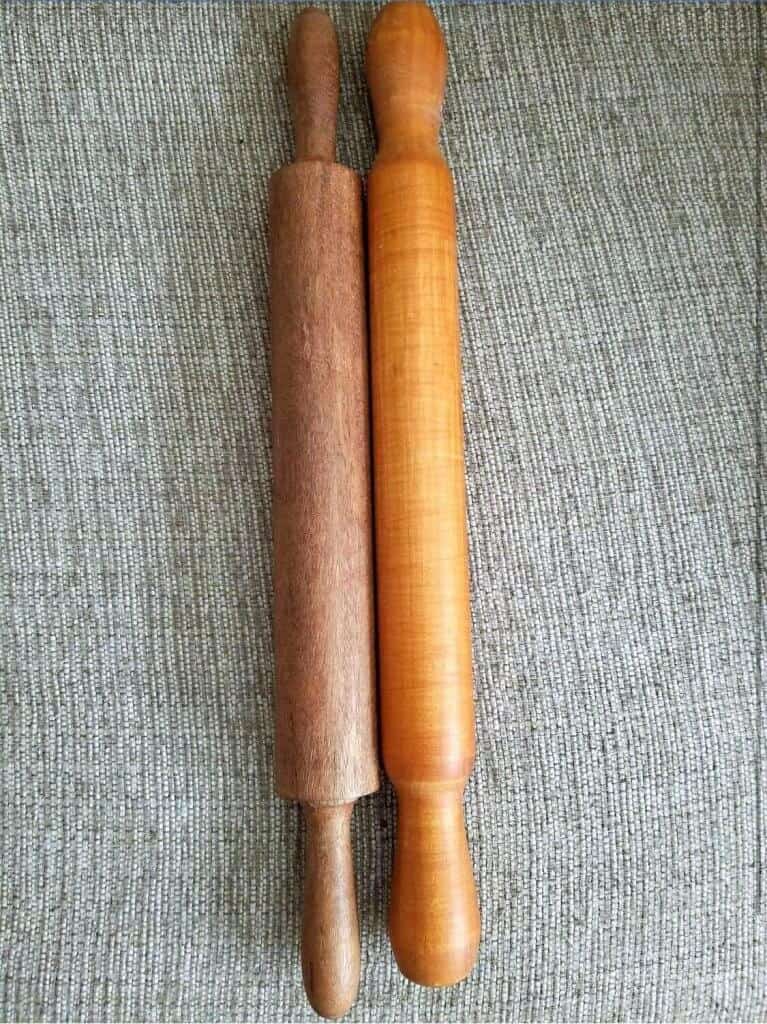
When I found these vintage wooden rolling pins for sale on Facebook marketplace, I was super excited to grab them to use for this pretty DIY home decor project! If you like to use your baking pins for real baking don't use them for this project. But if you want a pretty prop to display in your kitchen and pretend like you bake from scratch… give this a try! 🙂 These make great gifts, too!
How To Make Decorative Rolling Pins
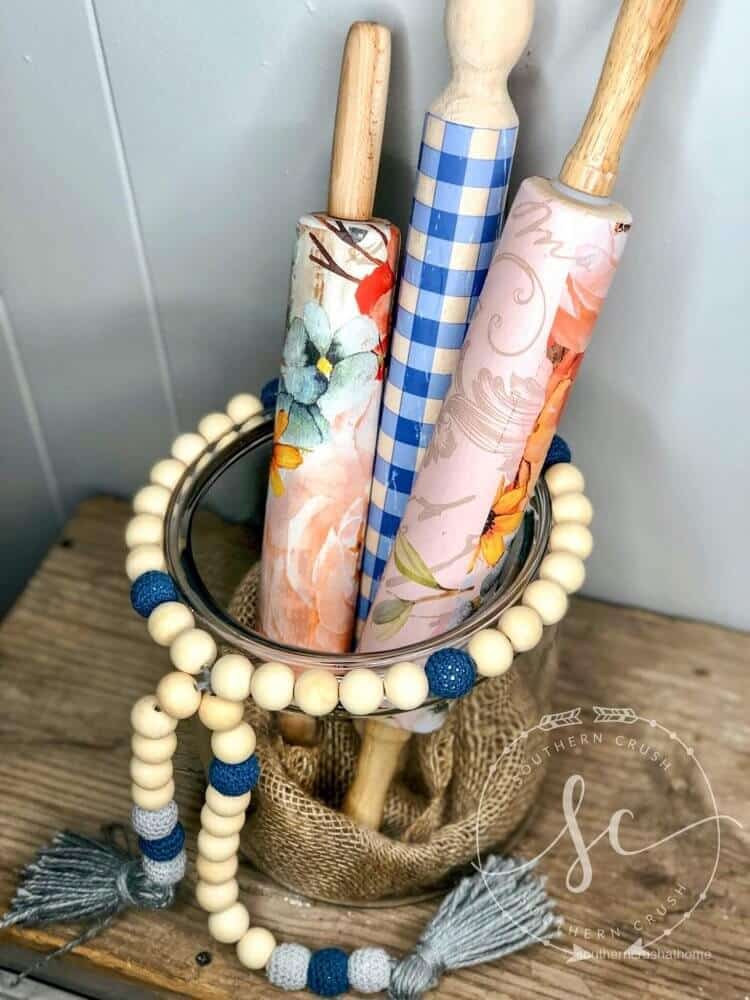
When you cover wooden rolling pins in floral transfer, all of a sudden you have a farmhouse chic home decor item that you can use in any room of your house.
I'll take you through every single step with lots of pictures along the way. I even have a video at the end showing you how I did it all.
After the tutorial, I'll answer some questions about the craft too. If you have any questions, you can leave them here in the comments or even join my Facebook page and ask me there too!
Most of the supplies for this project I already had on hand, but they are super easy to find online as well.
Even though you can buy brand new rolling pins, I highly recommend finding them used at a thrift shop if you can. I prefer to use old wooden rolling pins because they have more character and tell a deeper story with all of their dents and little flaws.
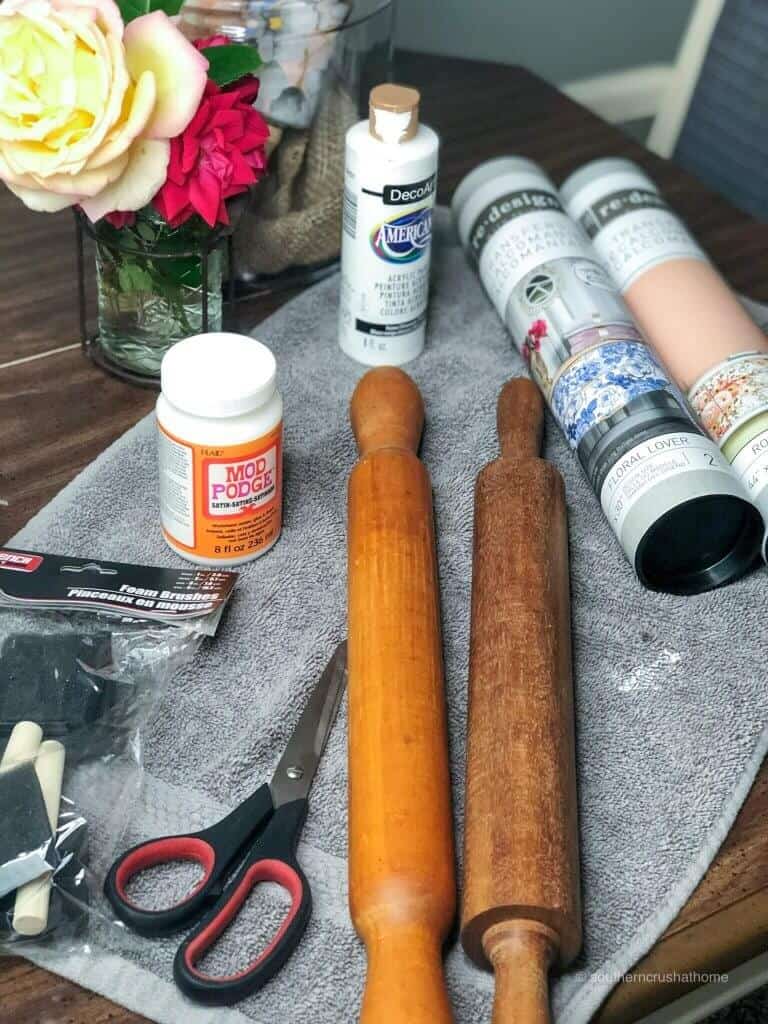
Supplies
Here is a list of supplies you will need to make this DIY rolling pin project.
- wooden rolling pins
- chalk-type or acrylic paint
- mod podge
- striped transfer
- floral transfer of your choice
- paintbrush
- scissors
1. Paint The Rolling Pins
Paint the rolling pin your desired, light color, leaving the ends natural. Allow the paint to dry completely. Do NOT skip this step as it is important. If the paint is even a little bit wet, the floral transfers will not work. I suggest letting them dry overnight at least.
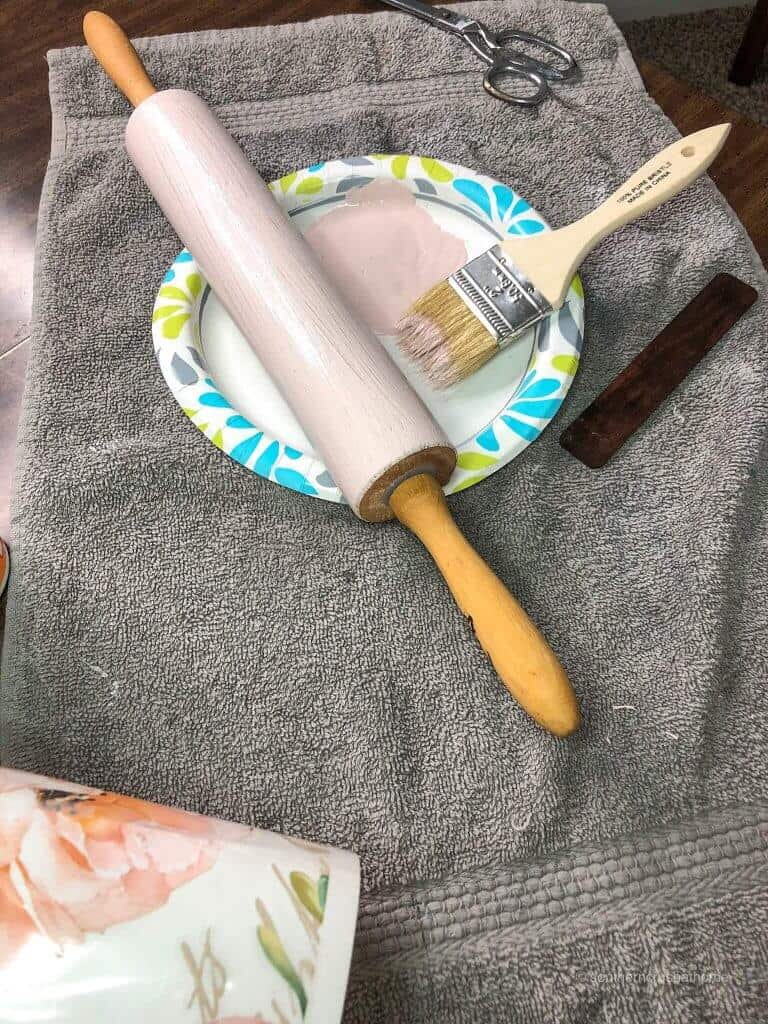
2. Apply Mod Podge
Apply a light layer of mod podge to the painted area as this will help the transfer to stick. Allow it to dry until it is sticky. You don't have to let it dry overnight – it should still be slightly sticky – so, it only needs about 30-45 minutes to dry.
3. Cut the Transfer to fit the rolling pin
Cut a piece from the transfer to fit around your rolling pin. I made one that used a floral transfer and another that used a gingham transfer. There are several different choices you can pick from in order to match your current decor.
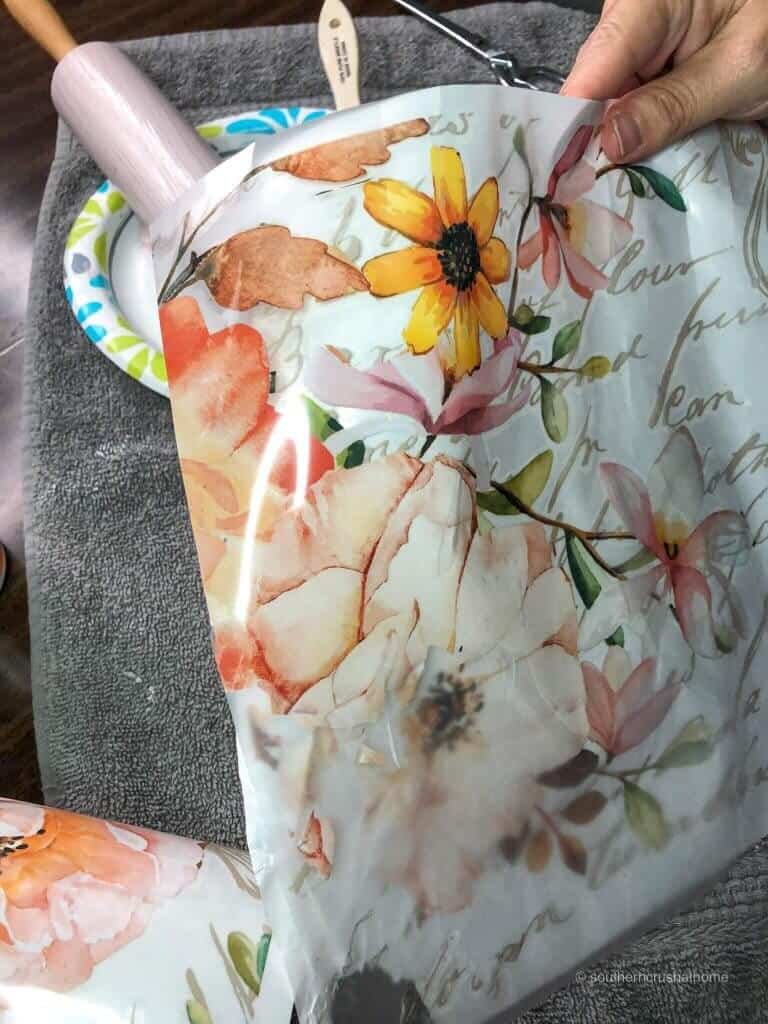
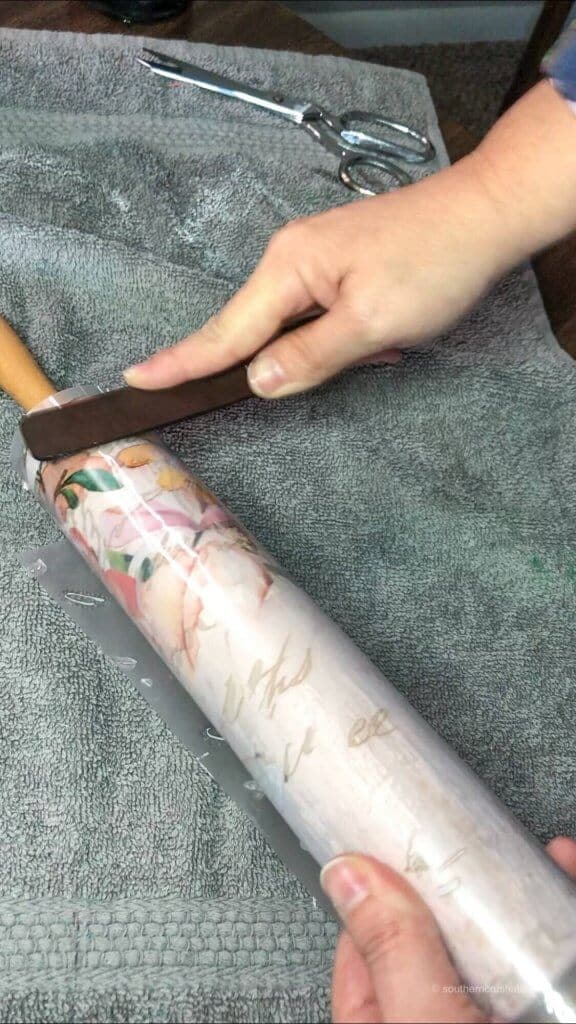
4. Rub The Transfer Onto the Rolling Pin
Begin rubbing the transfer onto the barrel of the rolling pin. This may take a while for the transfer to release, just be patient and continue rubbing until it is completely onto the rolling pin.
This step takes the longest. Go slowly and keep rubbing. It will eventually transfer to the rolling pin.
Take breaks if you need them. I call this craft my workout! It works those muscles, I tell you what!
Live Video Tutorial
If you missed the live video tutorial over on Facebook, you can find it HERE. I love posting videos on my Facebook page and answering questions about my crafts live. Please join me on my Facebook page for more live tutorials!
Perfect Rustic Decor
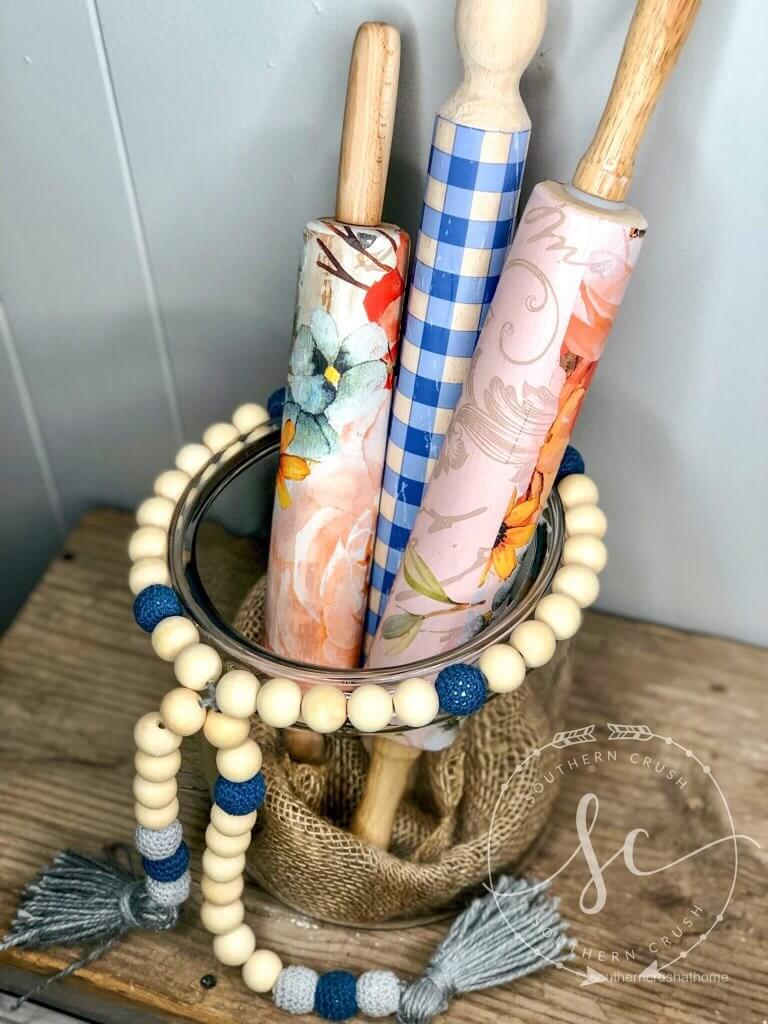
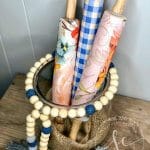
This was by far one of my favorite DIY projects. It is so versatile with the design choices. It makes the perfect gift for any occasion. Mine are displayed in a glass jar below.
Ya'll, don't forget to pin this project for later!
Where To Display Decorative Rolling Pins
Since it uses rolling pins, I think it will look the most perfect in the kitchen. After putting my rolling pins in a jar with my DIY wooden bead garland, I think they will fit in any room in the house.
In fact, if you place these pins in a mason jar, it will look so cute on a breakfast tray in your living room.
Add it to a galvanized tub in your laundry room for a pretty little rustic decoration. The only room I can't really see it fitting naturally is the bathroom.
Other Types of Transfers
For this specific craft, I used floral furniture transfer. There are tons of different shades and patterns out there from which you can choose. If you aren't really into flowers, there are also lots of typography ones and other patterns, like stripes.
Another way to transfer any image to the wood rolling pin is to print the image on paper and transfer it to the wood. How to Make a Coffee Bar Sign with an Image Transfer
You can also decorate your rolling pins with fabric. Print directly onto some fabric and glue the fabric to the rolling pin. You'll be surprised at how amazing it turns out!
Other Kitchen Items to Redecorate
Don't just stop with the rolling pins! You can use floral transfers to redecorate lots of kitchen items. Here are just a few of my favorite things to freshen up in the kitchen.
- Cutting board
- Wooden utensils
- Kitchen signs
- Wooden Baskets
- Glass Mason Jars
You don't have to spend a lot to make some cute crafts. Check out my most recommended DIY Dollar Tree Craft Supplies!
More Farmhouse Craft Projects
The farmhouse wooden beaded tassel looks great with this project. See how to make one for yourself here – Farmhouse Beaded Tassel DIY Project!
If you want to give this as a gift, my hand-painted mugs also make a wonderful gift too. Put both of them into a gift basket and fill it up with baking and coffee accessories.
Another one of my favorite farmhouse decor crafts is this messy bow I made on a burlap pillow wrap. You can use tons of colors or make them monochromatic. The options are endless!
If you love this kind of DIY project, you need to be getting my emails, friends! Each week I send out a couple of emails that include updates, crafts, shopping experiences, and decor inspiration. Be sure to get yourself signed up below. I can’t wait to meet you!
DIY Floral Decorative Rolling Pins
Materials
- wooden rolling pins
- paint I recommend chalk or acrylic
- mod podge
- floral transfer of your choice
- paintbrush
- scissors
Instructions
- Paint the rolling pins in the color of your choice. Keep in mind that the paint will likely show through the transfer. Make sure the paint is 100% dry before going to the next step.
- Apply a thin layer of mod podge over the paint, and let it dry slightly until it's tacky.
- Rub the transfer onto the rolling pin - this may take a few minutes, so just keep rubbing!
- Display and enjoy!
Love this idea. I don’t bake either buy love old rolling pins. I will have to try this out.
Love this
I need to this!! What a cute idea? That would definitely be an eye catcher!
I have been looking for some of these old ones to do this on no luck might just have to settle for the family dollar ones lol so cute
I love this idea!
I want to try the rolling pins thanks so much for the ideas
I make but not as often as I used to. I love this idea.????
So darling. What a great way to display rolling pins.
What a pretty way to display a collection.
Hi my name is Debbie I love the printable you gave us. I try to watch you whenever I can. Love watching you craft
Oh my goodness, I am going to try this one too! How special!
those are beautiful i want to get some rolling pins to do the crafts with them
You could also use decorative napkins just pull them apart and modge podge them on.
Where did u buy transfers?
there should be a link in the supply list for sure
I made a flag rolling pin for my 4th of July decor, but I used a napkin and decoupaged it on. I think it might be easier that way.
There are definitely several ways! Even painting directly on them is adorable! Thank you so much!