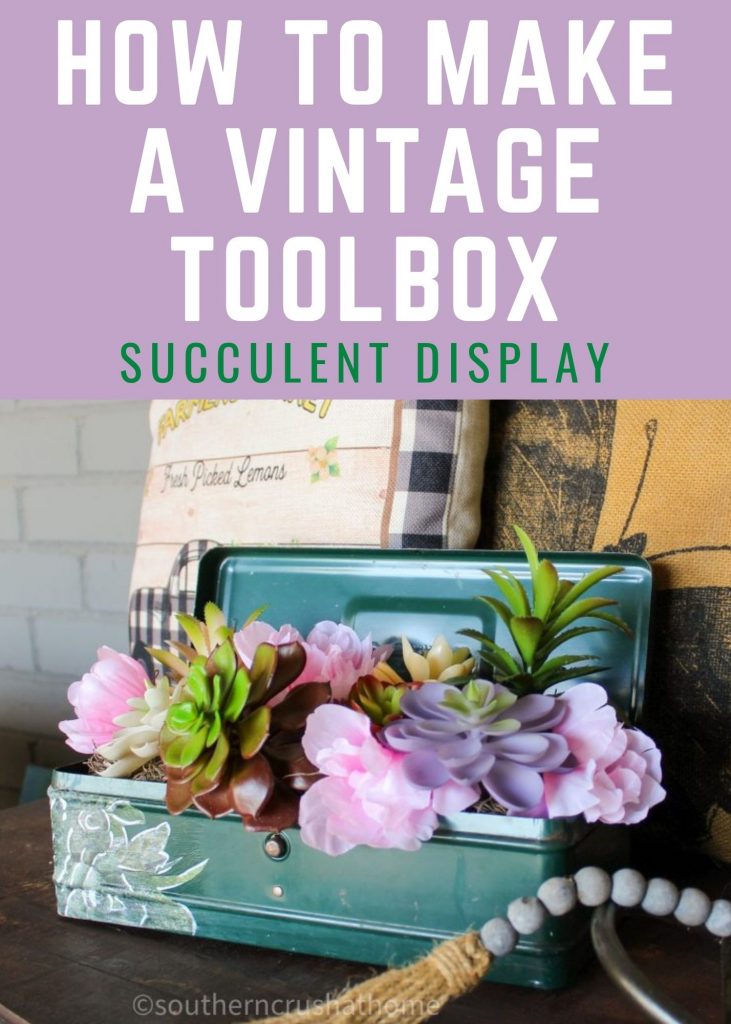
Vintage Toolbox Succulent Display
This Vintage Toolbox Succulent Display is so unique and will be a statement piece in your home. Add your favorite succulents and silk flowers to match your decorating style. You won’t believe how easy this succulent display is to make!
Be Sure to PIN this for Later!
WHAT YOU’LL NEED TO MAKE A VINTAGE TOOLBOX SUCCULENT DISPLAY
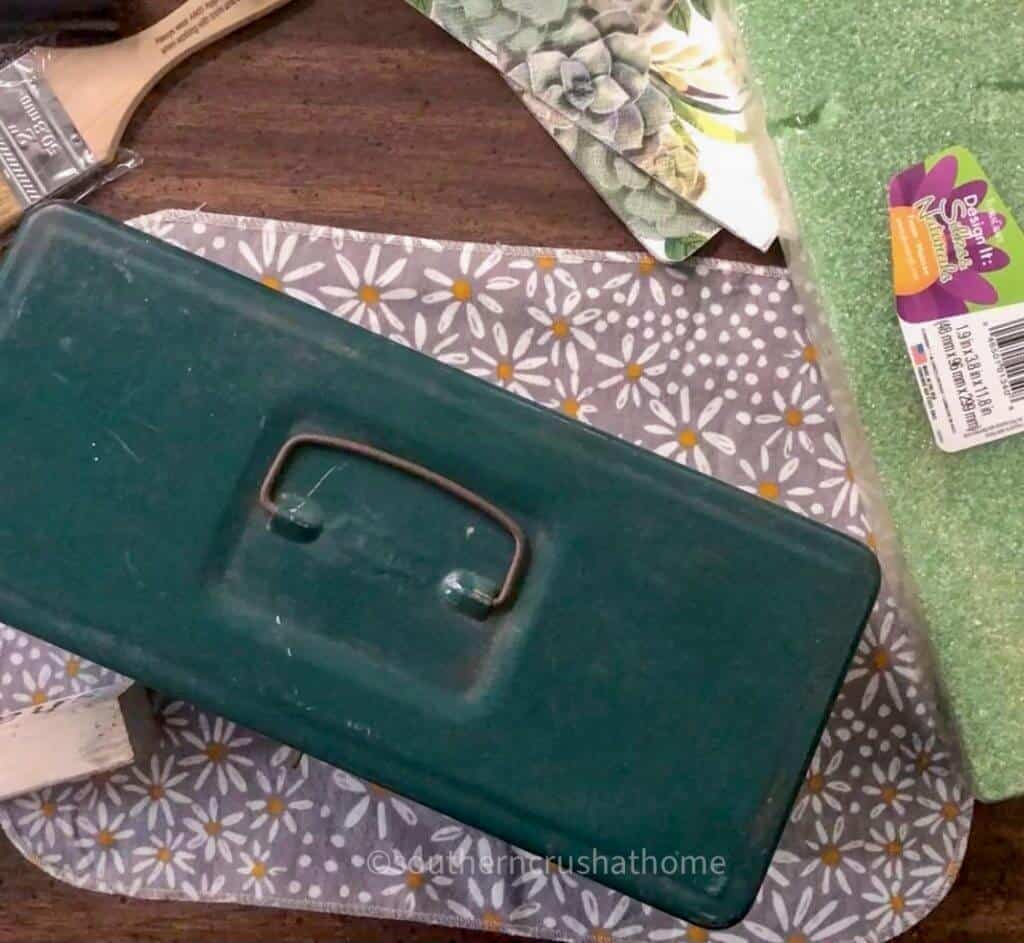
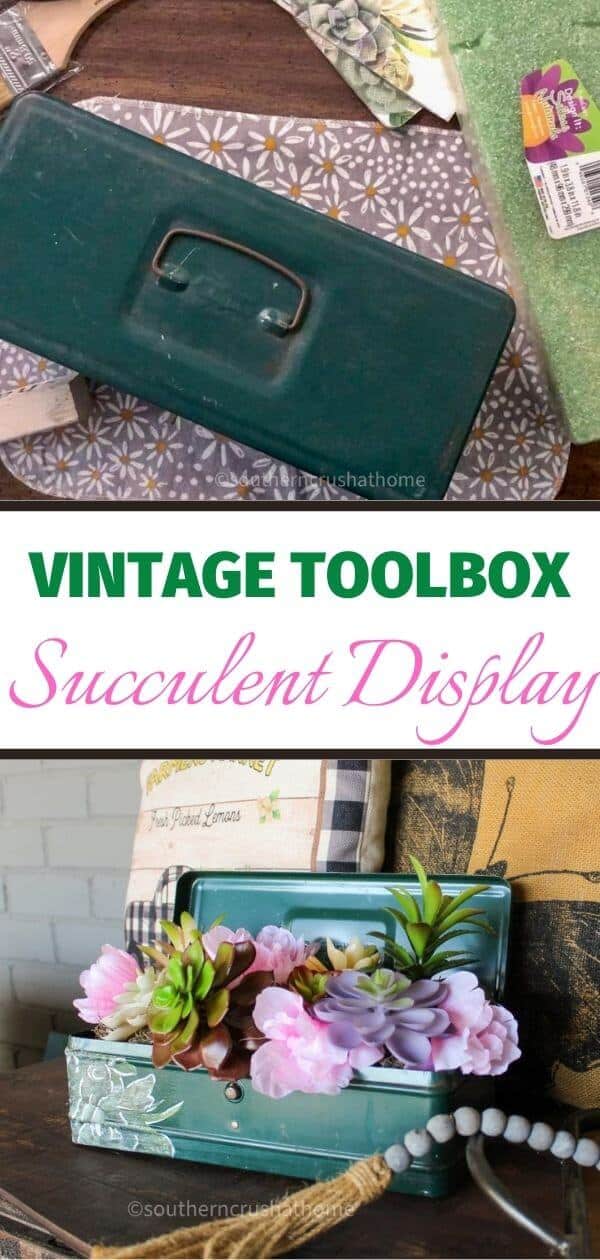
- Vintage Toolbox – check out thrift stores and antique markets!
- Decorative Napkins (succulent design)
- Succulents (I used 7 from Dollar Tree)
- Mod Podge
- Silk Flowers (1 bunch from Dollar Tree)
- Foam Block
- Spanish Moss
- Chip Brush
- Hot Glue Gun
- Scissors
- Craft Knife
My friend Miss Tracy has an awesome “napkin club” if you love napkins as much as I do! Each month she sends you a bundle of fun napkins and then shows you what to make with them!
HOW TO MAKE A VINTAGE TOOLBOX SUCCULENT DISPLAY
Cut the napkin in half twice, then cut around the succulent image that you want to use. The image is intricate, but you don’t have to cut it exact. Try to cut out the main image.

Once the napkin is cut, separate it to one layer. Most are 2-3 plys. You only want to adhere the top layer. Be sure to separate it very slowly so it doesn’t tear. Place the napkin on the toolbox to determine where you want the placement to be. I chose to add the napkin to the corner of the toolbox and around the side.
NEXT…
Use an inexpensive chip brush to add mod podge to the toolbox front and side. Gently place the napkin onto the mod podged toolbox and use saran wrap, or a plastic bag, to press down on the napkin until it is secure.
You don’t want it to tear, so take your time while adding the napkin. Press down with your fingers to remove any air bubbles. You can add additional mod podge to the top of the napkin if it needs a little bit more. Mod podge dries clear, so you don’t have to worry about it leaving streaks.
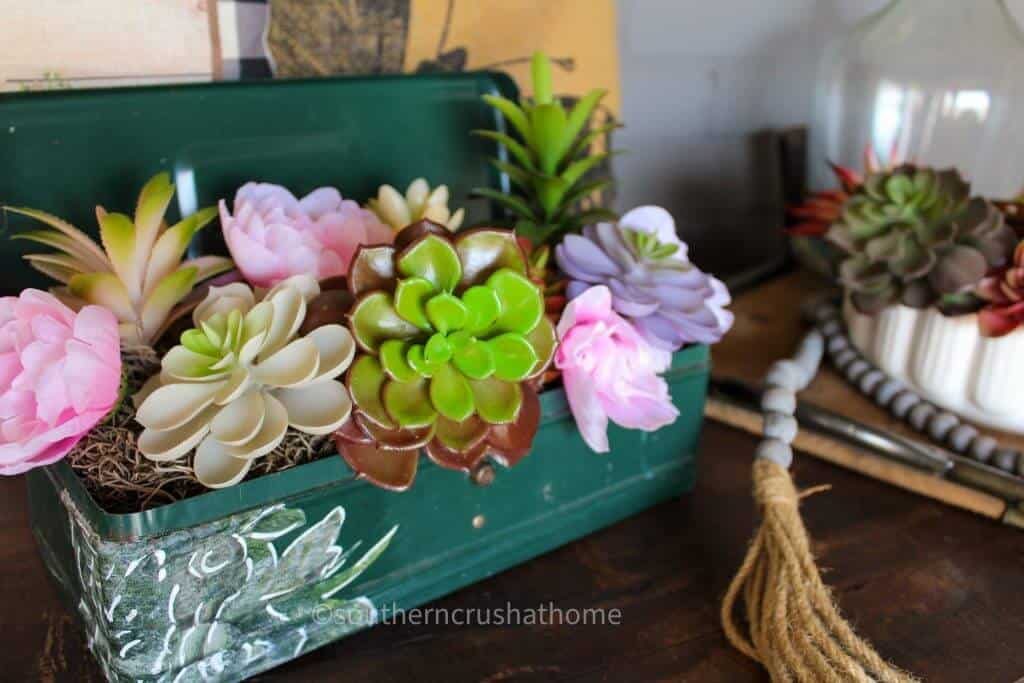
Use a heat gun to give it a quick dry. Then a craft knife to cut into the napkin where it is covering the toolbox opening. Highlight some of the succulents with a chalk pen. This is optional, but I like that it gives it a little pop.
Place the floral foam into the toolbox. You can use a craft knife to cut it to size. You don’t even have to remove the plastic covering. That always makes such a mess! Cover the floral foam with spanish moss. Begin adding the succulents into the foam by pushing the stems into the foam until it is secure. Use scissors, or a craft knife to make a hole in the foam if the succulent needs a little help.
THAT’S IT!
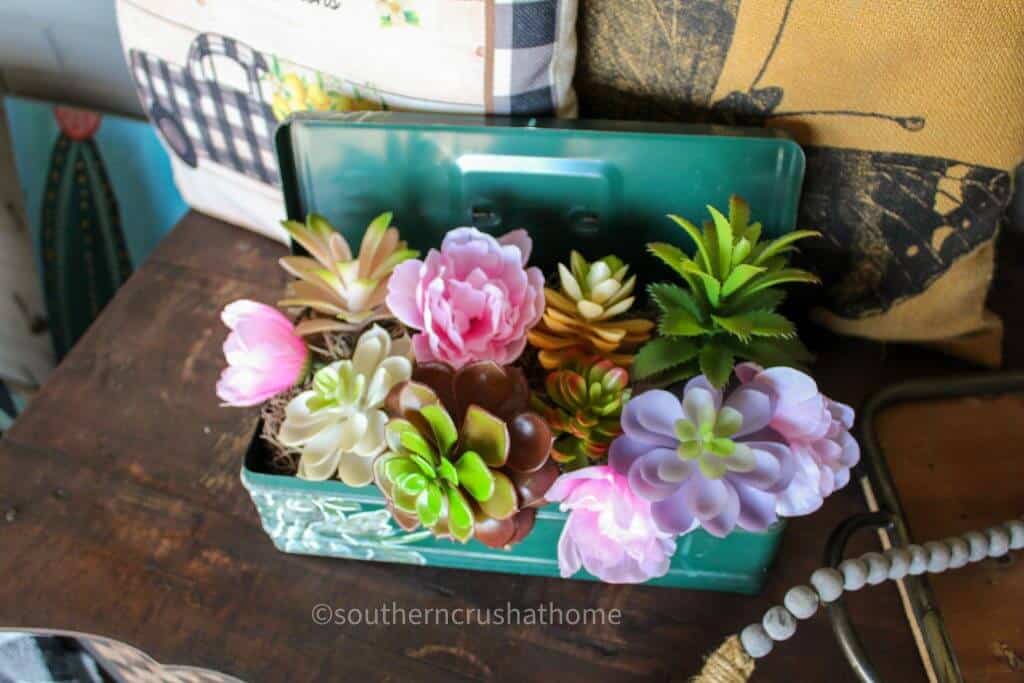
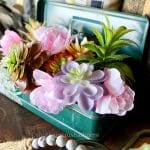
You can fill it entirely with succulents, or you can add a few pretty pink florals like I did. I really like the contrast of the soft pink against the green of the succulents. That’s all there is to it! It’s so stinkin’ cute. You can just let the top of the cover fall onto the succulents by placing it against a wall, or leaning it against something.
VINTAGE TOOLBOX SUCCULENT PLANTER
This entire project only cost $10 to make! Imagine what this little beauty would cost if you happened to find one at an antique market, or home store? And, of course where is the fun in buying it? There is no better feeling than spotting something like this vintage toolbox at a thrift store, and turning it into a beautiful home decor piece that you can be proud to display.

Because the pink flowers are not hot glued into the foam, you can also change them out seasonally if you like. Think about rustic fall colors, or shades of deep reds for the holidays. Don’t you just love decor that can be changed with just a few quick switches?
BE SURE TO CHECK OUT THESE OTHER Dollar store craft ideas!
Be Sure to PIN this for Later!
GET DIY EMAILS
If you love DIYs and Ideas like these as well as seeing all the fun things I find out shopping, you need to be getting my emails, my friend! Each week I send out a couple of emails that include updates, crafts, shopping experiences, and decor inspiration. Be sure to get yourself signed up below. I can’t wait to meet you!
Vintage Toolbox Succulent Display
Equipment
- scissors
- Heat Gun (optional)
- paint brush
- Craft Knife
Materials
- 1 Vintage Toolbox
- 7 Dollar Tree Succulents
- 1 Silk Flower Bunch
- 1 Foam Block
- 1 bag Spanish Moss
- 1 Succulent Napkin
- Mod Podge
Instructions
- Cut the napkin in half twice, then cut around the succulent image that you want to use.
- Once the napkin is cut, separate it to one layer and place it on the toolbox to determine where you want the placement to be.
- Use an inexpensive chip brush to add mod podge to the toolbox front and side.
- Gently place the napkin onto the mod podged toolbox and use saran wrap, or a plastic bag, to press down on the napkin until it is secure.
- Press down with your fingers to remove any air bubbles. You can add additional mod podge to the top of the napkin if it needs a little bit more.
- Use a heat gun to give it a quick dry, then a craft knife to cut into the napkin where it is over the toolbox opening.
- Use a chalk pen to highlight some of the succulents. This is optional, but I like that it gives it a little pop.
- Place the floral foam into the toolbox. You can use a craft knife to cut it to size.
- Cover the floral foam with spanish moss.
- Begin adding the succulents into the foam by pushing the stems into it until it is secure. You can use scissors to poke holes in the foam if you need to.
- Fill it entirely with succulents, or add a few pretty pink florals like I did.
- Decorate with your beautiful vintage toolbox!
So cute!!
I love how the vintage tool box turned out! So pretty! Can’t wait to make the paper flowers. once I get moved and settled.