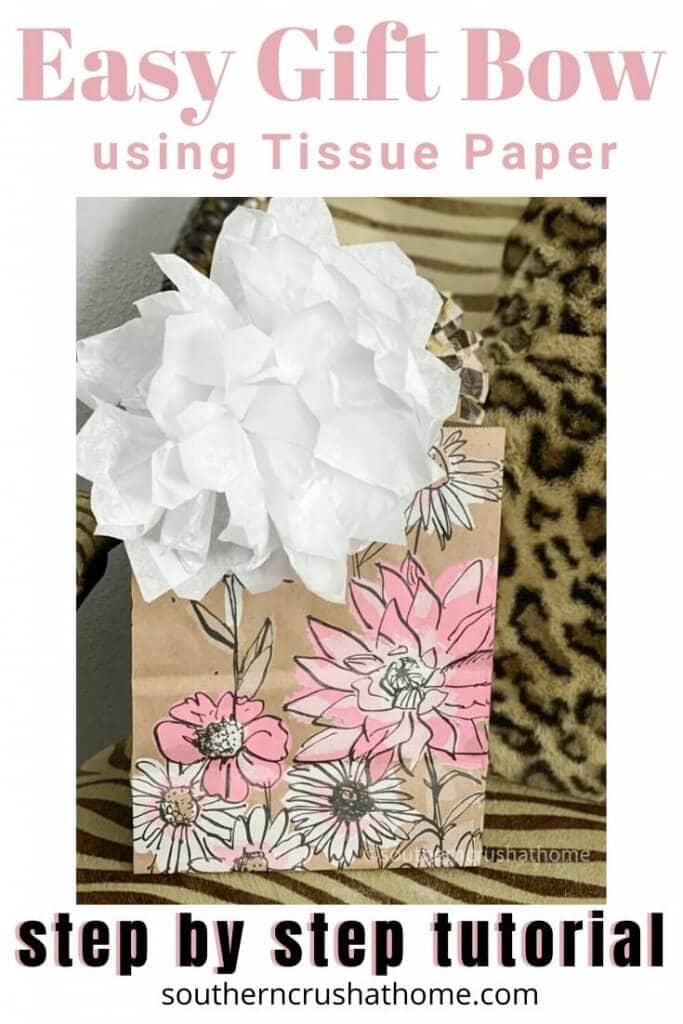
How to Make an Easy Gift Bow (Using Tissue Paper) + Video
Let's face it. Tissue paper is cheap and almost always on hand when you need a quick and easy gift bow! It's the perfect solution to taking your gift to the next level.
How to decorate a gift with tissue paper
Tissue paper is one of those things that seems to always be around my house; whether we bought it and only used one sheet or we bought the huge value bundle and have a ton leftover. It seems like every time I'm headed to a celebration that requires a gift; we are in the car when we are wrapping it. It usually includes a stop at a local Dollar Store where I end up grabbing tissue paper. This is one of those bows that I could easily make in the car at the last minute and it would look like I spent lots of time making the gift beautiful!
There are several ways to decorate a gift using tissue paper. The most popular way to decorate is by strategically placing the tissue paper sheets into the gift bag leaving a portion of the sheet sticking out of the top of the bag. Another way is to wrap the actual gift up in tissue paper first and then place the wrapped gift inside the gift bag. I'm going to show how to make a super easy gift bow using tissue paper to make the gift feel extra special.
These easy gift bows are great for all types of gifting occasions such as birthdays, Christmas, wedding showers, baby showers, thank you gifts, swap gifts, and much more.
>>Be sure to PIN this tutorial for later!<<
Supplies Needed to Make a Tissue Paper Gift Bow
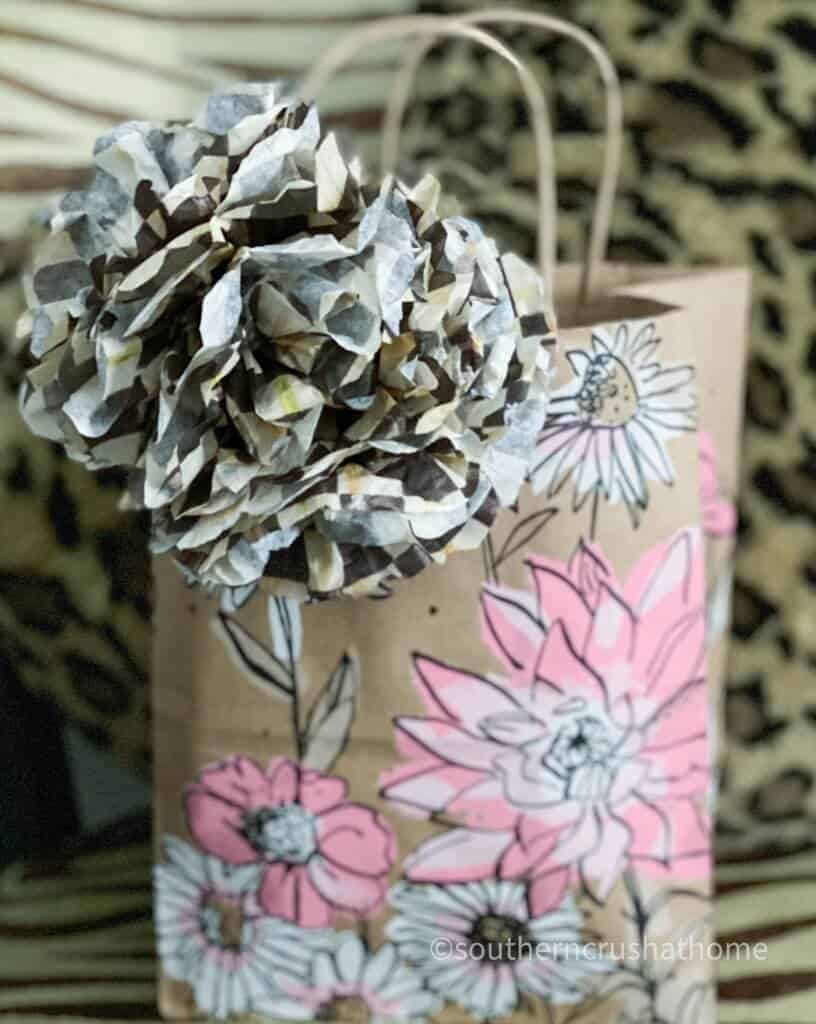
- any single sheet of tissue paper of your choice; plain colors or any pattern of your choosing. I used Dollar Tree plain white tissue paper and MacKenzie Childs Courtly Check patterned tissue paper
- scissors
- twine to match tissue paper
Step-by-Step Easy Gift Bow Tutorial
- Fold your single sheet of tissue paper in half lengthwise.
- Then fold your tissue in half a second time the opposite way.
- Taking your scissors, cut through both of the folded seams. This should leave you with four, equal-sized separate sheets of tissue paper.
- Begin folding the stack of tissue paper sheets down from the top of one of the sides about one inch across.
- Now flip the tissue paper over and repeat this process by folding down about an inch.
- Repeat this process over and over until you have a fan-like pattern.
- Take your thick strip of folded tissue paper sheets and fold it in half towards the middle.
- Take your scissors and cut the ends of your strip either “rounded” or “pointed” for effect. Both ways are really cute, it's literally your preference.
- Taking your matching baker's twine or string, tie a small knot in the center of the tissue paper stack to secure your bow. Leave enough twine to tie your gift bow onto the actual gift.
- Slowly separate your layers by spreading each layer of tissue paper apart towards the center of your bow until complete. Be patient and careful not to tear your tissue paper during this process. The cheaper the tissue paper I've found, the easier it is to accidentally rip it while separating the layers.
- Finally, fluff your bow. Make it pretty. Don't handle it too much though or it will begin to appear wrinkled. (not really the look you're going for on this)
- Attach to your gift bag handles by securing them with your twine.
If you prefer, watch the easy-to-follow instructions on this video tutorial HERE.
Viola! Easy gift bow is done! You will never decorate a gift bag without one of these tissue paper bows again!
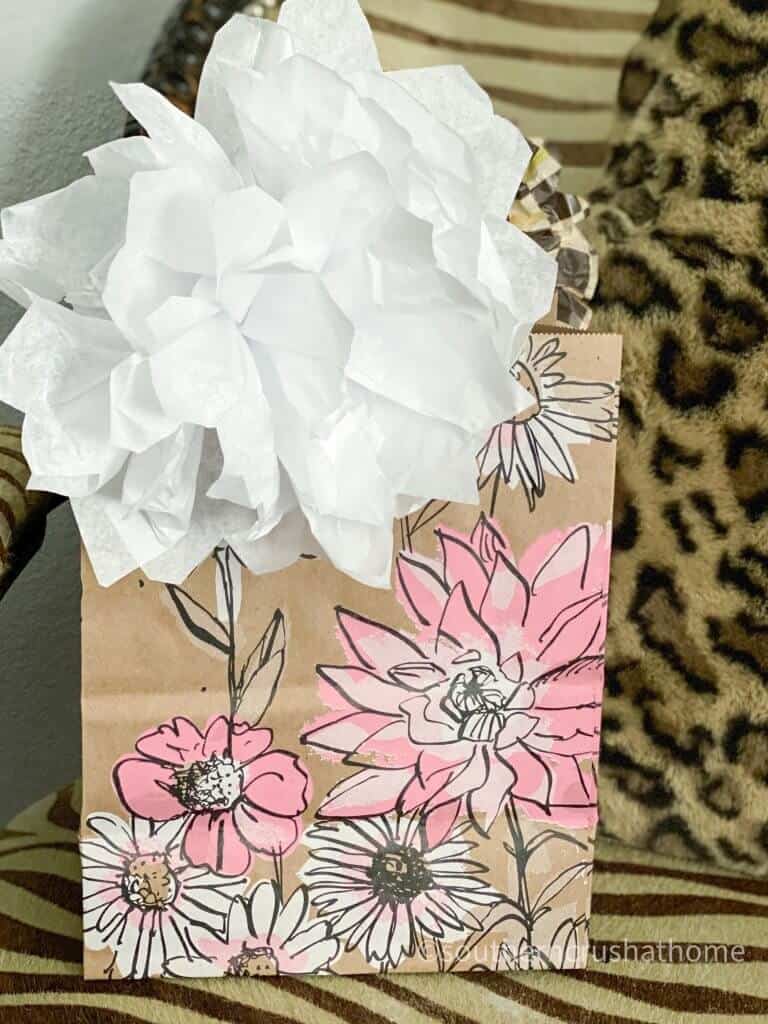
You can get super creative with the patterned tissue papers and make the gift bows even more fun and unique. This was my MacKenzie Childs Courtly Check tissue paper gift bow. Keep in mind that the nicer the tissue paper, the thicker it is and the fluffier it will be!
More Simple DIY Gift Bow Ideas
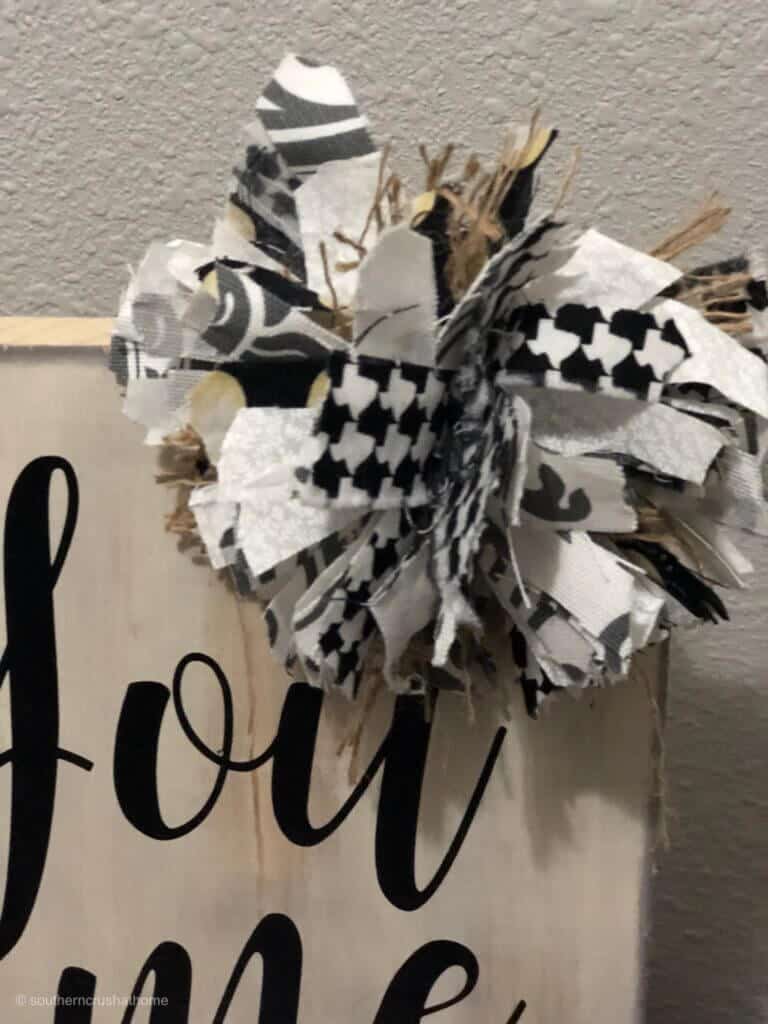
My Signature Messy Bow is a fabulous option for decorating a gift. I realize that I may be biased, but this one is my favorite bow. Using scrap fabric and burlap, you can actually create a bow that coordinates with any gift bag or even with the gift inside the bag! The variations are endless with this bow.
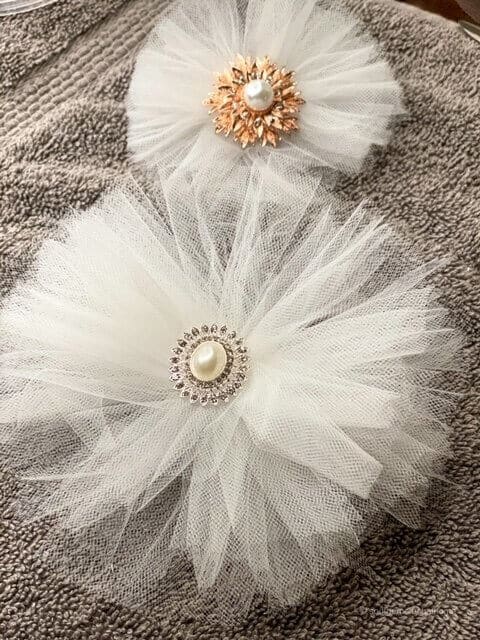
A simple DIY Tulle Bow is always another quick and easy option for wrapping up a gift in a special way. These bows are so pretty and can really make your gift stand out. With or without bling, these are my “go-to” bow for wedding shower gift bows.
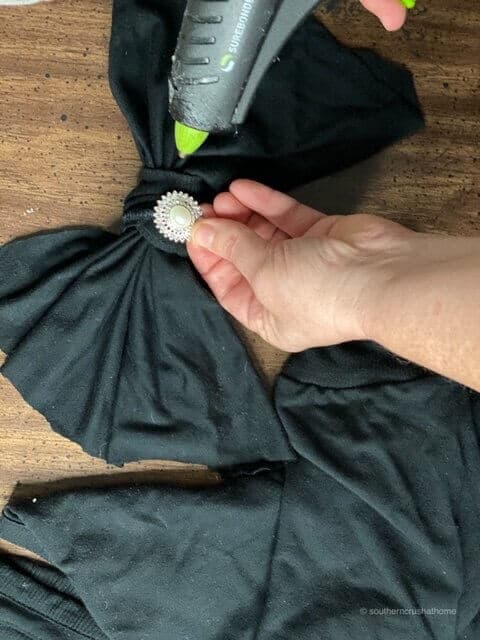
A repurposed T-shirt Bow is a great way to make a gift bow last minute from something you have around the house. I never look at t-shirts the same way after making these upcycled bows.
These DIY bows are so easy that even your kids can make some with you. It may be fun to make a few ahead of time and keep them safe inside a Tupperware container for future last-minute use on a gift for a special someone.
Want 7 Easy Bow Tutorials + Bonus Tree Topper?
If you love this kind of DIY project, you need to be getting my emails, friends! Each week I send out a couple of emails that include updates, crafts, shopping experiences, and decor inspiration. Be sure to get yourself signed up HERE. I can’t wait to meet you!
Leave your thoughts below in the comments, please… BTW— Life is short—Enjoy the mess!
**P.S. Please join us over on our Facebook Page to see more fun “Live”.
Love these. I see some on Christmas gifts this year. Thanks
Where has this been all of my life! I can’t believe I never thought of this! We used to make these when I was a kid all the time. Thank you for the tip!
Love it..might have to try it
very pretty
Just made some for a baby shower! Thank you for the inspiration ❤️