Rustic Pumpkin Decor Made Out Of Glass Bulbs (Pottery Barn Inspired)
Rustic pumpkin decor in just a few minutes! The supplies are really inexpensive and it looks charming on your mantle.
Pumpkins are a Fall staple when it comes to decorating! Typically, you will find your traditional orange pumpkins, but occasionally you’ll see a white or gray one.
This year, I went with navy pumpkins which was a fun paint pour project!
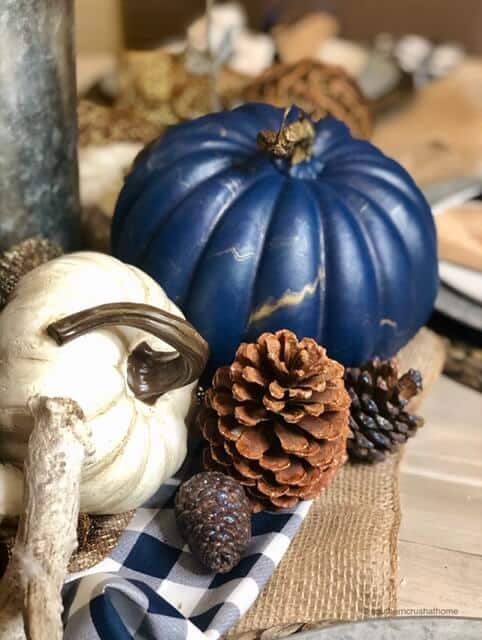
After first seeing Pottery Barn’s mercury glass version of these glamorous, antique-looking glass-finished pumpkins; I knew they were just what my Fall dining table centerpiece needed.
Supplies Needed to Make a Rustic Pumpkin
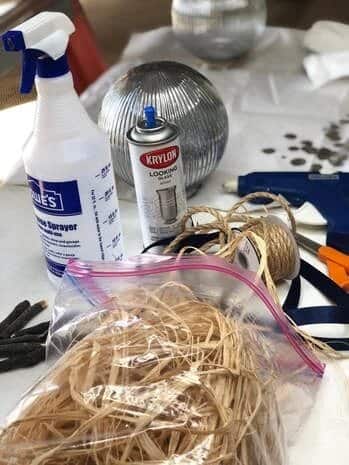
- Glass globe light cover
- Raffia ribbon
- Wooden stick from the yard for a stem
- Krylon “looking glass” spray paint
- Spray water bottle filled with water
- Trim (whatever you’d like, I used rope and satin ribbon)
- Battery-operated votive (optional)
- Hot glue gun
- Scissors
- Paper Towels
The spray paint makes it nearly impossible to do this project indoors, so this project is a great excuse to get outdoors and enjoy the fresh air! So there’s that!
Watch the Full Video Tutorial here
If you are a visual learner, then I have the perfect video for you. Just watch the tutorial video and make the craft with me.
How To Decorate With A Pottery-Barn Look-A-Like Rustic Pumpkin
This is one of the largest DIY pumpkins that I’ve made, so you’ll need to leave plenty of room around it. This glass pumpkin really does become a fantastic centerpiece and a conversation starter.
When you decorate with it, place it somewhere safe where it won’t get broken. The globe has the perfect base – but it’s still breakable.
This fits perfectly on a mantle or shelf where it won’t be knocked down easily.
Since it has a neutral color, it can fit in the middle of a bunch of other fall decor pieces too.
Since it’s made out of glass, you can put it on your porch with your other outdoor decor pieces.
Rustic Pumpkin Tutorial
Here’s the complete tutorial in the printable card, just like I promised. Don’t forget to pin this post to your craft board – it’s the perfect craft for a girl’s night!
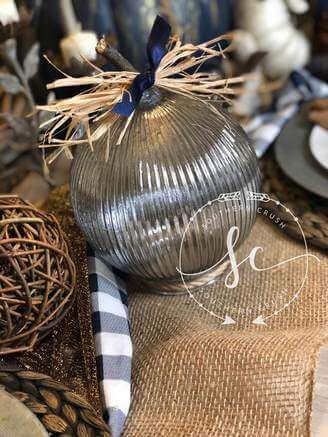
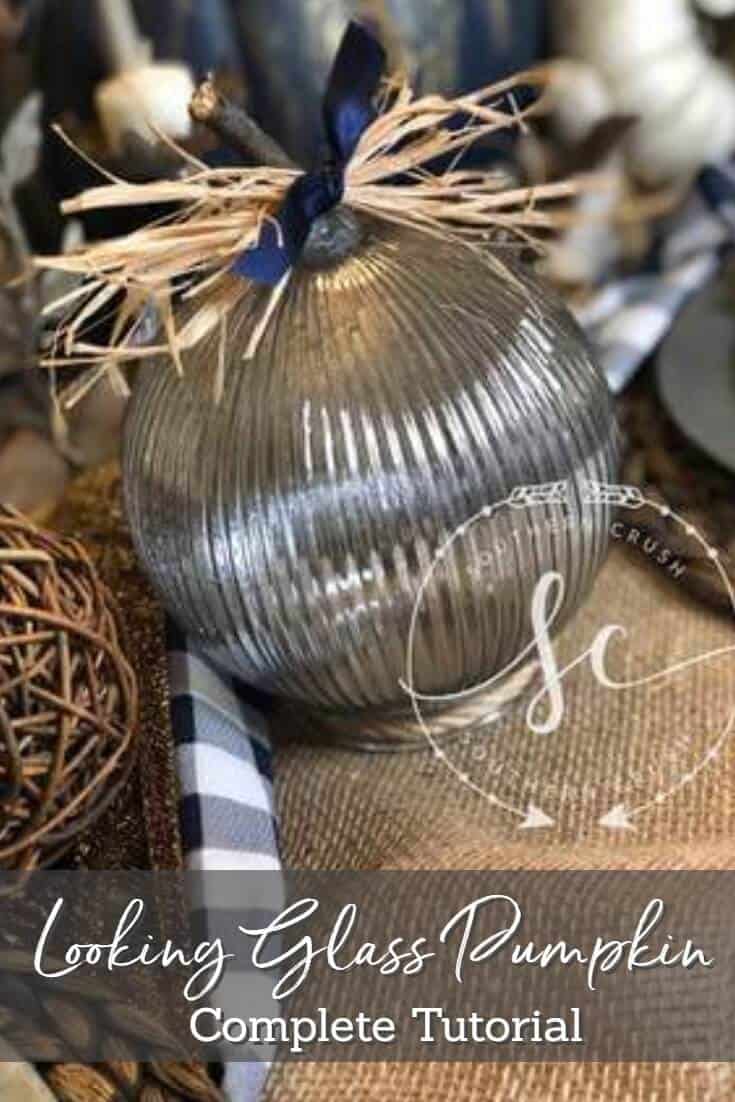
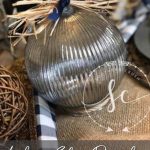
Mercury Glass Pottery Barn Look-A-Like Pumpkin
The final pumpkin did not disappoint. It looks even better, in my humble opinion than the mercury glass Pottery Barn version!
It was so much fun and super easy to do. It would be a great Fall project for doing outdoors once those cooler temps roll in.
These looking glass pumpkins would be so cute as decor on a table as a centerpiece or on a fireplace mantle or simply in a guest bath for the Fall season! What do you think, will you make one of these for yourself?
If you love this kind of DIY project, you need to be getting my emails, friend! Each week I send out a couple of emails that include updates, crafts, shopping experiences and decor inspiration.
Be sure to get yourself signed up below. I can’t wait to meet you!
>>>Leave your thoughts below in the comments please… BTW— Life is short—Enjoy the mess!
Looking Glass Rustic Pumpkin
Equipment
- Krylon looking glass spray paint
- Spray water bottle filled with water
- scissors
- Paper Towels
Materials
- 1 glass globe light cover
- ½ yard Raffia Ribbon
- 6 inch Wooden stick
- ½ yard rope or ribbon
- 1 battery-operated votive
Instructions
- Lightly and sporadically spray the inside of your glass globe light cover with the water from your spray bottle of water. Let dry a few minutes.
- Next take the Krylon looking glass spray paint, and spray the inside of the inside of the globe lightly. Let it drip dry.
- Take a dry paper towel and twist it up to fit inside the globe in order to ‘dab’ some of the excess wetness off of the inside edges of the globe. This also helps with the ‘mercury’ effect.
- Let the globe drip dry completely.
- Using the hot glue, glue the wooden stick to the top of the globe and hold until it stays in place.
- Glue or tie on some rope around the bottom and raffia ribbon and/or regular ribbon for embellishment on the top.
- Add a battery operated votive underneath the globe for added ambiance!
It’s really pretty project can’t wait to make this pumpkins. Thanks for the video it help alot.
You’re so welcome! I’m glad you’ll try it!!
I just made your glass pumpkin. They came out great I did it a little different. I put an acorn on top of the bow. It covers up the knot
I’m so glad you made one!!! What a great idea to add the acorn!
Loved the looking glass pumpkin. Great presentation, a pleasure to watch. Thank youPhyllis Ursery
I’m so glad! Thank you for your kind words!