How to Make a Gift Bow 8 Different Ways (featuring Melanie’s Messy Bow)
Messy bows are perfectly imperfect and make for a whimsical, personal touch to your Christmas gifts. This tutorial will show you how to make a gift bow 8 different ways including how to create my popular Southern Crush Messy Bows! Most of the supplies are things you may already have at home. The best part is, all of these different fancy bows take less than 10 minutes to finish!

Be sure to PIN this for later!
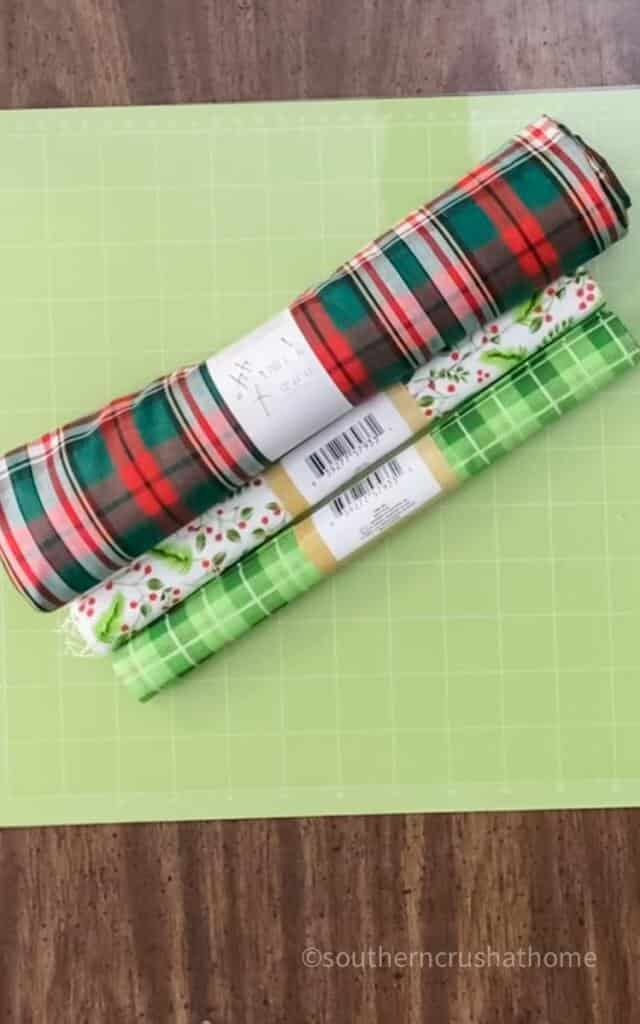
what is needed to make a christmas gift bow
- different fabrics or a variety of ribbons (optionally burlap material for texture)
- zip tie or pipe cleaner or floral wire
- scissors
- optionally one of each of the following: ornaments, peppermints, pinecone pick, buttons, fairy lights, faux holly, jingle bells
This is perfect for busy moms who need quick and easy gift bow idea that don't require too many supplies or time commitments.
It's also great project if you're looking for last minute gift bow ideas since each diy messy bow only takes about 5-10 minutes!
So grab some ribbons, fabric scraps, burlap, yarn, etc., and let's dive in to how to make a Christmas gift bow 8 different ways. My favorite way to decorate a gift is with my diy messy bow collection for the holidays.
This is one of the easiest and best bows I've ever made and it is so cute and it fits my decorating style perfectly. I always seem to have scrap fabric lying around so diy messy bow making is one of those easy craft projects for me.
When I first created the official “messy bow” over on my Facebook page it went viral. SEE IT HERE
how to make a basic messy bow for christmas
These easy-to-make messy bows can be made in any color you like and look great on top of a holiday present. They're so unique that your friends will love them! You'll get more bang for your buck this season when everyone is asking “Where did you get this?” I'm going to show you how to make these amazing diy messy bows today!
first
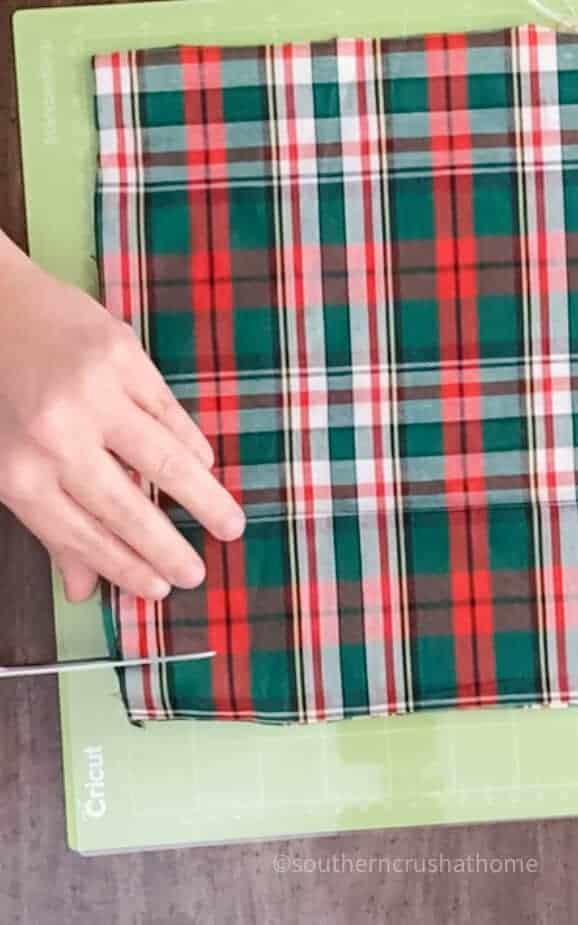
Cut a square piece out of each of the fabric patterns you choose to use for your bow. I always tend to have a lot of spare fabric scraps and ribbons left over from other cute bow making craft projects that are perfect for making these easy messy bows.
next…
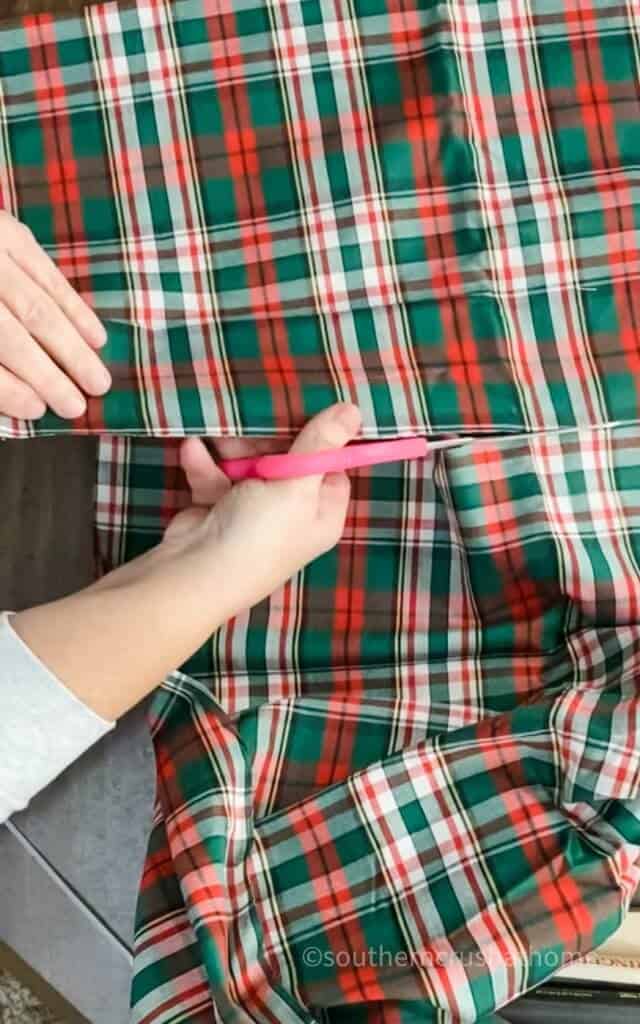
Cut several 1″ wide notches into one end of the fabric square in each pattern. I hope you know that this is not an exact science and that is what make this diy craft project so relaxing.
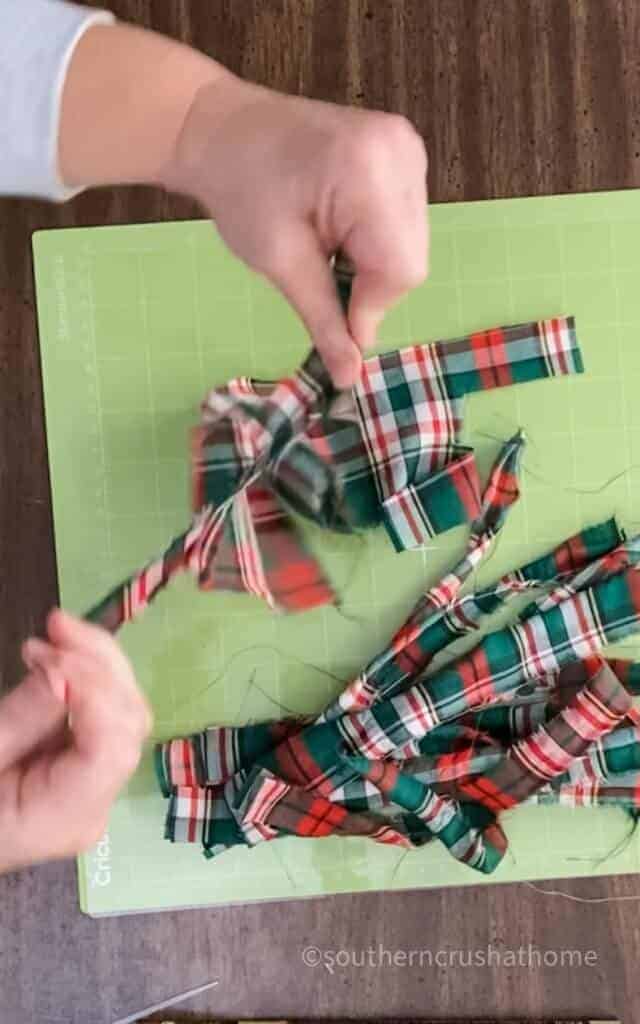
Rip the fabric into strips. This can be a very fun and therapeutic way to get out the stress of the holidays! Trust me. Enjoy ripping the fabric to shreds or ribbon strips. Repeat for each of the fabric patterns until there is a nice mess, I mean… stack.
then…
Lay down a zip tie, pipe cleaner or strip of floral wire and then begin to lay the fabric strips back and forth in a circular layering pattern until all the fabric strips are used.
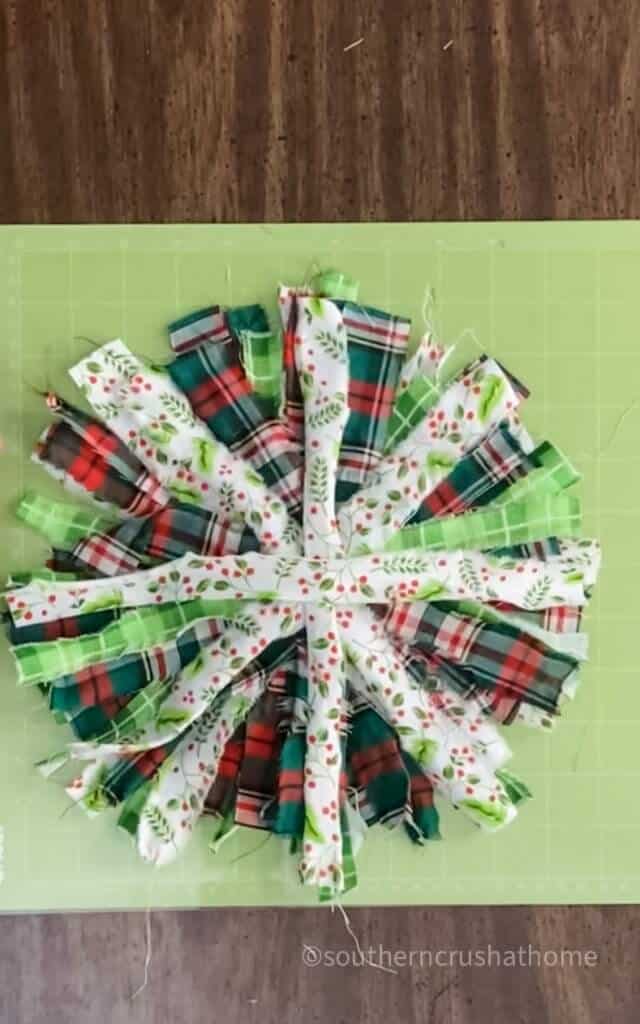
Carefully lift up the stack of fabric and ribbons by the zip tie and begin to pull the zip tie leaving a small amount of ‘give' in order to twist and flip the stack over for the final tightening of the zip tie.
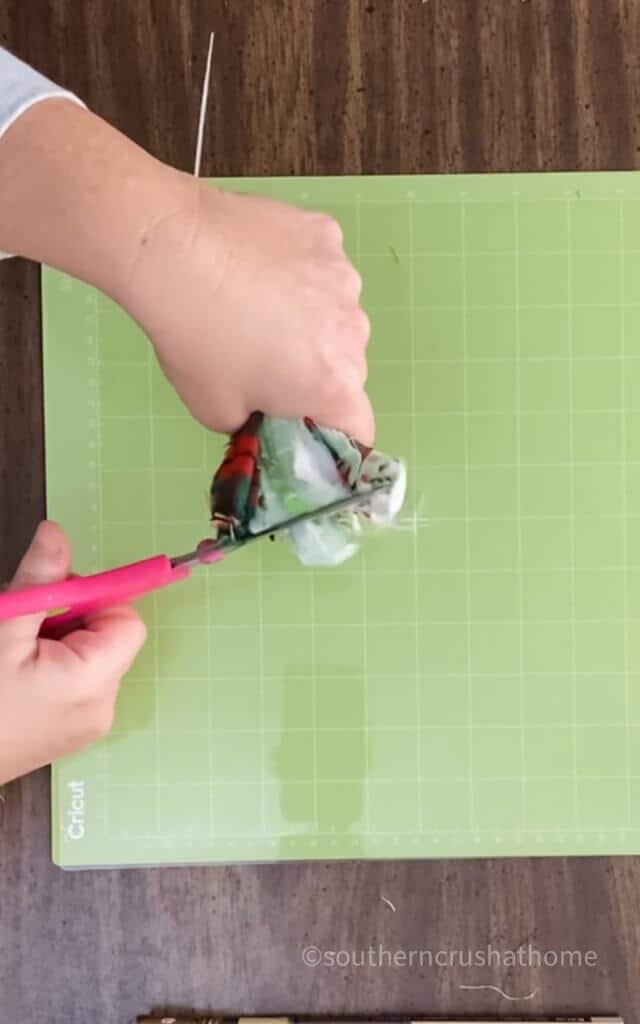
Grab the bundle of fabric and ribbons and form a ‘bouquet' shape. Using fabric scissors, trim the top into a flat surface. This is where the infamous ‘mess' of the messy bow project is created.
finally…
Turn the bow over and give it a good shake to knock of any loose pieces of fabric. This will serve to fluff the bow. Pull out any loose strings that stick along the edges that you do not like. I like more of a shabby look, so I tend to leave a few strings on my messy bow.
Embellish the messy bow if you desire. I am going to share with you 8 different ways to make this diy messy bow unique and cute in each of their own ways.
How to Make a Christmas Messy Bow 8 Different Ways for Gifts
If you’ve tried all the different messy bow variations, but are still craving more ways to make your gifts look extra pretty this year, I have a few suggestions for you. Check out these 8 creative ideas for making Christmas bows in various shapes and sizes that can be used with any gift!
Whether you want a simple one-step process or an intricate design with lots of steps, there is something here for everyone.
You will love how easy it is to give someone their favorite present when they see the kind of effort put into wrapping it up just right!
Which way do you think would work best on my gifts? I am seriously loving idea #5 because it offers so many options! Let me know what you think.
How do you make a messy layered bow?
These 8 different ideas each take a simple single layer small messy bow and add a layer of ‘extra' specialness to them. You can layer your gift bow with just about anything. Typically I add a layer of sparkly bling to my diy messy bows; however, these 8 ideas have my creative juices flowing.
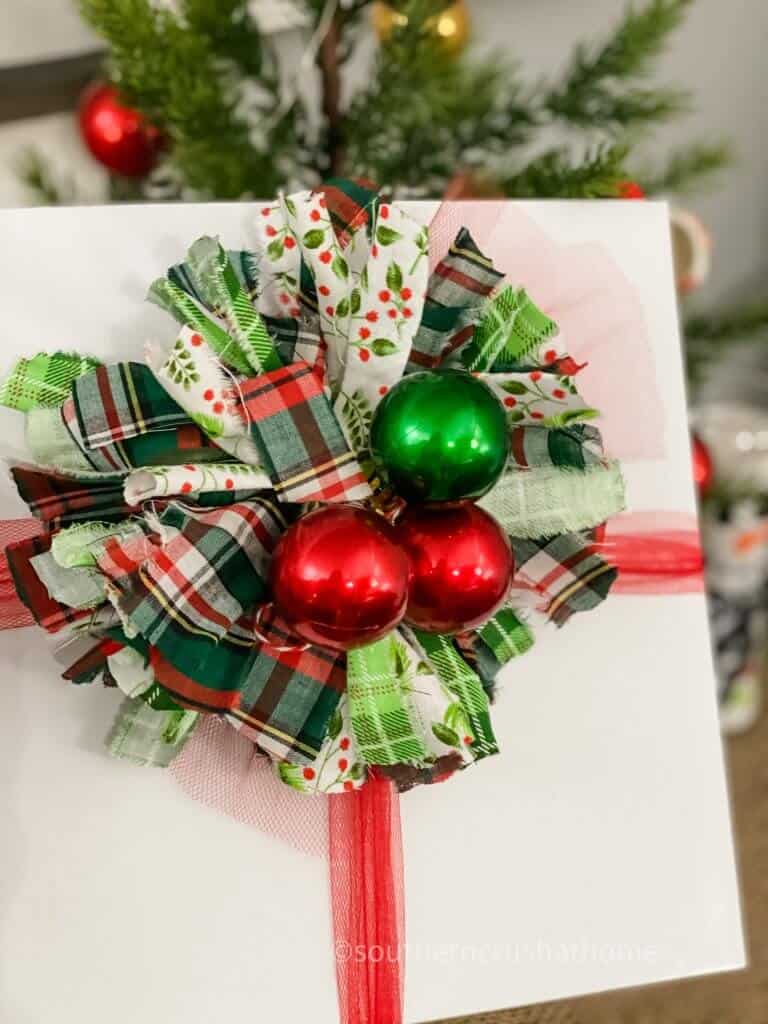
Christmas Gift Bow Idea #1
Add a few red and green ornaments using floral wire. This makes such a festive and cute version of a messy bow.
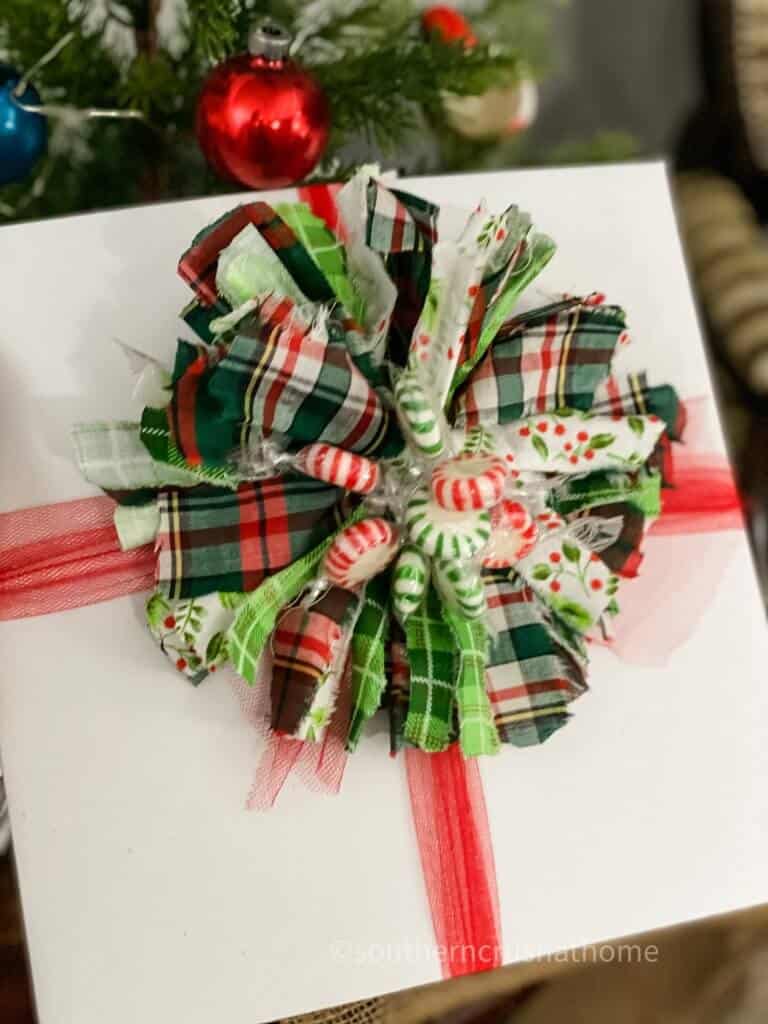
Christmas Gift Bow Idea #2
Grab a few peppermint candies and spearmint candies and secure them using floral wire around the wrapper ends. Twist them until they make a little bundle for the messy bow. Try not to eat them all before this diy project is complete. LOL
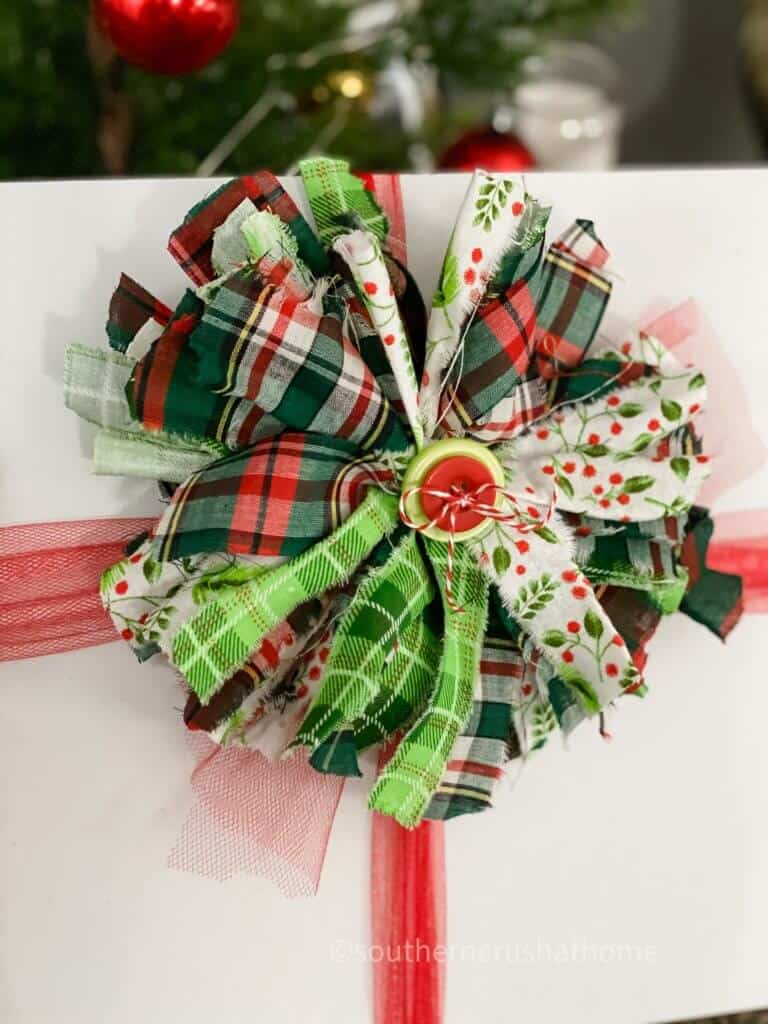
Christmas Gift Bow Idea #3
Using buttons is one of my favorite ways to embellish diy projects. This Christmas bow is no exception.
Tap into your button stash and choose a complimentary color for the fabric and ribbons. Add a cute bow using baker's twine.
Attach this button masterpiece with a dab of hot glue to the messy bow. How adorable is this idea?
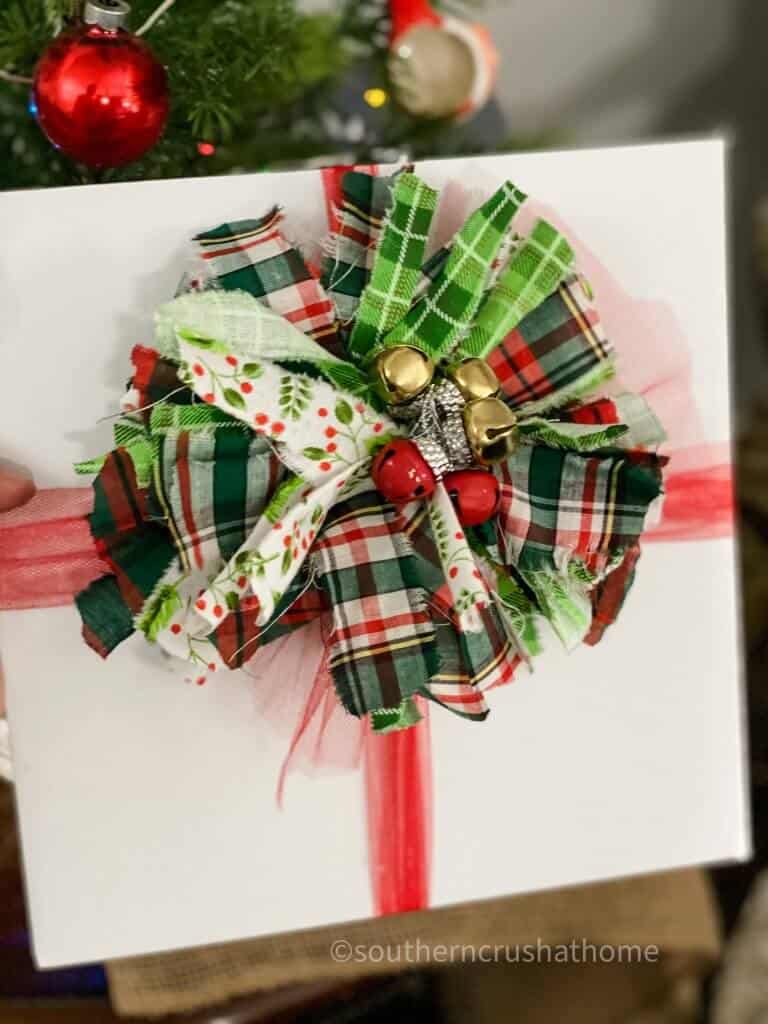
Christmas Gift Bow Idea #4
Jingle bell all the way! These jingle bells came from the Dollar Tree but I wanted them a different color. I painted the silver bells red with craft paint and attached them to the messy bow with floral wire. What do you think? Tell me in the comments!
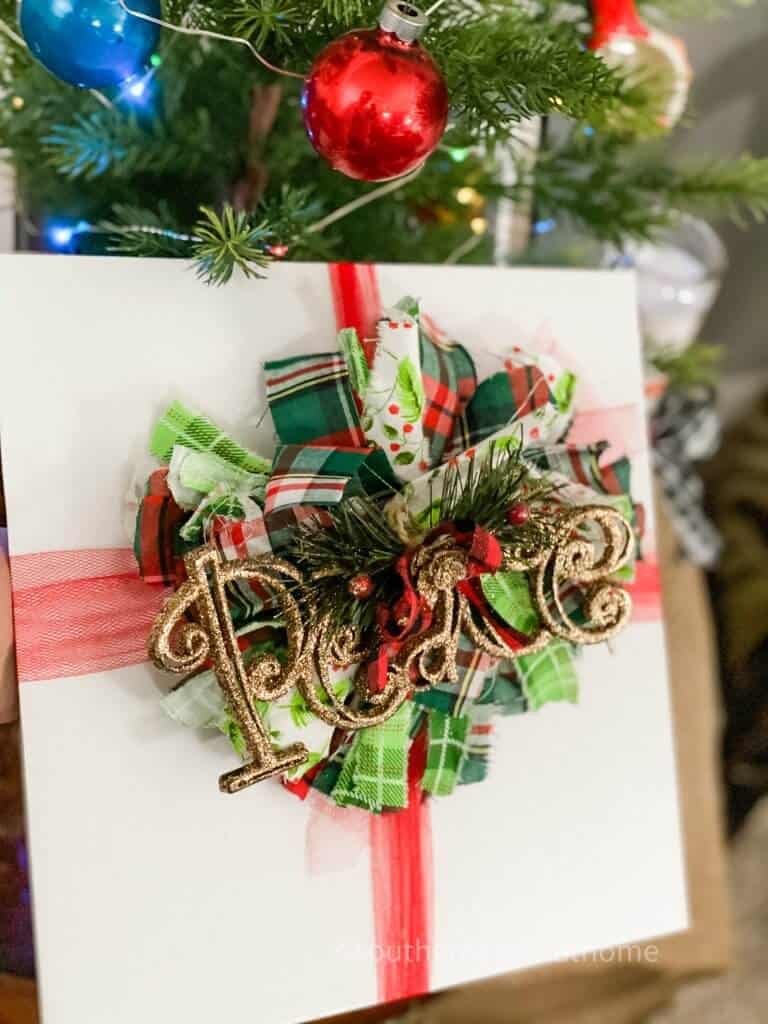
Christmas Gift Bow Idea #5
Dollar Tree has tons of sweet little word ornaments that make perfect gift package embellishments on their own; but why not pair them with a diy messy bow?
Attach any fun holiday word ornament using jute twine to create a one of a kind Christmas gift bow for someone special!
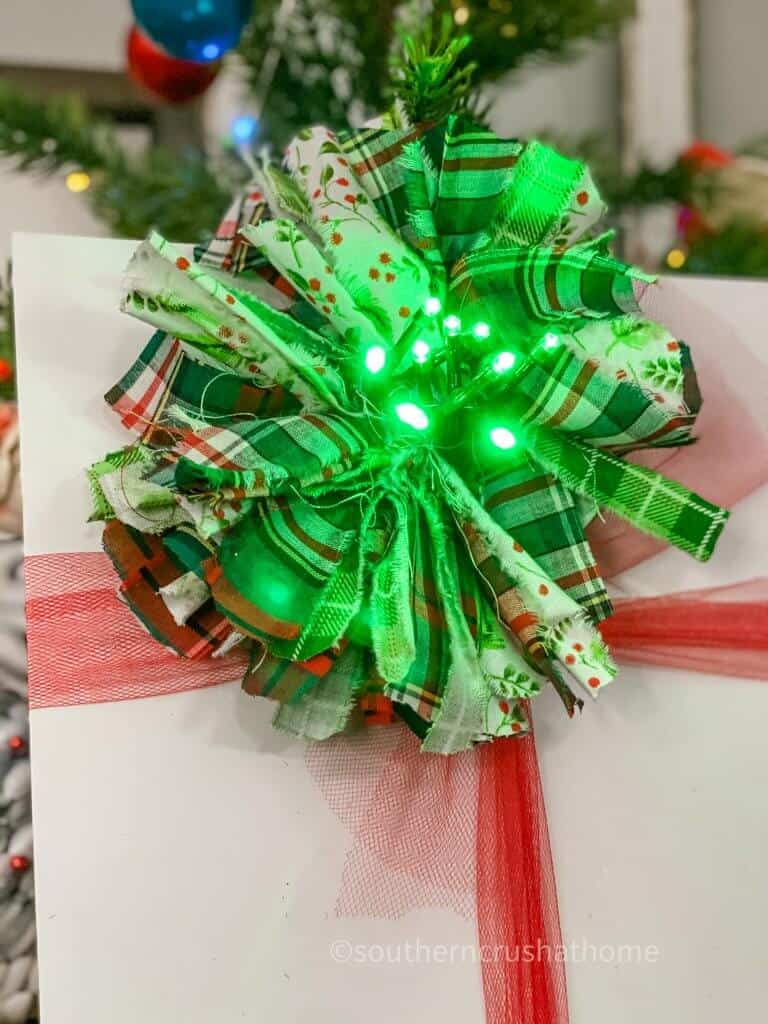
Christmas Gift Bow Idea #6
Fairy lights make any holiday diy project a little brighter. Add a small cluster in any festive color to the middle of this messy bow using floral wire to create a luminous bow that they will remember!
This one is fun for kids, too! (tuck the batteries back behind the bow)
Christmas Gift Bow Idea #7
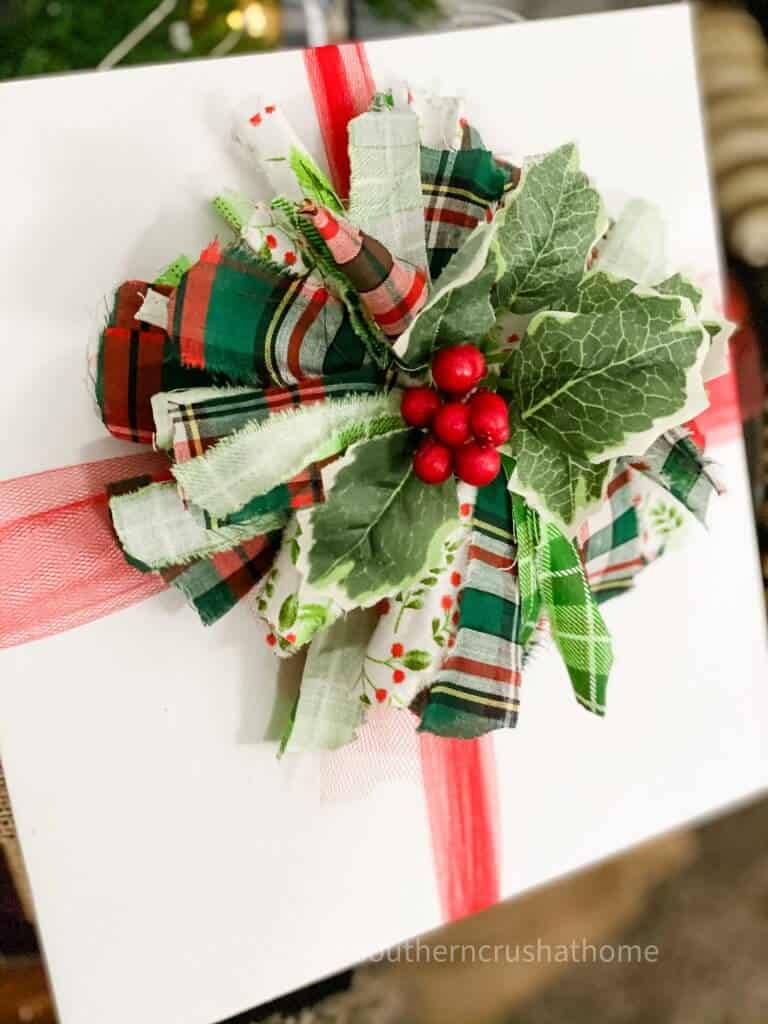
This idea is one of my favorites! Tuck a small piece of faux holly into the middle of the messy bow. Use hot glue to secure if needed. This creates an instantly gorgeous Christmas gift bow!
Christmas Gift Bow Idea #8
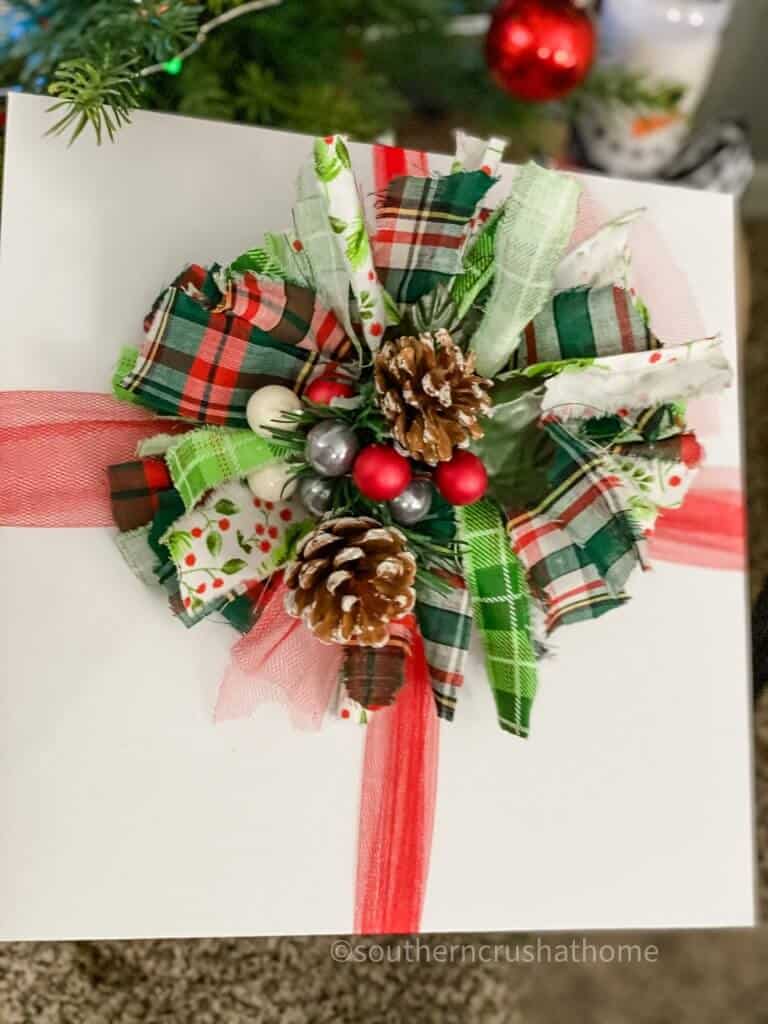
Christmas picks and stems are sold everywhere and have some many uses in holiday crafts. Why not add one to the middle of a messy bow to jazz it up a bit? I took a pick with pinecones and berries and attached it using floral wire to create this unique, rustic holiday look.
DIY Messy Bows 8 Different Ways for Gifts
With these 8 different ways to make a Christmas messy bow, you’ll never run out of gift wrapping ideas. Plus they're all quick and easy!
How do you make a messy bow for a Christmas tree?
Last year I made the cutest Messy Bow Tree Topper and the complete step by step tutorial is HERE. I actually made two, one for a small traditional Christmas tree and one for my whimsical Pioneer Woman inspired Christmas Tree!
How do you make a messy bow for a Christmas wreath?
You can also use this messy bow inspiration on diy wreath projects. Make several and add them with floral wire or hot glue. Which idea do you think would look the cutest?
Have you seen my tutorial on How to Make an Easy 5 Minute Bow for a Wreath (Step by Step Instructions)
STEP BY STEP bow making VIDEO TUTORIAL
If you are more of a visual learner and want to see the exact step-by-step bow making video tutorial, be sure to check out this video below over on my YouTube Channel!

How to Make a Gift Bow for Christmas
Materials
- scrap fabrics or a variety of ribbons
- zip tie or pipe cleaner or floral wire
- scissors
- optionally one of each of the following: ornaments peppermints, pinecone pick, buttons, fairy lights, faux holly, jingle bells
Instructions
- Cut a square piece out of each of the fabric patterns you choose to use for your bow.
- Cut several 1' wide notches into one end of the fabric square in each pattern.
- Rip the fabric into strips. Repeat for each of the fabric patterns until there is a nice stack.
- Lay down a zip tie, pipe cleaner or strip of floral wire and then begin layering the fabric strips back and forth in a circular pattern until all the fabric strips are used.
- Carefully lift up the stack of fabric and ribbons by the zip tie and begin to secure it leavine a small amount of 'give' in order to twist and flip the stack over for the final tightening of the zip tie.
- Grab the bundle of fabric and ribbons and form a 'bouquet' shape. Trim the top into a flat surface. This is where the infamous 'mess' of the messy bow project is created.
- Turn the bow over and give it a good shake to knock of any loose pieces of fabric.
- Embellish the messy bow if you desire.
One Comment