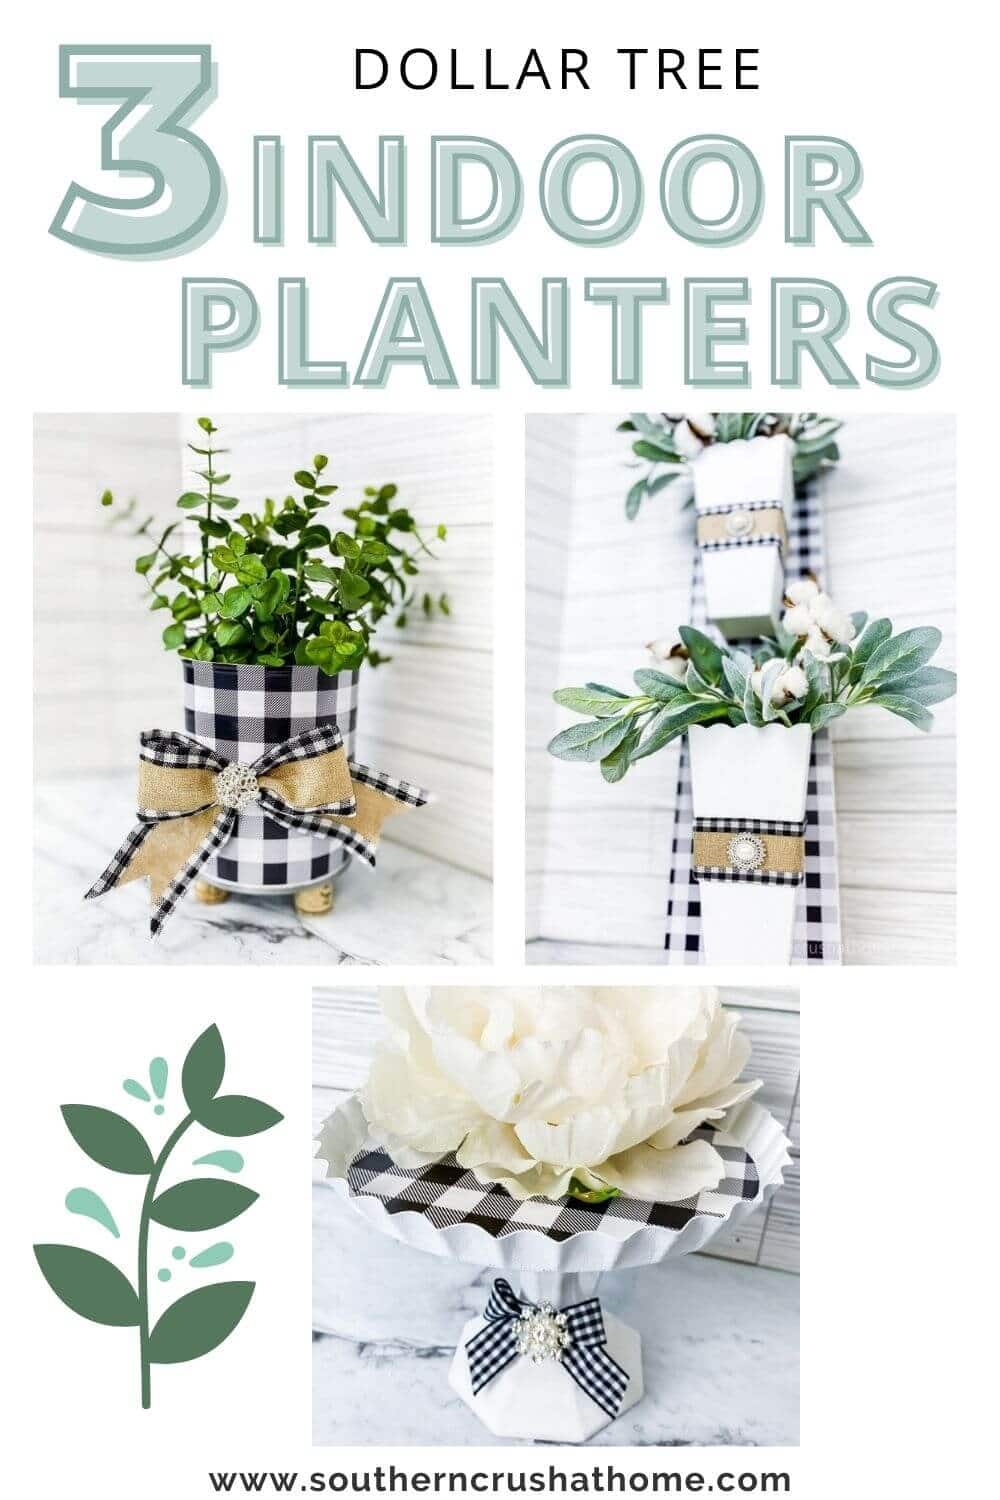
Easy Indoor Planter Ideas (using Dollar Tree Vinyl)
Today I’m sharing three easy indoor planter ideas all using Dollar Tree supplies. They are all so stinkin’ cute I can’t decide which one I like best. Let me know which one is your favorite.
This blog post contains affiliate links. The opinions are wholly my own from my own experience. I may earn a small commission from clicks through to the websites that end in a purchase.
On one of my recent trips to Dollar Tree, I was on the hunt for Crafters Square vinyl. They did not disappoint!
I found so many cool patterns and designs, including my favorite buffalo plaid! I scooped it up and came up with 3 super cute indoor planters that I couldn’t wait to share with you!
If you’ve priced craft vinyl at stores lately, you know how expensive it is. Knowing you can easily find it at Dollar Tree is such a budget-friendly option. Keep it in mind the next time you are in a pinch for vinyl
So let’s get to these buffalo plaid vinyl craft projects. The first one I’m sharing is a tin can indoor planter. Tin can crafts are all the rage. It’s a great way to repurpose too!
Supplies Needed to Make a Tin Can Indoor Planter
- Empty Tin Can (I used a large tomato can)
- Buffalo Plaid Vinyl from Dollar Tree in the Crafter’s Square section
- Hot Glue Gun
- Wine Corks (mine were thrifted)
- Bling Embellishments
- Burlap and Buffalo Plaid Trimmed Ribbon
- Zip Ties
How to Make a Tin Can Indoor Planter
Step 1.
First, you want to remove the label from your tin can. I used a diced tomato can as I liked the size. But you can use whatever size can that you like.
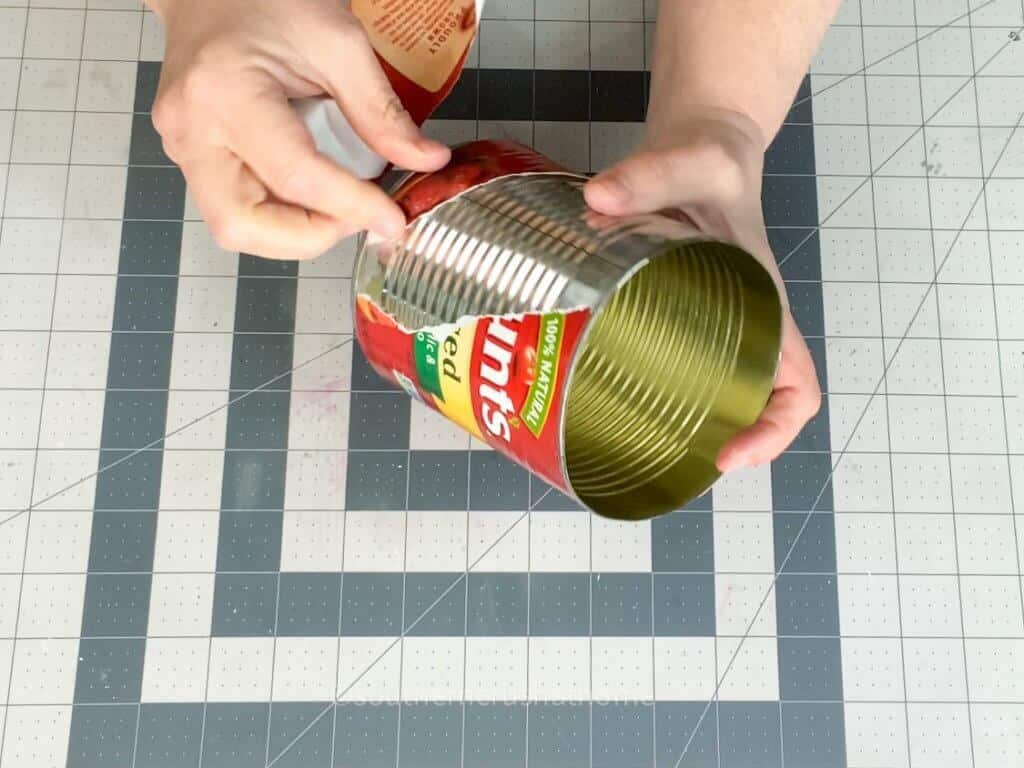
You don’t have to worry about any residue because the can will be covered with your buffalo plaid vinyl.
Step 2.
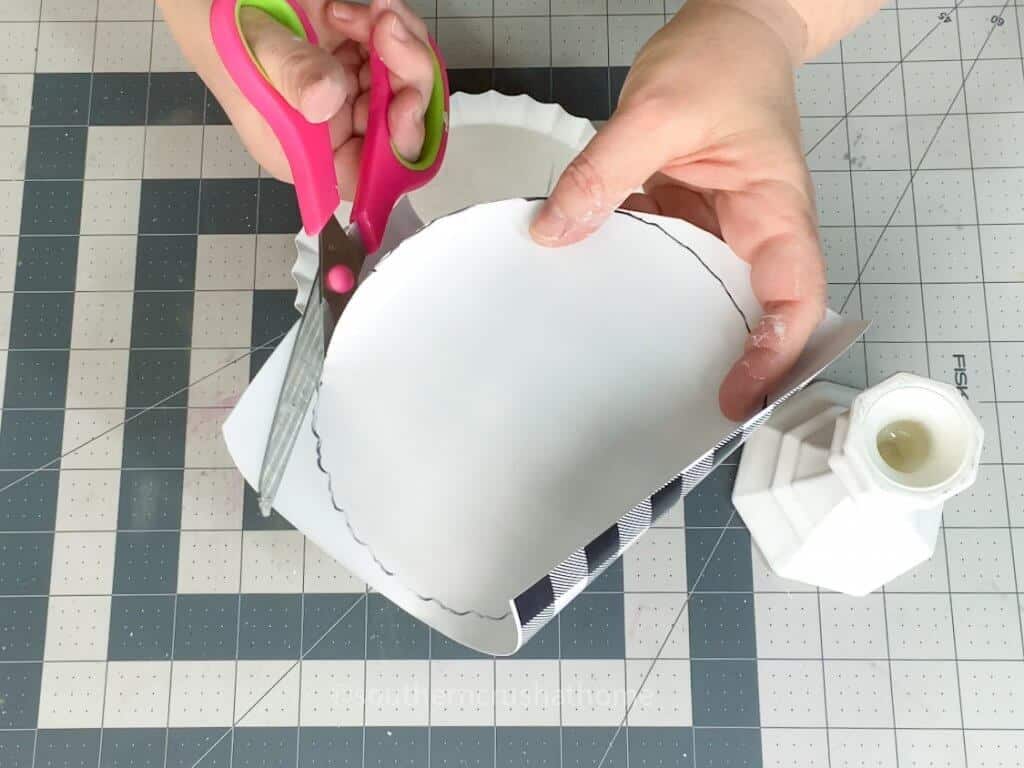
Now you want to hold the vinyl up to your tin can to get an idea of where to start cutting. I don’t usually measure, but you certainly can.
I’m all about quick and easy crafting. Just be sure to cut along the line of the vinyl so it is fairly straight.
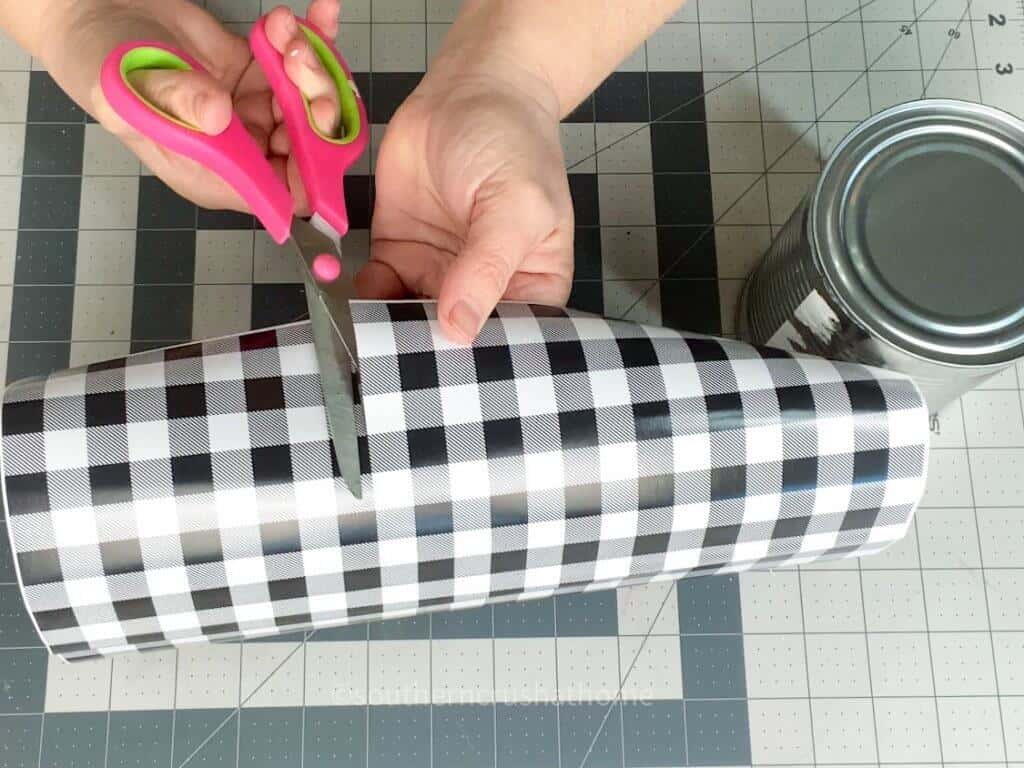
Continue cutting until you have the length that you need to fit the empty can. Go ahead and cut the vinyl to the end of your roll so it’s easier to store for your next project!
Step 3.
Now that you have the correct size to fit your tin can you want to peel off the vinyl backing. It’s really important to take your time when placing the vinyl on the can as it’s super sticky.
Start placing a little bit of the vinyl on at a time to ensure that it is even. Smooth it out as you go to remove any wrinkles or bubbles.
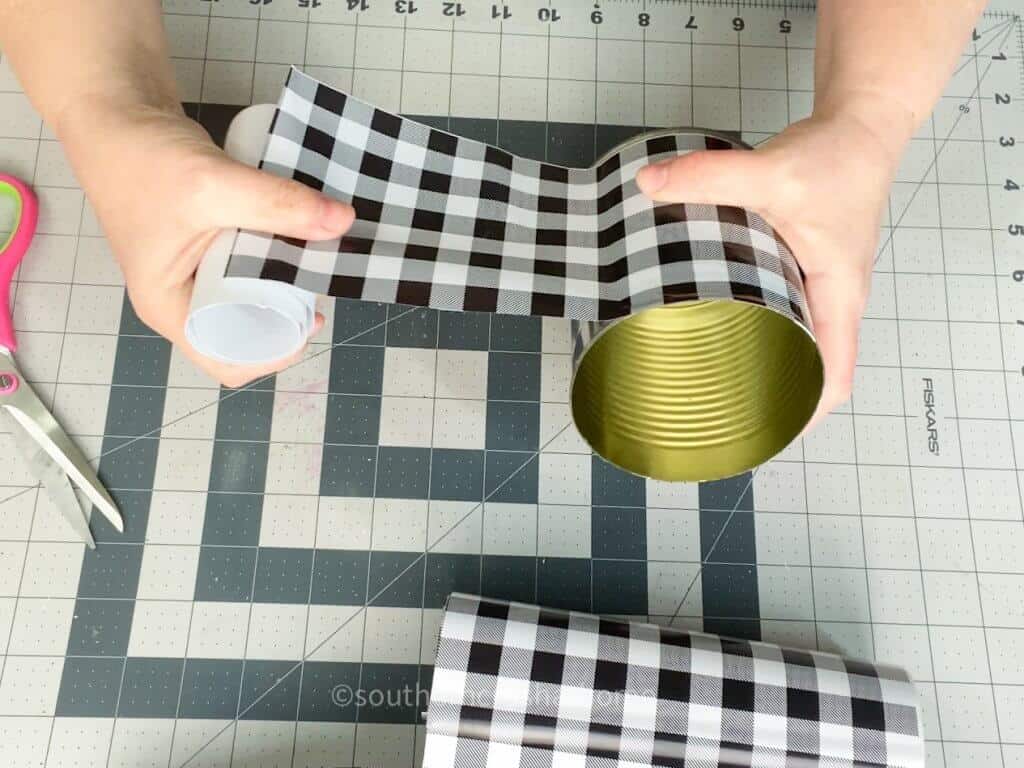
You can peel it off and put it back on, but it’s best to go slowly so it is nice and even. I wanted my buffalo plaid to match up, so I cut a small piece off so it would be even.
Step 4.
Gather your corks and find two that you like. Use your craft knife to cut the corks in half. Trim up the bottoms to make sure they sit flush.
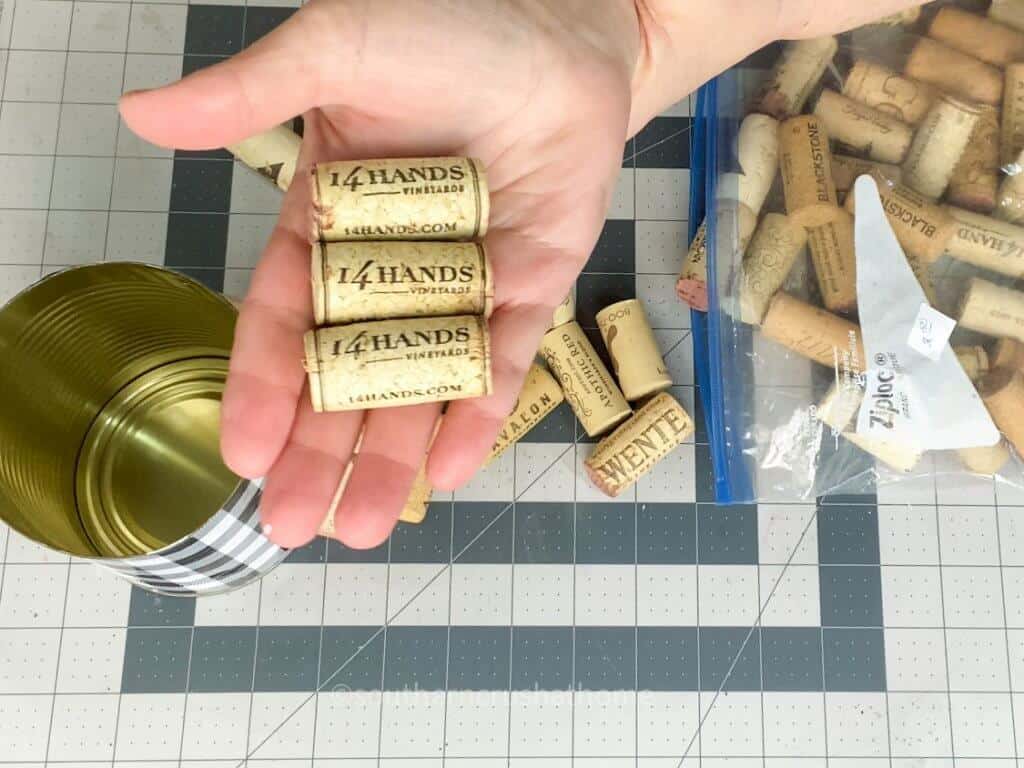
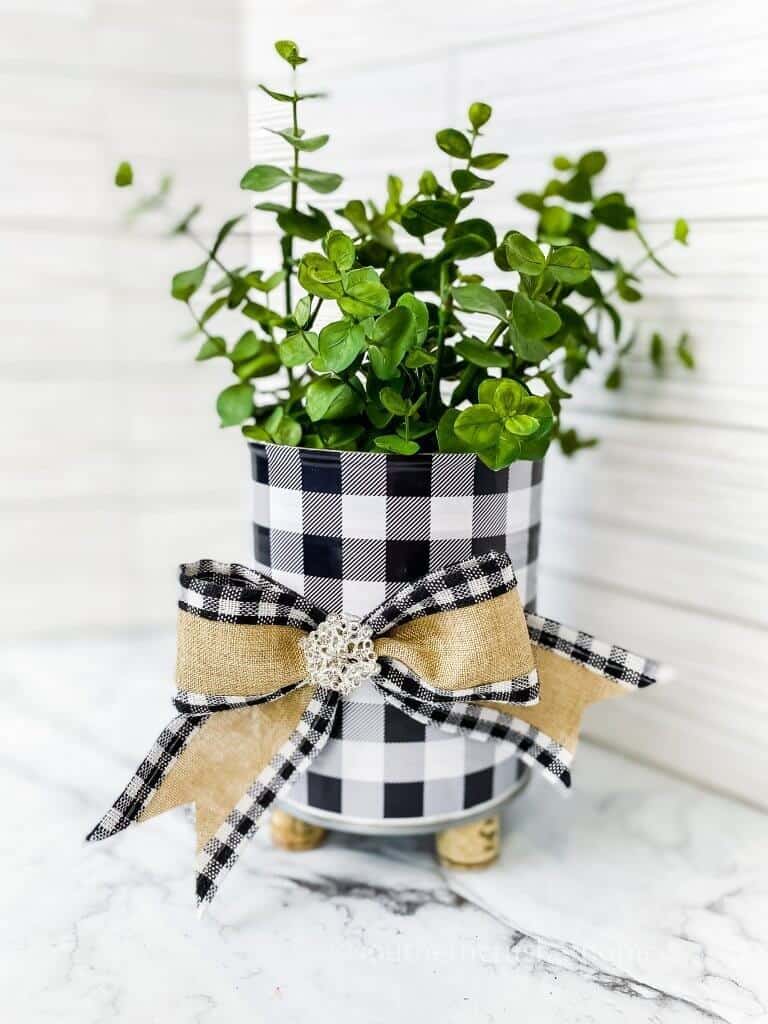
Hot glue your cork feet to the bottom of the can. Super simple and adorable!
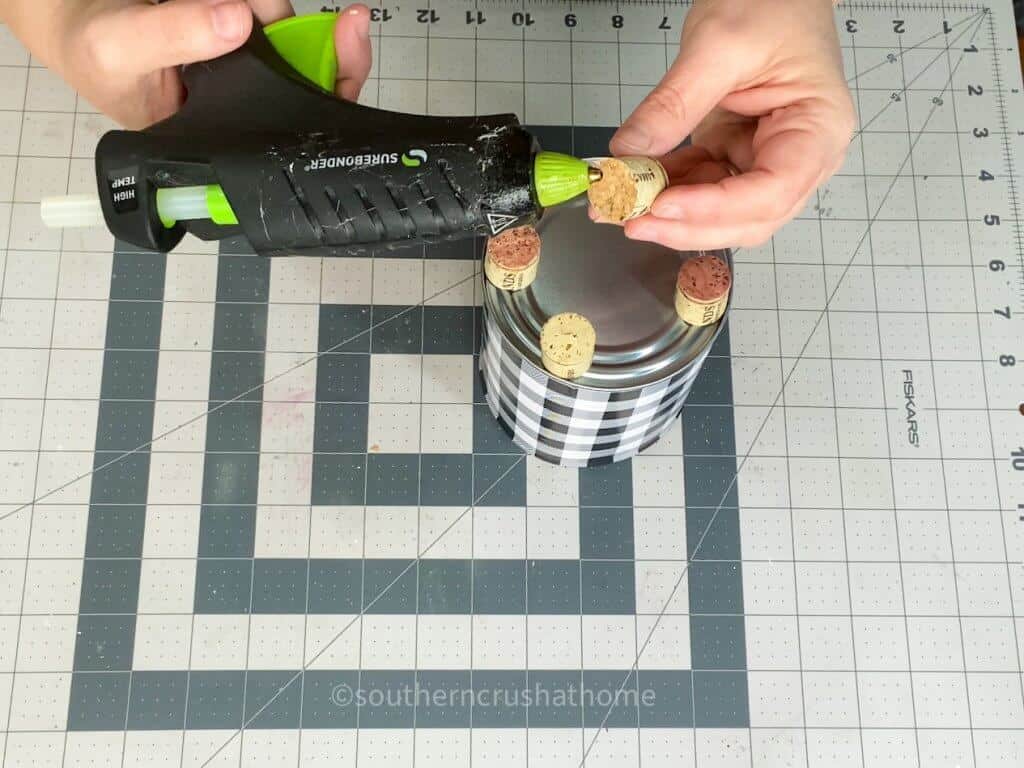
How cute are those little cork feet? Now I want to add them to everything! Ha!

Step 5.
Now you are going to make a simple bow with a zip tie. I finished it off with a nice dovetail end. Hot glue it to the center of the can.

Step 6.
Everything needs a little bit of bling, so I added a pretty rhinestone embellishment to the middle of the bow with hot glue. Beautiful!
Now you can fill your planter with whatever greenery or flowers that you like. I went with a little bit of faux boxwood and love how it pops against the buffalo plaid.
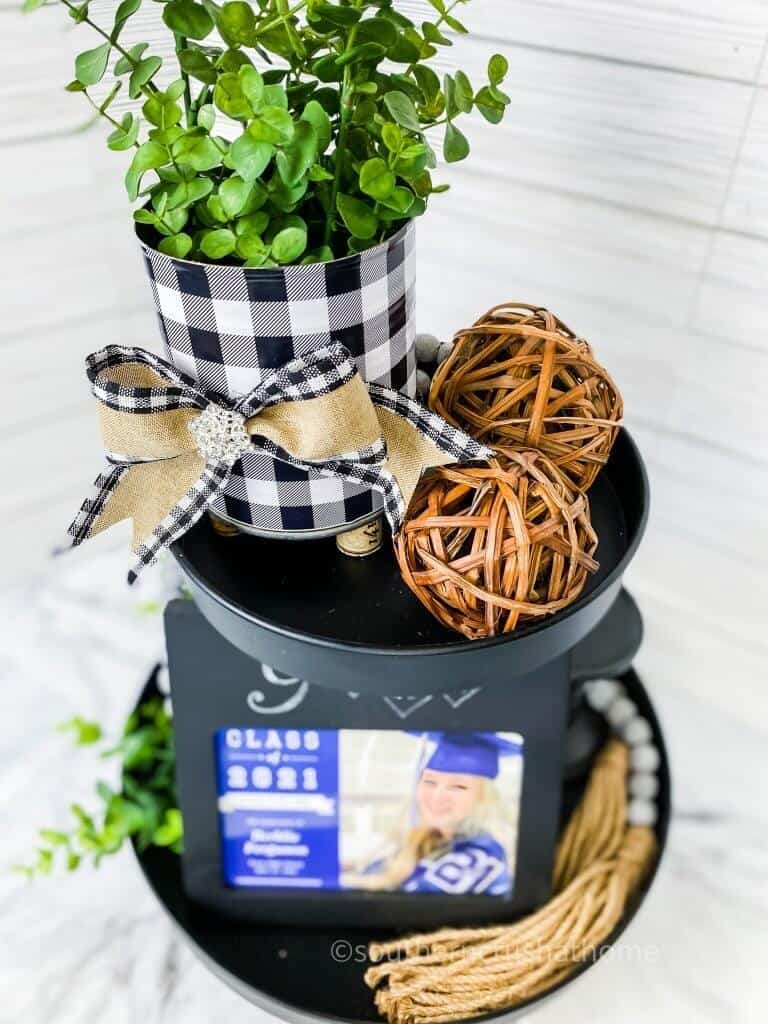
I placed my pretty planter on a tiered tray. Isn’t it so pretty? Is this something you can see yourself making?
Now let’s move on to our second dollar store indoor planter idea.
Popcorn Bucket Vertical Planter Supplies
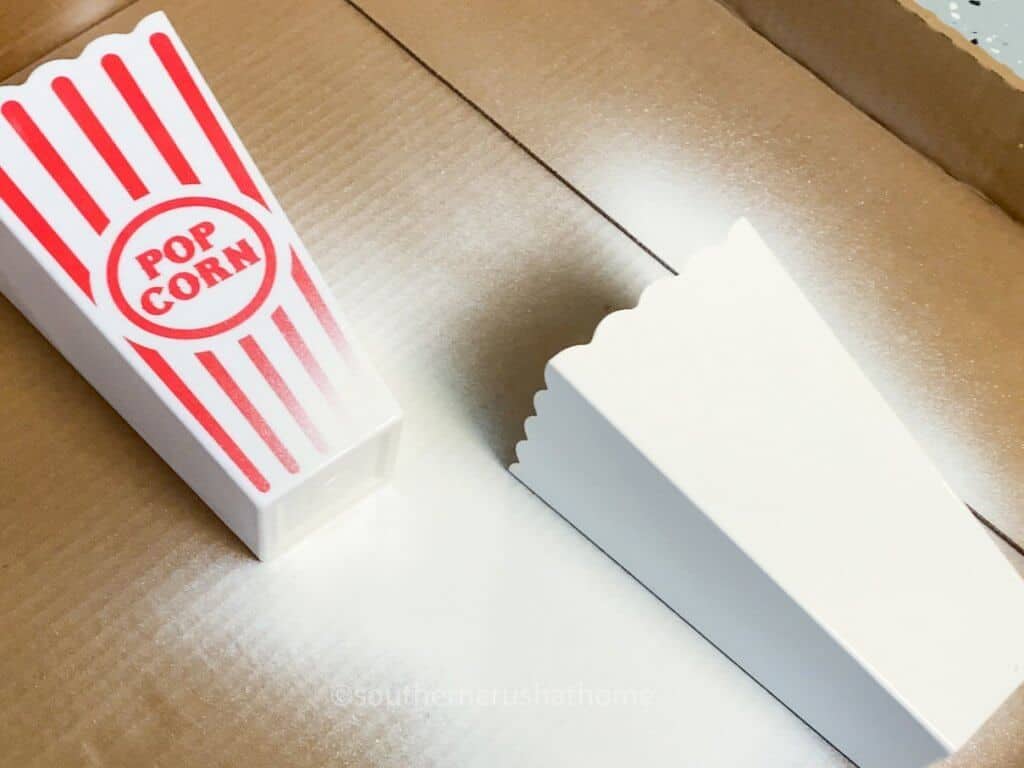
- Popcorn Buckets from the Dollar Tree
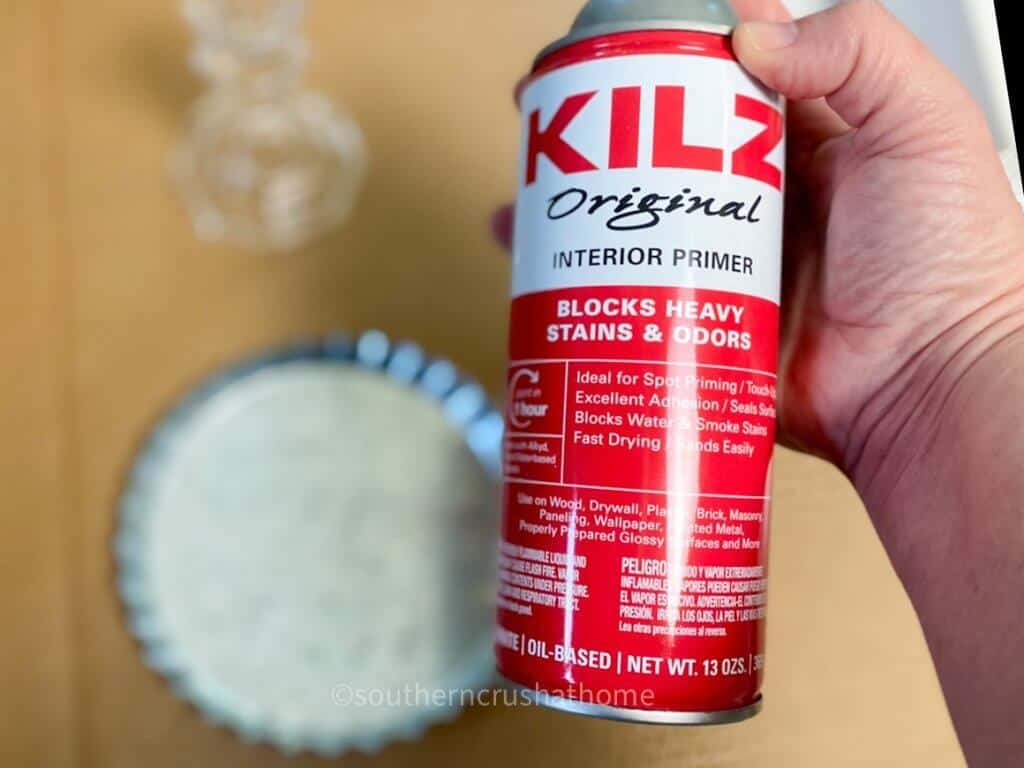
- Kilz Spray Paint
- Buffalo Plaid Vinyl from Dollar Tree in the Crafter’s Square section
- Wood Bunny Sign from the Dollar Tree
- Rhinestone Embellishment
- Burlap and Buffalo Plaid Trimmed Ribbon
- Hot Glue Gun
How to Make Popcorn Bucket Vertical Indoor Planters
Step 1.
Spray the popcorn buckets with Kilz primer. If you don’t have Kilz you can use chalk paint. Let dry.
Step 2.
Remove the jute twine tag that is on the Dollar Tree wood sign. Don’t worry about the holes, those will be covered up.
Cut your buffalo plaid vinyl to fit the wood sign. Again, I didn’t measure and just eyeballed it to ensure it was cut large enough to cover the entire sign.
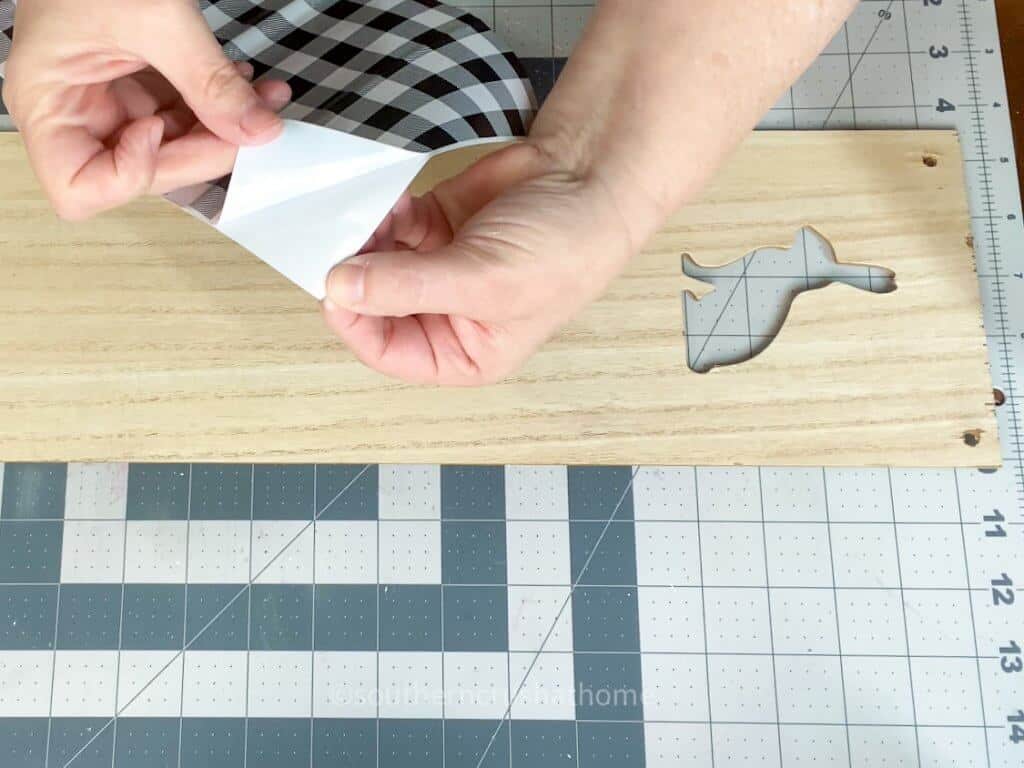
Slowly peel the backing and place it a little at a time. Use a craft knife to trim off any excess. This gives it a nice clean edge.
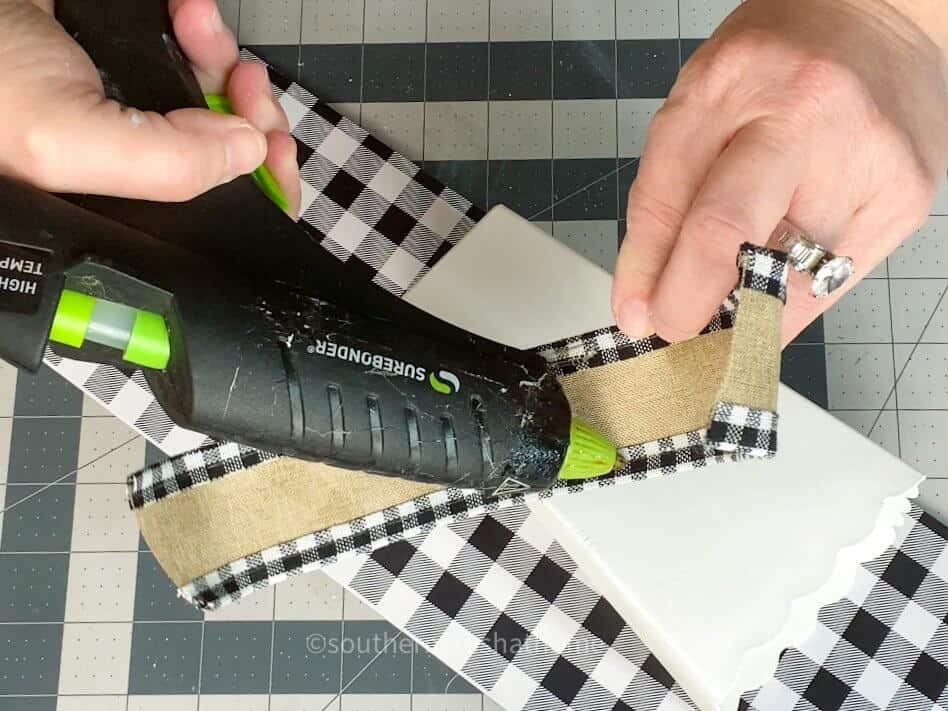
Step 3.
Wrap ribbon around the popcorn buckets and secure them with a little hot glue.
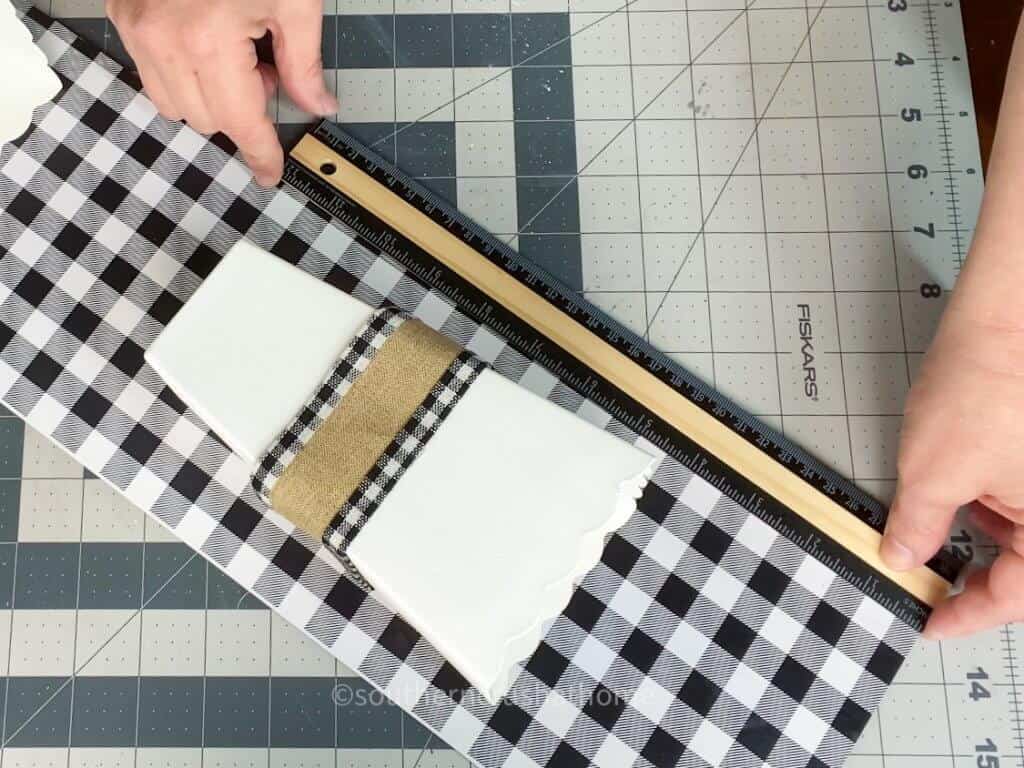
Step 4.
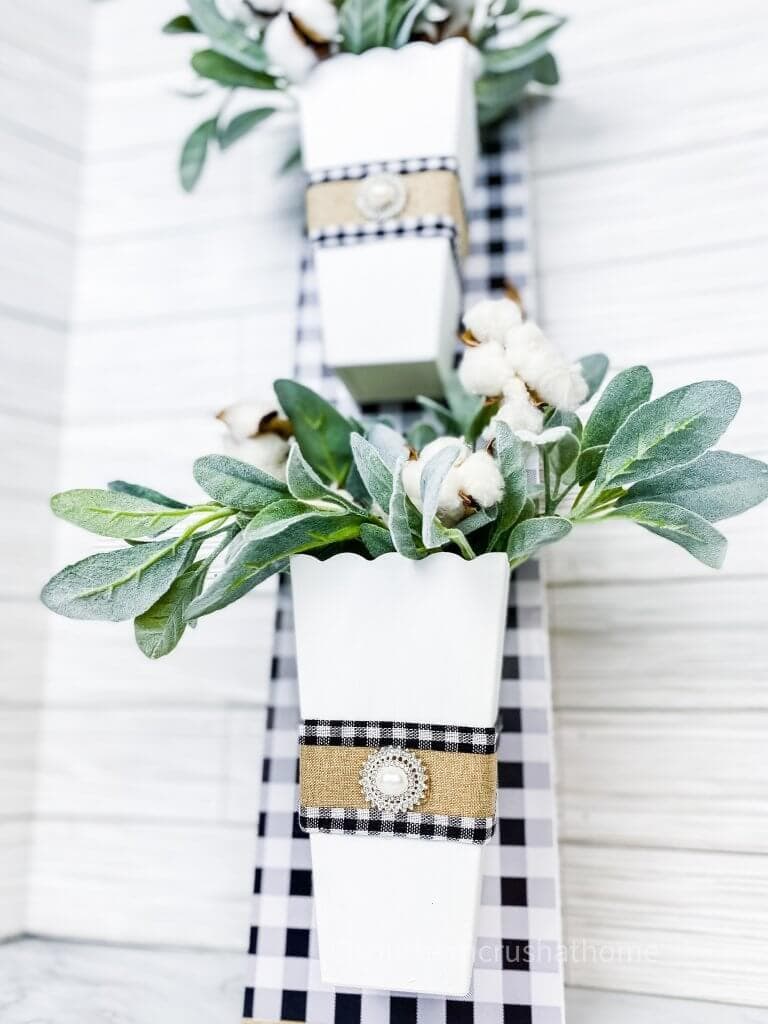
Since you are adding two buckets to the vertical planter you want to ensure it is even, so measure between the buckets and mark where they will be attached.
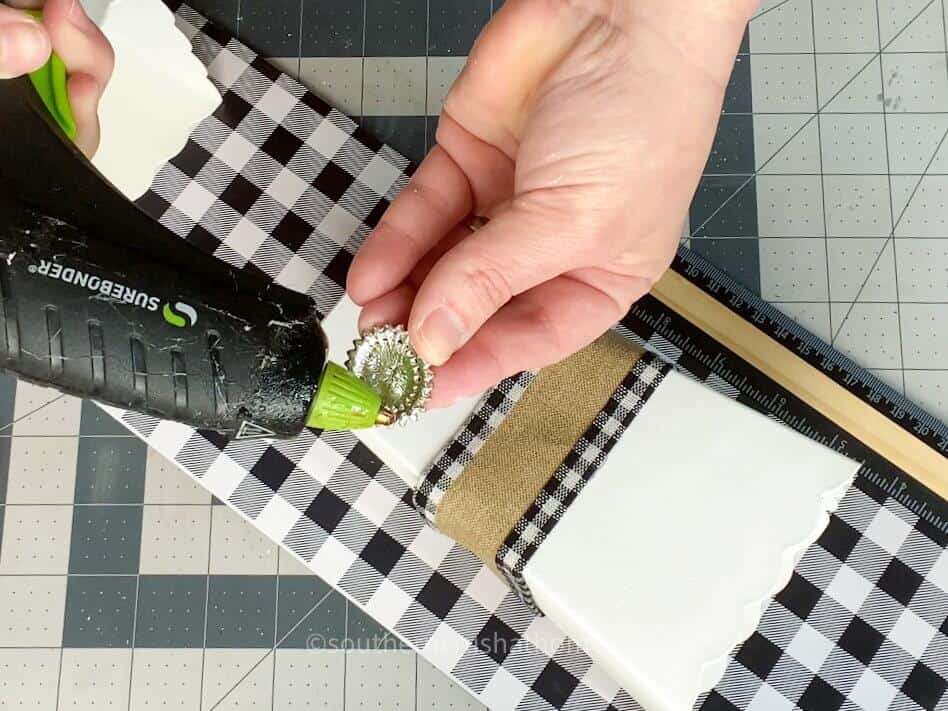
Step 5.
Hot glue the popcorn buckets to the vertical planter and add a pretty embellishment to the center of each ribbon. Of course, I had to add my signature bling to this indoor planter as well!
Step 6.
Add a little bit of floral foam to the inside of each bucket and fill it with greenery. I used lamb’s ear. Look at how stinkin’ cute this indoor vertical planter idea is:
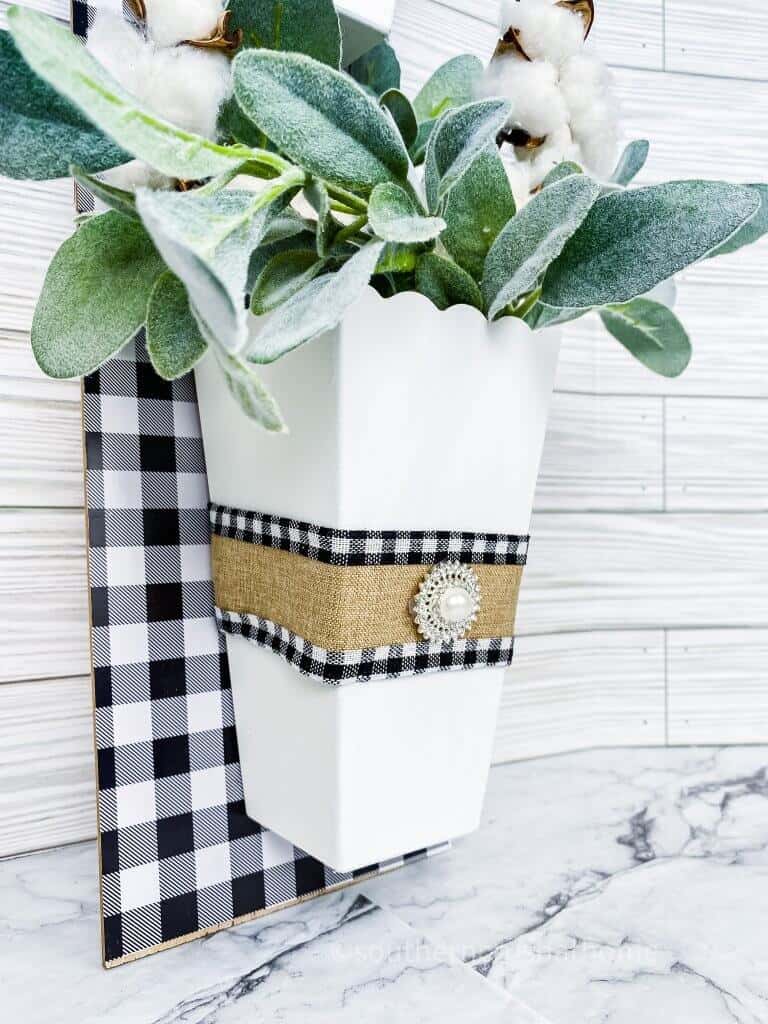
It can easily be hung with command strips. No one would ever guess this was made for just a few dollars!
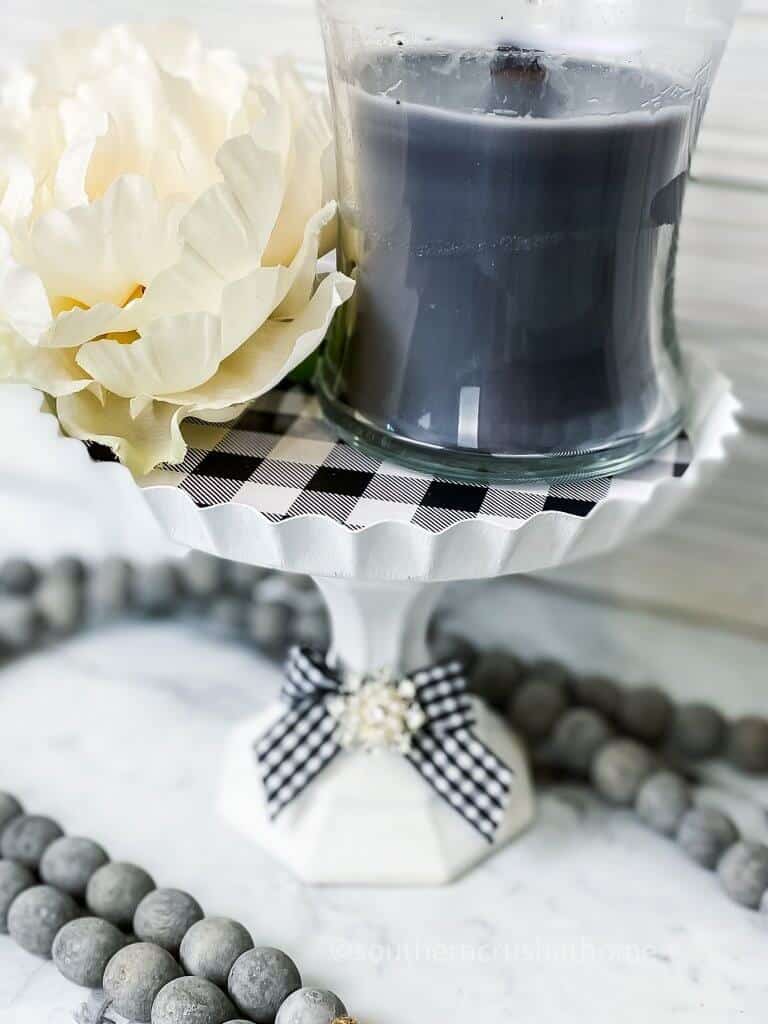
Here is the third Dollar Tree indoor planter idea for a pretty plant stand.
Supplies Needed for Plant Stand
- Round Galvanized Bottlecap Tin from the Dollar Tree
- Glass Candlestick from the Dollar Tree
- Buffalo Plaid Vinyl from Dollar Tree in the Crafter’s Square section
- Buffalo Check Ribbon from Dollar Tree
- Bling Centerpiece
- Kilz Primer
- E-6000
- Hot Glue
How to Make a Dollar Tree Plant Stand
Step 1.
Spray paint both the candlestick and the tray with Kilz primer.
Step 2.
Place the tin upside down on the buffalo plaid vinyl. Use a sharpie to trace around it and cut out the circle.
It doesn’t have to be perfect as we will be trimming it anyway.
Step 3.
Peel the backing off the vinyl and start to secure it to the center of the tin. Secure it slowly pressing it with your fingers.
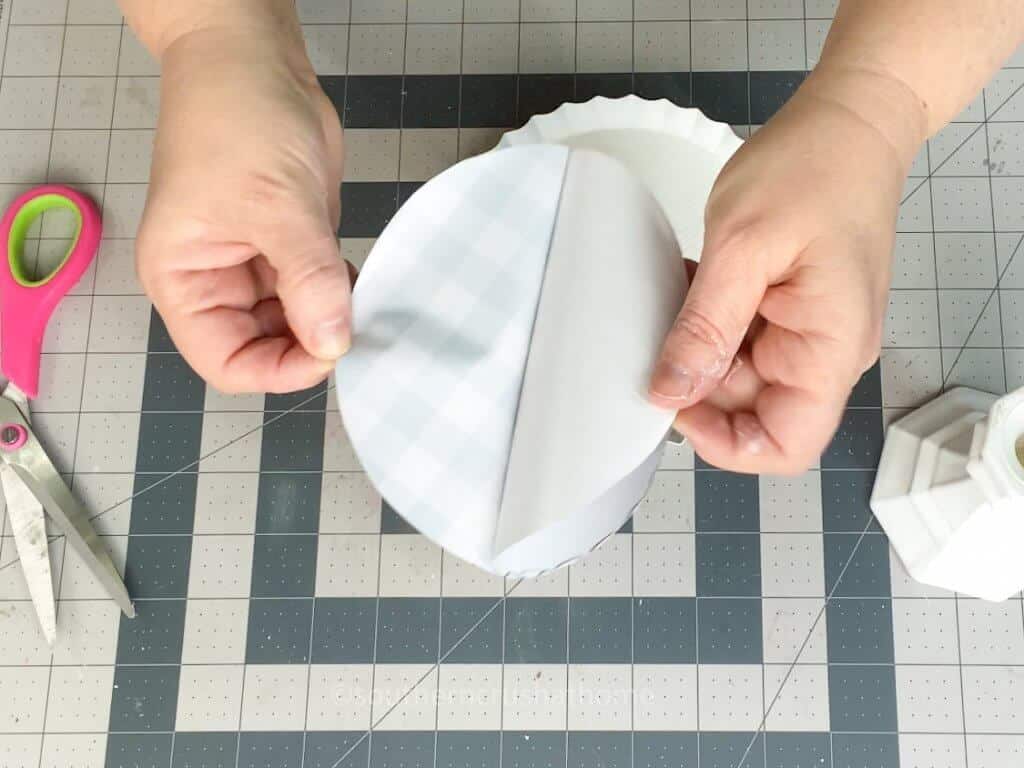
Use your craft knife to trim off any excess vinyl.
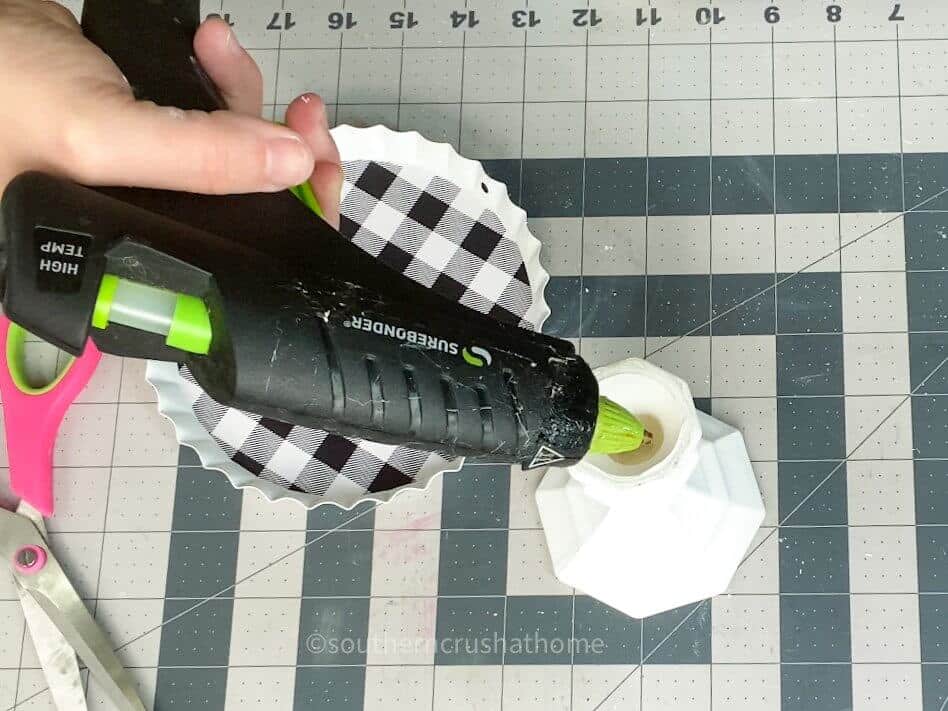
Step 4.
Now you want to attach the tin to the candlestick with a combination of E-6000 and a little hot glue. This will make it nice and secure.
Step 5.
Create a small bow with buffalo plaid ribbon and a zip tie. Simply hot glue it to the base of the candle holder. So darling!
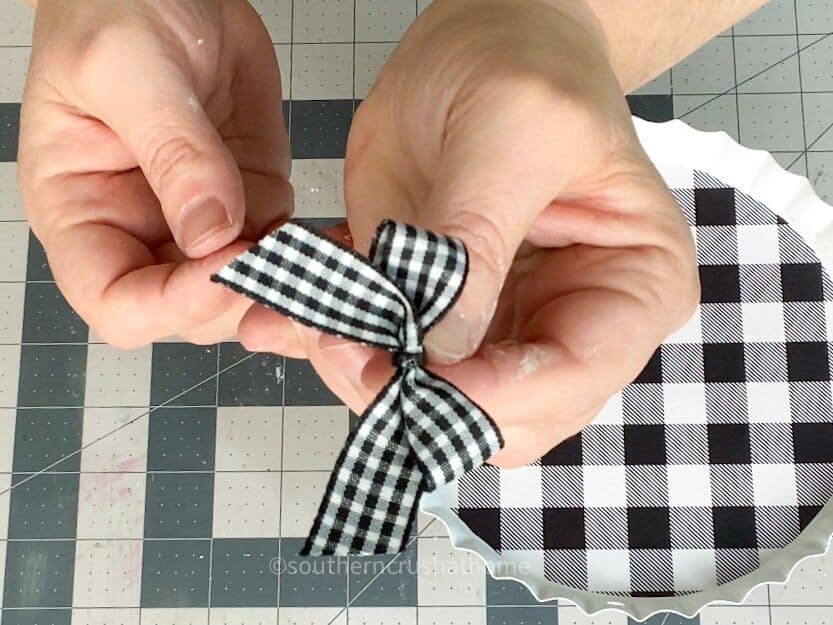
Of course, I gave it a little bit of bling with a pretty embellishment.
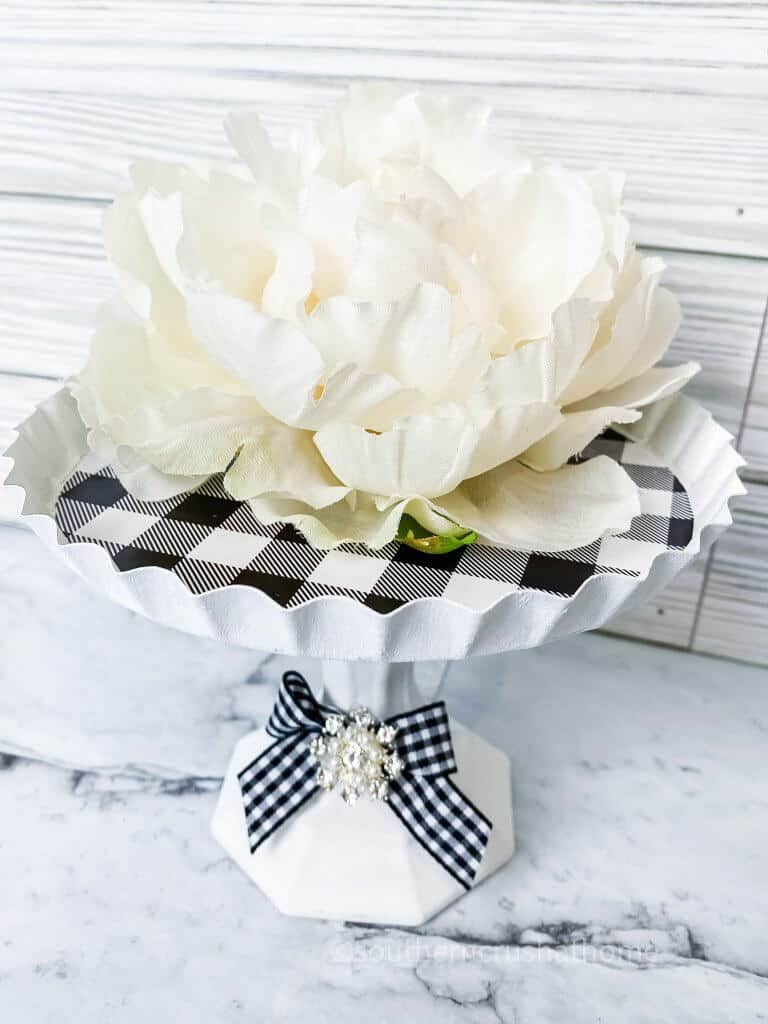
You can add a real or faux plant, a candle, or whatever you like. This is such a versatile plant stand craft project!
What do you think? Do you have a favorite? If you do make one of these indoor planter ideas be sure to come back and leave me a comment to let me know.
Be sure to PIN this for Later!
See all three tutorials for indoor planters here on my YouTube video!
BE SURE TO CHECK OUT THESE OTHER BUFFALO PLAID DIY IDEAS!
Classic DIY Buffalo Check Doormat (Painted Concrete)