DIY Dollar Tree Black and White Pumpkins
Let's go all in on Dollar Tree black and white buffalo check pumpkins. They're easy to make and add a unique touch to your fall decor! I'm taking some fun products like a hair donut to make some really sinking cute fall pumpkins. Be sure to let me know in the comments below which one of these three pumpkin projects is your absolute favorite.
Be sure to PIN this one for later!
This blog post contains affiliate links. The opinions are wholly my own from my own experience. I may earn a small commission from clicks through to the websites that end in a purchase.

You might also like these pumpkin ideas!
- 4 Easy Dollar Tree Black and White Pumpkin Ideas
- How to Make Blue Pumpkins (using Marble Spray Paint)
- My Favorite Faux DIY Pumpkins + Printable
- DIY Fabric Pumpkins Out of Embroidery Hoops
How to Make DIY Black and White Pumpkins
Fall is a time for displaying beautiful and unique pumpkin crafts. Black and white pumpkins offer a unique twist on traditional orange pumpkins or jack-o-lanterns. To create your own black and white pumpkins to display follow along with the easy tutorials below.
YouTube Video Tutorial
If you prefer, you can watch these three DIY black and white pumpkins come to life on video below. Be sure to subscribe and hit the notification bell to see new inspiration!
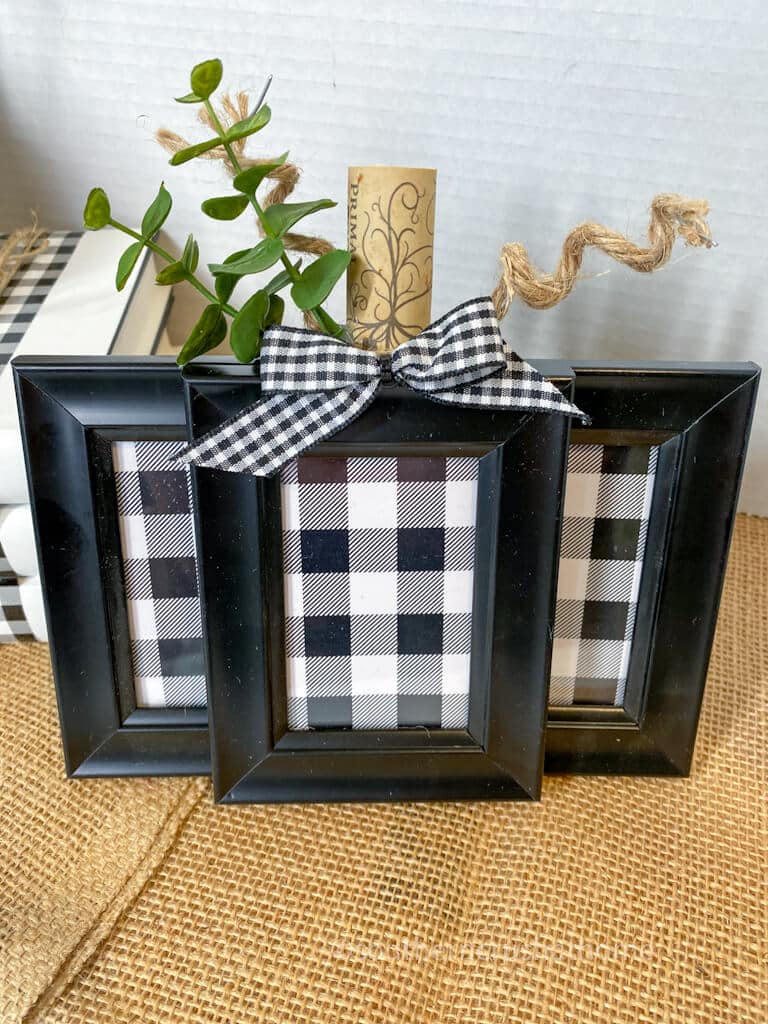
Dollar Tree Picture Frame Pumpkin
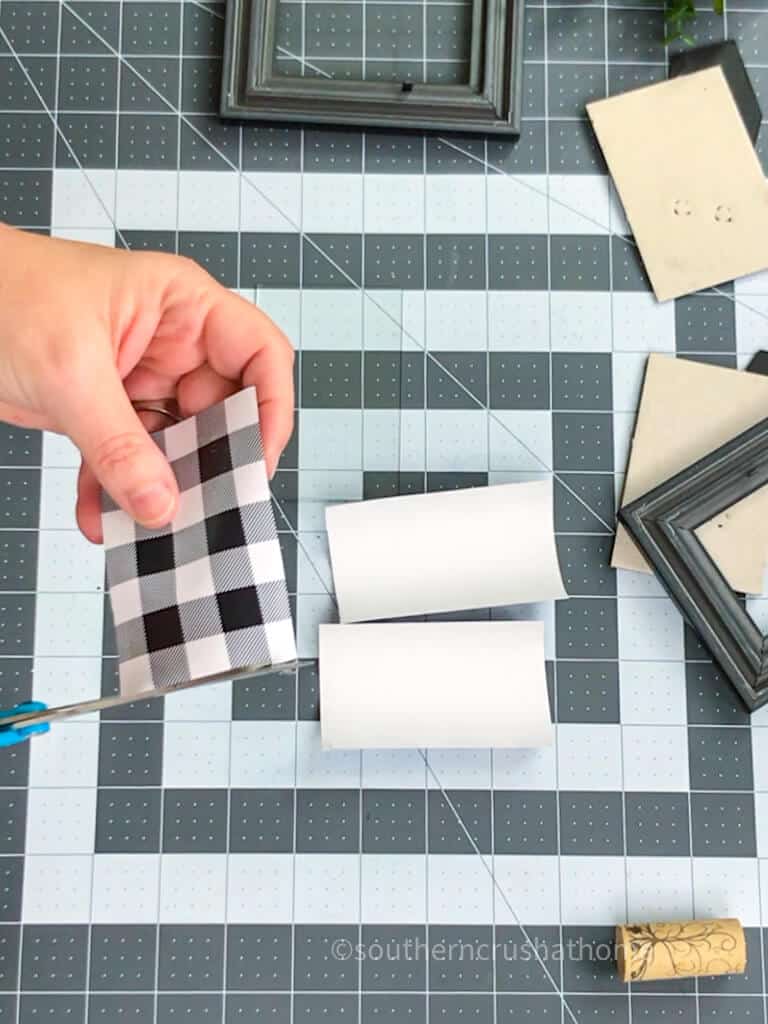
We're going to start out with this really cute picture frame pumpkin. You're going to need three of these little mini Dollar Tree picture frames, Crafter's Square vinyl, scissors, a wine cork, and some hot glue. You can make these whatever color you want, but everything in these projects I'm using is black and white.
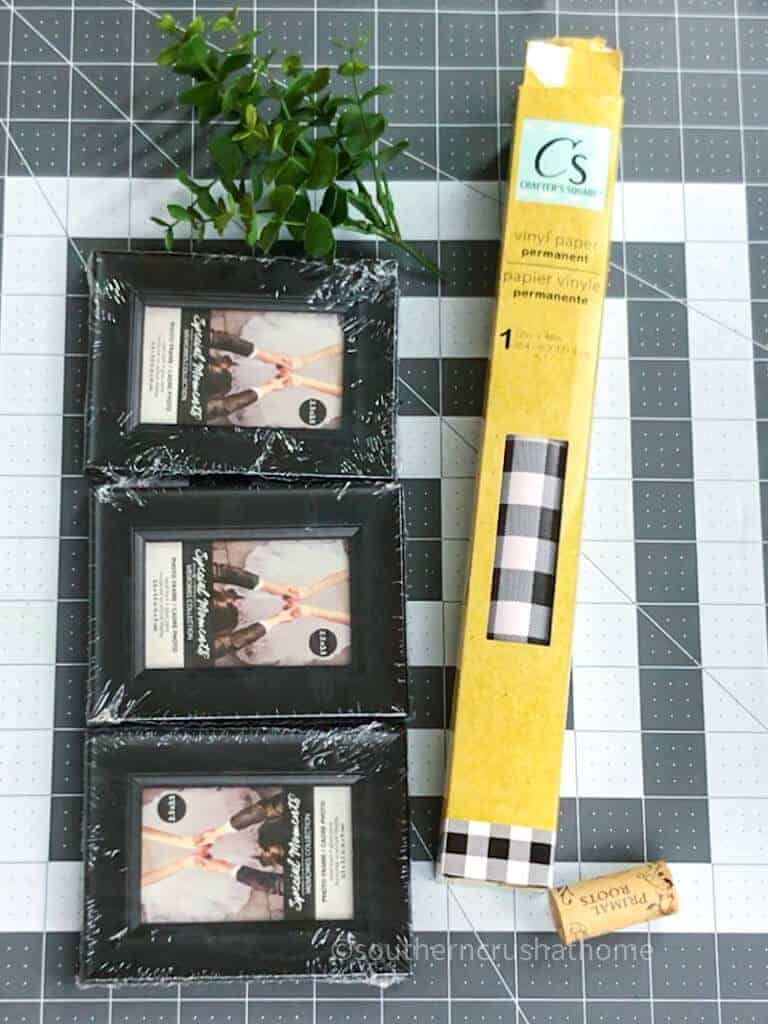
These are those fun little wedding place-setting picture frames. They're really tiny and cute. You're going to take the guts out which is what I call the back along with the little cardboard part.
Next, take buffalo check Crafter Square vinyl from Dollar Tree and cut yourself out a little square the size of the glass of the picture frame. I just used the glass and picture frame as a template and then added them back in place of the photos. So this just makes a really cute, easy, quick way to add the Buffalo Check.
Now I'm going to use some hot glue to glue the first two picture frames together just right there on the sides.
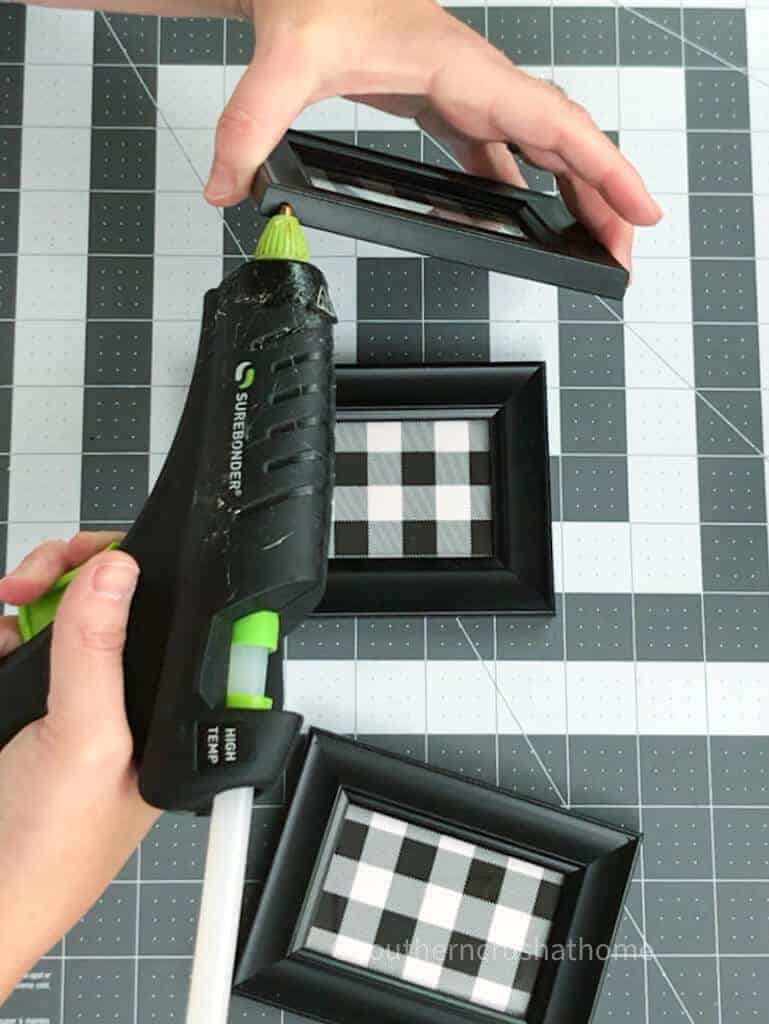
And then I'm going to put a generous feed of hot glue down the center of the two that I just glued together and pop back on the middle picture frame.
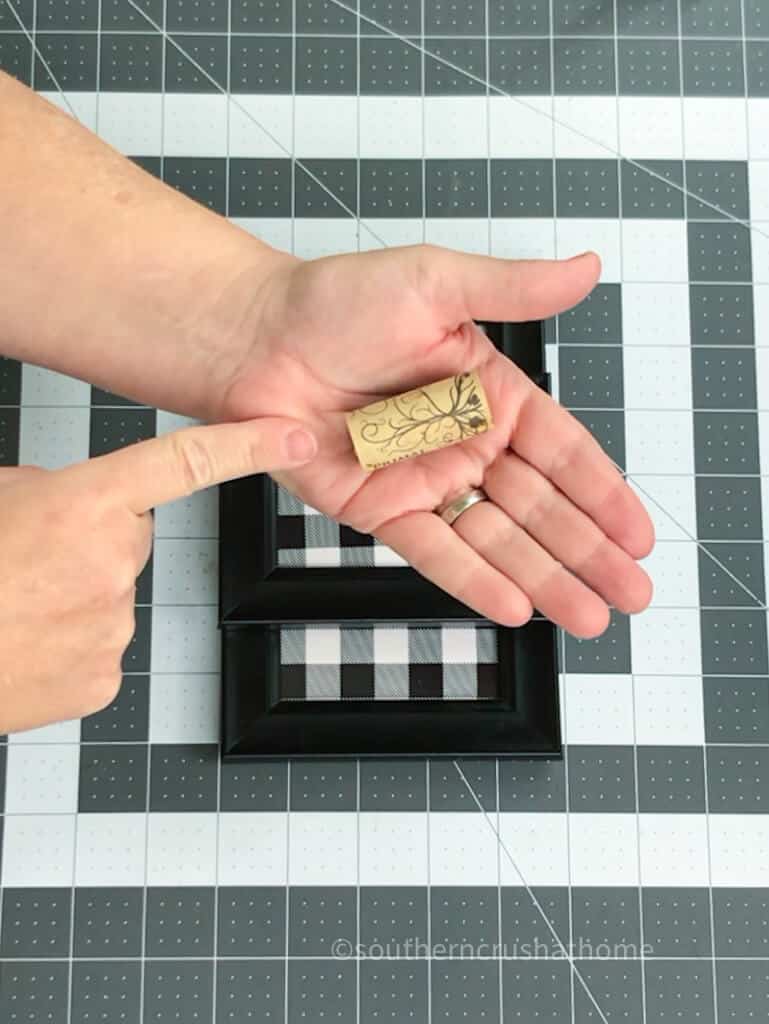
Finally, I'm adding a little cork. You can get corks at thrift stores or I've linked some here for you.
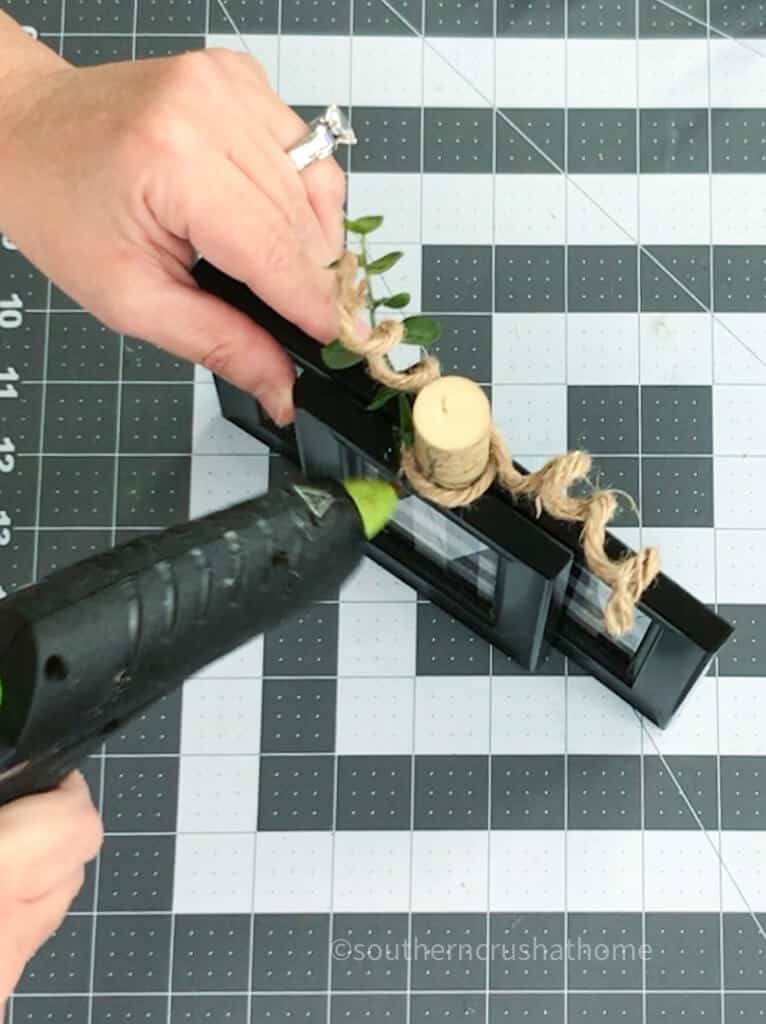
To embellish the pumpkin I added some wired twine that you can also get at Dollar Tree. To make some little curly cues, I guess is what you call them, just take a pen and roll it up loosely around the wired twine to make the little “corkscrew look” for the pumpkin.
Then I took a little bit of boxwood greenery and hot glued it onto the cork along with a small zip tie bow.
Oh, my goodness, you guys, this is adorable for a tiered tray or just to sit on your kitchen counter. You can even use the easel backs from the photo frames to prop it up! I absolutely love it.
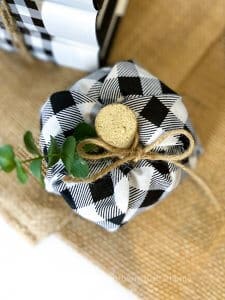
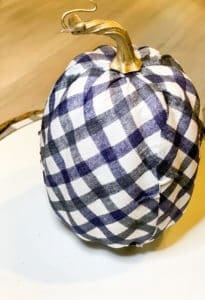
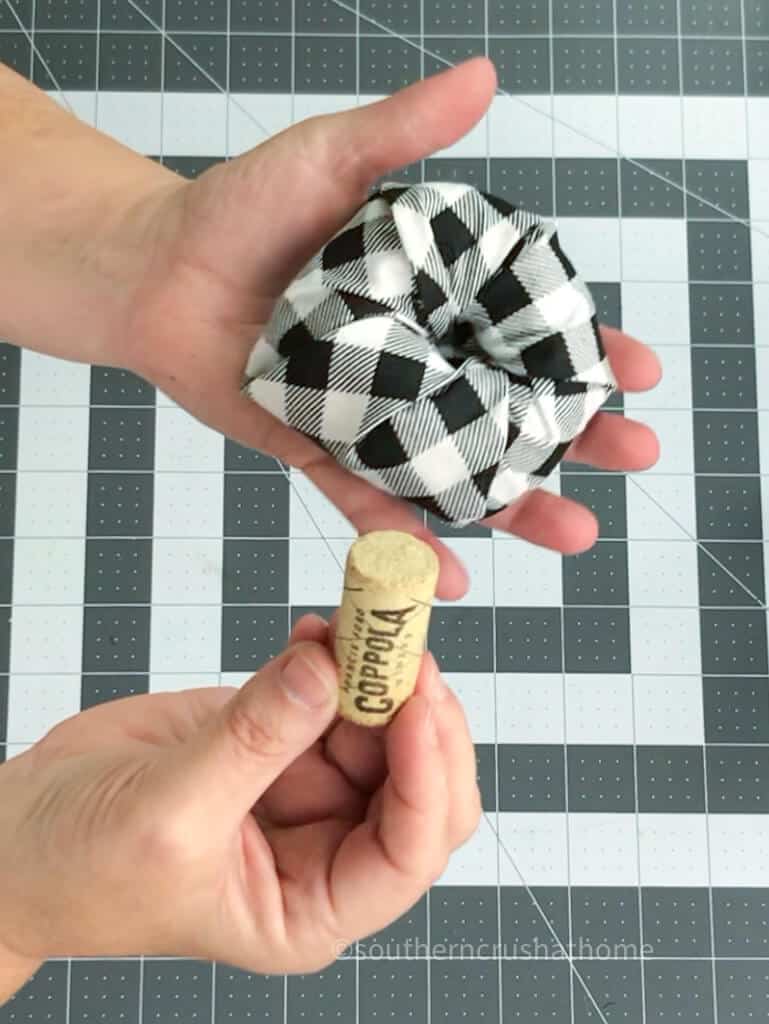
Dollar Tree Hair Donut Pumpkin
Pumpkin number two is made from a Dollar Tree hair donut. Don't ask me how I got this idea. I have no idea. I saw people were using those little dish sponge scrubbies, and I thought, oh, this is similar in size.
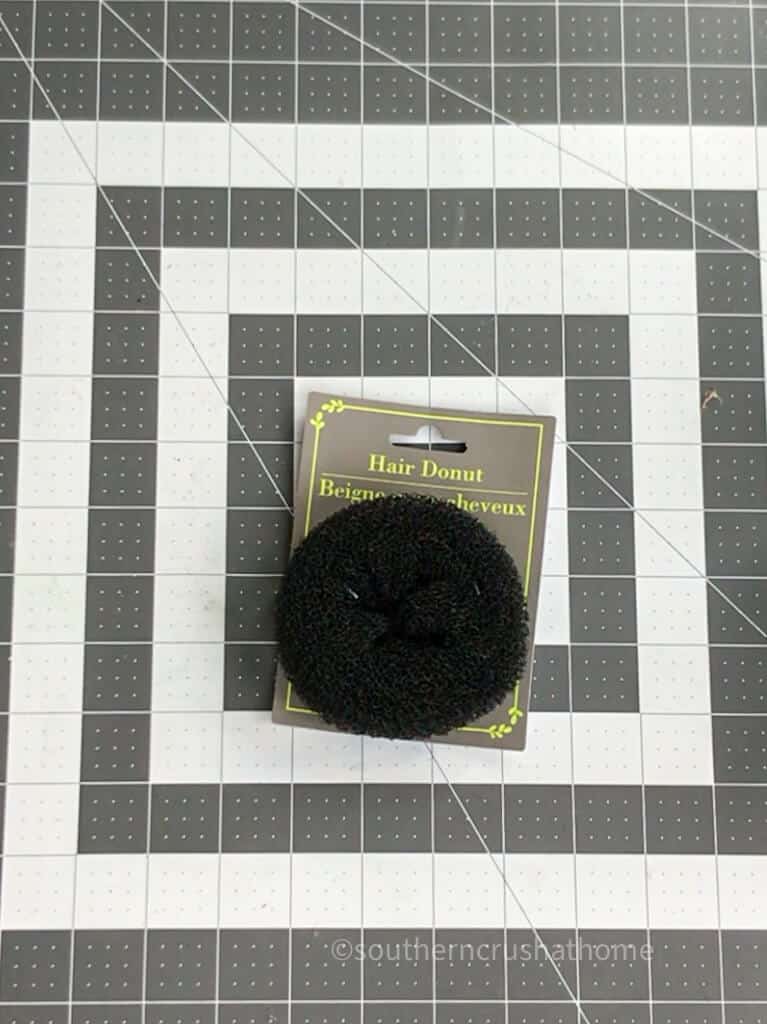
So I took a little hair donut, and I took a scrap piece of fabric also from Dollar Tree and using my rotary cutter, I just cut out about a few inches on either side of the doughnut creating a square shape just a few inches in diameter surrounding the donut.
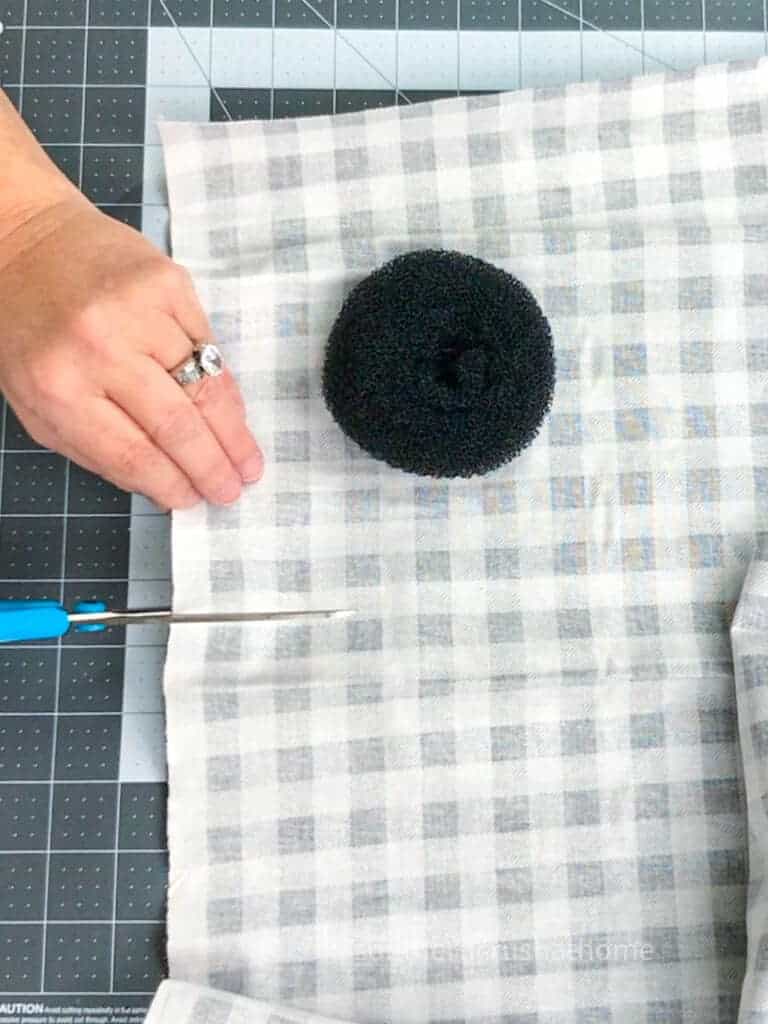
Next, I simply tucked the fabric in, starting with each corner, all four corners to the center of the doughnut.
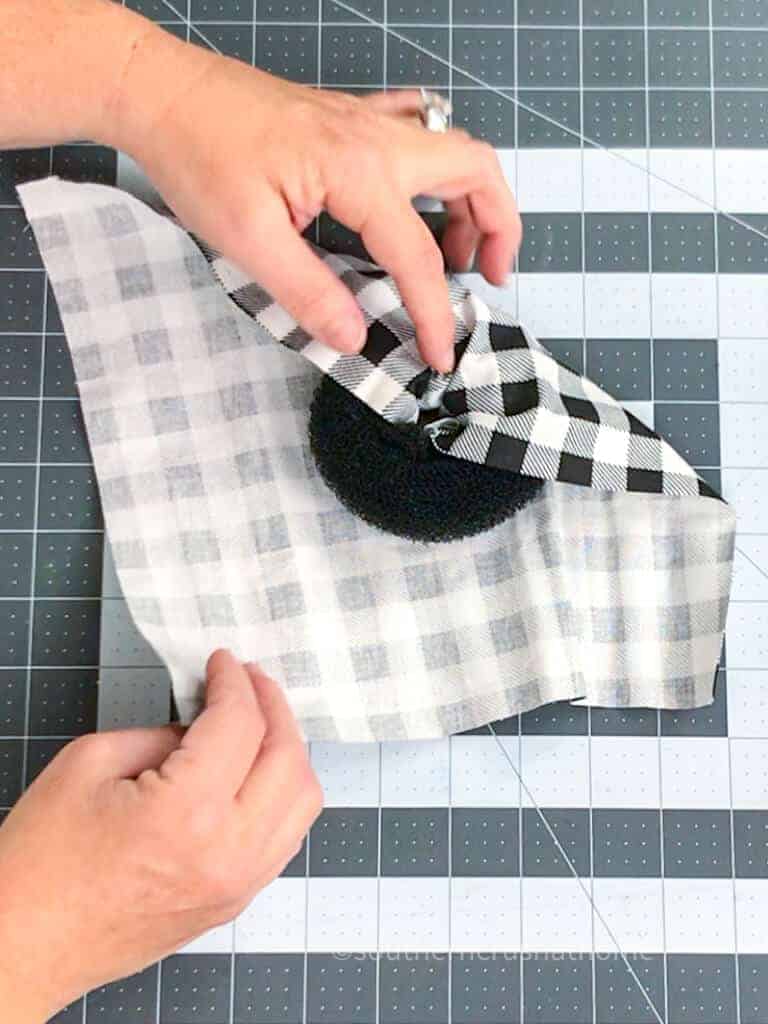
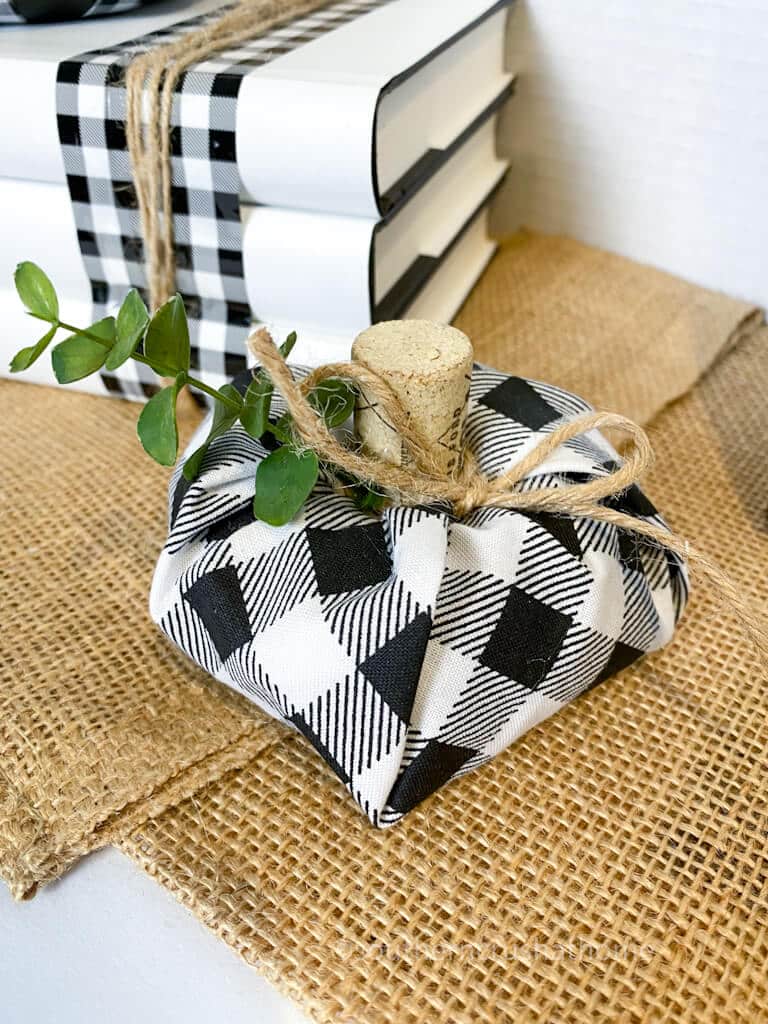
I dipped into my bundle of corks again, picked one out for a pumpkin stem, and tacked it in the center with a little bit of hot glue along with a small twine bow and a sprig of greenery just to give it a little bit of a cute little farmhouse look.
My grandmother used to use one of these for her hair, so it was really hard to use it for a pumpkin. But it turned out super darling, super cute. Look at this. Oh, my gosh.

Couldn't get easier. And so now we have two little pumpkins. What do you think?
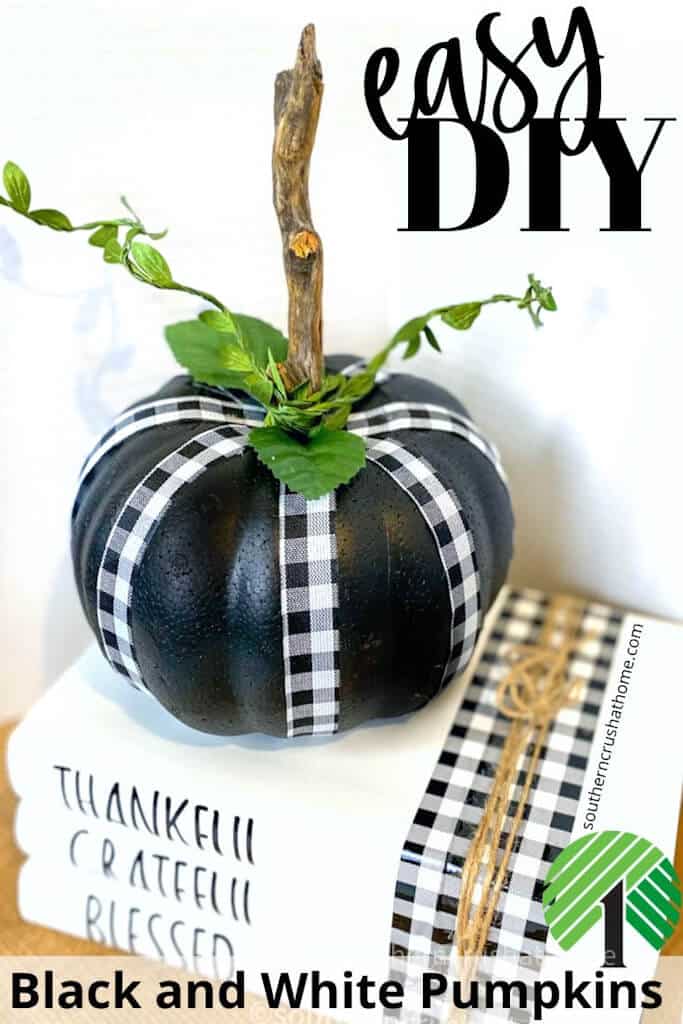
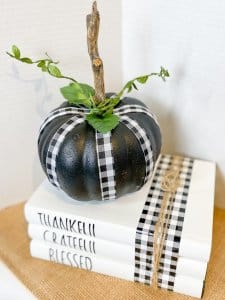
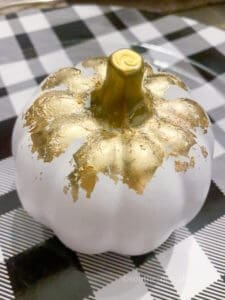
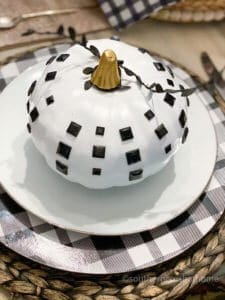
Dollar Tree Styrofoam Black Pumpkin
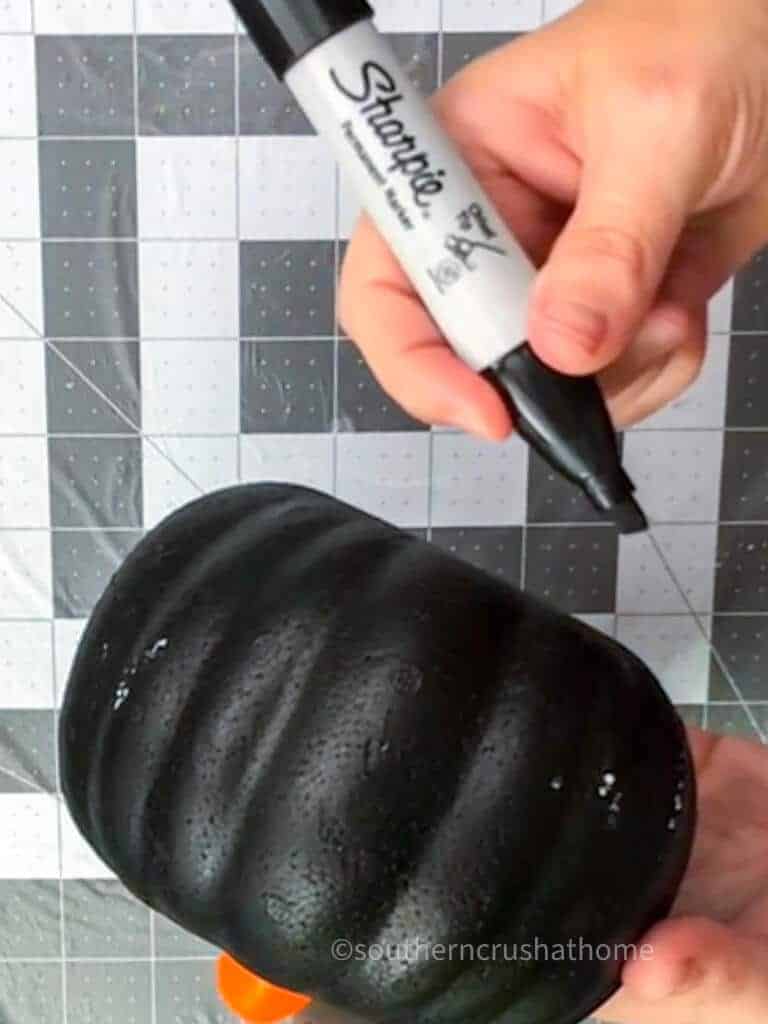
Now the last pumpkin is going to be one of these black styrofoam pumpkins from Dollar Tree. Now mine got all scuffed up, and I don't know about you, but they have that little cheap white styrofoam inside and when it shows it drives me crazy.
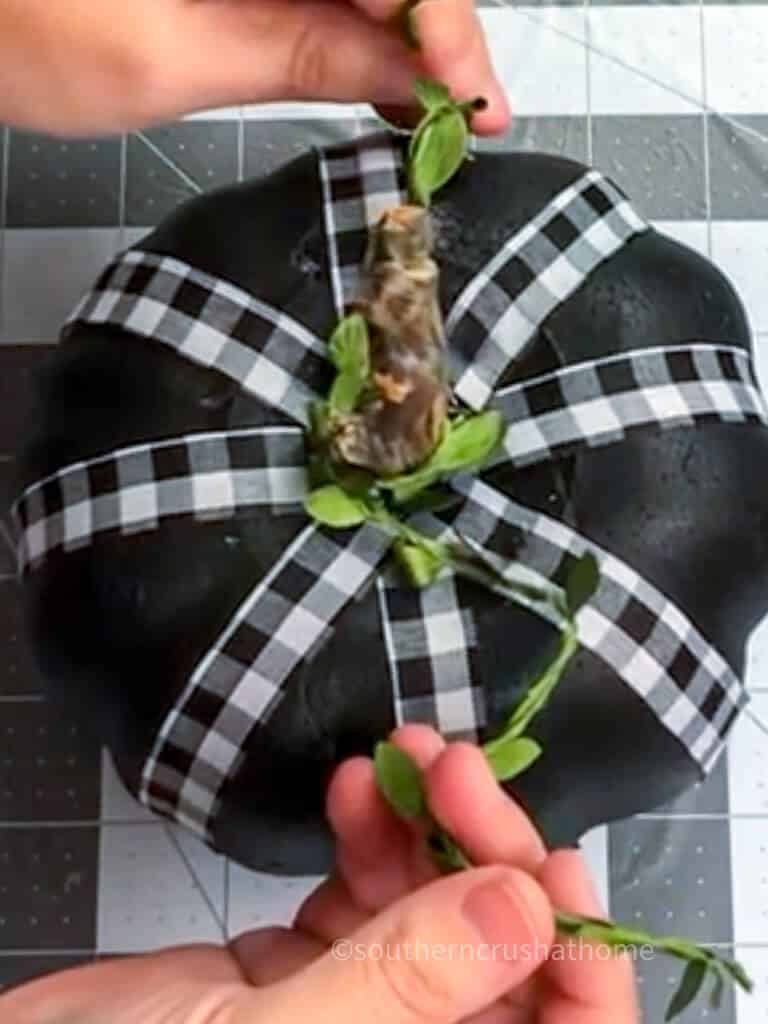
So I just use a black sharpie to kind of fill in the gaps so that you wouldn't see the white peeking out. Then I removed the tag and that little toothpick stem from the center.
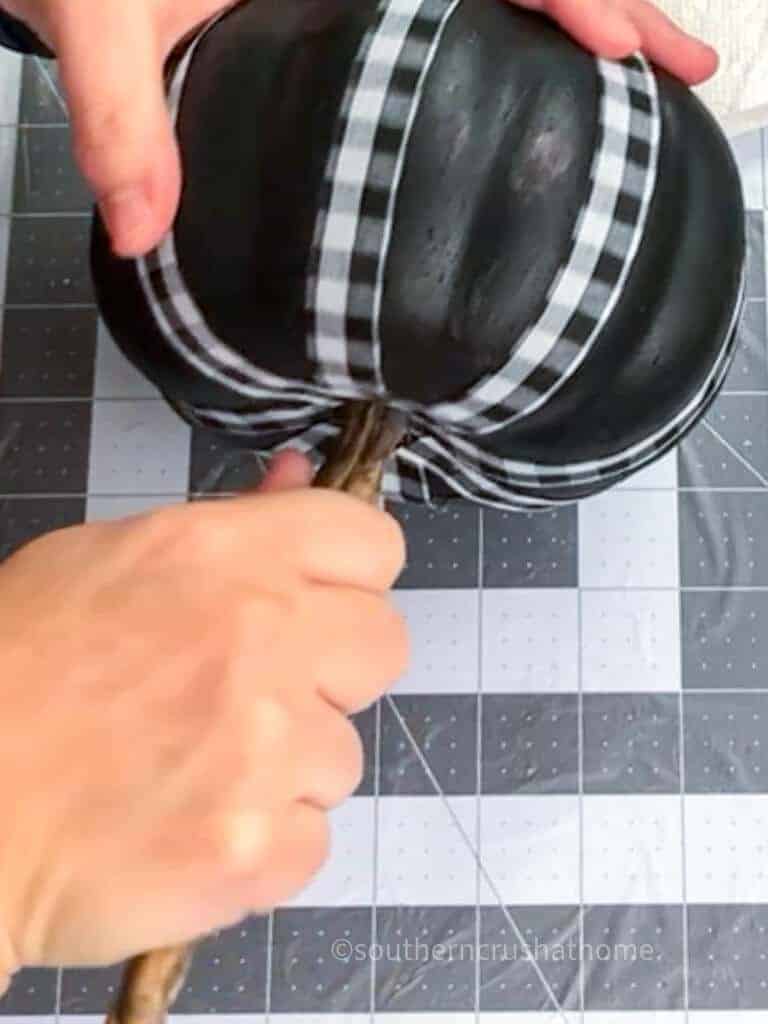
Then I'm going to take this dollar tree Buffalo Check ribbon and hot glue it to the center of the pumpkin wrapping it around the circumference of the pumpkin. I tried to go down the spine and follow the grooves, but it does not have to be exact.
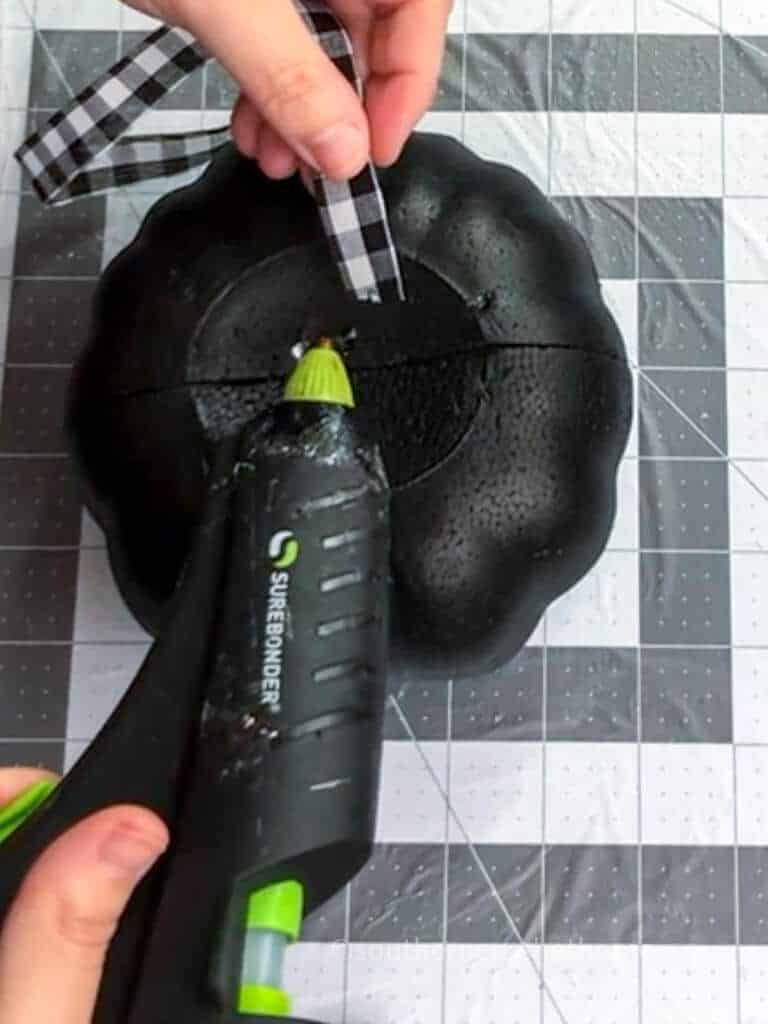
I repeated this step with separate strips of ribbon for the entire pumpkin until I felt like it had enough buffalo Check on it. Is there ever enough? Is there such a thing?
If you don't know, I do have a free Buffalo Check group over on Facebook that I will link HERE Below if you're interested in joining us over there. We share lots of fun projects. And yes, we have a lot of fun.
Finally, I added a stick from the yard to the center. You guys know how to use a stick from the yard?
And then I wrapped this really cute greenery wired ribbon with tiny little faux leaves around the stick.
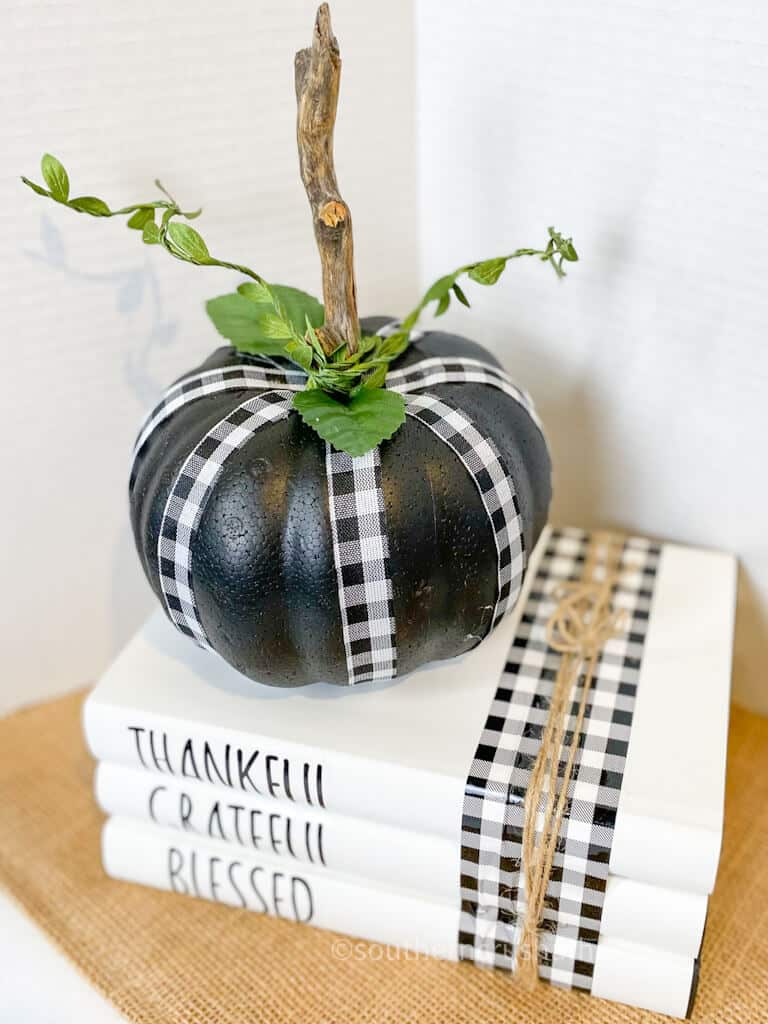
It is so cute, so stinking cute the way that this pumpkin comes together. I did my best to cute up this plain Dollar Tree black styrofoam pumpkin and make it a little more adorable and farmhouse looking instead of scary, spooky, Halloweeny. Is that a word? Halloween? I placed it here on a stack of Dollar Tree farmhouse books.
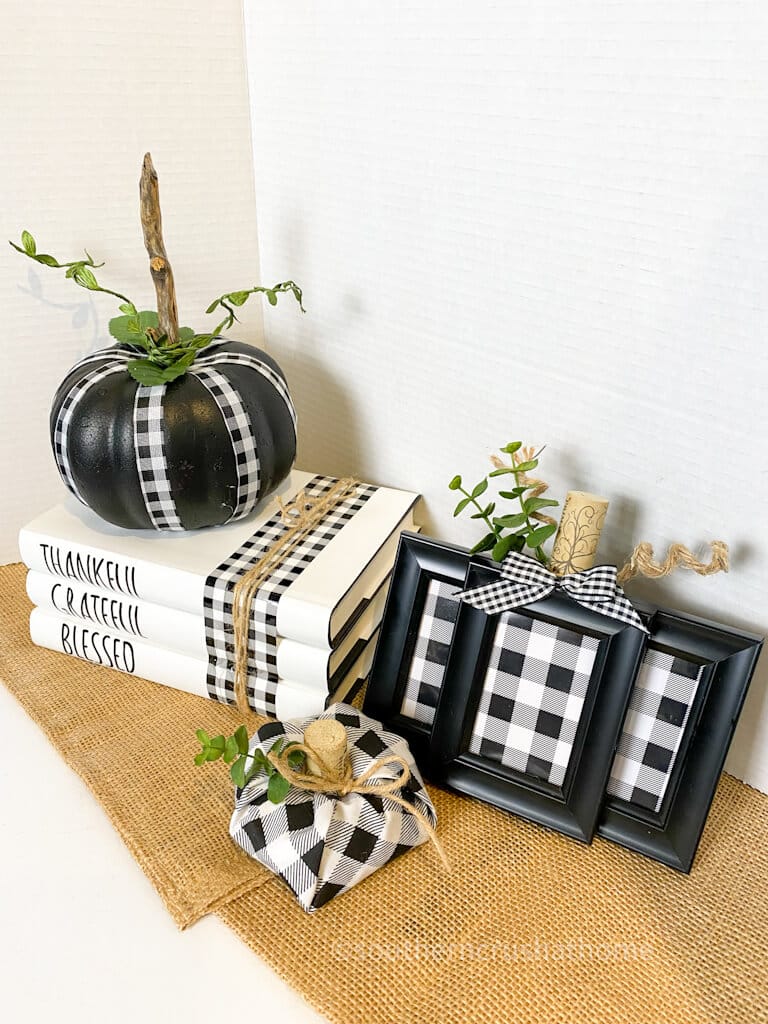
Together, these three DIY pumpkin ideas will make the perfect fall centerpiece or tiered tray decoration. So get creative with your pumpkin decor this season by incorporating black and white elements into your design. Happy crafting!
Let me know in the comments below if you will try to make one of these and which one of these black and white pumpkins is your favorite out of all of them.
I appreciate you so much. Be sure to hop on my list below for more.
Cute ideas! I hope they come out with larger foam pumpkins at DT or DT+
Hard to pick a favorite but I have not seen the picture frame one before. I may have to try it! I would also like the use the wire with the leaves to maybe trail across to tops if he frames a bit?
So clever and adorable! 🙂
The black and white is classic looking.