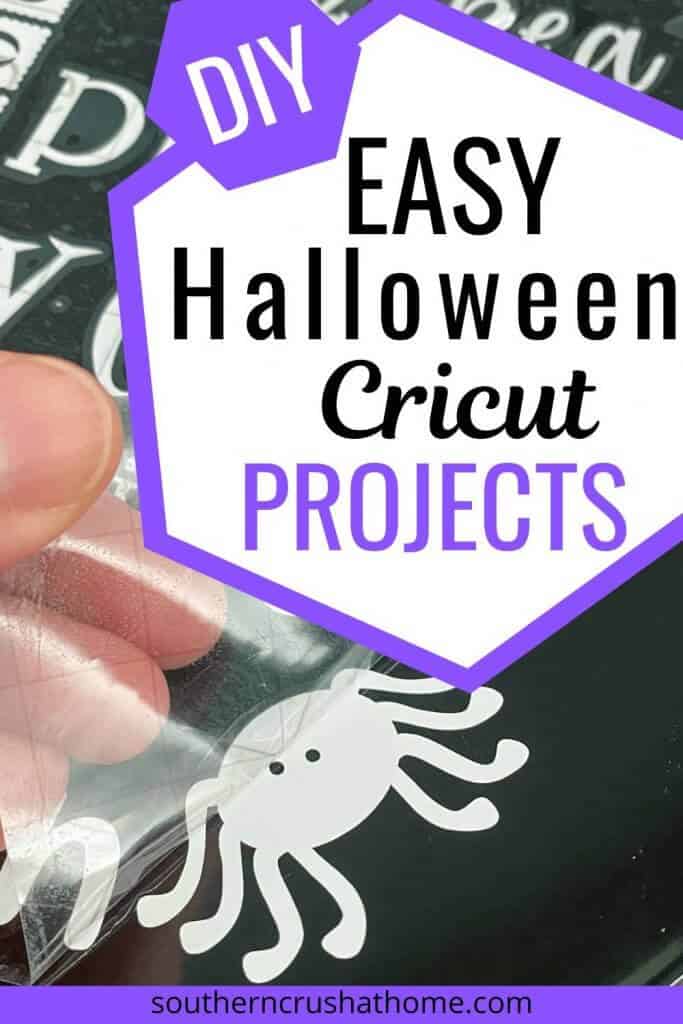
Easy Halloween Cricut DIY using Dollar Store Items
It’s time to decorate for Halloween and there’s no better way to create decor on a budget than an Easy DIY using a Cricut and Dollar Store plates! If you know me at all, you know how much I love decorating on a budget and using things I find at the Dollar Store. Now, with a Cricut Maker and Cricut Easy Press, I can create even more decor goodness in no time at all! These two DIY projects are perfect for beginners like me.
This is a sponsored post written by me on behalf of Cricut. All opinions are 100% mine.
This post contains affiliate links at no extra cost to you. *This post is sponsored by Cricut. Please see my full disclosure here. For this DIY project, I created a super easy DIY Halloween Plate using a simple black plate from Dollar Tree and my new Cricut Maker. Additionally, I created some fun holographic decor using the Easy Press. Trying out both of these tools has taken literally all of the intimidation away! They will be awesome for making tons of easy projects–Let me show you how simple it is!
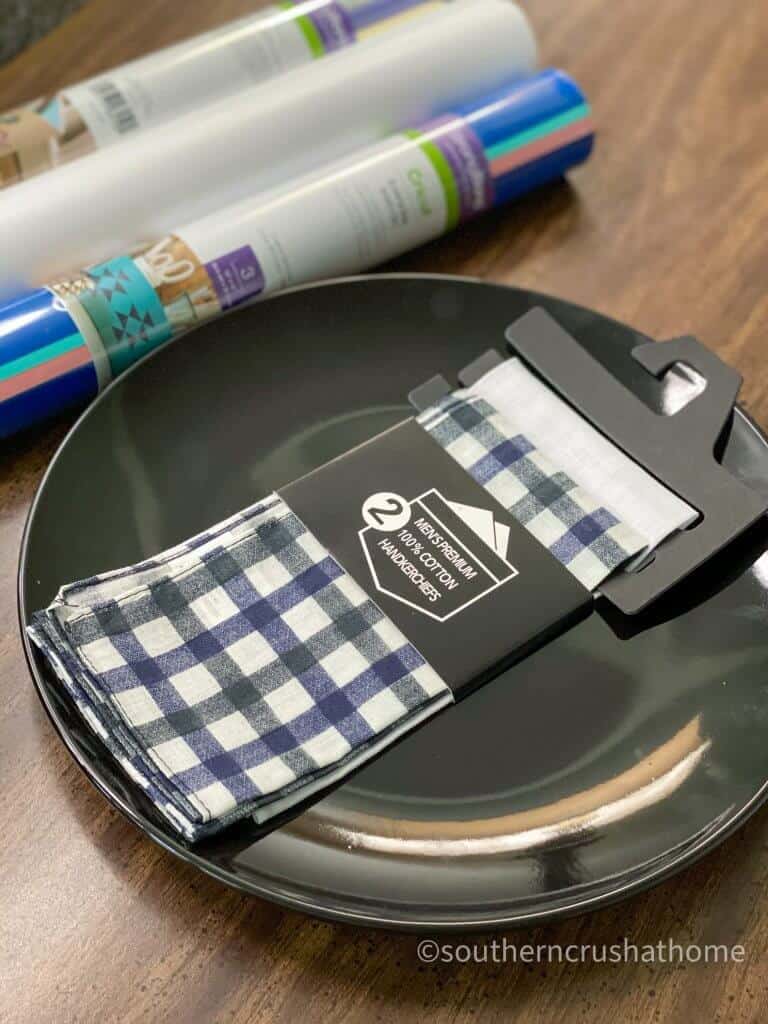
DIY Halloween Plate DIY Supplies
- 1 Black Dollar Store Plate
- Set of Dollar Store Handkerchiefs
- White Temporary Cricut Vinyl
- Cricut Holographic Iron-on
- Transfer Tape
- Cricut Easy Press
- Easy Press Mat
- Cricut Maker or any Cricut cutting machine
- Standard Grip Cutting Mat
- Weeding Tool
- Scissors
- Smoothing Tool
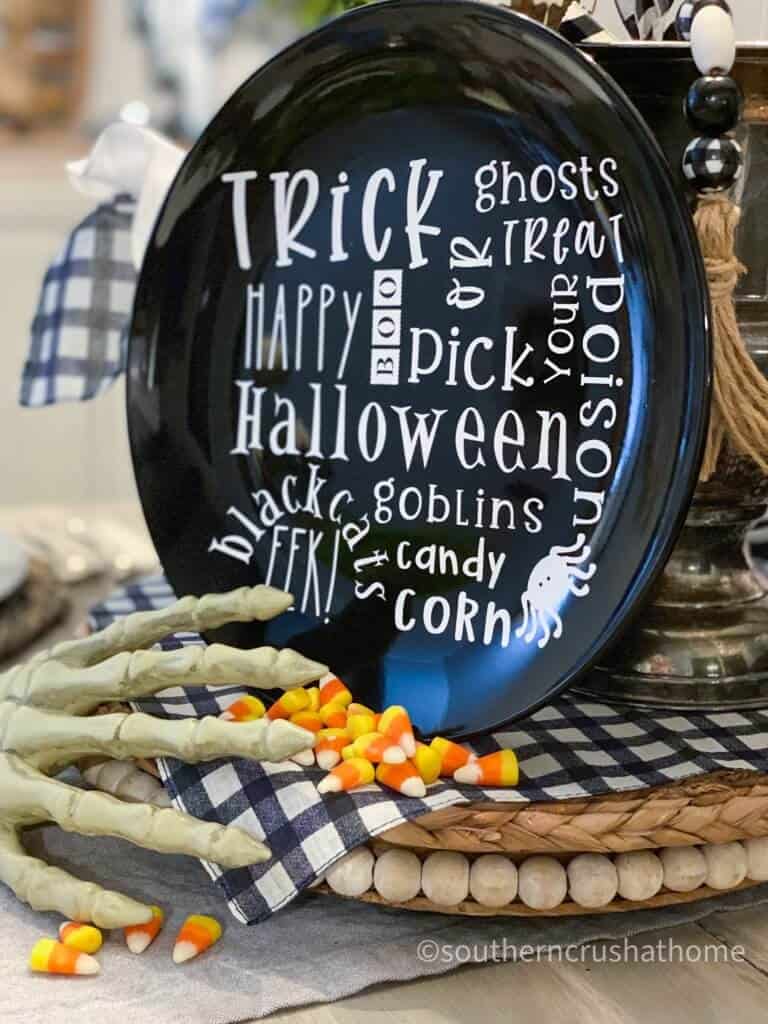
You certainly could use a different color plate and/or vinyl if you’d prefer to; however, I really like the contrast of the white against the black. Oh and look at that buffalo check!!!!
NEW TO CRICUT?
If you don’t have the Cricut Access Membership, now is the time to get it because you’ll get access to thousands of images, hundreds of fonts, 10% off your purchase of materials, machines, tools, etc… plus 10% off premium images, fonts, ready-made projects, AND you get priority in the member care line!
easy step by step halloween diy plate instructions
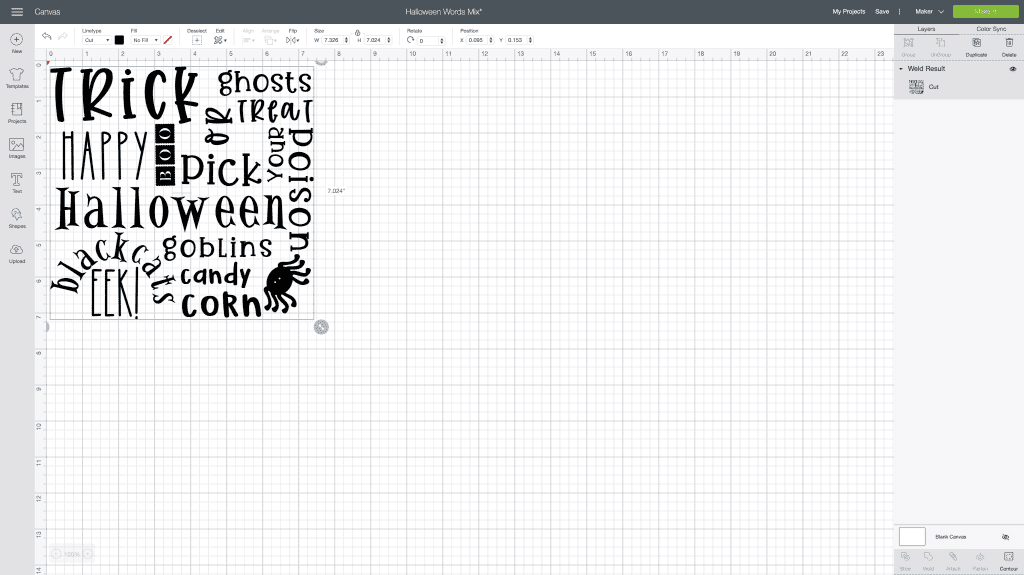
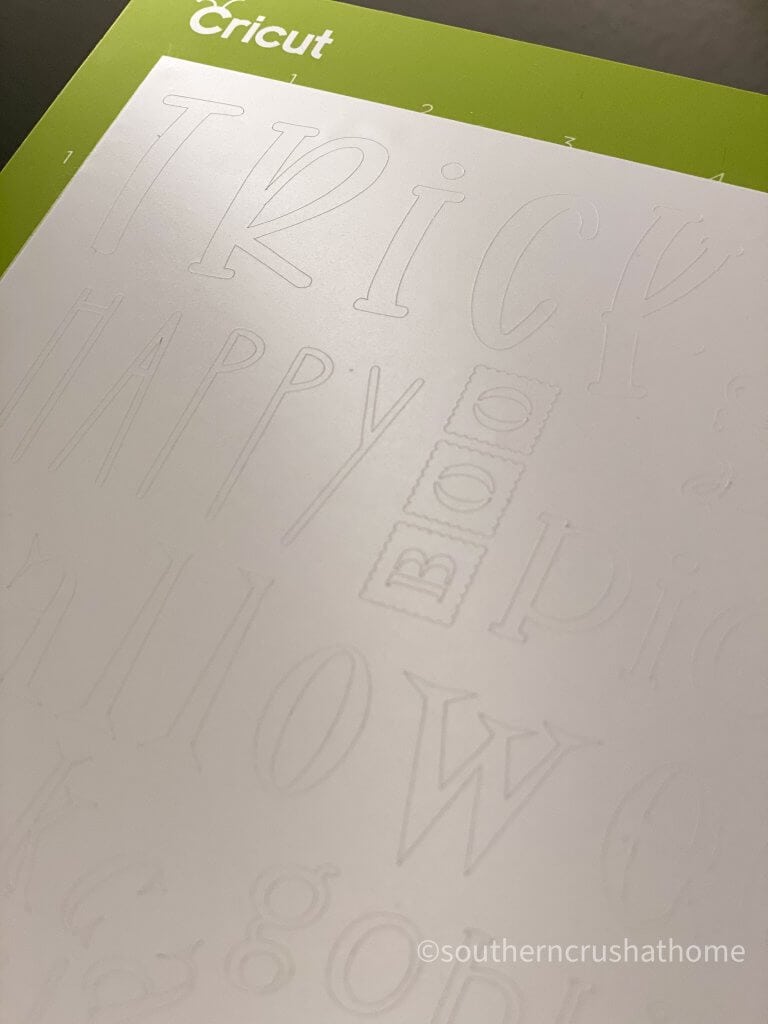
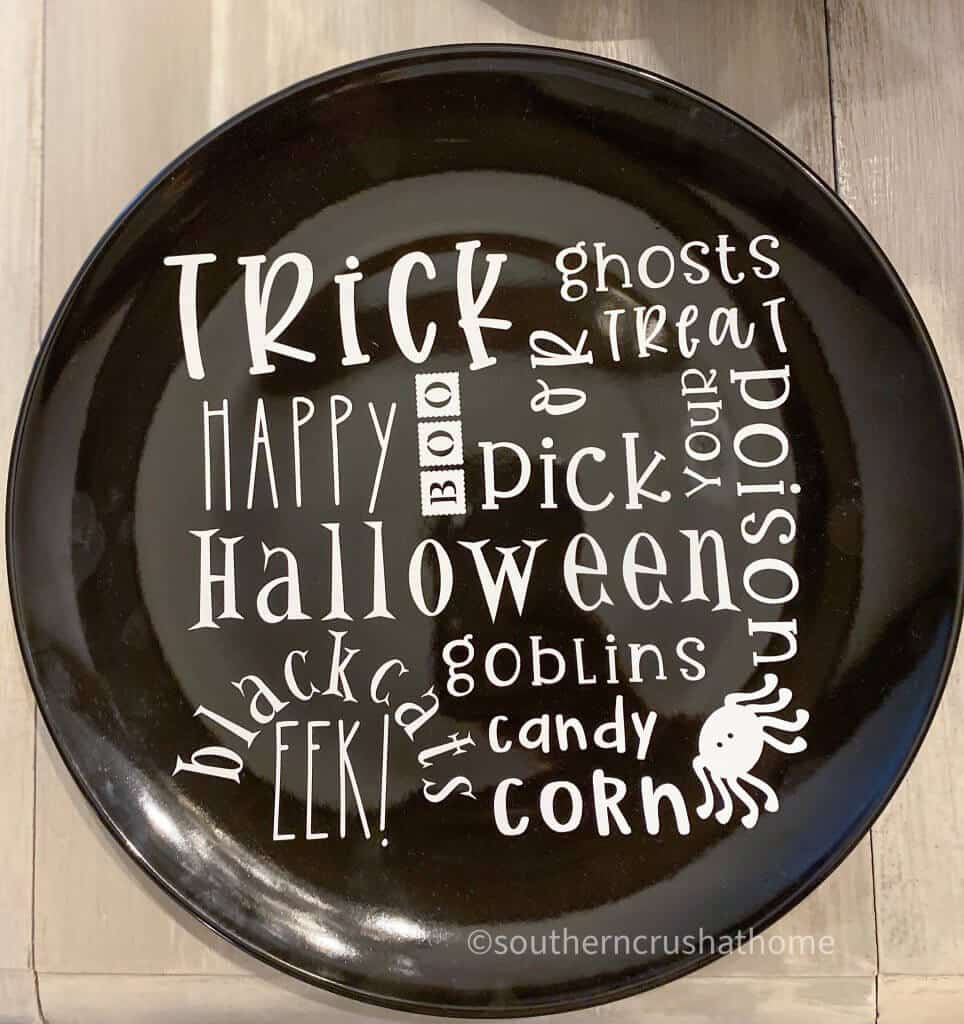
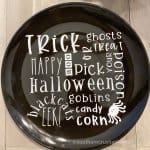
First, choose the size you want your design to be. I found for the dollar store plates about 5-7″square was a good size to fit in the center of the plate. I designed this Halloween SVG by first downloading a few fonts from CreativeMarket and then placing popular Halloween words like “trick or treat, ghosts, goblins, happy halloween, boo, black cats, candy corn, pick your poison and eek” in all directions forming a whimsical design. Feel free to grab this exact svg design for FREE inside my free library HERE.
cricut halloween diy instructions continued…
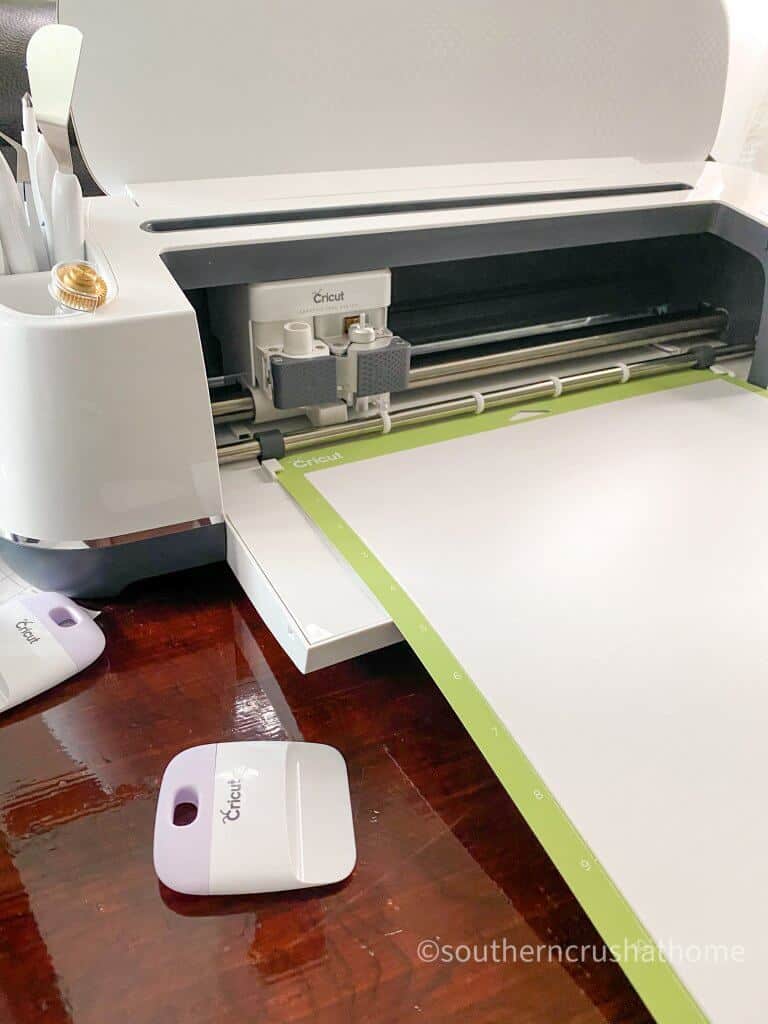
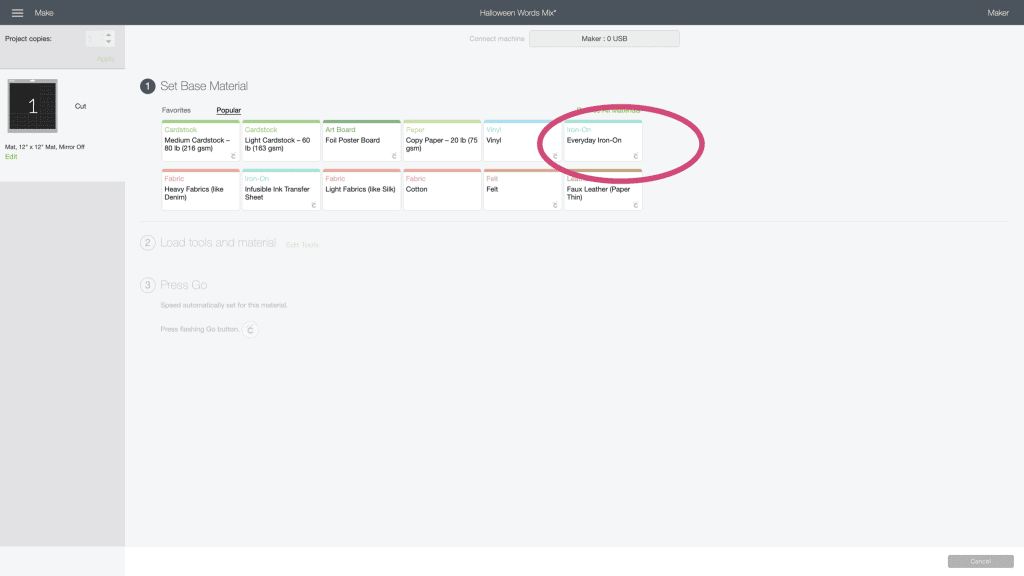
Next, you’ll need to place your white temporary vinyl onto the standard gripping mat lining it up with the top left corner of the grid just as seen in the design space. Place the mat with the vinyl adhered into the edge of the machine. Go back to the computer and inside Design Space choose Vinyl as your material to have the Cricut Maker cut for you.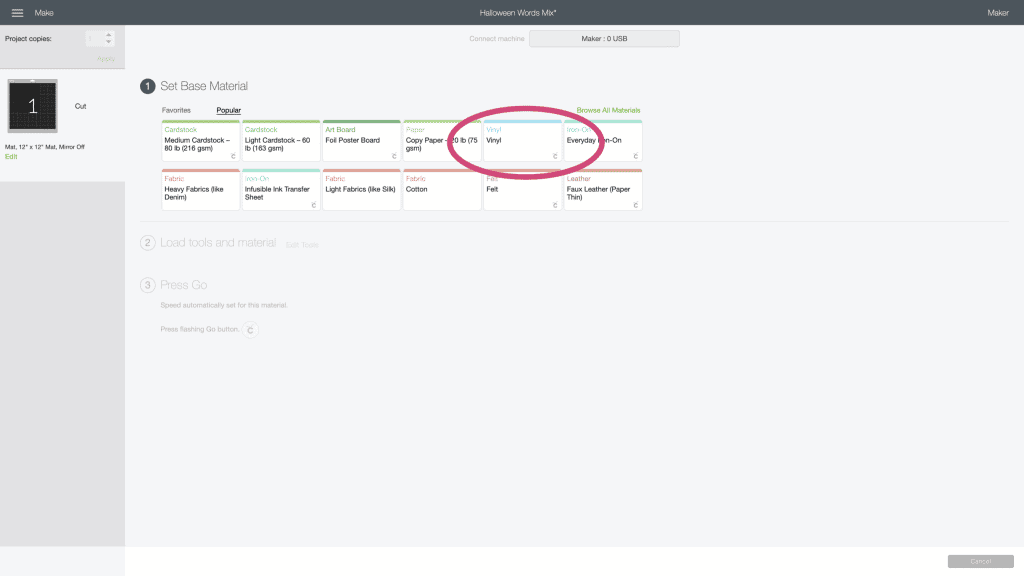
Press the arrow keys on your Cricut Maker for the machine to adjust your mat placement and then press the Cricut button once it lights up. That’s it! The machine does the rest for you!
After the Cricut is finished cutting your design, carefully remove your vinyl from the gripping mat and cut out the shape that contains your design. Hang on to the rest of your vinyl sheet to use for Scrap Vinyl Cricut Projects!
Begin carefully removing the largest portion of your ‘negative’ space vinyl that is not part of your design. This will come off in one big sticky ball.
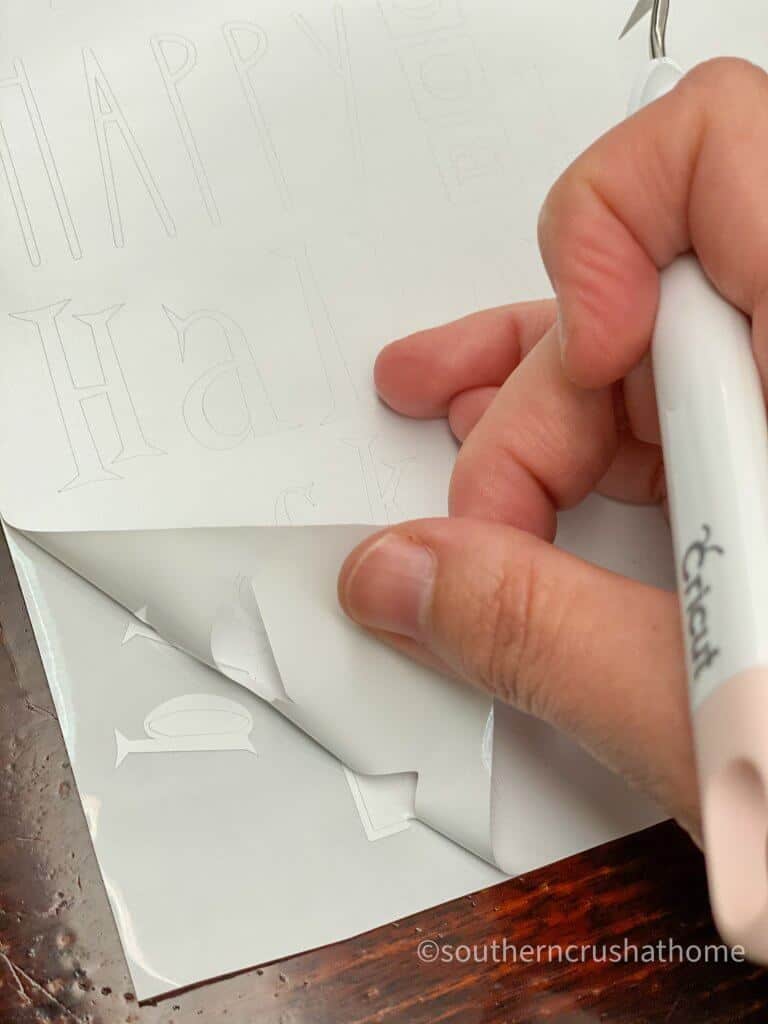
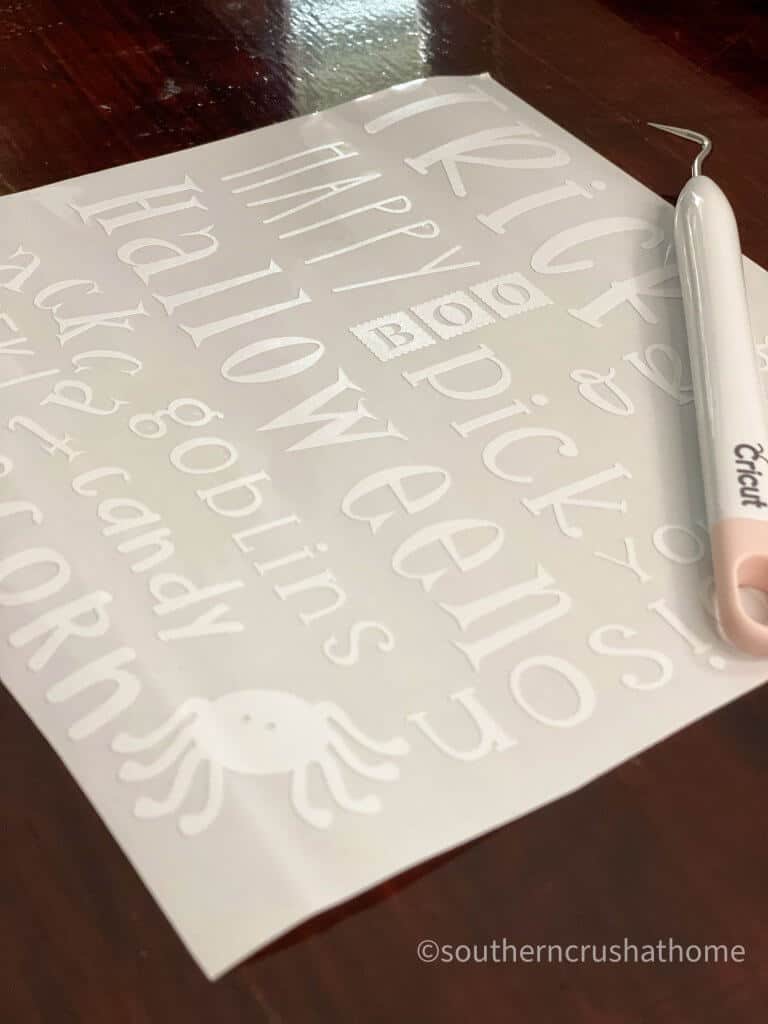
Carefully remove the additional portions of negative vinyl inside your lettering using your Cricut Weeding Tool. The key to this is to be patient and don’t rush the process. It can be very soothing to do this and the results will be fabulous! You should be left with just your lettering behind.
Next, grab your Cricut Transfer paper and cut out a square that covers your design and stick it to the front of your design. I like this transfer paper becuase it has handy gridlines that you can use to make sure your design goes on straight. Smooth the design down onto the transfer paper to ensure that it sticks.
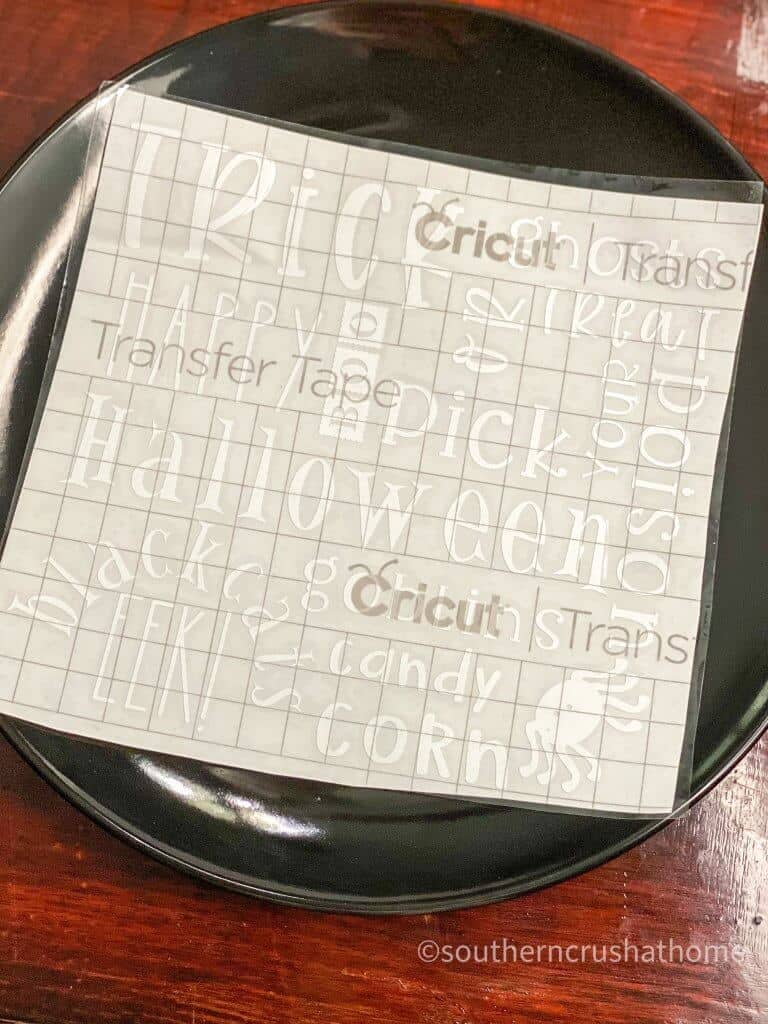
Carefully remove the transfer paper while keeping the vinyl design attached to it by removing it at the same time from the vinyl’s paper backing. You may need to use your weeding tool again to make sure that all pieces of your design make the ‘transfer’ over to the transfer paper.
final steps for your cricut halloween plate diy
Once the design is on the transfer paper, it’s time to adhere it to your Dollar Store Plate! Find the center of the plate and place your sticky side down and smooth it over with your Cricut smoothing tool. Carefully remove the transfer paper to reveal your vinyl design again using the weeding tool where needed! It’s so much fun to see your design come to life before your eyes!

Now you have a super cute Halloween Dollar Store Plate to use in various places in your home. I can see me using this Cricut Maker to personalize tons of items around the house!
This DIY has another surprise project using my new Cricut Easy Press! Here are the instructions on that easy peasy design project.
How to use the cricut easy press
Easy instructions on making an iron-on design
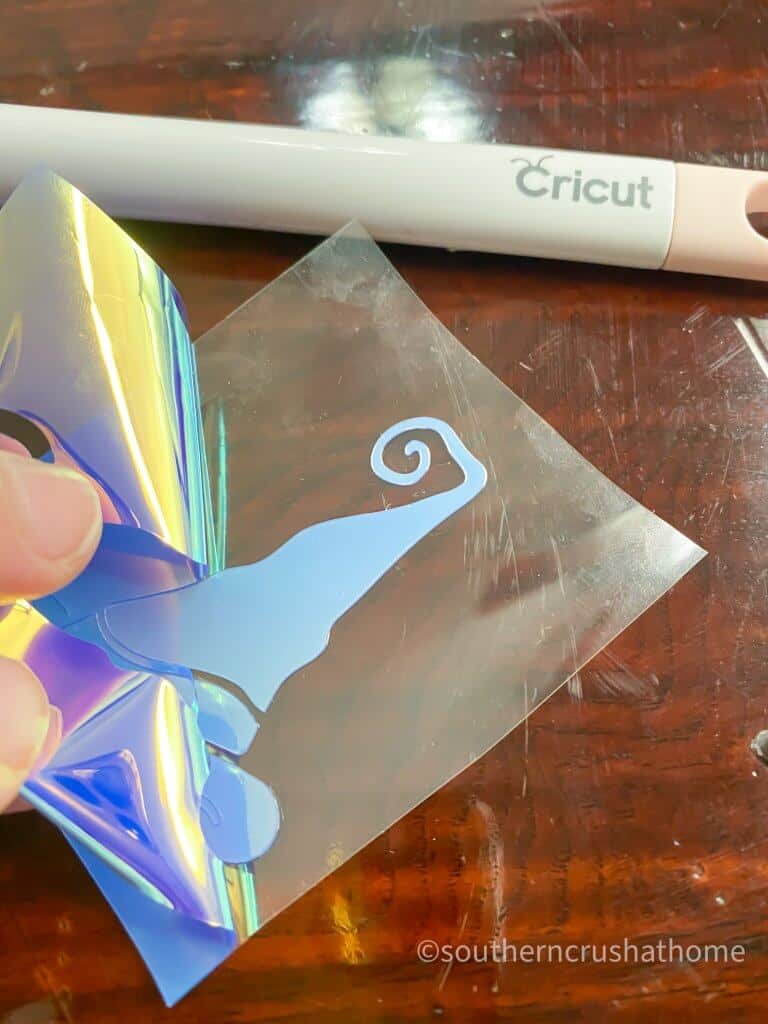
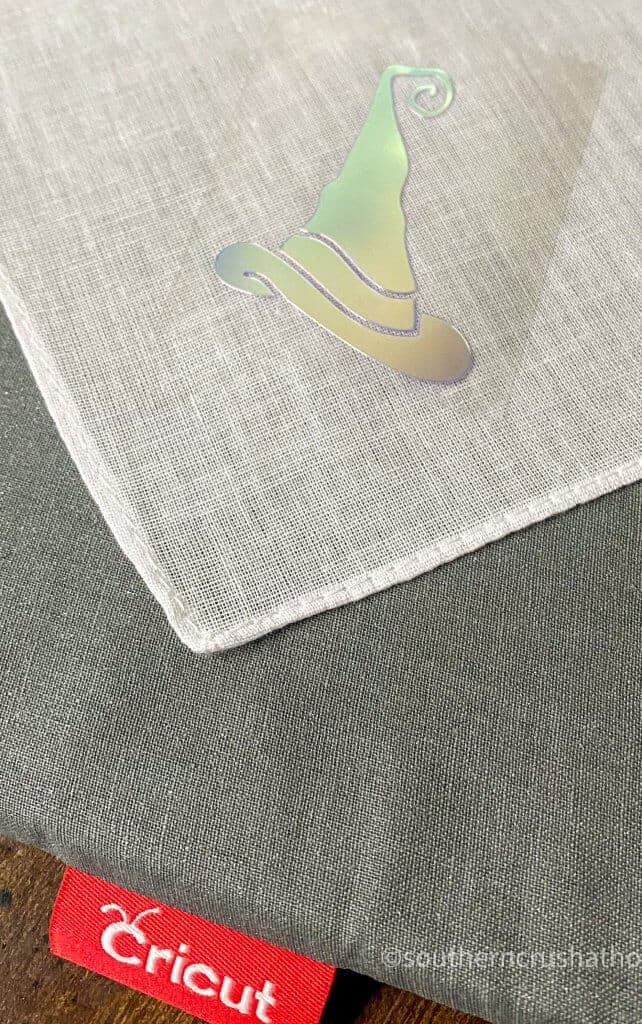
The Easy Press is such an awesome value! Think of all of the t-shirts, blankets, and linens you can make as gifts! I chose to personalize this linen handkerchief from the Dollar Store to add to my Halloween Decor. Using the same technique in Cricut Design Space, design your idea or use one of Cricut’s super cute options. I went with a Cricut witch’s hat for this Halloween idea and you can find it on my Make it Now link here. I chose to use the new holographic iron on material for this DIY which requires you to stick the foil shiny-side down! (If you have wording for this material, be sure to mirror your image). Choose Everyday Iron-on as the correct material for your project before hitting go!
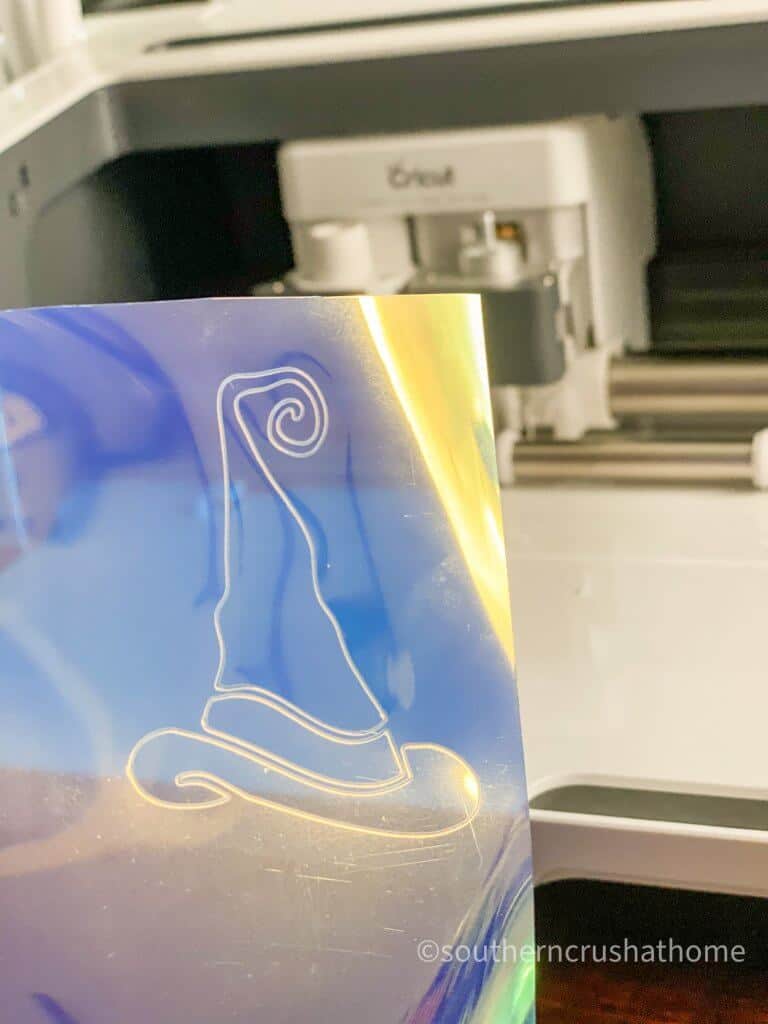
Peel back the negative material as shown and weed out any additional areas as needed after your design is cut.
Next, heat up your Cricut Easy Press and gently press your material to ‘warm’ it up using your Cricut Mat underneath to protect your surface.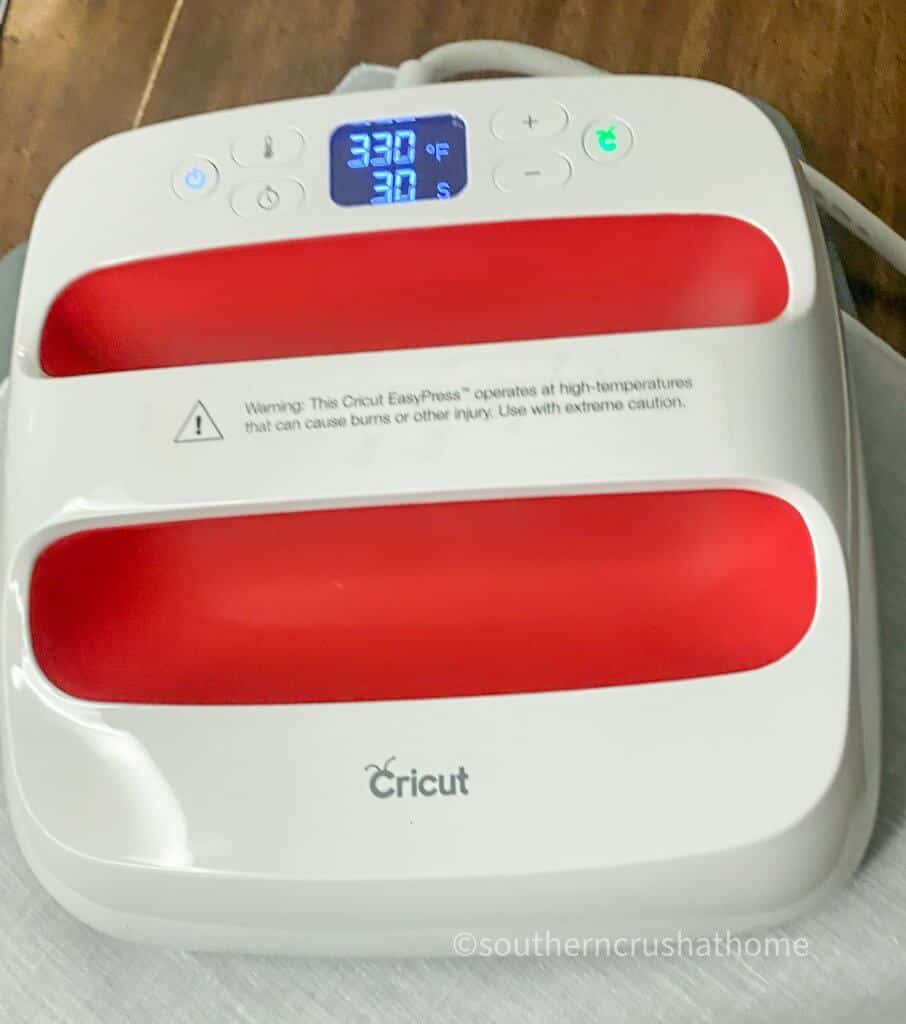
Place your design onto your material.
Now, place the Press over the top of your design. Press the cricut icon and watch the 30 second timer countdown. Flip your material over and repeat the process for 15 seconds. Wait for your design to cool and peel back to reveal your holographic design! I cannot express to you enough how fun and easy using this tool is!
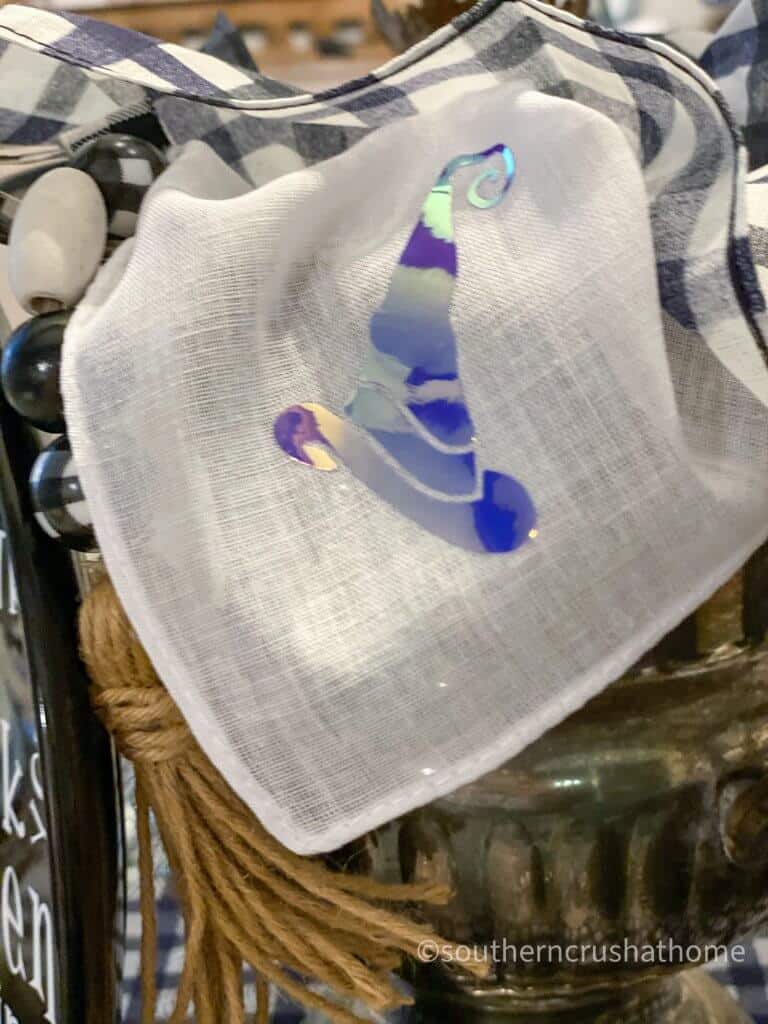
These two quick and easy projects make decorating for Halloween doable! I love how these two decor ideas turned out for my table. 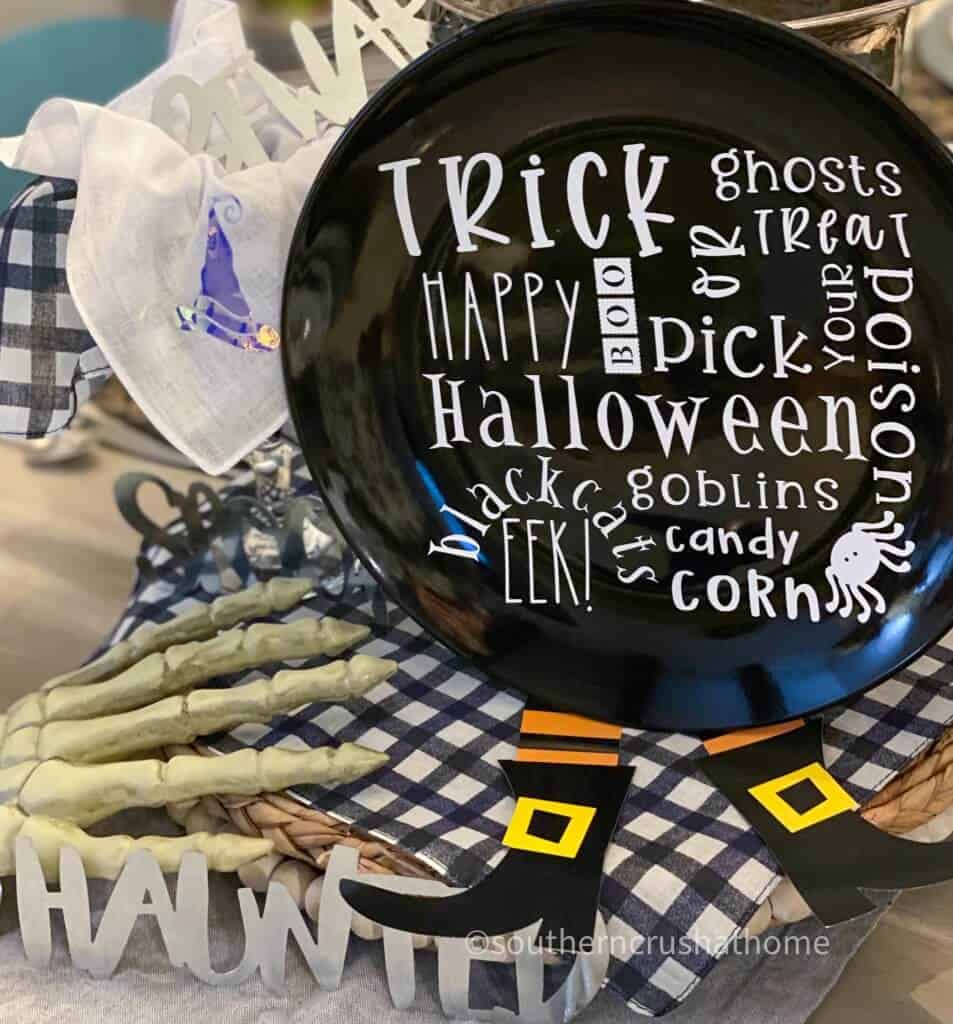
HOW TO SAVE MONEY ON CRICUT SUPPLIES + where to buy them
Cricut.com has the best Black Friday sale! I love finding a good deal on Cricut vinyl craft supplies. Save money by stocking up on Cricut craft supplies during their amazing sales. One question I hear people ask over and over is where can I buy supplies to use with my Cricut cutting machine? My favorite store to find Cricut supplies and blanks cheap is the Dollar Store. They have tons of inspiration pieces; ceramic dishes, glass vases, wooden blanks and more!
If you like DIY projects like this, you need to be getting my emails my friend!
How to Make DIY Halloween Dollar Store Plate with a Cricut
Equipment
- Cricut Cutting Machine
Materials
- 1 Black Dollar Store Plate
- 1 Removable Vinyl
- 1 Weeding Tool
- 1 Transfer Tape
- 1 Smoothing Tool
Instructions
- First, choose the size you want your design to be.
- Next, you'll need to place your white temporary vinyl onto the standard gripping mat lining it up with the top left corner of the grid just as seen in the design space.
- Place the mat with the vinyl adhered into the edge of the machine.
- Go back to the computer and inside Design Space choose Vinyl as your material to have the Cricut Maker cut for you.
- Press the arrow keys on your Cricut Maker for the machine to adjust your mat placement and then press the Cricut button once it lights up.
- After the Cricut is finished cutting your design, carefully remove your vinyl from the gripping mat and cut out the shape that contains your design.
- Begin carefully removing the largest portion of your 'negative' space vinyl that is not part of your design.
- Carefully remove the additional portions of negative vinyl inside your lettering using your Cricut Weeding Tool.
- Next, grab your Cricut Transfer paper and cut out a square that covers your design and stick it to the front of your design.
- Carefully remove the transfer paper while keeping the vinyl design attached to it by removing it at the same time from the vinyl's paper backing.
- Find the center of the plate and place your sticky side down and smooth it over with your Cricut smoothing tool.
- Carefully remove the transfer paper to reveal your vinyl design
So adorable!! Can’t wait to start decorating!
Yes! It’s time! I can’t believe Halloween is around the corner!
Awesome ideas! Love you blog and your tips and ideas!
Awe thank you! I appreciate it!
I’ve never tried one! Thanks for sharing! So many possibilities 🙂
I hope you’ll try one soon! You’re welcome!
What a fun easy craft project. Thanks for sharing. Your attention to detail made it very easy to follow along.
Yes, it was super fun and very easy! Thank you!
What a cute DIY! Always amazed at what such crafty people can make.
Yes! Thank you so much!
Awesome!!
Thank you for this tutorial! I love that I can make such cute decor items with things Incan buy from the Dollar Tree!
Right? That’s my favorite part! Cute and affordable, it’s a win-win!
Great post!!! Such cute ideas and easy to follow instructions!! Thank you. Love your blog!!!!
You’re too sweet! Thank you so much!
I love this!! It gives me inspiration for more ideas to try! You are awesome, Melanie!!
Awe thank you so much! I hope you try it!
This is such a cute idea. Thank you for sharing!
Thank you and you’re so welcome!
Beautiful website! Love the photos and instructions!
Awe thank you so much!
I love decorating with Dollar Store products! There are so many things you can do with them!
Right? They make it fun because its affordable to make mistakes! LOL
This plate is so cute and perfect for Halloween!
I am not a crafter but your tutorial totally makes me want to buy a Cricut!
Ha! That’s funny! Thank you! SHOP for a CRICUT HERE
Really cute idea! Love this!!
Thank you so much! It was so easy!
So cute!!! Started my decorating!!!
Yay!! It’s fun to decorate for the seasons!
Sprinkled I love everything but don’t have a cricket
Thank you! SHOP HERE
Absolutely beautiful
Thank you so much!
Sprinkled
I really need to get myself a Cricut!
Yes, you do! Order one HERE https://www.southerncrushathome.com/cricut
I love Halloween decorations that are classy!
Awe that’s sweet! Thank you!
Love it and sprinkled
Thank you!
Would love to learn how to make SVG’s. This is so cute.
Have a beautiful Cricuit and am so intimidated by it. This project may inspire me to finally get it out of the box!
Yay!!! I hope you do! The first one gets you over the intimidation and turns into addiction! I’m so glad you’re inspired.
Cute!!
Thank you!
Thank you Melanie this is an awesome idea love it and all you do the blog is great and Thank you for the free SVG????
You’re so welcome! I appreciate you!
Nice. Wish I had a cricut
Get one! They are so much fun to use on so many DIY projects!
Love it
Thank you so much! I appreciate you.
Love this craft idea!
Thank you so much!
Super cute idea!
Thank you!
New to your blog… I am in love with Farmhouse decor. I do need to get a cricket or one of those machines to do most of these designs…
Welcome! This was actually my first Cricut project as my Cricut Maker is brand new! You’d love it if you get one! Shop all Cricut HERE
Would really love to have a circuit. It looks like fun.
Yes! It is a lot of fun!
This Halloween plate it just too cute! ????❤️
Thank you so much! I can’t wait to display it
I love all the possibilities there are with Cricut! The plate is so cute!
Right? Thank you so much!
Love this!!! I have the first Cricut from over a decade ago, and need a new one. I still love and use mine, but would love something digital. Great project, thank you for sharing!
Wow! You must have made so many cute things!!! SHOP HERE for something new!
Love this so much.
Thank you!
This is so cute! What a great idea!
Your ideas are so darn cute????❣️???? They fit with so many decorating styles and Are easy to recreate! Love them!
Awe thank you so much! What a sweet compliment!
Love your blog, your Facebook lives, the free printables, craft ideas, tips, talents, creativity and inspiration!
WOW! Thank you for the kind words! They are so appreciated!
Love this! Thanks for a great tutorial.
Thank you and you’re so welcome!
nice love the idea.
Thank you!
So cute
I want a cricut but didn’t realize how many different ones there are ???? so more research it is. ???? Because I love what you did with this! ????????
Such a cute idea!
Thank you!
What a cute idea! I love that file!
Awe thank you so much! I appreciate that!
Love that!! ❤️
Awe thank you!
This is so cute!!!
Thank you!
Time to buy a Circut! These are adorable. I love how you have the whole project in a recipe card.
Thank you! I agree, the recipe card is super convenient! Shop Cricut HERE
Love your blog page
You’re too sweet! I appreciate you!
The plate turned out really good. I love my cricut.
Thank you! I’d love to see what you’ve made with your Cricut!
I LOVE how these turned out! So stinkin CUTE!!
Awe! Thank you so much!
I can’t wait to try this!