5 Easy Dollar Tree DIY Candle Ideas for Last-Minute Christmas Gifts
There’s always that moment in the holiday season when you realize you need “just one more” gift. Maybe it’s for a neighbor who dropped by with treats, a teacher you forgot to shop for, or a friend hosting an impromptu get-together.
Instead of rushing to the store and grabbing something random, you can turn a simple Dollar Tree pillar candle into a beautiful, thoughtful gift in just a few minutes.
These DIY candle ideas are all made with affordable supplies, many from Dollar Tree or the grocery store. Each one has its own personality—cozy winter, gingerbread charm, classic tartan, rustic birch, and vintage-inspired prints—so you can match the style to whoever you’re gifting.
This blog post contains affiliate links. The opinions are wholly my own from my own experience. I may earn a small commission from clicks through to the websites that end in a purchase.
They’re also perfect for dressing up your own holiday décor. Line them up on a mantel, tuck one into a dough bowl, or pair a candle with a mug and hot cocoa packet for a simple yet special gift set. They’re quick, relaxing, and easy to customize with ribbon, greenery, and a bit of sparkle.
Watch the DIY Candle Tutorial
If you’d like to see each step in action, you can watch the full video tutorial where I walk through all five candle ideas from start to finish.
Now let’s walk through each candle project so you can recreate them at home.
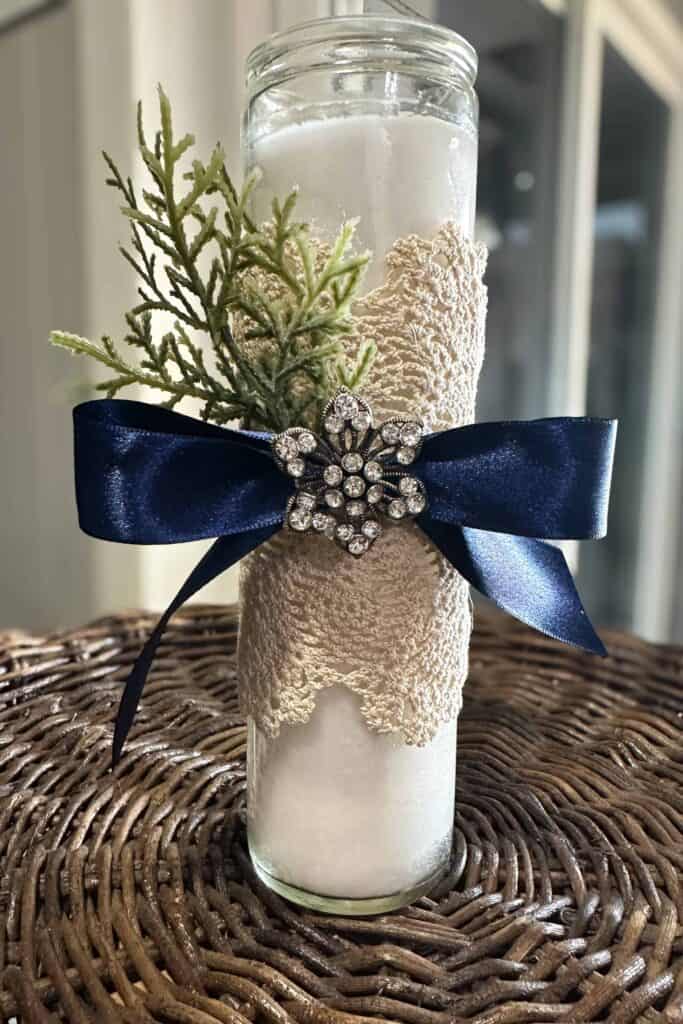
Doily and Brooch Vintage DIY Candle
Supplies Needed
Wrapping the Doily
For the first candle, I used a simple off-white doily to give a plain pillar candle a soft, vintage feel. Instead of gluing the entire doily down, I threaded a piece of jute twine or string through some of the open spaces and tied it around the back. This secures the doily in place without any messy glue stains on the lace.
You can use a new doily, a thrifted one, or even a small lace placemat trimmed to size. The look is delicate and pretty, but it comes together in just a few minutes.
Embellishing with Ribbon and Sparkle
To dress it up, I added a classic bow made from navy ribbon, but you can choose any color that matches your holiday palette. A zip-tie bow is an easy way to get nice, even loops—just form your loops, add the zip tie in the center, trim it off, and your bow is ready.
A small dot of hot glue in the center of the doily holds the bow in place. Then, for that signature touch, I pinned a vintage-style brooch right into the center of the bow. You can add a sprig of faux greenery or berries behind the bow for a more wintery look.
The finished candle feels elegant and timeless—perfect to keep on hand for last-minute gifts that still feel special and intentional.
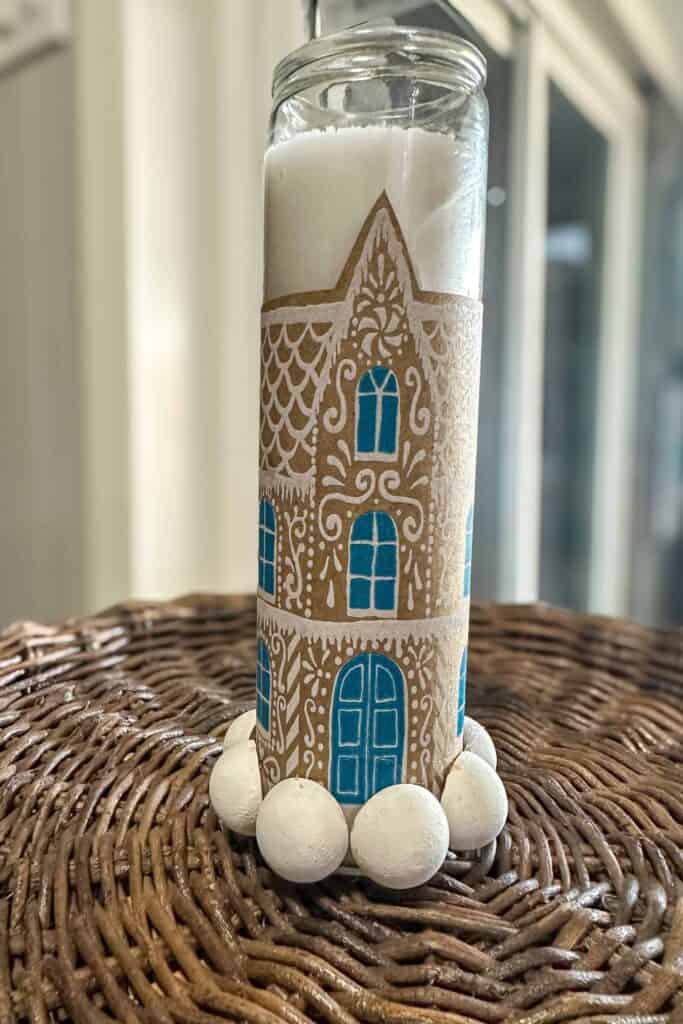
Gingerbread Grocery Bag Candle Wrap
Supplies Needed
Creating the Gingerbread Scene
The second candle idea has a cozy gingerbread look using something you probably already have on hand: a brown paper grocery bag. Trader Joe’s bags are especially cute with their seasonal designs, but any brown sack or even Dollar Tree lunch bags will work.
Using a printable template, you can trace and cut out a row of gingerbread houses or a simple winter scene from the bag. Once cut to size, brush clear school glue (like Elmer’s) onto the back with a small artist brush, paying extra attention to the edges and corners so it adheres smoothly to the glass.
Wrap the paper around your candle and gently smooth out any wrinkles or bubbles as it dries.
Adding Beaded Details
To give the candle a finished, boutique feel, I added a row of white half wooden beads along the bottom edge. A trick here is to line the beads up on a strip of painter’s tape before painting them. This keeps them steady while you coat them with white chalk paint and let them dry.
Once the beads are dry, keep them on the tape and add a tiny dot of hot glue to each one as you press them around the base of the candle.
The result is a sweet, wintery gingerbread-style candle that looks like it came from a specialty shop, especially when paired with a holiday mug and hot cocoa mix for gifting.
Tartan Napkin DIY Candle with Wax Seal
Supplies Needed
- Plaid Napkin
- Wax Seal Kit
- Ribbon of Choice
Wrapping with Tartan Napkins
The third candle design uses decorative cocktail napkins—an easy and inexpensive way to add pattern and color. Tartan plaid is especially on-trend and gives that Ralph Lauren–inspired, cozy lodge feel.
Start by separating the layers of the napkin using small pieces of tape at the corners; you want just the top printed layer. Cut a section that fits the height of your candle, then brush a thin layer of Mod Podge onto the candle and carefully wrap the napkin around it.
Smooth it down gently with your fingers, adding more Mod Podge in very light strokes if needed. Thin layers help prevent tearing and wrinkles.
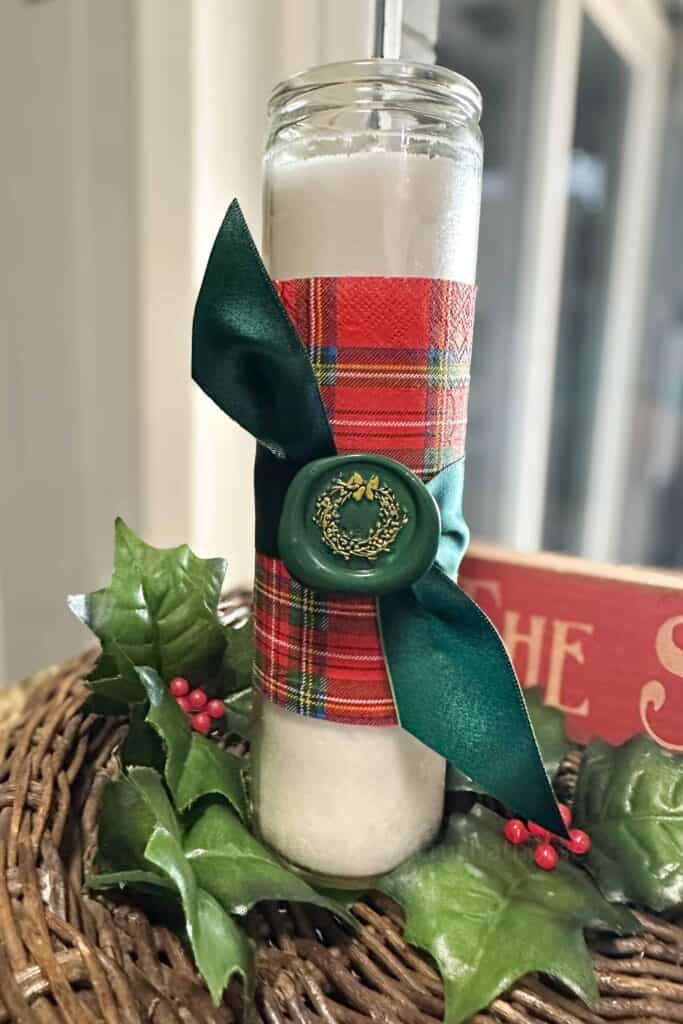
Ribbon and Wax Seal Accent
To finish the candle, I added a narrow ribbon tied in a simple half-knot. If your ribbon is too wide, you can cut it in half lengthwise—this works best with double-sided ribbon, so both edges look finished.
The star of this candle is the wax seal. Using emerald green sealing wax, press out a small puddle onto a silicone surface, stamp it, and let it set. Once cool, color in the design with the gold marker that usually comes with the kit.
To attach the seal to your candle, place a small dot of hot glue on the back, let it cool just slightly so it’s not too hot, and press it onto the ribbon knot.
It’s a beautiful, old-world detail that makes the candle feel like a luxurious, custom gift—perfect paired with a bottle of wine, a set of napkins, or a small tray.
Faux Birch Wood DIY Candle
Supplies Needed
Creating the Birch Texture
For the fourth idea, I gave a plain candle the look of birch wood, which is wonderful for winter decorating long after Christmas is over.
You can use a stencil designed to mimic wood grain, or a wood comb tool that drags through paint to create a similar effect.
I applied two shades of chalk paste: a gray as the base and a shimmery silver on top for dimension. Using the stencil, I spread the colors over the candle, then peeled it away for the reveal—a satisfying moment every time.
Once the design is set, a quick pass with a heat tool helps dry and set the paste completely.
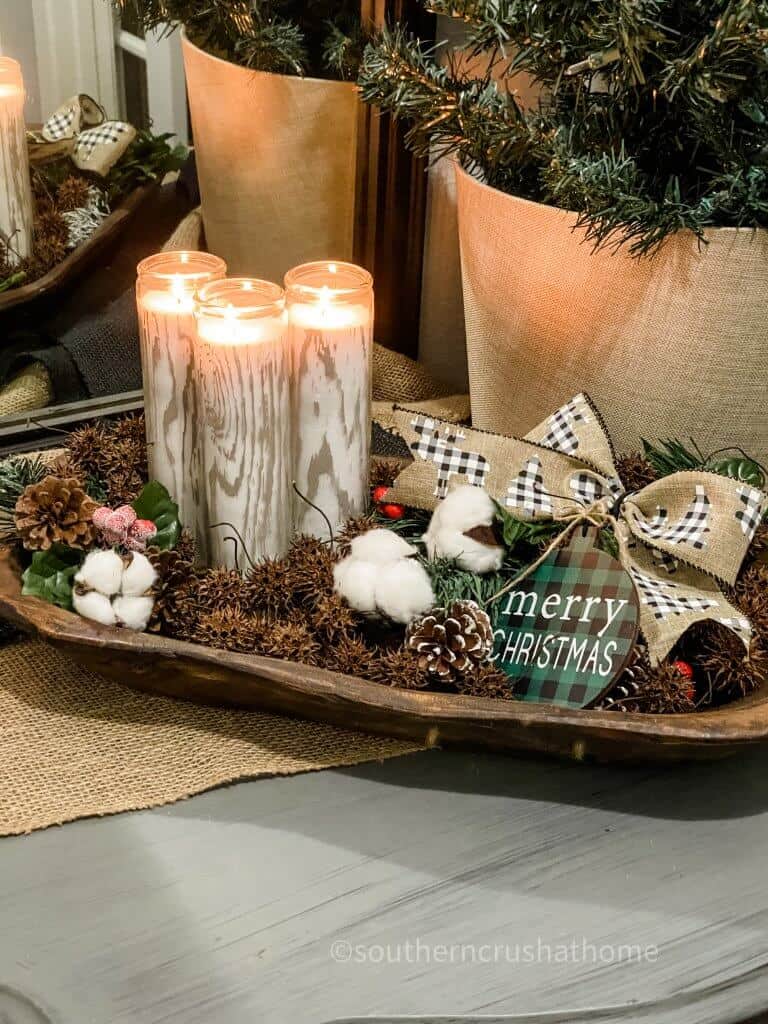
Styling in a Winter Dough Bowl
These faux birch candles look beautiful grouped in a dough bowl filled with greenery, pinecones, and ornaments for Christmas, then left out into January with just evergreens and natural elements.
They bring a soft, woodland look to your table or mantel and feel more like sculptural décor than a simple candle.
Printable Rustic Candle Wrap Trio
Supplies Needed
- Brown Kraft Paper (optional)
- FREE Printables
- Double Sided Tape
- Embellishments (optional)
- Hot Glue
Printing and Wrapping the Designs
The fifth idea is a set of printable candle wraps that has been a favorite and gone viral before—and for good reason. It’s quick, customizable, and perfect for making multiple gifts at once.
Print your chosen designs onto brown paper that’s been attached to a regular piece of printer paper. You can do this with brown grocery bags cut to size or kraft-style paper sheets, secured lightly onto copy paper before running through your printer.
Once printed, peel the brown paper off the backing sheet and wrap it around your pillar candle, securing it with hot glue along the seam. The brown paper gives a rustic, old-fashioned look that feels very cozy and farmhouse-inspired.
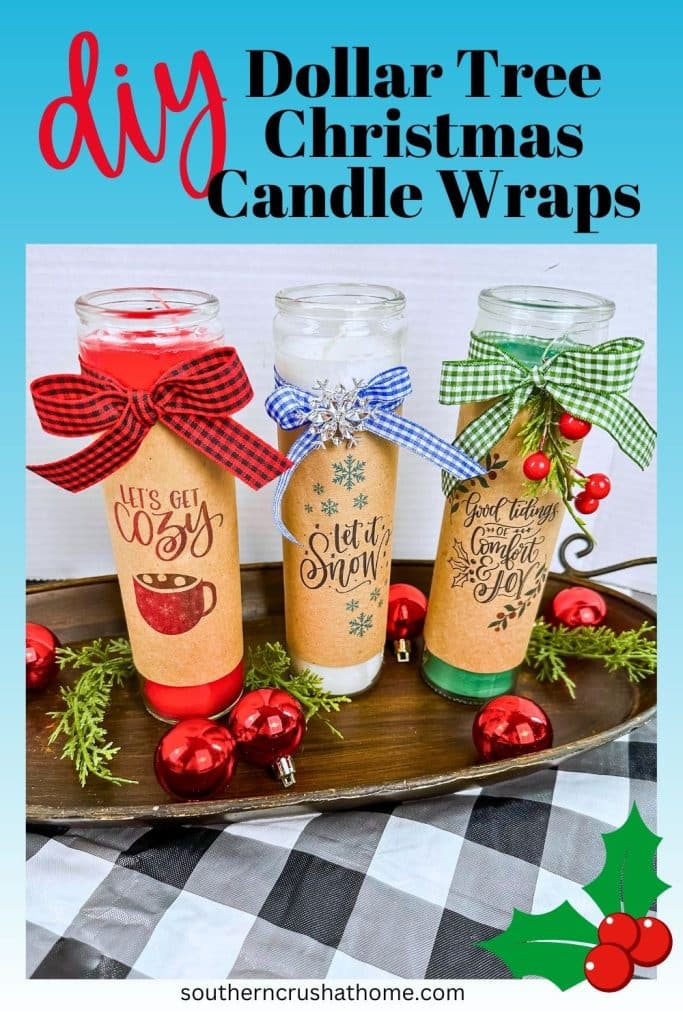
Embellishing Each Candle
To finish the trio, I decorated candles in three different colors—white, green, and red—with simple ribbons, small ornaments, faux holly berries, and a bit of greenery.
You can vary the embellishments so each one feels slightly different while still coordinating as a set.
Grouped together, the three candles make a beautiful centerpiece, mantel display, or gift set.
They’re also easy to tailor to different styles simply by changing the printables and ribbon colors.
These five candle DIY ideas are proof that last-minute Christmas gifts don’t have to look last minute. With a little paper, ribbon, glue, and a few thoughtful details, you can create gifts that feel personal, charming, and festive.
Keep a few of these candles on hand for unexpected guests, teacher gifts, or those “just in case” moments, or simply use them to cozy up your own home for the season. Mix and match styles, play with different ribbons and greenery, and make them your own.
I’d love to know which candle idea is your favorite and how you plan to use it—in your décor or as a gift.