How to Make an Easy DIY Christmas Garland with Dollar Tree Snowflakes
This easy DIY Christmas garland made with wooden Dollar Tree snowflakes is the perfect way to add a touch of whimsy and holiday cheer to your home. Using just a few simple materials, you can create a beautiful garland perfect for draping over mantles, doorways, or windows. And best of all, this garland can be made in no time using Rustoleum Imagine Color Shift spray paint!
This blog post contains affiliate links. The opinions are wholly my own from my own experience. I may earn a small commission from clicks through to the websites that end in a purchase.
Rustoleum Color Shift spray paint makes this garland really stand out! Simply spray it on and let it dry. This will give your snowflake garland an extra pop of color and make it truly unique!
Sparkly Christmas decor is so easy to make and so beautiful!
This post shows you how to make a DIY Christmas garland; however, you can also get creative and make different types of glitter Christmas decor: ornaments for your Christmas tree, a festive wreath, or awesome filler for a dough bowl or tiered tray.
Why You’ll Love Craft & Hobby Color Shift Spray Paint:
- Imitates the look of glitter without the mess
- Requires no sealer
- Comes in six gorgeous, ready-to-sparkle colors (iridescent shimmer, green copper, turquoise waters, blue galaxy, purple sunrise, and champagne pink)
Once you start using this Rustoleum Imagine Color Shift spray you'll be hooked and able to create stunning holiday decorations that will add some sparkle and cheer to your home. So get crafting, and enjoy your glittery Christmas decor!
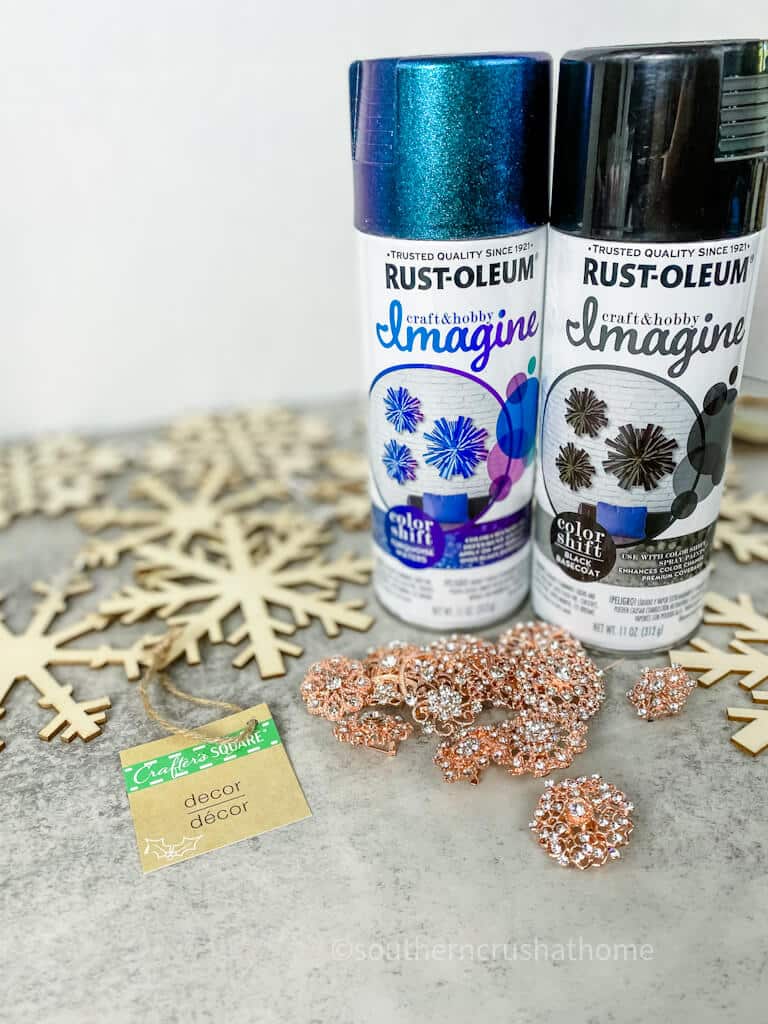
Supplies Needed to Make a Snowflake Garland
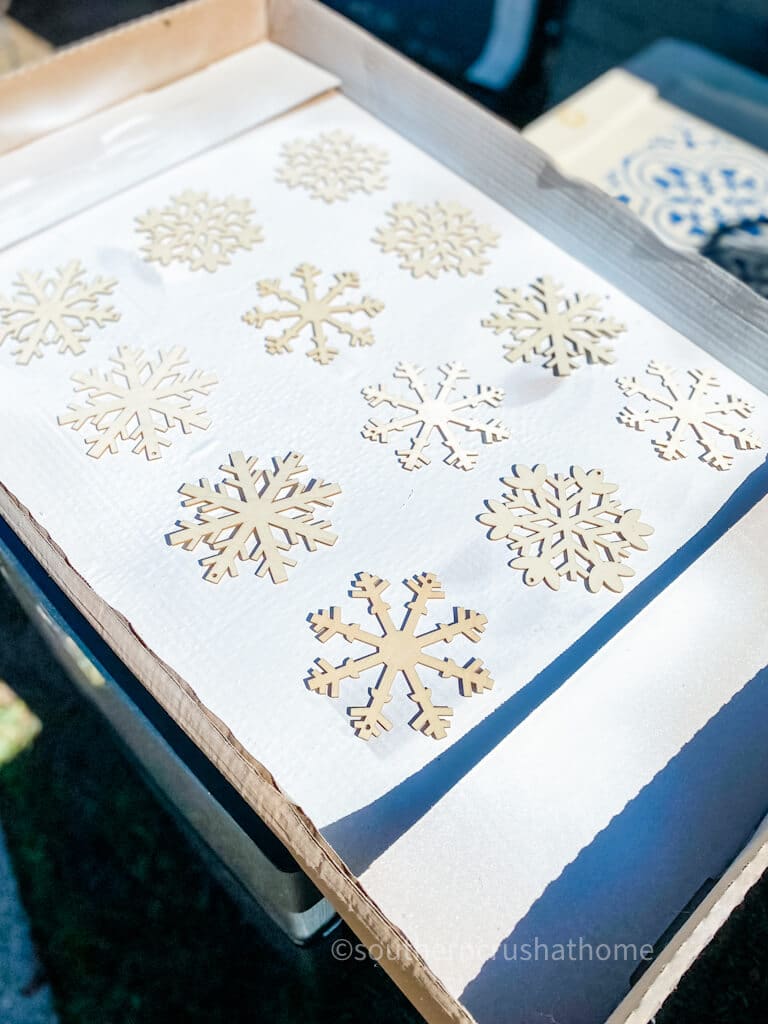
- 3 Strands of wooden snowflakes (I got mine at Dollar Tree)
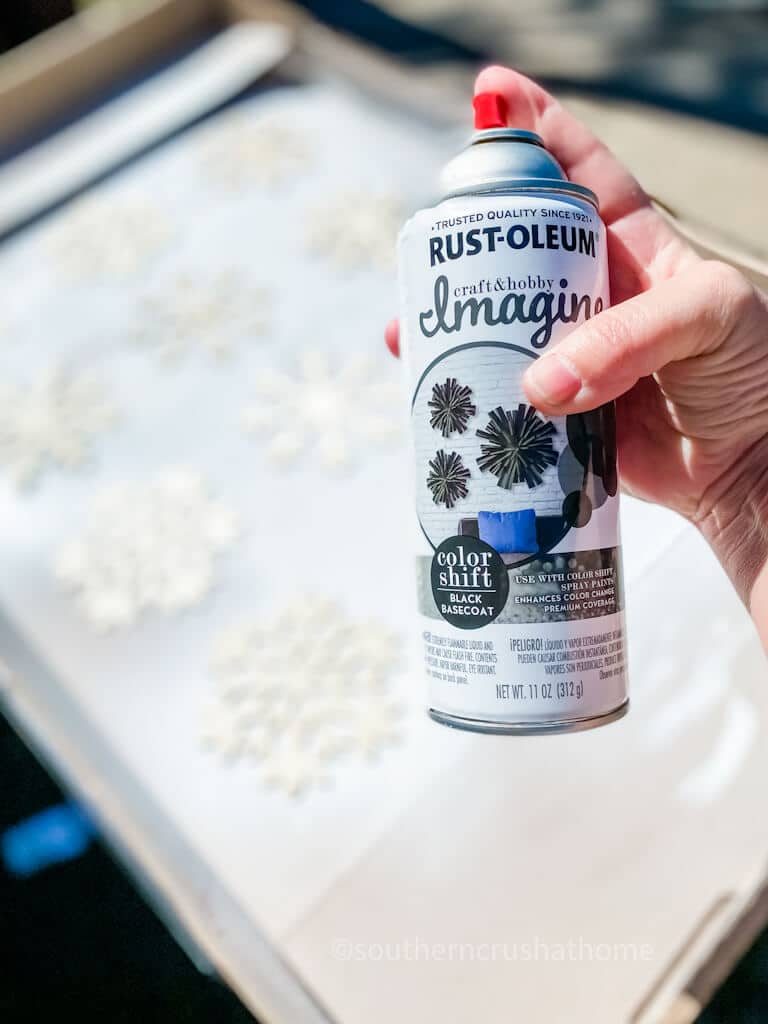
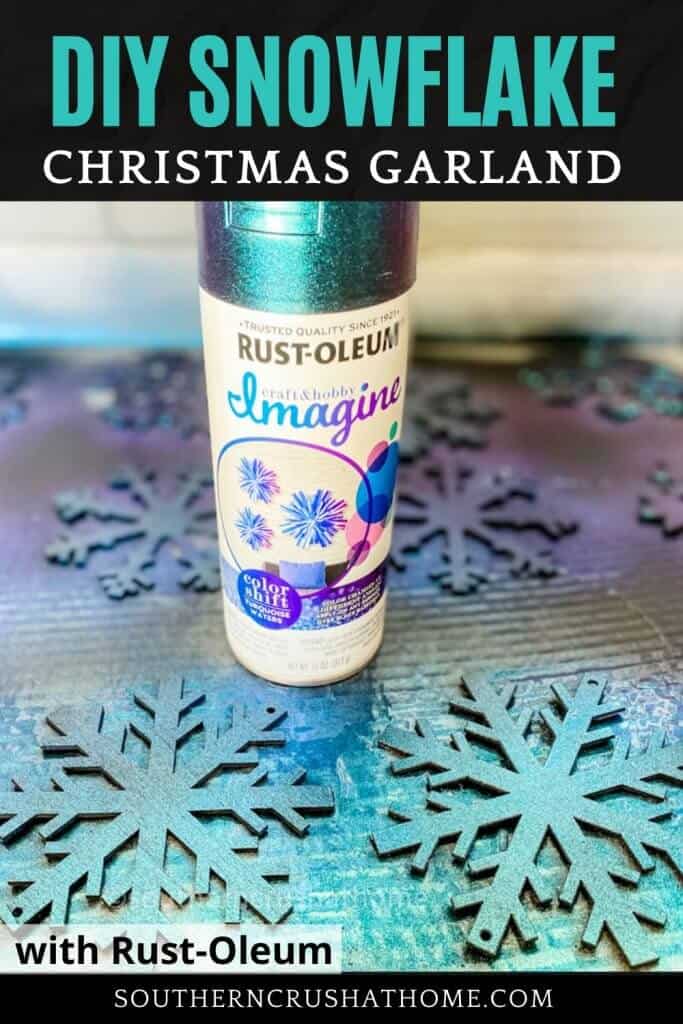
- Rustoleum Imagine Color Shift spray paint in color Turquoise Waters
- Rustoleum Imagine Color Shift spray paint in color Black Basecoat
- Scrap cardboard box to catch overspray
- Scissors
- Jute twine
- Bling embellishments
- Hot glue
Where to Buy Rust-Oleum Color Shift Spray Paint
- Menards
- Joann
- Do-It-Best
Watch a Step by Step Video Tutorial
If you prefer to see a video tutorial, watch my YouTube video below.
How to Make a DIY Christmas Garland
Use scissors to cut off any tags from snowflakes.
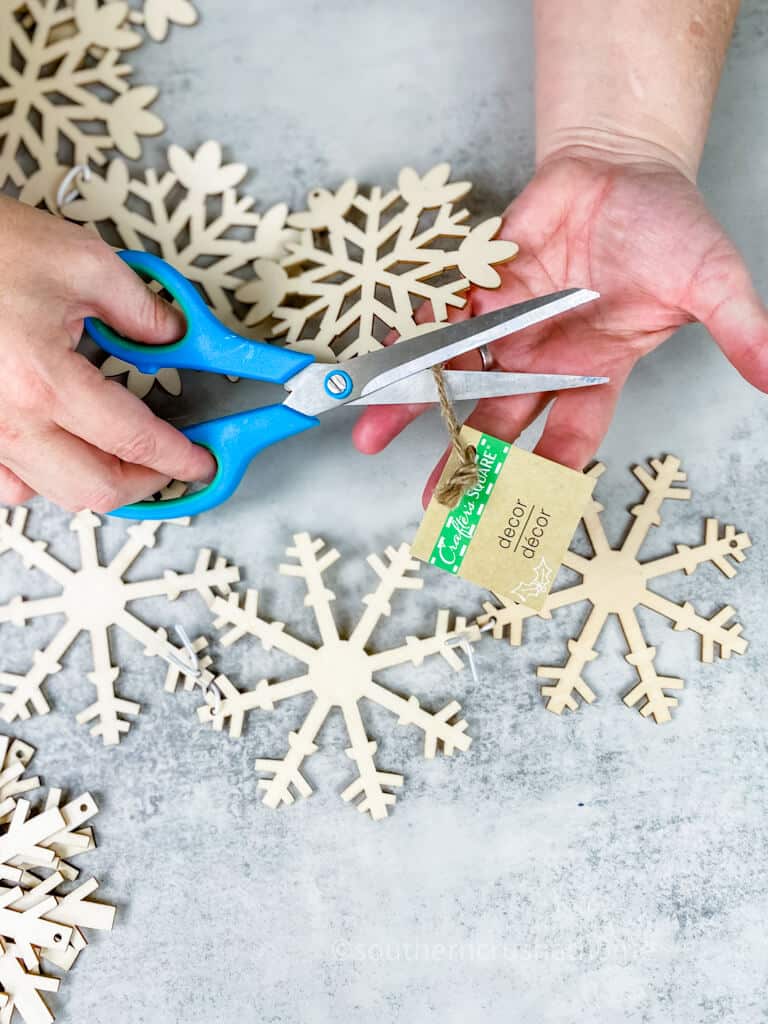
Next, remove the tiny rubberbands that tie the snowflakes together on the strand.

Arrange snowflakes in a scrap piece of cardboard for spray painting. Take the project outside or to a well-ventilated area for spraying.
Using even strokes approximately 12-14″ away from the project, apply a coat of Rustoleum Imagine Color Shift black basecoat spray paint to the snowflakes. Allow to dry, flip snowflakes over and repeat on the opposite side of the snowflakes.
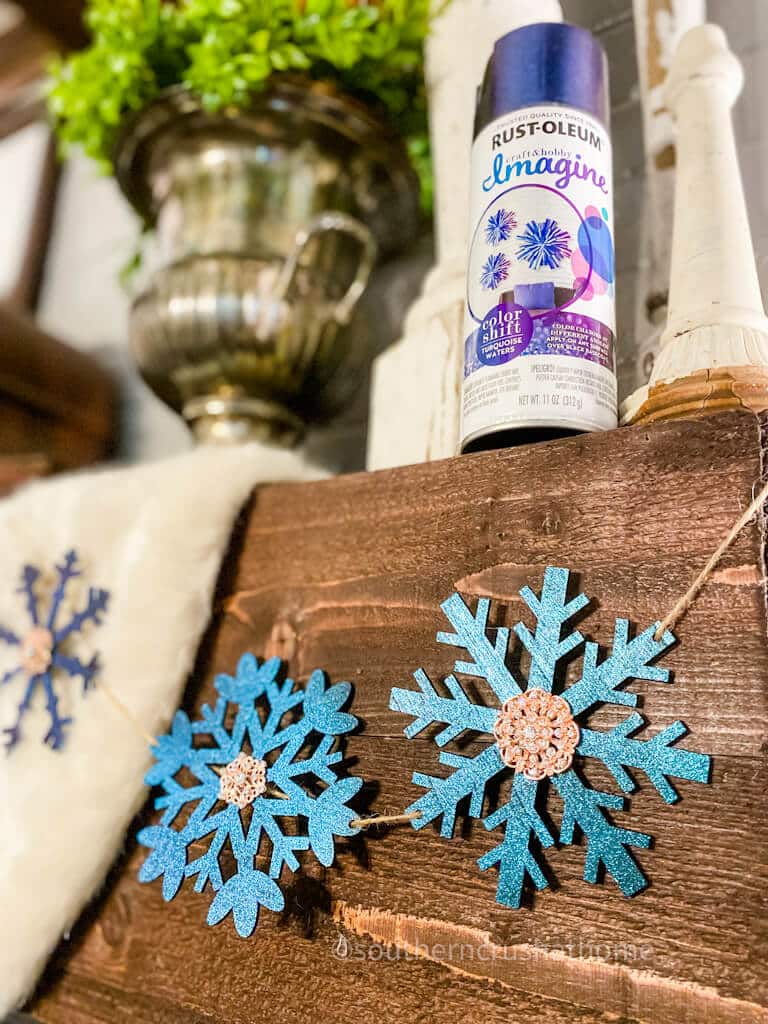
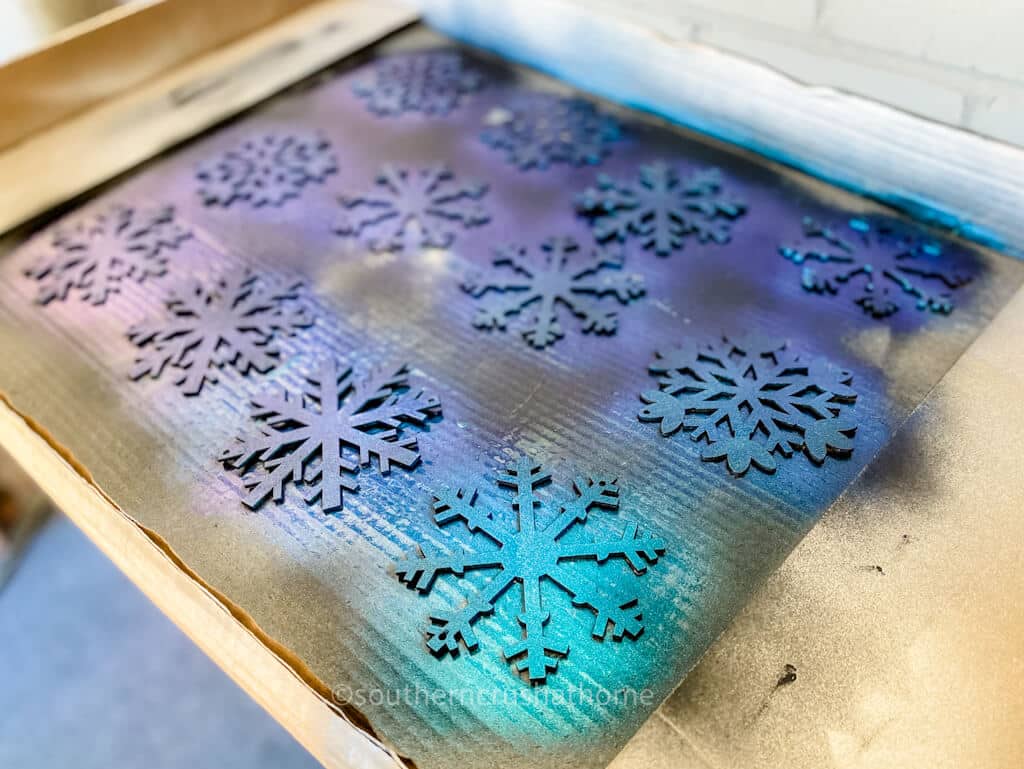
Once the base coat is dry, apply a coat of the Rustoleum Imagine Color Shift Turquoise Waters spray paint to one side of the snowflakes.

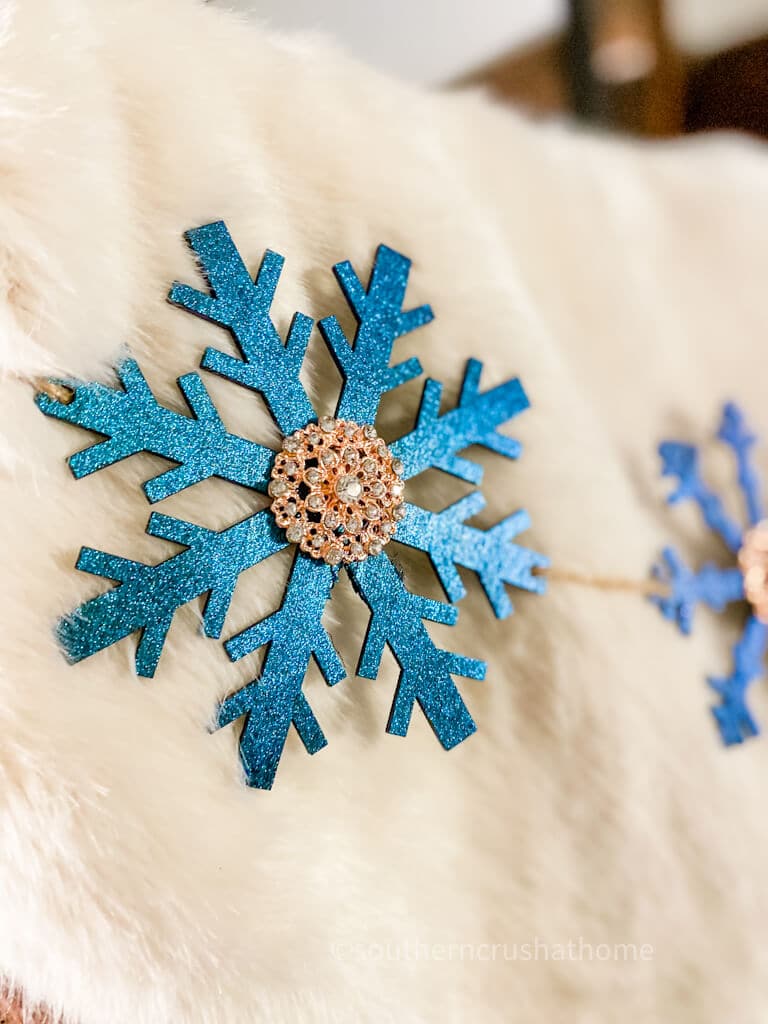
This colored side will be the front of the snowflakes. Isn't it beautiful?
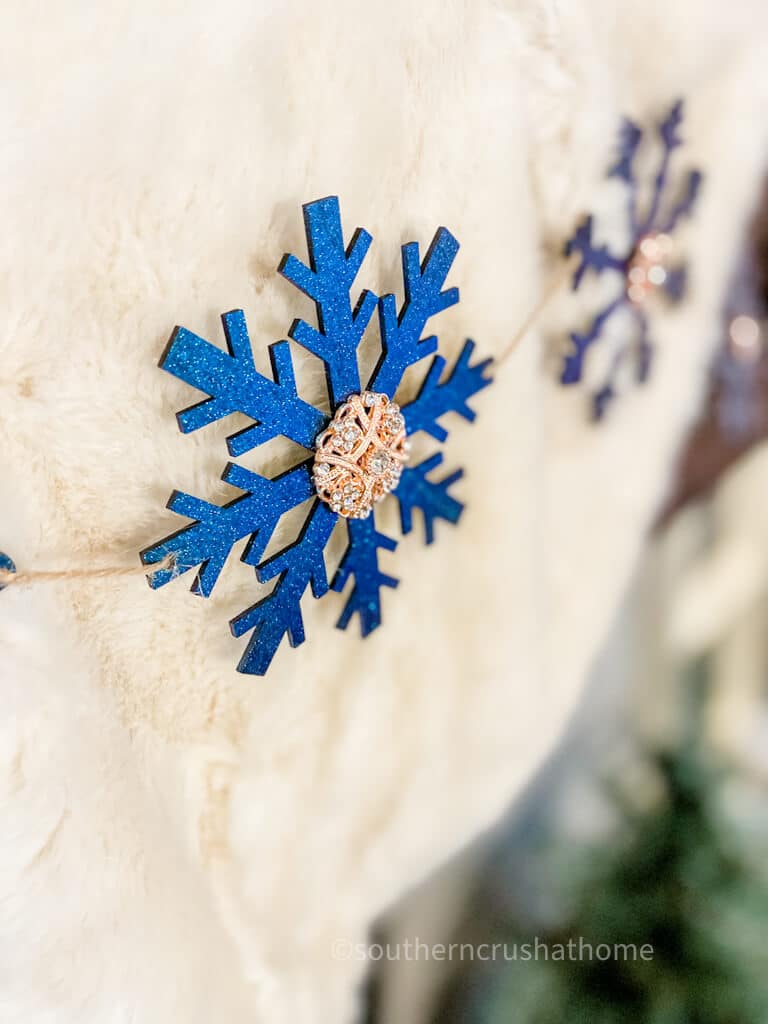
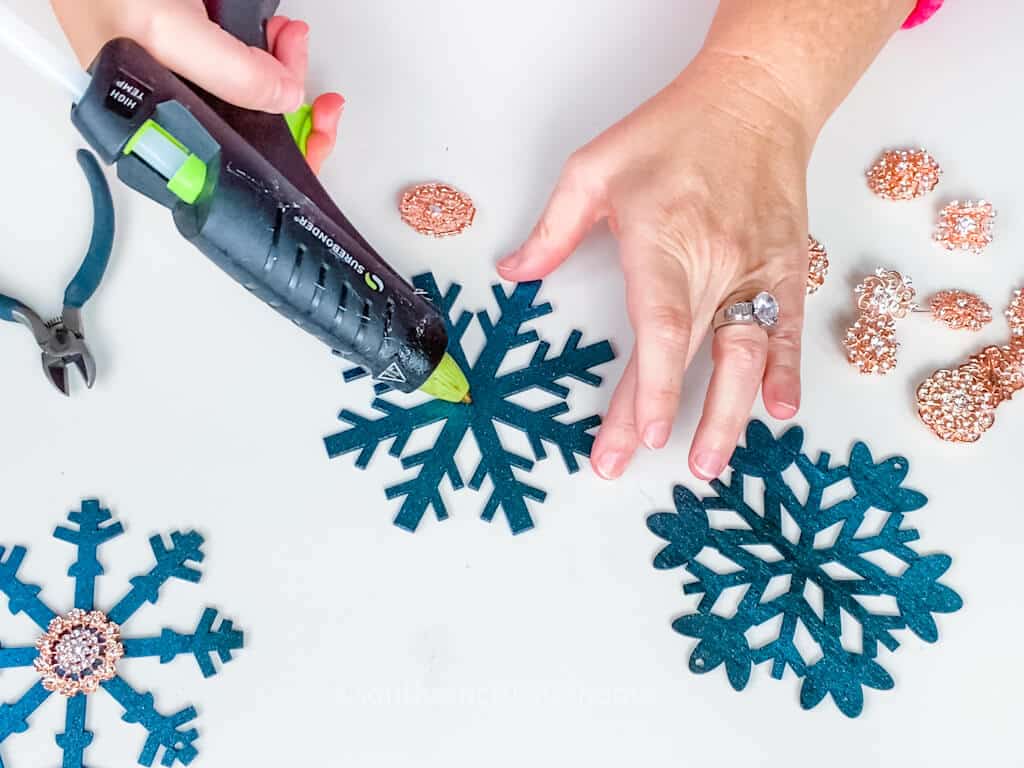
Once the snowflakes are completely dry, bring inside and hot glue jewels or bling onto the center of each snowflake to kick them up a notch! I used these pretty rose gold colored rhinestone brooches by first removing the pin from the back of each one.
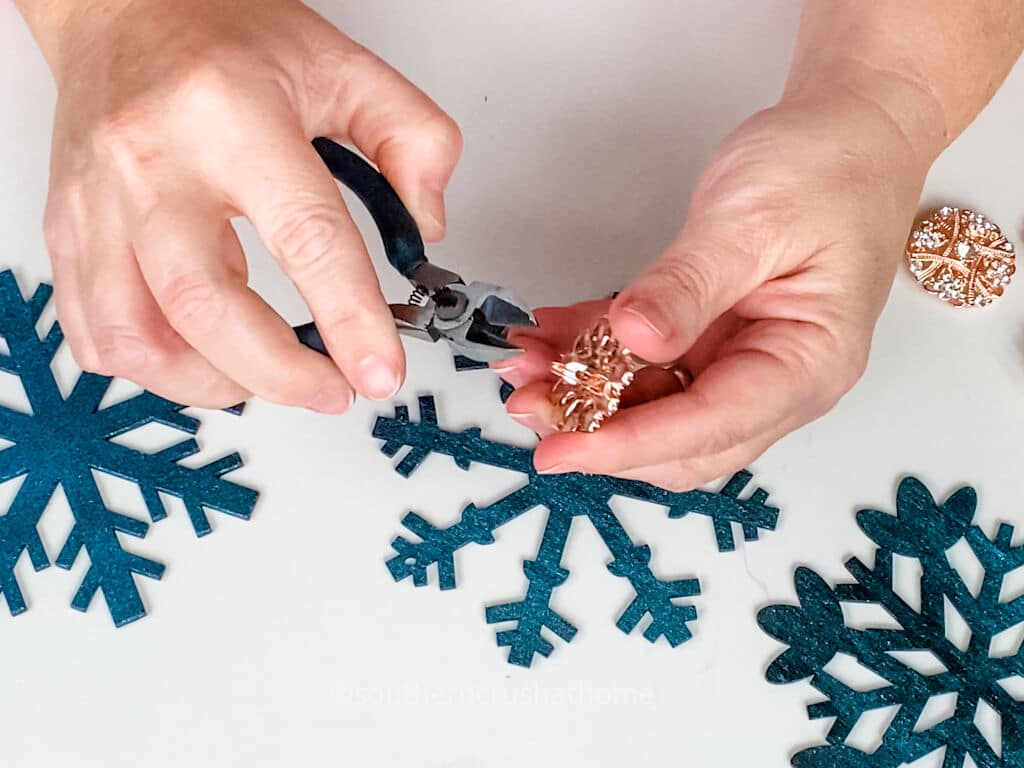
Next, I adhered them by using just a small drop of hot glue to the center of each snowflake.
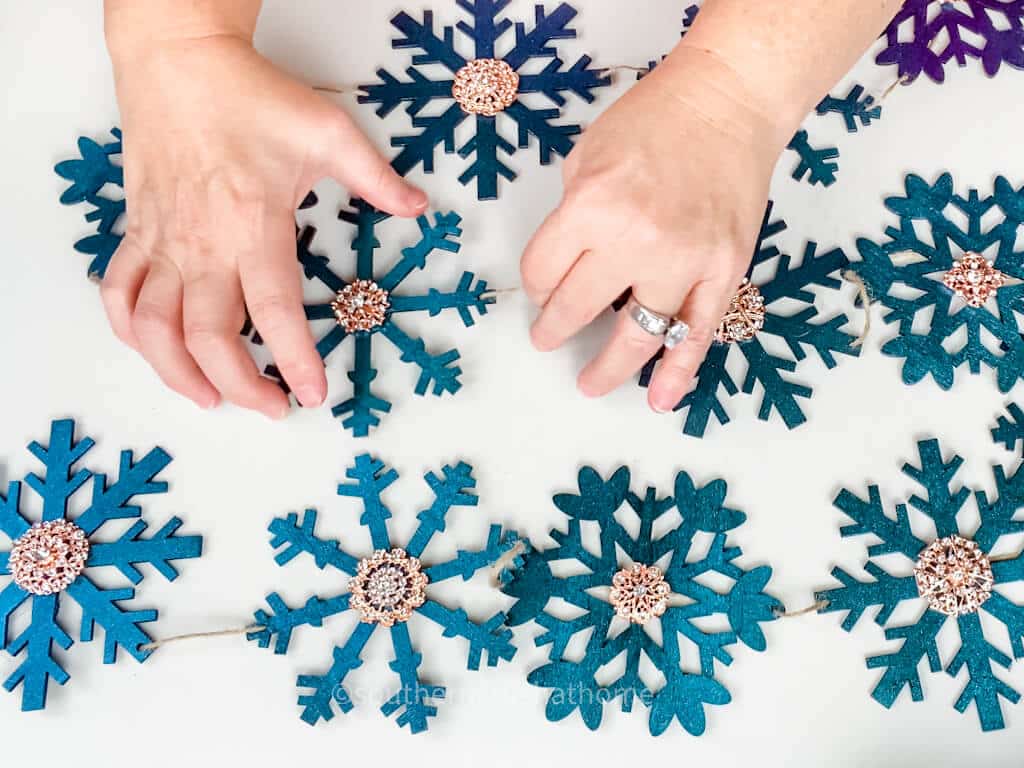
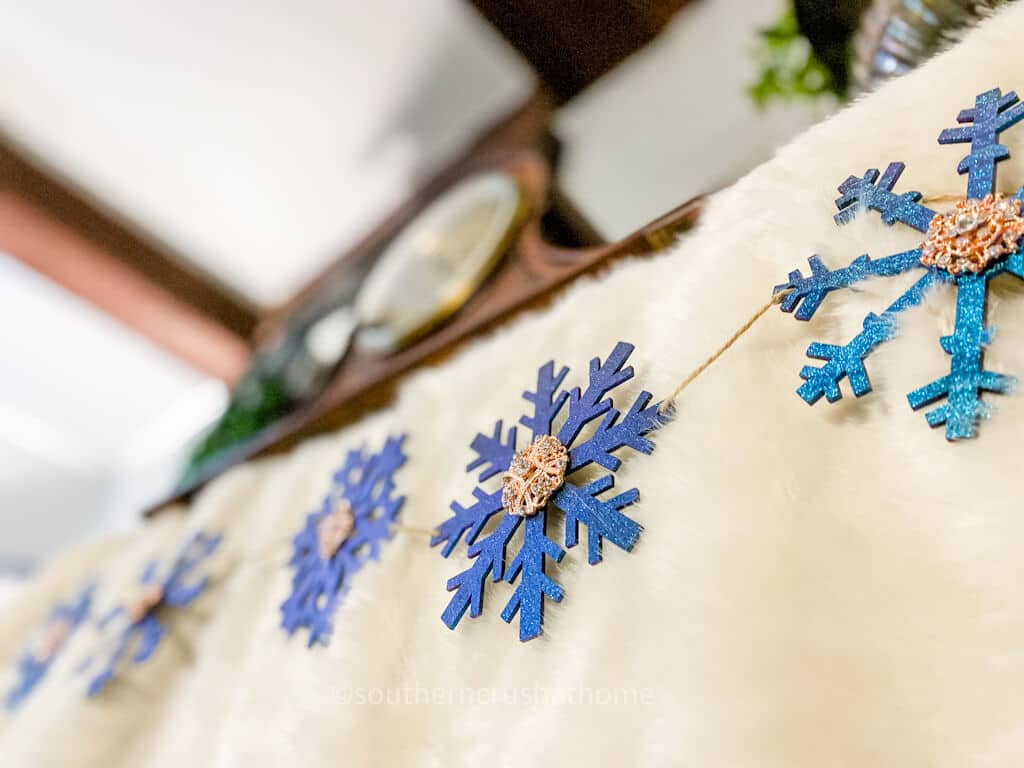
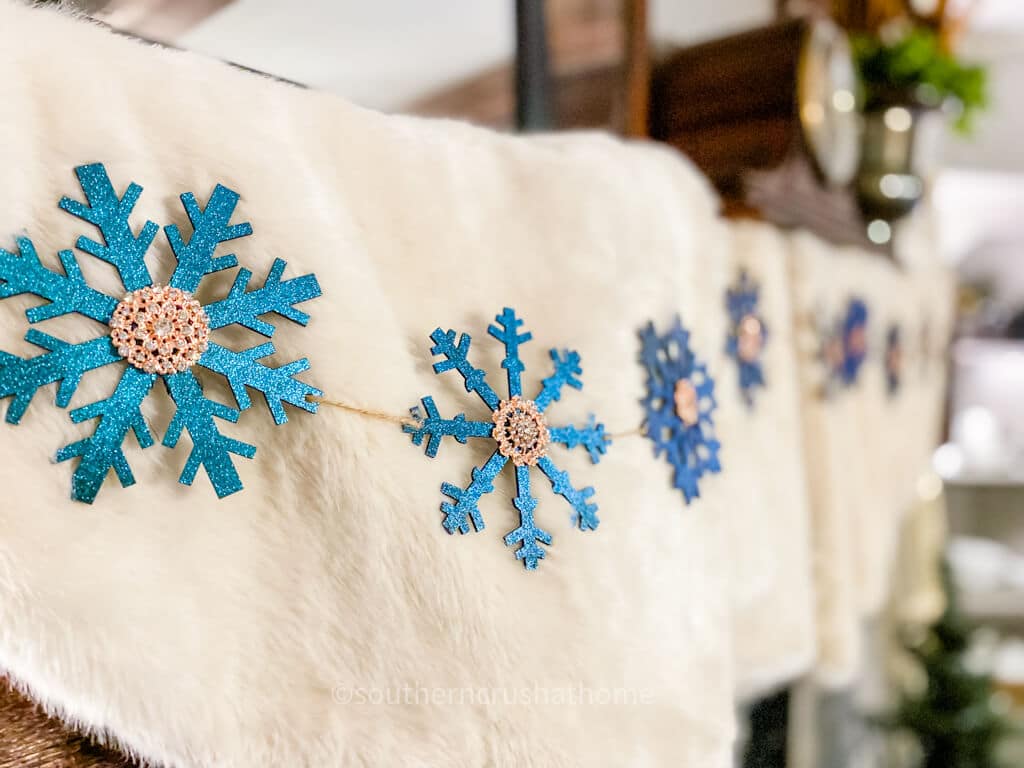
Finally, reattach each snowflake to each other to create the garland using some simple jute twine.
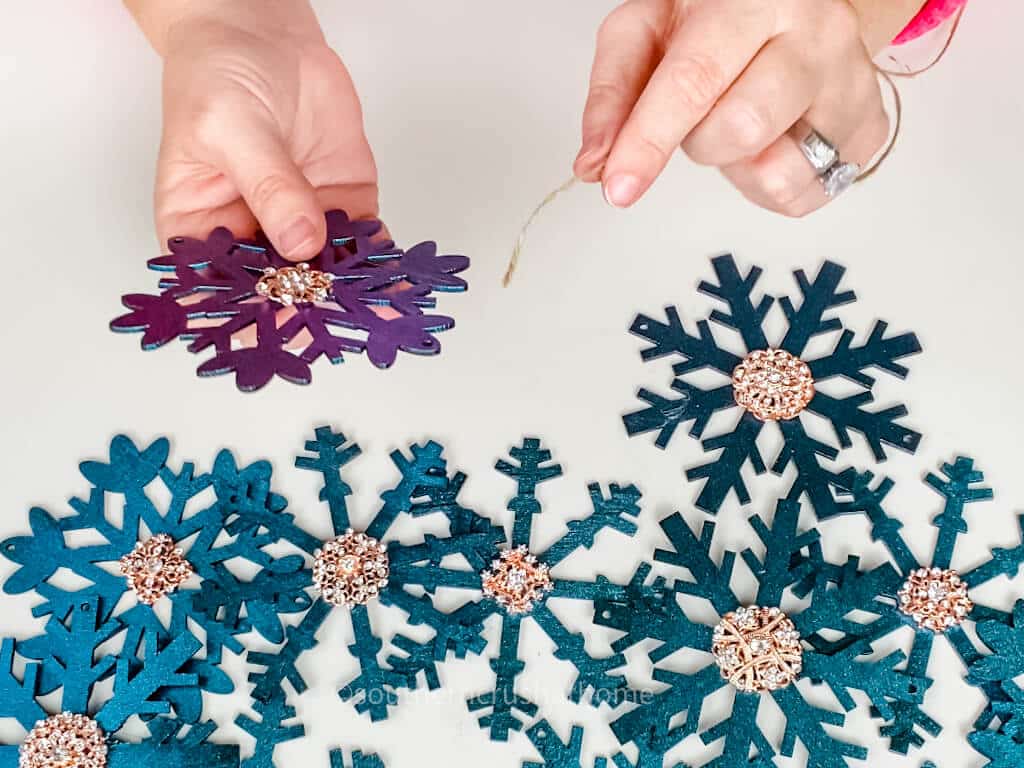
Be sure to untangle them and make sure the space between each snowflake is similar in length adjusting them as seen below.
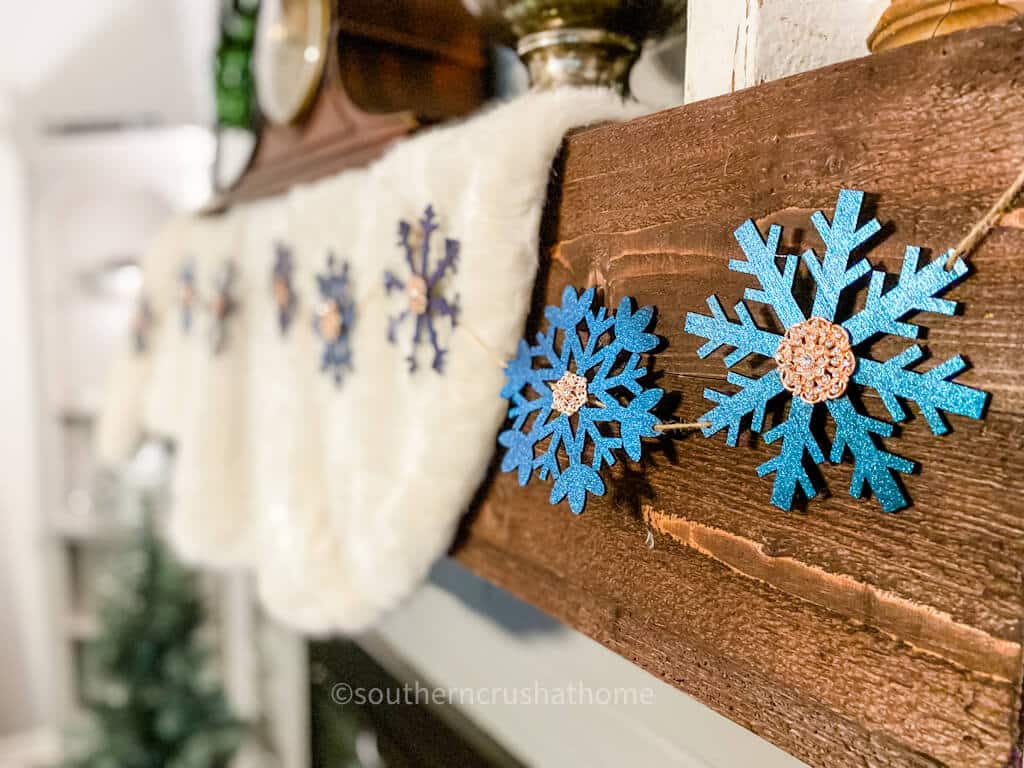
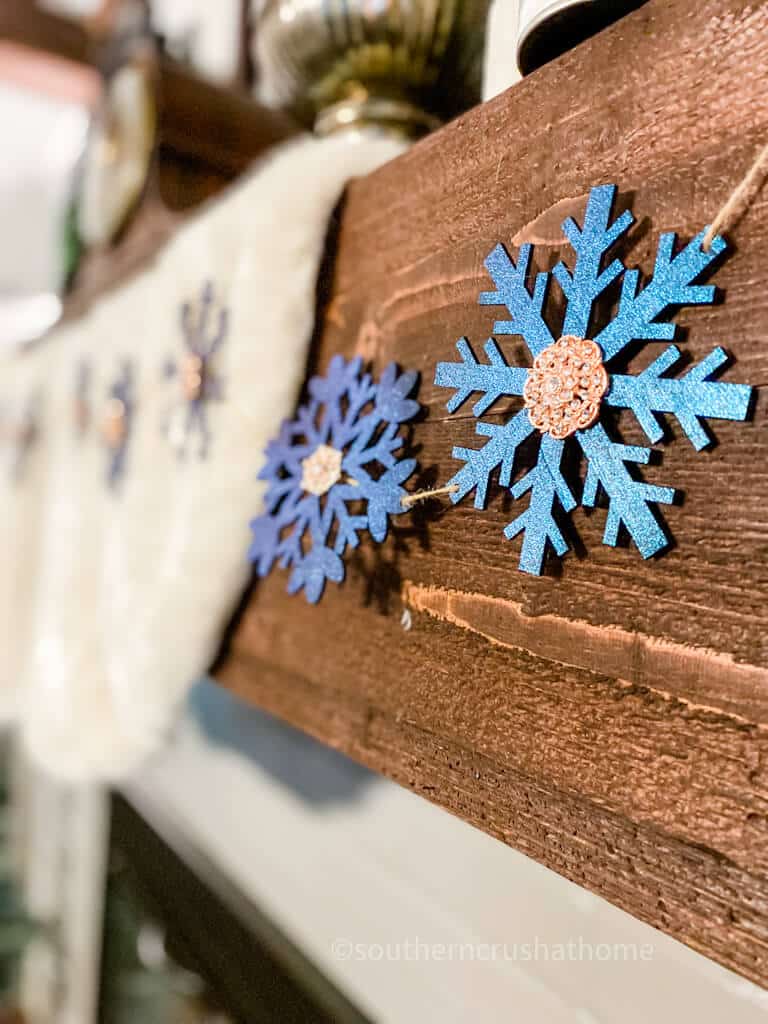
Now, it's time to hang up your snowflakes! You can use them to decorate a mantel or doorway or use them to create a winter wonderland scene in a window. Wherever you choose to put them, your snowflakes will add some charming flair to your home!
Aren't the colors in the color shift product simply amazing?
The snowflakes literally change different colors as you move around the room.
It feels and looks like Glam Christmas Magic! It's so easy, will you try this out for your next DIY?
Get creative with this easy DIY garland and make it your own! There are so many ways that you can customize it to fit your own personal style. Have fun and enjoy!
How to Style a Mantle with a Christmas Garland
One of the best ways to style a mantle is with a garland. A garland can add color, texture, and holiday cheer to any space.
Here are a few tips on how I styled my mantle with this DIY Christmas snowflake garland:
-I started by draping a faux fur Christmas tree skirt across the mantel. You can let it hang down a bit in the center or keep it more contained by tucking the ends underneath something heavy on top.
-Next, I strung the snowflake garland across the mantle in a swooping fashion using the jute twine. You may even choose to add a holiday-themed ribbon.
-Finally, take a step back and assess the overall look. Make sure that the garland is symmetrical if that is the look you're going for and that there is a good balance of decorations. Then, enjoy your beautiful holiday mantle!
Short but Fascinating History of Snowflakes
It wasn't until the 19th century that snowflakes were truly appreciated for their beauty. In 1885, Wilson Bentley, a farmer from Vermont, took the first photographs of snowflakes. He used a microscope to capture the delicate details of the snowflakes, and his images helped people to see the beauty of these tiny ice crystals.
Bentley's work helped to popularize the study of snowflakes, and today, there are many people who enjoy studying and photographing these delicate ice crystals.
Be sure to PIN this one for later!
More Christmas Garlands
If you like, you can add a traditional garland to the mix on your mantle. I've gathered the 21 Best Artificial Christmas Garlands for you all in one spot! Put on your creative hat and think of ways to incorporate a bit of this sparkly project into your holiday decor this year! Be sure to come back and share it with me below!
Speaking of sharing…

How to Make a DIY Christmas Garland with Dollar Tree Snowflakes
Equipment
- Pair of Scissors
Materials
- 3 Strands of wooden snowflakes
- 1 Rustoleum Imagine Color Shift spray paint in the black base color
- 1 Rustoleum Imagine Color Shift spray paint in the color Turquoise Waters
- Scrap cardboard box
- Jute twine
- Bling Embellishments (optional)
Instructions
- Start by removing the tiny rubberbands that tie the snowflakes together on the strand.
- Next use scissors to cut off any tags from snowflakes.
- Arrange snowflakes in a scrap piece of cardboard for spray painting. Take the project outside or to a well-ventilated area for spraying.
- Using even strokes approximately 12-14″ away from the project, apply a coat of Rustoleum Imagine Color Shift black base spray paint to the snowflakes. Allow to dry, flip snowflakes over and repeat on the opposite side of the snowflakes.
- Once the base coat is dry, apply a coat of the Rustoleum Imagine Color Shift Turquoise Waters spray paint to one side of the snowflakes.
- This colored side will be the front of the snowflakes. Isn't it beautiful?
- Once the snowflakes are completely dry, bring inside and hot glue jewels or bling onto the center of each snowflake to kick them up a notch! I used these pretty rose gold colored rhinestones.
- Finally, reattach each snowflake to each other to create the garland using some simple jute twine.