How to Add Stencil Art on a Microwave
Adding a cute design to my microwave is hands down my favorite way to decorate using stencil art! Not only is it super easy to do, clean-up is a breeze.
Changing out the stencil design each season is a fun way to add some whimsy to my home without breaking the bank! See how to do it yourself with the easy instructions below.
PIN this for later!
If you love stenciling as much as I do, you're going to want to check out the monthly craft club where each month you are sent a surface, a new stencil art design, and paste to use. Find out more here below.
This blog post contains affiliate links. The opinions are wholly my own from my own experience. I may earn a small commission from clicks through to the websites that end in a purchase.
Supplies Needed to Stencil Your Microwave
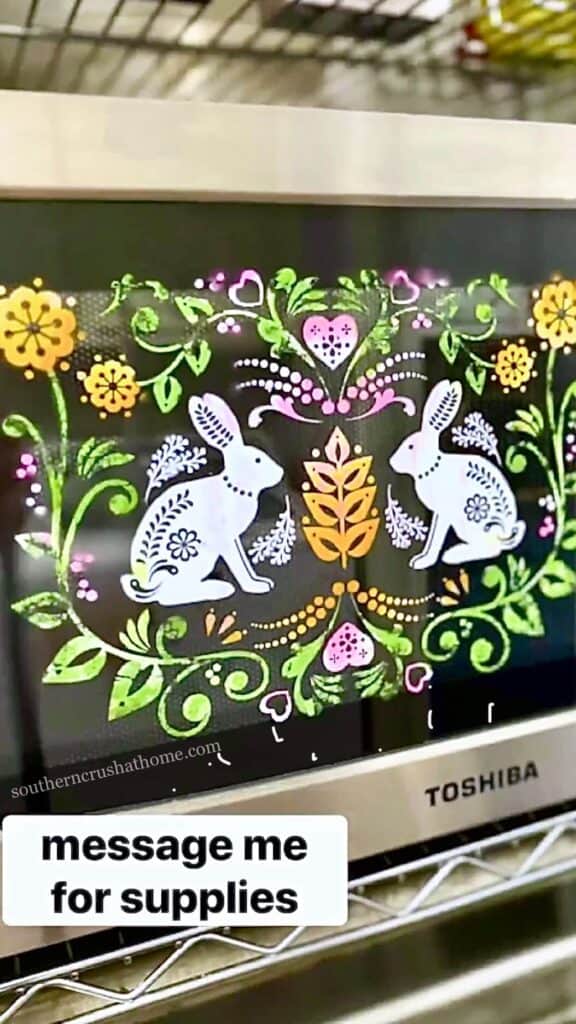
Spring Microwave Stencil Art Design
- STENCILS
- https://shop.bydesign.com/magnoliadesignco/#/shop/detail/ST-FLOWERPOWERPATTER/from/165557
- https://shop.magnoliadesignco.com/#/shop/detail/ST-SPRINGMINIS2023/from/165557
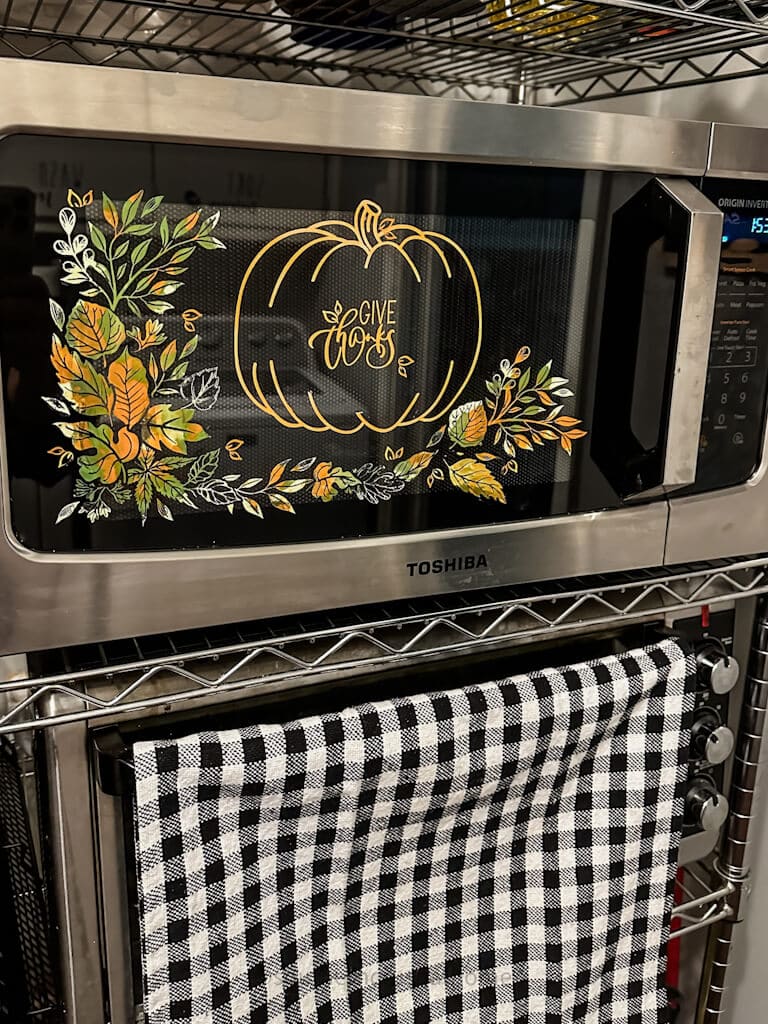
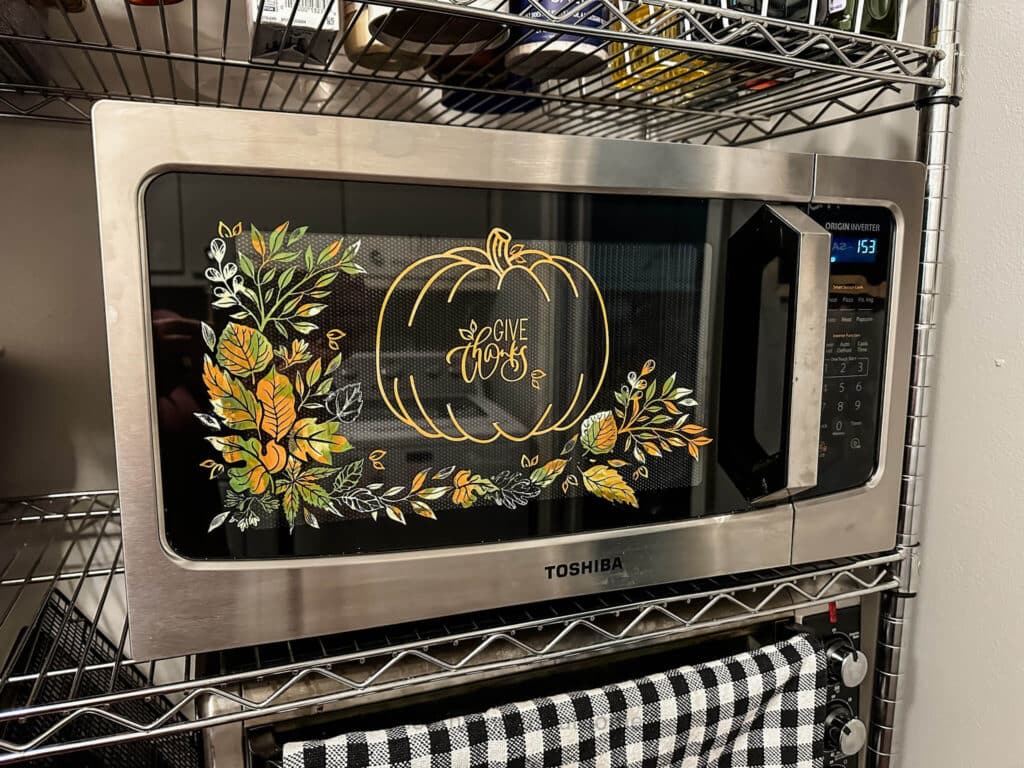
FALL MICROWAVE STENCIL ART DESIGN
- STENCILS
- https://shop.magnoliadesignco.com/#/shop/detail/ST-PUMPKINFACES/from/165557
- https://shop.magnoliadesignco.com/#/shop/detail/ST-HELLOFALL/from/165557
- https://shop.magnoliadesignco.com/#/shop/detail/ST-FALLMINIS2022/from/165557
- CHALK PASTES
- https://shop.magnoliadesignco.com/#/shop/detail/C-PEACHYKEEN/from/165557
- https://shop.magnoliadesignco.com/#/shop/detail/C-MINTGREEN/from/165557
- https://shop.magnoliadesignco.com/#/shop/detail/C-MAGNOLIAGREEN2/from/165557
- https://shop.magnoliadesignco.com/#/shop/detail/C-CLEMENTINE/from/165557
Step-by-Step Instructions for Adding Stencil Art to a Microwave
Once you have all of your supplies ready, the process of adding stencil art to your microwave is a simple one. I've added each step below for your convenience.
Pro Tip: If stenciling on glass or other hard surface, be sure to “fuzz” your new stencil first to remove some of the extra stickiness! This can be done by sticking and peeling up on a tacky towel a few times. This helps avoid stretching the stencil when you remove it from the surface.
Step One
Choose your stencils and clean the face of your microwave to ensure a clean application. Apply the stencil in the position you desire
Pro Tip: Lay the stencil down on the surface, then gently remove bubbles by swiping with a squeegee! This will help in avoiding bleed through of the chalk paste.
Step Two
Add a small amount of chalk paste in the areas where there is a silkscreen opening on the reusable stencil.
If using more than one color, apply one at a time.
Pro Tip: Less is better! Apply a thin layer of chalk paste and only go over the surface once if possible. The more you swipe over the design, the more likely it will bleed through.
Step Three
Squeegee off any excess paste and return it to its container. Now it's time to “peel, squeal, and reveal” your new design!
Pro Tip: Peel off the stencil while your chalk paste is still wet. Don't wait for it to dry!
Step Four
Use an artist brush and water or isopropyl alcohol to remove any smudges or places where you want the paste removed.
Lastly, enjoy your new design!
Watch your family's faces as they appreciate the fun your new stencil provides each time they heat something up!
How do remove it?
You can remove it with water and a paper towel.