Reverse Crackle Pumpkin DIY Using Dollar Tree Decor
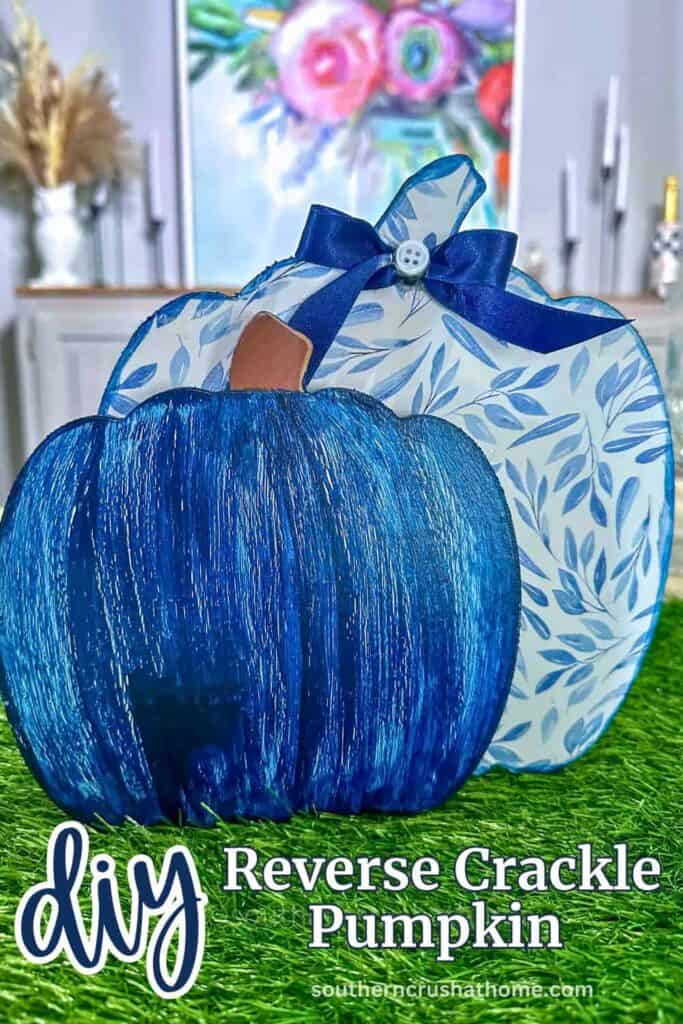
If you're ready to give your fall pumpkins a vintage twist this season, you're going to love this Reverse Crackle Pumpkin DIY. This isn’t your typical dark-base crackle—this version flips the script with a light base and dark topcoat for a totally fresh look that’s still packed with rustic charm.
And the best part? You can make it using budget-friendly Dollar Tree fall decor and a bottle of plain ol’ Elmer’s glue.
Whether you’re going for farmhouse fall vibes or just want to try a new painting technique, this crackle paint method is super fun, easy, and totally addicting once you see those little cracks form.
PIN this for later!
Supplies You’ll Need
- Dollar Tree faux pumpkin (any shape will do)
- Elmer’s glue (or Mod Podge)
- White acrylic paint (for base coat)
- Navy blue or dark acrylic paint (for top coat)
- Fine grit sandpaper
- Heat tool (or time to let dry naturally)
- Scissors
- Paintbrush
- Optional: Ribbon for bow
- Optional: Metallic marker or paint for edges
- Hot glue gun and glue sticks
YouTube Tutorial
Step-by-Step Instructions
Step 1: Prep the Pumpkin
Start by removing any decorations from your Dollar Tree pumpkin. This might include twine bows, glitter accents, or glued-on embellishments. I used sandpaper to lightly scuff off the glitter, giving me a smooth surface to work with.
This helps the paint stick better and gives a cleaner finished look.
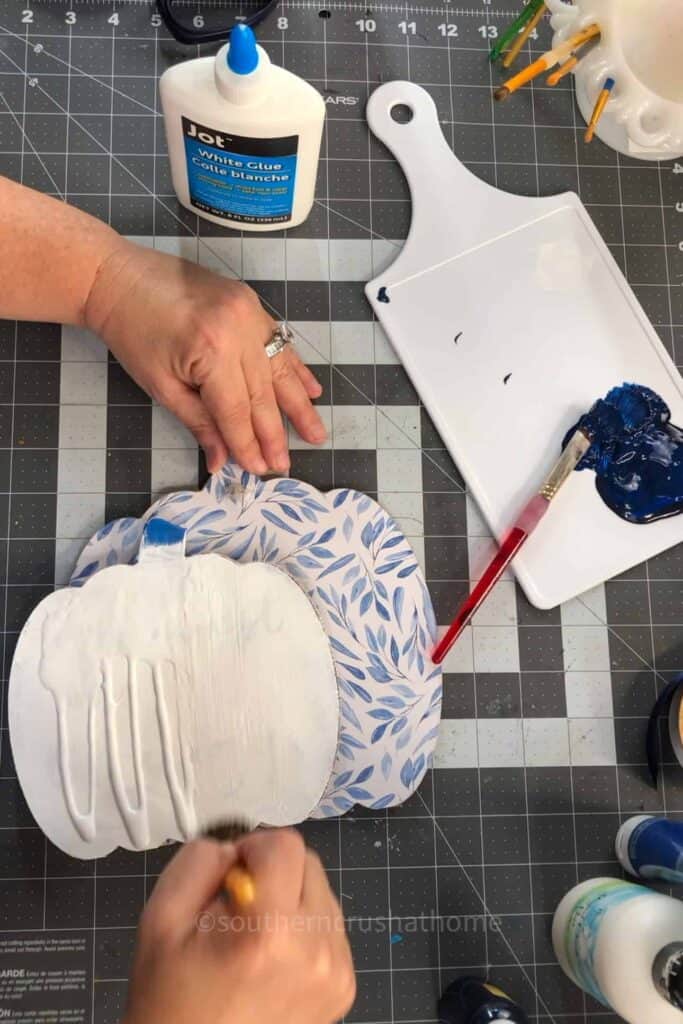
Step 2: Add Your White Base Coat
This is where the reverse crackle magic starts. Instead of using a dark base like most crackle projects, we’re starting with a white coat of acrylic paint.
Let this coat dry completely—and I mean completely. You can use a heat tool to speed things up, but it’s super important that this layer is totally dry before moving on. If it’s even a little damp, your crackle won’t work right.
Step 3: Apply the Elmer’s Glue
Now for the fun part. Grab your bottle of Elmer’s glue and brush on a nice, even layer over your dry white base. The thickness of this layer will determine the size of your cracks:
- A thin coat gives you fine, hairline cracks.
- A thicker coat creates more dramatic, chunky cracks.
Let the glue sit just until it’s tacky—not dry. If it dries too much, the top coat won’t crack.
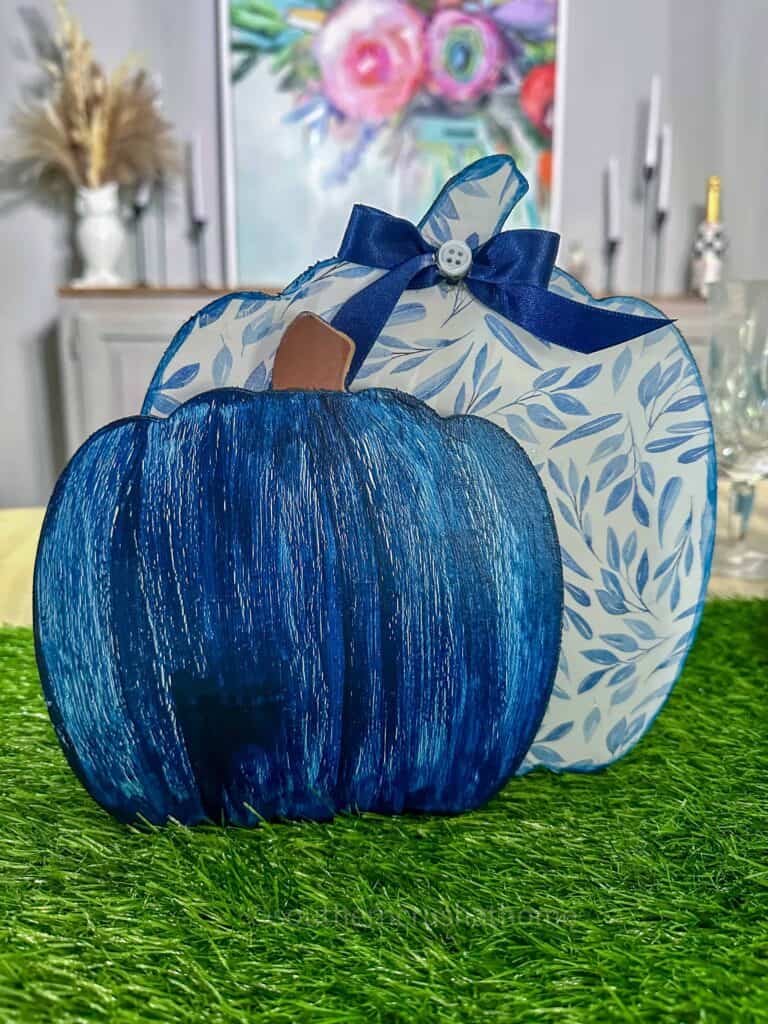
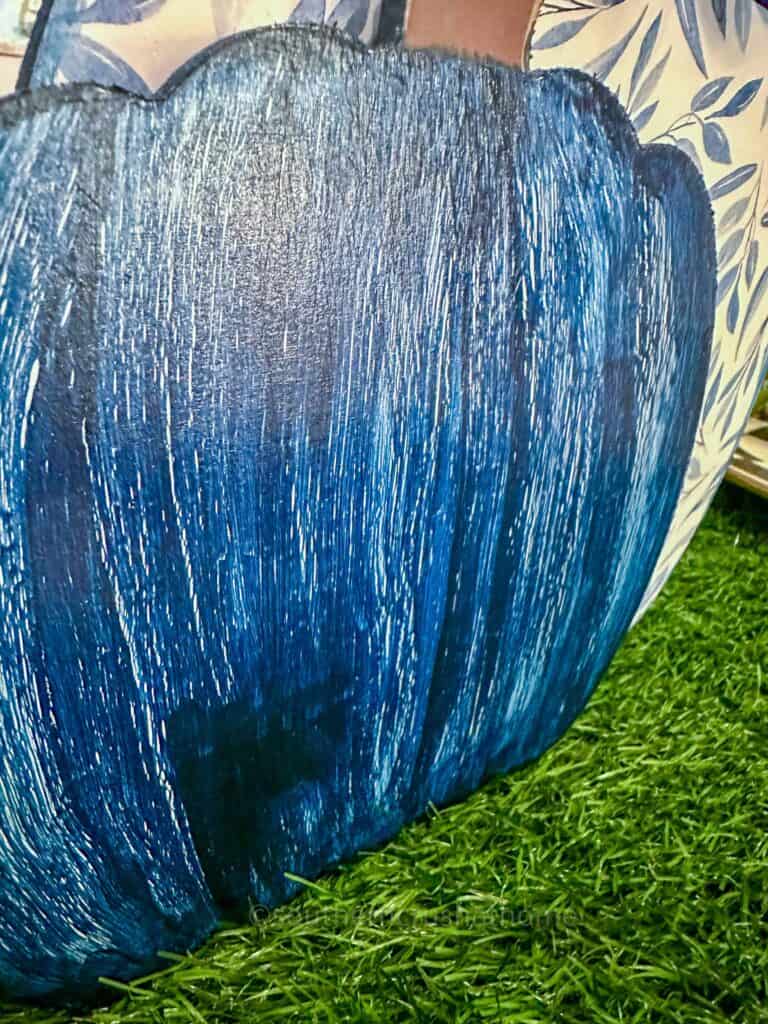
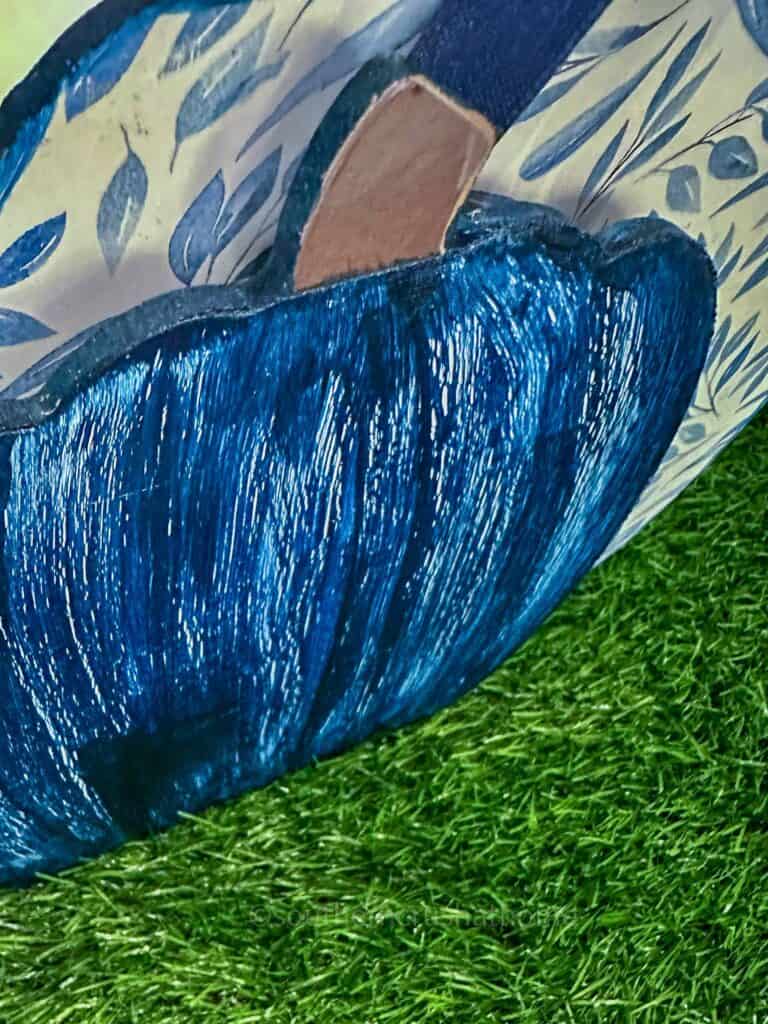
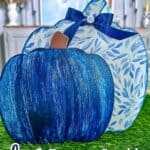
Step 4: Add the Navy Blue Topcoat
While the glue is still tacky, carefully brush on your topcoat. I used a rich navy blue acrylic paint for a bold contrast against the white. This is where the “reverse” look really comes to life.
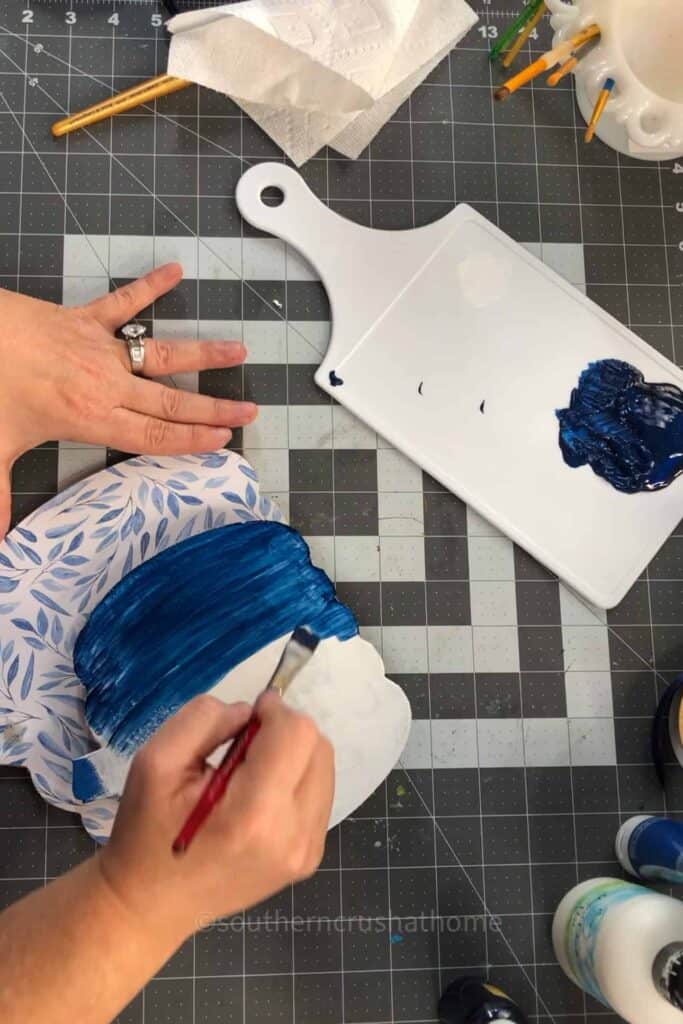
Be careful not to over-brush—just a few light strokes in one direction will do. Too much brushing can disrupt the crackling process.
You’ll start to see the cracks forming as the topcoat dries. It’s honestly the most satisfying thing to watch.
Step 5: Let It Dry
Let the pumpkin dry naturally if you can. This gives the best crackle finish. If you're in a hurry, use a heat tool on low and keep it moving to avoid bubbling or warping.
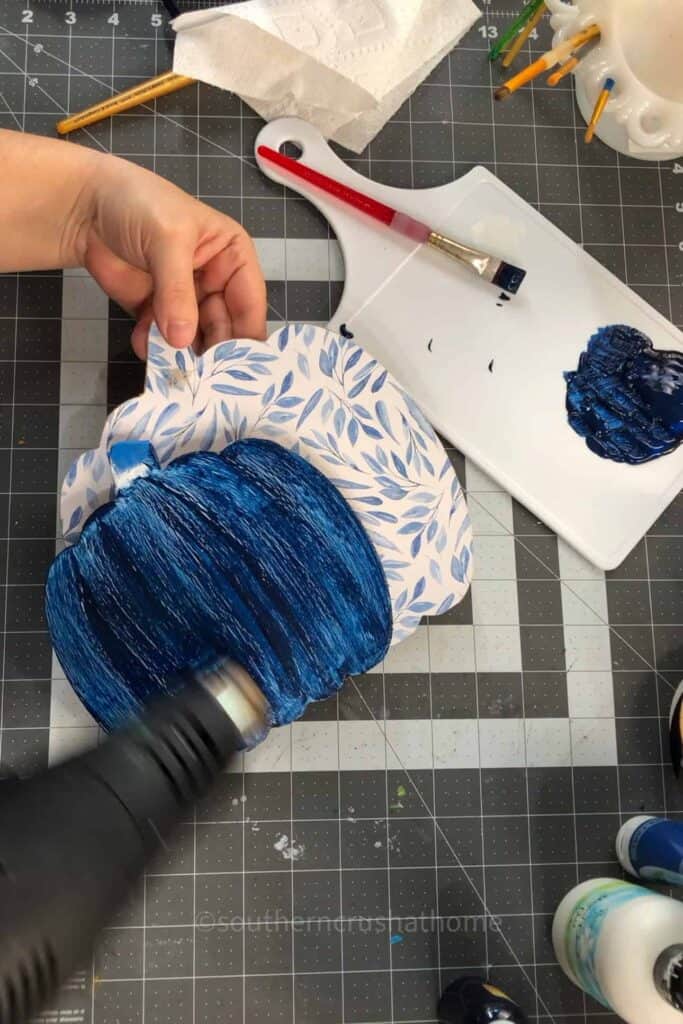
The cracks will continue to develop as the paint dries, revealing that crisp white layer underneath.
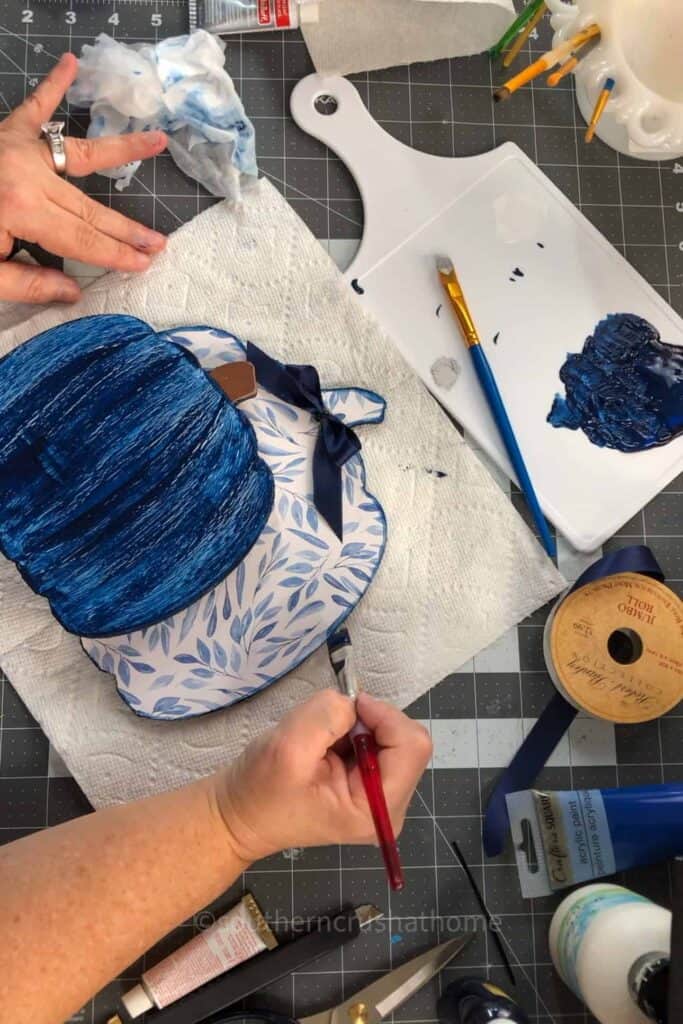
Step 6: Add Details
If you want to add some extra flair, now’s the time!
- Use a metallic marker or paint to accent the edges of your pumpkin.
- Create a cute seasonal bow from ribbon and hot glue it to the top.
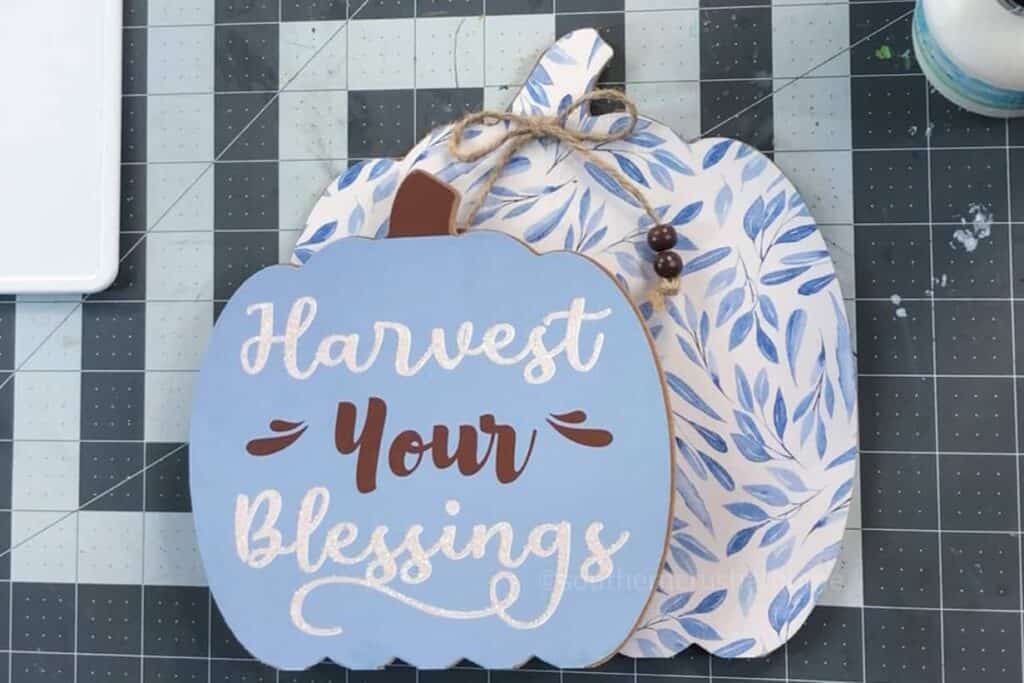
- Want more drama? Add a little faux greenery or a mini tag that says “Fall” or “Thankful.”
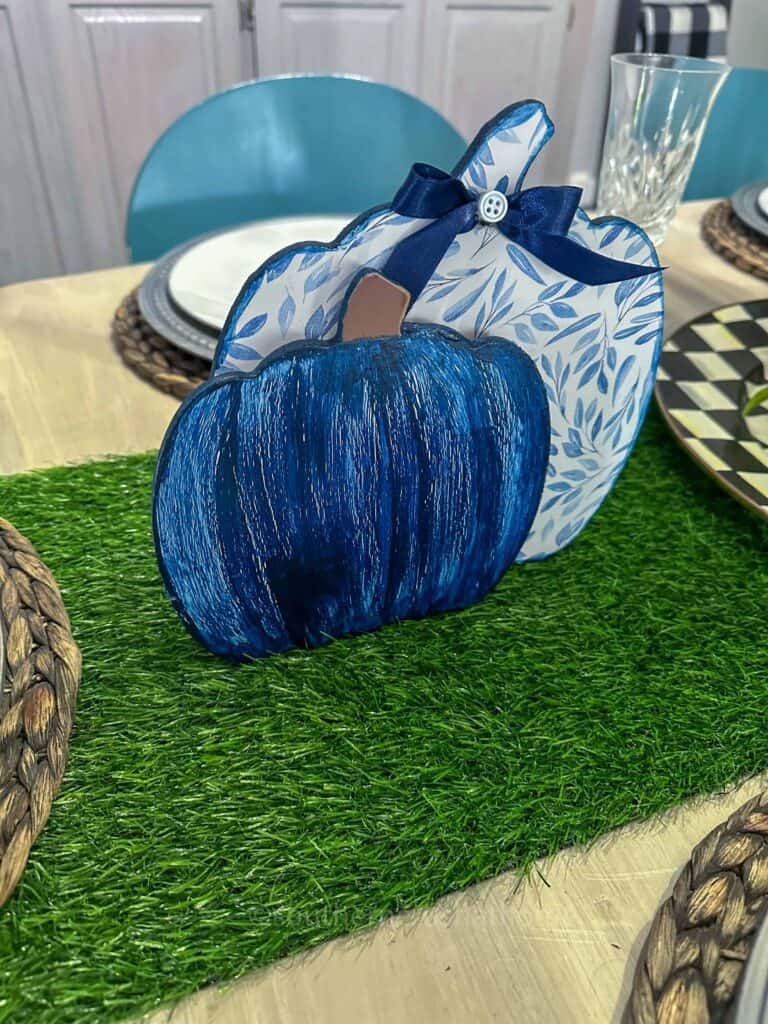
Step 7: Display Your Reverse Crackle Pumpkin
Your pumpkin is ready to show off! Here are a few fun ways to decorate with your crackle paint pumpkin:
- Add it to a fall mantel display
- Style it in a dough bowl with neutral florals
- Use it as a centerpiece on a dining or entry table
- Place it on a stack of books for a rustic bookshelf look
- Tuck it into a tiered tray with other small autumn accents
What is Crackle Paint, Anyway?
Crackle paint (also known as craquelure) is a technique used to create a weathered, timeworn look. It’s often seen in vintage furniture or antique artwork, and it gives surfaces a textured, aged appearance.
You don’t need a specialty crackle medium to achieve this look—Elmer’s glue or Mod Podge works just as well and makes this a super affordable DIY project.
Tips for a Successful Crackle Pumpkin
- Let each layer dry thoroughly—especially the base coat.
- Don’t overwork the topcoat—apply it and let it do its thing.
- Use contrasting colors—the more difference between the base and topcoat, the more dramatic your crackle will look.
- Practice on a small surface first if it’s your first time using this method.
Why I Love the Reverse Crackle Look
This twist on the traditional crackle technique feels fresh and modern, but still keeps that vintage-inspired, rustic pumpkin charm we all love for fall.
Plus, with supplies from Dollar Tree, it’s budget-friendly and so easy to pull off—even if you're not super crafty.
More Pumpkin DIY Ideas
Love this technique? You might also enjoy these other fall projects:
- Easy DIY Spackle Pumpkin
- Decoupage Pumpkin with Pressed Flowers
- Ombre Pumpkin Decor with Mylar Fringe
This Reverse Crackle Pumpkin DIY is the perfect weekend craft for fall lovers who want something a little different. It brings texture, style, and just a bit of drama to your autumn displays—and it’s easier than it looks.
I’d love to see how your pumpkins turn out! Share your version on social and tag me so I can cheer you on.
Happy Fall, and happy crafting!
Reverse Crackle Pumpkin DIY Using Dollar Tree Decor
Materials
- Dollar Tree faux pumpkin any shape will do
- Elmer’s glue or Mod Podge
- White acrylic paint for base coat
- Navy blue or dark acrylic paint for top coat
- Fine grit sandpaper
- Heat tool or time to let dry naturally
- Scissors
- Paintbrush
- Optional: Ribbon for bow
- Optional: Metallic marker or paint for edges
- Hot glue gun and glue sticks
Instructions
Step 1: Prep the Pumpkin
- Start by removing any decorations from your Dollar Tree pumpkin. This might include twine bows, glitter accents, or glued-on embellishments. I used sandpaper to lightly scuff off the glitter, giving me a smooth surface to work with.
- This helps the paint stick better and gives a cleaner finished look.
Step 2: Add Your White Base Coat
- This is where the reverse crackle magic starts. Instead of using a dark base like most crackle projects, we’re starting with a white coat of acrylic paint.
- Let this coat dry completely—and I mean completely. You can use a heat tool to speed things up, but it’s super important that this layer is totally dry before moving on. If it’s even a little damp, your crackle won’t work right.
Step 3: Apply the Elmer’s Glue
- Now for the fun part. Grab your bottle of Elmer’s glue and brush on a nice, even layer over your dry white base. The thickness of this layer will determine the size of your cracks:
- A thin coat gives you fine, hairline cracks.
- A thicker coat creates more dramatic, chunky cracks.
- Let the glue sit just until it’s tacky—not dry. If it dries too much, the top coat won’t crack.
Step 4: Add the Navy Blue Topcoat
- While the glue is still tacky, carefully brush on your topcoat. I used a rich navy blue acrylic paint for a bold contrast against the white. This is where the “reverse” look really comes to life.
- Be careful not to over-brush—just a few light strokes in one direction will do. Too much brushing can disrupt the crackling process.
- You’ll start to see the cracks forming as the topcoat dries. It’s honestly the most satisfying thing to watch.
Step 5: Let it Dry
- Let the pumpkin dry naturally if you can. This gives the best crackle finish. If you're in a hurry, use a heat tool on low and keep it moving to avoid bubbling or warping.
- The cracks will continue to develop as the paint dries, revealing that crisp white layer underneath.
Step 6: Add Details
- If you want to add some extra flair, now’s the time!
- Use a metallic marker or paint to accent the edges of your pumpkin.
- Create a cute seasonal bow from ribbon and hot glue it to the top.
- Want more drama? Add a little faux greenery or a mini tag that says “Fall” or “Thankful.”