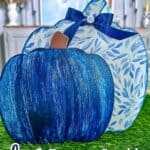
Reverse Crackle Pumpkin DIY Using Dollar Tree Decor
If you're ready to give your fall pumpkins a vintage twist this season, you're going to love this Reverse Crackle Pumpkin DIY. This isn’t your typical dark-base crackle—this version flips the script with a light base and dark topcoat for a totally fresh look that’s still packed with rustic charm.
Materials
- Dollar Tree faux pumpkin any shape will do
- Elmer’s glue or Mod Podge
- White acrylic paint for base coat
- Navy blue or dark acrylic paint for top coat
- Fine grit sandpaper
- Heat tool or time to let dry naturally
- Scissors
- Paintbrush
- Optional: Ribbon for bow
- Optional: Metallic marker or paint for edges
- Hot glue gun and glue sticks
Instructions
Step 1: Prep the Pumpkin
- Start by removing any decorations from your Dollar Tree pumpkin. This might include twine bows, glitter accents, or glued-on embellishments. I used sandpaper to lightly scuff off the glitter, giving me a smooth surface to work with.
- This helps the paint stick better and gives a cleaner finished look.
Step 2: Add Your White Base Coat
- This is where the reverse crackle magic starts. Instead of using a dark base like most crackle projects, we’re starting with a white coat of acrylic paint.
- Let this coat dry completely—and I mean completely. You can use a heat tool to speed things up, but it’s super important that this layer is totally dry before moving on. If it’s even a little damp, your crackle won’t work right.
Step 3: Apply the Elmer’s Glue
- Now for the fun part. Grab your bottle of Elmer’s glue and brush on a nice, even layer over your dry white base. The thickness of this layer will determine the size of your cracks:
- A thin coat gives you fine, hairline cracks.
- A thicker coat creates more dramatic, chunky cracks.
- Let the glue sit just until it’s tacky—not dry. If it dries too much, the top coat won’t crack.
Step 4: Add the Navy Blue Topcoat
- While the glue is still tacky, carefully brush on your topcoat. I used a rich navy blue acrylic paint for a bold contrast against the white. This is where the “reverse” look really comes to life.
- Be careful not to over-brush—just a few light strokes in one direction will do. Too much brushing can disrupt the crackling process.
- You’ll start to see the cracks forming as the topcoat dries. It’s honestly the most satisfying thing to watch.
Step 5: Let it Dry
- Let the pumpkin dry naturally if you can. This gives the best crackle finish. If you're in a hurry, use a heat tool on low and keep it moving to avoid bubbling or warping.
- The cracks will continue to develop as the paint dries, revealing that crisp white layer underneath.
Step 6: Add Details
- If you want to add some extra flair, now’s the time!
- Use a metallic marker or paint to accent the edges of your pumpkin.
- Create a cute seasonal bow from ribbon and hot glue it to the top.
- Want more drama? Add a little faux greenery or a mini tag that says “Fall” or “Thankful.”
