How to Make an Easy Dollar Store Ornament Tree DIY
The holiday season is here and what better way to decorate your home than with festive and beautiful ornaments. Luckily, with this dollar store ornament tree DIY, you can create a stunning display without spending a fortune.

PIN this for later!
In this post, I’ll share with you the process of how to make your own ornament tree using a few simple materials that you can find at your local dollar store.
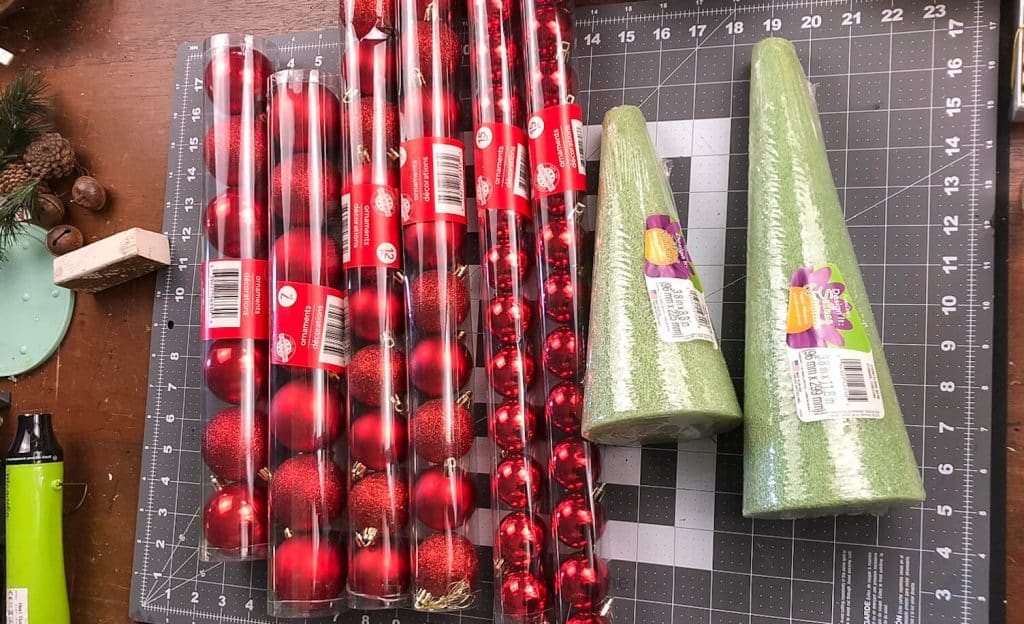
Supplies Needed
- styrofoam cone in desired size
- assorted ball-shaped ornaments in desired color(s) and sizes
- hot glue
- embellishments of your choice
- wire cutters if needed
How to Make an Easy Dollar Store Ornament Tree DIY
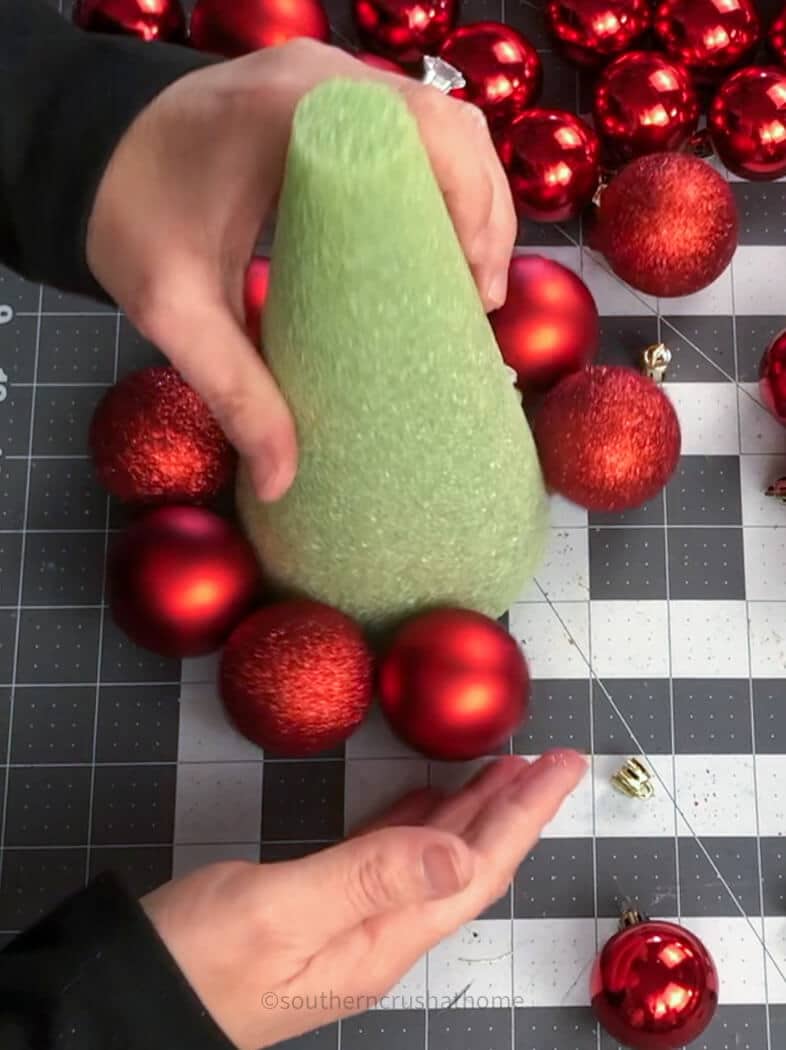
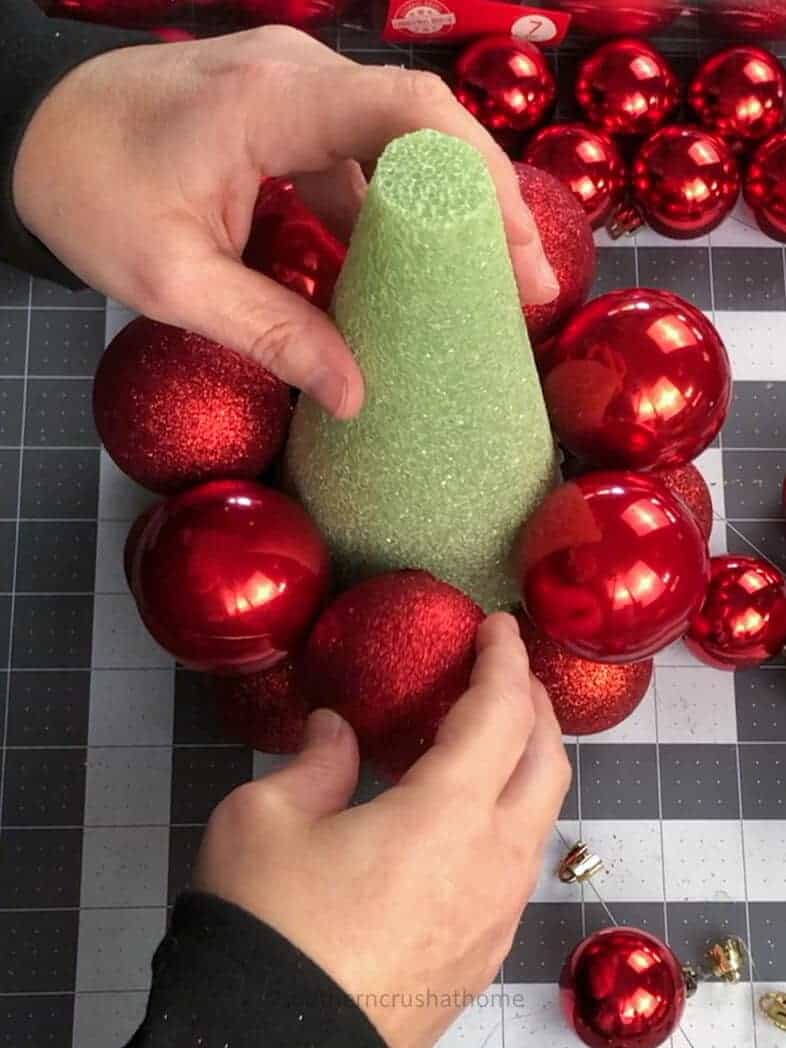
Step 1: Choosing the Ornaments
Look for ornaments in various colors, sizes, and textures to create a dynamic and festive look. I chose all red ball ornaments for a monochromatic look but in varied tones including glittered!
Step 2: Glue the Ornaments
Start at the bottom of the cone and work your way up. Use hot glue to attach each ornament to the foam cone. Make sure to glue the ornaments in tightly to create a more dense tree.
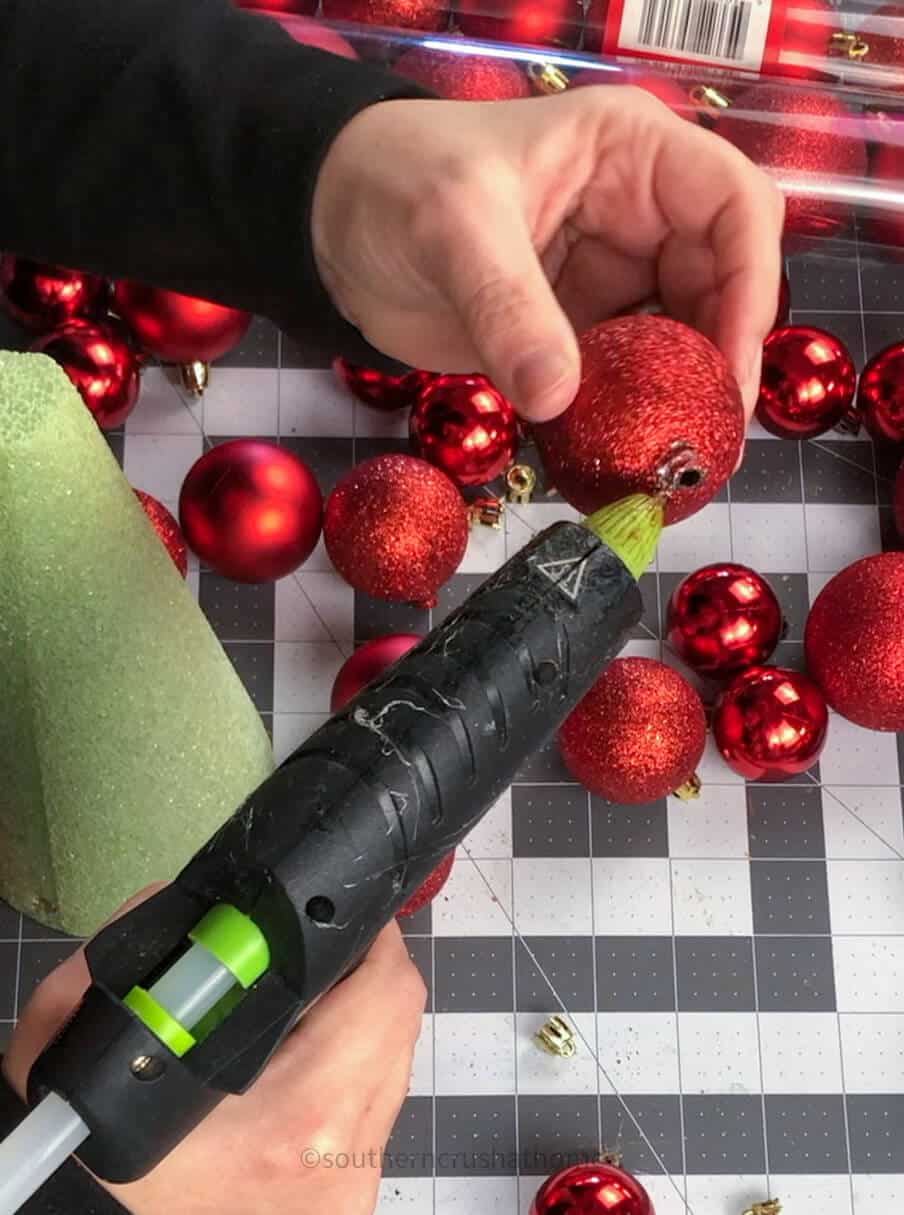

As you work your way up the cone, alternate the colors and sizes of the ornaments for a more interesting and varied look.
Step 3: Fill in the Gaps
To fill in the gaps between ornaments on this ornament tree, you’ll need to add an embellishment. This can be scrap ribbon, faux holly, or scrap greenery from a Christmas garland.


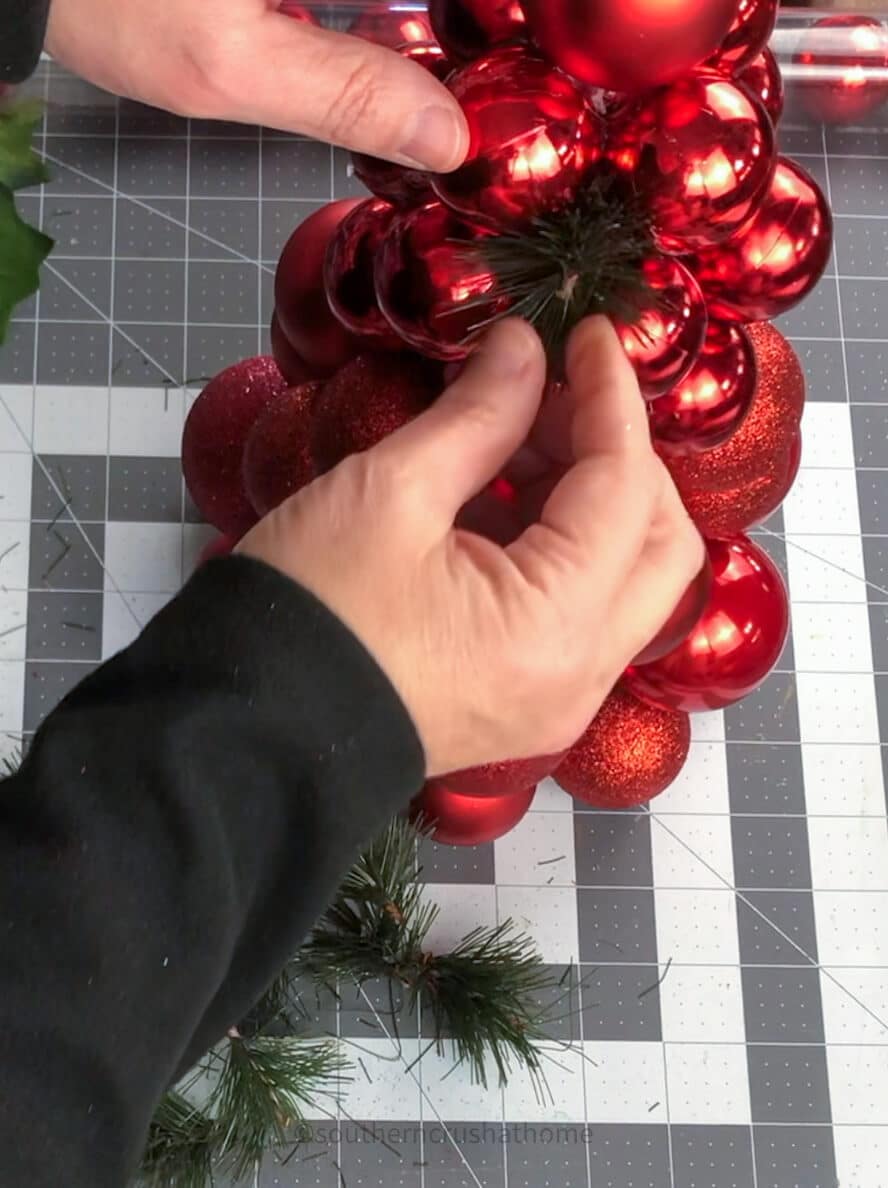

You can also add a few extra ornaments to fill in any gaps or spaces.
Step 4: Add Finishing Touches
Once you’ve covered the entire cone in ornaments, add a tree topper. You can create your own using a small piece of ribbon or bow, or find a pre-made topper at the dollar store. I chose to leave my tree without a tree topper.
Use a heat tool to melt away any extra hot glue strings that peek out from your ornament tree.

Step 5: Display Your Ornament Tree
Your dollar store ornament tree DIY is now complete! Display it anywhere in your home for a festive and frugal decoration.

You can use it as a centerpiece on your dining table like I did!

Or show it off on a mantel or on an entryway table.
Get creative and add your own personal touches to make it truly unique to your style.

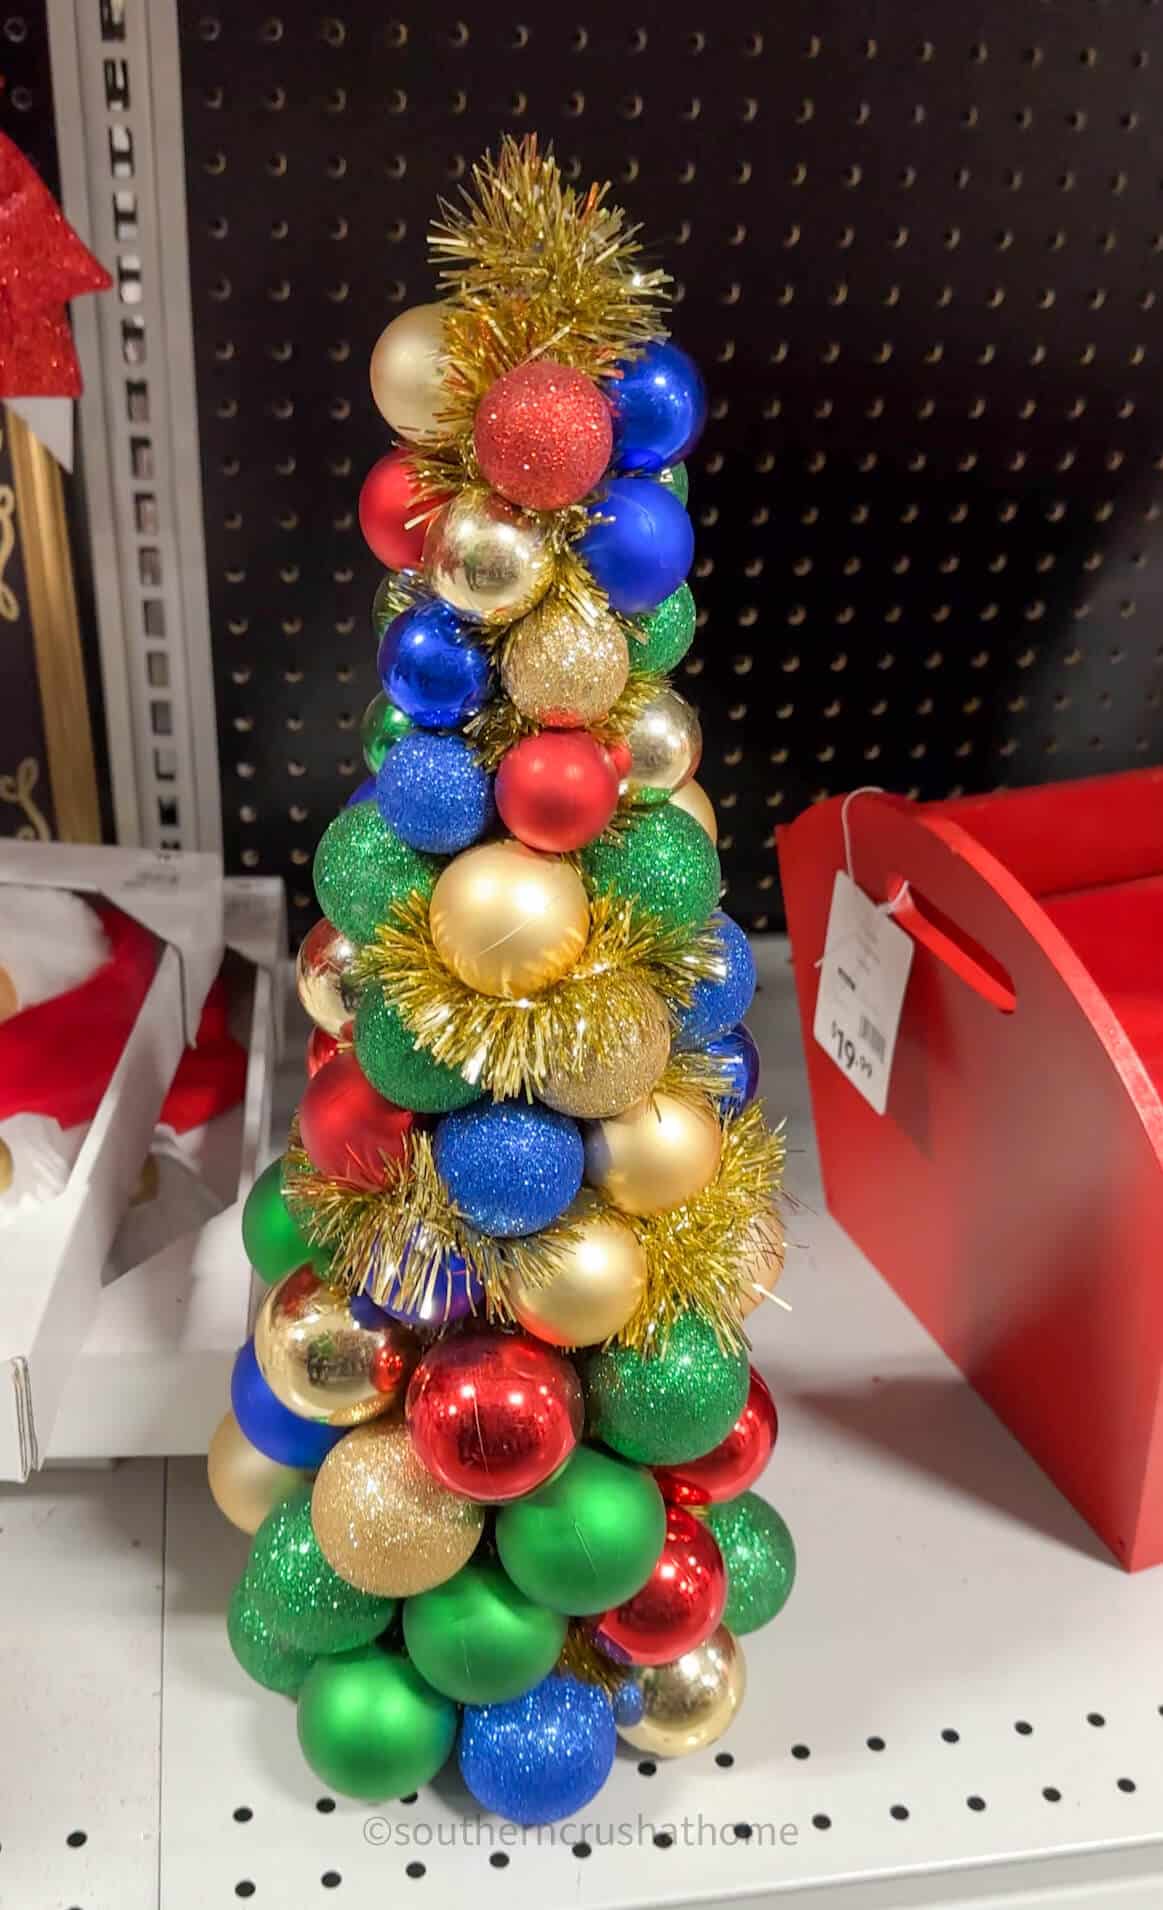
If you’re on a budget, you might be relieved to see how to create something like these gorgeous Christmas ornament trees without breaking the bank. I’ve seen these in the stores anywhere from $30.00-$130.00!

How to Customize Your Ornament Tree
One of the best things about this DIY is that you can customize it to fit your own personal style. If you’re looking for a more rustic and natural look, try using ornaments made from wood, twine, or burlap.
Or, if you prefer a more glamorous and sparkly tree, use metallic and glittery ornaments.
You can also create multiple trees in different sizes and colors to create a stunning display.

Creating a festive and beautiful Christmas tree doesn’t have to be expensive. With this dollar-store ornament tree DIY, you can create a stunning display without spending a fortune.
Follow these simple steps, use your favorite ornaments, and customize them to fit your own personal style. Happy decorating!

How to Make an Easy Dollar Store Ornament Tree DIY
Materials
- styrofoam cone in desired size
- ball-shaped ornaments in desired color s and sizes
- hot glue
- embellishments
- wire cutters
Instructions
Step 1: Choosing the Ornaments
- Look for ornaments in various colors, sizes, and textures to create a dynamic and festive look. I chosean all red for a monochromatic look but in varied tones including glittered!
Step 2: Glue the Ornaments
- Start at the bottom of the cone and work your way up. Use hot glue to attach each ornament to the foam cone. Make sure to glue the ornaments in tightly to create a more dense tree.
- As you work your way up the cone, alternate the colors and sizes of the ornaments for a more interesting and varied look.
Step 3: Fill in the Gaps
- To fill in the gaps between ornaments on this ornament tree, you’ll need to add an embellishment. This can be scrap ribbon, faux holly, or scrap greenery from a Christmas garland.
- You can also add a few extra ornaments to fill in any gaps or spaces.
Step 4: Add Finishing Touches
- Once you’ve covered the entire cone in ornaments, add a tree topper. You can create your own using a small piece of ribbon or bow, or find a pre-made topper at the dollar store. I chose to leave my tree without a tree topper.
Step 5: Display Your Ornament Tree
- Your dollar store ornament tree DIY is now complete! Display it anywhere in your home for a festive and frugal decoration.
So fun, Mel!! Have a wonderful Christmas!!
Merry Christmas to you, too! I hope to see you in the new year!
Such a beautiful project, Melanie! And it looks so beautiful on your dining table. This is a great project that anyone can make and personalize to fit their decor. Thank you for crafting with the Handcrafted Society!
Thank you! It was so much fun to join you! Thanks for stopping by my friend!
Hey Melanie, This is the sweetest Christmas tree! I love how budget-friendly it is. I’ve seen them for much more at different shops! Great Job!
Thank you so much! I appreciate you for inviting me to join you for this super fun handcrafted society collaboration!